1
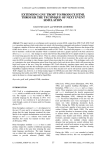
Version 1.0.10 Beta
October 30, 2012
sQuid User Manual
Observation and interaction in experimental environments
Thomas Schaffter
sQuid User Manual
Observation and interaction in experimental environments
Version 1.0.10 Beta
October 30, 2012
Thomas Schaffter
[email protected]
Laboratory of Intelligent Systems, Ecole Polytechnique F´ed´erale de
Lausanne (EPFL), Lausanne, Switzerland
lis.epfl.ch/squid
Table of Contents
1 Introduction
1.1 Overview . . . . . . . . . . . . . . . . . . . . . . . . . . . . . . . . .
1.2 License / How to cite sQuid . . . . . . . . . . . . . . . . . . . . . . .
1.3 Contact . . . . . . . . . . . . . . . . . . . . . . . . . . . . . . . . .
1
1
1
1
2 Getting Started
2.1 Installation . . . .
2.2 Run sQuid . . . .
2.3 Cameras . . . . .
2.4 Experiment . . . .
2.5 sQuid Port Player
3
3
3
3
6
7
.
.
.
.
.
.
.
.
.
.
.
.
.
.
.
.
.
.
.
.
.
.
.
.
.
.
.
.
.
.
.
.
.
.
.
.
.
.
.
.
.
.
.
.
.
.
.
.
.
.
.
.
.
.
.
.
.
.
.
.
.
.
.
.
.
.
.
.
.
.
.
.
.
.
.
.
.
.
.
.
.
.
.
.
.
.
.
.
.
.
.
.
.
.
.
.
.
.
.
.
.
.
.
.
.
.
.
.
.
.
.
.
.
.
.
.
.
.
.
.
.
.
.
.
.
.
.
.
.
.
.
.
.
.
.
.
.
.
.
.
Introduction
1
Introduction
1.1
Overview
sQuid is an open-source C++/Qt software application designed to observe environments using FireWire cameras (IEEE 1394), while interacting with these environments
through a port interface (e.g. parallel port (IEEE 1284)). We envision that this application will be very useful in scientific research as well as robotics.
As an example, we control a system of LEDs and valves while multiple cameras
capture visual information from an experiment. Specifically, fruit flies (Drosophila
melanogaster ) are placed within a transparent chamber to visualize their behavior.
While capturing images from two cameras, we simultaneously control a series of LEDs
to excite fluorescence proteins and generate gas flow by controlling a series of valves.
1.2
License / How to cite sQuid
sQuid is an open-source software application released under a Creative Commons
Attribution-NonCommercial 3.0 Unported License. A brief description of the license
is available at http://creativecommons.org/licenses/by-nc/3.0/ and the full license
at http://creativecommons.org/licenses/by-nc/3.0/legalcode. Please cite the papers
listed on lis.epfl.ch/squid when using sQuid in your publication. For commercial use,
please contact the author.
1.3
Contact
The sQuid project can be contacted via its website at lis.epfl.ch/squid. Please feel free
to contact the author with bug reports and information on related projects.
1
sQuid User Manual
2
Getting Started
2
Getting Started
2.1
Installation
A Unix-based operating system is required to run sQuid. An installation guide is
provided to install sQuid on a recent release of openSUSE. The document is available
at lis.epfl.ch/squid.
2.2
Run sQuid
sQuid can be run with the command lines below if a shortcut has been installed using
ln -s (see the sQuid Installation Guide). A settings file can also be specified at the
time of launching sQuid. As a reminder from the installation guide, the symbol $ is
used to mention that a command has to be run as simple user by opposition to root
user. The symbol $ must not be entered.
$ squid
$ squid -s settings.txt
An example of settings file named settings.txt is available in the sQuid package. You
can run the next command line for more information about sQuid.
$ squid --help
sQuid lists at startup all the available FireWire cameras. The main dialog of sQuid
then appears as shown in Fig. 2.1.
2.3
Cameras
The panel on the top of the sQuid dialog is dedicated to the setting of the detected
FireWire cameras. Start by selecting the camera you want to configure. Two different
modes can be used to run the cameras.
• Freerun
The cameras generate the triggers themselves.
3
sQuid User Manual
Figure 2.1: sQuid is an open-source software application for monitoring and supervising experimental setups. The principal dialog of sQuid (top-right corner)
provides an interface to control the camera and set an experiment. The port
player (top-left corner) allows to control a hardware setup, here a system of valves
and LEDs for fluorescent microscopy. The video streams captured by two FireWire
cameras are displayed in dedicated windows.
• Trigger
Software triggers are generated by the computer.
A trigger is a signal generated by the camera or sent to the camera to indicate that
it should start integrating, i.e. capturing a frame. In most application, it is therefore
important that the triggers are generated at a constant rate called framerate or frame
per seconds (FPS). The framerate of a digital camera depends on the camera specifications and the video mode or resolution selected. In general, the higher the resolution
is the lower are the available framerates.
In Freerun mode, each camera generates its own trigger. Note that in the applications
where the synchronization of the cameras is of prior importance, the cameras should
be interconnected and configured to share the same trigger generator. First, select
the camera resolution from the menu Camera > Resolution. This menu lists all the
MONO8 supported video modes. Then select the framerate from the menu Camera
> Framerate.
Alternatively, the mode Trigger can be selected in place of Freerun. In Trigger mode,
the triggers are generated by the computer and sent to all cameras. The advantage is
that you can here specify precisely the camera framerate. The framerate (frames per
4
Getting Started
second) is defined by
framerate (FPS) =
1 second
Time interval in second between two frames
(2.1)
The time interval between grabbing two frames is specified in milliseconds (ms) in
sQuid. It is important to look at the specifications of the cameras (e.g. integration
time) before using any arbitrary time intervals. Specifying a framerate above the supported limit would result in triggers being ignored and thus missing frames. There
are two scenarios to consider. If you selected one of the predefined video mode, you
can consider using the highest predefined framerate available as visible in the menu
Cameras > Framerate. You can also try higher framerates until sQuid starts reporting
in the console that triggers have been ignored.
In the second scenario, you decided to use an area of interest (AOI). An area of interest
is used when only a portion of the entire camera image is requested. An AOI can be
selected from the menu:
Cameras > Resolution > Set AOI...
and is defined by four parameters representing a rectangle placed inside the image
canvas. The first two parameters X and Y in pixels (px) represent the position of the
top-left corner of the rectangle. The point {X, Y } = {0, 0} is the top-left corner of
the original image canvas. The width and height of the AOI must be multiples of four
pixels and be defined to respect the following conditions.
X + AOI width ≤ Image canvas width
Y + AOI height ≤ Image canvas height
(2.2)
(2.3)
The advantage of using an AOI is that higher framerates can be achieved since there
is less data to transfer from the camera to the computer. To define the trigger period
in milliseconds, start by running the camera in Freerun mode and look at the value of
the FPS achieved. Since the camera captures as far as possible in this mode, you will
get an idea of the optimal framerate you can use in Trigger mode.
Also, there are three parameters you can set for each camera:
• Gain
The gain is defined as the ratio between the number of electrons (“e-“) per pixel
and the number of counts per pixel.
• Shutter speed
The shutter speed is a cover over the sensor that controls the length of time
that the light reaches it.
• Brightness
The brightness allows to adjust the midtones of the image.
5
sQuid User Manual
The above settings can be saved for each camera in the sQuid settings file. By default,
the ranges of values as well as the default values are read from the cameras.
2.4
Experiment
An experiment in sQuid consists in exporting the frames of the cameras to image files
while manipulating an hardware setup connected to the parallel port, for instance. In
the current version of sQuid, frames can be exported to grayscale TIFF (tagged image
file format) or PGM (portable graymap). Start by setting a unique name to identify an
experiment. Avoid white spaces ’ ’, for example replace them by underscores ’ ’. Set
the working directory to the place where you want the experiments to be saved (one
folder per experiment is created). Set also the duration of the experiment among one
of the next three strategies.
• Manual
Click on the button Stop to stop the experiment.
• Fixed
The experiment stops when the specified duration of the experiment in minutes
is elapsed.
• Player
The experiment stops when the playlist defined in the sQuid player is completed
(see Section 2.5). Click on the button Set Player... to edit the playlist. Select
the mode Playlist in the player to start playing the playlist at the same time as
starting the experiment.
sQuid provides the experimenter with a text area that can be completed with notes
or observations taken during the experiment. Once the experiment is done, the experimental data collected are available in a specific experiment folder named after the
name of the experiment and the time at which the experiment started. The frames
captured during the experiment are saved in subfolders (one per camera) along with a
document containing information about the experiment (report). The report contains
the start and end time of the experiment as well as the name of the cameras running
and the notes taken. Note that sQuid can send the report to a list of email addresses
right after that the experiment ended. A list of comma-separated email addresses can
be set via the menu:
Tools > Set Emails...
and check the option Send report by email. Note that you can also ask sQuid to alert
you by email if an error occurs (defined in sQuid settings file). This is particularly
useful for experiments lasting several minutes/hours. Finally, the settings of sQuid
at the time of the experiment are automatically written to the file settings.txt. In
the same fashion, the settings of the port player are saved to settings player.txt. To
reproduce later an experiment in the same condition, simply open settings.txt from
the menu File > Open... (the port player settings are loaded automatically along with
the sQuid settings file).
6
Getting Started
2.5
sQuid Port Player
The port player or simply player in sQuid is an instance of the standalone application
QPortPlayer that is released along sQuid. QPortPlayer enables to control the port
interfaces of a computer. In its current version, it allows to manipulate the data pin of
the parallel port (IEEE 1284) of a computer. Its purpose is to allows the manipulation
of a hardware setup such as the arm of a robot or a system of LEDs for fluorescent
microscopy directly from sQuid while the cameras are integrating.
The standalone application QPortPlayer can be run with the command lines below if
a shortcut as been installed using ln -s (see the sQuid Installation Guide).
$ qportplayer
$ qportplayer -s settings.txt
A standard parallel port has seven data pins that can be used individually or in combinations to emit signals and control a hardware setup. The table contained in the
player, also called playlist, is used to define the different signals. Each line of the table
represents a state and each column is dedicated to a specific pin. A pin can either be
ON or OFF in a given state as shown in Fig. 2.2.
Figure 2.2: The software application QPortPlayer released along and integrated
into sQuid is used to control an experimental setup through a parallel port (IEEE
1284).
7
sQuid User Manual
The player has three distinct modes.
• Edition
States in the playlist can be added, removed or edited.
• Manual
Click on a state to manually active it. Click somewhere in the table where there
are no states to disable it.
• Playlist
Apply successively the states. The duration of each state is determined by the
value specified in the field duration and by the duration unit (minutes, seconds,
milliseconds) selected.
A panel of LEDs is shown in the bottom part of the application dialog. Each LED is
associated to a given pin. The LED is gray when the associated pin is turned OFF and
green when the pin is ON. These LEDs show the effective status of the parallel port
(the status is read from the parallel port to ensure that the desired pin state has been
correctly applied). Note that all pins are turned OFF when selecting the mode Edition.
The default port player contains all seven available data pins from the parallel port and
are named Pin1,Pin2, etc. This default setting can be modified using a QPortPlayer
settings file. An example of settings file named settings player.txt is available in sQuid
folder. The pins are defined by
pins = ”CO2 L 0x327 3 CO2 R 0x327 4 Air L 0x327 5 Air R 0x327 6 green 0x327 0 blue 0x327 1“
In the above example, four pins are used to control four valves delivering CO2 and Air
from the left (L) and right (R) part of an arena (CITE RAMDYA2012). Two other pins
are configured to turn on or off a blue and green LED to enable fluorescent microscopy.
Each pin is defined by a name (without space), the address of the port it belongs to
and the index of the pin (0-7 for a parallel port). Click on the button Open... from
the player to load a settings file. If you use QPortPlayer as a standalone application,
the settings file can be specified at launch time using the option -s settings.txt
or --settings-file settings.txt.
Select the mode Playlist and click on the button Start to start applying the states
defined in the playlist. The duration of each state is determined by the value specified
in the field duration and by the duration unit (minutes, seconds, milliseconds) selected.
Click on the button Pause to hold and later resume playing the playlist. Click on the
button Stop to abort the execution. The parallel port is then turned OFF after the
last state is completed. You can also select the option Repeat playlist to restart again
and again playing the entire playlist.
The table in the sQuid player contains an additional column labeled Save that has been
added to application QPortPlayer. If the Save element is checked for a given state,
the frames grabbed by the cameras are saved to files (only in Playlist mode). To start
playing the playlist at the same time as the experiment starts, select the mode Player
8
Getting Started
in the sQuid dialog and the mode Playlist in the player. The filename of each image
files contains information about the name of the camera used, the time at which the
frame has been grabbed (experiments start at t = 0) and the name of the pins turned
ON at that time.
9