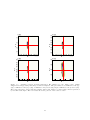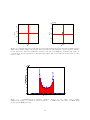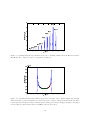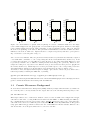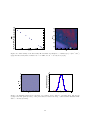
1
The S 3-Tools User’s Guide
Fran¸cois Levrier
University of Oxford
LERMA - Ecole Normale Sup´erieure de Paris
April 2011
Contents
1 Introduction
1.1 The SKA Simulated Skies (S 3 )
1.2 The S 3 -Tools . . . . . . . . . .
1.3 Using this User’s Guide . . . .
1.3.1 Organization . . . . . .
1.3.2 Conventions used in this
.
.
.
.
.
.
.
.
.
.
.
.
.
.
.
.
.
.
.
.
.
.
.
.
.
.
.
.
.
.
.
.
.
.
.
.
.
.
.
.
.
.
.
.
.
.
.
.
.
.
.
.
.
.
.
.
.
.
.
.
.
.
.
.
.
.
.
.
.
.
.
.
.
.
.
.
.
.
.
.
.
.
.
.
.
.
.
.
.
.
.
.
.
.
.
.
.
.
.
.
.
.
.
.
.
.
.
.
.
.
2
2
2
3
3
3
2 Installation
2.1 Prerequisites . . . . . . . . . . . . . . . . . . . . . .
2.2 Getting the S 3 -Tools . . . . . . . . . . . . . . . . . .
2.3 Automatic installation using install.py . . . . . .
2.3.1 Full installation . . . . . . . . . . . . . . . . .
2.3.2 Upgrade . . . . . . . . . . . . . . . . . . . . .
2.4 Manual installation . . . . . . . . . . . . . . . . . . .
2.5 C components of the S 3 -Tools . . . . . . . . . . . . .
2.6 External data and tools . . . . . . . . . . . . . . . .
2.6.1 Hi and CO templates [University of Oxford]
2.6.2 Hi templates [Kapteyn Institute] . . . . . . .
2.6.3 Global Sky Model . . . . . . . . . . . . . . .
2.6.4 WCSTools . . . . . . . . . . . . . . . . . . . .
.
.
.
.
.
.
.
.
.
.
.
.
.
.
.
.
.
.
.
.
.
.
.
.
.
.
.
.
.
.
.
.
.
.
.
.
.
.
.
.
.
.
.
.
.
.
.
.
.
.
.
.
.
.
.
.
.
.
.
.
.
.
.
.
.
.
.
.
.
.
.
.
.
.
.
.
.
.
.
.
.
.
.
.
.
.
.
.
.
.
.
.
.
.
.
.
.
.
.
.
.
.
.
.
.
.
.
.
.
.
.
.
.
.
.
.
.
.
.
.
.
.
.
.
.
.
.
.
.
.
.
.
.
.
.
.
.
.
.
.
.
.
.
.
.
.
.
.
.
.
.
.
.
.
.
.
.
.
.
.
.
.
.
.
.
.
.
.
.
.
.
.
.
.
.
.
.
.
.
.
.
.
.
.
.
.
.
.
.
.
.
.
.
.
.
.
.
.
.
.
.
.
.
.
.
.
.
.
.
.
.
.
.
.
.
.
.
.
.
.
.
.
.
.
.
.
.
.
.
.
.
.
.
.
.
.
.
.
.
.
.
.
.
.
.
.
.
.
.
.
.
.
4
4
4
5
5
6
7
7
8
8
9
10
11
3 Standard tests
3.1 S 3 -SEX . . . . . . . . . . . . .
3.2 S 3 -SAX . . . . . . . . . . . . .
3.3 Cosmic Microwave Background
3.4 Global Sky Model . . . . . . .
3.5 Noise . . . . . . . . . . . . . . .
.
.
.
.
.
.
.
.
.
.
.
.
.
.
.
.
.
.
.
.
.
.
.
.
.
.
.
.
.
.
.
.
.
.
.
.
.
.
.
.
.
.
.
.
.
.
.
.
.
.
.
.
.
.
.
.
.
.
.
.
.
.
.
.
.
.
.
.
.
.
.
.
.
.
.
.
.
.
.
.
.
.
.
.
.
.
.
.
.
.
.
.
.
.
.
.
.
.
.
.
.
.
.
.
.
12
12
12
22
23
25
. . . . . . . .
. . . . . . . .
. . . . . . . .
the S 3 -Tools
. . . . . . . .
.
.
.
.
.
.
.
.
.
.
.
.
.
.
.
.
.
.
.
.
.
.
.
.
.
.
.
.
.
.
.
.
.
.
.
.
.
.
.
.
.
.
.
.
.
.
.
.
.
.
.
.
.
.
.
.
.
.
.
.
.
.
.
.
.
.
.
.
.
.
.
.
.
.
.
.
.
.
.
.
26
26
26
26
27
28
S3Map GUI
The S3Map GUI and underlying scripts . . . . . . . . . . . . . . . . . . . . . . . . . . . . .
S3Map options . . . . . . . . . . . . . . . . . . . . . . . . . . . . . . . . . . . . . . . . . . .
Query files . . . . . . . . . . . . . . . . . . . . . . . . . . . . . . . . . . . . . . . . . . . . .
29
29
29
32
. . . . . .
. . . . . .
. . . . . .
. . . . . .
document
.
.
.
.
.
.
.
.
.
.
.
.
.
.
.
.
.
.
.
.
.
.
.
.
.
.
.
.
.
.
.
.
.
.
.
.
.
.
.
.
.
.
.
.
.
.
.
.
.
.
.
.
.
.
.
.
.
.
.
.
4 Querying the S3 databases
4.1 Database structure . . . . . . . . . . . . . . . .
4.2 Performing online queries . . . . . . . . . . . .
4.2.1 SQL query forms . . . . . . . . . . . . .
4.2.2 Mandatory attributes for mapping using
4.3 Structure of query result files . . . . . . . . . .
5 The
5.1
5.2
5.3
i
.
.
.
.
.
.
.
.
.
.
.
.
.
.
.
.
.
.
.
.
.
.
.
.
.
6 Non-interactive scripts
6.1 General syntax . . . . . . . . . . . . . . . . . . .
6.2 Arguments and keywords to SEX map script.py
6.2.1 Arguments . . . . . . . . . . . . . . . . .
6.2.2 Keywords . . . . . . . . . . . . . . . . . .
6.3 Arguments and keywords to SAX map script.py
6.3.1 Arguments . . . . . . . . . . . . . . . . .
6.3.2 Keywords . . . . . . . . . . . . . . . . . .
6.4 Running a script . . . . . . . . . . . . . . . . . .
6.4.1 Typical script commands . . . . . . . . .
6.4.2 Terminal output while running a script .
.
.
.
.
.
.
.
.
.
.
.
.
.
.
.
.
.
.
.
.
.
.
.
.
.
.
.
.
.
.
.
.
.
.
.
.
.
.
.
.
.
.
.
.
.
.
.
.
.
.
.
.
.
.
.
.
.
.
.
.
.
.
.
.
.
.
.
.
.
.
.
.
.
.
.
.
.
.
.
.
.
.
.
.
.
.
.
.
.
.
.
.
.
.
.
.
.
.
.
.
.
.
.
.
.
.
.
.
.
.
.
.
.
.
.
.
.
.
.
.
.
.
.
.
.
.
.
.
.
.
.
.
.
.
.
.
.
.
.
.
.
.
.
.
.
.
.
.
.
.
.
.
.
.
.
.
.
.
.
.
.
.
.
.
.
.
.
.
.
.
.
.
.
.
.
.
.
.
.
.
.
.
.
.
.
.
.
.
.
.
.
.
.
.
.
.
.
.
.
.
.
.
.
.
.
.
.
.
.
.
.
.
.
.
.
.
.
.
.
.
.
.
.
.
.
.
.
.
.
.
33
33
33
33
34
34
34
35
36
36
36
7 Lower-level routines
38
8 Parallel extensions
39
ii
Acknowledgements
I started working on the SKA Simulated Skies and what were to become the S 3 -Tools as a SKADS postdoc
with the subdepartment of Astrophysics of the University of Oxford. I therefore wish to heartily thank
Steve Rawlings, who was head of the subdepartment at the time, for his constant enthusiasm and support.
I also wish to thank those (Ian Heywood and Hans-Rainer Kl¨ockner, mostly) who helped debugging the
code, kept asking for new functionalities and never failed to say thanks when I replied to their calls for
help. Thanks also to Richard Wilman and Danail Obreschkow for providing the S 3 databases that this
work builds upon, and to Rense Boomsma for his Hi templates. As far as optimization and parallelization
are concerned, I am deeply indebted to Mihai C. Duta, Matteo Turilli and Fred Dulwich, from the Oxford
e-Research Center (OeRC).
1
Chapter 1
Introduction
1.1
The SKA Simulated Skies (S 3 )
The SKA Simulated Skies project (S 3 ) aims at building mock radio skies suitable for planning science
with the SKA1 and the pathfinder experiments such as the South African MeerKAT2 and the Asutralian
ASKAP3 . The S 3 project comprises a number of simulations, of which essentially two are relevant for
the present guide :
• S 3 -SEX (Semi-Empirical eXtragalactic) : a large-scale simulation of the extragalactic radio continuum
sky covering a sky area of 20◦ × 20◦ , out to redshift z = 20, and down to 10 nJy, with a frequency
coverage going from 151 MHz to 18 GHz. It also includes Hi gas masses for star-forming galaxies. For a
complete description, see [Wilman et al. (2008), Wilman et al. (2010)].
• S 3 -SAX (Semi-Analytical eXtragalactic) : a smaller-scale simulation of the extragalactic Hi and CO
line emissions, derived from the Millenium simulation [Springel et al. (2005)], which comes in two flavours.
S 3 -SAX-Sky is a skyfield simulation giving the apparent properties of galaxies, with a field of view that
depends on the maximum redshift, while S 3 -SAX-Box is a simulation of a cubic volume giving their
intrinsic properties. Throughout this guide, S 3 -SAX shall be understood as meaning S 3 -SAX-Sky. For a
complete description, see [Obreschkow et al. (2009)].
The S 3 set of simulations, performed at the University of Oxford in the framework of the European
Union’s SKADS program4 are publically available on the S 3 website
http://s-cubed.physics.ox.ac.uk
and the databases built from these may be queried there. The S 3 -Tools may then be used on query
results to build maps and spectral data cubes.
1.2
The S 3 -Tools
The S 3 -Tools are a set of Python and C routines whose purpose is to provide user-friendly access to the
S 3 simulations, in particular to build 2-dimensional images and 3-dimensional spectral data cubes that
may be used as input for instrument simulators.
In order to use the S 3 -Tools, you will need a number of python modules, a C compiler, and - as far as
S 3 -SAX is concerned - a set of templates. The next chapter describes the installation procedure in detail.
The S 3 -Tools were designed to meet the following requirements :
1 http://www.skatelescope.org/
2 http://www.ska.ac.za/
3 http://www.atnf.csiro.au/SKA/
4 http://www.skads-eu.org/
2
• Versatile and reliable mapping of S 3 sources (both line and continuum) over a certain area of the sky
and a certain range in frequency, at a given resolution
• Positioning of the output maps and cubes at a user-specified position in the sky (so as to be observable
by a given array, for instance)
• Possible addition of ancillary signals such as Cosmic Microwave Background (CMB) emission, diffuse
Galactic emission, signal from the Epoch of Reionization (EoR)...
• Inclusion of noise and Gaussian beam smearing
• Batch mode with a hint of parallel computing for heavy map-making jobs
To achieve these goals while keeping a user-friendly approach, Graphical User Interfaces (GUI) are used,
serving as frontends to scripts which handle the actual work. Thus, the S 3 -Map GUI is the way users
will specify which maps to make out of a set of S 3 sources. To be more specific, the state of the GUI is
passed as arguments to a python script command, either SEX map script.py or SAX map script.py. It
is this command that actually builds the maps using lower-level routines.
1.3
1.3.1
Using this User’s Guide
Organization
This guide is organized as follows :
• Chapter 2 deals with the installation of the S 3 -Tools and additional data required to make maps.
• Chapter 3 explains the standard tests that can be performed to check the S 3 -Tools work correctly.
• Chapter 4 explains how to query the S 3 databases so as to obtain query results that hold the necessary
information for the S 3 -Tools to work.
• Chapter 5 details the practical steps involved to make images and cubes from S 3 query results using
the S3Map GUI.
• Chapter 6 goes one step deeper and focuses on the non-interactive scripts SEX map script.py and
SAX map script.py.
• Chapter 7 delves into all the gory details about the algorithms used in the lower-level routines.
• Chapter 8 describes the solutions devised to split up large map-making jobs into smaller sub-jobs, so
the S 3 -Tools can be run on a cluster or on cloud-computing resources.
1.3.2
Conventions used in this document
Throughout this document, different fonts are used for different types of items:
• File and directory names, terminal output, command line input
• Graphical User Interfaces, buttons, menus and entry fields
3
Chapter 2
Installation
2.1
Prerequisites
In order to use the S 3 -Tools, a number of python modules are required : os, sys, getopt, math, numpy,
scipy, pyfits, time, random, types, ctypes, stat, Image, Tkinter, tkFileDialog, tkFont, matplotlib. The
install script install.py contained in the distribution and described below first looks for the necessary
packages and warns the user if some cannot be found. Depending on which package is missing, the
limitations could go from not being able to build the plots when running tests to downright not being
able to make maps at all, so a missing package is not to be taken lightly. For Mac OS X users, the
necessary packages should all be included in the SciSoft package (version 2008.3.1 onwards).
2.2
Getting the S 3 -Tools
Although they should find a permanent home on the S 3 website in the future, the S 3 -Tools are currently
hosted on an external website at http://www.lra.ens.fr/∼levrier/Recherche/S3/. To get them directly, the following command may be used
%wget http://www.lra.ens.fr/∼levrier/Recherche/S3/S3Tools.tgz
Once the archive is retrieved, it should be uncompressed in a temporary directory :
%tar -zxvf S3Tools.tgz
The archive contains the following :
• Two files : README, which is a shortened version of this chapter of the User’s Guide, and install.py,
which is the installation script described in 2.3
• Eight subdirectories : C/, Config/, Doc/, Jobs/, Output/, Routines/, Tests/, Tmp/
Each subdirectory serves a specific purpose :
• C/ contains the C components of the S 3 -Tools (see 2.5)
• Config/ contains configuration files, such as Config Path.py, which is discussed in 2.4, and Config Map.py,
which is mentioned in chapter 7.
• Doc/ contains documentation and help files
• Jobs/ is dedicated to holding shell scripts (e.g. to run batch jobs, see chapter 8)
• Output/ is the repository for both input and output files
4
• Routines/ contains all routines, both low- and high-level
• Tests/ contains files for test runs of the S 3 -Tools (see 3)
• Tmp/ is where input tarballs are uncompressed to access query results. Users may create subdirectories
under Tmp/ to hold single source cubes for parallel jobs (see chapter 8).
2.3
Automatic installation using install.py
Installation can be performed easily via a dedicated python script. Type
%python install.py
at the command line prompt and follow the instructions. The script first checks for necessary modules1 :
Running tests for Python modules...
os...
[ok]
[...]
matplotlib...
[ok]
It then inquires whether a former installation of the S 3 -Tools exists or not
Is there an existing installation of the S3Tools [Y/N] ?
then prompts for the existing or desired installation directory
Give full path to (existing/desired) installation directory :
Depending on the answer to the first question, the script will either fully install the S 3 -Tools in the
specified directory, or upgrade the existing installation towards which it is pointed.
2.3.1
Full installation
In that case, all files within the archive are copied to the target directory and the user is prompted as to
whether the script should proceed with configuration
Installing S3Tools in /Users/levrier/Desktop/S3try/
Do you want to proceed with path configuration now [Y/N] ?
If the answer is no, then the script skips this part and proceeds with making symbolic links in Jobs/ to
the python routines and shell scripts within Routines/. In that case, manual configuration will be needed
(see 2.4). If the answer is yes, on the other hand, the user is prompted for a number of installation-specific
pieces of information :
• The python executable to use2 :
Give python executable [python] :
• The PDF viewer that will be used to open this guide from the S3Map GUI3 :
1 Note that the installation script will not halt if it finds a missing module (signalled by a [NO]). It is up to the user to
check whether modules are missing, and act on it.
2 This is the command used to launch the python interpreter from the command line. This is configurable here so that
users may choose between different python versions.
3 This is also how the viewer is launched from the command line, as the python routines basically spawn a UNIX child
process using that command.
5
Give PDF viewer command for help files [acroread] :
• The paths to external data and tools (Hi and CO templates, Global Sky Model, WCSTools, EoR
templates,... see 2.6). If any of these are not installed, simply hitting the RETURN key will leave the default values indicated (and of course the corresponding functionality of the S 3 -Tools will not be available):
Give full path to directory under which to find the Hi and CO templates for SAX made by
Danail Obreschkow [/Path/To/Oxford Templates/] :
Give full path to directory under which to find the Hi templates for SAX made by
Rense Boomsma [/Path/To/Kapteyn Templates/] :
Give full path to directory under which to find the WCS binaries [/Path/To/WCS/bin/] :
Give full path to directory under which to find Global Sky Model [/Path/To/GSM/] :
Give full path to directory under which to find the IQU continuum templates for SAX made
by Tigran Arshakian [/Path/To/MPIFR Templates/] :
Give full path to directory under which to find the EoR signal templates made by Mario
Santos [/Path/To/IST Templates/] :
These are used to automatically edit the configuration file Config/Config Path.py, the original file being
moved to Config Path.py.bak. This configuration can be done manually, as explained in 2.4.
The installation script then proceeds with making the already mentioned symbolic links in Jobs/, and
finally reminds the user of a final mandatory step, which is explained in 2.5 :
For the S3Tools to work, you need to compile the file S3.c under Routines/ into a
libS3.so shared object library. Please refer to the README file.
2.3.2
Upgrade
As already mentioned, the install.py script can also upgrade an existing installation. Although users
may want to do a backup of the Routines/ subdirectory, it is not necessary, as the script will always
make copies of the existing python files and shell scripts with a .bak extension4 . In any case, it is not
advised to do a full backup of the entire installation, especially if the Output/ subdirectory is swollen.
When upgrading, the script looks through the .py and .sh files inside the Routines/ subdirectory of the
distribution source, and seeks a file of the same name in the existing installation :
Upgrading S3Tools in /Users/levrier/Desktop/S3try/
If no such file can be found, the file is copied to the target directory, for instance
Adding ipol.py to your distribution...
If a corresponding file is found, a diff command is performed on these. If a difference is found, the
existing file is backed up with a .bak extension and the new one is installed in its place, e.g.
ipol.py needs upgrading...
For the sake of users of earlier versions of the S 3 -Tools, the script also looks to see if you already have the
C/, Tests/ and Jobs/ subdirectories, which are new additions as of March 2011. If not, it creates them
and fills them with the relevant files, i.e. C-related files into C/ and symbolic links to the python files in
Routines/ into Jobs/. The Tests/ subdirectory is created empty, as in the case of a full installation.
4 Be
warned, however, that any existing .py.bak file, e.g. from a previous upgrade, will be lost in the process !
6
Note for users of S 3 -Tools predating March 2011:
It is important to note that when upgrading an existing installation, the script will not alter any of the
files inside the Config/ subdirectory, so as to avoid breaking working configurations. However, for users
of an older (predating March 2011) installation of the S 3 -Tools, that also means that the Config Path.py
will be missing a couple lines, which need to be manually inserted. These are :
# Directory where reference files are located and basic functionality tests are run
TESTS DIR=S3TOOLS PATH+"Tests/"
# Directory where the shell script jobs are placed for parallel computing
JOBS DIR=S3TOOLS PATH+"Jobs/"
2.4
Manual installation
If the user opted out of automatic configuration when prompted by install.py, the Config Path.py
file found under the Config/ subdirectory needs to be edited manually. For simplicity, we shall assume
that the S 3 -Tools were installed in ∼/S3Tools/, that is, there is a S3Tools/ directory under the home
folder, with subdirectories C/, Config/, Doc/, Jobs/, Output/, Routines/, Tests/ and Tmp/.
The variables to edit in Config Path.py are the following :
S3TOOLS PATH : Should be set to the full path to the S 3 -Tools distribution. In our example, this would
be S3TOOLS PATH="/Users/levrier/S3Tools/"
python : Should be set to the python executable to use. Default is "python", but users with various
versions of python may want to use a specific one.
PDFViewer : Should be set to a command used to open PDF files from the terminal. It will be called to
display this guide from the S3Map GUI when clicking the Help button.
SAX TEMPLATES DIR : Should be set to the full path of the directory under which to find the Hi and CO
templates for SAX made by Danail Obreschkow [University of Oxford] (see 2.6.1).
KAPTEYN TEMPLATES DIR : Should be set to the full path of the directory under which to find the Hi
templates for SAX made by Rense Boomsma [Kapteyn Institute] (see 2.6.2).
GSM DIR : Should be set to the full path to the Global Sky Model distribution (see 2.6.3).
WCS DIR : Should be set to the full path to the WCSTools binaries (see 2.6.4).
IST EOR TEMPLATES DIR : Should be set to the full path of the directory under which to find the EoR signal templates from Mario Santos (Instituto Superior T´ecnico, Lisbon). This is currently in the test phase.
MPIFR TEMPLATES DIR : Should be set to the full path of the directory under which to find the IQU
templates for SAX made by Tigran Arshakian [Max-Planck Institut fur Radioastronomie]. This is not
implemented yet.
2.5
C components of the S 3 -Tools
The S 3 -Tools now include a tiny bit of C to speed up some computations5 . The single C file is S3.c,
located under the C/ subdirectory, and it needs to be compiled into a shared object library file called
5 To
be precise, the single C function is used to perform spatial resolution degrading of emission template cubes, see...
7
libS3.so. To do so, a typical UNIX command would be
%gcc -Wall -O2 -fPIC -c S3.c && gcc -shared -Wl,-soname,libS3.so -o libS3.so S3.o
Mac OS X users may need to install the free cross-platform make CMake6 and do a little more work.
Instead of the one-liner above, the following steps should yield the desired shared library object :
%cd C
%mkdir build
%cd build
%cmake ../
%make
If all goes well, a libS3.so should appear under C/build/. This file must then be copied over to
Routines/ and a symbolic link to it created in Jobs/. In the gcc case, that would be done like this :
%cp libS3.so ../Routines
%cd ../Jobs
%ln -s ../Routines/libS3.so
and in the CMake case :
%cp libS3.so ../../Routines
%cd ../../Jobs
%ln -s ../Routines/libS3.so
2.6
External data and tools
By themselves, the S 3 -Tools can only make data cubes from S 3 -SEX query results, as the sources for
that simulation are either pointlike or ellipses, which can be built on-the-fly and require no emission
template7 . For other functionalities, the user needs to download and install other elements :
• To make S 3 -SAX data cubes, a set of position-position-velocity (PPV) emission templates is required.
For Hi emission, there are two sets available : one by Danail Obreschkow (University of Oxford), and
one by Rense Boomsma (Kapteyn Institute). These are described in 2.6.1 and 2.6.2, respectively. For
emission in the rotational lines of CO (J = 1 → 0 to J = 10 → 9), users will require the set of Oxford
templates.
• The S 3 -Tools include the possibility to add diffuse Galactic emission from 10 MHz to 100 GHz, via
the Global Sky Model8 [de Oliveira-Costa et al. (2008)], which is derived from a number of publically
available large-area radio surveys. To use it, the GSM data and software are required, as well as the
WCSTools. See 2.6.3 and 2.6.4 for details.
2.6.1
Hi and CO templates [University of Oxford]
Installation
The templates can be downloaded as an archive SAX templates.tgz from the LRA ftp server
6 http://www.cmake.org/
7 That may change in the future when infrared emission is taken into account, as spectral energy distribution (SED)
templates may have to be used in this frequency domain.
8 Also dubbed S 3 -GAL on the S 3 website.
8
%wget ftp://ftp.lra.ens.fr/outgoing/levrier/SAX templates.tgz
The user should be aware that the archive weighs over 2 GB, and 11.6 GB when uncompressed. It
contains four files and four directories :
drwxr-xr-x
drwxr-xr-x
drwxr-xr-x
-rw-r--r--rw-r--r-drwxr-xr-x
-rw-r--r--rw-r--r--
398
8282
8282
1
1
8282
1
1
levrier
levrier
levrier
levrier
levrier
levrier
levrier
levrier
levrier
levrier
levrier
levrier
levrier
levrier
levrier
levrier
13532
281588
281588
157500
157500
281588
144900
144900
Feb
May
May
May
May
May
May
May
15 20:09 FITS
8 2009 ascii
11 2009 line_profiles
11 2009 line_widths_CO.txt
11 2009 line_widths_HI.txt
11 2009 major_axis_profiles
11 2009 spatial_widths_CO.txt
11 2009 spatial_widths_HI.txt
After untarring the archive, the Config Path.py file needs to be edited, so that SAX TEMPLATES DIR is
set to the directory containing the above hierarchy (see 2.4).
Note for users of S 3 -Tools predating March 2011:
Older (predating March 2011) installations of these templates did not include the FITS/ subdirectory,
into which FITS files for the templates are placed : The original template files are ascii (under ascii/)
but they take a while to load into arrays, much longer than when read from FITS files. Consequently,
when making S 3 -SAX cubes, the script first looks for a FITS file, and uses that if it can find it. Otherwise,
it uses the ascii file and takes the opportunity to convert it to FITS and save it under FITS/ for future
use. The downside of that is that FITS files take up a much bigger disk space (typically 8 to 9 times
larger) than ascii files, so storage issues may occur.
About the templates
TO BE COMPLETED
2.6.2
Hi templates [Kapteyn Institute]
Installation
The templates can be downloaded as an archive KI templates.tgz from the LRA ftp server
%wget ftp://ftp.lra.ens.fr/outgoing/levrier/KI templates.tgz
This archive weighs 265 MB, but almost 2.7 GB after decompression. It contains a Profiles/ subdirectory, 3 .txt files and 1150 FITS files of the form template type vasymp inclination.fits :
drwxrwxrwx
-rw-r--r--rw-r--r--rw-r--r--rwxr-xr-x
[...]
-rwxr-xr-x
1177
1
1
1
1
levrier
levrier
levrier
levrier
levrier
levrier
levrier
levrier
levrier
levrier
1 levrier
levrier
40018
46026
45968
46337
812160
May 7
Jun 20
Jun 20
Feb 1
Jan 22
1713600 Jan 22
2008
2008
2008
2010
2008
Profiles
hi_widths_0.2.txt
hi_widths_0.5.txt
spatial_widths.txt
template_S0-Sab_100_0.fits
2008 template_Sdm_75_90.fits
After untarring the archive, the Config Path.py file needs to be edited, so that KAPTEYN TEMPLATES DIR
is set to the directory containing the above hierarchy (see 2.4).
9
About the templates
The emission cubes all have the same pixel size (4”) and are assumed to be at a redshift of z = 0.0045,
so that the physical size of a pixel is about 0.36 kpc. The third dimension of the cubes is velocity, and
channels are 5 km.s−1 wide, but the number of channels varies from one template to the next to save
space, although it is always odd to have a central channel9 . The right ascension and declination axes also
have an odd number of pixels (127) to have a central pixel. All template galaxies have a null position
angle (major axis along the vertical).
The filenames reflect the galaxy’s type, asymptotical rotation velocity and inclination :
• Type : There are 5 galaxy types : S0-Sab, Sb-Sbc, Sc-Scd, Sd and Sdm (dwarf galaxies). This is
important for the diameter, as all large galaxies (S0-Sab to Sd) are generated to have a 22 kpc diameter
(measured at Σ = 1 M /pc2 ), but some extend much further because of the faint tail in the radial Hi
profile. The template dwarf galaxies (Sdm) have a 16 kpc diameter.
• Asymptotical rotation velocity : Five mass and luminosity ranges are defined using the asymptotical
rotation velocity Va , which can take the values 100, 150, 200, 250 or 300 km.s−1 for S0-Sab to Sd galaxies,
and 50, 75, 100, 125 or 150 km.s−1 for Sdm galaxies.
• Inclination : Possible inclinations range from 0◦ (face-on) to 90◦ (edge-on) in steps of 2◦ .
We thus recover the expected number of templates, as 1150 = 46 × 5 × 5.
2.6.3
Global Sky Model
Installation
The Global Sky Model [de Oliveira-Costa et al. (2008)] data and routines can be downloaded from the
GSM website at https://www.cfa.harvard.edu/∼adeolive/gsm/. The direct download link is :
%wget http://xte.mit.edu/angelica/gsm/gsm.tar.gz
This archive weighs 109 MB (351 MB uncompressed) and contains the following hierarchy :
-rw-r--r--rw-r--r--rw-r--r--rw-r--r--rw-r--r--
1
1
1
1
1
levrier
levrier
levrier
levrier
levrier
levrier
levrier
levrier
levrier
levrier
122683392
122683392
122683392
1045
5413
Mar
Mar
Mar
Mar
Mar
17
17
17
17
17
2008
2008
2008
2008
2008
component_maps_23klocked.dat
component_maps_408locked.dat
component_maps_5deg.dat
components.dat
gsm.f
After untarring the archive, the gsm.f F77 file in the distribution must be replaced with a non-interactive
one10 available from
%wget http://www.lra.ens.fr/∼levrier/Recherche/S3/gsm.f
Compile that file into a gsm executable, e.g.
%g77 gsm.f -o gsm
The last step is to edit the Config Path.py file so that GSM DIR be set to the directory containing the
above hierarchy. Now, in order for the S 3 -Tools to be able to use the GSM, the WCS Tools must also be
installed (see below and 2.6.4).
9 This
central channel corresponds to vz = 0 in the galaxy’s rest-frame.
is because by default, the executable resulting from the compilation of gsm.f prompts the user for a frequency
at which to make a map, and a name for the output file. Both of these things must be dealt with by the S 3 map-making
routines without user intervention, thus requiring that the gsm executable be non-interactive.
10 This
10
About the GSM
The Global Sky Model uses Principal Component Analysis (PCA) CITE of 11 publically available
large-scale radio surveys (from 10 MHz to 94 GHz), to allow the building of Galactic emission maps
at any intermediate frequency via interpolation. The output maps are in Galactic coordinates using the
HEALPIX scheme CITE with Nside = 512. As the cubes built from S 3 data are in equatorial coordinates,
conversion is performed by the WCSTools, which therefore need to be installed (see 2.6.4). Assuming
this is the case and that the user has requested a spectral data cube be made with p frequency channels
(ν1 , ν2 , . . . , νp ), p GSM maps need to be built. This is done internally (using routines that can be found
in GSM routines.py).
2.6.4
WCSTools
The WCSTools are required for the correct inclusion of the Global Sky Model in S 3 data cubes. They can
be downloaded from http://tdc-www.harvard.edu/wcstools/. After untarring the wcstools-xxx.tar.gz
archive11 into a directory, compilation of the one program that is required, xy2sky is done (under UNIX)
in that directory by typing
%make xy2sky
The resulting xy2sky executable is located in the bin/ subdirectory, and it is this one that the WCS DIR
variable in Config Path.py should be set to. To compile all programs in the WCSTools, the above
command should be replaced by
%make all
Troubleshooting regarding installation of the WCSTools should be dealt with according to instructions
on the WCSTools website.
11 where
xxx refers to the version of the software.
11
Chapter 3
Standard tests
The S 3 -Tools installation contains (in the Routines/ subdirectory) a few shell scripts that can be run to
test the correct working of the S 3 -Tools (more precisely of SAX map script.py and SEX map script.py,
see chapter 6). These scripts basically build some data cubes, which then need to be compared to reference files. Consequently, to use these scripts, user should download an archive containing these reference
files from the LRA ftp server :
%wget ftp://ftp.lra.ens.fr/outgoing/levrier/Tests.tgz
Uncompressed in the Tests/ subdirectory of the installation target directory, it reveals a couple input files
Tests/single-sax.tar.gz and Tests/single-sex.tar.gz, as well as a Tests/Reference/ hierarchy
containing a number of .fits, .png and .log files, which are to be used as references. The source in
single-sax.tar.gz is a single galaxy and the one in single-sex.tar.gz is a radio source which is made
up of two 8.7”×1.9” lobes and a central pointlike core.
3.1
S 3 -SEX
To test making cubes out of S 3 -SEX query results, a test script run-SEX-tests.sh is available under
Routines/. To run it from the command line, users should type
%sh run-SEX-tests.sh
This script performs a series of python SEX map script.py commands with varying arguments (see chapter 6), to test the making of continuum emission data cubes :
• Emission with varying spatial resolution both with and without Gaussian beam smearing (see Fig. 3.1)
• Emission spectra from both lobes and central core of the single test source (see Fig. 3.2)
• Spatial window splitting : Using spatially resolved (0.1” pixels) continuum emission, four maps are made
corresponding to the four quadrants of the source. This is to test that we can split a map in different
patches without affecting pixel values. The four submaps are shown on the left panel of Fig. 3.13, and
should be compared with the full map at the same resolution, which is the top left panel of Fig. 3.1.
3.2
S 3 -SAX
To test making maps out of S 3 -SAX query results, two test scripts are available. To run these from the
command line, the user should type
12
70
70
65
60
55
55
15
10
5
5
0
50
10
15
10
["]
90
90
80
80
70
5
5
0
10
["]
70
60
60
50
50
40
40
30
20
10
0
10
20
30
20
["]
200
200
100
100
["]
["]
65
60
50
["]
["]
75
["]
["]
75
0
10
0
10
20
200
300
["]
0
100
100
200
200
300
300
200
100
0
100
200
300
200
["]
100
0
100
["]
Figure 3.1: Continuum emission for the single source within single-sex.tar.gz, which is made up of
two 8.7”×1.9” lobes and a central pointlike core, at varying spatial resolutions : pixel sizes are 0.1” (top
row), 3” (middle row) and 40” (bottom row). In each row, the left figure shows the spatially resolved
emission without Gaussian beam smearing, while the figure on the left includes the effect of a circular
Gaussian beam with FWHM twice the size of the pixel. On each figure, two thin black ellipses represent
the lobes and a red reticule shows the position of the core.
13
Flux density [Jy]
10
10
10
10
10
-7
-8
-9
-10
-11
10
3
10
4
[MHz]
Figure 3.2: Spectral energy distribution (SED) over the full S 3 -SEX frequency range 151 MHz - 18 GHz
for the single source within single-sex.tar.gz. Represented are the flux densities for the entire field
(blue line), the expected values at the reference frequencies for the lobes (blue squares) and the core (red
diamonds), as well as the expected total intensities (colored circles). Also represented is the flux density
for the pixel containing the sole core (red curve), as computed by the S 3 routines over the full frequency
range (see chapter 7).
14
145
145
["]
140
["]
140
135
135
130
130
215
210
205
200
215
["]
210
205
200
["]
Figure 3.3: Spatially unresolved frequency-integrated Hi emission for the single source within
single-sax.tar.gz, using University of Oxford templates, with (right) and without (left) Gaussian
beam smearing. The pixel size is 0.5” for a source with a 0.15” major axis, and the map size is 40×40
pixels. The circular Gaussian beam used on the right has a 1” full-width at half-maximum (FWHM).
The red reticule shows the position of the source’s center.
%cd Routines/
%sh run-SAX-Oxford-tests.sh
%sh run-SAX-Kapteyn-tests.sh
These scripts perform a series of python SAX map script.py commands with varying arguments (see
chapter 6), to test the making of Hi and CO emission data cubes with various spatial and spectral resolutions. The difference between the two being the set of templates used, either those made by Danail
Obreschkow (University of Oxford), which can be used for both Hi and CO, or those made by Rense
Boomsma (Kapteyn Institute) for Hi only. Obviously, for the scripts to work, the corresponding templates need to be installed and the Config Path.py file configured so the scripts can find them (see 2.6.1
and 2.6.2)...
The tests performed by run-SAX-Oxford-tests.sh are the following :
• Spatially unresolved Hi emission, with varying spectral resolution (channel widths 6, 60, 600 kHz and
2, 10 and 40 MHz), both with and without Gaussian beam smearing (see Figs. 3.3 and 3.4)
• Spatially resolved Hi emission at varying spatial resolutions and constant 120 kHz spectral resolution,
both with and without Gaussian beam smearing (see Fig. 3.5)
• Spatially unresolved CO emission in the J = 1 → 0 to J = 10 → 9 lines, with spectral resolution
varying in proportion to rest frequency, without Gaussian beam smearing (see Fig. 3.6)
• Spatially resolved (1 milliarcsecond pixels) CO emission in the J = 1 → 0 to J = 10 → 9 lines, with
spectral resolution varying in proportion to rest frequency, without Gaussian beam smearing (Fig. 3.6)
• Spatially integrated CO(1-0) emission spectra at varying spectral resolutions (see Fig. 3.7).
• Spatially unresolved Hi and CO emission in all lines, with a 10 MHz - 200 GHz frequency coverage (see
Fig. 3.8). The script also computes the integrated flux over the ranges in frequency correspondign to the
various lines, for comparison with expected values :
*
*
*
*
HI
CO(1-0)
CO(2-1)
CO(3-2)
---->
---->
---->
---->
2.38999999998e-08 Jy.km/s when
8.43e-06 Jy.km/s when expected
3.34999999999e-05 Jy.km/s when
7.47999999997e-05 Jy.km/s when
expected integrated flux is
integrated flux is 8.43e-06
expected integrated flux is
expected integrated flux is
15
2.39e-08 Jy.km/s
Jy.km/s
3.35e-05 Jy.km/s
7.48e-05 Jy.km/s
4.5
1e10
4.0
3.5
Flux density [Jy]
3.0
2.5
2.0
1.5
1.0
0.5
0.0
110
115
120
125
130
135
140
145
150
155
[MHz]
Figure 3.4: Spatially-integrated Hi emission spectra for the single source within single-sax.tar.gz,
using University of Oxford templates, for various spectral resolutions : 6 kHz (solid blue line), 60 kHz
(blue circles), 600 kHz (red bars), 2 MHz (green bars), 10 MHz (blue bars) and 40 MHz (magenta bars).
*
*
*
*
*
*
*
CO(4-3)
CO(5-4)
CO(6-5)
CO(7-6)
CO(8-7)
CO(9-8)
CO(10-9)
---->
---->
---->
---->
---->
---->
---->
0.000131 Jy.km/s when expected
0.000201 Jy.km/s when expected
0.000284 Jy.km/s when expected
0.000376999999999 Jy.km/s when
0.000478999999999 Jy.km/s when
0.000547999999998 Jy.km/s when
0.000441999999999 Jy.km/s when
integrated flux is 0.000131
integrated flux is 0.000201
integrated flux is 0.000284
expected integrated flux is
expected integrated flux is
expected integrated flux is
expected integrated flux is
Jy.km/s
Jy.km/s
Jy.km/s
0.000377
0.000479
0.000548
0.000442
Jy.km/s
Jy.km/s
Jy.km/s
Jy.km/s
• Channel splitting : Using spatially unresolved Hi emission with 60 kHz spectral resolution and 6 MHz
bandwidth, three cubes are built corresponding to the lower 2.4 MHz of the band, the central 1.2 MHz
and the upper 2.4 MHz. This is done to check that we recover the same emission as the one we get
when building the whole 6 MHz cube in one go. This is essential for the correct working of the parallel
map-making jobs, described in chapter 8 (see Fig. 3.9).
• Spatial window splitting : Using spatially resolved (1 mas pixels) Hi emission at 120 kHz spectral
resolution, four maps are made corresponding to the four quadrants of the source. This is to test that
we can split a map in different patches without losing sources and that pixel values are not affected by
the process. The four submaps are shown on the right panel of Fig. 3.13, and should be compared with
the full map at the same resolution, which is the bottom left panel of Fig. 3.5.
The tests performed by run-SAX-Kapteyn-tests.sh are the following :
• Spatially unresolved Hi emission, with varying spectral resolution (channel widths 6, 60, 600 kHz and
2, 10 and 40 MHz), both with and without Gaussian beam smearing (see Figs. 3.10 and 3.11)
• Spatially resolved Hi emission at varying spatial resolutions and constant 120 kHz spectral resolution,
both with and without Gaussian beam smearing (see Fig. 3.12)
These scripts use as an input the single-sax.tar.gz archive, which contains full data for a single galaxy
from the S 3 -SAX database. Some scripts take longer to complete than others, but the data cubes should
16
+1.388e2
0.45
0.4
+1.388e2
0.40
0.35
0.3
["]
["]
0.30
0.2
0.25
0.20
0.15
0.1
0.10
0.40
0.35
0.30
0.25
0.20
0.15
0.10
0.05
0.40
0.35
0.30
0.25
+2.084e2
["]
0.20
0.15
+1.388e2
0.10
0.05
+2.084e2
["]
+1.389e2
0.45
0.25
0.40
0.35
0.20
["]
["]
0.30
0.25
0.15
0.20
0.15
0.10
0.10
0.40
0.35
0.30
0.25
0.20
["]
0.15
0.10
0.05
0.20
+2.084e2
0.15
0.10
["]
0.05
+2.085e2
Figure 3.5: Spatially resolved frequency-integrated Hi emission for the single source within
single-sax.tar.gz, using University of Oxford templates. The pixel sizes are 15 milliarcseconds (top
left), 5 milliarcseconds (top right), 1 milliarcsecond (bottom left) and 0.3 milliarcsecond (bottom right).
The source has a 0.15” major axis and a 0.0228” minor axis, with a 4◦ position angle, and is represented
by the thin black ellipse. The red reticule shows the position of the source’s center.
17
+1.389e2
0.25
145
0.20
["]
["]
140
0.15
135
0.10
130
215
210
205
200
0.20
0.15
["]
0.10
["]
0.05
+2.085e2
Figure 3.6: Spatially unresolved (left) and resolved (right) CO(1-0) frequency-integrated emission for the
single source within single-sax.tar.gz. The pixel sizes are respectively 0.5 arcsecond and 1 milliarcsecond. The source has a 33.5 milliarcsecond major axis and a 5.1 milliarcsecond minor axis, with a 4◦
position angle, and is represented by the thin black ellipse. The red reticule shows the position of the
source’s center.
9
1e8
8
7
Flux density [Jy]
6
5
4
3
2
1
0
10400
10500
10600
10700
10800
10900
11000
11100
11200
[MHz]
Figure 3.7:
Spatially-integrated CO(1-0) emission spectra for the single source within
single-sax.tar.gz, for various spectral resolutions : 7 MHz (solid blue line), 14 MHz (blue
circles) and 21 MHz (red bars).
18
6
CO(9-8)
5
Flux density [ Jy]
CO(10-9)
CO(8-7)
4
CO(7-6)
3
CO(6-5)
2
CO(5-4)
CO(4-3)
1
CO(3-2)
CO(2-1)
CO(1-0)
0
0
20
40
60
80
100
120
140
[GHz]
Figure 3.8: Spatially-integrated spectrum from the cube containing emission from all Hi and CO lines.
The Hi line is too faint (see text) to be apparent on this plot.
4.0
1e10
3.5
Flux density [Jy]
3.0
2.5
2.0
1.5
1.0
0.5
0.0
130
131
132
133
134
135
136
137
[MHz]
Figure 3.9: Spatially-integrated Hi emission spectra for the single source within single-sax.tar.gz,
using University of Oxford templates, for various spectral coverages : full spectral line (solid blue line),
lower frequency band (blue circles), central frequency band (green circles) and upper frequency band (red
circles). The spectral resolution used is 60 kHz for all four data cubes.
19
145
145
["]
140
["]
140
135
135
130
130
215
210
205
200
215
210
["]
205
200
["]
Figure 3.10: Spatially unresolved frequency-integrated Hi emission for the single source within
single-sax.tar.gz, using Kapteyn Institute templates, with (right) and without (left) Gaussian beam
smearing. The pixel size is 0.5” for a source with a 0.15” major axis, and the map size is 40×40 pixels.
The circular Gaussian beam used on the right has a 1” full-width at half-maximum (FWHM). The red
reticule shows the position of the source’s center.
1.6
1e10
1.4
1.2
Flux density [Jy]
1.0
0.8
0.6
0.4
0.2
0.0
0.2
110
115
120
125
130
135
140
145
150
155
[MHz]
Figure 3.11: Spatially-integrated Hi emission spectra for the single source within single-sax.tar.gz,
using Kapteyn Institute templates, for various spectral resolutions : 6 kHz (solid blue line), 60 kHz (blue
circles), 600 kHz (red bars), 2 MHz (green bars), 10 MHz (blue bars) and 40 MHz (magenta bars).
20
+1.388e2
0.45
0.4
+1.388e2
0.40
0.35
0.3
["]
["]
0.30
0.2
0.25
0.20
0.15
0.1
0.10
0.40
0.35
0.30
0.25
0.20
0.15
0.10
0.05
0.40
0.40
0.40
0.35
0.35
0.30
0.30
["]
["]
0.45
0.25
0.20
0.15
0.10
0.05
+2.084e2
0.25
0.20
0.20
0.15
0.15
0.10
0.10
0.35
0.25
+1.388e2
0.45
0.40
0.30
["]
+1.388e2
0.35
+2.084e2
["]
0.30
0.25
0.20
["]
0.15
0.10
0.05
0.40
+2.084e2
0.35
0.30
0.25
0.20
["]
0.15
0.10
0.05
+2.084e2
Figure 3.12: Spatially resolved frequency-integrated Hi emission for the single source within
single-sax.tar.gz, using Kapteyn Institute templates. The pixel sizes are 15 milliarcseconds (top
left), 5 milliarcseconds (top right), 1 milliarcsecond (bottom left) and 0.3 milliarcsecond (bottom right).
The source has a 0.15” major axis and a 0.0228” minor axis, with a 4◦ position angle, and is represented
by the thin black ellipse. The red reticule shows the position of the source’s center.
21
+1.39e2
+1.39e2
0.25
0.25
0.20
0.20
0.15
0.15
0.10
0.10
78
76
76
74
74
72
72
70
70
68
68
66
66
18 16 14 12 10
["]
["]
78
5
8
5
0
10
0.20
0.15
+1.388e2
0.10
0.05
0.20
+2.086e2
0.15
+1.388e2
0.25
0.25
0.20
0.20
0.15
0.15
0.10
0.10
0.10
0.05
+2.084e2
64
62
62
60
60
58
58
56
56
54
54
52
52
50
50
18 16 14 12 10
8
["]
["]
["]
64
5
5
0
10
0.20
0.15
0.10
["]
0.05
+2.086e2
["]
0.20
0.15
0.10
["]
0.05
+2.084e2
Figure 3.13: Demonstration of spatial window splitting on resolved continuum emission for the single
source within single-sex.tar.gz (left) and on resolved Hi frequency-integrated emission for the single
source within single-sax.tar.gz, using University of Oxford templates (right). The four subplots
show the four quadrants of the sources. The pixel size is 100 milliarcsecond in the S 3 -SEX case and 1
milliarcsecond in the S 3 -SAX case. Figures should be compared respectively with the top left panel of
Fig. 3.1 and the bottom left panel of Fig. 3.5.
all be done in a few minutes. They are put in the Tests/ subdirectory and then automatically compared
- via UNIX diff commands - to the corresponding files in the Tests/Reference/ subdirectory. If all
goes well, there should not be any difference found. However, it is possible that small differences could
be present (for instance due to different rounding schemes in floating point operations). Therefore, the
scripts also build plots of spectra for the different cubes produced and save these plots as .png files in
the Tests/ subdirectory. Visual inspection of these plots with respect to the corresponding ones in the
Tests/Reference/ subdirectory should make it clear whether there is cause for alarm or not...
As a matter of fact, the figures in this chapter are simply .eps versions of these test plots, which can be
built independently of making the FITS files, by running
%python plot-SAX-Oxford-tests.py or %python plot-SAX-Kapteyn-tests.py
Actually the shell scripts run-SAX-Oxford-tests.sh and run-SAX-Kapteyn-tests.sh simply run these
python commands themselves after having built the FITS files.
3.3
Cosmic Microwave Background
To check that Cosmic Microwave Background (CMB) emission (a simple uniform blackbody emission at
T = 2.725 K) can be correctly included in the output data cubes, the following shell script may be run
%sh run-CMB-tests.sh
This script builds a cube of unresolved emission centered on the S 3 -SAX source single-sax.tar.gz,
called hi-co-cmb.fits, covering all Hi and CO lines from 100 MHz to 1 THz, including the CMB (i.e.
the --nocmb flag has been removed from the calls to SAX map script.py), and a cube of the same size,
called cmb.fits, centered on a different patch of sky, which thus recovers only CMB emission. The python
script plot-CMB-tests.py, which is called at the end of run-CMB-test.sh then builds a difference cube
and checks that correct integrated fluxes are recovered for each line :
22
4.0
1e8
3.5
Flux density [Jy/sr]
3.0
2.5
2.0
1.5
1.0
0.5
0.0
0
200
400
600
800
1000
1200
[GHz]
Figure 3.14: Flux density of the CMB emission computed from the CMB-only cube (blue circle) overlaid
with the expected curve (solid red).
*
*
*
*
*
*
*
*
*
*
*
HI
CO(1-0)
CO(2-1)
CO(3-2)
CO(4-3)
CO(5-4)
CO(6-5)
CO(7-6)
CO(8-7)
CO(9-8)
CO(10-9)
---->
---->
---->
---->
---->
---->
---->
---->
---->
---->
---->
2.38999999998e-08 Jy.km/s when
8.43e-06 Jy.km/s when expected
3.34999999999e-05 Jy.km/s when
7.47999999997e-05 Jy.km/s when
0.000131 Jy.km/s when expected
0.000201 Jy.km/s when expected
0.000284 Jy.km/s when expected
0.000376999999999 Jy.km/s when
0.000478999999999 Jy.km/s when
0.000547999999998 Jy.km/s when
0.000441999999999 Jy.km/s when
expected integrated flux is
integrated flux is 8.43e-06
expected integrated flux is
expected integrated flux is
integrated flux is 0.000131
integrated flux is 0.000201
integrated flux is 0.000284
expected integrated flux is
expected integrated flux is
expected integrated flux is
expected integrated flux is
2.39e-08
Jy.km/s
3.35e-05
7.48e-05
Jy.km/s
Jy.km/s
Jy.km/s
0.000377
0.000479
0.000548
0.000442
Jy.km/s
Jy.km/s
Jy.km/s
Jy.km/s
Jy.km/s
Jy.km/s
Jy.km/s
It also builds a plot of the emission from the CMB-only cube, in Jy/sr (see chapter 7), overlaid with the
expected curve, and saves it under cmb spectrum.png (Fig. 3.14).
3.4
Global Sky Model
To check that the Global Sky Model plugin for the S 3 -Tools works, the following shell script may be run
%sh run-GSM-tests.sh
This script builds 10 single-pixel, single-frequency ”images” at 10, 20, 50, 300 MHz and 1, 2, 20, 30 40 and
50 GHz, named gsm-6am-10MHz.fits to gsm-6am-50GHz.fits, centered on galactic coordinates l = 11.3◦
and b = 89.6◦ , chosen to match those from Fig. 3 in [de Oliveira-Costa et al. (2008)] - and which are
devoid of any signal from the single S 3 -SAX test source. The spectrum derived from these (in brightness
temperature [K] as a function of frequency [GHz] - see chapter 7) is saved into gsm spectrum.png, which
can be directly compared to the aforementioned figure (see the left panel of Fig. 3.15). Also built is a large
scale (30◦ on a side) emission map from the GSM at 1 GHz. This is saved into gsm-30deg-1GHz.fits
23
10
10
T [K]
10
10
10
10
10
10
10
10
10
6
40
5
4
35
3
2
30
1
]
10
0
[
10
-1
25
-2
20
-3
-4
-5
15
-6
10
-2
10
-1
10
0
10
1
10
2
205
200
195
[
[GHz]
]
190
185
180
Figure 3.15: Flux density of the Global Sky Model emission at Galactic coordinates (l, b) = (11.3◦ , 89.6◦ )
(left) and Global Sky Model emission at ν = 1 GHz on a 30◦ × 30◦ sky area (right).
4.0
Probability Distribution Function
30
20
[']
10
0
10
20
20
10
0
10
20
3.5
3.0
2.5
2.0
1.5
1.0
0.5
0.0
30
1e7
6
4
2
0
Pixel value [Jy]
[']
2
4
6
1e
8
Figure 3.16: Example 10 nJy noise-only map over a square degree, with a 5” pixel size (left). Also shown
(right) is the histogram (in blue) of the pixel values for that noise map, overlaid with a Gaussian PDF
with σ = 10 nJy (red line).
24
and a figure of it is saved into gsm 30deg.png (see the right panel of Fig. 3.15). The .png files can be
built separately once the FITS files are present under Tests/ by running
%python plot-GSM-tests.py
which is actually run automatically at the end of run-GSM-tests.sh.
3.5
Noise
Noise can be added to cubes made via the S 3 -Tools. This functionality can be tested with the following
shell script :
%sh run-noise-tests.sh
This script uses single-sax.tar.gz as an input and build two maps, each covering the same square
degree field outside the source, with a 10 nJy level noise (see chapter 7 for details). Both maps are
720×720 pixels, the pixel size being 5”, and one is convolved with a 30” FWHM circular Gaussian beam.
The maps are saved in map-noise.fits and map-noise-smeared.fits. On Fig. 3.16 are shown the
unconvolved map and the histogram of its values, overlaid with a Gaussian PDF with σ = 10 nJy. These
plots are built by the python script plot-noise-tests.py at the end of run-noise-tests.sh.
25
Chapter 4
Querying the S3 databases
4.1
Database structure
The S 3 -SEX and S 3 -SAX databases have similar structures, and consist of the following tables :
• For S 3 -SEX : a Clusters table holding cluster properties, a Galaxies table holding galaxy properties
(possibly including the cluster index to which they belong) and a Components table, which lists the
properties of the several components that may make up a single galaxy, such as cores and radio lobes.
• For S 3 -SAX : a galaxies line table containing the apparent position and emission line properties of the
galaxies and a galaxies delu table containing the intrinsic properties of the galaxies as in the catalog from
[de Lucia et al. (2006)].
For more information on the structure of the database and the attributes held in the various tables, please
refer to the appropriate sections of the S 3 website.
4.2
Performing online queries
4.2.1
SQL query forms
The databases can be queried via SQL forms on the dedicated S 3 -SEX and S 3 -SAX sections of the S 3
website. More specifically, the query forms may be found at :
• http://s-cubed.physics.ox.ac.uk/queries/new?sim=s3 sex for S 3 -SEX
• http://s-cubed.physics.ox.ac.uk/queries/new?sim=s3 sax for S 3 -SAX
In both cases, queries should be written in the SQL format, which is quite straightforward to understand
and implement, at least in this simple case. For instance, with S 3 -SEX :
select * from Galaxies, Components where Galaxies.galaxy=Components.galaxy and Galaxies.right ascension between
-0.02 and 0.02 and Galaxies.declination between -0.02 and 0.02;
will select all properties1 (that’s what the wildcard * stands for) from both Galaxies and Components
tables where the center of the galaxy falls within the central 0.04◦ ×0.04◦ of the simulation, and after
identification of the object via the galaxy index, which is common to the Galaxies and Components tables.
Similarly, for S 3 -SAX, a typical query line would be :
1 These
are called attributes in SQL-speak.
26
select * from galaxies line where galaxies line.ra between -0.02 and 0.02 and galaxies line.decl between -0.02 and 0.02;
which would also select all properties from objects in the galaxies line table which fall within the central
0.04◦ ×0.04◦ of the simulation.
In both of these queries, the wildcard * after the select command means that all attributes will be
returned. It can be replaced by a comma-separated list of attributes, keeping in mind that to make maps
from these simulations, it is mandatory that some properties be included in the query, as the mapping
algorithms require them. The next paragraph lists these mandatory attributes. For more complicated
queries, users may refer to the S 3 website or the MySQL documentation at http://www.mysql.com
4.2.2
Mandatory attributes for mapping using the S 3 -Tools
S 3 -SEX
In the Galaxies table
• galaxy : Object identifier. This is the same index as the galaxy attribute in the Components table.
• redshift : Hubble flow redshift. At least one of redshift or modified redshift is required
• modified redshift : Apparent redshift (including peculiar velocities). At least one of redshift or modified redshift is required
• distance : Comoving distance in Mpc. Only necessary if Hi mapping is requested.
• sftype : Star formation type (None [0], Quiescent [1], Starburst [2])
• agntype : AGN type (None [0], Radio-Quiet [1], FRI [2], FRII [3], GPS [4])
• m hi : Mass of Hi gas in M . Only necessary if Hi mapping is requested.
In the Components table
• galaxy : Object identifier. This is the same for all components of a single galaxy.
• right ascension : Right ascension of the component’s center, in degrees.
• declination : Declination of the component’s center, in degrees.
• position angle : Position angle of the component, in radians, counted positively east from north.
• major axis : Major axis of the component, in arcseconds
• minor axis : Minor axis of the component, in arcseconds
• i 151 : Base-10 logarithm log(I151 ) of the component’s flux density at 151 MHz, in Jy.
• i 610 : Base-10 logarithm log(I610 ) of the component’s flux density at 610 MHz, in Jy.
• i 1400 : Base-10 logarithm log(I1400 ) of the component’s flux density at 1.4 GHz, in Jy.
• i 4860 : Base-10 logarithm log(I4860 ) of the component’s flux density at 4.86 GHz, in Jy.
• i 18000 : Base-10 logarithm log(I18000 ) of the component’s flux density at 18 GHz, in Jy.
S 3 -SAX
In the galaxies line table only
• ra : Right ascension of the galaxy’s center, in degrees.
• decl : Declination of the galaxy’s center, in degrees.
• zapparent : Apparent redshift (including peculiar velocities).
• diskpositionangle : Position angle of the galaxy, in radians, counted positively east from north.
• diskinclination : Inclination of the galaxy’s disc on the line of sight, in radians (0 means face-on, π/2
means edge-on)
• distance : Comoving distance in Mpc.
To these, users should add the following for mapping the Hi line :
• hiintflux : Velocity-integrated line flux of the Hi line, in Jy.km.s−1
27
• himajoraxis 10max : Radius at which the surface brightness in the line ΣHI is at least 10% of its maximum
value, in arcseconds.
• hiwidth50 : Width of the line at 50% of the peak luminosity, in km.s−1 .
• hiwidth20 : Width of the line at 20% of the peak luminosity, in km.s−1 .
• rmolc : H2 /Hi surface density ratio at the disk center. Only necessary when using the University of
Oxford templates (see 2.6.1).
• hubbletype : Numerical Hubble type along the RC2 sequence (-6,...,10). Only necessary when using the
Kapteyn Institute templates (see 2.6.2).
For mapping the CO(J → J − 1) line, users will obviously require the corresponding attributes :
• cointflux 1 : Velocity-integrated line flux of the CO(1-0) line, in Jy.km.s−1
• cointflux 2 : Velocity-integrated line flux of the CO(2-1) line, in Jy.km.s−1
• cointflux 3 : Velocity-integrated line flux of the CO(3-2) line, in Jy.km.s−1
• cointflux 4 : Velocity-integrated line flux of the CO(4-3) line, in Jy.km.s−1
• cointflux 5 : Velocity-integrated line flux of the CO(5-4) line, in Jy.km.s−1
• cointflux 6 : Velocity-integrated line flux of the CO(6-5) line, in Jy.km.s−1
• cointflux 7 : Velocity-integrated line flux of the CO(7-6) line, in Jy.km.s−1
• cointflux 8 : Velocity-integrated line flux of the CO(7-7) line, in Jy.km.s−1
• cointflux 9 : Velocity-integrated line flux of the CO(9-8) line, in Jy.km.s−1
• cointflux 10 : Velocity-integrated line flux of the CO(10-9) line, in Jy.km.s−1
• h2majoraxis 10max : Radius at which the surface brightness in the molecular lines ΣH2 is at least 10%
of its maximum value, in arcseconds. Needed for any J.
• cowidth50 : Width of the molecular lines at 50% of the peak luminosity, in km.s−1 . Needed for any J.
• cowidth20 : Width of the molecular lines at 20% of the peak luminosity, in km.s−1 . Needed for any J.
• rmolc : H2 /Hi surface density ratio at the disk center. Needed for any J.
Finally, when parallel jobs are required, one should also add the id attribute to the list (see chapter 8).
4.3
Structure of query result files
When a query is completed, users are e-mailed with a link to download the results. These are saved in a
gzipped tarball idquery.tar.gz, where idquery is a hash given by the S 3 database server at submission
time. The tarball contains two plain text files idquery.sql and idquery.result.
In idquery.sql, the original SQL-formatted query is recalled, for instance :
select component,structure,right_ascension,declination,position_angle,major_axis,minor_axis
from Galaxies, Components where Galaxies.galaxy=Components.galaxy and Components.right_ascension
between -0.02 and 0.02 and Components.declination between -0.02 and 0.02;
idquery.result contains a first line listing the attributes retrieved, followed by the comma-separated
list of query results proper. For instance :
component,structure,right_ascension,declination,position_angle,major_axis,minor_axis
53878311,1,0.00213,0.0182,0,0,0
53878312,2,0.00215,0.01942,0.016,8.748,1.917
53878313,2,0.00211,0.01699,0.016,8.748,1.917
28
Chapter 5
The S3Map GUI
5.1
The S3Map GUI and underlying scripts
For most users, making maps from query results may be done via S3Map, a graphical user interface (GUI)
written in python, which is run from within the Routines/ subdirectory :
%cd Routines/
%python S3Map.py
A window similar to the one presented in Fig. 5.1 should appear after a few moments. It is through this
interface that users specify which maps to make. To be more specific, the state of the GUI is passed
as arguments to a python script command, either SEX map script.py or SAX map script.py. It is this
command that is in charge of actually building the maps using lower-level routines. The actual command
that would be run in the current state of the GUI can be displayed in the terminal by clicking on the
Show button. Users can then copy-paste this command into a terminal window and perform the same
mapping non-interactively. This is a useful feature for building batch jobs or debugging purposes. See
chapter 6 for more details on these scripts, and chapter 7 for lower-level routines.
5.2
S3Map options
The various buttons on the S3Map GUI have the following functions:
• Input Tarball entry field : Allows the user to specify the name of the tarball to use, which can be either
a .tar or a .tar.gz file. This is the name without extension and by default the file is looked for in the
directory given by the OUTPUT DIR variable in Config Path.py, unless the input tarball is selected by the
Browse button (see below).
• Browse button : Allows the user to select the input tarball via a file selction popup window. The filename
without extension is then reproduced in the Input Tarball entry field and the directory is retained to use
for the output.
• Output Name entry field : Allows the user to specify the name of the output file(s). This is the name
without any extension, as these are automatically added (only .fits for FITS files at the moment). The
file is put in the same directory as the input tarball.
• X From, X To, Y From and Y To entry fields : Allow to specify the parameters of the rectangular area
to map. Values are entered in degrees, arcminutes and arcseconds1 . Be careful not to skip the sign entry
field for each parameter.
1 Be
careful that right ascension is in degrees, arcminutes and arcseconds, and not hours, minutes, seconds...
29
Figure 5.1: The S3Map graphical user interface
30
• From Query checkboxes : If set, the adjacent entry field (one of X From, X To, Y From and Y To) is
updated with the value read from the WINDOW keyword in the input .query file (see 5.3).
• Minimum Frequency entry field : Specifies the frequency of the center of the first spectral channel to
consider. Units can be changed by using the Units drop-down menu.
• Frequency Resolution entry field : Specifies the width δν of each spectral channel. Channels are assumed
to be perfect bandpass filters2 . Units can be changed by using the Units drop-down menu.
• Number of Channels entry field : Specifies the number of spectral channels to be considered.
• Setup button : Uses the value of the Number of Channels entry field and the range in redshifts specified
by the with z in entry fields, along with the selection from the Line drop-down menu, to compute frequency
coverage and update the Minimum Frequency and Frequency Resolution entry fields (see chapter 7).
• Beam Major FWHM entry field : Specifies the full width at half maximum (FWHM) of the (assumed
elliptical Gaussian) beam to use, along its major axis. Units can be changed by using the Units drop-down
menu.
• Beam Minor FWHM entry field : Specifies the full width at half maximum (FWHM) of the (assumed
elliptical Gaussian) beam to use, along its minor axis. Units can be changed by using the Units drop-down
menu.
• Beam Position Angle entry field : Specifies the position angle of the beam’s major axis, counted positively
east from north.Units can be changed by using the Units drop-down menu.
• Pixel size entry field : Specifies the size of a pixel’s side. Pixels are considered square. Units can be
changed by using the Units drop-down menu.
• Noise level entry field : Specifies the amount of (Gaussian) noise to be added to the map, in nJy. This
value is the standard deviation of a zero-mean Gaussian random map which is then convolved by the
same beam as the noise-free map
• Source Types drop-down menu : Allows the user to select the types of sources (Radio-quiet AGN,
FRI radio-loud AGN, FRII radio-loud AGN, quiescent star-forming galaxies and starburst galaxies) that
should be mapped. Of course, a source type that was not included in the query cannot be mapped. Only
active when using S 3 -SEX data.
• GPS drop-down menu : Allows the user to select whether GPS sources should be included. Only active
when using S 3 -SEX data containing such sources
• Continuum checkbox : If set, the output map or cube will include continuum emission. Currently only
applies to S 3 -SEX data cubes.
• I, Q, U, V drop-down menu : Allows to select whether the output map or cube will include an extra
axis for polarization. Currently, only total (unpolarized) continuum intensity is available for S 3 -SEX and
no continuum is available for S 3 -SAX.
• Hi line checkbox : If set, the output map or cube will include Hi line emission. In the case of S 3 -SAX,
the Hi Data drop-down menu becomes active, allowing the user to choose between Oxford templates
(see 2.6.1) and Kapteyn templates (see 2.6.2).
• CO lines checkbox : If set, the output map or cube will include CO line emission. Only active when
using S 3 -SAX data. In that case, the Transitions drop-down menu becomes active, allowing the user to
choose which of the ten possible transitions to map. Only those present in the input tarball may be ticked
on, and they are by default. The All and None buttons allow to select all CO lines or none of them.
• EoR signal checkbox : If set, the output cube will include the Epoch of Reionization signal. The data
templates to be used can be selected via the EoR Data drop-down menu. Currently in the test phase.
• Global Sky Model checkbox : If set, the output cube will include the Global Sky Model signal (see 2.6.3).
• Image Accuracy entry field : Specifies the image accuracy parameter. Only applies to S 3 -SEX data.
• Z-Axis drop-down menu : Allows to select the third axis units, the choice being velocity or frequency.
• Reverse R.A. Axis checkbox : If set, the output cube’s right ascension axis will increase from left to
right, instead of increasing from right to left, which is customary in astronomical images.
• Map Center Right Ascension and Map Center Declination entry fields : Allow to specify the parameters of
the desired map center. Right ascension is entered in hours, minutes and seconds, declination in degrees,
2 For
a channel centered on ν0 , the bandpass is one for frequencies ν such that |ν − ν0 | < δν/2, and 0 otherwise.
31
arcminutes and arcseconds, recalling that 1 second in right ascension corresponds to 15 arcseconds. Be
careful not to skip the sign entry fields. See ?? for more details.
• About button : Displays information about the S 3 -Tools in a separate window.
• Help button : Launches the PDF viewer specified by the PDFViewer variable in Config Path.py (see
2.4) and opens this User’s guide.
• Show button : Displays, in the terminal, the full python command that will be issued should the user
press the Run button with the current configuration of the GUI. This python command is based on the
SEX map script.py and SAX map script.py scripts, as explained in chapter 6. Also displayed are the
size of the would-be output map or cube, both in number of pixels and in estimated memory usage.
• Run button : Runs the map-making command with the current configuration of the GUI.
• Quit button : Exits the S3Map GUI.
5.3
Query files
During the develoment of the S 3 -Tools, it appeared that some form of a ”summary” for the .result files
returned by database queries was necessary, e.g. to deactivate buttons on the GUI which are irrelevant
for a certain set of results, or to initialize some fields with relevant values (such as spatial or redshift
extents). These summaries are called query files and given the suffix .query. They are built by two
dedicated routines SEX create query file and SAX create query file
Example of a S 3 -SAX .query file :
DB=S3SAX
N_OBJECTS=1
CLUSTER_ITEMS=
GALAXY_ITEMS=id,galaxyid,box,ra,decl,distance
WINDOW=0.057951,0.057951,0.038626,0.038626
REDSHIFT=9.66001,9.66001
HI_RANGE=0.130232090735,0.136195883628
CO_1_0_RANGE=10.4982261246,11.1199930132
CO_2_1_RANGE=20.9964522492,22.2399860263
CO_3_2_RANGE=31.4946783739,33.3599790395
CO_4_3_RANGE=41.9929044985,44.4799720527
CO_5_4_RANGE=52.4911306231,55.5999650659
CO_6_5_RANGE=62.9893567477,66.719958079
CO_7_6_RANGE=73.4875828723,77.8399510922
CO_8_7_RANGE=83.985808997,88.9599441054
CO_9_8_RANGE=94.4840351216,100.079937119
CO_10_9_RANGE=104.982261246,111.199930132
Example of a S 3 -SEX .query file :
DB=S3SEX
N_OBJECTS=1
CLUSTER_ITEMS=
GALAXY_ITEMS=galaxy,cluster,sftype,agntype,distance,modified_redshift
WINDOW=0.00211,0.00215,0.01699,0.01942
REDSHIFT=1.970476,1.970476
TYPES=FRI
GPS=NO
32
Chapter 6
Non-interactive scripts
6.1
General syntax
The S3Map GUI is actually a front-end to two python scripts called SEX map script.py (for S 3 -SEX
data) and SAX map script.py (for S 3 -SAX data), whose arguments are derived from the state of the
GUI. Consequently, it is possible to run map-making jobs from the command line without using S3Map.
The arguments to SEX map script.py and SAX map script.py are described below in 6.4.2 and also in
the corresponding help files, which can be printed out by issuing the following python command at the
prompt:
%python SEX map script.py --help
or
%python SAX map script.py --help
The general syntax for these scripts is :
%python XXX map script.py --argument=value --keyword
where the arguments and keywords depend on which script is run.
6.2
6.2.1
Arguments and keywords to SEX map script.py
Arguments
The following lists the possible arguments to SEX map script.py and gives an explanation of the expected values for each :
• in : ID of the query results tarball to use as input. This is the filename minus the .tar.gz extension.
• out : Name of the FITS file to write the results to. This is to be given without the .fits extension.
• types [Optional] : A string of the form x,y,z,... giving the source type indices (eligible values are 1
to 5) to include in the map. Default is to include all source types that are present in the input tarball.
• window [Optional] : A string of the form min x,max x,min y,max y giving the spatial window to map.
Values are to be given in arcseconds and the default is to use the query window from the input tarball
(.query file see 5.3), in which case a conversion from degrees to arcseconds is performed internally.
• freqinfo : A string of the form min freq,delta freq,nchans giving the center frequency of the first
channel in GHz, the width of each channel in GHz, and the number of channels.
33
• bmaj [Optional] : Full-width at half-maximum (FWHM) of the major axis of the (assumed Gaussian)
beam, in arcseconds. Default is zero, which implies no beam convolution.
• bmin [Optional] : Full-width at half-maximum (FWHM) of the minor axis of the (assumed Gaussian)
beam, in arcseconds. Default is zero, which implies no beam convolution.
• bpa [Optional] : Position angle of the beam, counted positively east from north, in radians. Default is
zero.
• noise [Optional] : Level of the Gaussian noise to add, in nJy. The value specified is the standard
deviation of a Gaussian-distributed random map with zero mean. The noise map is thereafter convolved
by the same beam as the noise-free map. Default is zero (no noise).
• pixelsize : Size of a pixel’s side, in arcseconds. Pixels are considered square.
• dir [Optional] : Full path to the directory where the input tarball should be found and the output cube
should be put. The default is to use the directory specified by the OUTPUT DIR variable in Config Path.py.
• continuum [Optional] : A comma-separated list of Stokes parameters (I, Q, U, V) to specify which type
of continuum is to be mapped. Currently, only --continuum=I is possible.
• imageaccuracy [Optional] : Minimum half-size, in pixels, of all single-source images. Default is 20.
• rarefpos [Optional] : Value of the right ascension at the image center, in degrees. Default is 180, that
is 12 hours.
• decrefpos [Optional] : Value of the declination at the image center, in degrees. Default is 0.
• zrange [Optional] : A string of the form z min,z max specifying which range of redshift should be
mapped. Default is to use the query range from the input tarball (.query file see 5.3).
• ztype [Optional] : Can be either redshift or modified redshift, depending on whether the redshift
to be used is the Hubble flow one or the apparent one. Default is to use the latter.
• flux limit [Optional] : Allows to specify a flux limit, in nJy, so that any source whose fluxes at the
reference frequencies are all below that cutoff are not mapped. Currently inactive.
6.2.2
Keywords
The following lists the possible keywords to SEX map script.py and gives an explanation of their effects
when set :
• hi [Optional] : Set this option to map Hi line emission.
• freqaxis [Optional] : Set this option to have a third axis in units of frequency (Hz). This is the default.
• veloaxis [Optional] : Set this option to have a third axis in units of velocity (km/s). This is only
possible in conjunction with the --hi keyword.
• gsm [Optional] : Set this option to include the Global Sky Model emission (see 2.6.3).
• reversera [Optional] : Set this option to have a right ascension axis increasing from left to right.
Default is the customary convention in astronomical images (right acension increases from right to left).
• separate maps [Optional] : Set this option to make separate cubes for the different source types and
non-S 3 data (CMB, Global Sky Model).
• userefpos [Optional] : Set this option to effectively use the map center direction specified via the
rarefpos and decrefpos arguments.
• nocmb [Optional] : Set this option to skip the inclusion of the CMB emission (see 3.3) in the output
cube. This is an option as the default is to always include it.
6.3
6.3.1
Arguments and keywords to SAX map script.py
Arguments
The following lists the possible arguments to SAX map script.py and gives an explanation of the expected values for each :
• in : ID of the query results tarball to use as input. This is the filename minus the .tar.gz extension.
34
• out : Name of the FITS file to write the results to. This is to be given without the .fits extension.
• window [Optional] : A string of the form min x,max x,min y,max y giving the spatial window to map.
Values are to be given in arcseconds and the default is to use the query window from the input tarball
(.query file see 5.3), in which case a conversion from degrees to arcseconds is performed internally.
• freqinfo : A string of the form min freq,delta freq,nchans giving the center frequency of the first
channel in GHz, the width of each channel in GHz, and the number of channels.
• bmaj [Optional] : Full-width at half-maximum (FWHM) of the major axis of the (assumed Gaussian)
beam, in arcseconds. Default is zero, which implies no beam convolution.
• bmin [Optional] : Full-width at half-maximum (FWHM) of the minor axis of the (assumed Gaussian)
beam, in arcseconds. Default is zero, which implies no beam convolution.
• bpa [Optional] : Position angle of the beam, counted positively east from north, in radians. Default is
zero.
• noise [Optional] : Level of the Gaussian noise to add, in nJy. The value specified is the standard
deviation of a Gaussian-distributed random map with zero mean. The noise map is thereafter convolved
by the same beam as the noise-free map. Default is zero (no noise).
• pixelsize : Size of a pixel’s side, in arcseconds. Pixels are considered square.
• dir [Optional] : Full path to the directory where the input tarball should be found and the output cube
should be put. The default is to use the directory specified by the OUTPUT DIR variable in Config Path.py.
• hi [Optional] : Set to either Oxford or Kapteyn to specify which set of Hi emission templates are to
be used. Default is not to request Hi mapping, which corresponds to --hi=0
• rarefpos [Optional] : Value of the right ascension at the image center, in degrees. Default is 180, that
is 12 hours.
• decrefpos [Optional] : Value of the declination at the image center, in degrees. Default is 0.
• zrange [Optional] : A string of the form z min,z max specifying which range of redshift should be
mapped. Default is to use the query range from the input tarball (.query file see 5.3).
• hash [Optional] : Set to a user-chosen string which is meant to identify several map-making jobs as
part of the same project. See chapter 8 for more details.
6.3.2
Keywords
The following lists the possible keywords to SAX map script.py and gives an explanation of their effects
when set :
• co 1 0 [Optional] : Set this option to map CO(1-0) line emission.
• co 2 1 [Optional] : Set this option to map CO(2-1) line emission.
• co 3 2 [Optional] : Set this option to map CO(3-2) line emission.
• co 4 3 [Optional] : Set this option to map CO(4-3) line emission.
• co 5 4 [Optional] : Set this option to map CO(5-4) line emission
• co 6 5 [Optional] : Set this option to map CO(6-5) line emission.
• co 7 6 [Optional] : Set this option to map CO(7-6) line emission.
• co 8 7 [Optional] : Set this option to map CO(8-7) line emission.
• co 9 8 [Optional] : Set this option to map CO(9-8) line emission.
• co 10 9 [Optional] : Set this option to map CO(10-9) line emission.
• freqaxis [Optional] : Set this option to have a third axis in units of frequency (Hz). This is the default.
• veloaxis [Optional] : Set this option to have a third axis in units of velocity (km/s). This is only
possible when one and only one of hi, co 1 0, co 2 1, co 3 2, co 4 3, co 5 4, co 6 5, co 7 6, co 8 7,
co 9 8 or co 10 9 is set.
• gsm [Optional] : Set this option to include the Global Sky Model emission (see 2.6.3).
• reversera [Optional] : Set this option to have a right ascension axis increasing from left to right.
• separate maps [Optional] : Set this option to make separate maps for the S 3 data and non-S 3 data
(CMB, Global Sky Model).
35
• userefpos [Optional] : Set this option to effectively use the map center direction specfied via the
rarefpos and decrefpos arguments.
• nocmb [Optional] : Set this option to skip the inclusion of the CMB emission (see 3.3) in the output
cube. This is an option as the default is to always include it.
6.4
Running a script
6.4.1
Typical script commands
6.4.2
Terminal output while running a script
What the SEX map script.py and SAX map script.py scripts actually do is to first look up the input.
This means a .result file with the right name (i.e. that specified by the --in argument’s value) in the
right directory (specified by the --dir argument’s value). If one is found, the corresponding .sql file
must be there too :
Looking for a .result file...
A .result file was found. Looking for a .sql file...
A .sql file was found.
If no relevant .result file can be found, the scripts look for a .tar or .tar.gz file of the same name
(also in the same directory). This is typically the case when using database query results directly. In
that case, the files in the tarball (which should include the .result and .sql files) are extracted :
Looking for a .result file...
No .result file found. Looking for a tar ball...
Tar ball found. Processing it...
If not even a tarball can be found, the script exits cleanly and warns the user :
Looking for a .result file...
No .result file found. Looking for a tar ball...
No tar ball found. Check your inputs (especially the --dir and --in arguments) !
Assuming proper input was found, the scripts then look up a corresponding (i.e. with the same name)
.query file (see 5.3) :
Looking for a .query file...
A .query file was found.
If no such file can be found, one is built automatically (via the already mentioned routines SEX create query file
and SAX create query file, which are described in chapter 7) :
Looking for a .query file...
No .query file found. Building one...
The scripts use these to read in the spatial and redshift extents covered by the data, to use as default
values if the --window or --zrange arguments are missing. In that case, the user is notified :
Using query window [7.596,7.74,61.164,69.912] (arcseconds) as mapping window
Using query redshift [1.96970937,1.96970937] as mapping redshift range
Also in the .query file is the number of objects inside the full results, which is printed to the screen :
File contains 1 objects
36
If the beam size, specified by the values of the --bmin and --bmaj arguments, is not greater than the
requested pixel size (specified by --pixelsize), then no convolution will be done :
Beam size too small with respect to pixel size, I will not be performing convolution
Computation of the image size is performed, so the user knows what to expect - and may abort the run
if the output map size is too big (see chapter 7):
Will build 720 x 720 x 1 image
Then the actual map-making proceeds, via the SEX build map and SAX build map routines, which are
described extensively in chapter 7,
Actually making S3 map takes 0.118352890015 seconds
Finally, the S 3 data cube is written out to a FITS file, whose name is specified by the value of the --out
argument, and placed in the same directory as the input :
Writing to FITS takes 0.172261953354 seconds
If some additional data is to be considered (Cosmic Microwave Background, Global Sky Model,...), it is
treated as a post-processing step. For instance :
Making CMB signal
Added CMB signal to my_map.fits
Making GSM map(s)
outfile_1420.405751 already exists. No need to rebuild it.
Added GSM signal to my_map.fits
For more details on these, see chapter 7
37
Chapter 7
Lower-level routines
TO BE COMPLETED....
38
Chapter 8
Parallel extensions
TO BE COMPLETED....
39
References
[de Lucia et al. (2006)] de Lucia, G., Springel, V., White, S.D.M., Croton, D., Kauffmann, G., 2006,
MNRAS, 366, 499
[de Oliveira-Costa et al. (2008)] de Oliveira-Costa, A., Tegmark, M., Gaensler, B.M., Jonas, J., Landecker, T.L., Reich, P., 2008, MNRAS, 388, 247
[Levrier et al. (2009)] Levrier, F., Wilman, R.J., Obreschkow, D., Kl¨ockner, H.-R., Heywood, I., Rawlings, S., 2009, in ”Widefield Science and Technology for the SKA” SKADS Conference 2009, edited by
S.A. Torchinsky, A. vanArdenne, T. van den Brink-Havinga, A. van Es, A.J. Faulkner
[Obreschkow et al. (2009)] Obreschkow, D., Kl¨ockner, H.-R., Heywood, I., Levrier, F., Rawlings, S., 2009,
ApJ, 703, 1890
[Springel et al. (2005)] Springel, V., White, S.D.M., Jenkins, A., Frenk, C.S., Yoshida, N., Gao, L.,
Navarro, J., Thacker, R., Croton, D., Helly, J., Peacock, J.A., Cole, S., Thomas, P., Couchman, H.,
Evrard, A., Colberg, J., Pearce, F., 2005, Nature, 435, 629
[Wilman et al. (2008)] Wilman, R.J., Miller, L., Jarvis, M.L., Mauch, T., Levrier, F., Abdalla, F.B.,
Rawlings, S., Kl¨
ockner, H.-R., Obreschkow, D., Olteanu, D., Young, S., 2008, MNRAS, 388, 1335
[Wilman et al. (2010)] Wilman, R.J., Jarvis, M.L., Mauch, T., Rawlings, S., Hickey, S., 2010, MNRAS,
405, 447
40