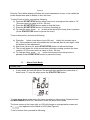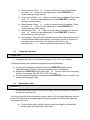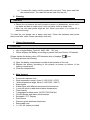
1
UK
User Manual
Digital Oven/Meat/Timer Thermometer
Model E341
Item number 5-8000
We congratulate you for purchasing our SUNARTIS® Digital Oven/Meat/Timer
Thermometer.
Before using this product please read this instruction manual and especially
the safety instructions carefully. Please keep this instruction manual for later
reference and pass it to another user in case of further handling.
Below we give you some important information for handling the Digital Oven/Meat –
Timer Thermometer.
▲ Operation instructions:
• Clean the probe with a damp cloth before use.
• Remove the battery insulator before the first use.
• Please do not place the whole unit into the oven. The probe and the metal
cord are the only parts designed for working under high temperature (below
260°C/ 500°F). For long - term use, the probe and metal cord must be kept
below 260°C/ 500F°. The main body of the thermometer (the part with LCD)
must remain outside the oven or any environment where the temperature is
outside of the following temperature range: +10°C till +50°C (14°F till 122°F).
• Care after use: Clean the thermometer with a damp cloth, and press the
rewind button to rewind the cord fully after use.
1. Use
1.1.
Modes: Normal/Cooking-Mode, Timer-Mode, Alarm-Mode,
Calendar/ Clock-Mode
Please Note:
• The unit turns on and starts in normal mode automatically.
• Alarm sounds when the probe temperature reaches preference-cooking
temperature (PREF, the temperature at the lower right of LCD). At the same
time, the timer starts to count up. It tells the user how long the meat has been
overcooked.
The Digital Oven/Meat/Timer Thermometer offers a variety of modes for multiple
uses.
I.
II.
III.
IV.
The Normal/Cooking Mode: to control the oven and meat temperature for
perfect cooking results.
The Timer Mode: offers a free set timer (up to 99 hours and 59 minutes) and
a stopwatch function for any needed measuring.
The Alarm Mode: a feature to set a daily alarm (in Calendar Mode) as a
repeating reminder, along with the actual surround temperature.
The Calendar/Clock Mode: shows time and date with the surround
temperature as a clock feature while the item is not in use.
To switch to the other mode, pause the timer, count-up timer or alarm (if any) in the
current mode. Press and hold the MEAT/MODE button for 2 about seconds.
Order of modes: Normal/Cooking Mode → Timer Mode → Alarm Mode →
Calendar/Clock Mode → …repeating…).
I.
Normal/Cooking Mode
Please note:
• Insert the stainless steel probe (at least 2.5cm into the meat and make sure
the probe is away from bone to get an accurate reading of the internal
temperature.
• When you turn on the unit, there is a larger offset between the estimated and
real cooking time due to insufficient collected data. Please take the value of
estimated cooking as a reference only.
Figure 1
Figure 2
Entering this mode the LCD will jump back and forth between the estimated cooking
time and the target temperature (see Figure 1 and 2).
During the thermometer is in operation, the programming will estimate a cooking time
based on the collected temperature data. And the lowest row of LCD, in normal mode,
will jump back and forth between estimated cooking time (WAIT FOR, 38:28 - see
Figure 2) and target/alarm temperature (BEEF MED: 71 - see Figure 1).
To select a preset Meat type, proceed as following:
a) Press the MEAT/MODE button to choose the type of meat (beef, veal, lamb,
ham, poultry, pork, ham).
b) Press the PREF/SET button to select the desired doneness level
(MEDium, WELLdone, MediumRAR for beef, veal, lamb and pork and
COOKed and FRESH for ham. Poultry should always be well done.
To select User setting, proceed as following:
a) Press the MEAT/MODE button to choose USER option.
b) To adjust the preference-cooking temperature (PREF) press
(Press and hold the or button for fast adjustment).
or
Meat
Doneness/Preference
Temperature °F/°C
USER
(Free setting possible)
160/71
Beef, Veal,
Lamb
Medium rare
Medium
Well Done
145/63
160/71
170/77
Poultry
(always well done)
165/74
Pork
(always well done)
160/71
Ham
Pre-cooked
Fresh
140/60
160/71
button
Meat table according to the FTA
II.
Timer Mode
Please note:
• To switch to timer mode: Make sure the alarm and the count up timer is not in
operation (i.e. It is paused) in normal mode. Press and hold the MEAT/MODE
button in normal mode until the MEAT menu at the lower left of LCD
disappears. Then, it is in the timer mode.
• During timer counting value less than a minute (0~59second), the H and M
icons will disappear at the lower right of LCD.
Figure 3
Entering Timer Mode display will show the oven temperature on top, in the middle the
probe temperature and on bottom a zero set timer.
To start Count up timer, proceed as following:
a) Press the START/STOP button when timer is not running and the value is: 00
(The max count-up value is 99 hr : 59 min).
b) Press the START/STOP button again to stop the timer.
c) Press the START/STOP button to continue counting up.
d) To clear the timer, press or button at the same time during timer is paused
(Press START/STOP button to pause the timer).
To set a time period, proceed as following:
a) Press the
button to set hours (up to 99) and
button for minutes (up to
59). If the maximum time is exceeded the counted will start at zero again. Hold
the button for fast adjustment.
b) After timer value is set, press START/STOP button to activate the timer.
c) The unit will alarm for a minute and timer will start counting up when the timer
reaches: 00 (The max count-up value is 99 hr : 59 min).
d) To clear the timer, press
or
button at the same time during timer is
paused (Press START/STOP button to pause the timer).
III.
Alarm-Clock Mode
Please note:
• In any mode, the unit will alarm if the present time reaches the preset time of
alarm clock. To stop the alarm press the START/STOP button.
Figure 4
To enter alarm clock mode pause the timer and alarm in timer mode. Press and hold
the MEAT/MODE button for 2 seconds to enter the alarm clock mode.
The timer screen at the lower right on LCD will change to a temperature screen and
an
Icon appears at the middle of LCD (See Figure 4).
To set a chosen time, proceed as following:
a) Press and hold the PREF/SET button for about 2 seconds to enter the
setting mode of alarm clock.
ª The hour digits blink. A
bell icon appears next to
.
b) Press or button to set the hour of alarm clock (Press and hold or
button for fast adjustment
c) Press PREF/SET again to shift to minute setting.
ªThe minute digits blink.
d) Press or button to set the minute of alarm clock (Press and hold or
button for fast adjustment).
e) To confirm and escape the setting mode, press PREF/SET again.
f) The alarm clock will be stored and return to alarm clock mode
(automatically) from setting mode if no button is pressed in about 2
minutes.
g) Press button to activate or deactivate the alarm.
ª When the l icon appears at the middle of LCD. The alarm clock is
activated.
IV.
The Calendar/Clock Mode
Please note:
• In Calendar/Clock Mode, the thermometer samples every 30 seconds. The
unit will alarm and jump to normal mode automatically if the probe temperature
reaches the alarm temperature (in normal mode).
Figure 5
To enter Calendar/Clock Mode pause the alarm (if in Alarm Mode). Press and hold
the MEAT/MODE button for 2 seconds to enter the Calendar/Clock Mode.
The clock and calendar located at the middle and top of LCD are shown.
To set Clock and calendar, proceed as following:
a) 24hour or 12hour format: Press and hold the PREF/SET button for 2
seconds to enter the setting mode of clock. Press or button to
select desired time format, 24-hour or 12-hour. Then press PREF/SET
to confirm and go to hour setting.
b) Hour setting: Press or button to set the hour of clock (Press and
hold or button for fast adjustment). Press PREF/SET to confirm
and go to minute setting.
c) Minute setting: Press or button to set the minute of clock (Press
and hold or button for fast adjustment). Press PREF/SET to
confirm and go to year setting.
d) Year setting: Press or button to set the year of calendar (Press and
hold or button for fast adjustment). Press PREF/SET to confirm
and go to month setting.
e) Month setting: Press or button to set the month of calendar (Press
and hold or button for fast adjustment). Press PREF/SET to
confirm and go to day setting.
f)
Day setting: Press or button to set the day of calendar (Press and
hold or button for fast adjustment). Press PREF/SET to confirm
and escape the setting mode.
g) Auto escape: The clock and calendar values will be stored and return to
Clock/Calendar Mode automatically (from setting mode) if no button is
pressed in about 2 minutes. The second will be set to zero
automatically if or button is pressed during minute setting.
1.2.
Language selection
Please note:
• Language will return to the default language if the unit is out of battery.
To change between the installed languages proceed as following:
a) To enter the language mode press and hold PREF/SET button during
installing battery. The unit will enter language mode automatically.
b) Release the PREF/SET button and press or button to select the language
(Order of languages: EN, DE, FR, IT, ES, SW, NL).
c) After the desired language is selected, press PREF/SET button to confirm and
escape the language mode.
1.3.
Retractable cable
Attention!
¾ Please ensure the probe is being held tightly during retracting the cable into
the unit to avoid any hurt.
The unit is provided with a retractable cable of about 100 cm length between unit and
probe. This should give enough range to place the probe in the meat and leave the
unit outside the oven.
a) To pull out the cable, hold the unit with one hand tightly, and then pull
out the probe and cable with other hand.
b) To rewind the cable, hold the probe with one hand. Then, press and hold
the rewind button. The cable will retract back into the unit.
2. Cleaning
Attention!
¾ Please do not immerse the unit in water or place it in dishwasher, as the unit is
not water resistant or water proof. User can clean it with a damp cloth.
¾ After use the steel probe might be hot. Clean only when it is cooled off to
prevent burning.
To clean the unit please use a damp cloth only. Clean the stainless steel probe
before and after used. Please use damp cloth only.
3. Battery Replacement:
Please note:
• Use a single Battery Type AA AM3, LR6 1.5V only.
• Please dispose the Battery according to present law (see Section 7 Disposal).
Please replace the battery when LCD becomes dim or displays “
To Change proceed as following:
" icon.
a) Open the battery compartment located at the backside of the unit.
b) Replace the battery according to the polarity as shown on bottom of the
battery compartment.
c) Close the compartment.
4. Main features
•
•
•
•
•
•
•
•
•
•
•
•
•
•
5 seconds response time
Wide temperature range: Oven 0°~300°C(32°~572°F)
Wide temperature range: Meat 0°~200°C(32°~392°F)
Alarm signal
6 Meat types with different doneness level selections
1 user set option to add desired alarm temperature.
Timer feature
7 languages for Meat menu (UK,FR,IT,ES,SW,NL)
Clock/Calendar and Alarm clock features
Selectable °C/°F Display
Dual Sensor
Premium grade stainless steel probe
Retractable cord
1 x1.5V AA battery included
5. Technical Data
Casing:
Probe:
Size:
Measuring range:
Measuring accuracy:
ABS plastic
Stainless steel 18/8
101.1 * 85 * 41.6 mm
Meat: 0° to +200°C (32° to +392°F)
Oven: 0° to ~300°C (32° to ~572°F)
± 1°C (0°C till 100°C)
± 2°C (100°C till 200°C)
± 5°C (200°C till 300°C)
6. General Warnings
Attention!
¾ Please do not place the whole unit in the oven. The probe and the metal cord
are the only parts designed for working under high temperature shortly (below
260°/ 500°). For long - term use, the probe and metal cord must be kept below
260°/ 500°. The main body of the thermometer (the part with LCD) must
remain outside the oven or any environment where the temperature is 10~50°C (14~122°F).
¾ Please ensure the probe is being held tightly during retracting the cable into
the unit to avoid any hurt.
¾ Clean the probe thoroughly after each use.
¾ The thermometer is NOT water-proof and NOT dishwasher safe. Do not
immerse the whole product into water or wash it in the dishwasher. You can
clean it with a damp cloth.
¾ After use the steel probe might be hot. Clean only when it is cooled off to
prevent burning.
¾ Please replace the battery when the display becomes dim. Please well deal
with the used batteries.
7. Disposal
The product, its packaging and the supplied batteries have been manufactured
from valuable materials that can be recycled. Recycling reduces the amount of
refuse and helps to preserve the environment.
Dispose of the packaging at a recycling point, which sorts materials by type. Make
use of the local facilities provided for collecting paper, Cardboard and lightweight
packaging by type.
Battery
Please take note, that this unit contains a battery. Batteries and
accumulators must not be disposed of as unsorted municipal waste. Users
of batteries and accumulators must use the available collection framework
for the return, recycling and treatment of batteries and accumulators.
Please take care of our environment and dispose your batteries
accordingly. Thank you for your assistance.
Unit:
This product contains valuable parts that can be recycled to reduce the
impact on the environment. Please use public municipal assembly for
disposal.
Packaging:
Packaging materials can be recycled. Please dispose in an environmental
safe way.
8. Marking:
By attaching the CE-Marking ( 'Communauté Européenne', what means
'European Community') the producer confirms, that the product meets the
demands of the relevant European guidelines for product safety.
Interseroh:
We are participating in the dual system. Please help by disposing
accordingly.
9. Service:
For any questions about the product Mingle Instrument GmbH Europe is at
your service.
You can reach us by telephone during normal office hours, 08:00 am to 05:00
pm o’clock, or at any time via email.
Virmondstr. 143 D-47877 Willich
Phone: +49(0) 2156 496850
Fax: +49(0) 2156 496811
Email: [email protected]
www.mingle-europe.com