1
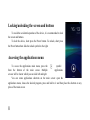
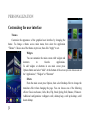
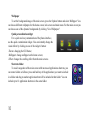
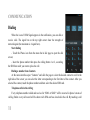
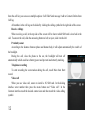
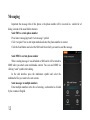
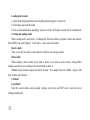
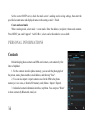
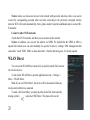
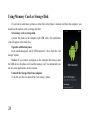
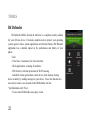
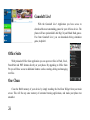
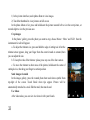
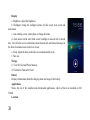
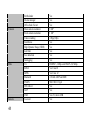
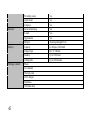
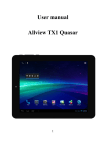
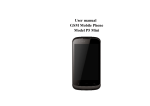
P5 QUAD
User manual
Contents
Contents......................................................................................................................................... 2
Notices for the use of phone .................................................................................................... 4
INTRODUCTION ............................................................................................................................. 6
Turning the device on and off .................................................................................................. 6
Insert the SIM card ....................................................................................................................... 6
Device aspect and buttons ...................................................................................................... 7
Locking/unlocking the screen and buttons .......................................................................... 8
Accessing the applications menu ........................................................................................... 8
PERSONALIZATION........................................................................................................................ 9
Customizing the user interface................................................................................................. 9
COMMUNICATION..................................................................................................................... 11
Dialing........................................................................................................................................... 11
Messaging.................................................................................................................................... 13
Mail................................................................................................................................................ 14
PERSONAL INFORMATIONS ...................................................................................................... 16
Contacts ...................................................................................................................................... 16
Calendar...................................................................................................................................... 17
Recorder ...................................................................................................................................... 19
2
CONNECTIVITY ............................................................................................................................ 19
Wifi ................................................................................................................................................. 19
WLAN Direct ................................................................................................................................ 21
GPS ................................................................................................................................................ 22
Bluetooth...................................................................................................................................... 22
Using Memory Card as Storage Disk ..................................................................................... 24
TOOLS............................................................................................................................................ 25
Bit Defender ................................................................................................................................ 25
Gameloft Live! ............................................................................................................................ 26
Office Suite .................................................................................................................................. 26
One Clean................................................................................................................................... 26
Robin – personal assistant (optional) .................................................................................... 27
Internet Explorer ......................................................................................................................... 29
Clock............................................................................................................................................. 30
Calculator.................................................................................................................................... 31
Camera ........................................................................................................................................ 31
Images.......................................................................................................................................... 32
Music ............................................................................................................................................. 34
FM Radio ...................................................................................................................................... 35
Settings ......................................................................................................................................... 36
Specifications.............................................................................................................................. 42
3
Notices for the use of phone
Your phone is a product of superior design and craftsmanship and should be treated with care. The
following suggestions can help you comply with the terms of repair kits, to extend the life of mobile
phone.
Place the mobile phone and their parts and components out of reach of small children.
Keep the phone dry, rain, humidity and all types of liquids which contain minerals will corrode
electronic circuits.
Don’t touch the phone with wet hands when charging, it will cause electric shock or damage the
phone.
Avoid place the device in high temperature environment. Temperatures will shorten the life of
electronic devices, damage batteries, and warp or melt certain plastics.
Avoid place the device in too low temperature environment. When the temperature rises, the phone
will produce water vapor that may damage electronic circuit.
4
Avoid place the phone in dusty, dirty places, otherwise parts may be damaged.
To avoid the phone in a lit cigarette, near open flame or any heat source.
Do not open the device, non-professional approach will do damage to the phone.
Do not throwit from height, knock or shake the phone, rough handling can damage internal circuit
boards.
Do not paint the phone, because the paint will block headphones, microphones or other removable
parts, and lead it not work.
Use clean, soft, dry cloth to clean the camera, light sensor lenses. Prohibit the use of harmful
chemicals and cleaning agents, cleaning fluids to clean the phone
If mobile phone, battery, charger, or mobile phone accessories are defective, send to the nearest
qualified service center for inspection.
I f nessary, Service Centre staff will assist you and will arrange for phone repairs.
Warning: We take no responsibility for situations where the phone is used in other way than as
provided in the manual.
Our company reserves the right to make changes in the content of the manual without making this
public. These changes will be posted on the website of the company in the regarding product page.
The contents of this manual may be different from that in the product. In this case, the last will be
considered.
5
INTRODUCTION
Turning the device on and off
To power on the device, press and hold the Power button untill the screen will show the boot up
image.
To power off the device, press and hold the Power button for three seconds, then select the Power Off
option on the screen.
NOTE: Comply to the warnings where the usage of radio transmitting devices is limited. To use the
device in such areas, you must switch the phone to the Airplane mode. To do this, press and hold the
Power button for three seconds and then chose Airplane Mode option.
Insert the SIM card
To insert the SIM card into the SIM slot, follow the next step:
1.
Take out the battery cover;
2.
Take out the battery;
3.
Insert the SIM cards into the desired SIM slots.
6
Device aspect and buttons
1. Menu button
2. Home button
3. Back button
4. Speaker
5. Volume buttons
6. Power button
7. Earphones jack
8. Receiver
9. Led flash
10. MicroUSB plug
11. Back camera
12. Front camera
7
Locking/unlocking the screen and buttons
To avoid the accidental operation of the device, it is recommended to lock
the screen and buttons.
To lock the device, short press the Power button. To unlock, short press
the Power button then slide the unlock symbol to the right.
Accessing the applications menu
To access the applications main menu, press the
symbol
from the bottom of the main screen. Multiple
applications
screens will be shown which you can slide left and right.
You can create applications shortcuts on the main screen: open the
applications menu, choose the desired program, press and hold to it and then place the shortcut on any
place of the main screen.
8
PERSONALIZATION
Customizing the user interface
Themes
Customize the appearance of the graphical user interface by changing the
theme. To change a theme access main menu, then select the application
"Themes". Choose one of the themes to preview, then click "Apply" to set.
Widgets
You can customize the main screens with widgets and
shortcuts
to
favorite
applications.
To add widgets or shortcuts in one main screen press
Options button and select "Add". At the bottom of the screen you can choose one of
the "Applications", "Widgets" or "Shortcuts"
Effects
From the main screen press Options, then select Desktop effect to change the
transition effect when changing the page. You can choose one of the following
effects: Classic no bounce, Cube, Box, Flip, Stack, Spring, Roll, Bounce, Winnover.
Additional configurations: wallpaper scroll, desktop loop, scroll up desktop, scroll
down desktop.
9
Wallpaper
To set the background image of the main screen, press the Options button and select Wallpaper. You
can choose different wallpapers for the home screen, lock screen and main menu. For the main screen you
can choose one of the dynamic backgrounds by clicking "Live Wallpapers".
Quick personalization widget
For a quick and easy customization of the phone interface,
use the quick customization widget. You can instantly change the
visual effects by clicking on one of the widget’s button:
-Theme: changing the GUI theme;
-Wallpaper: change wallpaper on the home screen;
-Effect: changes the scrolling effect from the main screens.
Shortcuts folder
To avoid congestion of the main screen with most used applications shortcuts, you
can create folders as follows: press and hold any of the applications you want to include
in a folder and drag to another application that will be included in that folder. You can
include up to 12 application shortcuts in the same folder.
10
COMMUNICATION
Dialing
When the icon of GSM Signal appears in the notification, you can dial or
receive calls. The signal bar on the top right corner show the strength of
network signal (the maximum is 4 signal bars) .
Start dialing
- Touch the Phone icon from the menu bar in idle page to open the dial
screen;
- Insert the phone number then press the calling button 1 or 2, according
the SIM from wich you want to place the call.
Dialing a number from Contacts
At the menu interface open “Contacts” and slide the page to select the desired contact to call. In the
right side of the screen you can select the letter corresponding to the first letter of the contact. After you
selected the contact, touch the phone number and then select the desired SIM card.
Telephone calls in the call log
Every telephone number called and received in “SIM1 or SIM2” will be reserved in phone’s menu of
call log. Below every call record will be shown wich SIM card was involved in the call. By touching a call
11
from the call list, you can access multiple options: Call/ Edit/ Send message/ Add to Contacts/ Delete from
Call log.
All numbers in the call log can be dialed by clicking the calling symbol in the right side of the screen.
Receive callings
When receiving a call, in the top side of the screen will be shown which SIM card is involved in the
call. To answer the call, slide the answering button to left, to reject, slide it to the left.
Proximity sensor
According to the distance between phone and human body it will adjust automatically the switch of
the backlight.
During the call, close the phone to the ear, the backlight will turn off
automatically which could save battery power and prevent inadvertently touching.
Telephone recording
To start recording the conversation during the call, touch More then Start
record.
Video call
When you use video call, ensure to install a 3G SIM card. In the dialing
interface enter number then press the menu button and “Video call”. In the
Contacts interface touch the desired contact icon and then touch the video calling
symbol.
12
Messaging
Important the message title of this phone is the phone numbe will be reserved in s similar for of
dialog instead of the usual folder structure.
Send SMS to certain phone number
Press home>messaging>touch “new message” symbol.
Click “recipient” box to start input method and enter the phone number or contact.
Click the Send button and select the SIM card from which you want to send the message.
Send MMS to certain phone number
When creating message it was defaulted as SMS and it will be turned to
MMS when you attach some multimedia content. You can send MMS via
clicking “send” symbol after editing.
In the edit interface press the attachment symbol and select the
multimedia files you want to be sent as mms.
Send messages to multiple numbers
Enter multiple numbers in the box of entering each number is divided
by the comma in English.
13
Notices: For now this phone can mass messages to almost 20 numbers the correct number depends on
the characters you can only enter 312 characters in the box of “recipient”.
When a message is sent or sent again a little yellow letter will appear. The number 1 or 2 on the letter
refers to SIM1 or SIM2.
When message sending failed a red triangle with exclamation will appear.
when editing information other functions of Menu button
Mail
5.1 Gmail
Create an electronic mail account
Select mail> settings. You can activate or edit existing e-mail accounts as well as create a new e-mail
account.
Select mail, Google account setting interface appears. Then touch ‘next step’> create account>enter
name last name and e-mail account.
Google servers determine whether the name can be used, if so, new interface appears prompting enter
password, then judge the password’ security, users who doesn’t meet the requirements need to re-enter the
password.
Successfully register a new Gmail account, a messenger created automatically for testing.
14
Loading mail account
a. Open Gmail skip introduction screen>loading interface appears >select load
b. Enter name, password then load
E-mail account initialization, prompting “login successful” All Google accounts will be synchronized.
Creating and sending, mails
When creating mails, select mail > creating mails. Enter the address (recipient) theme and contents.
Press MENU you could ‘append’ ‘Add Cc/Bcc’, select send or discarded.
Receive mails
There is tone for new mails, in the status box will show an message symbol.
Delete mails
When loading a mail account if you want to delete it you need to restore factory settings.When
loading a second one you could press the menu button to delete it.
Notices: many functions depend on Gmail Account for example Electronic Market Google Talk
Sync Contact and Calendar.
5.2 Email
Load Email
Enter the correct address and password >settings correct port and POP server, check the server
settings automatically.
15
Set the correct SMTP server, check the mails server’s sending and receiving settings, then enter the
specified account name and displayed name on the outing e-mail.> Finish.
Create and send mails
When creating mails, select mails > create mails. Enter the address (recipient) theme and contents.
Press MENU you could ‘append’ ‘Add Cc/Bcc’, select send or discarded or save as draft.
PERSONAL INFORMATIONS
Contacts
Default display phone contacts and SIM card contacts, sort contacts by first
letter of alphabet.
1. For the contacts stored in phone memory, you can edit the photograph of
the person, name, phone number, email address, and then tap "Save".
2. You can also import / export contacts saved in the SIM to the phone
memory or vice versa, or from/to SD memory card (Menu-> Import / Export).
3. In detailed contact information interface, tap Menu. You can press "Share"
to share contacts by Bluetooth, email, etc..
16
4. In detailed contact information interface, tap Menu and then tap Associate SIM card to choose a
default SIM card to dial the contact.
●Adding contact to Favorites
1.Open Contacts from application menu.
2.Select the desired contact. The contacts from SIM card cannot be added to Favorites.
3.In the contact detailed view, touch the “Start” symbol from the top bar to add it to the Favorites.
●Searching in Contacts
1.In the Contacts interface, touch the Search symbol to search a contact in the phonebook.
2.Enter the first letter of the contact to find the persons name that begin with that letter.
Calendar
Enter the calender application
Load Goggles accounts, enter the application, In the interface of month or week will use gray to
highlight the day. Display default the date on the current month.
In the interface press menu 4 display modes will appear
1) Schedule Intrface shows a certain schedule(click on the initial time and view forward,click the
final time to view backwards )
2) day Interface displays a day's schedule (last clicked date),Slide around to turn page accoring day.
17
3) week Interface displays a week's schedule (last clicked date),Slide around to turn page accoring
week.
4) today Interface displays a day's schedule, In the interface of month or week use gray to highlight
the day.
5) month nterface displays a month's schedule (last clicked date) Slide around to turn page accoring
month.
New activities
Press menu, more < touch new activities.
Enter the name of activity in the activities’ box.
Notices:Such as special occasions such as birthday or a day with events,
set the all-day option to Yes. If the activity is at a certain time period, select the
start time and end time.
3) Enter the event location, description, guests, repeat, remind time.
4) Click Done to return to calendar.
Notices: All-day events appear in the calendar heading. It will not show
the period of calendar.
Cancel activities In the time frame, press for long to delete the activity.
18
Recorder
Recorder can record voice, and send it quickly via Bluetooth or MMS as
well as make it as ring tone.
Notices: recorder can only save the audio files as amr., 3gpp., ogg. File
format.
1) Click the recorder application.
2) Keep the phone’s microphone near the voice source.
3) Click recorder to record voices ,and click to stop or playback.
All recordings save in Recording folder in the default music program.
CONNECTIVITY
Wifi
Wi-Fi provides as far as 300feet (100M) range of wireless network access. If you use cell phone to
connect wifi, you should connect to the wireless access point or hot spots .
Notices:The availability and coverage of Wi-Fi signal depend on the number, infrastructure and other
objects penetrated by the signal.
19
Open Wi-fi and to connect to the wireless network
Press home>Menu then touch Settings> WLAN symbol
Slide the wi-fi switch to activate Wi-Fi. Phone will automatically scan for available wireless
networks. Then a list of Wi-Fi network will show the founded network name and security settings. (open
network or WEP WPA/WPA2 with password).If you enable the notification in Wi-Fi settings, the status
box will show an icon when open available wireless network found.
Touch one of the Wi-Fi choices to connect the network. When you choose open network, phone will
connect to it automatically. If you choose WEP WPA/WPA2 with password, you should type the
password first, then touch to connect it.
Notices: when the phone is connected to the wireless network, the status
box will show the Wi-Fi icon , and the approximate signal strengthen (the
number of lit bars). If touch the connected network will display the name of
Wi—Fi network, status, speed, signal strength, security and IP address.
If you want to delete the wireless settings, please touch “Forget” as in the
right picture. If you want to connect to this network, you should re-enter these
settings.
Notices: unless you choose not to reserve the network, otherwise, there is
no need to re-enter the corresponding password when next time connecting to
the previously encrypted wireless network. Wi-Fi will search automatically, that
is, phone needn’t to perform additional steps to connect Wi-Fi networks.
20
Notices: unless you choose not to reserve the network with password, otherwise, there is no need to
re-enter the corresponding password when next time connecting to the previously encrypted wireless
network. Wi-Fi will search automatically, that is, phone needn’t to perform additional steps to connect WiFi networks.
Connect to other Wi-Fi networks
Touch other Wi-Fi networks, and then you can connect to this network.
Notices: in addition, you can surf the internet via GPRS. We default that the GPRS in SIM1 is
opened after started, users can select manually, the specific location is “settings> SIM management>data
connection” touch “SIM1 SIM2 no data connection” when the dot turns green, it’s already opened.
WLAN Direct
You can use the WLAN Direct connectivity to quickly transfer files between
two wireless devices.
To turn on the WLAN Direct, open the applications menu -> Settings ->
More -> WLAN Direct.
Note: If you use WLAN Direct, the device will be disconnected from any
wireless network that was connected.
To send a file from Gallery you must open the desired file, then touch the
sharing symbol (
) and select WiFi Direct. The phone will scan for
21
available WLAN Direct devices and show a list. Select the desired transfer device from wich you must
accept the transfer.
GPS
You can use the built in GPS receiver to navigate maps with street precision.
To activate the satellite positioning, go to main menu -> Settings -> Location services and check the
GPS Satellites box.
Bluetooth
Turn on Bluetooth or set the phone can be detected
Press Home>Menu>Settings.
Slide the Bluetooth switch to activate, then touch Bluetooth box to open the Bluetooth function.
After started, the status box will show this icon ( ). Device scanning starts automatically. All the devices
founded will display in the list under the icon.
Touch Menu button to access settings for Bluetooth connection.
Important: the maximum detecting time of the phone is 2 minutes.
Pairing and connection of Bluetooth headset
1) Press home>menu, then touch settings.
22
2) Touch Bluetooth>your phone will scan for the Bluetooth devices within range, and show the
founded devices in the list under the icon.
Tips
If the list can’t find your equipment, touch Search for devices to re-scan it.
Make sure that the devices wanted are under the detected mode.
1) Touch headset in the equipment list to finish the connection.
Notices: generally Bluetooth devices need password to be paired, often use
0000 as the default password.
2) The pairing and connecting status will show under the headset in the
Bluetooth devices list. When the headset connected to your phone, the status box
will show this icon
means connected. Then you can use the headset to make
or receive callings..
Cut the connection to the Bluetooth
Press home>menu>settings>Bluetooth.
In the list of Bluetooth equipment, touch the connected hand-free headset.
Press and select OK.
23
Using Memory Card as Storage Disk
If you want to send music, pictures or other files to the phone’s memory card from the computer you
should set the memory card as storage disk first.
Set memory card as storage disk
Connect the phone to the computer with USB cable. The notification
icon will appear in the status box.
Open the notification panel.
In the notification panel, touch “USB connected” then check the “usb
storage” option.
Notices: If you connect your phone to the computer then choose open
the USB device, the phone can’t read the memory card. You temporarily can
not use some applications, such as camera.
Uninstall the Storage Disk from computer
To do this you have to uncheck the “usb storage” option.
24
TOOLS
Bit Defender
Bit Defender Mobile Security & Antivirus is a complete security solution
for your Allview device. It includes complete tools to protect your operating
system against viruses, unsafe applications and Internet threats. Bit Defender
application has a minimal impact on the performance and battery of your
phone.
Tools:
-Virus Scan: ccan memory for virus detection;
-Check applications: scanning for malware;
-Web Security: real-time protection for Web browsing;
-Anti-theft: remote geolocation, remote device lock, memory erasing
device remotely by sending messages to your device. To use this function it is
necessary to create a user account on the Bit Defender web site
"my.bitdefender.com" (Free);
-View events: Bit Defender scan query events.
25
Gameloft Live!
With the Gameloft Live! Application you have access to
download the most outstanding games for your Allview device. The
phone will have preinstalled Little Big City and Shark Dash games.
Free from Gameloft Live!, you can download driving simulation
game, Asphalt 6.
Office Suite
With preloaded Office Suite application you can open text files in Word, Excel,
PowerPoint and PDF formats directly on your phone. By upgrading to Office Suite
Pro you will have access to additional features such as creating, editing and managing
text files.
One Clean
Clean the RAM memory of your device by simply touching the OneClean Widget from your main
screen. This will free up some memory of unwanted running applications, and make your phone run
smoother.
26
Robin – personal assistant (optional)
Notes:
1. The application needs an active Internet connection;
2. The application recognizes commands in English;
3. For correct operation of the application make this setting: in the applications menu go to Settings > Language & input -> Voice Search -> Language -> English (Generic).
Robin application allows controlling the phone and it’s instruments by voice commands, like this:
- Open the application from Robin widget on the main screen;
- Click the
icon at the bottom of the screen;
- Speak your command.
Robin will recognize many commands in different categories:
- Search and navigation. For example: "Find a restaurant nearby", "I Fell Like Some Ice Cream",
"Show satellite view / map view", "Zoom in / Zoom out".
- Weather information. For example: "How is the weather tomorrow?", "Is it Snowing in Bucharest?",
"Should I bring my umbrella today?".
- Fun. For example: "Tell me a joke / How about another one", "Give me my daily horoscope", "Read
some poetry".
- Social. For example: "What's new on Facebook?", "Share my location".
27
- Messaging. For example: "Read my email", "Send a message to Peter", "Send email".
- Voice dial. For example: "Call Michael", "Show my contact list".
- Applications and websites. For example: "Take a picture", "Turn on GPS", "Browse cnn.com".
For more examples of commands press the bottom right of the interface Robin.
As you are using Robin, the application will learn your way of speaking and continuously improve
it’s performance, providing you the best voice-commanding experience.
28
Internet Explorer
Internet explorer
1)In the interface of internet explorer touch address filed and enter the
URL.
2)Use keypad to enter URL. The appropriate web sites will appear on the
screen. You can touch it directly go to the page or continue to enter URL.
Homepage
Select “homepage” you could load in the set homepage.
Functions of menu
Menu>Forward
After browsing through multiple pages, you will move to a web page after
the current page.
Menu>Save to Bookmarks
Click to make the current URL as a bookmark saved.
Menu>Bookmarks/History
View, add and manage the bookmarks
Find on page, search what you need in current page.
Select text, in the text, click and drag to select a piece of text.
29
Share page, select the Bluetooth, SMS or Email to share the current page.
Setting, contains a variety of browser settings.
Clock
Open the menu of application, click Clock.
In the interface of Clock, you can find several functions:
1.
Alarm: you can set several alarms
2.
Timer: clockwise timer
3.
Watch: stopwatch
4.
Time: world clock
Alarm
After functions set phone will arrives in the setting time to alert you by
ringing or vibrating to achieve it’s function. Press Menu to add alarm you can also add it from the adding
interface. You could set the alarm according to your needs. In the interface of alarm will show two closed
alarms, on for week days and one for weekend.
Edit
You can edit the current alarm. Also you can edit time ringing tones vibration repeat form and
tabs.
30
In the interface of alarm settings, you could perform the operations of changing time, repeat days,
ringtone, vibration and label.
Calculator
This function can turn your phone into calculator,it can do some simple
calculations.
Touch the number keys to make it appear in the blank box.
In the interface of calculator, press MENU button or hold down the screen to
the left, then the senior panel appears.
Camera
1. Photo camera
Open camera
Press home, touch menu, select Camera.
Take pictures
1 Aim your object with the screen.
2 Touch the “shutter” button on the screen.
31
3 After taking photos will save to the camera’s galley folder with the name of taking time.
4 You can view the photos by touching the preview box button.
5 Camera settings: click to open advanced photo shutting options
2. Video camera
Open camera
Press home, touch menu, select camera.
1. Aim your object with the screen.
2. Touch the “shutter” button on the screen.
3. After taking video will save to the camera’s galley folder with the name of taking time.
4. You can view the videos by touching the preview box button.
5. Video camera settings
Images
Open images
Press home touch label of applications then touch Galley.
Use images
After taking pictures, you can view them and share them with your friends.
View images
32
1) In the picture interface, touch photo album to view images.
2) Touch the thumbnail to view pictures on full screen.
In the photo album or list, press and hold down the picture towards left to view the next picture, or
towards right to view the previous one.
Crop images
In the photos’ gallery, press the photo you want to crop, choose Menu > ‘More’ and ‘Edit’ then the
instruments for edit will appear.
a. To adjust the trimmer size, press and hold the edge of cutting tool. After the
trimmer arrow appears, drag your finger from the center inward or outward, then
you can adjust the size.
b. To keep the ratio of the trimmer please press any one of the four corners.
c. To move the trimmer to other areas of the picture, hold down the center of
cutting device, then drag your finger to certain position.
Send images via mails
In the images gallery, press the wanted photo then touch share symbol from
top-right of the screen. Touch Email when tips appear. Picture will be
automatically attached to e-mail. Edit the mail, then touch send.
Use videos
After video taken, you can view it or share it with your friends.
33
Watch movies
1) In the interface of photos’ gallery, touch videos album. You can watch movies after touching the
wanted video.
2) Touch the screen, then the play control keys appear.
Music
The phone can play digital audio files from memory card.
Open Music
Press home, touch the label of applications, touch Music. Then the interface
of Music Media appears.
Manage the play list
Enter music interface and select a playlist.
1) To play songs in a playlist, touch the playlist name.
2) To delete a playlist, touch and hold the playlist, then tap Delete.
3) To set the song as ringtone, hold down the song and then set it as your
ringtone. The track will be set as default ringtone.
34
FM Radio
FM Radio
Through this program, you may listen to FM radio on the device, FM radio use the wired headset as
an antenna to receive signals, before opening this program ,you can install the original equipmentheadphones, when listening, you can switch it manually to speakers or the mode with wired headphones.
Open FM radio
Touch the FM Radio label to open the application of FM radio.
Click the Back button, the radio program move to the background, and you
can still continue to listen to programs and other applications run at the same
time. Press menu and click exit to exit radio.
Collect the channel you are favorite
Press the menu button in the FM interface, click the “search” ,and then
view the channel list, press long one channel ,click “Add to Favorite”to rename
the channel.
35
Settings
Your service provider may default some device settings, so you may not be able to change these
settings.
Dual SIM Settings
You can choose the default Sim card for Voice call, Video call, Messaging, Data connection.
Note: the Gemini is a built-in technology that allows you to receive a phone call on a SIM card when
you are making data transfer from the other SIM card.
WLAN
Touch Wi-Fi switch to activate. Open Wi-Fi to search for available networks automatically. Networks
without password can be used directly, for others you need to enter the password first.
Notice: Open Wi-Fi then the flight mode - Wi-Fi will close automatically; Open flight mode then
connect Wi-Fi - it can be used normally.
Bluetooth
Touch Bluetooth switch to activate. Touch Bluetooth to enter the device searching screen. You can
modify settings by pressing the Menu button.
Data usage
Here you can activate or deactivate the data connection and see a chart of data usage status. You can
also set the data mobile limit for each SIM.
36
More
Airplane mode
Virtual Private Networks(VPN) Settings.
Tethering & portable hotspot
Wifi Direct
Mobile network
3G service: here you can enable/disable the 3G service.
Access point names: add or modify the access points.
Network operators.
Sounds
This option allows you to set audio tones for calls, e-mail alerts and SMS notifications. Settings
include: Vibration, Volume, Tone Audio, Reviews
Select General / Silent / Meeting / Outdoor profile by touching the right side circle.
Power Saving
You can choose one of the three power schemes:
-Closed
-Normal: calling and messaging are available; data connection remains the same state
-Super-long standby: calling and messaging services remains in the same state.
37
Display
a. Brightness: adjust the brightness
b. Wallpaper: change the wallpaper picture for idle screen, lock screen and
main menu
c. Auto rotating screen: rotate phone to change direction
d. Alert missed call & sms: blink screen backlight on missed call or unread
sms. You will also receive notifications about missed calls and unread messages in
the form of animated icons in the lock screen;
e. Sleep: adjust the delay before the screen automatically locks
f. Font size
Storage
1) View SD Card and Phone Memory.
2) Uninstall or Format SD Card.
Battery
Displays information about the charging status and usage of the battery.
Applications
Shows the list of the installed and downloaded applications, which of them are installed on SD
CARD.
Location
38
Access to my location: enable applications to use your location information.
GPS satellites: switch on/off the GPS receiver.
Google location service: let applications to use the WiFi or mobile network connection to get
localization.
Security
1) Set up screen locks Use slide, images PIN or password to lock the screen.
a. Touch “images”, the first time there will be a simple unlock instructions and examples, click “next
step” to continue the step “make the unlocking image”
b. Touch PIN Enter PIN numbers to unlock the screen.
c. Touch password Set password to unlock the screen.
d. Touch “no” Stop this application.
2) Set up SIM card lock Enter 4-8numbers PIN to set the lock of SIM.
To change a blocked PIN code, you need to open the "SIM Lock ", then go to Change Password
screen, the phone will automatically prompt to enter the old PIN code and to enter a new PIN code twice,
finally the phone will prompt that the change of the code was successful. If you enter the PIN with error
for three times, SIM card PIN codes will be automatically locked, PUK codes is usually supplied with SIM
card. If no, you should go to the service provider for the codes.
If you enter 10 times wrong PUK code, the SIM card will be permanently locked.
3) Password visible Password visible when enter it
39
4) Select device administration Add or delete device manager.
5) Unknown sources: install apps from unknown sources
6) Trusted credentials: show the trusted credentials
7) Install from SD card Install the encrypted certificate from SD card.
Languages and input
1) Selecting Language: include all the languages on the phone and totally amount of 12 kinds.
2) Spell checker
3) Custom Dictionary: add words to custom dictionary or delete.
4) Input method : you can select Android keyboard or MultiLing keyboard input method.
5) Text to speech settings
6) Pointer speed
Reset to factory settings
Backup my data: backup my settings and data of other applications.
Restoring automatically: the system will restore settings or other backup data after a certain
application is installed.
Factory data reset: clear all data stored on the phone.
Accounts
Manage and change synchronization options for the used accounts.
Date and Time
40
1) Automatic date & time: use date and time provided by network or by GPS
2) Automatic time zone: check to use network-provided time zone
3) Set Date / Set time: touch to set date / time.
4) Selecting time zone Select Time Zone according to where you are.
4) Use 24 hour time format : ON/OFF
5) Select date format: there are 3 kinds of formats you can choose from: Month-Day-Year, DayMonth-Year and Year-Month-Day.
Schedule power on/off
You can set time of boot or shutdown the phone.
Schedule airplane on/off
You can set the time of activating or deactivating the plane mode.
Accessibility
1.Power button end call
2.Touch and hold delay
3.Install web scripts
Developer options
Set options dedicated to the Android software developers
About phone
You can check the information about: phone status, legal information, software version.
41
Specifications
General
Language
Network
Dimensions
Display
Characteristics
42
Dual SIM. Dual Stand-by
Dimensions
Weight
Type
Touchscreen
Dimensions
Resolution
OS
CPU
GPU
GPS
AGPS
3G video calling
Romanian, English, German, Spanish,
French, Dutch, Russian, Italian etc.
2G: 850/900/1800/1900 MHz
3G: UMTS 900/2100 MHz
Yes
136,5*67*9,8 mm
140,7g
IPS-LCD
Capacitive touchscreen , multitouch
4,5"
960X540 px, 240 dpi
Android 4.1 Jelly Bean
Cortex-A7, 1,2GHz Quad Core
PowerVR SGX 544/OpenGL ES 2.0
Yes
Yes
Yes
Sound
Video
Applications
43
Flash memory
RAM memory
External memory
Widget
Multitasking
FM Radio
Contacts SIM association
Turn to Mute
Vibration when call is connected
3.5mm jack
Amplifier
Speaker
Audio file playing
Alert type
Render
Internet render
ES File Explorer
News
Stunel
ES Task Manager
4GB, 2GB available
1GB
Up to 32GB with microSD card
Yes
Yes
Yes, with RDS
Yes
Yes
Yes
Yes
Yamaha audio amplifier
Yes
Yes
Vibrations, audio ringtone
HD video formats with 720p resolution
HD with 720p resolution
Yes
Yes
Yes
Yes
Camera
Data
Sensors
44
Bit Defender
Theme manager
Office Suite Viewer
Main camera resolution
Front camera resolution
Video recording
Touchfocus
High Dynamic Range (HDR)
Led flash
Face detection
Geotagging
3G
EDGE
GPRS
Bluetooth
WLAN
WiFi Direct
VoIP
USB
G-senzor
Yes
Yes
Yes
8 MP
1 MP
720p@30fps
Yes
Yes
Yes
Yes
Yes
HSDPA 7,2 Mbps and HSUPA 5,4 Mbps
Yes Class10
Yes Class 12
4.0 with A2DP and EDR
WiFi 802.11 b/g/n
Yes
Yes
Yes 2.0, micro USB
Yes
Internet
Battery
Package content
45
Proximity sensor
Light sensor
Compass
Social networking
E-mail
Applications
Hotspot
Capacity
Charger type
Stand by
Calling time
Phone
User manual
Warranty card
220V charger
Earphones
USB data cable
Yes
Yes
Yes
Yes
Yes
Yes
Thetering through Wi-Fi
Li-Polymer 2100 mAh
DC 5V, 500mA
Up to 230 hours
Up to 300 minutes
DECLARATION OF CONFORMITY
Nr. 1244
We, SC VISUAL FAN SRL, importer located in Brasov, 16 Liliacului STR., registered at the Commerce Chamber Brasov no.
J08/818/2002, CUI 14724950, assures, guarantee and declare on our own responsibility, in accordance with art.5 from HG nr. 1.022/2002
regarding the statute of the products and services that can jeopardize life, health, work security and environmental protection, that:
The product P5 QUAD – mobile phone ALLVIEW brand - and the accessories that came with the product: 220V charger,
headphones and battery don’t jeopardize life, health, work security and environmental protection and they are according to:
- The Stipulations of HG nr.982/2007 witch transpose the essential requirements specified in Direction 2004/108/CE, regarding
electromagnetically compatibility;
- The Direction regarding the low voltage equipment users assurance 73/32/CEE, modified by Direction 93/68/CEE (HG 457/2003)
and tests EN 55013:2001+A1:2003+A2:2006, EN 55020:2007, EN 610000-3-2:2006, EN 61000-3-3:1995+A1:2001+A2:2005;
- The Direction regarding the radio and telecommunication equipments R&TTE 1999/5/CE (HG 88/303).
- The safety requirements of the European Directive 2001/95/EC and of EN standards 60065:2002/A12:2011 and EN
60950-1:2006/A12:2011, of the decibels level emitted by the sold devices.
The Product described upstairs in this Declaration and all the accessories are according to the next standards:
- Health EN 50360, EN 50361;
- Safety EN 6095-1;
- EMC EN 301 489-1-7/17;
- Radio spectrum EN 301511 EN 300328;
After the performed tests emerge that the samples comply with the upstairs specification, as the test results show. Documentation is
stored on VISUAL FAN LTD - Brasov, 61 Brazilor STR.
Also available on web:”http://allview.ro”
CE 0678
SAR value: 1,55 W/kg
Director
COTUNA GHEORGHE