1
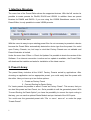
User Manual
K.M.E.
Preset Editor V2
Index
1. Interface Structure.................................................................................. 1
2. Preset Library......................................................................................... 1
3. How to build User Presets...................................................................... 2
3.1 Fast Configuration....................................................................... 2
3.2 Routing + Overview..................................................................... 2
3.3 Link Simulation............................................................................ 3
3.4 Channel Setup............................................................................. 3
3.5 Crossover..................................................................................... 4
3.6 Parametric EQ............................................................................. 4
3.7 Limiter.......................................................................................... 4
3.8 Delay............................................................................................ 4
3.9 Channel Tools.............................................................................. 5
3.10 Create Preset............................................................................. 5
1. Interface Structure
The menu bar of the Preset Editor shows the supported devices. With the fulll version its
possible to create presets for DA428, DA230 and VSS28. In addition there are preset
libraries for DA428 and DA230. If you are using the VSS28 Standalone version of the
Preset Editor, its only possible to create VSS28 presets.
Figure 1: Preset Editor Menu
With the menu its easy to open existing preset files. Its not necessary to preselect a device
because the Preset Editor automatically detects the device type from the preset. You could
open Factory Presets, too, but keep in mind that Factory Presets are not editable and
Preset illustration is limited.
Under the menu item “Other => Check for Updates” its possible to check the version of the
Software. If an internet connection is active and an update is available, the Preset Editor
will download the installer and asks for installation of the latest version.
2. Preset Library
The preset library includes all the K.M.E. Factory Presets sorted by applications. After
choosing an application and an appropriate preset, you could easily load the preset with
the editor. Here you have up to two further options:
1. Create as Factory Preset
2. Convert Routing for Dante Option
For Versio presets its possible to select “Create as Factory Preset”. This means, that you
can load this preset as User Preset, too. So its possible to edit the generated preset. With
“Convert Routing for Dante Option” you have the possibility to convert the input routing in
that way, you can use the optional Dante Module as input instead of the XLR inputs.
You could save the generated preset with “File => save / save as” or under the page
“Create Preset”.
1
3. How to build User Presets
3.1 Fast Configuration
The Fast Configuration is the easiest way to speed up the preset creation. First you could
choose one of the "Routing Setups". Routing Setups are predefinded Setups, suited for
the most common applications. Basically the Routing Setup will set an appropriate input
routing and the Mute & Level groups.
In addition, you could import channel settings with the Fast Configurator. For this purpose
two options are available:
1. Import channel from K.M.E. Speaker Library
2. Import channel from external User Preset
Channels from external Factory-Presets cannot be loaded into the Fast Configurator.
For input mode configuration you could use “Analog”, “Digital” or “Dante Option”. By using
“Analog” or “Digital” keep in mind that the input mode is not part of the preset and must be
set on device or by the DA428 / DA230 Remote Control or Dante Module. With “Dante
Option” you have the possibility to convert the input routing in that way, you can use the
optional Dante Module as input instead of the XLR inputs. Only use this option on devices
with integrated Dante Module, otherwise the presets are not functional.
Before finishing the Fast Configuration its possible to set a preset name. By clicking
“Create Preset” the Fast Configurator generates a User Preset for the configured Routing
Setup and imported channels and opens the preset with the editor. There you could edit all
the settings as described below.
If you don`t want to use the Fast Configuration, press the “Skip” button. In that case the
Preset Editor opens a new preset with default values.
3.2 Routing + Overview
Here you can set the routing for each input channel. This process depends on the input
signal (analog or digital). With the Preset Editors overview you can see how the inputs are
connected to the output channels. Please keep in mind that the input mode is not part of
the preset and must be set on device or by the DA428 / DA230 Remote Control or Dante
Module.
2
3.3 Link Simulation (DA428 / DA230)
The Link Simulation may help users to understand the different link options. The overview
shows the different link routing in dependency off the current link and input mode as well
as the resulting signal (analog or digital) at the appropriate link output.
Please keep in mind that input mode and link mode are not part of the preset and must be
set on device or by the DA428 / DA230 Remote Control or Dante Module.
3.4 Channel Setup
With “Channel Setup” you can set different channel related settings:
Channel Name:
Name for each channel, max. 9 digits
Mute:
Mute setting after loading the preset
Gain:
Gain setting after loading the preset
Phase:
0° / 180°
Mute Groups:
independent / Group 1 (strong / weak) / Group 2 (strong / weak)
Here you can mute all single channels separately (independent) or in dependence of one
or more channels. For example you can select channel A as master (=Group1 strong) and
channel B as slave (=Group1 weak). After this settings you can mute channel A and
channel B is muted automatically, too. If you want to mute only channel B you can do it,
because it is independently switchable.
Level Groups:
independent / Group 1 / Group 2
With this function you are able to set the channel gain separately (independent) or in
dependance of one or more channels. For example you can set the channel A and B as
group 1 (using a mono signal for the subs) and the channel C and D as group 2 (using a
stereo signal for the top units). While using this settings you can change the volume for the
subwoofer or for the top units by using only one encoder of each group. For using this
function you have to link the single channels to the group 1 or group 2. If there is a volume
difference in the pre-setting between the single channels (at the time of the linking), the
difference still exists in the group. Both groups are identically functional.
3
3.5 Crossover
These digital filters (crossover) limit the frequency range. The high pass filter can not be
deactivated. When you need a full-range audio signal on the output you have to set the
frequency to 35 Hz and choose a type of the high pass filter.
3.6 Parametric EQ
With this digital filter you can affect the frequency range by making adjustments of filter
frequency (center frequency), the gain (boost resp. cut) and the Q-factor (bandwidth). For
each channel there are Low Shelf, High Shelf and 8 parametric EQs available.
3.7 Limiter
This dynamic processor is working when the audio signal exceeds the entered thresholdvalue. The two time constants attack and release time draw the speed of the gain
regulation mechanism. With the post gain you can adjust your audio signal level. The
Settings are dependent to the program material and the PA-System.
To make the adjustment easier, the Preset Editor offers a tool for calculating the output
power. The first step is to set the impedance of the connected speakers. Then you can set
“Threshold” and “Gain” to affect the desired output.
Another approach is to select the option “Generate Threshold”. After that, set the
impedance and the maximum speaker output (AES) of your speakers. Then, the Preset
Editor calculates the appropriate Limiter Threshold. Please take into account that the result
may be rounded to a valid value for the preset (in that case, there is a recalculation of the
desired output).
3.8 Delay
Under “Delay” you could choose two different delay times. The sum of both results in the
total delay of the channel. Because of the separate settings its possible to use the “System
Delay” for system related delay (e.g. delay between bass and top) and the “Delay” for the
application (e.g. delay line).
4
3.9 Channel Tools
With “Channel Tools” the Preset Editor offers channel copy and reset functionality. Its
freely selectable which channel should be copied to another (or to all others). In addition
the user could select the settings which should be affected by the copy or reset process.
The Overview illustrates the current copy selection (blue settings will be copied to the
orange settings).
3.10 Create Preset
At the page “Create Preset” the user can decide which settings should be locked on
device. In addition a preset name can be set (up to 12 digits). As summary the Preset
Editor draws an overview which illustrates the settings from input to output. The locked
parameters are drawn in red color.
5