1
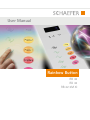
User Manual
Rainbow Button
RB 42
RD 42
RB 42 2M XI
Kapitelbezeichnung
Kapitelbezeichnung
X.X Unterpunkt
SCHAEFER GmbH
Winterlinger Str. 4
72488 Sigmaringen
Germany
Phone +49 7571 722-0
Fax +49 7571 722-99
[email protected]
www.ws-schaefer.de
Support
If you have any questions regarding this product please contact:
Phone +49 7571 722-51
Fax +49 7571 722-99
Copyright
Duplication (copy, print, microfilm or any other form) as well
as electronic spreading of this document is only permitted after formal written
consent of SCHAEFER GmbH.
SCHAEFER GmbH reserves the right to carry out alterations
of technical details without prior notice.
For all transactions our General Conditions of Sale and Delivery shall be applicable.
All rights reserved.
Ress.: 013702
Revision: 2010-10-08
2
Index
User Manual RB 42
Index
1
1.1
1.2
1.3
General description .................................. 4
RB 42 .....................................................................4
RD 42 .....................................................................4
RB 42 2M XI ........................................................4
2
Illustration ................................................ 4
3
Configuration ........................................... 5
4
4.1
4.2
4.3
4.4
4.5
4.5.1
4.5.2
4.5.3
Installation and connection ................... 5
Change-over between
3-wire and 4-wire-technology .....................5
RB 42 and RD 42.................................................6
RB 42 2M XI..........................................................7
Connection Power Saver PS 42 and
connection of several buttons ......................8
Connection Config Kit .....................................9
Individual button with supply voltage .......9
Individual button without supply voltage .9
Several buttons ............................................... 10
5
5.1
5.2
5.2.1
5.2.2
5.2.3
5.2.4
5.2.5
5.2.6
5.3
5.3.1
Settings ................................................... 11
Button function on/off .................................11
Setting colour and brightness .................... 12
Brightness ”red” in off state ....................... 13
Brightness “green” in off state ................... 13
Brightness ”blue” in off state ..................... 13
Brightness “red” in on state ........................ 13
Brightness “green” in on state ................... 13
Brightness “blue” in on state ...................... 13
Reduction .......................................................... 14
Reduction motion detector ......................... 14
5.3.2
5.3.3
5.4
5.5
5.6
5.7
5.8
5.9
5.10
Reduction light sensor in off state ........... 14
Reduction light sensor in on state ............ 14
Colour change at activation ....................... 15
Colour change at reduction ........................ 15
Max. turn-on time ......................................... 16
Sensitivity ......................................................... 16
Locking several buttons ................................ 17
Sending the configuration .......................... 17
Test mode .......................................................... 17
6
RB 42 2M XI – additional function ....18
7
7.1
7.2
7.3
Characteristics ........................................20
RB 42.................................................................... 20
RD 42................................................................... 21
RB 42 2M XI....................................................... 22
3
General description | Illustration
1.1 RB 42 | 1.2 RD 42 | 1.3 RB 42 2M XI
1
General description
1.1
RB 42
The Rainbow Button RB 42 is a non-contact button
for installation behind glass, Perspex®, etc. It reacts to
capacitive changes. Doing so, it independently adapts
to changed ambient conditions.
The colours for quiescent and acknowledgement state
can be freely set. Furthermore, the sensitivity and a
number of other parameters can be set.
All settings can be carried out comfortably with the
PC programme Rainbow-Configurator or with the DIP
switches directly on the device.
The design of the visible touch surface is generally
specified by the pressure on the glass surface, and the
corresponding area is lit up by the button from the
back.
In combination with the Power Saver PS 42, further
functions are available. Thus, it is possible to reduce
the brightness level of the RB 42 dependent on other
parameters.
2 Illustration
4
1.2 RD 42
The Rainbow Display RD 42 is identical in construction
with the RB 42. The button function is off, however.
Thus, the RD 42 serves as luminous display whose colour can be changed via the recall light input.
The colours for the deactivated and the acknowledged
state are freely adjustable. There is also a reduction
function available in combination with the PS 42.
1.3 RB 42 2M XI
The RB 42 2M XI has been designed especially for the
function as an emergency call button. It has an additional potential-free alternating contact and a monitoring circuit.
The monitoring circuit automatically checks the function of the button at an interval of 24 hours. This
ensures increased function safety of the button. For
information regarding the precise function see section 4.3.
Configuration | Installation and connection
4.1 Change-over between 3-wire abd 4-wire technology
3 Configuration
There are two configuration options:
• The RB 42 is configured by SCHAEFER according to customer specifications.
•You configure the RB 42 yourself. You make all
settings without additional aids at the RB 42 and
afterwards send these settings to a number of
other buttons.
Alternatively, you can also carry out the settings
via the PC programme called „Rainbow-Configurator“. For this, you will need a Windows PC, the Config Kit of SCHAEFER GmbH and the RB 42-ConfigAdapter.
4 Installation and connection
The button is meant for installation behind a closed
glass surface. From the rear, a stainless steel plate having a rectangular cutout for the RB 42 is bonded. The
button is fixed to the stainless steel plate by means of
welding studs.
The functional earth of the button (green cable) must
be connected with the stainless steel plate by means
of a welding stud.
Upon installation it must be observed that the touch
plates are flush and that there is no air space between
the glass plate and the touchplates.
4.1 Change-over between
3-wire and 4-wire technology
You can switch between 3-wire and 4-wire technology with a jumper.
jumper open 4-wire technology
jumper inserted 3-wire technology
(NO and L1 are
internally connected)
5
Connection
4.2 RB 42 and RD 42
4.2 RB 42 and RD 42
jumper for change-over
between 3-wire and 4-wire
technology
jumper for
DIP switch for
configuration
key +
key -
functional earth (connect to faceplate)
6
L1
L2
NO
C
+
recall light input
button output
GN D
D
+
supply voltage
Connection
4.3 RB 42 2M XI
4.3 RB 42 2M XI
plug-in connector for further Rainbow button RB
42, Power Saver PS 42 and
for Config Kit
DIP switch for
configuration
key +
key -
functional earth (connect to faceplate)
The C2 – NC2 contacts are designed in such a manner
that a short-circuit can be excluded with great probability (EN 81-1:1998 + AC:1999, Appendix H). Connect
the emergency call device to these contacts. That way,
a button defect, with great probability, will lead to an
emergency call being triggered.
jumper for change-over
between 3-wire and
4-wire technology
+
L1
L2
NO
C
NC
NO
C
GND
GN
D+
supply voltage
recall light input
button output
NC2
NO2 alternating
C2 output
contact
The C – NO contacts are designed in such a manner
that no interference impulses occur. Connect other
alarm devices here.
Impulse diagrams, see section 6.
7
Connection
4.4 Connection Power Saver PS 42 and connection of several buttons
4.4 Connection Power Saver PS 42 and connection of several buttons
Connect the buttons and the possibly present PS 42
with a ribbon cable via the 8-pole Micro-Match connectors.
- + +
max. ribbon cable length: 2 m.
Do not lead the cable outside the fixture!
It suffices if you connect the supply voltage to one
button only
further RB 42, RD 42, RB 42 2M XI or PS 42
8
supply voltage
12 V ... 30 V
Connection
4.5 Connection Config Kit | 4.5.1 and 4.5.2
4.5 Connection Config Kit
The following information applies equally for RB 42,
RD 42 and RB 42 2M XI
4.5.1 Individual button with supply voltage
8-pole Micro-Match of Config Kit
Connect the 8-pole Micro-Match to the RB 42 and
connect the supply voltage.
+
supply voltage
12 V ... 30 V
4.5.2 Individual button without supply voltage
Config-Adapter
If no supply voltage is available, use the Config-Adapter.
10-pole Micro-Match of
Config Kit
8-pole Micro-Match of
Config Kit
Attach it to the RB 42 as shown. |Attach the 8-pole
and the 10-pole Micro-Match connector of the Config Kit to the adapter. Do not connect the supply voltage. Power supply to the button is via the 10-pole
Micro-Match.
-++
No supply
voltage!
9
Connection
4.5.3 Several buttons
4.5.3 Several buttons
If you wish to set several RB 42 at once, use the Config
Adapter.
Attach it to the RB 42 as shown. Attach the 8-pole
Micro-Match connector of the Config Kit to the adapter. Connect the supply voltage to one of the buttons.
Careful!
Do not attach the 10-pole Micro-Match of the
Config Kit to the adapter.
Config-Adapter
8-pole Micro-Match of Config Kit
8-pole Micro-Match to other
RB 42 or PS 42
RB 42
+
supply voltage
12 V ... 30 V
RB 42
+
further RB 42 or PS 42
10
No supply voltage
Settings
5.1 Button function on/off
5 Settings
Directly at the RB 42, it is possible to use the keys and
DIP switches to change all settings.
The DIP switch is used to select which value is to be
adjusted (e. g. colour in off state). The minus key is
used to decrease this value, the plus key to increase it.
The current value is indicated by the luminous colour
of the RB 42.
When resetting the DIP switches into home position,
the altered values are stored in the RB 42 and are not
lost if there is a power cut.
The following settings apply for RB 42, RB 42 emergency call button and RD 42.
Note:
If you are using several buttons, connect
these as outlined under 4.4. Alter these
settings at one button to what you desire.
Afterwards, send this configuration to all
the other buttons.
For normal operation, the DIP switches must all be
OFF.
ON
1 2 3 4 5
5.1 Button function on/off
The button function can be switched off. With function disabled, the RB 42 serves as luminous display RD
42.
ON
1 2 3 4 5
right key or left key
Button function off
Button function on
Button: blue
Button: red
right key or left key
11
Settings
5.2 Setting colour and brightness
5.2 Setting colour and brightness
For the deactivated and for the activated (acknowledged) state, two separate colours can be set. The
resulting colour and brightness arise from the mixture of red, green and blue light. With the following
settings, the red, green and blue portions can be set
separately for each state.
The plus key increases the saturation of the selected
colour, the minus key reduces it. A permanently
pressed key works like fast-repeat key pressing (repeat
function).
The composite colour for the state concerned is always the one that is shown.
The following image shows the composition of the
colours.
Colour circle:RGB colour model
(additive colour mixture)
RGB portion of individual colours for maximum
brightness
blue
red
Example
To set red as the colour for the off state, the green
portion must first be set to zero (5.2.2), as must the
blue portion (5.2.3). Afterwards, adjust the red portion
(5.2.1) to achieve the desired brightness level.
Resulting colour
red
orange
yellow
green
cyan
blue
magenta (violet)
white*
Red
portion
255
255
200
0
0
0
0
82
Green
portion
0
7
255
255
255
0
127
255
Blue
portion
0
0
0
0
200
255
255
125
* White results at equal brightness levels of red, green
and blue portions. Since the individual LED colours
shine at different intensity, different values need to
be set here.
green
12
Settings
5.2.1 - 5.2.6 Brightness red, green and blue in on state and off state
5.2.4 Brightness “red” in on state
5.2.1 Brightness ”red” in off state
ON
ON
1 2 3 4 5
Plus key: red saturation increases
Minus key: red saturation decreases
The button shows the colour in off state.
The button shows the colour in on state.
5.2.2 Brightness “green” in off state
5.2.5 Brightness “green” in on state
Plus key: green saturation increases
Minus key: green saturation decreases
ON
1 2 3 4 5
1 2 3 4 5
Plus key: red proportion increases
Minus key: red proportion decreases
Plus key: green proportion increases
Minus key: green proportion decreases
ON
1 2 3 4 5
The button shows the colour in off state.
The button shows the colour in on state.
Note: When green portion is very low, flickering may
result. Remedy: Increase green portion or switch it off.
Note: When green portion is very low, flickering may
result. Remedy: Increase green portion or switch it off.
5.2.3 Brightness ”blue” in off state
5.2.6 Brightness “blue” in on state
Plus key: blue saturation increases
Minus key: blue saturation decreases
ON
1 2 3 4 5
The button shows the colour in off state.
Plus key: blue proportion increases
Minus key: blue proportion decreases
ON
1 2 3 4 5
The button shows the colour in on state.
.
Note:
For more major colour adjustments, hold
one key down for a longer time!
13
Settings
5.3 Reduction | 5.3.1 - 5.3.3
5.3 Reduction
5.3.2 Reduction light sensor in off state
ON
In combination with the Power Saver PS 42, the
brightness of the RB 42 can be reduced.
The PS 42 supplies two independent output signals:
motion detector and light sensor.
Example 1:
Brightness reduction when the elevator is not in use.
In extreme cases, the buttons can be completely dark
(see 5.3.1).
1 2 3 4 5
The brightness level of the lowered, switched-off
state is set. This becomes active when the Power Saver
is connected and the light sensor has not responded.
Plus key: brightness level increases
Minus key: brightness level decreases
The button shows the colour in lowered, switched-off
state.
Example 2:
Glass elevator: Brightness reduction when the elevator is indoors. Brightness increase when outside light
hits the elevator (see 5.3.2 and 5.3.3).
5.3.3 Reduction light sensor in on state
Setting of times and sensitivity level of the motion
detector and light sensor is done at the Power Saver
PS 42.
5.3.1 Reduction motion detector
ON
The brightness level of the lowered, switched-on state
is set. This becomes active when the Power Saver is
connected and the light sensor has not responded.
1 2 3 4 5
Plus key: brightness level increases
Minus key: brightness level decreases
ON
1 2 3 4 5
The brightness level of the lowered, switched-off
state is set. This becomes active when the Power Saver
is connected and the motion detector has not responded.
Plus key: brightness level increases
Minus key: brightness level decreases
The button shows the colour in lowered, switched-off
state.
14
The button shows the colour in lowered, switched-on
state.
Settings
5.4 Colour change at activation | 5.5 Colour change at reduction
5.4 Colour change at activation
ON
1 2 3 4 5
This sets the speed at which the colour change occurs
when activating the buttons (shift from deactivated
to the switched-on/acknowledged state).
left key
left key
colour change
slow
colour change
fast
colour change
immediate
button: blue
button: turquoise
button: green
right key
right key
5.5 Colour change at reduction
ON
1 2 3 4 5
This sets the speed at which the colour change occurs
during reduction (shift from normal to lowered state)
and vice versa.
button: blue
right key
Colour change
immediate
button:
yellow
Colour change
fast
Colour change
slow
button:
turquoise
Colour change
very slow
left key
left key
left key
button: green
right key
right key
15
Settings
5.6 Max. turn-on time | 5.7 Sensitivity
5.6 Max. turn-on time
ON
1 2 3 4 5
This sets the maximum time a button can be in „on“
state. After this time, it resets itself and recalibrates..
left
key
maximum
turn-on time:
5s
button: blue
right
key
left
maximum
key
turn-on time:
1 min
left
maximum
key
turn-on time:
30 s
button:
turquoise
right button: green
key
5.7 Sensitivity
left
maximum
key
turn-on time:
2 min
maximum
turn-on time:
4 min
right button: yellow right button: red
key
key
ON
1 2 3 4 5
With this parameter, the sensitivity level of the button
can be altered. With great glass thickness, the sensitivity level is also high.
Use this parameter to adapt the RB 42 to different
installation situations.
very slow
button: blue
16
left
key
right
key
slow
button:
turquoise
left
key
right
key
normal
button: green
left
key
high
button:
right yellow
key
left
key
right
key
very high
button:
red
Settings
5.8 Locking several buttons| 5.9 Sending the configuration| 5.10 Test mode
5.9 Sending the configuration
5.8 Locking several buttons
ON
ON
1 2 3 4 5
With this function, the triggering of a button can be
prevented if another button is pressed.
Requirement: The buttons must be connected with
each other as described under 4.4.
buttons not
locked
right key or
left key
button: blue
right key or
left key
buttons
locked
button:
turquoise
5.10 Test mode
1 2 3 4 5
With this function, the current settings are sent to all
connected buttons.
For this, connect the buttons with a ribbon cable as
described under 4.4. The DIP switches of all receiving
buttons must be on „normal“. The Config Kit must not
be connected.
Also use this function to transmit the settings of a
present button on to a new one.
Left key: Activates the sending of the configuration.
ON
1 2 3 4 5
Only for RB 42 2M XI
This position moves the RB 42 2M X into test
mode.
The check is switched on every 10 secs. for a duration of 5 secs.
C - NO
closed
open
C2 -NO2
closed
open
5 s
5s
17
RB 42 2M XI - additional function
7.1 RB 42
6 RB 42 2M XI – additional function
The RB 42 2M XI has an additional monitoring circuit,
which cyclically checks the function of the button.
After activation, and at an interval of 24 hours, the
monitoring circuit triggers the button automatically
for a duration of 5 secs.
switching on
voltage
C - NO
switching
pulses
Faultless function
In absence of errors, C – NO and C2 – NO2 remain
open during the monitoring time, and C2 – NC2 remain closed. At the C2 – NO2 and C2 – NC2 contacts,
momentary switching pulses may occur.
< 100 ms
button
activation
closedopen
C2 - NO2
closed
open
C2- NC2
closed
open
5 s
5 s
waiting time monitoring
18
24 h
waiting time
5 s
monitoring
24 h
waiting time
RB 42 2M XI - additional function
7.2 RD 42
Faulty button – response of the monitoring function
If there is a defect in the button, it is identified during the next monitoring and reported by C2 – NO2
closing and C2 – NC2 opening.
The C – NO contacts are not meant for reporting an
error. Depending on the type of error, they can be
closed or open during monitoring.
switching on
voltage
C - NO
error
occurrence
contact can be open
or closed
closed
open
C2 - NO2 closed
open
C2- NC2
closed
open
5 s
5 s
23 - 27 h
waiting time monitoring
waiting time
(no error)
5s
monitoring
(error)
24 h
waiting time
19
Characteristics
7.1 RB 42
7 Characteristics
7.1 RB 42
12 V … 30 V DC, smoothed
Quiescent current (typ.)
15 mA at 12 V
Operating current (typ.)
LEDs off, relay on: 40 mA at 12 V
LED blue on, relay off: 60 mA at 12 V, 30 mA at 30 V
all LEDs on, relay on: 180 mA at 12 V, 80 mA at 30 V
Temperature range
-20 °C … +65 °C
Connection technology terminal, 0.1 mm² … 1 mm²
Recall light
12 V … 30 V AC/DC
Outputs
1 potential-free NC
switching voltage = max. 50 V AC / 60 V DC
switching current = max. 1 A ohmic load
switching capacity = max. 37 VA AC / 30 W DC
Dimensions
(L x W x D)
74 mm x 41.5 mm x 25 mm
pitch 42 mm
Fixing
2 welding studs
21.45
2
Supply voltage
glass/Perspex®
st. steel plate
41.5
10
21.45
2
73.5
welding studs M3x8 on
st. steel plate
20
73.5
66±0.1
Characteristics
7.2 RD 42
7.2 RD 42
12 V … 30 V DC, smoothed
Quiescent current (typ.)
15 mA at 12 V
Operating current (typ.)
LEDs off: 10 mA
LED blue on: 50 mA at 12 V, 25 mA at 30 V
all LEDs on: 160 mA at 12 V, 70 mA at 30 V
Temperature range
-20 °C … +65 °C
Connection technology terminal, 0.1 mm² … 1 mm²
Recall light
12 V … 30 V AC/DC
Dimensions (L x W x D)
74 mm x 41.5 mm x 25 mm
pitch 42 mm
Fixing
2 welding studs
21.45
2
Supply voltage glass/Perspex®
st. steel plate
41.5
10
21.45
2
73.5
welding studs M 3x8
st. steel plate
66±0.1
41.5
10
73.5
21
Characteristics
7.3 RB 42 2M XI
7.3 RB 42 2M XI
22
Supply voltage 12 V … 30 V DC, smoothed
Quiescent current (typ.)
30 mA at 12 V, 16 mA at 30 V
Operating current (typ.)
LED blue on: 70 mA at 12 V, 30 mA at 30 V
all LEDs on, output on 180 mA at 12 V, 80 mA at 30 V
Temperature range
-20 °C … +65 °C
Connecting technology terminal, 0.1 mm² … 1 mm²
Inputs
1 input
12 V … 30 V AC/DC
Outputs
1 potential-free NC
switching voltage switching current switching capacity 1 potential-free alternating contact
switching voltage =
max. 30 V AC / 30 V DC
switching current =
max. 2 A ohmic load
switching capacity =
max. 62.5 VA AC / 60 W DC
During the automatic check, switching pulses of up to
100 msecs. can occur at this contact.
Dimensions
(L x W x D)
74 mm x 57 mm x 25 mm
Fixing 2 welding studs
=
=
=
max. 50 V AC / 60 V DC
max. 1 A ohmic load
max. 37 VA AC / 30 W DC
Characteristics
7.3 RB 42 2M XI
glass/Perspex®
2
st. steel plate
22.1
Durchbruch in Trägerplatte
58
welding studs M 3x8
on st. steel plate
55.75
5
41.5
10±0.1
43
73.5
66±0.1
66±0.1
23