1
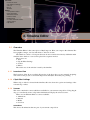
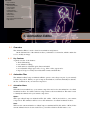
User’s Manual
Version 1.0
Robin Adams
c 2015 RayComposer - Robin Adams
Copyright http://www.raycomposer.de
The content of this user’s manual ist copyrighted and may not be copied, distributed, downloaded, modified, reused, reposited, reproduced or otherwise used except as provided herein
wihtout the express written permission of RayComposer - Robin Adams.
First release, February 2015
Foreword
Dear Laserist,
I’d like to thank you for using RayComposer.
When I started doing laser shows more then 15 years ago, laser control systems were really
awkward to use and extremely expensive. One had to be a computer guru and laser engineer
to perform even a basic laser show. Things have improved a lot since. Laser projectors have
become really inexpensive and computers have become much more powerful.
When I started RayComposer, I already had a lot of experience designing the computer
hardware interfaces for laser shows. But what bothered me then was, that the hardware can only
be as good as the software driving it. And many common software for laser shows still uses the
same user interface as it used decades ago.
RayComposer is my attempt to improve on that situation. It was completely written from
scratch and takes an approach to creating laser shows different from any other software. RayComposer tries to be more intuitive to use then any other laser show software, when drawing
graphics as well as composing laser shows.
Composing laser shows? In my opinion, what really mesmerizes the audience is when the
laser show really expresses the music. To provide the tools for achieving this was one of the key
goals when designing RayComposer. This is also why the main laser show documents are called
"Compositions" in RayComposer.
I’d like to thank my friends and family who provided ideas and supported me while writing
RayComposer.
Have fun with RayComposer & be creative.
Robin Adams
Founder of RayComposer
Contents
1
Introduction . . . . . . . . . . . . . . . . . . . . . . . . . . . . . . . . . . . . . . . . . . . . . . . . . 7
1.1
What is RayComposer?
1.1.1
1.1.2
1.1.3
1.1.4
1.1.5
Animation Editor
Timeline Editor . .
Programmer . . . .
Projectors . . . . . .
Video Surface . .
2
Timeline Editor . . . . . . . . . . . . . . . . . . . . . . . . . . . . . . . . . . . . . . . . . . . . . . . 9
2.1
Overview
2.1.1
2.1.2
2.1.3
2.1.4
2.1.5
Lasershow View . . . .
Clip & Effect Settings
Sources . . . . . . . . . .
Effects . . . . . . . . . . .
Timeline . . . . . . . . . .
.
.
.
.
.
.
.
.
.
.
.
.
.
.
.
.
.
.
.
.
.
.
.
.
.
.
.
.
.
.
7
.
.
.
.
.
.
.
.
.
.
.
.
.
.
.
.
.
.
.
.
.
.
.
.
.
.
.
.
.
.
.
.
.
.
.
.
.
.
.
.
.
.
.
.
.
.
.
.
.
.
.
.
.
.
.
.
.
.
.
.
.
.
.
.
.
.
.
.
.
.
.
.
.
.
.
.
.
.
.
.
.
.
.
.
.
.
.
.
.
.
.
.
.
.
.
.
.
.
.
.
.
.
.
.
.
.
.
.
.
.
.
.
.
.
.
.
.
.
.
.
.
.
.
.
.
.
.
.
.
.
.
.
.
.
.
.
.
.
.
.
.
.
.
.
.
.
.
.
.
.
.
.
.
.
.
.
.
.
.
.
.
.
.
.
.
.
.
.
.
.
.
.
.
.
.
.
.
.
.
.
.
.
.
.
.
.
.
.
.
.
.
.
.
.
.
.
.
.
.
.
.
.
.
.
.
7
7
7
7
8
9
.
.
.
.
.
.
.
.
.
.
.
.
.
.
.
.
.
.
.
.
.
.
.
.
.
.
.
.
.
.
.
.
.
.
.
.
.
.
.
.
.
.
.
.
.
.
.
.
.
.
.
.
.
.
.
.
.
.
.
.
.
.
.
.
.
.
.
.
.
.
.
.
.
.
.
.
.
.
.
.
.
.
.
.
.
.
.
.
.
.
.
.
.
.
.
.
.
.
.
.
.
.
.
.
.
.
.
.
.
.
.
.
.
.
.
.
.
.
.
.
.
.
.
.
.
.
.
.
.
.
.
.
.
.
.
.
.
.
.
.
.
.
.
.
.
.
.
.
.
.
.
.
.
.
.
.
.
.
.
.
.
.
.
.
.
.
.
.
.
.
.
.
.
.
.
.
.
.
.
.
.
.
.
.
.
.
.
.
.
.
.
.
.
.
.
.
.
.
.
.
.
.
.
.
.
.
.
.
.
.
.
.
.
.
.
. 9
. 9
. 9
10
10
2.2
Menus
2.2.1
2.2.2
2.2.3
2.2.4
2.2.5
2.2.6
2.2.7
2.2.8
Composition Menu . . . .
Playback Menu . . . . . . .
Animations Menu . . . . . .
Patterns Menu . . . . . . . .
Media Menu . . . . . . . . .
Cue Lists & Fixtures Menu
Settings Menu . . . . . . . .
Help Menu . . . . . . . . . . .
.
.
.
.
.
.
.
.
.
.
.
.
.
.
.
.
.
.
.
.
.
.
.
.
.
.
.
.
.
.
.
.
.
.
.
.
.
.
.
.
.
.
.
.
.
.
.
.
.
.
.
.
.
.
.
.
.
.
.
.
.
.
.
.
.
.
.
.
.
.
.
.
.
.
.
.
.
.
.
.
.
.
.
.
.
.
.
.
.
.
.
.
.
.
.
.
.
.
.
.
.
.
.
.
.
.
.
.
.
.
.
.
.
.
.
.
.
.
.
.
.
.
.
.
.
.
.
.
.
.
.
.
.
.
.
.
.
.
.
.
.
.
.
.
.
.
.
.
.
.
.
.
.
.
.
.
.
.
.
.
.
.
.
.
.
.
.
.
.
.
.
.
.
.
.
.
.
.
.
.
.
.
.
.
.
.
.
.
.
.
.
.
.
.
.
.
.
.
.
.
.
.
.
.
.
.
.
.
.
.
.
.
.
.
.
.
.
.
.
.
.
.
.
.
.
.
.
.
.
.
.
.
.
.
.
.
.
.
.
.
.
.
.
.
.
.
.
.
.
.
.
.
.
.
.
.
.
.
.
.
.
.
.
.
.
.
.
.
.
.
.
.
.
.
.
.
.
.
.
.
.
.
.
.
.
.
.
.
.
.
.
.
.
.
.
.
.
.
.
.
.
.
.
.
.
.
.
.
.
.
.
.
.
.
.
.
.
.
.
.
3
Animation Editor . . . . . . . . . . . . . . . . . . . . . . . . . . . . . . . . . . . . . . . . . . . . 13
3.1
Overview
3.1.1
Key Features . . . . . . . . . . . . . . . . . . . . . . . . . . . . . . . . . . . . . . . . . . . . . . . . . 13
10
10
11
11
11
12
12
12
12
13
3.2
Animation Files
13
3.2.1
3.2.2
3.2.3
3.2.4
3.2.5
3.2.6
3.2.7
3.2.8
3.2.9
3.2.10
Animation Menu . . . . . . .
Frame Menu . . . . . . . . . .
Layer Menu . . . . . . . . . . .
Palette Menu . . . . . . . . . .
Gradients Menu . . . . . . . .
Edit Menu . . . . . . . . . . . . .
Draw Menu . . . . . . . . . . .
View Menu . . . . . . . . . . . .
Busses & Projectors Menu
Help Menu . . . . . . . . . . . .
4
Projectors . . . . . . . . . . . . . . . . . . . . . . . . . . . . . . . . . . . . . . . . . . . . . . . . . . 21
4.1
Projector Configuration
4.1.1
4.1.2
4.1.3
4.1.4
4.1.5
Projectors Menu
Edit Menu . . . . .
Projector Menu
Busses Menu . . .
Help Menu . . . .
5
Lighting Control . . . . . . . . . . . . . . . . . . . . . . . . . . . . . . . . . . . . . . . . . . . . . 23
5.1
Programmer
5.1.1
5.1.2
5.1.3
5.1.4
5.1.5
5.1.6
5.1.7
5.1.8
Lighting Menu . . .
Edit Menu . . . . . . .
Programmer Menu
Fixtures Menu . . . .
Fog Menu . . . . . . .
Settings Menu . . .
View Menu . . . . . .
Help Menu . . . . . .
6
RayComposer USB . . . . . . . . . . . . . . . . . . . . . . . . . . . . . . . . . . . . . . . . . . 27
6.1
RayComposer USB
6.1.1
6.1.2
6.1.3
Key Features . . . . . . . . . . . . . . . . . . . . . . . . . . . . . . . . . . . . . . . . . . . . . . . . . 27
Driver Installation . . . . . . . . . . . . . . . . . . . . . . . . . . . . . . . . . . . . . . . . . . . . . . 27
Troubleshooting . . . . . . . . . . . . . . . . . . . . . . . . . . . . . . . . . . . . . . . . . . . . . . . 28
6.2
Signal Description
28
6.3
DMX Interface
28
6.4
Programming Interface
28
.
.
.
.
.
.
.
.
.
.
.
.
.
.
.
.
.
.
.
.
.
.
.
.
.
.
.
.
.
.
.
.
.
.
.
.
.
.
.
.
.
.
.
.
.
.
.
.
.
.
.
.
.
.
.
.
.
.
.
.
.
.
.
.
.
.
.
.
.
.
.
.
.
.
.
.
.
.
.
.
.
.
.
.
.
.
.
.
.
.
.
.
.
.
.
.
.
.
.
.
.
.
.
.
.
.
.
.
.
.
.
.
.
.
.
.
.
.
.
.
.
.
.
.
.
.
.
.
.
.
.
.
.
.
.
.
.
.
.
.
.
.
.
.
.
.
.
.
.
.
.
.
.
.
.
.
.
.
.
.
.
.
.
.
.
.
.
.
.
.
.
.
.
.
.
.
.
.
.
.
.
.
.
.
.
.
.
.
.
.
.
.
.
.
.
.
.
.
.
.
.
.
.
.
.
.
.
.
.
.
.
.
.
.
.
.
.
.
.
.
.
.
.
.
.
.
.
.
.
.
.
.
.
.
.
.
.
.
.
.
.
.
.
.
.
.
.
.
.
.
.
.
.
.
.
.
.
.
.
.
.
.
.
.
.
.
.
.
.
.
.
.
.
.
.
.
.
.
.
.
.
.
.
.
.
.
.
.
.
.
.
.
.
.
.
.
.
.
.
.
.
.
.
.
.
.
.
.
.
.
.
.
.
.
.
.
.
.
.
.
.
.
.
.
.
.
.
.
.
.
.
.
.
.
.
.
.
.
.
.
.
.
.
.
.
.
.
.
.
.
.
.
.
.
.
.
.
.
.
.
.
.
.
.
.
.
.
.
.
.
.
.
.
.
.
.
.
.
.
.
.
.
.
.
.
.
.
.
.
.
.
.
.
.
.
.
.
.
.
.
.
.
.
.
.
.
.
.
.
.
.
.
.
.
.
.
.
.
.
.
.
.
.
.
.
13
14
15
15
16
16
18
18
19
20
21
.
.
.
.
.
.
.
.
.
.
.
.
.
.
.
.
.
.
.
.
.
.
.
.
.
.
.
.
.
.
.
.
.
.
.
.
.
.
.
.
.
.
.
.
.
.
.
.
.
.
.
.
.
.
.
.
.
.
.
.
.
.
.
.
.
.
.
.
.
.
.
.
.
.
.
.
.
.
.
.
.
.
.
.
.
.
.
.
.
.
.
.
.
.
.
.
.
.
.
.
.
.
.
.
.
.
.
.
.
.
.
.
.
.
.
.
.
.
.
.
.
.
.
.
.
.
.
.
.
.
.
.
.
.
.
.
.
.
.
.
.
.
.
.
.
.
.
.
.
.
.
.
.
.
.
.
.
.
.
.
.
.
.
.
.
.
.
.
.
.
.
.
.
.
.
.
.
.
.
.
.
.
.
.
.
.
.
.
.
.
.
.
.
.
.
.
.
.
.
.
21
21
22
22
22
23
.
.
.
.
.
.
.
.
.
.
.
.
.
.
.
.
.
.
.
.
.
.
.
.
.
.
.
.
.
.
.
.
.
.
.
.
.
.
.
.
.
.
.
.
.
.
.
.
.
.
.
.
.
.
.
.
.
.
.
.
.
.
.
.
.
.
.
.
.
.
.
.
.
.
.
.
.
.
.
.
.
.
.
.
.
.
.
.
.
.
.
.
.
.
.
.
.
.
.
.
.
.
.
.
.
.
.
.
.
.
.
.
.
.
.
.
.
.
.
.
.
.
.
.
.
.
.
.
.
.
.
.
.
.
.
.
.
.
.
.
.
.
.
.
.
.
.
.
.
.
.
.
.
.
.
.
.
.
.
.
.
.
.
.
.
.
.
.
.
.
.
.
.
.
.
.
.
.
.
.
.
.
.
.
.
.
.
.
.
.
.
.
.
.
.
.
.
.
.
.
.
.
.
.
.
.
.
.
.
.
.
.
.
.
.
.
.
.
.
.
.
.
.
.
.
.
.
.
.
.
.
.
.
.
.
.
.
.
.
.
.
.
.
.
.
.
.
.
.
.
.
.
.
.
.
.
.
.
.
.
.
.
.
.
.
.
.
.
.
.
.
.
.
.
.
.
.
.
.
.
.
.
.
.
.
.
.
.
.
.
.
.
.
.
.
.
.
.
.
.
.
.
.
.
.
.
.
.
.
.
.
.
.
.
.
.
.
.
.
.
.
.
.
.
.
.
.
.
.
.
.
.
.
.
.
.
.
.
.
.
.
.
.
.
.
.
.
.
.
.
.
.
.
.
.
.
.
.
.
.
23
23
24
24
24
24
24
24
27
Index . . . . . . . . . . . . . . . . . . . . . . . . . . . . . . . . . . . . . . . . . . . . . . . . . . . . . . 31
What is RayComposer?
Animation Editor
Timeline Editor
Programmer
Projectors
Video Surface
1. Introduction
1.1
What is RayComposer?
RayComposer is a computer software for creating multimedia shows. Its primary focus is
creating laser shows.
RayComposer consists of five main parts:
• Animation Editor
• Timeline Editor
• Programmer
• Projectors
• Video Surface
1.1.1
Animation Editor
The animation editor is a vector based drawing application, where you can create the laser
graphics and shapes you want to use in your laser show.
1.1.2
Timeline Editor
The Timeline Editor provides the time line where you define how clips and effects will be played
along the flow of time; usually also syncronised to music.
1.1.3
Programmer
The programmer provides a user interface similar to a lighting console for moving lights. First
you set up the fixtures which are present in your lighting setup. Then you can create a look using
the programmer. The contents of the programmer can then be added to a cue list. Cue lists can
be used in the timeline to synchronize lighting to your laser show.
1.1.4
Projectors
The Projectors Window has two uses: It is ised to set up how many projectors there are, how they
are connected and their technical aspects. Second, you set up how the busses of the composition
are distributed to the different projectors.
8
1.1.5
Chapter 1. Introduction
Video Surface
The video surface is used to output laser graphics, images or videos It is usually used as a full
screen window on a video beamer.
Overview
Lasershow View
Clip & Effect Settings
Sources
Effects
Timeline
Menus
Composition Menu
Playback Menu
Animations Menu
Patterns Menu
Media Menu
Cue Lists & Fixtures Menu
Settings Menu
Help Menu
2. Timeline Editor
2.1
Overview
The Timeline Editor is the center piece of RayComposer. Here you compose the elements like
laser graphics, images, cue lists and effects to the flow of time.
The Window consists of four parts that can be moved and resized freely within the main
timeline editor window or can even be placed in a separate monitor.
Those areas are:
• View
• Clip & Effect Settings
• Sources
• Effects
The center area of the window is used by the timeline.
2.1.1
Lasershow View
The Lasershow View shows a realistic 3D preview of the laser show you are currently designing.
You can move the projectors around in the preview and adjust where they are pointing.
2.1.2
Clip & Effect Settings
When a clip or effect is selected in the timeline, this view shows the options and settings of the
selected clip or effect.
2.1.3
Sources
This view contains the sources which are available for your current composition. Using drag &
drop you can directly create a clip in the timeline that will play the selected source.
There are four different kinds of sources available:
• Animations
• Patterns
• Media
• Cue Lists
Animations
This shows all animations that are part of your current composition.
10
Chapter 2. Timeline Editor
Patterns
This shows all patterns that are part of your current composition.
Media
This shows all media objects that are part of your current composition.
Cue Lists
This shows all cue lists of the current lighting setup.
2.1.4
Effects
This tree contains all effects that can be used on the timeline. Use drag & drop to place the effect
on the timeline.
2.1.5
Timeline
The timeline consists of non-scrolling part on the left hand side that displays the track numbers,
labels and their grouping. On the right hand side you find the main timeline area where effects
and clips can be placed. The ruler on the top of the area displays the time.
2.2
2.2.1
Menus
Composition Menu
New
Create a new composition. The new composition will replace your current composition.
Open...
Will open a RayComposer Composition File (file suffix: *.RCC). The opened composition will
replace the current composition.
Recently Opened
The sub menue of this menu option provides shortcuts to open files that have been recently
opened.
Save
Will save the current composition to a RayComposer Composition file (file suffix: *.RCC). If the
composition has not been saved before, you will be asked for the file name to use.
Save As...
Will save the current composition to a RayComposer Composition File (file suffix: *.RCC) and
asks for the file name to use.
Composition Settings...
This opens the Composition Settings window. There you can adjust several settings for your
current composition, like the main audio file, the grid to use. You can also provide a descriptive
text for your composition.
Video Export...
Export your composition as a video file.
Close
Closes the time line window. If this was the last open window, the application will quit.
Quit
Close all windows and exit the application.
2.2 Menus
2.2.2
11
Playback Menu
Play
Play the current composition.
Play Selection
Play the current composition from the loop start until the loop end time.
Loop
When this menu option is active, the playback will start at the beginning of the composition or
loop when the end of the composition or loop has been reached.
Stop
Stop playback.
Pause
Pause playback.
Link to Timecode
When this menu option is active, playback is synchronized to an external timecode source.
Timecode Settings...
This menu option opens the timecode settings dialog. This allows you select the options for
timecode input and output as well as the timing parameters to use.
2.2.3
Animations Menu
Add New Animation...
Adds a new Animation to your animation collection and opens it in RayComposer Animation
Editor.
Load Collection...
Load the list of pattern from a RayComposer Pattern Collection file (file suffix: *.RPC). The
loaded pattern collection will replace the current list of patterns.
Save Collection As...
Save the current list of patterns to a RayComposer Pattern Collection file (file suffix: *.RPC).
Set to
The sub menu of this menu option allows you to set the animation collection to a default one.
The following options exist:
• default - the animation collection you saved as your favorite using the "save as default"
menu option
• RayComposer - the system default animation collection that ships with RayComposer
Save as default
Save the current animation collection as the default animation collection. The default animation
collection will be used for every new composition you create.
2.2.4
Patterns Menu
Import Media...
Load a RayComposer composition file as pattern and add it to the list of patterns.
Save current Pattern as...
Save the currently selected pattern as a pattern file.
12
Chapter 2. Timeline Editor
Load Collection...
Load the list of pattern from a RayComposer Pattern Collection file (file suffix: *.RPC). The
loaded pattern collection will replace the current list of patterns.
Save Collection As...
Save the current list of patterns to a RayComposer Pattern Collection file (file suffix: *.RPC).
Set to
The sub menu of this menu option allows you to set the pattern list to a default one. The following
options exist:
• default - the pattern list you saved as your favorite using the "save as default" menu option
• RayComposer - the system default pattern list that ships with RayComposer
Save as default
Save the current pattern list as the default pattern list. The default pattern list will be used for
every new composition you create.
2.2.5
Media Menu
Import Media...
Import a media file, like a sound clip, picture or video clip into RayComposer. Small files will
be directly embedded into your composition file, larger files will be referenced by their filename.
2.2.6
Cue Lists & Fixtures Menu
Add new Cue List...
Adds a new cue list and opens it in the programmer window.
Programmer...
Open the programmer window.
Fixture Patch...
Open the fixture patch window. In the fixture patch window you can assign the fixture to the
available DMX universes.
2.2.7
Settings Menu
Application...
Opens the application settings window where you can adjust general application settings, like
the sound card to use and the user interface language.
2.2.8
Help Menu
Help...
Open the RayComposer Programmer User’s manual.
About...
This will open a window with information about your current RayComposer Version and license.
Overview
Key Features
Animation Files
Animation Menu
Frame Menu
Layer Menu
Palette Menu
Gradients Menu
Edit Menu
Draw Menu
View Menu
Busses & Projectors Menu
Help Menu
3. Animation Editor
3.1
Overview
The Animation Editor is used to draw laser animations and pictures.
On the left hand side of the animation editor you find the tools menu bar, which contains the
tools to modify an image.
3.1.1
3.2
Key Features
A quick overview of the features:
• 2D & 3D drawing
• true animation editing
• fixed and user- adjustable grids, linear and radial
• user adjustable image aspect ratio, for e.g. film or video aspect ratios
• import & export of many laser-related file formats and SVG files
Animation Files
The Animations RayComposer Animation Editor operates on are always are part of your currently
loaded Composition. When you open or import an animation, it will automatically be added to
the list of animations in your current composition.
3.2.1
Animation Menu
New...
Will added a new animation to your current composition and set it as the animation to be edited
in animation editor. You will be asked to assign a name to the new animation. The name is used
to identify the animation in your current composition.
Open...
Will open a RayComposer Animation File (file suffix: *.RCA) and add it to your current
composition. The animation will be set it as the animation to be edited in animation editor.
Save
Will save the current animation to a RayComposer Animation File (file suffix: *.RCA). If the
current animation has not been saved before, you will be asked for the file name to use.
14
Chapter 3. Animation Editor
Save As...
Will save the current animation to a RayComposer Animation File (file suffix: *.RCA) and asks
for the file name to use.
Import...
Import files from a file format different from RayComposer Animation file format. Several file
formats are supported, most notable: The ILDA-file format - a stadard file format for exchange
of laser graphics. The SVG file format - a common file format for vector graphics artwork. The
imported animation will be added to your current composition and be set as the current animation
in the animation editor.
Export...
Export the current animation to a file format different from the RayComposer Animation file
format. Several file formats are supported for export.
Print...
Create a printout of the current frame. When selecting this menu option you will see a print
preview where you can select the printer.
Settings...
When you select this Menu Option, a Settings dialog which allows you to change several settings
regarding the current animation.
Information Tab
Here you can change the title of the animation. The title is used to identify the animation in
timeline editor. The "Created by" field lets you enter the authors name of the animation. The
"Info" field lets you define a textual description of the animation that is saved with the animation.
Settings Tab
Here you can change the aspect ration of the animation.
Security
Close
Closes the animation editor window. If this was the last open window, the application will quit.
Quit
Close all windows and exit the application.
3.2.2
Frame Menu
First
Switch the current frame to the first frame of the animation.
Previous
Switch the current frame to the one previous to the current frame.
Insert
Insert an empty frame after the current frame and switch to it.
Duplicate
Insert a copy of the current after the current frame and switch to it.
Clear
Remove all Objects in the current frame. The frame is then empty.
3.2 Animation Files
15
Delete
Remove the current frame.
Name
This Menu option will open a dialog for changing the name of the current frame.
Reverse
Reverses the order of the selected frames; first selected frame will become first and last will
become first. This menu item is only available when multiple frames are selected in the frame
list.
Morph
Morph the shape of objects from one selected frame to the next selected frames. When this
menu option is selected, a dialog opens which will ask you the number of in-between frames
that should be created for the morph. This menu item is only available when multiple frames are
selected in the frame list.
Next
Switch the current frame to the one following to the current frame.
Last
Switch the current frame to the last frame of the animation.
3.2.3
Layer Menu
New...
Create a new layer. When selecting this menu a dialog will open which asks you for the layer’s
name and numeric layer id.
Visible
Switch the visible state of the current layer. Invisible layers will not be shown in the animation
editor.
Locked
Switch the locked state of the current layer. A locked layer can not be drawn on. It is also not
possible to change any objects on a locked layer.
3.2.4
Palette Menu
Load...
Load a color palette in RayComposer palette file format. (file suffix *.rcp) The loaded palette
will replace the current animation’s color palette.
Save...
Save the color palette of the current animation to RayComposer palette file format. (file suffix
*.rcp).
Import...
Import a color palette from a foreign file format. The imported palette will replace the color
palette of the current animation.
Export...
Export the color palette of the current animation to a foreign file format.
16
Chapter 3. Animation Editor
Set to
The sub menu of this menu option allows you to set the color palette to a default one. The
following options exist:
• default - the color palette you saved as your favorite palette using the "save as default"
menu option
• RayComposer - the system default palette that ships with RayComposer
• ILDA default - the palette most commonly used for ILDA files
• ILDA standard - the palette of the ILDA color palette standard
Save as default
Save the current color palette as the default color palette. The default color palette will be used
for every new animation you create.
3.2.5
Gradients Menu
Load Collection...
Load a gradient collection in RayComposer gradient collection file format. (file suffix *.rgc) The
loaded gradient collection will replace the gradient collection of the current animation.
Save Collection...
Save a the gradient collection of the current animation in RayComposer gradient collection file
format. (file suffix *.rgc)
Set to
The sub menu of this menu option allows you to set the gradient collection to a default one. The
following options exist:
• default - the color palette you saved as your favorite palette using the "Save as default"
menu option
• RayComposer - the system default gradient collection that ships with RayComposer
Load Gradient...
Load a gradient in RayComposer gradient file format. (file suffix *.rcg) The loaded gradient will
be appended to the gradient collection of the current animation.
Save Current Gradient...
Saves the currently selected in the gradients list gradient in RayComposer gradient file format.
(file suffix *.rcg)
3.2.6
Edit Menu
Cut
Removes the selected objects or area from the current frame and copies it into the clipboard.
Copies
Copies the selected objects or area into the clipboard.
Paste
Pastes the selected objects or area into the current frame.
Select
Switch to the object selection tool. Use the rubberband to select objects in the frame.
Select Area
Switch to area selection tool. Use the rubberband to select an area within the frame.
3.2 Animation Files
17
Select All
Select all objects in the frame
Clear Selection
De-selects all objects.
Invert Selection
All selected objects are removed from the selection. All previously not selected objects are
selected.
Delete Selection
All selected objects are removed.
Gradient
Switch to Gradient tool. The currently selected gradient will be applied to the selected objects
when you click inside the frame. The sub-menu offers selection of the gradient type and spread
mode.
The following gradient types can be selected:
• linear - the gradient will be applied along the line from the first to the second defined point
• radial - the gradient will be applied circular using the first point as center and the second
point as outer radius
• conical - the gradient will be applied around the circumference of a circle. the first point
defines the center, the second point the angle on the circumfernce, where the gradient will
start
The gradient spread can be selected as follows:
• pad - after the end is reached, the gradient will keep the color
• repeat - after the end is reached, the gradient will be repeated starting from the beginning
• reflect - after the end is reached, the gradient will be repeated starting from the end
Accentize
Accentize tool lets you insert accents (single beams) into the paths of the currently selected
objects or area. You define the accept distance by clicking into the frame twice.
Rotate Selection
Switch to the rotation tool. The selected objects will be rotated around the center point you select
with first click by the angle you select with the second and third mouse click in the drawing area.
Shear Selection
Switch to the shearing tool. The selected objects will be sheared. With the first mouse click you
select the origin. With the second and third mouse click you select the shearing angle.
Trapez
Switch to the trapezoid tool. The selected objects will be distorted along a trapezoid. With the
first mouse click you select the origin. With the second and third mouse click you select the
trapezoid angle.
Rotated Copies
Switch to the rotated copies tool. This tool creates several copies of the selected objects and
arranges them around a circle. With the first click you select the center, with the second mouse
click the radius and the angle for the first copy. The third mouse click adjusts the number of
copies or you can select a fixed number of copies with the "number of copies" option.
18
Chapter 3. Animation Editor
Tiled Copies
The tiled copies tool
3.2.7
Draw Menu
Draw Beam
Draws an Accent (single beam) where you click inside the image. When you click on an existing
path, an accent will be inserted.
Draw Polyline
Draw a line consisting of several line segments.
Draw Curve
Draw a rounded freehand curve.
Draw Rectangle
Draw a Rectangle.
Draw Circle
Draws a Circle.
Draw Circular Arc
Draws a circular arc.
Draw Polygon
Draws a Polygon.
Draw Star
Draws a Star.
Draw Spiral
Draws a Spiral.
Draw Wave
Draws a Wave.
Draw Text
Draw a Text.
3.2.8
View Menu
Zoom to Selection
Switch to zoom to selection tool. Click and drag the rubberband inside the drawing area to select
the zoom area.
Zoom In
Magnify the current view of the drawing area.
Zoom Out
Zoom out of the current drawing area.
Show Grid
Toggle this option to switch the grid display on and off. This menu has a submenu that allows
you to select how the grid is displayed:
• Lines - grid is drawn with lines
• Dots - grid is displayed as dots
3.2 Animation Files
19
Snap to Grid
When Snap to Grid is selected, all movement and positions will be rounded to their next grid
position.
Show BItmap
This option is used to toggle the display of a background image for tracing.
Load BItmap...
Load a bitmap image as background image.
Keep Aspect Ratio
When keep aspect ratio is selected, the aspect ratio of the loaded image will be preserved. Else it
will be magnified to fill the full drawing area.
Colorize from Bitmap
Color the selected object from the background image.
Raster...
Create a Raster Image from the loaded Bitmap. A Dialog will open where you can select the
number of rows and columns the raster should consist of.
Show previous frame
When this option is selected, the frame previous to the current frame will also be drawn in the
drawing area using a different color.
View
This submenu of this menu entry lets you select the direction from which you view the 3D
drawing space
• Front - XY view
• Right - ZY view
• Top - XZ view
• Bottom - X-Z view
• Left - -ZY view
• Rear -XY view
Docks
The submenu of this menu entry lets you select which dockable widget are visible.
• Colors - The color picker and palette
• Frames - The frame list
• Layers - The layers list
• Gradients - The gradient collection.
Toolbars
The submenu of this menu entry lets you select which toobars are visible.
• File - File functions
• Frame Controls - buttons to navigate the frame list
• Tools - drawing and modification tools
• View - zoom & grid tools
• Preview - laser preview settings
3.2.9
Busses & Projectors Menu
Projectors...
Open the Projectors Window to configure Busses & Projector Setup.
20
3.2.10
Chapter 3. Animation Editor
Help Menu
Help...
Open the RayComposer Animation Editor User’s manual.
About...
This will open a window with information about your current RayComposer Version and license.
Projector Configuration
Projectors Menu
Edit Menu
Projector Menu
Busses Menu
Help Menu
4. Projectors
4.1
4.1.1
Projector Configuration
Projectors Menu
New
Create a new Projector Setup. The new projector setup will replace the existing one.
Open...
Will open a RayComposer Projector Setup File (file suffix: *.RCPM). The opened projector
setup will replace the current projector setup.
Save As...
Will save the current projector setup to a RayComposer Projector Setup File (file suffix: *.RCPM)
and asks for the file name to use.
Close
Closes the projector setup window. If this was the last open window, the application will quit.
Quit
Close all windows and exit the application.
4.1.2
Edit Menu
Cut
Remove the selected items and copy them into the clipboard.
Copy
Copy the selected items into the clipboard
Paste
Paste the items from the clipboard into the currently active view.
Insert...
Insert a new item.
Delete
Remove the selected items.
22
4.1.3
Chapter 4. Projectors
Projector Menu
Add Projector
Insert a new projector at the end of the projector list.
4.1.4
Busses Menu
Add Busses...
This opens a dialog where you can select one or several busses that should be imported into your
current composition.
4.1.5
Help Menu
Help...
Open the RayComposer Programmer User’s manual.
About...
This will open a window with information about your current RayComposer Version and license.
Programmer
Lighting Menu
Edit Menu
Programmer Menu
Fixtures Menu
Fog Menu
Settings Menu
View Menu
Help Menu
5. Lighting Control
5.1
Programmer
5.1.1
Lighting Menu
New
Create a new lighting setup.
Open...
Will open a RayComposer Lighting Setup File (file suffix: *.RLS). The opened Lighting setup
will replace the current lighting setup.
Save
Will save the current lighting setup to a RayComposer Lighting Setup (file suffix: *.RLS). If the
current lighting setup has not been saved before, you will be asked for the file name to use.
Save As...
Will save the current lighting setup to a RayComposer Lighting Setup File (file suffix: *.RLS)
and asks for the file name to use.
Close
Closes the programmer window. If this was the last open window, the application will quit.
Quit
Close all windows and exit the application.
5.1.2
Edit Menu
Most edit action operate on the currently active view. You can see which view is active by the
orange frame that surrounds it. Views that you can edit are: The cue list, the fixture list, the
fixture group list and the preset list.
Cut
Remove the selected items and copy them into the clipboard.
Copy
Copy the selected items into the clipboard
24
Chapter 5. Lighting Control
Paste
Paste the items from the clipboard into the currently active view.
Remove
Remove the selected items.
Insert...
Insert a new item.
Select All
Select all items.
Invert Selection
All selected items become deselected. All previously selected items become selected.
Redo
Re-do the last undone action.
Undo
Un-do the last action.
5.1.3
Programmer Menu
Clear All
Clear the programmer. All attribute values that have been set for the fixtures will be cleared.
Live
When the programmer is live, the changes you make in the programmer are immediately visible
in your lighting setup. When it is not live, changes in the programmer will not be visible live.
5.1.4
Fixtures Menu
Patch...
Opens the fixture patch window.
5.1.5
Fog Menu
Fog
Trigger the preset named "Fog". This can be used as a shortcut to control the Fog machine
Fog Duration...
Select how long the Fog Preset will be run, when you use the Fog menu option.
5.1.6
Settings Menu
ArtNET Settings
This menu option opens the ArtNET settings window.
5.1.7
View Menu
Cue List
Toggle if the cue list will be displayed.
5.1.8
Help Menu
Help...
Open the RayComposer Programmer User’s manual.
5.1 Programmer
25
About...
This will open a window with information about your current RayComposer Version and license.
RayComposer USB
Key Features
Driver Installation
Troubleshooting
Signal Description
DMX Interface
Programming Interface
6. RayComposer USB
6.1
6.1.1
RayComposer USB
Key Features
•
•
•
•
•
•
•
•
•
•
•
•
•
•
•
•
6.1.2
Resolution: 16 Bit (65536 x 65536 Image points)
Sampling Rate: 1 - 200000 Hz
Maximum Frame Size (Points): 4 billion
Color Channels: 6 Channels with high resolution, ISP Signals:
Red, Green, Blue, Intensity/Yellow, Cyan, Magenta
Shutter: actively controlled shutter signal
Computer Interface: USB 2.0 high-speed (480 MBps),
also compatible with USB 1.1 and USB 3.0 ports
Projector Interface: ILDA Standard Projektor Interface
Processor: 96 MHz 32 Bit RISC-Processor
Memory: 4 GB integrated Flash Memory
DMX512-Input, RDM-capable (using Adapter)
DMX512-Output, RDM-capable (using Adapter)
Driver: Windows, Linux, Mac OS X;
open API, also compatible with third party applications
Power Supply: using USB Bus
Dimensions: 91 x 55 x 24mm
USB cable: included
Made in Germany
Driver Installation
When you are using a Version of Microsoft Windows prior to Windows 8, a driver for RayComposer USB needs to be installed. Please note that Windows Versions prior to Microsoft
Windows XP SP2 are not supported by our driver.
Getting the Driver
The device driver can be downloaded from our homepage at http://www.raycomposer.de. It is
also included in the RayComposer installation.
28
Chapter 6. RayComposer USB
Installing the Driver
In device manager, right click the device and choose "Update driver...". Then select the driver
files of RayComposer USB.
6.1.3
Troubleshooting
Device works unreliably
Although RayComposer USB draws less power then the USB Specification allows, sometimes
the USB port or USB cable does not deliver enough power to the device.
When the devices sometimes works unreliably please check that you are using only high
quality USB cables and only USB Hubs with separate power supply.
6.2
Signal Description
Table 6.1 on page 29 contains a detailed signal description for the ILDA ISP port of RayComposer
USB.
6.3
DMX Interface
RayComposer USB integrates a complete DMX-512 interface with RDM (Remote Device
Management) capabililty. One DMX Output and one DMX Input is integrated.
The DMX-Signals are available on the ILDA ISP Connector. To use them with standard
DMX Equipment you need our DMX Breakout Adapter cable with either 5-Pin or 3-Pin DMX
Connectors.
6.4
Programming Interface
RayComposer publishes a public Application Programming Interface (API) that developers can
use to create custom applications. The documentation for this API can be found at:
http://www.raycomposer.de/apidoc
6.4 Programming Interface
Pin
Voltage Level
Signal Name
1
2
3
±10V differential
±10V differential
0 to +5V differential
4
-
5
6
7
8
0 to +5V differential
0 to +5V differential
0 to +5V differential
0 to +5V differential
9
0 to +5V differential
10
11
12
13
0 to +5V differential
0 to +5V differential
0 to +5V
14
15
16
±10V differential
±10V differential
0 to +5V differential
17
-
18
19
20
21
0 to +5V differential
0 to +5V differential
0 to +5V differential
0 to +5V differential
22
0 to +5V differential
23
24
25
0 to +5V differential
0 to +5V differential
X Axis +
Y Axis +
Intensity +
(for single color projectors)
Interlock A
(connected to Interlock B inside RayComposer USB)
Intensity Red Laser +
Intensity Green Laser +
Intensity Blue Laser +
User-Defined Signal 1 +
(e.g. Deep Blue Laser)
User-Defined Signal 2 +
(e.g. Yellow Laser)
DMX Input +
DMX Output +
User-Defined Signal from Projector to DAC
Shutter Signal
(5V=Laser Active, reference potential is Ground)
X Axis −
Y Axis −
Intensity −
(for single color Projectors)
Interlock B
(connected to Interlock A inside RayComposer USB)
Intensity Red Laser −
Intensity Geen Laser −
Intensity Blue Laser −
User-Defined Signal 1 −
(e.g. Deep Blue Laser)
User-Defined Signal 2 −
(e.g. Yellow Laser)
DMX Input −
DMX Output −
Ground
Table 6.1: RayComposer USB ILDA Port Signals
29
Index
A
API . . . . . . . . . . . . . . . . . . . . . . . . . . . . . . . . . . . 28
D
Device Driver . . . . . . . . . . . . . . . . . . . . . . . . . 27
DMX Breakout . . . . . . . . . . . . . . . . . . . . . . . . 28
DMX-512 . . . . . . . . . . . . . . . . . . . . . . . . . . . . . 28
I
ILDA Signals . . . . . . . . . . . . . . . . . . . . . . . . . . 28
ISP . . . . . . . . . . . . . . . . . . . . . . . . . . . . . . . . . . . 28
P
Programmer . . . . . . . . . . . . . . . . . . . . . . . . . . . 23
Projector Configuration . . . . . . . . . . . . . . . . . 21
R
RayComposer USB . . . . . . . . . . . . . . . . . . . . 27
RDM . . . . . . . . . . . . . . . . . . . . . . . . . . . . . . . . . 28
U
USB . . . . . . . . . . . . . . . . . . . . . . . . . . . . . . . . . . 27