1
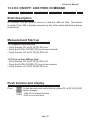
S2
USER’S MANUAL
& NAVIGATION MENUS
Analogue and Digital Satellite Analyzer
930 - 2250
Preliminary Version
Subject to change without notice
USER’S MANUAL CODE: UG-S2-1.08-2.1-EN-1.0
VERSION: grafica 2.1
S2 User’s Manual
INDEX
USEFUL SUGGESTIONS ............................................................................ 4
MAIN KEYS .................................................................................................. 6
METER POWER UP .................................................................................... 7
1.0 CONFIGURAIONT MENU ...................................................................... 8
2.0 MEMORY PLAN MENU ........................................................................11
3.0 DISH ALIGNMENT: SAT FINDER ........................................................ 12
4.0 DUAL LNB: DUAL FEED DISH ALIGNMENT ...................................... 13
5.0 BUZZER ............................................................................................... 14
6.0 SATELLITE SIGNAL MEASUREMENTS: MEAS ................................. 15
7.0 SPECTRUM MEASUREMENTS: SPECT ............................................ 19
8.0 HELP: AUTOMATIC TUNING FUNCTION ........................................... 21
9.0 MEMORY: MEMORIZATION FUNCTION ............................................ 22
10.0 STORE: FAST MEMORY KEY .......................................................... 24
11.0 AUTOSCAN: AUTOMATIC SEARCH ................................................ 25
12.0 DATA LOGGER .................................................................................. 26
13.0 DC ON/OFF: LINE FEED COMMAND ............................................... 27
14.0 MPEG PROG SERVICE..................................................................... 28
APPENDIXES
A1 - MAIN TECHNICAL SPECIFICATIONS ............................................... 29
A2 - ACCESSORIES .................................................................................. 31
A3 - SMART PROGRAMME ...................................................................... 32
A4 - TROUBLE SHOOTING ....................................................................... 40
A5 - BATTERIES MAINTENANCE AND RECHARGE ............................... 41
A6 - FRONT PANEL DESCRIPTION.......................................................... 42
A7 - SIDE PANEL DESCRIPTION ............................................................. 43
A8- SERVICE NOTES AND GUARANTEE REGULATIONS ..................... 44
A9 - FAULT IDENTIFICATION FORM............................................................................................45
A10 - STANDARD ROVER EQUIPMENT REPAIR AND OR SERVICE FORM.................................................46
A-11 DISPOSAL OF ELECTRONIC EQUIPMENT RULES ........................ 47
pag. 3
S2 User’s Manual
USEFUL SUGGESTIONS
1) Thank you for choosing our measurement equipment, which is currently used
and appreciated by the most important Satellite Service Providers, Broadcasters and by many installers because it is very user’s friendy and provides
complete and accurate measurements. On our part we will do all our best to
fulfil your requirements now and in the future.
2) This manual is a new concept of quick User’s Guide which is easy to read.
Select the function/measurement you need directly from the index and on the
respective page you will find useful information to start the specific function
or a wanted measurement.
3) Every section that descibes a specific measurement is divided in there parts:
a. Measurement/Function brief description : provides a high level
description of the specific Measurement or function.
b. Measurement start up: is a list of steps to be followed in order to start
the specific measurement.
c. Push buttons and displays: graphic description of the push buttons
that need to be used and relevant displays that will result during
the measurement exercize.
4) The meter is very User’s Friendly, the first step is to select a pre-memorized
memory plan and then start a dish alignment task just by pressing the “SAT
POINT” key. Every memory plan contains the transponders of a specific satellite and are identified by the name of the satellite. You may also build your
own plan with a dedicated trasponder list by means of the MEMORY function
or utilyzing the SMART PC optional programme.
5) IMPORTANT: the meter is delivered by the manufacturer with some default
settings for testing and demonstration purposes.
a. The meter turns off after 5 minutes inactivity in order to optimize the
battery duration and also for air transportation,
b. Make sure that you are using the meter with the proper memory
plan that has the wanted trasponder list,
c. Some memory plans have been previously memorized in the meter
and may be recalled by name.
pag. 4
S2 User’s Manual
USEFUL SUGGESTIONS
Pre-memorized S2 Trasponder lists
ASTRA 28
TELS 15
Eutelsat 70
ASTRA 23
TELEC 8
Panamsat 72
ASTRA 19
ATLNB 12
LMI 75
Hotbird 13
Hispasat 30
NILES 07
Eutelsat 07
Eutelsat 21
Intesat 18
Eutelsat 10
Arabsat 25
NSS 22
AMOS 4
Arabsat 26
Intelsat 27
SIRIUS 4
EBIR 28
Panamsat 43
SIRIUS 5
Ebir 33
Panamsat 45
INTEL 1
Expr 53
Panamsat 58
HELLAS 39
NSS 57
Asia 105
Turksat 42
Panamsat 68
6) Navigation through all the possible selections may be achieved using keys
SELECT, UP e DOWN:
using the SELECT key that will highlight a field which can be changed in a menu. This field may be a value (i.e. frequency) or a state
to be modified (i.e. START? or STORE?).
The UP and DOWN keys will modify the value of the highlighted field or will change its status depending on what this
field is representing.
7) The meter’s keys, as shown in the following section, have a double function
that may be enabled by pressing the key for more than two seconds. The
description of this double function written won the front panel lable immidiately above the main key.
pag. 5
S2 User’s Manual
MAIN KEYS
Allon you to select the menu modifiable fields. The selected fields are
highlighted with a dark backround.
Will modify the field values highlighted with the SELECT key.
• provides the list of memory plans.
• The Autoscan feature is not available for SAT signals.
• Enables the automatic satellite search funtion.
• If pressed for 2” it will enable the Dual Feed dish alignment feature.
• Spectrum analysis of the RF input signal.
• If pressed a second time it will enable the spectrum Ma
X Hold.
• Provides analoge or digital transponder measurements.
• By pressing this key more than once, all the menus will appear in sequence
showing all the provided measurements.
• If pressed for 2” it will allow you to escape from any active funtion.
• Starts the automatic measurement procedure and memorizes the measurements results of these for all the transonders contained in the active
memory plan.
• Enables the memory function to create a custom memory plan. A memory
plan may contain up to 199 different programmes.
• If pressed for 2” you may memorize the tuned transponder directly to the
first available programme in the memory plan.
• Key to start the automatic tuning of a digital transponder.
• If pressed for 2” this key will turn on the BUZZER function based on the
Noise Margin measurement.
• Reads all the services transmitted by a digital transponder. In this list all
the Video and audio PIDs wil be shown.
• If pressed for 2” the Configuration Menu will be displayed to change all the
meter working settings.
pag. 6
S2 User’s Manual
METER POWER UP
To power up the meter press the
[14] key.
On the meter’s display [2] a welcome screen will show for about 6”, this display
will provide all the detailed identification data for the meter.
DISPLAY LAYOUT.
Logo
Model Name
Hardware Version
Boot Loader Version
Serial Number
Firmware Version
Always provide the Model name, Firmware Version and Serial Number every
time you need technical support or when the meter needs to be sent to an authorized Rover Service Centre (Ref. Appendix A8).
pag. 7
S2 User’s Manual
1.0 CONFIGURAIONT MENU
Brief description
The configuration menu will allow you to set the main working parameters
that
will
be
applied
during
the
meter
operation.
This menu will also enable some special functions like “FILE
MANAGER” (to cancel memory plans), the motor driver function for motorized
dishes and the SAT settings.
Measurement start up
• Press the “MPEG PROG SERVICE” [1] key for 2 seconds
• On display [2] the Configuration Menu will be shown
• Select “METER SET UP” to access the typical meter settings (Rif. Par. 1.1),
• Select “SAT CONFIG.” to chose a SAT standard (Rif. Par. 1.2)
• Select “FILE MANAGER” to delete memory plans (Rif. Par. 1.3)
• Select “DiSEqC MOTOR” to drive a motorized antenna (Rif. Par. 1.4)
Push buttons and displays
Press the key for 2”
Ref. Par. 1.1
Ref. Par. 1.2
Ref. Par. 1.3
Ref. Par. 1.4
to display the configuration menu
fig. 1.1
1.1 “METER SET UP” :
Press the
key to access the “Meter Set up” menu:
• OFF
• 5 min
• 10 min
• dBµV
• dBmV
• dBm
available languages
• ON
• OFF
• Full ON
• 30 sec
pag. 8
S2 User’s Manual
continue: CONFIGURATION MENU
1.2 “SAT CONFIGUR.” :
Referring to fig. 1.1, press the
and press the
key to choose “SAT CONFIGUR”
key to access the “SAT CONFIGUR. MENU”:
• DSS
• DVB
LNB1 DiSEqC: a-b-c-d. See Par. 4.0
LNB2 DiSEqC: a-b-c-d. See Par. 4.0
not yet available
1.3 “FILE MANAGER” :
The File Manager function will allow CUSTOM and LOGGER file deletion from the main meter memory. The CUSTOM files contain the user’s defined transponder lists, while the LOGGER files are
automatically created by the meter using the Data Logger function.
NOTE: It is not possible to delete the Factory Pre-memorized files which contain the transponder
list of the main satellites. These may be deleted only from a PC by means of the SMART interface
application programme (Ref. Appendix A3).
Referring to fig. 1.1, press the
and then press the
key to choose “FILE MANAGER”
key to access the “FILE MANAGER MENU”:
• CUSTOM
• LOGGER
The list of files shown in this field depends on the file
type selected before :
• if the file type is CUSTOM, the pre-memorized memory
plans are displayed HBIR13, PLAN 45 ecc.
• If the file type is LOGGER, all Logger files will be displayed as LOG. 1, LOG. 5 etc.
After selecting the File Type and the file name, the Deletion has to be confirmed by highlighting the
DELTETE command and confirming this selection (CONFIRM?) pressing the Up or Down key.
NOTE: it not possible to delete factory pre-memorized files (i.e. HBIR13), the meter will display the
error messge “FAILED !”. To remove these files use the SMART PC interface programme.
pag. 9
S2 User’s Manual
continue: CONFIGURATION MENU
1.4 “DiSEqC MOTOR” (menu to drive motorized antennas):
Referring to fig. 1.1, press the
and then press the
key to select “DiSEqC MOTOR”
key to access the “SYSTEM MENU MOTOR” menu:
Selected satellite
Motor Action (see table below)
Motor action enabling (see table below). The information on this line depends on the selection made
in the “ACT” field.
received signal Power measurement
The first display line shows the satellite to which we want to aim the motorized dish (i.e. Hot Bird 13°
E). The wanted satellite may be selected using the PLAN [3] key (see par. 2.0).
The motor action is called “ACT”. Depending on the verb selected in this field, using the UP and
DOWN keys, sub fields will be shown (see table below) that will allow the completion of the desired
action. Once the wanted action has been properly configured, in order to start it the third line of the
display has to be selected using the SELECT key and its status changed using the UP and DOWN
keys (see ACT enabling column in the table below).
ACT
ACT sub fields
Description
ACT enabling
MOVE
none
allows the meter movement
towards the wanted direction
EAST or WEST
DIR:
• EAST
• WEST
GOTO
from POS 1 to
POS 99
selects one of the 99 motor prememorized positions
APPLY?
(move to the selected position)
STORE
from POS 1 to
POS 99
memorizes the current motor position in one of the 99 possible
memory locations.
STORE?
(stores the current
motor position)
RESET
none
removes any eventual rotational
preset EAST or WEST motor
movememts limits.
APPLY?
(removes rotation
blockages)
During the alignment phase, the displayed measurements is only the average digital power measurement .
Once the satellite has been reccognized, the meter will show the Noise Margin measurement and the
quality analysis (PASS, MARGINAL, FAIL) as well as the Service handler data.
NOTE
Press any key to exit the “DiSEqC MOTOR” function.
pag. 10
S2 User’s Manual
2.0 MEMORY PLAN MENU
Brief description
The Memory Plan menu provides a list of all the available transponder files which can be selected to be used for measurements or dish alignment tasks. Upon
meter power on, the last selected Memory Plan will be active.
Measurement start up
• To select a Memory Plan (transponder list) press the PLAN [3] key,
• Select the wanted Memory Plan using keys UP [7] and DOWN [9],
• The highlighted list with the dark backround will be the active one,
• Press any key to exit the menu, for example the MEAS [6] key in order
to start the measurements on the transponders contained in the selected
Memory Plan.
Push buttons and displays
Press the
key and select the wanted Plan using the
or
keys.
The active list will always be the one highlighted with the black background.
Press
to start measuring.
NOTE
Memory Plans may be of 3 types: :
1. Pre-memorized by Ro.Ve.R. Labs.
2. Custom plans User defined: from
PLAN 1 up to PLAN 99.
3. Logger files resulting from a DATA
LOGGER automatic measurements run
on the active Mermory Plan. The maximum LOGGER files is 99. (Depending
on availale memory).
pag. 11
S2 User’s Manual
3.0 DISH ALIGNMENT: SAT FINDER
Brief description
This function allows a Dish Alignment based on the identification of three transponders contained in the
active Memory Plan (Ref. Sec. 2.0). These three transponders may be selected manually. When the satellite is recognized by the meter, it will automatically display the fine alignment display that will also allow
cross-pol adjustments. The meter will also show on the bottom part of the display the Network Identification and the Satellite orbital position.
Measurement start up
• Press the PLAN [3] key only if the transponder list needs to be changed (Ref. Sec. 2.0),
• Press the SAT FINDER [4] key to access the menu funtion,
• Use the SELECT [10] key to chose the 3 listed trasponders and with the UP [7]
and DOWN [9] keys select the wanted transponder (see note below),
• Use SELECT [10] to highlight the START? command, press UP [7] or DOWN
[9] to begin the Sat Finder function,
• A rotating bar will indicate that the function is active. Start the dish alignment
task until the buzzer will be enabled by the meter. This is the indication that the
satellite has been identified,
• The display will change and will show the Noise Margin measurement with a
graphic bar and a numeric value. See figure below.
• Procede with the fine alignment until the bar length has been maximised. Go
to Section 6.0 “MISURE: MEAS” .
NOTE: the 3 transponders used for the satellie identification may also be the same.
Push buttons and displays
Press the
Use keys
Use
key and press
and
to chose the field to be changed.
to change the listed transponder.
to highlight “START?” and press
after the satellite
is found
pag. 12
or
to start the sat search.
S2 User’s Manual
4.0 DUAL LNB: DUAL FEED DISH ALIGNMENT
Brief description
This special function will allow the alignment of a satellite dish which has two
LNBs by making simultaneous measurements from both LNBs (without moving
the RF feed between LNBs and without changing frequency values), furhter
more it will allow the SKEW adjustment (polarization plan) with a 0,2 dB accuracy.
Measurement start up
• Press the SAT FINDER [4] key for 2 seconds,
• Choose the memory plans relevant to the satellite to which the dish is to
be align,
• Connect a DiSEqC Switch (i.e. model DiSEqC-SWI-2-01, Ref. Appendix A2)
to the RF meter input,
• Connect the DiSEqC switch to the LNBs coax cables,
• Start the dish alignment.
Push buttons and displays
Press the
key for 2 seconds to start the DUAL LNB feature.
Select the Memory Plans (ref- Sec. 2.0) relevant to the sattelites to aim the
dish. Press the
to highligh the Memory Plan and Transponder fields to
modify and press the
and
keys to apply the wanted values.
LNB IN 1 Memory Plan Ref. Sec. 2.0
LNB 1 Memory Plan transponder number or
programme (Ref. Sec. 2.0)
NOTES
• the graphic bars represent
the Noise Margin measurements for both satellites.
• As a reference and to help
optimize the dish alignment,
both bars have a maximum
value memory indication.
This is a vertical line which
represents the maximum
Noise Margin value optained
for each LNB during the dish
alignment process.
LNB 2 Memroy Plan transponder number or
programme (Ref. Sec. 2.0)
LNB IN 2 Memory Plan Ref. Sec. 2.0
pag. 13
S2 User’s Manual
5.0 BUZZER
Brief description
The Buzzer is a beep sound which varies its rhythm proportionally to the signal’s
Noise Margin measurement. This is a dish alignment aid feature, when the selected
satellite digital transonder is locked (satellite is found) the meter will start the Buzzer
and at the same time show the Noise Margin measurement, the quality analysis
(PASS, PARGINAL, FAIL) and the Network data (NIT tables).
Measurement start up
• Select the Memory plan and the wanted transponder (Ref. Sec. 2.0).
• Press the HELP [12] key for 2 seconds,
• The meter will show the BUZZER FUNCTION menu,
• the Buzzer will be heard only when the selected transponder is locked,
• Press any key to disable this function,
• It is possible to modify the transponder frequency when the meter is in this mode.
Push buttons and displays
Press the
key for 2” to start the BUZZER FUNCTION.
On the first line of the Display the active Memory Plan transponder or programme name will be shown. The transponder relevant frequency value may be
changed, if this is done the transponder name will be replaced by three Horizontal lines. When the digital tranponder is locked, the meter will start the Buzzer
and display the measurements shown here below.
active memory plan transponder
measurement that will be shown when the tranponder
is locked
pag. 14
S2 User’s Manual
6.0 SATELLITE SIGNAL MEASUREMENTS: MEAS
Brief description
MEAS starts the measurements on the tuned transponder. By pressing repeatedly
the MEAS key, the display will show in sequence (Ref. next paragraph) all the
measurements made on the selected transponder as a numerical value and with
a graphic bar that varies its length proportionally to the represented measurement.
This bar memorizes the peack measurement value.
Measurement start up
Tuning:
The upper part of the display shows the transponder tuning parameters. These
parameters are those of the active tranponder. To change them use the SELECT [10] key to highlight the field to be changed and use UP [7] and DOWN
[9] keys to modify its value. The tuning parameters that may be changed are: :
Transponder number, frequency, Symbol Rate and Standard. Refer to section
“Push buttons and displays” in this section for more information.
Measurements:
The lower part of the display will show all measurements. The digital signal
measurements will show only if the transpnder is locked. Refer to section “Useful Suggestions” at the beginning of this User’s Manual for more details.
By pressing repeatedly the “MEAS” [6] key the following measurements will be
displayed (for analogue signals only the level measuremenet will show):
MEAS : Measurement level 1: displays the average power (PWR) for a
digital signal or the level measurement in case of an analogue
+
signal,
MEAS : Measurement level 2: displays the Noise Margin (N. MARG.),
the signal quality (QLTY), the MER and EVM measurements with
+
a relevant graphic bar,
MEAS : Measurement level 3: displays the bBER (Pre BER) and aBER
(Post BER) measurements with relevant graphic bars, con relative
+
barre grafiche,
MEAS : Measurement level 4: data obtained from the NIT tables: FEC,
Network name(NETW NAME),bouquet name (BOUQ. NAME) & date
(DATE).
NOTE: on the bottom display status line the transponder main information is always
shown. For digital transponders: Network name, orbit position, encryption system and a
lock that is closed if the signal is locked. For analog trasponders, a square will be placed
on top of the “AN” writing of the front panel.
pag. 15
S2 User’s Manual
continues: SATELLITE SIGNAL MEASUREMENTS: MEAS
Push buttons and displays
6.1 Power measurement (digital) or Level measurement (analog)
Press the
and use the
use keys
and
key to choose the field to be modified
to modify the displayed value.
Memory Plan (Ref. Sec. 2.0)
LNB LINE FEED
• Vertical low: VL 12
• Vertical high: VH 12
• Horizont low: HL 12
• Horizontal high: HH 12
• OFF
Active Memory Plan transponder or programme number (Ref. Sec. 2.0)
Transponder Frequency
MW o IF
Modulation: analogue
or Digital QPSK
DISEqC:
• Position A
• Position B
• Position C
• Position D
• OFF
Local oscillator: from 0 to
20.000 MHz
fig. 6.1 Digital signal first level measurements.
Symbol Rate: from 2 to
45 MS/s
fig. 6.2 Analogue signal first level measurements.
NOTES
• If there is no signal or if the signal level is below the meter’s measurement dynamic range, the
string PWR_TOO_LOW (power too low) will be shown,
• The meter will always show a graphic bar proportional to the signal level or power measurement,
• The graphic bar memorizes the peak signal level or power value this is represented by a vertical
line on the display,
• To display all the signal available measurements, the MEAS key has to be pressed repeatedly
(see next paragraphs in this section for more details),
• Regardless of the measurement level the meter is, by pressing the “Power On” key [14], meter will
return to the First Level or Power measuremts display (Ref. fig. 6.1 or 6.2) depending on the type
of trasnponder being measured (Digital or Analogue).
pag. 16
S2 User’s Manual
continue: SATELLITE SIGNAL MEASUREMENTS: MEAS
6.2 Noise Margin, Quality, MER and SNR measurements
Press the
key again to display the second measurement level:
Memory Plan (Ref. section 2.0)
Active Memory Plan transponder or Programme number (Ref. section 2.0)
Transponder Frequency: MW o IF
NOTE
There are variable fields
in this measurement level:
Memory Plan, Transponder or
Programme number and Frequency.
fig. 6.3 The second measurement level provides the Noise Margin and the MER (modulation error)
measurements with the relevant graphic bars. The instruments supplies both the EVM measurement and the quality analisys (PASS, MARGINAL, FAIL).
6.3 BER before and after error correction
Press the
key again to display the third measurement level:
Memory Plan (Ref. section 2.0)
Active Memory Plan transponder or Programme number (Ref. section 2.0)
Transponder Frequency: MW o IF
NOTE
There are variable fields
in this measurement level:
Memory Plan, Transponder or
Programme number and Frequency.
fig. 6.4 The third measurement level provides the BER (Bit Error Rate) before and after error correction. The aBER (post Viterbi) shows a value of “<10-8“ for signals that may be considered as
error free after the error correction process.
pag. 17
S2 User’s Manual
continues: SATELLITE SIGNAL MEASUREMENTS: MEAS
6.4 FEC, NETW. NAME and BOUQ. NAME
Press the
key again to display the fourth measurement level:
Memory Plan (Ref. section 2.0)
Active Memory Plan trasponder or Programme number (Ref. section 2.0)
Transponder Frequency: MW
o IF
NOTE
There are variable fields
in this measurement level:
Memory Plan, Transponder or
Programme number and Frequency.
fig. 6.5 This display will show the network name, the bouquet, the data and the FEC (forward error
correction) value for the measured digital transponder.
NOTES
• If there is no signal or if the power measurement is below the meter’s dynamic range or when the
signal is not locked, the measurements will show only horizontal lines,
• From the second to the fourth measurement levels the variable fields are only the Memory Plan,
the Transponder or Programme number and the signal frequency value,
• When the signal frequency value is changed, the Transponder or Programme number is replaced
by three horizontal lines, this is because the correspondence between the memory location and
the new frequency is lost,
• From any measurement level the meter is, by simply pressing the Power ON key [14] it is possible
to return to the first measurement level shown in fig. 6.1 or fig. 6.2,
• On the bottom line of the display and starting from the measurement level 2, the NIT readings
are displayed: network name, orbit position, encryption system, “S” letter to indicated that this is a
satellite signal and a lock that will be closed when the digital signal is locked.
pag. 18
S2 User’s Manual
7.0 SPECTRUM MEASUREMENTS: SPECT
Brief description
The SPECT key will access the meter’s spectrum analysis measurements.
when accessing this measurement mode, the meter will automatically set the
reference level in order to show all the detected carriers within the screen display for the selected SPAN value.
Measurement start up
• Select a Memory Plan (Ref. section 2.0),
• Connect the LNB to the meter’s RF input [17],
• Press the SPECT [5] key,
• Use the SELECT [10] key to change the spectrum variable fields as shown
in fig. 7.1: SPAN, transponder or programme number, Frequency, Reference
level. The chosen field will be highlighted with a dark background,
• Use the Up [7] and DOWN [9] keys to change the chosen field,
• Press the SPECT [5] key again in order to enable the Max Hold feature (Ref.
par. 7.2). With this feature the meter memorizes the RF input signal maximum
value, this will be shown as a trace that overlaps to the real time spectrum
curve.
NOTES
• Varying the transponder or programme name the spectum marker moves to the selected carrier
centre frequency,
• VVarying the marker frequency, this will move gradually on the spectrum, the speed of this
displasement will automatically increase just by keeping the UP [7] or DOWN [9] keys pressed,
• Varying the displayed frequency, the transponder or programme name will be replaced by horizontal lines. This because the correspondence between the frequency value and the transponder
or programme name is lost,
• If during the dish alignment process, the Spectrum displays a transponder pattern of an unknown Satellite it is possible to tune these carriers by simply pressing the HELP [12] key (Ref.
section 8.0).
pag. 19
S2 User’s Manual
continues: SPECTRUM MEASUREMENTS: SPECT
7.1 Measured Signal Spectrum analysis
Press the
key and use the
Use keys
and
SPECTRUM SPAN: sweep width in
MHz : 50, 100, 200, 500, FULL
key to choose a field to be modified
to modify the displayed value.
TRANSPONDER NUMBER
TRANSPONDER
(ordered by frequency value) CENTRE FREQUENCY
LEVEL MARKER:
AUTOMATIC REFERENCE LEdB scale reference
value; may be varied ma-
0,1 dB resolution
VEL:
nually
SPECTRUN
ANALYSIS
CURVE: 5 dB division in
FREQUENCY MARKER:
quasi Real Time
0,1 MHz resolution
CLOSED LOCK =
Locked signal
OPEN LOCK =
un-locked signal
POWER/LEVEL: FREQUENCY
LEVEL/POWER VALUE IN dBuV
MARKER
fig. 7.1 ASTRA transponder spectrum with a 500 MHz SPAN.
7.2 Measured Signal Spectrum analysis with Max Hold
Press the
key again to enable the signal max hold feature.
MAX HOLD TRACE: peak
memory value reached by
the measured signal
MAX HOLD FUNCTION:
Max Hold function enabled
fig. 7.2 ASTRA transponder spectrum with the Max Hold Function enabled
pag. 20
S2 User’s Manual
8.0 HELP: AUTOMATIC TUNING FUNCTION
Brief description
The HELP [12] key will start an automatic search of all the tuning parameters of a seleted transponder. This function is particularly useful if there is the need to recognize
a transponder found in SPECTRUM or MEAS mode which has not been pre-memorized in any Memory Plan and of which we know only its frequency.
Measurement start up
• Press the MEAS [6] key to set the transponder centre frequency, Local Oscillator frequency, the Polarization and Band of the received signal for which we
want to get all the tuning parameters (Ref. Section 6.0),
OR
• Press the SPECT [5] key and place the frequency marker on the centre frequency of the digital carrier shown on the display (Ref. section 7.0),
• Press the HELP [12] key to start the auto-tuning function.
Push buttons and displays
When help is need in order to lock a digital signal press the
key,
the meter will start an automatic search of all the missing tuning parameters.
(signal standard: DSS or DVB and Symbol Rate).
Use SELECT
to choose a
Memory Plan
when
locked
choose with select and press
up or down to
memorize
fig. 8.1 Automatic search of a transponder tuning parameters
NOTES
• When the transponder is locked, the meter wil display a memorization menu to store
the transponder in the first available memory location of the active memory plan (fig,
8.1),
• In this menu it is possible to choose a different memory plan,
• If the memory location is already used, the meter will display “OVERWRITE?” otherwise it will show “SAVE”.
pag. 21
S2 User’s Manual
9.0 MEMORY: MEMORIZATION FUNCTION
Brief description
The Memory function will allows to modify an existing Memory Plan or to define
a new one.
Measurement start up
9.1 Create a new memory plan:
• Press key MEMORY [11],
• Use the SELECT [10], UP [7] and DOWN [9] keys to choose a new Memory
plan (Ref. fig. 9.1), the name of the Memory PLan is automatically assign by
the meter with the prefix “PLAN” followed by the first available plan number
(es.PLAN45),
• Use the SELECT [10] key to choose all the fields that will define the trasnponder to be memorized (Ref. fig. 9.1): Frequency, Standard, Polarization and
Band, Symbol Rate and Local Oscillator and then set the wanted value using
keys UP [7] and DOWN [9] Keys,
• Use the SELECT [10] key to highlight the Save? command and press UP [7]
or DOWN [9] to confirm the programme storage.
9.2 Modify an existing Memory Plan:
• Press the MEMORY [11] key,
• Use the SELECT [10], UP [7] and DOWN [9] keys to choose an existing Memory Plan (rif. fig. 9.1) and the programme number that needs to be changed.
• Use keys SELECT [10] to highlight the transponder field to be changed: Frequency, Standard, Polarizzation and Band, Symbol Rate and Local Oscillator
and set the new wanted values using keys UP [7] and DOWN [9],
• highlight the command OVERWRITE? to store the updated transponder programme position.
9.3 Add a new programme to an existing Mermoy Plan:
• Press the MEMORY [11] key,
• Follow the procedure describen in paragraph 9.2 with the only difference that a nee
programme number must be selected (Ref. fig. 9.1),
• The command line on the bottom part of the menu will be SAVE?, use keys UP [7] or
DOWN [9] to confirm the new programme number.
pag. 22
S2 User’s Manual
continue: MEMORY: MEMORIZATION FUNCTION
Push buttons and displays
Press the
key to start the memory task.
Use the key
to highlight the memory fields that need to be changed
and set the new values using the keys
and
and applying one of
three procedures descibed in “MEASUREMENT START UP”.
Memory Plan (Ref. section 2.0)
LNB LINE FEED
• Vertical low: VL 12
• Vertical high: VH 12
• Horizont low: HL 12
• Horizontal high: HH 12
• OFF
Active Memory Plan transponder or programme number (Ref. Sec. 2.0)
Transponder frequency:
MW o IF
Modulation: analogue or
Digital QPSK
DISEqC:
• Position A
• Position B
• Position C
• Position D
• OFF
Local Oscillator: from 0 to
20.000 MHz
command that confirms the memory change:
: SAVE? (adds a new programme) or OVERWRITE? (replaces an exhisting programme)
Symbol Rate: from
2 to 45 MS/s
fig. 9.1 MEMORY : creating or modifying a Memory Plan.
NOTES
• If a manual tuning is performed in any MEAS menu (Ref. par. 6.0) all these new values
will be shown when accessing the Memory menu.
• If a manual tuning is made in spectrum mode (Ref. Sec. 7.0) all these new values will
show when accessing the Memory menu.
pag. 23
S2 User’s Manual
10.0 STORE: FAST MEMORY KEY
Brief description
The STORE or fast memorization key will allow to add a transponder in a new
programme location in the active Memory Plan.
Measurement start up
• Tune an analogue or digital transponder (Ref. sections 6.0 MEAS and 7.0
SPECT),
• Press the MEMORY [11] key for two seconds,
• The transponder will be automatically stored in a new memory location of the
active Memory Plan.
Push buttons and displays
Press the MEMORY [11] key for 2 seconds to start the fast memorization function. The meter will update the memory programme number to the first available
free location in the active Memory Plan and will memorize it.
Once this task is completed the meter will show the Memory Menu in order to
allow any further change to the newly memorized transponder.
In any mode the meter is: Measurement or Spectrum, if the new tuning paramenters need to be stored press the
pag. 24
key fro two seconds.
S2 User’s Manual
11.0 AUTOSCAN: AUTOMATIC SEARCH
Brief description
This function is not available for satellite signals.
Measurement start up
This function is not available for satellite signals.
Push buttons and displays
The key
is pressed for 2 seconds the meter will show the display in fig. 11.1
fig. 11.1 this display will be shown for functions which are not available.
pag. 25
S2 User’s Manual
12.0 DATA LOGGER
Brief description
The Data Logger function allows automatic measurements to be carried out
on all transponders contained in a given Memory Plan after the dish has been
aligned. These measurements may be made at the dish or at any installation
outlet.
Measurement start up
• Press the DATA LOGGER [13] key,
• Use keys SELECT [10] , UP [7] and DOWN [9] to choose:
a) the Memory Plan to be used for the automatic measurements,
b) the LOGGER file where the measurements will be memorized (from 1 to 99),
• Start the Logger function highlighting with the SELECT [10] key the command
START? and pressing the UP [7] or DOWN [9] key to confirm,
• A status bar will indicate that the task is in progress. When the measurements
are completed the display will show the message “DONE!”.
NOTES:
• All the automatic measurements are carried out on the selected Memory Plan,
• The maximum number of logger files is 99,
• The logger files may be exported to EXCEL® spread sheets using the SMART programme,
• The meter shows the OVERWRITE command if the chosen logger file already exists.
Push buttons and displays
Press the
key to start the automatic measurements.
Use key
values using keys
to highlight the fields to be changed and set the wanted
and
keys.
Memory Plan to use for automatic measurements
Logger file that will store all measurements: from LOG 01 to LOG. 99
Memory command: SAVE? or
OVERWRITE?
fig. 12.1 DATA LOGGER function menu.
pag. 26
S2 User’s Manual
13.0 DC ON/OFF: LINE FEED COMMAND
Brief description
DC ON/OFF key will allow to remove or add the LNB line feed. This feature
is useful if the LNB is already powered by any other active distribution device
(Head End).
Measurement Start up
13.1 Remove LNB line feed
• Verify that the DC at RF IN [8] LED is on,
• Press the DATA LOGGER [13] key for two seconds,
• Verify that the DC at RF IN [8] LED is off.
13.2 Turn on the LNB line feed
• Verify that the DC at RF IN [8] LED is off,
• Press the DATA LOGGER [13] key for two second,
• Verify that the DC at RF IN [8] LED is on.
Push buttons and display
Press
for two seconds and verify that the yellow DC at RF IN [8] LED
status changes :
• LED off: line feed is active.
• LED on: no line feed.
pag. 27
S2 User’s Manual
14.0 MPEG PROG SERVICE
Brief description
Every transponder carries a given number of TV and Radio programmes.
This function will display the full programme list of the broadcasted programmes. Besides the services names also the audio and video PID values are
provided.
Measurement start up
• Tune a digital satellite transponder (Ref. section 6.0).
• Press the MPEG PROG SERVICE [1] key,
• After some seconds a full list of transmitted services from the specific satellite
will be displayed,
• Use the UP [7] and DOWN [9] keys to go through the full list.
Push buttons and displays
Lock the wanted transponder (Ref. section 6.0) and press the
key to get the full programme list and relevant audio and video PIDs as
shown in figure here below.
programme name
Video PID
pag. 28
Audio PID
S2 User’s Manual
A1 - MAIN TECHNICAL SPECIFICATIONS
ANALOGUE SAT
• Frequency Band: 930–2250 MHz
• Direct selection of: memory plan, programme, frequency, LNB, DiSEqC, with front panel key
board
• Memorizaton of: plan, programme, transponder, frequency, LNB, DiSEqC, local oscillator
frequency
• Frequency resolution: 0,1 MHz
• Input impedance: 75 ohm
• Interchangeable input connector: “F” (“IEC” or “BNC” or “N” optional)
• Power Supply at RF input: OFF, +13, +18 V, 22 kHz (0,3 A) (with ON/OFF key)
• DiSEqC 1,1: 4, 8, 12 or 16 polarizations, DiSEqC “a.b.c.d” already pre-programmed in sequence
and very easy to use. IT can power any type of LNB (analogue or DiSEqC, single or dual feed)
and any type of multiswitch (analogue or DiSEqC con 4, 8, 12, 16 inputs and SCR LNB)
• Analogue level measurement dynamic range at the RF input: from 35 to 120 dBuV, from –25
to + 60 dBmV (selectable) with limit indications: level Too Low, level Too High
• Measurement resolution: 0,1 dB
• Level measurement accuracy: 1.5 dB typ. (2.5 dB max.) with software correction (after 5 minutes warm-up)
• Measurement filter bandwidth in SAT mode: 4 MHz at –3 dB
• Measurement stability versus temperature between –10 and 50°C: 0,1 dB/°C
• LNB L.O. frequency selection: continuous from 0 to 20.000 MHz, for “L” bands (direct IF–SAT
reading), “S”, “C”, “KU”, “KA”.
QPSK (Demodulated)
• Frequency band: 930–2250 MHz
• Direct selection of: memory plan, programme, frequency, LNB, DiSEqC, with front panel keyboard
• Memorization of: plan, programme, transponder, frequency, LNB, DiSEqC, local oscillator frequency, standard, symbol rate
• Frequency resolution: 0,1 MHz
• Input impedance: 75 ohm
• Interchangeable input connector: “F” (“IEC” or “BNC” or “N” optional)
• Power Supply at RF input: OFF, +13, +18 V, 22 kHz (0,3 A) (with ON/OFF key)
• DiSEqC 1,1: 4, 8, 12 or 16 polarizations, DiSEqC “a.b.c.d” already pre-programmed in seuqence
and very easy to use. It can power any type of LNB (analog or DiSEqC, single or dual feed) and
any type of multiswitch (analogue or DiSEqC with 4, 8, 12, 16 inputs and SCR LNB)
• Digital power measurement dynamic range at RF input: from 35 to 120 typ. dBuV, from –30 to
+ 60 dBmV (seelctable) with limit indications: level Too Low, level Too High
• Power Measurement Resolution: 0,1 dB
• Power Measurement accuracy: 1,5 dB typ. (2.5 dB max.) with software correction (after 5 minutes warm up)
• Noise Margin Measurement accuracy: 0,5 dB typ. (1 dB max) with software correction
• Measurement filter bandwidth in SAT mode: 4 MHz at –3 dB
• Measurement stability versus temperature between –10 and 50°C: 0,1 dB/°C
• QPSK Symbol Rate setting: 2–45 MS/s, in 1 kS/s steps
• BER measurement before and after Viterbi:
– bBER up to 2x10⁻⁵
– aBER up to 2x10⁻⁸
• FEC, automatic recognition and visualizaton of value: FEC 1/2, 2/3, 3/4, 4/5, 5/6, 6/7, 7/8, 8/9
• Automatic quality test: FAIL, MARGINAL, PASS
pag. 29
S2 User’s Manual
continue: A1 - MAIN TECHNICAL SPECIFICATIN
• Noise Margin Measurements: from –1 to 12 dB with special algorithm which automatically takes
into account the FEC value
• LNB L.O. frequency selection: continuous from 0 to 20.000 MHz, for “L” bands (direct IF–SAT
reading), “S”, “C”, “KU”, “KA”.
• QPSK standard selection: DVB/DSS
NET. ID. and MPEG Service/Programme list
• Provides the name of the programmes (Services) the bouquet and transponder names the encryption system, orbitall position and date.
SAT SPECTRUM ANALYSIS
• Frequency band: 930–2250 MHz
• Span: 50–100–200–500–FULL
• dB/div: 5
• Display dynamic range: >30 dB
• Marker measurement resolution: 0.1 dB
• Measurement filter bandwidth: 4 MHz at –3 dB
• Reference level: from 0 to 120 dBµV, from –60 dBmV to +60 dBmV
• Reference level settings: automatic and manual adjustable
• Other selectable spectrum modes:
– MAX HOLD (peak hold)
– SAT POINTING: automatic optimum setting for satellite dish alignment
OTHERS
• Buzzer: Level or Quality according to measurement mode (with on/off Key)
• Power Supply:
– Built in rechargeable batteries: 7,2 V x 2,5 Ah (Ni–MH)
– Volage load: 12 Vca or 12 Vcc (1 A), (connector: Ø 5,5 x 2,2)
– AC/AC adapter : 230 Vac, output: 12 Vac (supplied)
• Battery duration at 25°C: 4 hours depending on LNB consumption (9 hours optional)
• Low Battery indicator: with acoustic signalling and visual indication on graphic display and automatic meter power down by microcontroller
• Indication of battery status charge: always shown on display
• Battery recharge time: 1 hour for approx 50% capacity, 3/6 hours for full charge
• Instrument size: H 80 x L 225 x DD 215 mm
• Instrument weight: 1.3 kg with batteries, bag and accessories
• Casing structure: ABS plastic housing rain-dust and shock proof
• USB interface: for PC interfacing; possibility of SW up-grades downloaded from internet, (memory plan configuration, printouts etc optional)
• B/W graphic display: 64 x 128 pixel
• Auto-Off timer: after 5 or 10 min without use (selectable on/off, always re-starts from last function)
• RF input overload protection: electronic, up to 60 Vac
pag. 30
S2 User’s Manual
A2 - ACCESSORIES
INCLUSIVE ACCESSORIES
• TRASF-MKA41: Adapter input 230 Vac, output 12 V, 1A
• CNN-F-0150: interchangeable F - F double female input connector
• TRACOLLA-50-GI: Shoulder strap
• VALIGIA-50-NE-S: Protective shock proof ABS carryng Bag for transportation
• CAVO-USB-AM-BM: USB cable to connect S2 to PC for software up-grades via
Internet. Length 180 cm
• CA-12: Vehicle cigarette lighter adapter (Input 12 Vdc, output 12 Vdc)
OPTIONAL ACCESSORIES
• DiSEqC-SWI-2-01: Two way DiSEqC switch for dual LNB dish pointing
• 1BAT-PACK-DSTEX: Extra power Ni - MH 4,5 A battery pack
• TRA-FFEM-CEIFEM: Interchangeable “F” female/ “IEC” female input connector
• TRA-BNCF-FFEM: Interchangeable “F” female/ “BNC” female input connector
• TRA-FFEM-NFEM: Interchangeable “F” female/ “N” female input connector
• TRASF-HKDH40-22: Universal AC/DC adapter, 110/230 Vac with interchangeable power cord
• RIGHTS-SMART-1: Authorisation code for SMART PRO PC management SW
pag. 31
S2 User’s Manual
A3 - SMART PROGRAMME
HOW TO INSTALL THE SMART PRO PROGRAM IN YOUR PC
- Download the S.M.A.R.T. program from the ROVER website (www.roverinstruments.
it) on the product support page, to your computer desktop. The file containing the
SMART program is zipped and can unzipped using the Unzip® or Winzip® computer
programs.
- The unzip program will ask for a password, which can be obtained by contacting ROVER by telephone or e-mail [email protected]. You will be asked to supply your
instrument’s serial number.
- Open the SETUP file in the Kit Installation Smart folder.
- Follow the automatic procedure which will guide you through the installation: you can
modify the installation folder; if the name of this folder is not modified, the program
creates a folder called SmSw.
- The SMART program inserts an icon in the program list of your computer and an icon
connecting to your desktop. By clicking on this icon, the SMART program strarts up
automatically.
HOW TO DOWNLOAD THE EXACT UPGRADE FROM INTERNET
- Download the upgrade from internet (www.roverinstruments.it), by going to the product
support page and selecting the upgrade relative to your instrument. Save it on your
computer desktop.
- The file containing the upgrade firmware is zipped and must be unzipped using computer programs Unzip® or Winzip®.
- The unzip program will ask for a password, which can be obtained by contacting ROVER by telephone or e-mail [email protected]. You will be asked to supply your
instrument’s serial number.
- Expand the upgrade file and save it on your PC (for example on your desktop).
pag. 32
S2 User’s Manual
1.0 HOW TO CONNECT YOUR MEASURING INSTRUMENT TO A PC
This procedure allows the SMART program to recognise the instrument connected to
the PC.
1.1.1 CONNECTION BETWEEN INSTRUMENT & PC
a) Connect the measurement instruments to the mains and then power on.
b) Connect the USB cable first to the measurement instrument and after to the PC
c) Start the SMART program.
d) From the instrument bar, click on the words “Instrument” and “Connect
Instrument”, (Figure 1) (see paragraph 1.3 “Warning”)
e) In the “Instrument Type” window, select your instrument’s model and con
firm your selection using the key “OK”.
f) The “Port Setting” window will open (serial port configuration) where you can
select the port number (COM) to which your instrument is connected. The
other settings can be changed, but it is best not to use the preselected ones.
Confirm by pressing the “OK” key to activate instrument connection.
Figure 1
1.2 NOTES
a) If the procedure is carried out correctly, the bar below will show the instru
ment data (instrument model, serial number and firmware version).
1.3 WARNINGS
a) If the up-grade procedure does not work, check connections and repeat the
operation.
b) If this operation continues to fail, contact Ro.Ve.R Laboratories SpA
([email protected]).
pag. 33
S2 User’s Manual
2.0 FIRMWARE UPGRADES
This procedure allows you to upgrade your meter with the last Firmware version available on our website.
2.1.1 HOW TO DOWNLOAD FIRMWARE UP-GRADES FROM INTERNET
a) Download from internet web site www.roverinstruments.it, in the Technical
support section, the up-grade regarding your instrument and save it on the
desktop of your PC,
b) The file containing the firmware is zipped; un-zip it using computer programs
Unzip®* or Winzip®*,
c) The unzip program will ask for a password which is provided directly by
Ro.Ve.R Laboratories SpA, by telephone or e-mail (info@roverinstrumentsit);
remember to provide your meter’s serial number,
d) Unzip the up-grade file and save it on your PC (for example on your desktop).
2.1.2 HOW TO PREPARE YOUR INSTRUMENT FOR AN UP-GRADE
a) Connect the measurement instruments to the mains and then power on.
b) Connect the USB cable first to the measurement instrument and after to the PC
2.1.3 HOW TO UP-GRADE YOUR INSTRUMENT USING A PC
a) Start up the Smart Pro program,
b) Click on “Instrument” and “Up grade Firmware” in the instrument bar, (Also
see paragraph 2.3 WARNINGS)
c) In the “Open” window, select the file you want to use for the up-grade and
confirm your selection by pressing the “open” key,
d) The “Upgrade Firmware” window will open where you can select the
instrument model and the port (COM) to which it is connected,
e) Press “Command Upgrade” to start the up-grade.
2.2 NOTES
a) When the up-grade has been correctly completed the PC screen will show
the words “Program Successful” and a summary window showing the
instrument settings.
b) Check the new firmware version number in the Start Up screen or self-test
windows.
2.3 WARNINGS
a) Do not use the instrument during the up-grade procedure.
b) If the up-grade procedure does not work check connections and repeat the
operation
c) If the operation continues to fail, contact Ro.Ve.R Laboratories SpA
([email protected]).
*All logos are registered by their owners.
pag. 34
S2 User’s Manual
3.0 GET SCREEN
This function allows you to transfer any data display from your instrument to a PC.
3.1.1 HOW TO TRANSFER A DISPLAY FROM INSTRUMENT TO PC
a) Connect your instrument to a PC by following the procedure described in
paragraph 1.0.
b) Click on “Tools” and “Get Screen” on the instrument bar.
c) Wait for the display to appear on the PC monitor.
3.1.2 HOW TO PRINT THE DISPLAY
a) Click on “File” on the instrument bar and select “Print Setup”.
b) Configure the print settings and press “OK” to confirm.
3.1.3 HOW TO SAVE THE DISPLAY
a) Click on “File” on the instrument bar and select “Save as”.
b) Chose a location where you want to save the file and press “Save”.
c) SMART will save the display obtained from the meter in bitmap format.
3.2 NOTES
a) Pictures are saved with file type .bmp (Bitmap),
b) Only the spectrums and measurements graphics, generated by the
instrument, can be transferred to the PC; demodulated television pictures
can not be transferred.
3.3 WARNINGS
a) If this operation continues to fail, contact Ro.Ve.R Laboratories SpA
([email protected]).
pag. 35
S2 User’s Manual
4.0 “INSTRUMENT FILE MANAGER” (DATA LOGGER TRANSFER)
This operation allows you to transfer a Data Logger from your measuring instrument to
a PC and then print it or save it in a file.
4.1.1 HOW TO TRANSFER A DATA LOGGER
a) Connect your instrument to a PC by following the procedure described in
paragraph 1.0,
b) Click on “Instrument” on the instrument bar and select “Instrument file
manager”,
c) Wait for the file list to download on the PC,
d) The folder Read File will be shown on the screen. Open the Logger folder,
e) All logger files will be listed,
f) Click twice on a file logger to visualise it
4.1.2 HOW TO PRINT A FILE LOGGER
a) Open the Logger folder,
b) Select and open the Logger file you want to print,
c) Click on “File” on the instrument bar and select “Print”,
d) Configure the print settings and press “OK” to confirm.
4.1.3 HOW TO SAVE A DATA LOGGER ON A PC
a) Open a Logger file,
b) Select and open the Logger file you want to save,
c) Click on “File” on the instrument bar and select “Save as”,
d) Chose the location where you want to save the file and press “Save”.
4.1.4 HOW TO DELETE A DATA LOGGER
a)Open the Logger folder,
b) Select from the “Instrument File Manager” window the logger file you want
to delete,
c) Press the “Delete” key in the “Instrument File Manager” window,
d) The file will be cancelled on instrument.
4.1.5 HOW TO EXPORT A DATA LOGGER IN AN EXCEL SPREADSHEET
a) Open the Logger folder,
b) Select and open the Logger file you want to export,
c) Click on “File” on the instrument bar and select “Export”,
d) In the open window, name the file and chose the location where you want
to save it,
e) Chose file type .XLS,
f) Select “Save”,
g) The Logger file will be saved in Excel format in the form of a table.
pag. 36
S2 User’s Manual
5.0 INSTRUMENT FILE MANAGER (MEMORY PLAN MANAGEMENT)
This function allows you to transfer and manage a Memory Plan on your PC in order to
be able to modify and print it.
5.1.1 HOW TO TRANSFER A MEMORY PLAN FROM YOUR METER TO A PC
a) Connect your instrument to a PC as described in paragraph 1.0
b) Click on “Instrument” on the instrument bar and select “Instrument File
Manager”.
c) Wait for the complete file list to download on to your PC.
d) The “Instrument File Manager” will appear on the screen. Open the “Mem.
Plan” folder required by clicking twice.
e) All memory files will be listed.
5.1.2 HOW TO MODIFY A MEMORY PLAN
HOW TO MODIFY AN EXISTING PROGRAM
a) Select and open the Memory file you want to edit,
b) Click twice on the line relative to the program you want to edit,
c) The program opens a window where you can modify all the parameters of
the chosen program.
HOW TO ADD A PROGRAM
a) Using the right-hand key on your mouse, click on the line you want to modify
and select “Add”,
b) Carry out the settings of the new program in the window that opens,
c)Press “Ok” to confirm the addition of a program.
5.1.3 HOW TO TRANSFER A MEMORY PLAN FROM A PC TO AN INSTRUMENT
a) Once you have carried out the modification, following the procedure described in paragraph 5.1.2, click on the “Instrument-PC” key in the MEM. PLAN
Properties section (on the right of the screen) to transfer a memory plan
from a PC to your instrument,
b) The memory plan will load in the instrument.
5.1.4 HOW TO PRINT A MEMORY PLAN
a) Select and open the Memory file you want to print (See 7.2.1),
b) Click on “Instrument” on the instrument bar and select “Print”,
c) Configure the print settings and press “OK” to confirm.
pag. 37
S2 User’s Manual
5.1.5 HOW TO SAVE A MEMORY PLAN
a) Open a Memory Plan file,
b) Click on “File” on the instrument bar and select “Save as”,
c) Chose a location where you want to save the file, give it a name and press
“Save”.
5.1.6 HOW TO DELETE A MEMORY PLAN
a) Select and open the Mem. Plan file you want to delete,
b) Press the “Delete” key in the “Instrument File Manager” window,
c) The file will also be deleted from the instrument.
5.2 NOTES
a) None
5.3 WARNINGS
a) When new memory plans are inserted, cancelled or modified and transferred
to the instrument, we suggest you carry out a Defrag in your meter. (Please
refer to the instrument’s user guide)
b) If this operation continues to fail, contact Ro.Ve.R Laboratories SpA
([email protected]).
pag. 38
S2 User’s Manual
6.0 LICENCE INFORMATION
This function allows you to insert a user licence number in your SMART program.
6.1.1 LICENCE INFORMATION
a) Start up the Smart program
b) Click “Help” on the instrument bar
c) Select “Licence Information”
d) Insert the licence number in the appropriate window
e) Press Add to include the licence number
f) Press “Ok” to close the “Licence Information” window.
6.2 NOTES
a) The Smart profezzional programme expired after 30 days from installation.
In any case the expired programme may be used to make firmware
upgrades for your meter.
b) Once the licence number is input the SMART programme may be used with
all its features.
6.3 WARNINGS
a) Ask for the licence number from Ro.Ve.R Laboratories S.p.A
([email protected])
pag. 39
S2 User’s Manual
A4 - TROUBLE SHOOTING
For all faults always call the manufacturer or the service centre in your country.
Never return the analyzer to the manufacturer before approvade and obtaining
his specific instructions.
Please find below the most common problems that could occur and which can
easily be solved:
PROBLEMS AND SOLUTIONS:
P:
S:
The analyzer does not work or work incorrectly even if it is connected
to the mains:
Verify that the green “MAINS” LED is on. If it is off verify the supplied
ac/ac adapter.
P:
S:
The batteries can not be charged:
Verify that when the meter is off the “MAINS” LED is on. Verify the
internal battery status.
P:
S:
The meter does not respond to any command:
In the rare cases that the analyzer does note respond to the front pa
nel commands, keep the ON/RESET [14] key pressed for about 10
seconds. This will reset the meter without any memory loss
(i.e. Memory Plans, Datat Loggers etc).
NOTES:
• To identify and report any faults photocopy and fill in the attached “FAULT
IDENTIFICATION FORM”. See Appendix A9.
• As the meter is very complex we strongly suggest that reapair should be
carried out only by expert staff authorized by Ro.Ve.R. Laboratories.
• The analyzer is built almost completely using SMD components and it is
there for not easy to repair: for this reason RO.Ve.R. Laboratories does not
provide any circuit diagramme.
• If the RO.Ve.R. Laboratories considers that the meter has to be sent back for
repair, photocopy and fill in the “EQUIPMENT REPAIR and or Service form”
and attach it to the meter when returning it. Appendix A10.
pag. 40
S2 User’s Manual
A5 - BATTERIES MAINTENANCE AND RECHARGE
a) In normal operational conditions the battery duration is 4 hours. This time
depends on the LNB current absortion.
b) The meter provides a visual indication on the battery charge status. In
an olmost dry battery conditions, this indication remains on the display.
This indication is shown with an icon on the bottom left side of the display.
c) The ac/ac adapter power socket [15] is located on the left side of the meter. The meter works also when it is being charged.
Always recharge the batteries using the supplied ac/ac adapter. The use of a
different AC/AC adapter may cause a permanent battery damage.
d) In order to preserve the battery change it is possible a to activate a shut
down timer in order to automatically turn off the meter when it is not used for
more than 5 or 10 minutes. For more details on this configuration possibility
see the “Menu Configuration” at section 1.1 of this User’s Manual.
pag. 41
S2 User’s Manual
A6 - FRONT PANEL DESCRIPTION
1
2
3
4
5
6
7
8
9
10
11
12
13
14
MPEG (press for 2 seconds to access the configuration menu)
Graphic display
PLAN
SAT FINDER (press for 2 seconds to access the DUAL LNB function)
SPECT (press for 2 seconds to access the SAT POINT function)
MEAS
UP (acts also as “Enter”)
DC at RF IN battery charge LED
DOWN (acts also as an “Enter”)
SELECT
MEMORY (press for 2 seconds to make a quick memorization of the tuned transponder)
HELP (press for 2 seconds to enable the BUZZER function)
DATA LOGGER (press for 2 seconds to turn on/OFF the power supply to the RF input)
On OFF switche (press for 10 seconds to reset the meter)
pag. 42
S2 User’s Manual
A7 - SIDE PANEL DESCRIPTION
15 ~ 12 Vac power feed
16 USB serial port
17 “F” RF input
pag. 43
S2 User’s Manual
A8- SERVICE NOTES AND GUARANTEE REGULATIONS
1) Rover Laboratories. S.p.A. guarantees the repair of its manufactured equipment for a period of 24 months.
2) IMPORTANT: the guarantee becomes valid when Rover Laboratories S.p.A. receives the correctly compiled warranty
coupon, or alternatively, on presentation of an invoice or receipt, clearly showing the date of purchase.
3) The guarantee covers the replacement, free of charge, of all parts, which are not functioning correctly due to manufacturing
faults.
4) The guarantee is considered void if:
a. the equipment is tampered with or repaired by non-authorized personnel;
b. damage is found, caused by the incorrect use of the equipment, without following the advice explained in the
User’s Guide accompanying the equipment;
c. damage is found caused by the use of the equipment in unsuitable working environments.
5)The following parts are not covered by the guarantee:
a. Parts subject to wear, such as aesthetics ones;
b. Batteries;
c. Bags.
6) The equipment can only be repaired by the manufacturer or by an authorised Rover Laboratories service centre.
a. Before returning the meter for repair, always contact Rover Laboratories S.p.A. or an authorised service centre
to obtain the return procedure for your analyzer.
b. When returning the meter, always send it with the following documentation attached: the fully-compiled FAULT
IDENTIFICATION FORM, a transport document and the eventual request for an estimate of repair costs.
d. Please note that the request for an estimate of repair costs must be submitted upon return of the analyser with
a written note. If the repair cost estimate is not accepted, Rover Laboratories reserves the right to charge the
customer for the estimate analysis costs.
7) Risks and costs for transport to Rover Laboratories S.p.A. must be sustained by the buyer. After repair, if the equipment is
under guarantee, Rover Laboratories S.p.A. will pay for the transport returning the goods to the customer. If the instrument
is not under guarantee, after repair, the equipment will be returned by courier service with the amount to be paid by the
customer shown in the invoice.
8) The equipment can not be replaced and the guarantee extended after the repair of a fault.
9) The guarantee does not cover compensation for direct or indirect damages of any kind to people or goods caused by the
use of the equipment and/or compensation caused by the suspension of use due to eventual repairs.
10) Rover Laboratories. S.p.A. is not responsible for eventual tampering and/or modifications that may cause the goods to no
longer adhere to the European “CE” regulations, especially regarding EMC and safety.
11) Rover Laboratories instruments are recognised and are fully compliant with DVB regulations and specifications
(ETS 300 421 – 12 / 94) and are consequently marked with the DVB logo and registered with id. N. 3088.
pag. 44
S2 User’s Manual
A9 - FAULT IDENTIFICATION FORM
BEFORE returning any goods for repair contact RO.VE.R. S.p.A. Italy to recive all relevant shipment modalities; the goods will be refused if not shipped
according to our instructions.
Phopocopy this form anc keep the original copy. Fill in only SECTION A of the photocopy and attach t to faulty equipment which you are returning to
RO.VE.R for repair. This will facilitate the repair and/or service of yuor equipment, board or spare part.
RO.VE.R. will complete SECTION B and return this form to you with the repaired equipment.
SECTION A:
TO BE COMPLETED BY THE CUSTOMER Invoice N.: ....................... Date ....../....../.......
NAME OF DISTRIBUTOR or INSTALLER:
• Company:..............................................................................................• Contact Name:............................................................................................
• Road:............................................................• N°:.................• City:...........................................................• ZIP Code:................................................
• VAT No:..........................................................................• Tel:..............................................................• Fax................................................................
• E-mail:.......................................................................................................................• Mobile.......................................................................................
• Mod./Codie (in the case of a single board):.........................................• Description:................................................• Serial N.:..................................................
• Accessories included in the delivery, please list: • Q.ty:...................• Description.........................................................................................................
.......................................................................................................................................................................................................................................
• If you are sending a single board or part of a piece of equipment, please indicate with a tick (X) in the reletive box, whether is a:
Board/module or sub-section NOT to be returned to the costumer and therefore RO.VE.R. property /because it has already been replaced previously.
Board/module or sub.section to be returned to the customer (to maintain a perfect compatibility with the product from which it was removed
and it must not be re-calibrated)
• Description of fault or problem encountered by the customer:....................................................................................................................................
.......................................................................................................................................................................................................................................
.....................................................................................................................................................................................................................................
• N.B. If you are sending more than one board, please include a separate “Repair and/or Service Form” for each board
SECTION B:
• Model or code:............................................................• Arrival date at RO.VE.R.:............................• Invoice N. .......................
• Repair technician:........................................................................................................• Repair Date:.........................................
• Iten repaired under guarantee:
YES
NO: because guarantee has expired.
NO: because product was tampered with
.
• Description of fault or problem found by the RO.VE.R. technician:............................................................................................
......................................................................................................................................................................................................
......................................................................................................................................................................................................
• Probable causa of the fault:.......................................................................................................................................................
......................................................................................................................................................................................................
......................................................................................................................................................................................................
• Measures taken by RO.VE.R. to avoid repetition of the fault:.....................................................................................................
......................................................................................................................................................................................................
......................................................................................................................................................................................................
• product out of production:
YES
NO • Fault experienced before:
YES
NO
LIST OF COMPONENTS / PART REPLACED AND DESCRIPTION OF REPAIR WOR UNDERTAKEN
Q.TY’
RO.VE.R CODE
DESCRIPTION
pag. 45
S2 User’s Manual
A10 - STANDARD ROVER EQUIPMENT REPAIR AND OR SERVICE FORM
Only for digital model S2
• Customer:.......................................................................
• Tel. No.:..........................................................................
• Instrument Mod.:............................................................
• Software version:...........................................................
• Contact person:...........................................................
• Fax No:.......................................................................
• Serial No:....................................................................
(shown on the display when the instrument is turned)
Please would you kindly answer the following questions to facilitate fault identification (tick the appropriate boxes)
IN WHICH CONDITION DID THE FAULT OCCUR?
Instrument turned off & being recharged
Whilst turning on the instrument
When the instrument was cold
When the instrument was hot
After an accidental fall
Other.......................................
IN THE FAULT ALWAYS PRESENT OR DOES IT ONLY OCCUR IN THE FOLLOWING CONDITIONS?
When tapping on the casing
When tr Instrum. is powered using internal batteries
When the instrum. is powered using the AC adapter
When the instrument has just been turned on
When the instrument is cold
When the instrument is hot
HAS THE INSTRUMENTS HAD ANY MECHANICAL BREAKAGES?
To the front panel
To the back panel
Dents in the casing
TURN OFF THE INSTRUMENT & POWER IT USING THE AC/AC ADAPTER, WHICH OF THE FOLLOWING LEDS ARE ON?
The “MAINS” LED in the front panel
NO LEDs
TURN ON THE INSTRUMENT & POWER IT USING THE AC/AC ADAPTER, WHICH OF THE FOLLOWING FAULTS OCCUR?
The keys do not push down well
The LEDs do not light up with the correct luminosity, etc. (please specify fault in the space below)
WHEN DOES THE FAULT OCCUR?
During the analog C/N measurement
During the digital C/N measurement
With all the channels
During the analog level measurement
During the digital power measurement
With only some channels, e.g.................
In spectrum mode
During the A/V ratio measurement
PLEASE INDICATE IN THE SPACE PROVIDED WHAT IS SHOWN ON THE ALPHANUMERICAL DISPLAY:
If the error occurs when turning on the instruments
If the error occurs at another stage
DO THE KNOBS FUNCTION CORRECTLY WHEN ADJUSTING THE PARAMETERS
yes
NO (If “NO” please clearly specify the fault in the space provided below)
ARE THERE PROBLEMS WITH THE LOUDSPEAKER?
There is no sound
The sound is distorted
ARE THERE ANY OF THE FOLLOWING PROBLEMS WITH THE MONITOR SREEN (if present)?
There is no picture
The monitor screen is while
The picture is distorted
The monitor screen is black
The sound is disturbed
There is a lot of interference on the picture
Other (clearly specify in the space provided below)
ARE THERE ANY OF THE FOLLOWING PROBLEMS WITH THE SCART SOKET (if present)?
The videm or audio outputs are not present
The video and audio inputs are not functioning
ARE THERE PROBLEMS WITH THE RS 232 -USB SOCKET (if present))?
It does not print
It does not connect ti the PC
IMPORTANT: Please clearly describe any further information which may be useful to us in order to identify the fault:
...............................................................................................................................................................................................................................................
...............................................................................................................................................................................................................................................
...............................................................................................................................................................................................................................................
Return to ROVER LABORATORIES S.p.A. - Istruments Service Laboratory - FAX +39.030.9906894
(Photocopy this page and keep the original copy. Attach a copy to the instruments in need ofo repair)
pag. 46
S2 User’s Manual
A-11 DISPOSAL OF ELECTRONIC EQUIPMENT RULES
English
Disposal of Old Electrical & Electronic Equipment (Applicable in the European Union and other European countries with separate collection system.)
The symbol on the product or no its packaging indicates that this product shall not be treated as waste. Instead it shall be handed over the apllicable collection point for the recycling of electrical and
electronic equipment. By ensuring this product is disposed of correctly, you will help prevent potential negative consequences for the environment and human health, which could otherwise be caused by inppropriate waste handling of this product. The recycling of materials will help to conserve
natural resources. For more detailed information about recycling of this product, please contact your
local city office, your household wate disposal service or the shop where you purchased the product
pag. 47
ROVER LABORTORIES S.p.A.
Via Parini 2/4 - 25010 Colombare di Sirmione (BS) ITALY
Tel. ++39.030.91981 • Fax ++39.030.9906894
[email protected] • www.roverinstruments.com
MADE IN ITALY