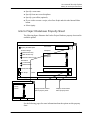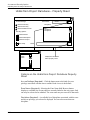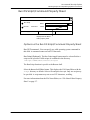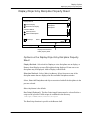
1
EDMControl
User Guide and Menu Reference
CADDS 5 Revision 9.0
DOC36839-002
©Copyright
September 1999
All Rights Reserved
The information and drawings contained herein are the sole property of Computervision Corporation, or its third
party licensor, furnished under license only, and authorized for use only by the licensee. Use of this document is
reserved exclusively for Computervision customers and personnel, and is provided under license only.
Reproduction or distribution of this material in whole or in part is forbidden without the express written consent of
Computervision Corporation.Copyright ©1994 Computervision Corporation. Unpublished-rights reserved under
the copyright laws of the United States.
Use, duplication, or disclosure by the Government is subject to restrictions as set forth in subparagraph (c)(1)(ii)
of the Rights in Technical Data and Computer Software clause at DFARS 252.227-7013 or FAR52.227-19(c)(1)
and (2), as applicable. Contractor is Computervision Corp. Bedford, MA 01730
The following trademarks of Computervision Corporation are registered with the USPTO:
Advanced Surface Design, CADDS, CADDShade, Computervision, CV-COMPUTERVISION Logo, CV (stylized
letters), CVMOS, CVware, Designer, HARNESSDESIGN, MEDUSA, microDRAFT, Personal Designer, Personal
Machinist and VersaCAD.
The following are trademarks of Computervision Corporation:
CV, CVaec, CVdesign, CV-DORS, CV-GEAR, CV Liberator, CVMAC, CVNC, CVselect, DesignView,
DIMENSION III, EDMClient, EDMControl, EDMNavigator, EDMVault, ISSM, MEDEA, MEDUSA DESIGN,
PlasticsLab, Product Structure Navigator, STRESSLAB, ThermaLab, VirtualStation. Computervision Services is
a service mark of Computervision Corporation.
The following are trademarks of others:
•
•
•
•
•
•
•
•
•
•
•
•
•
•
•
•
•
•
•
•
•
•
•
•
•
ALPHA, DEC, DECstation, ULTRIX and VAX are trademarks of Digital Equipment Corporation.
Apollo, Hewlett Packard, HP, HP-GL/2 and HP-UX are trademarks of Hewlett-Packard Company.
BRAVO is a trademark of Schlumberger Technologies, Inc.
CADAM is a trademark of Cadam, Inc.
CADRA-III is a trademark of Adra Systems, Inc.
CalComp is a trademark of Calcomp, Inc.
CATIA is a trademark of Dassault Systems, Inc.
DAZIX and Intergraph are trademarks of Intergraph Corporation.
HOOPS is a trademark of Autodesk, Inc.
Inventor and IRIS are trademarks of Silicon Graphics, Inc.
Interleaf is a trademark of Interleaf, Inc.
MICROSOFT and WINDOWS are trademarks of Microsoft Corporation.
MicroStation is a trademark of Bentley Systems, an Intergraph affiliate.
Motorola is a trademark of Motorola, Inc.
PATRAN is a trademark of PDA Engineering.
PostScript is a trademark of Adobe Systems, Inc.
SDRC is a trademark of Structural Dynamics Research Corporation.
SmartCAM is a trademark of Point Control Company.
SPARC and SPARCclassic are trademarks of SPARC International.
Sun, OpenWindows, Solaris, SPARCstation and SunOS are trademarks of Sun Microsystems, Inc.
UNIGRAPHICS is a trademark of McDonnell Douglas Corporation.
UNIX is a trademark of UNIX System Laboratories, a subsidiary of Novell, Inc.
Valisys is a trademark of the Valisys Corporation.
Versatec is a trademark of Versatec, Inc.
X Window System is a trademark of Massachusetts Institute of Technology.
Other marks are trademarks of their respective owners.
Rev. 11/94
Table of Contents
Preface
Your Comments _____________________________________________
Online User Documentation __________________________________
Related Documents _________________________________________
Book Conventions ___________________________________________
xi
xi
xi
xii
Overview of the EDMControl Options
Introduction_____________________________________________________ 1-2
Accessing EDMControl Options __________________________________ 1-3
Procedure ________________________________________________ 1-3
Change Management Command Palette ________________________ 1-5
Description ________________________________________________
Access and Security Option ________________________________
Display Option ____________________________________________
Change Option ___________________________________________
Zones Option ______________________________________________
Queries Option ____________________________________________
Administration Option _____________________________________
1-5
1-5
1-6
1-6
1-6
1-6
1-7
EDMControl Property Sheets _____________________________________ 1-8
Editor Button _________________________________________________ 1-8
EDMControl UserGuide and Menu Reference
Contents-iii
Access and Security Option
Introduction _____________________________________________________ 2-2
Overview of the Access and Security Option ______________________ 2-3
Description_________________________________________________ 2-3
Getting to the Access and Security Option _____________________ 2-3
Procedure _________________________________________________ 2-3
Options on the Access and Security Menu ______________________
Connect to Database ______________________________________
Disconnect From Database _________________________________
Link to Database ___________________________________________
Unlink From Database ______________________________________
Run OS Script/Command ___________________________________
Verify Link to Database _____________________________________
2-4
2-4
2-4
2-4
2-4
2-4
2-4
Connecting to the Project Database ______________________________ 2-5
Description_________________________________________________ 2-5
Getting to the Connect to Database... Option __________________ 2-5
Procedure _________________________________________________ 2-5
Connect to Project Database Property Sheet ___________________ 2-6
Options on the Connect to Database Property Sheet ________ 2-6
File Name Editor Property Sheet ________________________________ 2-7
Using the Property Sheet ____________________________________ 2-7
Disconnecting from the Project Database _________________________ 2-9
Description_________________________________________________ 2-9
Getting to the Disconnect from Database Option _______________ 2-9
Procedure _________________________________________________ 2-9
Linking to the Project Database _________________________________ 2-10
Description_______________________________________________ 2-10
Getting to the Link to Database... Option _____________________ 2-10
Procedure _______________________________________________ 2-10
Link to Project Database Property Sheet ______________________ 2-11
Options on the Link to Project Database Property Sheet ____ 2-12
Part Offset Options Property Sheet ___________________________ 2-13
Unlinking from the Project Database ____________________________ 2-15
Description_______________________________________________ 2-15
Contents-iv
EDMControl UserGuide and Menu Reference
Getting to the Unlink from Database... Option ________________ 2-15
Procedure _______________________________________________ 2-15
Unlink from Project Database... Property Sheet ________________ 2-16
Options on the Unlink from Project Database Property Sheet 2-16
Running Scripts and Operating System Commands_______________ 2-18
Description _______________________________________________ 2-18
Getting to the Run OS Script/Command... Option _____________ 2-18
Procedure _______________________________________________ 2-18
Run OS Script/Command Property Sheet _____________________ 2-19
Options on the Run OS Script/Command Property Sheet ____ 2-19
Verifying your Database Link ____________________________________ 2-20
Description _______________________________________________ 2-20
Getting to the Verify Link to Database Option_________________ 2-20
Procedure _______________________________________________ 2-21
Display Option
Introduction_____________________________________________________ 3-2
Overview of the Display Option __________________________________ 3-3
Description ________________________________________________ 3-3
Getting to the Display Option _________________________________ 3-3
Procedure ________________________________________________ 3-3
Options on the Display Menu__________________________________
Display Objects by Part ____________________________________
Display Objects by Discipline _______________________________
Display Objects by Zone ___________________________________
Display Zone Boundaries ___________________________________
Restore Viewed Objects ___________________________________
3-3
3-3
3-4
3-4
3-4
3-4
Displaying Objects by Part _______________________________________ 3-5
Description ________________________________________________ 3-5
Getting to the Display by Part... Option ________________________ 3-5
Procedure ________________________________________________ 3-5
Display Objects by Part Property Sheet ________________________ 3-7
Options on the Display Objects by Part Property Sheet_______ 3-7
File Name Editor Property Sheet _______________________________ 3-9
EDMControl UserGuide and Menu Reference
Contents-v
Using the Property Sheet ____________________________________ 3-9
Displaying Objects by Discipline_________________________________ 3-10
Description_______________________________________________ 3-10
Getting to the Display by Discipline... Option__________________ 3-10
Procedure _______________________________________________ 3-10
Display Objects by Discipline Property Sheet __________________ 3-11
Options on the Display Objects by Discipline Property Sheet 3-11
Displaying Objects by Zone _____________________________________ 3-13
Description_______________________________________________ 3-13
Getting to the Display by Zone... Option ______________________ 3-13
Procedure _______________________________________________ 3-14
Display Objects by Zone Property Sheet ______________________ 3-15
Options on the Display Objects by Zone Property Sheet_____ 3-15
Displaying Zone Boundaries _____________________________________ 3-17
Description_______________________________________________ 3-17
Getting to the Display Zones... Option ________________________ 3-17
Procedure _______________________________________________ 3-17
Display Zone Boundaries Property Sheet ______________________ 3-18
Options on the Display Zones Property Sheet _______________ 3-18
Restoring Objects ______________________________________________ 3-20
Description_______________________________________________ 3-20
Getting to the Restore Objects Option_____________________ 3-20
Change Option
Introduction _____________________________________________________ 4-2
Overview of the Change Option __________________________________ 4-3
Description_________________________________________________ 4-3
Getting to the Change Option _________________________________ 4-3
Procedure _________________________________________________ 4-3
Options on the Change Menu _________________________________
Post Snapshot Only _________________________________________
Post Changes ______________________________________________
Highlight Changes __________________________________________
Dehighlight Changes _______________________________________
Contents-vi
4-3
4-3
4-4
4-4
4-4
EDMControl UserGuide and Menu Reference
Update Changes __________________________________________ 4-4
Posting a Snapshot ______________________________________________ 4-5
Description ________________________________________________ 4-5
Getting to the Post Snapshot Only Option______________________ 4-5
Procedure ________________________________________________ 4-5
Posting Changes to the Project Database ________________________ 4-6
Description ________________________________________________ 4-6
Getting to the Post Changes... Option _________________________ 4-6
Procedure ________________________________________________ 4-6
Post Changes to Project Database Property Sheet _____________ 4-7
Options on the Post Changes to Project Database Property Sheet
4-7
File Name Editor Property Sheet _______________________________ 4-9
Using the Property Sheet ___________________________________ 4-9
Graphically Highlighting Changes _______________________________ 4-10
Description _______________________________________________ 4-10
Getting to the Highlight Changes... Option ___________________ 4-10
Procedure _______________________________________________ 4-10
Highlight Project Database Changes Property Sheet __________ 4-12
Options on the Highlight Project Database Changes Property
Sheet ____________________________________________________ 4-12
Dehighlighting Change Graphics _______________________________ 4-15
Description _______________________________________________ 4-15
Getting to the Dehighlight Changes... Option _________________ 4-15
Procedure _______________________________________________ 4-15
Dehighlight Project Database Changes Property Sheet ________ 4-16
Options on the Dehighlight Changes Property Sheet________ 4-16
Updating Objects Changed by Others __________________________ 4-17
Description _______________________________________________ 4-17
Getting to the Update Changes... Option_____________________ 4-17
Procedure _______________________________________________ 4-17
Update Changes from Project Database Property Sheet ______ 4-18
Options on the Update Changes from Project Database Property
Sheet ____________________________________________________ 4-18
EDMControl UserGuide and Menu Reference
Contents-vii
Zone Option
Introduction _____________________________________________________ 5-2
Overview of the Zone Option _____________________________________ 5-3
Description_________________________________________________ 5-3
Getting to the Zone Option ____________________________________ 5-3
Procedure _________________________________________________ 5-3
Options on the Zone Menu_____________________________________
Display Zone Boundaries ____________________________________
Create Project Zones _______________________________________
Delete Project Zones________________________________________
5-4
5-4
5-4
5-4
Displaying Zone Boundaries _______________________________________ 5-5
Description_________________________________________________ 5-5
Getting to the Display Zones... Option __________________________ 5-5
Procedure _________________________________________________ 5-5
Display Zone Boundaries Property Sheet ________________________ 5-6
Options on the Display Zones Property Sheet _________________ 5-6
File Name Editor Property Sheet ________________________________ 5-7
Using the Property Sheet ____________________________________ 5-7
Creating Project Zones ___________________________________________ 5-8
Description_________________________________________________ 5-8
Getting to the Create Zones... Option __________________________ 5-8
Procedure _________________________________________________ 5-8
Create Project Zones Property Sheet ___________________________ 5-9
Options on the Create Project Zones Property Sheet__________ 5-9
Deleting Project Zones__________________________________________ 5-11
Description_______________________________________________ 5-11
Getting to the Delete Zones... Option_________________________ 5-11
Procedure _______________________________________________ 5-11
Delete Project Zones Property Sheet __________________________ 5-12
Options on the Delete Project Zones Property Sheet ________ 5-12
Query Option
Introduction _____________________________________________________ 6-2
Contents-viii
EDMControl UserGuide and Menu Reference
Overview of the Query Option ___________________________________ 6-3
Description ________________________________________________ 6-3
Getting to the Query Option __________________________________ 6-3
Procedure ________________________________________________ 6-3
Options on the Query Menu___________________________________
List Change Status _________________________________________
Query by Zone and Discipline ______________________________
User Queries _______________________________________________
6-4
6-4
6-4
6-4
Listing the Status of Linked Parts __________________________________ 6-5
Description ________________________________________________ 6-5
Getting to the List Change Status Option ______________________ 6-5
Procedure ________________________________________________ 6-5
Example of a Typical Status Report ____________________________ 6-6
Providing Work Table Data _______________________________________ 6-7
Description ________________________________________________ 6-7
Getting to the Query by Zone/Discipline... Option ______________ 6-7
Procedure ________________________________________________ 6-7
Query by Zone and Discipline Property Sheet __________________ 6-8
Options on the Query by Zone and Discipline Property Sheet_ 6-8
File Name Editor Property Sheet _______________________________ 6-9
Using the Property Sheet ___________________________________ 6-9
Obtaining Data from the Database _____________________________ 6-10
Description _______________________________________________ 6-10
Valid User Queries ________________________________________ 6-10
Getting to the User Queries... Option _________________________ 6-11
Procedure _______________________________________________ 6-11
Query Project Database Property Sheet ______________________ 6-12
Options on the Query Project Database Property Sheet ____ 6-12
Procedure _______________________________________________ 6-13
Query Filter Options Property Sheet ___________________________ 6-14
Options on the Query Filter Options Property Sheet _________ 6-14
Example of a Filtered Query Displayed in the Query Result Box _ 6-15
Glossary
EDMControl UserGuide and Menu Reference
Contents-ix
Preface
The EDMControl User Guide and Menu Reference gives you a quick reference to
the menus and property sheets on the Graphical User Interface. It tells you the type
of information that needs to be entered in which fields, and the criteria for each
entry.
Your Comments
We welcome your suggestions and comments about this or any other
documentation. Send your comments in e-mail to [email protected]
Online User Documentation
Online documentation is provided in HTML. PostScript files of each book in the
online collection are also provided. You can print the PostScript files for hard copy
books. The documentation media contains the PostScript files.
Related Documents
The following documents may be helpful as you use EDMControl User Guide and
Menu Reference:
• Understanding EDMControl
• Understanding EDMInformation
• EDMInformation User Guide and Menu Reference
• EDMControl Administrator Guide
• EDMInformation Administrator Guide
EDMControl UserGuide and Menu Reference
xi
Preface
Book Conventions
The following table illustrates and explains conventions used in writing about
CADDS applications.
Use of the Convention Examples
Menu selections and
options
List Section option, Specify Layer
field, File menu
Explanation
Indicates a selection you must make from a
menu or property sheet or a text field that you
must fill in.
Marks a location or entity selection in graphic
examples.
Enter the text in a CADDS text field or on any
command line.
User-selected graphic
X, d1 or P1
location
User input in CADDS text
cvaec.hd.data.param
fields and on any command
line
tar -xvf /dev/rst0
System output
Binary transfer complete. Indicates system responses in the CADDS text
window or on any command line.
Variable in user input
tar -cvf /dev/rst0 filename Replace the variable with an appropriate
substitute; for example, replace filename with an
actual file name.
Variable in text
Indicates a variable that requires an appropriate
tagname
substitute when used in a real operation; for
example, replace tagname with an actual tag
name.
CADDS commands and
INSERT LINE TANTO
Shows CADDS commands and modifiers as they
modifiers
appear in the command line interface.
Text string
"SRFGROUPA" or ’SRFGROUPA’ Shows text strings. You must enclose text string
with single or double quotation marks.
Integer
Supply an integer for the n.
n
Real number
Supply a real number for the x.
x
Indicates the root (superuser) prompt on
#
# mkdir /cdrom
command lines.
Indicates the C shell prompt on command lines.
%
% rlogin remote_system_name
$
xii
-l root
$ rlogin remote_system_name
-l root
Indicates the Bourne shell prompt on command
lines.
EDMControl UserGuide and Menu Reference
Chapter 1
Overview of the EDMControl
Options
This chapter describes the following:
• Introduction
• Accessing EDMControl Options
• Change Management Command Palette
• EDMControl Property Sheets
EDMControl UserGuide and Menu Reference
1-1
Overview of the EDMControl Options
Introduction
Introduction
This chapter describes how licensed users access the Graphical User Interface
(GUI) for EDMControl. EDMControl is available from all CADDS 5 Explicit
environments, and its features are context sensitive.
1-2
EDMControl UserGuide and Menu Reference
Overview of the EDMControl Options
Accessing EDMControl Options
Accessing EDMControl Options
EDMControl options are available from the Utility Environment Management
pulldown menu located on the top bar of all Explicit environments.
Procedure
1.
Select Utility on the Environment Management menu area.
Result: The Utility pulldown menu appears, as illustrated on the next page.
EDMControl UserGuide and Menu Reference
1-3
Overview of the EDMControl Options
Accessing EDMControl Options
2.
Select CHANGE MANAGEMENT from the Utility pulldown menu to display the
Change Management command palette.
See the following pages for more information about the CHANGE
MANAGEMENT command palette.
1-4
EDMControl UserGuide and Menu Reference
Overview of the EDMControl Options
Change Management Command Palette
Change Management Command Palette
Description
All EDMControl options are accessible from the CHANGE MANAGEMENT
command palette, shown below. All options are logically grouped together into the
following areas:
• Access and Security
• Display
• Change
• Zones
• Queries
• Administration
The options available from the Change Management command palette are briefly
described on the following pages. See the following chapters for a more detailed
description of the options.
Access and Security Option
This option is always available; it is the only way to connect to the Project
Database. The Access and Security option gives you access to these suboptions:
• Connect to Database
• Disconnect from Database
• Link to Database
EDMControl UserGuide and Menu Reference
1-5
Overview of the EDMControl Options
Change Management Command Palette
• Unlink from Database
• Run OS Command
• Verify Link to Database
Display Option
This option is only valid after you are connected to the Project Database. The
Display option gives you access to these suboptions:
• Display by Part
• Display by Discipline
• Display by Zone
• Display Zones
• Restore Objects
Change Option
This option is only valid after you are connected to the Project Database. The
Change option gives you access to these suboptions:
• Post Snapshot Only
• Post Changes
• Highlight Changes
• Dehighlight Changes
• Update Changes
Zones Option
This option is only valid after you are connected to the Project Database. The
Zones option gives you access to these suboptions:
• Display Zones
• Create Zones
• Delete Zones
Queries Option
This option is always available. The Queries option gives you access to these
suboptions:
• List Change Status
1-6
EDMControl UserGuide and Menu Reference
Overview of the EDMControl Options
Change Management Command Palette
• Query by Zone/Discipline
• User Queries
Administration Option
This option is always available. Change Management provides built-in checks for
the necessary privileges.
The Administration option provides access to these suboptions:
• Change Management Installation
• Setup and Maintenance
• Administrative Utilities
• Administrative Queries
The EDMControl administrative options and suboptions are not discussed in this
book. For more information about the Administration options, see the
EDMControl Administrator Guide.
Please note: The Administration Option is primarily for the use of the
management and administrative team, or its authorized representatives, and not for
the use of the design team end user.
EDMControl UserGuide and Menu Reference
1-7
Overview of the EDMControl Options
EDMControl Property Sheets
EDMControl Property Sheets
When you select an option from a Change Management menu, the option either
performs a direct action or displays a property sheet. For example, the Access and
Security menu is shown below.
The menu options followed by three dots (. . .) display a property sheet when
selected. The menu options that are not followed by three dots perform a direct
action when selected.
Editor Button
Change Management property sheets have a unique feature called the Editor
button. (Basic information about using CADDS 5 property sheets can be found in
the Explicit Modeling User Guide.)
Some fields on property sheets display scrolling lists of valid selections for that
field. To access such a list, an Editor button is provided next to the field.
For example, the following is a field on a property sheet:
Select the empty field to type in a user name.
1-8
EDMControl UserGuide and Menu Reference
Overview of the EDMControl Options
EDMControl Property Sheets
Select the Editor button (with the three dots) to display a scrolling list of valid
users. When you select a user name on the list, it is automatically displayed in the
field to the left of the Editor button.
EDMControl UserGuide and Menu Reference
1-9
Chapter 2
Access and Security Option
The property sheet associated with each of the menu items is described in this
chapter.
• Introduction
• Overview of the Access and Security Option
• Connecting to the Project Database
• Disconnecting from the Project Database
• Linking to the Project Database
• Unlinking from the Project Database
• Running Scripts and Operating System Commands
• Verifying your Database Link
EDMControl User Guide and Menu Reference
2-1
Access and Security Option
Introduction
Introduction
Selecting the Access and Security option displays the menu illustrated below.
These menu selections affect your interaction with the project database.
Change Management
Admin
Connect to Database. . .
Disconnect from Database
Link to Database. . .
Unlink from Database. . .
Run OS Script/Command. .
Verify Link to Database
2-2
EDMControl User Guide and Menu Reference
Access and Security Option
Overview of the Access and Security Option
Overview of the Access and Security Option
Selecting the Access and Security option displays a pulldown menu. Each menu
option either executes a direct action or displays a property sheet.
Description
The Access and Security pulldown menu includes options for the following tasks:
• Connecting to the project database
• Disconnecting from the project database
• Linking to the project database
• Unlinking from the project database
• Running scripts and OS commands
• Verifying your database link
Getting to the Access and Security Option
1.
Select Utility on the Environment Management area of the top bar.
2.
Select CHANGE MANAGEMENT on the Utility pulldown menu.
Procedure
1.
Select the Access and Security option on the Change Management menu.
2.
Select the desired option from the Access and Security pulldown menu.
See the following pages for more information on the options in this procedure.
EDMControl User Guide and Menu Reference
2-3
Access and Security Option
Overview of the Access and Security Option
Options on the Access and Security Menu
Connect to Database
Displays a property sheet that enables you to connect to a project. This option is
always available because you can connect to another project, user, or group
without first disconnecting from the initial project; the system disconnects the first
project for you.
Disconnect From Database
This is a direct action option and is only available if you are connected to the
Project Database. Always disconnect when you are not working with the
associated database, because there are a limited number of users who can
concurrently access it.
Link to Database
Displays a property sheet that enables you to link to a project. This option is only
available if you are connected to a project and a part is active.
Unlink From Database
Displays a property sheet that enables you to unlink from a project. This option is
only available if you are connected to a project, a part is active, and the active part
is linked.
Run OS Script/Command
Displays a property sheet that enables you to execute a script or command at the
system level. This option is available at all times.
Verify Link to Database
This is a direct action option that verifies linkage to the associated database. This
option is available if you are connected to the Project Database and your active
part is linked.
2-4
EDMControl User Guide and Menu Reference
Access and Security Option
Connecting to the Project Database
Connecting to the Project Database
It is necessary to be connected to the project database before any Change
Management activities can begin.
Description
When working within Change Management, you must first be connected to the
project database and then linked to it. The Connect to Database... property sheet
guides you through the requirements and displays lists of authorized entries.
Getting to the Connect to Database... Option
1.
Select Utility on the Environment Management area of the top bar.
2.
Select CHANGE MANAGEMENT on the Utility pulldown menu.
3.
Select the Access and Security option on the Change Management menu.
4.
Select Connect to Database on the Access and Security pulldown menu to
display the Connect to Database property sheet.
Procedure
1.
Enter the following required information, in the order shown, on the Connect to
Database property sheet:
a.
Enter a user name in the User field.
b.
Enter a password in the Password field.
c.
Enter a project name in the Project field.
2.
Optionally, enter a Group name.
3.
If you wish to execute a script, select the Run Script button and then the Editor
button.
4.
Select Apply.
See the following pages for more information about this option.
EDMControl User Guide and Menu Reference
2-5
Access and Security Option
Connecting to the Project Database
Connect to Project Database Property Sheet
The following figure shows the property sheet and the available lists
Connect to Project Database
User:
...
Password:
Group:
...
Project:
Run Script
...
Name:
Reset
Apply
User Editor
Cancel
Project Editor
Group Editor
Project1
Project2
Project3
.
.
.
Group1
Group2
Group3
.
.
.
User1
User2
User3
.
.
.
Accept
Reset
...
Cancel
Accept
Reset
Cancel
Accept
Reset
Cancel
Displays the File Name Editor
Options on the Connect to Database Property Sheet
User Name (Required): Selecting the User field Editor button causes a
scrollable list of authorized users to be displayed. Select a name for which you are
authorized, or select the field and type in a valid name. Only one userid may be
selected. A User id may not exceed 12 characters in length.
Password (Required): The Password field is invalid until the userid has been
specified. A valid password must be typed into the Password field. The password
is protected. The password may not exceed eight characters in length.
Group Name (Optional): Selecting the Group field Editor button causes a
scrollable list of authorized groups to be displayed. Select a group for which you
are authorized, or select the field and type in a valid group name. Only one group
may be selected. A group name may not exceed 12 characters in length.
2-6
EDMControl User Guide and Menu Reference
Access and Security Option
Connecting to the Project Database
Project Name (Required): Selecting the Project field Editor button causes a
scrollable list of projects to be displayed. Select the project to connect to or select
the field and type the name of the project. Only one project may be selected. A
project name may not exceed eight characters in length.
Run Script (Optional): The Run Script toggle button must be selected before a
script can be specified. Valid scripts are contained in the directory
/usr/apl/cadds/data/control/scripts
The Run Script function is specific to the Bourne shell.
Select the Name field Editor button. This displays the File Name Editor with the
script directory as default. Select a file and press Accept. Only one script may
be specified. A script name may not exceed 255 characters, scrolling.
File Name Editor Property Sheet
The File Name Editor property sheet is illustrated below.
File Name Editor
Directory:
Directory
Accept
Directory Filter
File Name
Reset
Cancel
Using the Property Sheet
By default, the Directory fillin box displays your Explicit Modeling create
directory. A list of directories located below the create directory is displayed in the
Directory scroll window.
EDMControl User Guide and Menu Reference
2-7
Access and Security Option
Connecting to the Project Database
Select a directory and it replaces the create directory. Select the Directory Filter
box and a scrollable list of files contained in your selected directory is displayed.
Select a file and press Accept.
2-8
EDMControl User Guide and Menu Reference
Access and Security Option
Disconnecting from the Project Database
Disconnecting from the Project Database
You can disconnect from the Project Database by selecting this option on the
Access and Security menu.
Description
To end your Change Management work session, disconnect from the project
database. To reconnect to the database, you must again select the Connect to
Database menu option and enter the required information on the Connect to
Project Database property sheet.
Please note: Because there are a limited number of users who can
concurrently access the project database, always disconnect when you are not
working with the associated database.
Getting to the Disconnect from Database Option
1.
Select Utility on the Environment Management area of the top bar.
2.
Select ATTRIBUTE MANAGEMENT from the Utility menu.
3.
Select the Access and Security icon from the command palette.
Procedure
To disconnect from the project database, select Disconnect from Database from
the Access and Security menu. This is a direct action selection. After you select
this option from the menu, you are disconnected from the project database.
EDMControl User Guide and Menu Reference
2-9
Access and Security Option
Linking to the Project Database
Linking to the Project Database
You must create links to the project database in order to be able to post and
retrieve information. Only one project can be linked at a time.
Description
This menu option determines the model information to be displayed as snapshots
when you retrieve information from the project database. It also controls the
information that is posted to the project database when you post changes.
Your active part becomes a work part when it is linked to the project database. The
part is linked with either an Inwork or Released status.
Inwork status specifies that the most recent snapshot is to be displayed. A
Released link displays the last snapshot to have passed a Review and been
approved.
Please note: You must select the Specify Zone/Discipline toggle button, and
specify a zone name, before the list of authorized disciplines is displayed.
The items that are displayed are governed by your privileges for the specified zone
name. You will have read-only privileges if the displayed snapshot was posted to
the project database by another member of the design team. You will have write
privileges if the snapshot is one that you posted to the project database.
From one to ten disciplines can be selected.
Getting to the Link to Database... Option
Follow these steps to get to the Link to Database... option.
1.
Select Utility on the Environment Management area of the top bar.
2.
Select CHANGE MANAGEMENT on the Utility pulldown menu.
3.
Select the Access and Security option on the Change Management menu.
4.
Select Link to Database on the Access and Security pulldown menu to display
the Link to Project Database property sheet.
Procedure
2-10
1.
Select the Specify Zone/Discipline button.
2.
Select an access privilege.
EDMControl User Guide and Menu Reference
Access and Security Option
Linking to the Project Database
3.
Specify a zone name.
4.
Specify from one to ten disciplines.
5.
Specify a part offset (optional).
6.
If you wish to execute a script, select Run Script and select the Name Editor
button.
7.
Select Apply.
Link to Project Database Property Sheet
The following figure illustrates the Link to Project Database property sheet and its
available options.
Link to Project Database
Specify Zone/Discipline
Access Privilege
Zone Name:
Zonei
...
Disciplines
Read Access Only
Write Access Only
Read and Write Access
Data Status
In-work Data
Discipline1
Discipline2
Discipline3
.
.
.
Released Data
Specify Part Offset
Run Script
Options
Name:
Apply
...
...
Reset
Cancel
Zone Name Editor
Zone1
Zone2
Zone3
.
.
.
Accept
Displays the Parts Offset
Options property sheet.
Reset
Displays the File Name
Editor property sheet.
Cancel
See the following pages for more information about the options on this property
sheet.
EDMControl User Guide and Menu Reference
2-11
Access and Security Option
Linking to the Project Database
Options on the Link to Project Database Property Sheet
Specify Zone and Discipline: Select the Specify Zone/Discipline button if
you want this option. You do not need to select it if the zone/discipline you want
information about is already linked.
The following items on the property sheet are dependent upon your selecting the
Specify Zone/Discipline button:
• Zone Name
• Disciplines List
• Access Privilege
• Data Status
Zone Name: Selecting the Zone Name field Editor button causes a scrollable list
of authorized names to be displayed. This list is based upon access privileges
granted by the Project Administrator.
Select the zone name you want, or select the field and type in the name of a valid
zone. Select only one zone name.
A zone name may not exceed 24 characters.
Disciplines: When you have specified a zone, a scrollable list of disciplines
associated with the selected zone is displayed. Select from one to ten disciplines.
Access Privilege: The default setting for access privileges is Read Access
Only. To change this setting to either Write Access Only or Read and Write
Access select the appropriate button. Only one selection is valid at a time.
Data Status: The default setting for data status is In-work Data. This accesses
the most recent information filed in the project database.
The alternate setting is Released Data. This accesses the latest released
information in the project database.
Select Released Data if you want this selection. Only one selection is valid at a
time.
Part Offset: Select the Specify Parts Offset toggle button if you want to establish
the offset from the point of origin of the active part to the point of origin of the
project coordinate system.
2-12
EDMControl User Guide and Menu Reference
Access and Security Option
Linking to the Project Database
Selecting the Options button displays the Part Offset Options property sheet.
You can establish the parts offset either by specifying the actual X-, Y-, and Zproject coordinates (By Explicit Location), or by specifying the name of an offset
that has been predefined by the system administrator.
By Explicit Location and By Predefined Name cannot be selected together.
Please note: If you do not specify either a specific location or an offset name,
the part offset defaults to zero (0), the project origin.
For more information about linking, see the following pages.
Part Offset Options Property Sheet
The following figure shows the Part Offset Options property sheet and the options
associated with it.
Part Offset Options
By Explicit Location
0.000000
Y-offset:
0.000000
Z-offset:
0.000000
Offset Name
By Predefined Name
Accept
Offset
X-offset:
Reset
DX
Offset1
Offset2
Offset3
.
.
.
DY
Offset1
Cancel
DZ
0.00 0.00 0.00
1.00 2.00 3.00
4.00 5.00 6.00
Displays the calculator
By Explicit Location (Default): Select the By Explicit Location button and enter
the X-, Y-, and Z- project coordinates. You can either enter the information by
typing, or select the calculator button next to the field.
Press Accept.
EDMControl User Guide and Menu Reference
2-13
Access and Security Option
Linking to the Project Database
By Predefined Name: Select the By Predefined Name button. Select the
Offset Name Editor button. A scrollable list of authorized offsets is displayed.
Select your choice or select the option field and type in the name. Offset1 is the
default.
Press Accept.
A part offset name may not be more than 24 characters in length.
Run Script (Optional): The Run Script toggle button must be selected before a
script can be specified. Valid scripts are contained in the directory
/usr/apl/cadds/data/control/scripts
The Run Script function is specific to the Bourne shell.
Select the Name field Editor button. This displays the File Name Editor with the
script directory as default. Select a file and press Accept. Only one script may
be specified. A script name may not exceed 255 characters, scrolling.
For more information about the File Name Editor, see “File Name Editor Property
Sheet” on page 2-7.
2-14
EDMControl User Guide and Menu Reference
Access and Security Option
Unlinking from the Project Database
Unlinking from the Project Database
You can unlink zones and disciplines from the active part, or the part from the
project.
Description
Change Management generates tremendous amounts of information. You can
unlink in order to dispose of information that you will never want to track again.
When you unlink a read-only discipline, parts containing only that discipline will
no longer be displayed as snapshots.
When you unlink a write discipline, no more data relevant to that discipline is
posted to the project database.
When you unlink all of a zone’s disciplines, the zone itself is unlinked.
Please note: Unlinking a part does not delete it from the project.
Getting to the Unlink from Database... Option
1.
Select Utility on the Environment Management area of the top bar.
2.
Select CHANGE MANAGEMENT on the Utility pulldown menu.
3.
Select the Access and Security option on the Change Management menu.
4.
Select Unlink from Database... on the Access and Security pulldown menu to
display the Link to Project Database property sheet.
Procedure
1.
Select an access privilege.
2.
Select a zone name.
3.
Select an associated discipline.
4.
Select the unlinking option.
5.
If you wish to execute a script, select Run Script and then enter a script name in
the Name field.
6.
Select Apply.
For more information about unlinking, see the following pages.
EDMControl User Guide and Menu Reference
2-15
Access and Security Option
Unlinking from the Project Database
Unlink from Project Database... Property Sheet
Unlink from Project Database
Access Privilege
Zone Name:
Read Access Only
Write Access Only
Zone1
...
Disciplines
Discipline1
Discipline2
Discipline3
.
.
.
Read and Write Access
Unlinking Options
Unlink All Zones
Unlink All Disciplines
Unlink from Project
...
Name:
Run Script
Apply
Reset
Cancel
Zone Name Editor
Zone1
Zone2
Zone3
.
.
.
Accept
Displays the File Name
Editor property sheet
Reset
Cancel
Options on the Unlink from Project Database Property
Sheet
Access Privilege (Required): Click the button next to the kind of access
privilege associated with the zone to unlink. Read Access is the default.
Zone Name (Required): Selecting the Zone Name field Browser button
displays a scrollable list of zones that are currently linked to the active part. Only
one may be selected to be unlinked. The zone name may not exceed 24 characters.
Disciplines (Required): A scrollable list of disciplines associated with the zone
and access privilege you selected is displayed You can select more than one
discipline.
2-16
EDMControl User Guide and Menu Reference
Access and Security Option
Unlinking from the Project Database
Unlinking Options (Optional): These are elective options if you want to unlink
groups of zones or disciplines. You can unlink
• All the zones, based on access privilege, in the active part.
• All the disciplines in the zone named in the Zone Name field. This unlinks the
zone itself from the project database.
• The active part from the project.
Run Script (Optional): The Run Script toggle button must be selected before a
script can be specified. Valid scripts are contained in the directory
/usr/apl/cadds/data/control/scripts
The Run Script function is specific to the Bourne shell.
Select the Name field Editor button. This displays the File Name Editor with the
script directory as default. Select a file and press Accept. Only one script may
be specified. A script name may not exceed 255 characters, scrolling.
For more information about the File Name Editor, see “File Name Editor Property
Sheet” on page 2-7.
EDMControl User Guide and Menu Reference
2-17
Access and Security Option
Running Scripts and Operating System Commands
Running Scripts and Operating System
Commands
You can execute scripts and operating system commands from within the Explicit
Modeling environment.
Description
Change Management provides a mechanism for you to execute scripts and
operating system commands while you work with it. This feature is specific to the
Bourne shell.
Getting to the Run OS Script/Command... Option
1.
Select Utility from the top bar of the explicit desktop.
2.
Select CHANGE MANAGEMENT from the Utility menu.
3.
Select the Access and Security icon from the command palette.
4.
Select Run OS Script/Command from the Access and Security menu to
display the Run OS Script/Command property sheet.
Procedure
To run a script or an operating system command, enter the following information
on the Run OS Script/Command property sheet. This property sheet is illustrated
on the next page.
1.
Select either Run Script or Run OS.
2.
If you select Run Script, select the Name field Editor button. The File Name
Editor is displayed. Select a directory and file.
3.
If you selected Run OS type into the field the name of the operating system
command you want executed.
4.
Select Apply.
For more information about these options, see the following pages.
2-18
EDMControl User Guide and Menu Reference
Access and Security Option
Running Scripts and Operating System Commands
Run OS Script/Command Property Sheet
Run OS Script/Command
Run Script
Run OS
Name:
Command:
...
Name:
Apply
Reset
Cancel
Displays the File Name
Editor property sheet
Options on the Run OS Script/Command Property Sheet
Run OS Command: You can specify any valid operating system command in
this field. A command cannot exceed 255 characters.
Run Script (Optional): The Run Script toggle button must be selected before a
script can be specified. Valid scripts are contained in the directory
/usr/apl/cadds/data/control/scripts
The Run Script function is specific to the Bourne shell.
Select the Name field Editor button. This displays the File Name Editor with the
script directory as default. Select a file and press Accept. Only one script may
be specified. A script name may not exceed 255 characters, scrolling.
For more information about the File Name Editor, see “File Name Editor Property
Sheet” on page 2-7.
EDMControl User Guide and Menu Reference
2-19
Access and Security Option
Verifying your Database Link
Verifying your Database Link
You can verify the consistency between the active part’s entities and their related
records in the associated database.
Description
The Verify Link to Database option checks for consistency between the active
part’s entities and the related records for the entities in the associated database.
When you select this option, a list of entities with records in the associated
database is displayed. If any inconsistencies are found a message is displayed.
There are two types of inconsistencies:
• Records exist in the associated database, but the entity referred to no longer
exists in the part
• Attributes assigned to an entity no longer exist in the associated database
A non-serious inconsistency between Explicit Modeling and the associated
database can occur during a work session. However, inconsistencies between
Explicit Modeling and the associated database may indicate a serious problem.
Inconsistencies That Are Easily Reconciled:
If you delete entities that have records in the associated database and then verify
the part link to the associated database before you file the part, you will see a
message that associated database records still exist, but that the entities no longer
exist in the part. When you file the part, the records for the deleted entities are
deleted from the associated database.
Inconsistencies That Indicate a Problem:
The first Attribute Management action performed on an active part automatically
verifies the part against the associated database. If you ever see an inconsistency
displayed at this point, report it to the system administrator. Such inconsistencies
indicate a problem with Explicit Modeling or the RDBMS. For information about
resolving inconsistencies between Explicit Modeling and the associated database,
see the EDMInformation Administrator Guide.
Getting to the Verify Link to Database Option
2-20
1.
Select Utility from the top bar of the explicit desktop.
2.
Select CHANGE MANAGEMENT from the Utility menu.
EDMControl User Guide and Menu Reference
Access and Security Option
Verifying your Database Link
3.
Select the Access and Security icon from the command palette.
Procedure
To verify consistency between the active part and the associated database, select
Verify Link to Database from the Access and Security menu. This is a direct
action selection.
After you select this option from the menu. a list of linked entities is displayed. If
any inconsistencies are found between the part and the associated database, a
message is displayed indicating this.
EDMControl User Guide and Menu Reference
2-21
Chapter 3
Display Option
This chapter describes the following:
• Introduction
• Overview of the Display Option
• Displaying Objects by Part
• Displaying Objects by Discipline
• Displaying Objects by Zone
• Displaying Zone Boundaries
• Restoring Objects
EDMControl User Guide and Menu Reference
3-1
Display Option
Introduction
Introduction
Selecting the Display option displays the menu illustrated below. These menu
selections affect your interaction with the project database and determine which
objects are to be graphically displayed or blanked.
Change Management
Admin
Display by Part . . .
Display by Discipline . . .
Display by Zone . . .
Display Zones . . .
Restore Objects
The property sheet associated with each of the menu items is described in the
following pages.
3-2
EDMControl User Guide and Menu Reference
Display Option
Overview of the Display Option
Overview of the Display Option
Selecting the Display icon displays a pulldown menu. Each entry either executes a
direct action or displays a property sheet.
Description
Selecting the Display icon displays a menu on which you can choose one of the
following options:
• Display by Part...
• Display by Discipline...
• Display by Zone...
• Display Zones...
• Restore Objects
Getting to the Display Option
1.
Select Utility on the Environment Management area of the top bar.
2.
Select CHANGE MANAGEMENT on the Utility pulldown menu.
Procedure
1.Select
the Display option on the Change Management menu to display the
Display menu.
2.Select
the desired option from the Display pulldown menu.
See the following pages for more information on the options in this procedure.
Options on the Display Menu
Display Objects by Part
Select this option to display a property sheet that enables you to select a part whose
objects are to be displayed. You must be connected to the Project Database, the
part must be active, and it must be linked.
EDMControl User Guide and Menu Reference
3-3
Display Option
Overview of the Display Option
Display Objects by Discipline
Select this option to display a property sheet that enables you to display objects
associated with a specific discipline. You must be connected to the Project
Database, a part must be active, and it must be linked for read access.
Display Objects by Zone
Select this option to display a property sheet that enables you to display objects
located within a specific zone. You must be connected to the Project Database, a
part must be active, and it must be linked for read access. Optionally, it can also be
displayed by disciplines.
Display Zone Boundaries
Select this option to display a property sheet that enables you to specify the
boundaries of a zone that you want displayed. You must be connected to the
Project Database, a part must be active, and it must be linked for read or write
access.
Restore Viewed Objects
Select this direct action option to return your display to the last previous work
state.
For more information about the Display option, see the following pages.
3-4
EDMControl User Guide and Menu Reference
Display Option
Displaying Objects by Part
Displaying Objects by Part
This menu item allows you to graphically display the objects in a part that you
select.
Description
You can display, or remove from display, parts other than the active part that are
linked for the same zone/disciplines as the active part. The Display Objects by Part
property sheet provides lists of authorized parts, revisions, and snapshots from
which you may choose.
Please note: The displayed list of authorized parts will be different depending
upon your choice of Display Method.
If you select the Add to Display option, the parts listed are those that are not
currently being displayed.
If you select the Remove from Display option, the parts listed are those that are
currently being displayed.
You can select the part by either specifying its name, or by graphically removing
one or more objects. The system identifies the part that the object belongs to and
uses that part name.
Getting to the Display by Part... Option
1.
Select Utility on the Environment Management area of the top bar.
2.
Select CHANGE MANAGEMENT on the Utility pulldown menu.
3.
Select the Display option on the Change Management menu.
4.
Select Display by Part... on the Display pulldown menu to show the Display
Objects by Part property sheet.
Procedure
1.
Select the display method, Add (the default) or Remove.
2.
Specify the selection method,
• Select by Name (the default)
• Select by Name and Revision
• Select by Name and Snapshot
EDMControl User Guide and Menu Reference
3-5
Display Option
Displaying Objects by Part
• Select Graphically
3.
If you select one of the first three options, a scrollable list of parts is displayed.
Select one.
If you specify Select by Name, press Apply. All of the objects in the part are
either displayed or removed from display.
If you specify Select by Name and Revision, and press the Revision Editor
button, the Revision Editor displays a scrollable list of Revisions. The first
revision on the list is the default. Select one. Press Accept, then Apply. All of
the objects in that part or revision are added to, or removed from, your display.
If you specify Select by Name and Snapshot, and press the Snapshot Editor
button, the Snapshot Editor displays a scrollable list of snapshots. The first
snapshot is the default. Select one. Press Accept, then Apply All of the objects
in that part or snapshot are added to, or removed from, your display.
If you specify Select Graphically, select an object in the active part.
3-6
4.
If you want to execute a script, select the Run Script Editor button and the File
Name Editor is displayed.
5.
Press Apply.
EDMControl User Guide and Menu Reference
Display Option
Displaying Objects by Part
Display Objects by Part Property Sheet
Display Objects by
Part
Display Method
Add to Display
Partname1
Partname2
Partname3
.
.
.
Remove from Display
Selection Method
Select by Name
Select by Name and Revision
Revision1
Revision:
...
Select by Name and Snapshot
1
Snapshot:
...
Select Graphically
Run Script
...
Name:
Apply
Reset
Snapshot Editor
Revision Editor
1
2
3
.
.
.
Accept
Cancel
Revision1
Revision2
Revision3
.
.
.
Reset
Cancel
Accept
Reset
Displays the File Name
Editor property sheet
Cancel
Options on the Display Objects by Part Property Sheet
Display Method: Select either Add to Display, (to view a part not on display), or
Remove from Display (to turn off a part being displayed). Only one part may be
selected. Add to Display is the default.
Selection Method: Select one of the following:
• Select by Name (the default)
Displays a scrollable list of parts. The first part name is the default. Select a part
name. When you press Apply all of the objects in the part are displayed or
removed, as you specified.
• Select by Name and Revision
EDMControl User Guide and Menu Reference
3-7
Display Option
Displaying Objects by Part
Displays a scrollable list of parts. The first part name is the default. Select a part
name. Select the Revision Editor button. This displays the Revision Editor with
a scrollable list of revisions. The first revision is the default. Select one, then
press Accept. The revision number is entered in the Revision field. Press
Apply and the selected part or revision is added to, or removed from, your
display.
• Select by Name and Snapshot
Displays a scrollable list of parts. The first part name is the default. Select a part
name. Select the Snapshot Editor button. This displays the Snapshot Editor
with a scrollable list of snapshots. The first snapshot is the default. Select one,
then press Accept. The snapshot number is entered into the snapshot field.
Press Apply and the selected part or snapshot is added to, or removed from,
your display.
• Select Graphically
Select an object in the active part. Press Apply This identifies the active part as
the one to be added to, or removed from, your display.
Run Script (Optional): The Run Script toggle button must be selected before a
script can be specified. Valid scripts are contained in the directory
/usr/apl/cadds/data/control/scripts
The Run Script function is specific to the Bourne shell.
Select the Name field Editor button. This displays the File Name Editor with the
script directory as default. Select a file and press Accept. Only one script may
be specified. A script name may not exceed 255 characters, scrolling.
For information about the File Name Editor, see the next page.
3-8
EDMControl User Guide and Menu Reference
Display Option
Displaying Objects by Part
File Name Editor Property Sheet
The File Name Editor property sheet is illustrated below.
File Name Editor
Directory:
Directory Filter
Directory
Accept
File Name
Reset
Cancel
Using the Property Sheet
By default, the Directory fillin box displays your Explicit Modeling create
directory. A list of directories located below the create directory is displayed in the
Directory scroll window.
Select a directory and it replaces the create directory. Select the Directory Filter
box and a scrollable list of files contained in your selected directory is displayed.
Select a file and press Accept.
EDMControl User Guide and Menu Reference
3-9
Display Option
Displaying Objects by Discipline
Displaying Objects by Discipline
This menu item allows you to graphically display objects in a part as determined
by their disciplines.
Description
You can display, or remove from display, objects stored in the project database that
are identified by their links to specific disciplines.
The Display Objects by Discipline... property sheet provides a list of valid
disciplines from which to choose. This list is only displayed if your active part is
linked to a zone/discipline.
Please note: The displayed list of disciplines will be different depending
upon your choice of display method.
If you select the Add to Display option, the disciplines listed are those linked to
objects that are not currently being displayed.
If you select the Remove from Display option, the disciplines listed are those
linked to objects that are currently being displayed.
Getting to the Display by Discipline... Option
1.
Select Utility on the Environment Management area of the top bar.
2.
Select CHANGE MANAGEMENT on the Utility pulldown menu.
3.
Select the Display option on the Change Management menu.
4.
Select Display by Discipline... on the Display pulldown menu to show the
Display Objects by Discipline property sheet.
Procedure
3-10
1.
Select the display method, Add (the default) or Remove.
2.
Specify the selection method, by Name (the default) or All Disciplines.
3.
If you selected by Name, select from one to ten disciplines from the scrollable
list displayed in the Disciplines window.
4.
If you wish to execute a script, select Run Script and enter a script name in the
Name field.
5.
Select Apply.
EDMControl User Guide and Menu Reference
Display Option
Displaying Objects by Discipline
Display Objects by Discipline Property Sheet
Display Objects by Discipline
Disciplines
Display Method
Discipline1
Discipline2
Discipline3
.
.
.
Add to Display
Remove from Display
Selection Method
Select by Name
Select All Disciplines
Run Script
...
Name:
Apply
Reset
Cancel
Displays the File Name
Editor property sheet
Options on the Display Objects by Discipline Property
Sheet
Display Method: Select Add to Display to view disciplines not on display, or
Remove from Display to turn off disciplines being displayed. From one to ten
disciplines may be displayed. Add to Display is the default.
Selection Method: Select, Select by Name. Select from one to ten of the
discipline names that are displayed in the scrollable Disciplines window.
Select, Select All Disciplines and objects associated with all the disciplines in the
part are selected.
Select by Name is the default.
Run Script (Optional): The Run Script toggle button must be selected before a
script can be specified. Valid scripts are contained in the directory
/usr/apl/cadds/data/control/scripts
The Run Script function is specific to the Bourne shell.
EDMControl User Guide and Menu Reference
3-11
Display Option
Displaying Objects by Discipline
Select the Name field Editor button. This displays the File Name Editor with the
script directory as default. Select a file and press Accept. Only one script may
be specified. A script name may not exceed 255 characters, scrolling.
For more information about the File Name Editor, see “File Name Editor Property
Sheet” on page 3-9.
3-12
EDMControl User Guide and Menu Reference
Display Option
Displaying Objects by Zone
Displaying Objects by Zone
This menu item allows you to graphically display objects in a part as determined
by the zone or set of zones in which the part is located.
Description
You can display or remove from display objects, selectively or in a group, that are
identified by their disciplines and zones.
Initially, all of the objects in a part are displayed. Your selection of zones,
disciplines, and display method filters the object information and displays only
what you specify.
A part must be active and be linked to a project.
The list of valid zones or zone sets that is displayed is dependent upon the
selection method chosen.
The list of disciplines is displayed when a valid zone has been identified. This list
will vary according to the display method you choose.
Please note: The displayed list of disciplines will be different depending upon
your choice of display method.
Select the Display All option and objects of every discipline in the specified zone
are displayed.
Select the Add to Display option and the objects displayed are those linked to
zones and disciplines that are not currently being displayed.
Select the Remove from Display option and the objects removed are those linked
to zones and disciplines that are currently being displayed.
Getting to the Display by Zone... Option
1.
Select Utility on the Environment Management area of the top bar.
2.
Select CHANGE MANAGEMENT on the Utility pulldown menu.
3.
Select the Display option on the Change Management menu.
4.
Select Display by Zone... on the Display pulldown menu to show the Display
Objects by Zone property sheet.
EDMControl User Guide and Menu Reference
3-13
Display Option
Displaying Objects by Zone
Procedure
1.
Select the display method, Display All (the default), Add to Display, or
Remove from Display.
2.
Specify the selection method, Select Zone Name or Select Zone Set.
Press the Editor button next to the Zone Name. Either the Zone Name Editor or
Zone Set Editor, depending upon your Selection choice, displays a scrollable
list of zones or sets.
3.
Select a zone or zone set. The default is the first zone on the list.
4.
A scrollable list of disciplines associated with the selected zone or zone set is
displayed in the Disciplines window. Select from one to ten disciplines.
5.
If you wish to execute a script, select Run Script and then enter a script name in
the Name field.
6.
Select Apply.
For more information about this option, see the next page.
3-14
EDMControl User Guide and Menu Reference
Display Option
Displaying Objects by Zone
Display Objects by Zone Property Sheet
Display Objects by Zone
Display Method
...
Zone Name:
Display All
Disciplines
Add to Display
Discipline1
Discipline2
Discipline3
.
.
.
Remove from Display
Selection Method
Select Zone Name
Select Zone Set
...
Name:
Run Script
Apply
Reset
Zone Name Editor
Zone Set Editor
ZoneSet1
ZoneSet2
ZoneSet3
.
.
.
Zone1
Zone2
Zone3
.
.
.
Accept
Cancel
Reset
Cancel
Accept
Reset
Displays the
File Name Editor
property sheet
Cancel
Options on the Display Objects by Zone Property Sheet
Display Method: Display All (the default) displays objects of every discipline in
the selected zone or zone set.
Add to Display displays objects that are blanked.
Remove from Display blanks objects that are on display.
Selection Method: You can select either the Select Zone Name or Zone Set
option. Your choice displays the appropriate scrollable Editor. Select your choice
and it is entered into the Zone Name field. A zone or zone set name may not
exceed 24 characters in length. Select Zone Name is the default.
EDMControl User Guide and Menu Reference
3-15
Display Option
Displaying Objects by Zone
Disciplines: A scrollable list of valid disciplines is displayed when a zone name
or set has been specified. The list of disciplines displayed is also governed by the
display method you selected.
Run Script (Optional): The Run Script toggle button must be selected before a
script can be specified. Valid scripts are contained in the directory
/usr/apl/cadds/data/control/scripts
The Run Script function is specific to the Bourne shell.
Select the Name field Editor button. This displays the File Name Editor with the
script directory as default. Select a file and press Accept. Only one script may
be specified. A script name may not exceed 255 characters, scrolling.
For more information about the File Name Editor, see “File Name Editor Property
Sheet” on page 3-9.
3-16
EDMControl User Guide and Menu Reference
Display Option
Displaying Zone Boundaries
Displaying Zone Boundaries
Select this menu option to specify zones whose boundaries you want to view, or
displayed ones you want to blank.
Description
You can selectively display, or blank, the boundaries of zones based upon whether
you want to select
• Specific linked zones
• All the zones that are linked
• Any zone, linked or not
You must be connected to the project database. A part must be linked for read or
write access.
Getting to the Display Zones... Option
1.
Select Utility on the Environment Management area of the top bar.
2.
Select CHANGE MANAGEMENT on the Utility pulldown menu.
3.
Select the Display option on the Change Management menu.
4.
Select Display Zones... on the Display pulldown menu to display the Display
Zone Boundaries property sheet.
Procedure
1.
Select the display method.
2.
Select the type of zone association to be displayed.
3.
If you select Select Linked Zones or Select Any Zone a scrollable list
appropriate to your choice is displayed. Select one.
4.
Specify the layer on which the graphics are to be displayed.
5.
If you wish to execute a script, select Run Script and then enter a script name in
the Name field.
6.
Select Apply.
For more information about the options on the property sheet, see the next page.
EDMControl User Guide and Menu Reference
3-17
Display Option
Displaying Zone Boundaries
Display Zone Boundaries Property Sheet
The following figure shows the Display Zone Boundaries property sheet and the
available options.
Display Zone Boundaries Property Sheet
Display Zone Boundaries
Display Method
Zones
Add to Display
Zone1
Zone2
Zone3
.
.
.
Remove from Display
Selection Method
Select Linked Zones
Select All Linked Zones
Select Any Zone
000
Layer:
...
...
...
Run Script
Apply
Displays the Calculator
...
Name:
Reset
Cancel
Displays the File Name
Editor property sheet
Options on the Display Zones Property Sheet
Display Method: Select Add to Display and blanked zone boundaries are
displayed. Select Remove from Display and boundaries currently being displayed
are blanked. Add to Display is the default.
Selection Method: Select, Select Linked Zones and only the names of zones
that are currently linked is shown. Select, Select Any Zone and the listing is of all
the project zones, regardless of whether they are linked or not. Select, Select All
Linked Zones and no list is displayed. Instead, all of the linked zones in the project
are selected to be displayed. Select Linked Zones is the default.
Zones: Scrollable lists of zone names are displayed in this window, according to
the criteria established in Display Method and Selection Method above.
Layer: You can specify any layer from 0 to 254 on which to display the project
zone boundaries. Select the Calculator button or type in a number.
3-18
EDMControl User Guide and Menu Reference
Display Option
Displaying Zone Boundaries
Run Script (Optional): The Run Script toggle button must be selected before a
script can be specified. Valid scripts are contained in the directory
/usr/apl/cadds/data/control/scripts
The Run Script function is specific to the Bourne shell.
Select the Name field Editor button. This displays the File Name Editor with the
script directory as default. Select a file and press Accept. Only one script may
be specified. A script name may not exceed 255 characters, scrolling.
For more information about the File Name Editor, see “File Name Editor Property
Sheet” on page 3-9.
EDMControl User Guide and Menu Reference
3-19
Display Option
Restoring Objects
Restoring Objects
Select this menu option to restore objects to their last previous work session state.
Description
This is a direct action menu selection.
Executing Restore Objects returns your current snapshot to the previous work
session state.
Getting to the Restore Objects Option
1.
Select Utility on the Environment Management area of the top bar.
2.
Select CHANGE MANAGEMENT on the Utility pulldown menu.
3.
Select the Display option on the Change Management menu.
Procedure:
Select Restore Objects on the Display pulldown menu.
The snapshot is restored to its previous state.
3-20
EDMControl User Guide and Menu Reference
Chapter 4
Change Option
This chapter describes the following:
• Introduction
• Overview of the Change Option
• Posting a Snapshot
• Posting Changes to the Project Database
• Graphically Highlighting Changes
• Dehighlighting Change Graphics
• Updating Objects Changed by Others
EDMControl User Guide and Menu Reference
4-1
Change Option
Introduction
Introduction
Selecting the Change option displays the menu illustrated below. These menu
selections affect your interaction with the EDM project database.
Change Management
Admin
Post Snapshot Only
Post Changes . . .
Highlight Changes . . .
Dehighlight Changes . . .
Update Changes . . .
The property sheet associated with each of the menu items is described in the
following pages.
4-2
EDMControl User Guide and Menu Reference
Change Option
Overview of the Change Option
Overview of the Change Option
Selecting the Change icon displays a pulldown menu. Each option either executes
a direct action or displays a property sheet.
Description
The Change pulldown menu displays the following options:
• Post Snapshot Only
• Post Changes...
• Highlight Changes...
• Dehighlight Changes
• Update Changes...
Getting to the Change Option
1.
Select Utility on the Environment Management area of the top bar.
2.
Select CHANGE MANAGEMENT on the Utility pulldown menu.
Procedure
1.Select the Change option on the Change Management menu to display the
Change pulldown menu.
2.Select
the desired option from the Change pulldown menu.
For more information about the Change options, see the following pages.
Options on the Change Menu
Post Snapshot Only
Select this direct action option to create and post to the project database a snapshot
of the currently active part. You must be connected to the project database and the
part must be active. Changes must have been made.
EDMControl User Guide and Menu Reference
4-3
Change Option
Overview of the Change Option
Post Changes
Select this option to display a property sheet that enables you to identify changes
that you have made to the active part and post that information to the project
database.
Also select this option to lock a part for EDM Review.
You must be connected to the project database. The part must be active and linked
for write access.
Highlight Changes
Select this option to display a property sheet that enables you to graphically
identify changes that have been made since the last posting to the project database.
A part must be active; it must be connected to the project database, and may be
linked for either read or write access.
Dehighlight Changes
Select this option to display a property sheet that enables you to dehighlight some
or all of the graphics whose changes you have highlighted. A part must be active;
it must be connected to the project database, and may be linked for either read or
write access.
Update Changes
Select this option to display a property sheet that enables you to retrieve from the
project database information about changes that have been posted by others. A
part must be active; it must be connected to the project database, and must be
linked for read access.
For more information about these options see the following pages.
4-4
EDMControl User Guide and Menu Reference
Change Option
Posting a Snapshot
Posting a Snapshot
Periodically save your design work by posting a snapshot to the project database.
Description
This is a direct action menu item that posts a current snapshot of your design work
in the project database.
Changes are not committed and are not propagated to other users.
Getting to the Post Snapshot Only Option
1.
Select Utility from the top bar of the explicit desktop.
2.
Select CHANGE MANAGEMENT from the Utility menu.
3.
Select the Change icon from the command palette.
Procedure
1.
Select Post Snapshot Only on the pulldown menu.
2.
A current view of your design is posted to the database.
For more information about the Change option see the following pages.
EDMControl User Guide and Menu Reference
4-5
Change Option
Posting Changes to the Project Database
Posting Changes to the Project Database
Select this menu option to post your changes to the project database.
Description
You can post your changes with or without propagation to other members of the
concurrent engineering team.
Use this menu selection to
• Verify changes that have been made to objects, whether posted or not
• Highlight, or mark and highlight, changed objects that have or have not been
posted
• Commit the changes to the project database, propagating the change
information to other users.
Please note: Marking and highlighting objects is not the same as highlighting
changes. Marking and highlighting identifies objects that have been posted or not
posted to the project database. Highlight Change identifies entities that have been
added, modified, or deleted.
Getting to the Post Changes... Option
1.
Select Utility from the top bar of the explicit desktop.
2.
Select CHANGE MANAGEMENT from the Utility menu.
3.
Select the Change icon from the command palette.
4.
Select Post Changes... on the Change pulldown menu.
Procedure
Follow these steps to commit, verify, or verify and commit, changes you have
made to the design. You can also lock the part for EDM Review.
4-6
1.
Select Commit Changes or Verify Changes.
2.
If you selected Commit Changes, now select Apply.
3.
If you selected Verify Changes, now select the verification method.
4.
Select the objects to verify.
5.
If you wish to execute a script, select Run Script and then enter a script name in
the Name field.
EDMControl User Guide and Menu Reference
Change Option
Posting Changes to the Project Database
6.
Select Lock Part for Review if appropriate.
7.
Select Apply.
8.
To commit the verified changes, select Commit Changes.
9.
Select Apply.
Post Changes to Project Database Property Sheet
Post Changes to Project Database
Objects to Verify
Change Options
Objects Not Posted
Commit Changes
Objects Posted
Verify Changes
Verification Method
Lock Part for Review
Mark and Highlight
Highlight Only
Run Script
...
Name:
Apply
Reset
Cancel
Displays the File Name
Editor property sheet
Options on the Post Changes to Project Database
Property Sheet
Commit Changes: Select this option to commit changes you have made to the
project database. When you commit, Change Management transparently
• Checks authorizations
• Extracts and stores changed data in all the relevant tables for access by other
authorized users
• Creates a snapshot and numbers it sequentially
• Puts the snapshot into the EDM Vault
• Assigns a security number and files the part in the project database
Verify Changes: You can verify changes you made by selecting the Verify
Changes field.
Verification Method: You can select Mark and Highlight or Highlight Only.
Highlighting graphically displays objects that have been posted (in the project
EDMControl User Guide and Menu Reference
4-7
Change Option
Posting Changes to the Project Database
database) in green, and objects that have not been posted in red. These options are
only valid if Verify Changes has been selected. Mark and Highlight is the
default.
Objects to Verify: You can select Objects Not Posted or Objects Posted.
These options are only valid if Verify Changes has been selected. Objects Not
Posted is the default.
Lock Part for Review: Parts within a project are subject to periodic review. To
ensure that no changes are posted to the project database while the review is being
conducted, selecting this option locks the part until the review is finished.
The actual review is conducted within EDM.
Run Script (Optional): The Run Script toggle button must be selected before a
script can be specified. Valid scripts are contained in the directory
/usr/apl/cadds/data/control/scripts
The Run Script function is specific to the Bourne shell.
Select the Name field Editor button. This displays the File Name Editor with the
script directory as default. Select a file and press Accept. Only one script may
be specified. A script name may not exceed 255 characters, scrolling.
For information about the File Name Editor, see the next page.
4-8
EDMControl User Guide and Menu Reference
Change Option
Posting Changes to the Project Database
File Name Editor Property Sheet
The File Name Editor property sheet is illustrated below.
File Name Editor
Directory:
Directory Filter
Directory
Accept
File Name
Reset
Cancel
Using the Property Sheet
By default, the Directory fillin box displays your Explicit Modeling create
directory. A list of directories located below the create directory is displayed in the
Directory scroll window.
Select a directory and it replaces the create directory. Select the Directory Filter
box and a scrollable list of files contained in your selected directory is displayed.
Select a file and press Accept.
For more information about the Highlight Change Option see the following pages.
EDMControl User Guide and Menu Reference
4-9
Change Option
Graphically Highlighting Changes
Graphically Highlighting Changes
Select this menu item to graphically highlight changes, posted to the project
database, that have been made by you or another.
Description
You can graphically highlight changes that have been made to objects by you or
someone else. The comparison is between your active work part and a revision or
snapshot that you specify. The highlighting scheme is as follows:
• Objects that have been added are highlighted in green
• Objects that have been modified are highlighted in blue
• Objects that have been deleted are highlighted in red, in the snapshot only,
since they no longer exist in the active part
Please note: Use of the Revision or Snapshot fields requires the selection of
the Select Graphically button under Selection Method.
You can graphically select only one part at a time.
Getting to the Highlight Changes... Option
1.
Select Utility from the top bar of the explicit desktop.
2.
Select CHANGE MANAGEMENT from the Utility menu.
3.
Select the Change icon from the command palette.
4.
Select Highlight Changes... on the Change pulldown menu.
Procedure
Follow these steps to graphically highlight changes you, or another member of the
design team, have made to the design.
4-10
1.
Select the scope of the change.
2.
Specify the selection method.
3.
Select some or all of the types of changes.
4.
Specify the display methods.
5.
Select an object within the part to identify the part to the system.
6.
Select one of the three Selection buttons.
EDMControl User Guide and Menu Reference
Change Option
Graphically Highlighting Changes
7.
Specify either an EDM Revision designation or a Change Management
snapshot number.
8.
If you wish to execute a script, select Run Script and then enter a script name in
the Name field.
9.
Select Apply.
10. Select Abort, Restore,
or Done.
For more information about the property sheet see the next page.
EDMControl User Guide and Menu Reference
4-11
Change Option
Graphically Highlighting Changes
Highlight Project Database Changes Property Sheet
Highlight Project Database Changes
Change Types
Change Scope
Your Changes
Added Objects
Changes by Others
Modified Objects
Selection Method
Deleted Objects
Select All Objects
Display Methods
Select Graphically by Revision
Revision:
Disable Layer Colors
...
Select Graphically by Snapshot
Snapshot:
Display Previous Snapshot
...
Run Script
Name:
Apply
...
Reset
Snapshot Editor
Abort
Restore
Done
Display Changes in Color
Cancel
Revision Editor
1
2
3
Revision1
Revision2
Revision3
.
.
.
Accept Reset Cancel
Accept Reset Cancel
Displays the File Name
Editor property sheet
Options on the Highlight Project Database Changes
Property Sheet
Change Scope: Select Your Changes to determine changes that you made.
Select Changes by Others to determine changes that others have posted to the
project database.
4-12
EDMControl User Guide and Menu Reference
Change Option
Graphically Highlighting Changes
Your Changes is the default.
Change Types: You can specify the highlighting of any or all of the
• Added Objects
• Modified Objects
• Deleted Objects
The default is for all three to be highlighted.
Selection Method: Select, Select All Objects to highlight changes in all the
objects that have occurred between the time of the last posting to the project
database and now. This is the default.
Select, Select Graphically if you want to specify a specific revision or snapshot.
Only one part at a time can be selected graphically.
Revision: You can specify any officially released revision. The default is to
display the latest one. You must select Select Graphically by Revision to choose
this option and select the Revision Editor button to display a scrollable list of
revisions. The revision identification cannot exceed 20 alphanumeric characters.
Snapshot: You can specify a snapshot for comparison by entering its number.
Only one snapshot can be specified at a time. You must select Select Graphically
by Snapshot to choose this option and select the Snapshot Editor button to
display a scrollable list of snapshots.
Display Methods: Select Disable Layer Colors to turn off layer discrimination.
Change highlighting will be more visible. This is a default.
Select Display Changes in Color: added - green; modified - blue;
deleted - red. This is a default.
Select Display Previous Snapshot to simultaneously display the comparison
snapshot. Otherwise, highlighting will all be in red.
Run Script (Optional): The Run Script toggle button must be selected before a
script can be specified. Valid scripts are contained in the directory
/usr/apl/cadds/data/control/scripts
The Run Script function is specific to the Bourne shell.
EDMControl User Guide and Menu Reference
4-13
Change Option
Graphically Highlighting Changes
Select the Name field Editor button. This displays the File Name Editor with the
script directory as default. Select a file and press Accept. Only one script may
be specified. A script name may not exceed 255 characters, scrolling.
For information about the File Name Editor, see “File Name Editor Property
Sheet” on page 4-9.
4-14
EDMControl User Guide and Menu Reference
Change Option
Dehighlighting Change Graphics
Dehighlighting Change Graphics
Select this menu option if you want to dehighlight some of the changes you
highlighted.
Description
The Dehighlight Project Database Changes property sheet allows you to
selectively, or completely, turn off highlighting of changes. When you dehighlight,
the system
• Turns off the specified change highlighting
• Returns layer discrimination to its previous state
• Views off comparison snapshots and revisions
The following describes the use of this option.
Getting to the Dehighlight Changes... Option
1.
Select Utility from the top bar of the explicit desktop.
2.
Select CHANGE MANAGEMENT from the Utility menu.
3.
Select the Change icon from the command palette.
4.
Select Dehighlight Changes... on the Change pulldown menu.
Procedure
Follow these steps to dehighlight changes.
1.
Specify the scope of the change.
2.
Select the types of changes to be dehighlighted.
3.
If you wish to execute a script, select Run Script and then enter a script name in
the Name field.
4.
Select Apply.
For more information about this option see the next page.
EDMControl User Guide and Menu Reference
4-15
Change Option
Dehighlighting Change Graphics
Dehighlight Project Database Changes Property
Sheet
Dehighlight Project Database Changes
Change Types
Change Scope
Your Changes
Added Objects
Changes by Others
Modified Objects
Deleted Objects
Name:
Run Script
Apply
...
Reset
Cancel
Displays the File Name
Editor property sheet
Options on the Dehighlight Changes Property Sheet
Change Scope: Select the same option you used to highlight the changes. Your
Changes is the default.
Change Types: You can specify the dehighlighting of any or all of the
• Added Objects
• Modified Objects
• Deleted Objects
The default is for all three to be selected.
Run Script (Optional): The Run Script toggle button must be selected before a
script can be specified. Valid scripts are contained in the directory
/usr/apl/cadds/data/control/scripts
The Run Script function is specific to the Bourne shell.
Select the Name field Editor button. This displays the File Name Editor with the
script directory as default. Select a file and press Accept. Only one script may
be specified. A script name may not exceed 255 characters, scrolling.
For more information about the File Name Editor see “File Name Editor Property
Sheet” on page 4-9.
4-16
EDMControl User Guide and Menu Reference
Change Option
Updating Objects Changed by Others
Updating Objects Changed by Others
Update displayed objects that have been changed by others.
Description
Since others are also posting objects to the project database, it is necessary to
periodically update your design to incorporate those changed objects.
The following describes the use of this option.
Getting to the Update Changes... Option
1.
Select Utility from the top bar of the explicit desktop.
2.
Select CHANGE MANAGEMENT from the Utility menu.
3.
Select the Change icon from the command palette.
4.
Select Update Changes... on the Change pulldown menu.
Procedure
Follow these steps to update object data changed by other members of the design
team.
1.
Select the method by which the update occurs.
2.
If you select Select Disciplines a scrollable list of valid disciplines is displayed.
Select one.
3.
If you wish to execute a script, select Run Script and then enter a script name in
the Name field.
4.
Select Apply.
For more information about this option see the following pages.
EDMControl User Guide and Menu Reference
4-17
Change Option
Updating Objects Changed by Others
Update Changes from Project Database Property
Sheet
Update Changes from Project Database
Selection Method
Disciplines
Select Viewed Objects
Select by Name
Select All Disciplines
Run Script
Apply
Discipline1
Discipline2
Discipline3
.
.
.
...
Name:
Reset
Cancel
Displays the File Name
Editor property sheet
Options on the Update Changes from Project Database
Property Sheet
Selection Method: Select one of these three options:
• Select Viewed Objects - The objects in the active part that are visible will be
updated with changes that others have posted to the project database. This is the
default.
• Select by Name - Objects belonging to the selected disciplines will be
updated.
• Select All Disciplines - All Change Management objects will be updated.
Disciplines: The list that is displayed is based on the zone/discipline
combinations that are linked for your active part.
Run Script (Optional): The Run Script toggle button must be selected before a
script can be specified. Valid scripts are contained in the directory
/usr/apl/cadds/data/control/scripts
The Run Script function is specific to the Bourne shell.
4-18
EDMControl User Guide and Menu Reference
Change Option
Updating Objects Changed by Others
Select the Name field Editor button. This displays the File Name Editor with the
script directory as default. Select a file and press Accept. Only one script may
be specified. A script name may not exceed 255 characters, scrolling.
For information about the File Name Editor, see “File Name Editor Property
Sheet” on page 4-9.
EDMControl User Guide and Menu Reference
4-19
Chapter 5
Zone Option
This chapter describes the following:
• Introduction
• Overview of the Zone Option
• Displaying Zone Boundaries
• Creating Project Zones
• Deleting Project Zones
EDMControl User Guide and Menu Reference
5-1
Zone Option
Introduction
Introduction
Selecting the Zone option displays the menu illustrated below. These menu
selections affect your interaction with the project database.
Change Management
Admin
Display Zones . . .
Cancel
Create Zones . . .
Delete Zones . . .
The property sheet associated with each of the menu items is described in the
following pages.
5-2
EDMControl User Guide and Menu Reference
Zone Option
Overview of the Zone Option
Overview of the Zone Option
Selecting the Zone icon displays a pulldown menu. Each pulldown entry displays a
property sheet.
Description
The Zone pulldown menu includes options for the following tasks:
• Display Zones...
• Create Zones...
• Delete Zones...
These menu options assist you in
• Specifying project zone boundaries you want to view
• Creating new zones
• Deleting, if you are authorized, a zone which no part is accessing
Getting to the Zone Option
1.
Select Utility on the Environment Management area of the top bar.
2.
Select CHANGE MANAGEMENT on the Utility pulldown menu.
Procedure
1.Select
the Zone option on the Change Management menu to display the
Zone pulldown menu.
2.Select
the desired option from the Zone pulldown menu.
For more information about the Zone option see the following pages.
EDMControl User Guide and Menu Reference
5-3
Zone Option
Overview of the Zone Option
Options on the Zone Menu
Display Zone Boundaries
Select this option to display a property sheet that enables you to specify zones
whose boundaries you want to have graphically displayed. You must be connected
to the project database and be linked to a project.
Create Project Zones
Select this option to display a property sheet that enables you to specify new
zone/discipline combinations. You and the active part must both be connected to
the project database The active part does not need to be linked for read or write
access., but must be linked to a project.
Delete Project Zones
This option is restricted. The system determines the authority to delete read zones.
Administrative privileges grant the right to delete write zones. Select this option to
display a property sheet on which the zone to be deleted is identified. The zone
must not be accessed by any part.
For more information about this option see the following pages.
5-4
EDMControl User Guide and Menu Reference
Zone Option
Displaying Zone Boundaries
Displaying Zone Boundaries
Select this menu option to specify zones whose boundaries you want to display, or
displayed ones you want to blank.
Description
You can selectively display, or blank, the boundaries of zones based upon whether
you want to select
• Specific linked zones
• All the zones that are linked
• Any zone, linked or not
You must be connected to the project database. A part must be linked for read or
write access.
Getting to the Display Zones... Option
1.
Select Utility on the Environment Management area of the top bar.
2.
Select CHANGE MANAGEMENT on the Utility pulldown menu.
3.
Select the Display option on the Change Management menu.
4.
Select Display Zones... on the Display pulldown menu to display the Display
Zone Boundaries property sheet.
Procedure
Follow these steps to display zone boundaries.
1.
Select the display method.
2.
Select the type of zone association to be displayed.
3.
If you select Select Linked Zones or Select Any Zone a scrollable list
appropriate to your choice is displayed. Select one.
4.
Specify the layer on which the graphics are to be displayed.
5.
If you wish to execute a script, select Run Script and then enter a script name in
the Name field.
6.
Select Apply.
For more information about the property sheet, see the next page.
EDMControl User Guide and Menu Reference
5-5
Zone Option
Displaying Zone Boundaries
Display Zone Boundaries Property Sheet
Display Zone Boundaries
Display Method
Zones
Add to Display
Zone1
Zone2
Zone3
.
.
.
Remove from Display
Selection Method
Select Linked Zones
Select All Linked Zones
Select Any Zone
Layer:
000
Run Script
...
...
...
Name:
Apply
Displays the Calculator
...
Reset
Cancel
Displays the File Name
Editor property sheet
Options on the Display Zones Property Sheet
Display Method: Select Add to Display and blanked zone boundaries are
displayed. Select Remove from Display and boundaries currently being displayed
are blanked. Add to Display is the default.
Selection Method: Select Select Linked Zones and only the names of zones
that are currently linked is shown. Select Select Any Zone and the listing is of all
the project zones, regardless of whether they are linked or not. Select Select All
Linked Zones and no list is displayed. Instead, all of the linked zones in the project
are selected to be displayed. Select Linked Zones is the default.
Zones: Scrollable lists of zone names are displayed in this window, according to
the criteria established in Display Method and Selection Method.
Layer: You can specify any layer from 0 to 254 on which to display the project
zone boundaries. Select the Calculator button or type in a number.
Run Script (Optional): The Run Script toggle button must be selected before a
script can be specified. Valid scripts are contained in the directory
/usr/apl/cadds/data/control/scripts
5-6
EDMControl User Guide and Menu Reference
Zone Option
Displaying Zone Boundaries
The Run Script function is specific to the Bourne shell.
Select the Name field Editor button. This displays the File Name Editor with the
script directory as default. Select a file and press Accept. Only one script may
be specified. A script name may not exceed 255 characters, scrolling.
File Name Editor Property Sheet
The File Name Editor property sheet is illustrated below.
File Name Editor
Directory:
Directory Filter
Directory
Accept
File Name
Reset
Cancel
Using the Property Sheet
By default, the Directory fillin box displays your Explicit Modeling create
directory. A list of directories located below the create directory is displayed in the
Directory scroll window.
Select a directory and it replaces the create directory. Select the Directory Filter
box and a scrollable list of files contained in your selected directory is displayed.
Select a file and press Accept.
EDMControl User Guide and Menu Reference
5-7
Zone Option
Creating Project Zones
Creating Project Zones
Select this menu option to create, but not redefine, project zones, provided you
have been granted authority to do so by the Project Administrator.
Description
To create a project zone, you must be connected to the project database. Your
modeling part must be linked to the project database.
You can create a zone for read access or write access, provided you are authorized
to do so.
Zones are defined as rectangles or polygons that are bounded by a maximum and
minimum elevation. A newly created zone is entered in the project database Zone
Table. From then on, you can link and unlink the zone using its name.
A zone name cannot exceed 24 characters.
Getting to the Create Zones... Option
1.
Select Utility on the Environment Management area of the top bar.
2.
Select CHANGE MANAGEMENT on the Utility pulldown menu.
3.
Select the Zone option on the Change Management menu.
4.
Select Create Zones... on the Zone pulldown menu to display the Create
Project Zones property sheet.
Procedure
Follow these steps to create zone boundaries.
1.
Select an access privilege.
2.
Specify a selection method.
If you select Select Locations use a locator to identify objects to be included
in the zone.
If you select Select String graphically select a string that will define the zone.
5-8
3.
Select the Zone Name field and enter a new, unique name.
4.
Select the Z-maximum and Z-minimum fields and enter the extents of the zone.
5.
Select the Description field and describe the zone.
EDMControl User Guide and Menu Reference
Zone Option
Creating Project Zones
6.
Select Display Zone Boundaries
7.
Select the Layer field and enter the number of the layer on which the zone
boundary is to be displayed.
8.
If you wish to execute a script, select Run Script and then enter a script name in
the Name field.
9.
Select Apply.
The following figure shows the property sheet and the available options.
Create Project Zones Property Sheet
Create Project Zones
Zone Attributes
Access Privilege
Read Access Only
Zone Name:
Read and Write Access
Z-maximum:
0.000000
Z-minimum:
0.000000
Selection Method
Select Locations
Select String
Description:
Display Zone Boundary
Layer:
Run Script
Name:
Apply
000
...
...
...
...
Reset
Displays the File Name
Editor property sheet
Cancel
Displays the Calculator
Options on the Create Project Zones Property Sheet
Access Privilege: Select either Read Access Only or Read and Write Access.
The default is to grant read access only.
Selection Method: A zone is either a rectangle or a polygon, with maximum
and minimum extents. Choose Select Locations and use a locator to identify
objects to be included in the zone. The system calculates the zone boundary and
displays it. This is the default selection.
EDMControl User Guide and Menu Reference
5-9
Zone Option
Creating Project Zones
You can identify the perimeter of a zone by selecting Select String and
graphically selecting a predefined string entity. The endpoints of the string will
close automatically if they are open. Endpoints are not considered coincident.
EDMZone Attributes: Type a new, unique name into the Zone Name field. The
name may not exceed 24 characters.
Specify the maximum and minimum extents of the zone in the Z-maximum and
Z-minimum fields.
Type the zone/discipline purpose of the zone into the Description field.
Display Zone Boundary: You can elect to display or not to display the zone
boundaries graphically by clicking the toggle button on or off. The default is to
display the zone boundaries.
Layer: Specify a layer on which the zone boundary is to be displayed. The default
is layer 254. You can type the number into the field or select the Calculator button.
Run Script (Optional): The Run Script toggle button must be selected before a
script can be specified. Valid scripts are contained in the directory
/usr/apl/cadds/data/control/scripts
The Run Script function is specific to the Bourne shell.
Select the Name field Editor button. This displays the File Name Editor with the
script directory as default. Select a file and press Accept. Only one script may
be specified. A script name may not exceed 255 characters, scrolling.
For information about the File Name Editor, see “File Name Editor Property
Sheet” on page 5-7.
5-10
EDMControl User Guide and Menu Reference
Zone Option
Deleting Project Zones
Deleting Project Zones
Select this menu option to delete project zones, provided you have been granted
authority to do so by the Project Administrator.
Description
A project zone can only be deleted by someone with administrative authority to do
so. No part can be accessing the zone. If any is, the zone cannot be deleted.
Getting to the Delete Zones... Option
1.
Select Utility on the Environment Management area of the top bar.
2.
Select CHANGE MANAGEMENT on the Utility pulldown menu.
3.
Select the Zone option on the Change Management menu.
4.
Select Delete Zones... on the Zone pulldown menu to display the Delete
Project Zones property sheet.
Procedure
Follow these steps to delete zone boundaries.
1.
Select an access privilege.
2.
Specify a selection method.
3.
If you specified Select by Name a scrollable list of zones that meet the delete
criteria is displayed. Select one.
4.
If you wish to execute a script, select Run Script and then enter a script name in
the Name field.
5.
Select Apply.
For more information about the property sheet see the next page.
EDMControl User Guide and Menu Reference
5-11
Zone Option
Deleting Project Zones
Delete Project Zones Property Sheet
Delete Project Zones
Access Privilege
Zones
Read Access Only
Zone1
Zone2
Zone3
.
.
.
Read and Write Access
Selection Method
Select by Name
Select All Zones
Run Script
Name:
Apply
...
Reset
Cancel
Displays the File Name
Editor property sheet
Options on the Delete Project Zones Property Sheet
Access Privilege: Select one of
• Read Access Only (the default)
• Read and Write Access
Selection Method: Choose Select by Name and a scrollable list of authorized
Zones is displayed. This is the default.
Choose Select All Zones and every zone that meets the criteria is selected.
Zones: The list of authorized zones that is displayed is determined by the access
privilege and the selection method you select:
• Read Access Only displays a list of zones that are linked for read-only.
• Read and Write Access displays a list of all the zones.
Run Script (Optional): The Run Script toggle button must be selected before a
script can be specified. Valid scripts are contained in the directory
/usr/apl/cadds/data/control/scripts
The Run Script function is specific to the Bourne shell.
5-12
EDMControl User Guide and Menu Reference
Zone Option
Deleting Project Zones
Select the Name field Editor button. This displays the File Name Editor with the
script directory as default. Select a file and press Accept. Only one script may
be specified. A script name may not exceed 255 characters, scrolling.
For information about the File Name Editor, see “File Name Editor Property
Sheet” on page 5-7.
EDMControl User Guide and Menu Reference
5-13
Chapter 6
Query Option
This chapter describes the following:
• Introduction
• Overview of the Query Option
• Listing the Status of Linked Parts
• Providing Work Table Data
• Obtaining Data from the Database
EDMControl User Guide and Menu Reference
6-1
Query Option
Introduction
Introduction
Selecting the Query option displays the menu illustrated below. These menu
selections affect your interaction with the project database.
Change Management
Admin
Cancel
List Change Status
Query by Zone/Discipline . . .
User Queries . . .
The property sheet associated with each of the menu items is described in the
following pages.
6-2
EDMControl User Guide and Menu Reference
Query Option
Overview of the Query Option
Overview of the Query Option
Selecting the Query icon displays a pulldown menu. Each pulldown entry either
executes a direct action or displays a property sheet.
Description
The Query pulldown menu lists the options for the following tasks:
• List Change Status
• Query by Zone/Discipline
• User Queries
These options help you to
• View a screen report of the status of your active part
• Display the work table data for specific zone/discipline associations
• Request data about a variety of subjects
Getting to the Query Option
1.
Select Utility on the Environment Management area of the top bar.
2.
Select CHANGE MANAGEMENT on the Utility pulldown menu.
Procedure
1.Select the Query option on the Change Management menu to display the
Query pulldown menu.
2.Select
the desired option from the Query pulldown menu.
For more information about this option see the following pages.
EDMControl User Guide and Menu Reference
6-3
Query Option
Overview of the Query Option
Options on the Query Menu
List Change Status
Select this direct action option to create a screen report listing the status of the
active part in the project database.
Query by Zone and Discipline
Select this option to display a property sheet that enables you to specify a zones or
zones, and a set of disciplines, for which the information is posted to the work
table.
User Queries
Select this option to display a property sheet that enables you to request
information about any or all of the following:
• Objects
• Object geometry and rules
• Disciplines and discipline rules
• Entity sets
• Layer sets
• Links
• Transaction log
• Offsets
• Privileges
• Viewed parts
• Zones and zone sets
• Zone vertices
This option is available at all times if you are connected to the project database.
For more information about this option see the following pages.
6-4
EDMControl User Guide and Menu Reference
Query Option
Listing the Status of Linked Parts
Listing the Status of Linked Parts
Selecting this direct action option displays a list of information about the currently
linked parts.
Description
The List Change Status pulldown menu option displays a list of data about the
linked parts, including the following:
• Part name
• Part ID number
• Discipline name
• Zone name
• Display status
• Viewing status
• Snapshot number
• Data status
Getting to the List Change Status Option
1.
Select Utility on the Environment Management area of the top bar.
2.
Select CHANGE MANAGEMENT on the Utility pulldown menu.
Procedure
Follow these steps to list the status of linked parts.
1.
Select the Query option on the Change Management menu to display the Query
pulldown menu.
2.
Select List Change Status from the Query pulldown menu.
For an example of a typical status report see the next page.
EDMControl User Guide and Menu Reference
6-5
Query Option
Listing the Status of Linked Parts
Example of a Typical Status Report
#14#GET ADBMS STatus
STATUS REPORT
Part: ABC-PART-5
Discipline = EQUIP_A
(This is the active part)
Zone = PROJECT
Display: ON Id: 642 Partname: PART2
Status: UP TO DATE Current Snapshot = 1
Discipline = HVAC_A
Zone = ZONE_6A
Display: OFF Id: 646 Partname: PART6
Status: UP TO DATE Current snapshot = 1
Discipline = PIPING_A
Zone = PIPE_1
Display: ON (not viewed Id: 504) Partname: PART-12
Status: OUT OF DATE Current Snapshot = 5 (Last viewed=3)
Snapshots
Display: NEVER BEEN DISPLAYED (PUT) Id: 637 Partname: PART15
Status: UP TO DATE Current snapshot = 1
Discipline = PIPING_A
Zone = ZONE_6A
Display: NEVER BEEN DISPLAYED (LINK) Id: 644 Partname: PART4
Status: UP TO DATE Current snapshot = 1
Discipline = STEEL_A
Zone = PROJECT
Display: ON Id: 645 Partname: PART5
Status: UP TO DATE Current snapshot = 1
Parts displayed: ON - 3 OFF 1 NEVER DISPLAYED - 2 OUT OF DATE - 1
No changes were made.
6-6
EDMControl User Guide and Menu Reference
Query Option
Providing Work Table Data
Providing Work Table Data
Selecting this option provides data about objects, identified by zone/discipline
combination, from the project database to your work table.
Description
This pulldown menu option displays a property sheet on which you identify a
zone, or a set of zones, and a discipline classification.
Based on this information, the system identifies objects that lie within that
combination, and reports those objects to your work table.
The information reported includes
• Partid (Part identification)
• Uid (User identification)
• Zone name
• Discipline classification
Getting to the Query by Zone/Discipline... Option
1.
Select Utility on the Environment Management area of the top bar.
2.
Select CHANGE MANAGEMENT on the Utility pulldown menu.
3.
Select the Query option on the CHANGE MANAGEMENT menu.
4.
Select Query by Zone/Discipline... on the Query pulldown menu to show the
Query by Zone and Discipline property sheet.
Procedure
Follow these steps to display objects located within a zone.
1.
Specify the selection method.
2.
Select a zone or zone set.
3.
Select a discipline from the scrollable list that is displayed in the discipline
window.
4.
If you wish to execute a script, select Run Script and then enter a script name in
the Name field.
5.
Select Apply.
EDMControl User Guide and Menu Reference
6-7
Query Option
Providing Work Table Data
Query by Zone and Discipline Property Sheet
Query by Zone and Discipline
Selection Method
Zone Name:
Select Zone Name
Disciplines
Select Zone Set
Run Script
Discipline1
Discipline2
Discipline3
.
.
...
Name:
Apply
Cancel
Reset
Zone Name Editor
Zone Set Name Editor
Zone1
Zone2
Zone3
.
.
.
Accept
ZoneSet1
ZoneSet2
ZoneSet3
.
.
.
Reset
...
Cancel
Accept
Displays the File
Name Editor
property sheet
Reset
Cancel
Options on the Query by Zone and Discipline Property
Sheet
Selection Method: Select either Select Zone Name or Select Zone Set. Your
choice determines which list is displayed. Select Zone Name is the default.
Zone/Set: A scrollable list of valid zones or sets, depending on your selection
method, is displayed. Choose one and it is entered in the Zone Name field. The
name may not exceed 24 characters.
Disciplines: A scrollable list of valid disciplines is displayed. The lists vary
according to the zone or zone set you selected.
Run Script (Optional): The Run Script toggle button must be selected before a
script can be specified. Valid scripts are contained in the directory
/usr/apl/cadds/data/control/scripts
6-8
EDMControl User Guide and Menu Reference
Query Option
Providing Work Table Data
The Run Script function is specific to the Bourne shell.
Select the Name field Editor button. This displays the File Name Editor with the
script directory as default. Select a file and press Accept. Only one script may
be specified. A script name may not exceed 255 characters, scrolling.
File Name Editor Property Sheet
The File Name Editor property sheet is illustrated below.
File Name Editor
Directory:
Directory Filter
File Name
Directory
Accept
Reset
Cancel
Using the Property Sheet
By default, the Directory fillin box displays your Explicit Modeling create
directory. A list of directories located below the create directory is displayed in the
Directory scroll window.
Select a directory and it replaces the create directory. Select the Directory Filter
box and a scrollable list of files contained in your selected directory is displayed.
Select a file and press Accept.
EDMControl User Guide and Menu Reference
6-9
Query Option
Obtaining Data from the Database
Obtaining Data from the Database
Select this menu item to obtain a variety of information from the project database.
You can establish filter options to limit the search.
Description
You can request data that is contained in the RDBMS tables set up by your Project
Administrator. The information is provided in the form of SQL tables. The column
headings are determined by the Administrator.
Valid User Queries
Valid queries are listed in the /usr/apl/cadds/data/control/sql
directory. They are
• Disciplines
• Discipline Rules
• Entity Sets
• Layer Sets
• Links
• Transaction Log
• Object Construction Rules
• Objects
• Offsets
• Privileges
• Snapshots
• Viewed Parts
• Zones
• Zone Vertices
• Zone Sets
For more information about this option see the following pages.
6-10
EDMControl User Guide and Menu Reference
Query Option
Obtaining Data from the Database
Getting to the User Queries... Option
1.Select Utility
on the Environment Management area of the top bar.
2.Select CHANGE MANAGEMENT
3.Select
on the Utility pulldown menu.
the Query option on the CHANGE MANAGEMENT menu.
4.Select User Queries...
on the Query pulldown menu to show the Query
Project Database property sheet.
Procedure
Follow these steps to display data.
1.
Select the Query Name Editor button.
Select a query name from the File Name Editor that is displayed.
2.
3.
Specify the destination to which the data is to be sent.
a.
Graphic display.
b.
A file. Select the File Name Editor button. Select a file name from the File
Name Editor that is displayed.
c.
A printer or plotter. Enter the name of a properly configured printer or
plotter in the Device Name field.
Select the Query Filter Conditions button.
Select Options... in the Query Filter Conditions box.
Supply the requested information on the Query Filter Options property sheet.
4.
Select Apply.
For more information about User Queries see the following pages.
EDMControl User Guide and Menu Reference
6-11
Query Option
Obtaining Data from the Database
Query Project Database Property Sheet
Query Project Database
...
Query Name
Results Destination
Display in Result Box
Send to File
File Name:
Send to Device
Device Name:
Query Filter Conditions
Apply
Displays the File Name
Editor property sheet.
...
Options...
Reset
Cancel
Displays the Query Filter
Options property sheet.
Options on the Query Project Database Property Sheet
Query Name: Enter a valid query name or select the Editor button to display the
File Name Editor property sheet described on the next page.
Select the directory /usr/apl/cadds/data/control/sql/user. Only one
file can be specified.
Select Apply.
Results Destination: Select where you want the information to be sent:
• Display in Result Box displays the results in the Query Results box, described
on a following page. This is the default.
• Send to File places the results in a file at the end of a full pathname. Select the
Send to File, File Name Editor button and the File Name Editor property sheet
described on the next page is displayed. The default destination file is
/usr/tmp/results.txt.
Only one file may be selected. A file name may not exceed 24 characters.
6-12
EDMControl User Guide and Menu Reference
Query Option
Obtaining Data from the Database
• Send to Device sends the information to a properly configured printer or
plotter. The default device name is lpr. A device name may not exceed 24
characters.
For information about the File Name Editor and the options associated with it see
“File Name Editor Property Sheet” on page 6-9.
Query Filter Conditions: Select this option to filter the query by
• User
• Project
• Part name
• SQL Where clause statement
The default is not to select the Query Filter Conditions option.
Procedure
Follow these steps to specify an SQL Where clause.
1.
Select Query Filter Conditions on the Query Project Database property sheet.
2.
Select Options... in the Query Filter Conditions box.
3.
Select the User ID Editor button. Select an ID from the scrollable list that is
displayed.
4.
Select the Project ID Editor button. Select an ID from the scrollable list that is
displayed.
5.
Select the Part Name Editor button. Select a name from the scrollable list that
is displayed.
6.
Enter a valid SQL Where clause from the
/usr/apl/cadds/data/control/sql directory.
7.
Press Accept.
For more information about the Query Filter Options property sheet see the next
page.
EDMControl User Guide and Menu Reference
6-13
Query Option
Obtaining Data from the Database
Query Filter Options Property Sheet
Query Filter Options
User ID:
...
Project ID:
...
...
Part Name:
SQL Where:
Accept
Reset
Cancel
Part Name Editor
User ID Editor
Partname1
Partname2
Partname3
.
.
.
User1
User2
User3
.
.
.
Accept
Reset
Accept
Cancel
Reset
Cancel
Project ID Editor
Project1
Project2
Project3
.
.
.
Accept
Reset
Cancel
Options on the Query Filter Options Property Sheet
User ID: Enter a valid ID or select the Editor button and a scrollable list of valid
User IDs is displayed. Select only one. It may not exceed eight alphanumeric
characters. The system displays a message if you are not authorized to use this ID.
Project ID: Enter a valid ID or select the Editor button and a scrollable list of
valid Project IDs is displayed. Select only one. It may not exceed eight
6-14
EDMControl User Guide and Menu Reference
Query Option
Obtaining Data from the Database
alphanumeric characters. The system displays a message if you are not authorized
to use this ID.
Part Name: Enter a valid part name or select the Editor button and a scrollable
list of valid Parts is displayed. The list depends upon the Project ID that is
specified. Select only one. It may not exceed eighty alphanumeric characters.
SQL Where: Select this entry if you want to particularize the data you are
searching for.
You may enter a Standard Query Language Where clause statement. Valid
statements are contained in the /usr/apl/cadds/data/control/sql
directory. It may not exceed 80 alphanumeric characters.
Example of a Filtered Query Displayed in the Query
Result Box
The following is a brief example of data you might receive in response to a Query.
1.
Specify a Query Name of Discipline Rules.
2.
Enter the filter condition:
dr_disc_name like ’CV%’ order by 1,2;
EDMControl User Guide and Menu Reference
6-15
Query Option
Obtaining Data from the Database
3.
The information is displayed in the Query Result box.
Query Result
DR_DISC_NAME
DR_RULE_PRIORITY
DR_RULE_NAME
DR_OBJECT_TYPE
1
CV_ARCHITECTU
1
ARCH_WALL
Wa
2
CV_ARCHITECTU
2
ARCH_OB
Architectural_object
3
CV_ENTITIES
1
ALL
Entit
4
CV_EQUIPMENT
1
CVPD_N
Equipment Nozzle
5
6
7
8
9
Cancel
6-16
EDMControl User Guide and Menu Reference
Glossary
This Glossary contains definitions of words and phrases particular to EDMControl.
Access Privileges
Access to the Project Database is granted on a username/password basis for
zone/discipline combinations.
Change Control and Propagation
EDMControl propagates changes to users by tracking objects, snapshots,
and work parts whenever changes are posted. Users decide when to post or
retrieve object changes from the database.
Change Notification
Users may check at any time for modeling changes based on one or more
disciplines and graphically highlight these changes.
EDMControl
A change control management system for Explicit Modeling designs and
drawings based on geometric zone and functional relationships.
Database Administrator
Responsibility and authority for building and maintaining the RDBMS and
customizing the user interface.
Disciplines
Subdivisions of a product based upon the functional classifications (trades
and crafts). For example, hot water pipes, HVAC ducts, and so on.
EDMControl User Guide and Menu Reference
Glossary-1
Glossary
End User
Member of the engineering design team who utilizes EDMControl.
Offsets
The positioning of a Work Part with respect to other Work Parts within the
project coordinate system.
Object Construction Rules
A formula used by EDMControl to construct objects from entity primitives
stored in the Work Part.
Objects
A group of graphical entities created each time a user posts changes. The
graphical entities are used to display objects and are stored in snapshot
versions of the Work Parts. Object data is stored in the RDBMS tables.
Project
An undertaking requiring extensive planning and work, that has a definite
objective with specific start and completion dates.
Project Control
The phase of a project management cycle that compares actual
performance with the planned schedule of objectives and implements
corrective measures to avoid project completion delays.
Project Database
The database consists of all the Explicit Modeling Work Parts, the
Snapshot version of Explicit Modeling Work Parts associated with a
Project, and other project data contained in RDBMS tables.
Project Parts
Explicit Modeling parts, and data stored in RDBMS tables, associated with
a specific project.
Project Reporting
Reports generated, using SQL queries, about objects, parts, transaction
dates, changes, etc., based on data stored in the Project Database RDBMS
tables.
Glossary-2
EDMControl User Guide and Menu Reference
Glossary
Relational Database Management System - RDBMS
Database used by CADDSInformation to store and manage attributes, i.e.
ORACLE. EDMControl shares some, and uses some, of the
CADDSInformation tables.
SCRIPT
A global modifier which allows the execution of a UNIX shell script, set up
by the project administrator, from within the modeling session.
Snapshots
Versions of the Work Part created each time a user posts changes to the
Project Database Used to compare and track changes between versions,
and to display objects.
Structured Query Language - SQL
ANSI standard query language used for defining and manipulating data in a
RDBMS.
Work Parts
Standard Explicit Modeling parts that have been linked to a specific
EDMControl Project. They are used to store objects, and post objects, to
the project database.
Work Table
Table assigned to each user for temporary storage of data associated with
the current EDMControl operation.
Zones
Geometric subdivisions of a project as defined by a polygon in the XY
plane with a minimum and maximum Z elevation.
Zone/Disciplines
Standard Explicit Modeling parts that have been linked to a specific
EDMControl Project and are used to store objects, and post objects, to the
project database.
EDMControl User Guide and Menu Reference
Glossary-3
Index
A
Access and Security Menu options 2-4
Access and Security options 1-5
connecting to the database 1-5
disconnecting from the database 1-5
linking to the project database 1-5
overview 2-3
running an OS command 1-6
unlinking from the project database 1-6
verifying links 1-6
Access privileges 2-12
when unlinking from the database 2-16
Administration options 1-7
B
Boundaries
display zone 5-4
of zones 1-6
C
Change options 1-6
a complete overview 4-3
committing changes 4-7
dehighlighting changes 4-15
graphically highlighting changes 4-10
highlight specific changes 4-13
highlighting changes graphically 4-13
posting a snapshot 4-5
posting changes to the database 4-6
EDMControl User Guide and Menu Reference
updating objects 4-17
verifying changes before committing 4-7
verifying objects 4-7
Changes
graphically highlighting,dehighlighting 4-4
listing status of 6-4
posting or updating 4-4
Command Palette options
access and security 1-5
display,change,zones 1-6
queries,administration 1-6
Committing changes
checks authorizations 4-7
filing a part 4-7
Connecting to the project database 2-5
an access and security function 2-3
entering a password 2-6
specifying a user name or group name 2-6
specifying the project name 2-7
Creating a snapshot 4-3
Creating project zones 5-8
access privileges 5-9
identifying zones 5-10
selection method 5-9
specifying a layer to display the zone
boundary 5-10
D
Data Status
when linking to the project database 2-12
Dehighlighting changes 4-4
scope of the change 4-16
types of change 4-16
Index-1
Index
Deleting project zones 5-11
access privileges
read-write 5-12
selection method 5-12
Disciplines
linked to the project database 2-12
queries about 6-4
specified when displaying by zone 3-16
unlinking from database 2-16
used to supply data for the work table 6-8
Disconnecting from the project database 2-9
an access and security function 2-3
Display Menu options 3-3
Display options 1-6
displaying objects
by discipline 3-10
by part 3-5
by zone 3-13
displaying project zone boundaries
display method
adding to the display 3-18
displaying zone boundaries 3-17
selection method 3-18
specifying a layer on which to
display 3-18
restoring objects to a previous state 3-20
Displaying Objects
by discipline 3-4
display method 3-11
selection method 3-11
by part 3-3
display method 3-7
select an EDM revision 3-7
selection method 3-7
specifying a snapshot 3-8
by zone 3-4
display method 3-15
selection method 3-15
specifying associated disciplines 3-16
by zone boundaries 3-4
Displaying zone boundaries
display method
adding to the display using
display option 3-18
zone option 5-6
removing from display using
display option 3-18
zone option 5-6
Index-2
selection method
selecting all linked zones using
display option 3-18
zone option 5-6
selecting any zone using
display option 3-18
zone option 5-6
selecting linked zones using
display option 3-18
zone option 5-6
specifying a layer for display using
zone option 5-6
specifying a layer on which to display using
display option 3-18
Displaying zone boundaries using
display option 3-17
zone option 5-5
E
EDM
locking a part for review 4-8
select a revision to display a Part 3-7
specifying a released revision
highlighting changes graphically 4-13
EDM Vault
receives a snapshot when changes are
committed 4-7
EDMControl
also called CHANGE Mgt. 1-4
pulldown location 1-4
Entity sets
queries about 6-4
Extracting and storing data
when committing changes 4-7
G
Group name
used to connect to the database 2-6
H
Highlighting changes graphically 4-10
comparing a work part
EDMControl User Guide and Menu Reference
Index
and a revision 4-10
and a snapshot 4-10
EDM revision specifying 4-13
objects, working with 4-13
snapshot specifying 4-13
turning off layer discrimination 4-13
which changes to highlight
yours or anothers 4-12
L
Layer discrimination,turning off 4-13
Layer sets
queries about 6-4
Linking to the project database 2-10
access privileges,specifying 2-12
an access and security function 2-3
data status,specifying 2-12
part offset,specifying 2-12
selecting disciplines 2-12
specifying a zone and discipline 2-12
zone name,specifying 2-12
Links
queries about 6-4
Listing
changes in status 6-5
sample report 6-6
the status of changes 6-4
Locking a part for review
awaiting engineering review in EDM 4-8
M
Menus
access and security options 2-3
change options 4-3
display options 3-3
linking to the project database 2-10
query options 6-3
unlinking from the project database 2-15
zone options 5-3
EDMControl User Guide and Menu Reference
O
Objects
displayed by
discipline 3-4
part 3-3
zone 3-4
zone boundaries 3-4
displaying zone boundaries 1-6
queries about 6-4
restoring viewed objects 3-4
Objects,working with 4-13
Offsets
queries about 6-4
P
Part Offset
specified when linking to the database 2-12
Posting a snapshot 4-3
Posting changes 4-4
a complete overview 4-6
Privileges
queries about 6-4
Project zones 5-4
Property sheet
link to project database 2-11
Property sheets
Create Project Zones 5-9
Dehighlight Project Database Changes 4-16
Delete Project Zones 5-12
display zone boundaries using
display option 3-18
zone option 5-6
displaying objects by
part 3-7
zone 3-15
highlighting changes 4-12
Part Offset Options 2-13
Posting Changes 4-7
Query by Zone/Discipline 6-8
Query Filter Options 6-14
Query Project Database 6-12
Unlink from Project Database 2-16
Updating Changes from the Project
Database 4-18
Index-3
Index
Pulldown menus
access and security options 2-3
change options 4-3
display options 3-3
for query options 6-3
locating CADDSControl 1-3
zone options 5-3
Q
Queries
by zone and discipline 6-4
Query options 1-6
a complete overview 6-3
listing the status of changes 6-5
sample report 6-6
supplying database information to the
user 6-10
applying filter conditions 6-14
link status 6-5
listing valid queries 6-12
where to send the information
display in a result box 6-12
send to a file 6-12
send to a printer or plotter 6-13
work table data 6-7
supplying work table data 6-7
selection method
select zone name or zone set 6-8
R
Restoring viewed objects 3-4
S
Save your designs
by posting snapshots 4-5
Scripts
operating as
a database connection option 2-7
run OS script option 2-19
unlink from project option 2-17
a database linkage 2-14
operating as an option
Index-4
in the Explicit Modeling environment 2-18
while creating project zones 5-10
while dehighlighting 4-16
while deleting project zones 5-12
while displaying by discipline 3-11
while displaying by part 3-8
while displaying by zones 3-16
while displaying zone boundaries using
display option 3-19
zone option 5-6
while highlighting changes 4-13
while posting changes 4-8
while querying 6-8
while updating otherschanges 4-18
running as
an access and security option 2-4
Shell commands
running as
an access and security option 2-4
running as an option
in the Explicit Modeling environment 2-18
while creating project zones 5-10
while dehighlighting 4-16
while deleting project zones 5-12
while displaying by discipline 3-11
while displaying by part 3-8
while displaying by zones 3-16
while displaying zone boundaries using
display option 3-19
zone option 5-6
while highlighting changes 4-13
while posting changes 4-8
while querying 6-8
while updating others changes 4-18
Shell commands available while
connecting to the database 2-7
linking to the database 2-14
running the OS script 2-19
unlinking from the database 2-17
Snapshots
created and numbered when changes are
committed 4-7
creating 4-3
posting 4-3
restoring objects to a previous state 3-20
saving design work periodically 4-5
specified for display
EDMControl User Guide and Menu Reference
Index
by part 3-8
specifying a snapshot to highlight
changes 4-13
Supplying data for the work table 6-7
selection method
select zone name or zone set 6-8
Supplying database information to the user 6-10
applying filter conditions 6-14
link status 6-5
listing valid queries 6-12
where to send the information
display in a result box 6-12
send to a file 6-12
send to a printer or plotter 6-13
work table data 6-7
T
Transaction log
queries about 6-4
U
Unlinking from the project database 2-15
access privileges,specifying 2-16
an access and security function 2-3
disciplines,specifying 2-16
elective options 2-17
zone name,specifying 2-16
Updating objects changed by others 4-17
selection method 4-18
Z
Zone Name
specified when unlinking from the
database 2-16
used when linking to the project
database 2-12
Zone options 1-6
a complete overview 5-3
creating project zones 5-8
access privileges
read or read-write 5-9
identifying zones 5-10
selection method 5-9
specifying a layer to display the zone
boundary 5-10
deleting project zones 5-11
displaying zone boundaries 5-5
display method
adding to the display 5-6
selection methods 5-6
specifying a layer for display 5-6
Zones
boundaries,displaying 5-4
creating project zones 1-6
creating zones 5-4
linked to the project database 2-12
projects,deleting from 5-4
queries about 6-4
the zone
zone sets
zone vertices 6-4
Zones,selecting 3-18
V
Verifying
changes before committing to the
database 4-7
database linkage 2-4
links 2-20
an access and security function 2-3
Viewed parts
queries about 6-4
EDMControl User Guide and Menu Reference
Index-5