1
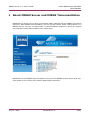
MIRAX Server
1.11
User's Guide
July 10, 2008
MIRAX Server 1.11 User's Guide
Contents
Disclaimer.....................................................................................................................4
Font types and symbols..................................................................................................5
Terms and abbreviations.................................................................................................6
Keyboard quick reference................................................................................................7
1 About MIRAX Server and MIRAX Teleconsultation.............................................................8
1.1 Storing and managing digital slides on a MIRAX Server............................................10
1.2 Teleconsultation module of MIRAX Viewer..............................................................10
1.3 Access to a slide stored on a MIRAX Server............................................................11
1.4 Overview of Teleconsultation................................................................................12
1.4.1 Online teleconsultation..................................................................................12
1.4.2 Offline teleconsultation..................................................................................12
1.4.3 Teleconsultation report..................................................................................13
1.5 Requirements for using Teleconsultation................................................................13
1.6 Requirements and privileges for hosts in an online teleconsultation session................13
2 Managing a MIRAX Server user account........................................................................14
2.1 Changing a user password...................................................................................14
3 Installing Teleconsultation bundled with MIRAX Viewer 1.10...........................................15
3.1 Prerequisites......................................................................................................15
3.2 Installing the application bundle............................................................................15
4 Connecting to and disconnecting from MIRAX Server......................................................16
4.1 Connecting to a MIRAX Server from MIRAX Viewer..................................................16
4.2 Logging in to a MIRAX Server via the web interface.................................................16
4.3 Disconnecting from the MIRAX Server....................................................................16
5 Managing digital slides on MIRAX Server.......................................................................17
5.1 Uploading a slide to MIRAX Server........................................................................17
5.2 Arranging slides in folders in MIRAX Server............................................................18
5.2.1 Creating a folder..........................................................................................18
5.2.2 Moving slides between folders........................................................................19
5.3 Sharing a slide with other MIRAX Server users........................................................19
5.4 Sharing a slide for E-School users.........................................................................20
5.5 Viewing a slide
5.5.1 Opening a
5.5.2 Opening a
5.5.3 Opening a
stored on a MIRAX Server..............................................................20
slide from a link............................................................................20
slide via the web interface..............................................................20
slide via Teleconsultation................................................................21
5.6 Deleting a slide from the server............................................................................21
6 Working with Teleconsultation in online mode................................................................22
July 10, 2008
3DHISTECH Ltd.
2(28)
MIRAX Server 1.11 User's Guide
6.1 Workflow............................................................................................................22
6.2 Creating a teleconsultation group (initiating an ad hoc online teleconsultation session) 22
6.3 Joining a teleconsultation session..........................................................................23
6.4 Working together on a slide in online teleconsultation..............................................23
6.5 Creating a teleconsultation report from the session.................................................24
6.6 Sharing the teleconsultation reports with the participants........................................25
6.7 Quitting a Teleconsultation session........................................................................25
7 Working with Teleconsultation in offline mode................................................................26
8 Troubleshooting.........................................................................................................27
8.1 I cannot connect to MIRAX Server from MIRAX Viewer.............................................27
8.2 I cannot open the slide from the link someone sent me...........................................27
8.3 I cannot change my password to MIRAX Server......................................................28
July 10, 2008
3DHISTECH Ltd.
3(28)
MIRAX Server 1.11 User's Guide
Disclaimer
Copyright © 2001-2008 3DHISTECH Ltd.
All rights reserved.
The following patents are pending for 3DHISTECH products: WO/2006/030326,
P0700409 and 11/826,752.
3DHISTECH Ltd. is not liable for damage of whatever nature (including, but not limited
to, general or specific damage, indirect damage, consequential damage or incidental
damage, including the results of the analysis of the digitized slides, for example: change
of health status related to erroneous diagnosis from the digitalized slide(s)) that stems
from or is associated with use of Product, digitalized slides, quality of staining, quality of
stained slides, quality of used method of staining. Certain legal systems do not allow the
limitation or exclusion of accidental damage. This restriction therefore may not apply in
your case. 3DHISTECH Ltd. assumes no responsibility for the functionality and fault-free
condition of your "application programs" (Workflows, VBA macros, Commander scripts).
CAUTION
For research and education uses only, not for use in diagnostic procedures. This product
has not been approved or cleared as a medical device by the U.S. Food and Drug Administration. The data and images obtained or viewed using this product are not intended for
clinical or diagnostic use.
Third-party disclaimer (LibTIFF - TIFF Library and Utilities)
3DHISTECH Ltd. is not liable for damage of whatever nature (including, but not limited
to, general or specific damage, indirect damage, consequential damage or incidental
damage, including damage resulting from lost profits, interruption of business, loss of
business information, pecuniary loss or similar damage) that stems from or is associated
with the incorporated part of this Product that is made by Silicon Graphics Inc.
THE SOFTWARE IS PROVIDED "AS-IS" AND WITHOUT WARRANTY OF ANY KIND, EXPRESSED, IMPLIED OR OTHERWISE, INCLUDING WITHOUT LIMITATION, ANY WARRANTY
OF MERCHANTABILITY OR FITNESS FOR A PARTICULAR PURPOSE.
IN NO EVENT SHALL SAM LEFFLER OR SILICON GRAPHICS BE LIABLE FOR ANY SPECIAL,
INCIDENTAL, INDIRECT OR CONSEQUENTIAL DAMAGES OF ANY KIND, OR ANY DAMAGES WHATSOEVER RESULTING FROM LOSS OF USE, DATA OR PROFITS, WHETHER OR
NOT ADVISED OF THE POSSIBILITY OF DAMAGE, AND ON ANY THEORY OF LIABILITY,
ARISING OUT OF OR IN CONNECTION WITH THE USE OR PERFORMANCE OF THIS SOFTWARE.
Further information
For the latest information on 3DHISTECH products and services,
visit http://www.3dhistech.com.
July 10, 2008
3DHISTECH Ltd.
4(28)
MIRAX Server 1.11 User's Guide
Font types and symbols
Example
Abbreviation or term that is explained in the section (page
6).
Example
Words or characters that appear on the screen. These include field names, screen titles, pushbuttons and menu
names, paths or options.
Keys on the keyboard. For example, function keys (such as
F11) or the Ctrl+O key combination.
Example
Cross-references to other documents.
Indicates that you need an additional module to use the
feature or that there are prerequisites for the task.
Warning!
Contains an important piece of information or a recommendation. The application will work if you choose not to follow
Important! the recommendation but its performance might be less
than optimal.
Contains a suggestion about using the application in some
other way or to some interesting purpose.
Tip!
July 10, 2008
3DHISTECH Ltd.
5(28)
MIRAX Server 1.11 User's Guide
Terms and abbreviations
Annotation
A particular detail of a digitized slide.
Host
User who uploaded the digital slide to MIRAX Server and
who initiates the teleconsultation about the slide.
MIRAX Server
user group
Group created by the MIRAX Server administrator.
Participant
User invited to participate in the evaluation of a slide
stored on MIRAX Server.
RTF
Rich Text Format
File format Teleconsultation uses to save a report of the
teleconsultation results.
Teleconsultation
Provides access to digitized slides for several users and
supports their collaboration in inspecting and evaluating
the virtual slide.
Teleconsultation
group
Group created by the host for a teleconsultation session,
independently of the user groups that exist on MIRAX
Server.
Several teleconsultation sessions (and therefore several
teleconsultation groups) can be active on a MIRAX Server
in parallel.
Telepathology
July 10, 2008
Teleconsulation in the field of pathology: pathologists exchange information and evaluate a slide together via teleconsultation.
3DHISTECH Ltd.
6(28)
MIRAX Server 1.11 User's Guide
Keyboard quick reference
Keyboard
shortcut
Description
Up
Moves the slide upwards.
Down
Moves the slide downwards.
Left
Moves the slide to the left.
Right
Moves the slide to the right.
+
Increases the magnification.
-
Decreases the magnification.
F1
Displays the list of shortcuts.
F2
Displays the entire slide in the active window.
F3
Shows the size at its actual size.
F4
Shows the slide at x2 magnification.
F5
Shows the slide at x5 magnification.
F6
Shows the slide at x10 magnification.
F7
Shows the slide at x20 magnification.
F8
Shows the slide at x40 magnification.
F9
Changes the magnification of the preview screen.
F11
Turns on/off the full screen view.
Ctrl+T
Shows/hides the slide tree.
ESC
Returns from full screen mode to normal mode.
Ctrl+M
Shows/hides the magnifier window in the top-right corner
of the screen.
Ctrl+P
Shows/hides the slide preview panel.
Ctrl+V
Switches between the Fit and Full View modes in the upper preview window on the slide panel:
July 10, 2008
•
In Fit mode, the preview window shows only the
digitized specimen cut.
•
In Full View mode, the preview window shows the
entire slide.
3DHISTECH Ltd.
7(28)
MIRAX Server 1.11 User's Guide
1
1 About MIRAX Server and MIRAX
Teleconsultation
About MIRAX Server and MIRAX Teleconsultation
MIRAX Server allows you to store and manage slides digitized with the MIRAX microscope
scanners. With MIRAX Teleconsultation you can access remote slides (slides stored on a
MIRAX Server) and you can participate in teleconsultation sessions in which you inspect
and evaluate virtual slides together with other users.
MIRAX Server and MIRAX Teleconsultation are part of the MIRAX product family that supports tasks in the routine and research pathologist's workflow.
July 10, 2008
3DHISTECH Ltd.
8(28)
MIRAX Server 1.11 User's Guide
1 About MIRAX Server and MIRAX
Teleconsultation
1. You digitize slides (which can be also tissue microarrays or slides stained with
fluorescent probes) with a MIRAX microscope, for example, with MIRAX SCAN.
For information on the microscopes, see MIRAX SCAN User's Manual.
2. The MIRAX scanner microscope stores the digitized slides on a computer connected to the scanner. In MIRAX Viewer, you can inspect the local slides and you
create
annotations
on
them
to
mark
interesting
areas.
MIRAX Viewer is a platform for several applications, called modules. For information on the MIRAX Viewer modules, see MIRAX Viewer 1.10 User's Manual.
3. From the local storage, you upload the files to MIRAX Server with file transfer
(3a)
or
via
Teleconsultation
in
MIRAX
Viewer
(3b).
For bulk upload, file transfer may be more convenient; if you need to transfer
only a handful of slides, you can upload them one-by-one via Teleconsultation.
4. Teleconsultation allows you to view remote slides (slides stored on a MIRAX
Server). With this module of MIRAX Viewer, you can also host a telepathology
session
or
participate
in
a
session
initiated
by
another
user.
July 10, 2008
3DHISTECH Ltd.
9(28)
MIRAX Server 1.11 User's Guide
1 About MIRAX Server and MIRAX
Teleconsultation
In a teleconsultation session a group of users inspect a digital slide simultanously (online) or asynchronously (offline).
5. You can also share slides for MIRAX E-School. For information on that product,
see E-School .4 – User's Guide.
1.1
Storing and managing digital slides on a MIRAX Server
MIRAX Server offers storing space for the digital slides of the users who have registered
on the server (registration is performed by the server administrator). Users can manage
and use their slides on the server in the following ways:
1.2
•
uploading slides to the server
•
arranging slides in folders, for example to group slides according to stainings or
your research projects
•
sharing slides with other users:
‒
with users who have an account on the same MIRAX Server (and can therefore access your slide if you make it public on the server or if you share the
slide with them explicitly)
‒
with users who will access the slide via MIRAX E-School if you do not want to
make the slide public
•
inviting other users into teleconsultation sessions to discuss slides
•
participating in teleconsultation sessions initiated by another user
Teleconsultation module of MIRAX Viewer
The Teleconsultation module for MIRAX Viewer allows you to access to digitized slides
from a remote location. With the chat support, you can also consult about slides with
other users in real-time or in asynchronous mode.
July 10, 2008
3DHISTECH Ltd.
10(28)
MIRAX Server 1.11 User's Guide
1 About MIRAX Server and MIRAX
Teleconsultation
Important!
Take into consideration that digitized slides are large: the MRXS file and
the associated folder is often 1GB or more. Therefore, it is recommended
that you use an Internet connection that has at least 1000 kbit/s capacity
when you are uploading slides or when you participate in a teleconsultation.
1.3
Access to a slide stored on a MIRAX Server
Whether you can open and view a slide stored on a MIRAX Server depends on the following criteria:
•
you can always access the slides that you uploaded to the server
•
you can always see the slides that a MIRAX Server user marked as Public
•
you can see slides that other users share (for instructions, see section 5.3 Sharing
a slide with other MIRAX Server users, page 19)
Therefore, you might not be able to see all the slides stored on the server either.
July 10, 2008
3DHISTECH Ltd.
11(28)
MIRAX Server 1.11 User's Guide
1 About MIRAX Server and MIRAX
Teleconsultation
If owners (uploaders) make slides public, any user on that MIRAX Server one can view
the slides if they logged in to the server.
If owners (uploaders) give permission to particular users, only these users can view the
slides. The slides are not even visible to other users.
If owners (uploaders) do not make slides public and do not give access to anyone, only
they can view the slides, the slides become “private”.
1.4
Overview of Teleconsultation
You can use the Teleconsultation module for telepathology to evaluate digitized slides
stored on a MIRAX Server via the Internet in offline and in online mode.
You need the Teleconsultation module to upload slides (one-by-one) to a MIRAX Server.
Uploading the slide creates a copy on the server, it does not remove the slide from your
local computer.
1.4.1
Online teleconsultation
Consultants evaluate the slide together, in a teleconsultation session initiated by a host
(typically the MIRAX Server user who uploaded the slide). A chat feature allows for realtime discussion in Teleconsultation.
Tip!
Teleconsultation does not have a voice channel. You might want to set up a
phone conference as well, outside of the MIRAX environment, to supplement the chat feature.
1.4.2
Offline teleconsultation
Consultants invited by the host to view, inspect and evaluate can work according to their
own schedule. Information can be exchanged via Teleconsultation-external methods, for
example e-mail or phone conference.
Consultants can use a freely available (unlicensed) version of MIRAX Viewer. The latest
free version of MIRAX Viewer can be downloaded from www.pathonet.org.
July 10, 2008
3DHISTECH Ltd.
12(28)
MIRAX Server 1.11 User's Guide
1 About MIRAX Server and MIRAX
Teleconsultation
Important!
Take into consideration the restrictions of the free version of MIRAX Viewer if you plan to use it in Teleconsultation, see page .
1.4.3
Teleconsultation report
An empty teleconsultation report (an RTF file) is created when the host starts the teleconsultation session. During the session the host can add information to it and at the end
of the session selected annotations can be exported to the file as images.
Only the host can export the report, but the distributed RTF file can be edited by anybody
with whom the host shares it.
1.5
Requirements for using Teleconsultation
For optimized running of online or offline teleconsultation sessions, at least a 1000 kbit/s
connection is recommended.
•
MIRAX Server
•
MIRAX Viewer (licensed or free)
1.6 Requirements and privileges for hosts in an online
teleconsultation session
•
The host must have a licensed version of MIRAX Viewer. Other participants can
use a freely available (unlicensed) version of MIRAX Viewer.
•
If the host quits the group, the teleconsultation session closes for all participants.
Other participants can leave the session without terminating it.
•
The can modify the virtual slide by adding annotations at any time. Other participants may request permission to modify the slide from the host.
•
Only the host can edit a teleconsultation report. Other participants can only read
the report after they received it from the host.
July 10, 2008
3DHISTECH Ltd.
13(28)
MIRAX Server 1.11 User's Guide
2
2 Managing a MIRAX Server user account
Managing a MIRAX Server user account
Your user account (username and password) is created by the MIRAX Server administrator. There are no restrictions on how many slides you can upload to the MIRAX Server,
provided that there is still storage place on the server.
Important!
You might not be able to change the password assigned to you by the administrator who enables or disables password resetting when your account
is created.
If you have trouble with resetting your password, contact your MIRAX
Server administrator.
2.1
Changing a user password
1. Log in to the server:
a. Open the MIRAX Server main page in your web browser.
b. Enter your username and password and click Login.
2. Select Change Password from the menu panel and modify the password.
July 10, 2008
3DHISTECH Ltd.
14(28)
MIRAX Server 1.11 User's Guide
3 Installing Teleconsultation bundled with
MIRAX Viewer 1.10
3 Installing Teleconsultation bundled with MIRAX
Viewer 1.10
Teleconsultation is not a standalone application: you need MIRAX Viewer to run it. Therefore, it is installed together with MIRAX Viewer, bundled into one executable.
3.1
Prerequisites
Prerequisite
Description
MIRAX Viewer version
1.10
Running on Microsoft Windows XP
Hardware
minimum:
Pentium P4, 3GHz, 1GB RAM
recommended:
Pentium C2D (DualCore), 2 GHz, 2GB RAM
Disk space
MIRAX Viewer bundled with the Teleconsultation module
minimum:
110 MB
3.2
Installing the application bundle
1. Start the MIRAXViewer.msi file that you received on a DVD or downloaded in
a compressed file.
2. Follow the instructions in the installation wizard.
July 10, 2008
3DHISTECH Ltd.
15(28)
MIRAX Server 1.11 User's Guide
4 Connecting to and disconnecting from
MIRAX Server
4 Connecting to and disconnecting from MIRAX
Server
4.1
Connecting to a MIRAX Server from MIRAX Viewer
1. Launch MIRAX Viewer on your computer.
2. Start Teleconsultation: click
in the toolbar.
3. Enter the server address and your authorization information in the dialog.
4.2
Logging in to a MIRAX Server via the web interface
1. Open the MIRAX Server main page in your web browser.
2. Enter your username and password and click Login.
4.3
•
Disconnecting from the MIRAX Server
Stop Teleconsultation: click
July 10, 2008
in the toolbar.
3DHISTECH Ltd.
16(28)
MIRAX Server 1.11 User's Guide
5
5.1
5 Managing digital slides on MIRAX Server
Managing digital slides on MIRAX Server
Uploading a slide to MIRAX Server
You need MIRAX Viewer to upload files to the server.
Tip!
Because the upload may take a significant amount of time – depending
on the slide size – it is recommended that you copy the slide to the server
before you start the Teleconsultation session.
You can only upload one slide at a time from MIRAX Viewer. Administrators
can perform bulk uploads via file transfer.
1. Launch MIRAX Viewer on your computer.
2. Start Teleconsultation: click
in the toolbar.
3. Enter the server address and your authorization information in the dialog.
If you encounter a problem, contact the MIRAX Server administrator.
4. Ensure that the slide is visible in the navigation tree on the Local tab in MIRAX
Viewer.
If the slide is not visible, add the folder that contains it to the navigation tree:
c. Open the slide: click
July 10, 2008
in the toolbar.
3DHISTECH Ltd.
17(28)
MIRAX Server 1.11 User's Guide
5 Managing digital slides on MIRAX Server
d. Browse to the folder that contains the slide, click Add Folder, and then click
Close.
5. Right-click the slide that you want to upload and then select Upload Slide to
Teleconsultation Server.
6. Set the properties for the copy of the slide to store on MIRAX Server.
If the Public checkbox is selected, any user on the MIRAX Server can access the
slide.
If the Public checkbox is not selected when the slide is uploaded to MIRAX Server, only those users will be able to see the slide with whom the slide owner
shares the slide.
7. Click Start Upload.
8. [optional]
If you want to notify someone about the new slide on MIRAX Server, click Yes.
Teleconsultation opens the mail application configured on your computer, A link
is automatically included in the message body. Fill in the e-mail header and
send the e-mail.
If this copy was created on the web server for an online teleconsultation session, you are advised to refrain from sending an e-mail at once. Instead, you
should click the No button, the reason being that invitations to an online teleconsultation session are initiated in a different dialog window at the moment
when a group is generated by the host.
In cases of offline teleconsultation, you may click Yes. An e-mail message is
opened in the computer’s standard e-mail program now. This message contains
the uniform resource locator (URL) that belongs to the exported virtual slide.
5.2
Arranging slides in folders in MIRAX Server
You can create folders on MIRAX Server to group your slides, for example for your cases
or projects, or to support your workflow.
5.2.1
Creating a folder
1. Log in to the server:
a. Open the MIRAX Server main page in your web browser.
b. Enter your username and password and click Login.
2. In the list of links on the left, click Main Page and navigate to the folder in
which you want to create the new folder.
July 10, 2008
3DHISTECH Ltd.
18(28)
MIRAX Server 1.11 User's Guide
5 Managing digital slides on MIRAX Server
3. Click Create New Folder, enter the name of the folder, and then click Save.
5.2.2
Moving slides between folders
1. In the list of links on the left, click Main Page and navigate to the slide that
you want to move.
2. Click Move this slide to another folder, browse for the destination folder, and
then click Move.
5.3
Sharing a slide with other MIRAX Server users
You can share your slides with other users on the MIRAX Server:
•
if you make a slide public on the server, all users will be able to see the slide if
they check their Slides Shared With Me page
•
you can use the MIRAX Server groups created by the server administrator, for example a group of users who specialize in a particular cancer type
•
you can share a slide with any subset of the users registered on this MIRAX Server by selecting them from the list of all users
•
for instructions on how to share a slide with E-School users, see section 5.4 Sharing a slide for E-School users below.
1. Log in to the server:
a. Open the MIRAX Server main page in your web browser.
b. Enter your username and password and click Login.
2. In the list of links on the left, click Main Page and navigate to the folder that
contains the slide that you want to share.
3. Select the sharing option:
‒
To share the slide with all users on this MIRAX Server, click Make
this slide public.
‒
To share the slide with users who are in a MIRAX Server group, click
Share this slide with groups.
‒
To share the slide with users that you pick one-by-one from the list
of all users on the server, click Share this slide with users.
4. Select the group or the users or the uses from the list.
July 10, 2008
3DHISTECH Ltd.
19(28)
MIRAX Server 1.11 User's Guide
5 Managing digital slides on MIRAX Server
5. Select the checkboxes if you want to allow these users to save your slide from
MIRAX Server to their computer and if they should also be able to modify the
slide after they downloaded it.
5.4
Sharing a slide for E-School users
Tip!
If you do not want to make a slide public you can still make it available in
E-School. The slide will be available only in the E-School document or ESchool exam via a special link.
1. In the list of links on the left, click Main Page and navigate to the slide that
you want to share for E-School.
2. Click Edit slide data, select the E-School checkbox, and then click Submit.
5.5
Viewing a slide stored on a MIRAX Server
5.5.1
Opening a slide from a link
If you receive a link to a slide stored on a MIRAX Server, click the link to open the slide.
Ensure that you can access the server and the slide stored there:
•
you need an Internet connection so that you can connect to the MIRAX Server on
which the slide is stored
•
MIRAX Viewer must be installed on your computer
•
the slide must be set to public or the owner of the slide must have added you to
the list of users who can access the slide
If you encounter any problems when you try to open a slide from a link, first contact the
owner of the slide so that you can check that the slide was shared with you.
5.5.2
Opening a slide via the web interface
1. Log in to the server:
a. Open the MIRAX Server main page in your web browser.
b. Enter your username and password and click Login.
2. In the list of links on the left, click Slides Shared With Me.
July 10, 2008
3DHISTECH Ltd.
20(28)
MIRAX Server 1.11 User's Guide
5 Managing digital slides on MIRAX Server
3. Select the slide from the list and click its link.
5.5.3
Opening a slide via Teleconsultation
1. Start MIRAX Viewer.
2. Connect to the MIRAX Server:
a. Start Teleconsultation: click
in the toolbar.
b. Enter the server address and your authorization information in the dialog.
3. On the Teleconsultation server tab, you can see all the slides that you uploaded and all the slides that other uses shared with you.
Double-click the slide that you want to open.
5.6
Deleting a slide from the server
1. Log in to the server:
a. Open the MIRAX Server main page in your web browser.
b. Enter your username and password and click Login.
2. In the list of links on the left, click Main Page and navigate to the slide that
you want to delete and the click Delete.
July 10, 2008
3DHISTECH Ltd.
21(28)
MIRAX Server 1.11 User's Guide
6
6.1
6 Working with Teleconsultation in online
mode
Working with Teleconsultation in online mode
Workflow
6.2 Creating a teleconsultation group (initiating an ad hoc
online teleconsultation session)
1. Start MIRAX Viewer.
2. Connect to the MIRAX Server on which you stored the slide for the teleconsultation.
a. Start Teleconsultation: click
in the MIRAX Viewer toolbar.
b. Enter the server address and your authorization information in the dialog.
3. Click the
icon.
4. Fill in the group properties and click OK.
If you want to send an e-mail to the participants, select the Send e-mail
checkbox. The e-mail will contain a link in which the server name and the group
name are visible and from which they can open the slide without or outside the
teleconsultation session as well.
July 10, 2008
3DHISTECH Ltd.
22(28)
MIRAX Server 1.11 User's Guide
6 Working with Teleconsultation in online
mode
5. [if you enabled e-mail notification]
The default mail application of your computer is launched. Enter the e-mail addresses of the participants and send the e-mail.
The group is created and the other users can join.
6.3
Joining a teleconsultation session
Users invited to a teleconsultation session need to join it, that is, select it from the list of
active sessions (several sessions might be active on the MIRAX Server in parallel).
Tip!
If you have received a notification e-mail with a link, you can read off the
MIRAX Server address and the group name from the link:
1. Start MIRAX Viewer.
2. Connect to the MIRAX Server on which the teleconsultation takes place:
a. Start Teleconsultation: click
in the MIRAX Viewer toolbar.
b. Enter the server address and your authorization information in the dialog.
3. Click the
icon.
In he Connect To Group window, select the group that you want to join and
enter a name under which other participants will see you during the teleconsultation.
4. Click OK to join the group.
6.4
Working together on a slide in online teleconsultation
The host must enable the slide so that all participants can see it (they cannot modify it or
take over the control):
•
On the Teleconsultation server tab, right-click the slide and then select Enable.
The slide is displayed in MIRAX Viewer in for all participants.
July 10, 2008
3DHISTECH Ltd.
23(28)
MIRAX Server 1.11 User's Guide
6 Working with Teleconsultation in online
mode
Warning!
If the host tries to enable a slide that has not been uploaded to MIRAX
Server, Teleconsultation starts uploading the slide. The upload, however,
might take time because digitized slides are usually large files (often
500MB, 1GB or larger). Uploading 1G slide over a 2000 kbit/s connection
requires more than 70 minutes. If uploading is started during teleconsultation, the waiting period for the slide might be unmanageably long and the
background upload process might also jeopardize the speed of teleconsultation.
6.5
•
It is possible to work with several virtual slides at the same time. The participants
always see the same slide(s) and the same part of the active slide as the host.
•
The host can work with the slide, for example move around on it to check its parts
as in MIRAX Viewer without Teleconsultation.
•
The host should take into consideration that MIRAX Viewer might be displayed
with different resolutions on the participants' screens. Best teleconsultation result
can be achieved with screen resolutions that do not differ significantly from each
other.
•
Participants can take over from the host: click Request control in the slide toolbar.
A request is sent to the host. The host can cede or deny control to the participant.
The name of the user who moderates the session is shown in red in the participant list (in the message box).
•
The host and the participants can also exchange comments via the chat tool.
Creating a teleconsultation report from the session
The host can create an RTF file with images of the annotation(s) from the slide the teleconsultation group is working on.
1. When you are done with the teleconsultation session, click the
slide toolbar.
icon in the
2. Select the annotation(s) that you want to export from the slide to the report
and then click OK.
3. Select where Teleconsultation should save the RTF file and enter a name for it.
July 10, 2008
3DHISTECH Ltd.
24(28)
MIRAX Server 1.11 User's Guide
6 Working with Teleconsultation in online
mode
Each selected annotation is included in the report, with a general preview of the virtual
slide with all annotations. The annotation label and what you entered in the comment
filed are displayed.
6.6 Sharing the teleconsultation reports with the
participants
At any time during a session, the host may send a copy of the teleconsultation report to
the participating clients. This process is initiated by clicking onto Send to clients. Clients
are; however, allowed to save a report they have received with the help of button Save to
file.
6.7
Quitting a Teleconsultation session
Click the
July 10, 2008
icon in the MIRAX Viewer toolbar.
3DHISTECH Ltd.
25(28)
MIRAX Server 1.11 User's Guide
7
7 Working with Teleconsultation in offline
mode
Working with Teleconsultation in offline mode
MIRAX Teleconsultation can be also used in offline mode: consultants evaluate the slide
according to their schedule.
July 10, 2008
3DHISTECH Ltd.
26(28)
MIRAX Server 1.11 User's Guide
8
8.1
8 Troubleshooting
Troubleshooting
I cannot connect to MIRAX Server from MIRAX Viewer
Check the following to ensure that you can access the server:
1. Is your Internet connection OK?
2. Are
you
entering
the
correct
name
or
address
to
the
server?
If you are not sure that you are entering the correct data in the connection dialog, contact your MIRAX Server administrator who can give you the name
and/or address of the server.
3. Are
you
entering
the
correction
user
name
and
password?
You can double-check by logging in to MIRAX Server via the web interface, see
section 4.2 Logging in to a MIRAX Server via the web interface (page 16). If you
can log in to the Server that way, your user name and password is correct.
8.2
I cannot open the slide from the link someone sent me
Check the following to ensure that you can access the server and the slide stored there:
1. Is your Internet connection OK?
2. Does the link point to a MIRAX Server on which you are a user?
Check the server name in the link.
3. Is the MIRAX Server working?
You can double-check by logging in to MIRAX Server
July 10, 2008
‒
from MIRAX Viewer, see section 4.1 Connecting to a MIRAX Server
from MIRAX Viewer (page 16)
‒
via the web interface, see section 4.2 Logging in to a MIRAX Server
via the web interface (page 16)
3DHISTECH Ltd.
27(28)
MIRAX Server 1.11 User's Guide
8.3
8 Troubleshooting
I cannot change my password to MIRAX Server
You might not be able to change the password assigned to you by the administrator who
enables or disables password resetting when your account is created.
If you have trouble with resetting your password, contact your MIRAX Server administrator.
July 10, 2008
3DHISTECH Ltd.
28(28)