1
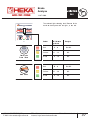
Operating Instructions
HEKA AUTO TEST SYSTEM
Univers UA2
H 2000
List of contents
Thank you and congratulations for purchase the HEKA test line.
Our aim is customer satisfaction. Please read the operating instruction.
We hope, you will have technical and economic success.
If you have any question please call HEKA hotline Tel.: +49-7 61-8 10 80.
General
General
Safety in operation
Fabricator
Measuring system
Technical data´s
Certifications
Maintenance
Guarantee
01
01
01
01
01
02
02
02
Using instruction
Quick use instruction
IR-Control
Toe, brake, suspension
Brake analyse
Toe test / analyse
Suspension test / analyse
Operation modes
Display indicating time
Visual defects
Weight input
PC-connection / function
Program options
03
04
05-06
07
08-09
10-11
12-13
14
14
14
15
16
Service
Trouble shooting
Date input
System Code
Initial Code
Service
Calibration
17
17
18
18
19
20
Placement / Installation
Transport, dimension, weight
Placement / Installation
21
21-27
General
13.07.2000
General
At the HEKA test line you can test:
Alignment for front- and rear axle.
Results are in mm with +/- on the display, printed mm and 1/10 of mm.
Brake force for each wheel, difference at the axle, rolling resistance,
ovality, and brake efficiency.
Suspension, numbers you get on the printout on the small printer.
Numbers and curves you get on the DIN A4 printer.
Numbers and curves you get on the PC screen and the printer.
The suspension test is a combination with the brake test.
The results will collected during the brake test, at the same plates.
Safety in operation
HEKA test lines must be used only from trained people, with driving licence.
The area behind the test line must be free of people.
The brake pedal must be checked, if its not to low by pushing hard, before
each test!
The test speed is minimum 5 km/h till maximum 10 km/h.
HEKA test lines can be installed in areas where people walking.
A safety plate should be installed, if the area are often used by people.
Fabricator
Measuring system
HEKA AUTO TEST GmbH,
Ensisheimer Str, 4
79110 Freiburg,
Germany
Tel.: +49-761-81080
Fax: +49-761-81089
The test plates for brakes and suspension are at ball bearings. A mechanical
free play is given and adjustable of 1/10 mm - 2/10 mm.
DMS sensors (amplifiers integrated) measure the force (in test direction) and
transmit the signals to the CPU, in the electronic box.
The alignment test works with two plates. One plate is fix. One plate is moving
left and right. The toe results are measured by potentiometer.
All zero points are automatically adjusted (each 10 seconds).
Microprocessor works with Software, analysed and calculated all data’s.
At the big display results are indicated. Via print signal the data’s will be send
to printer and to the RS 232 for PC.
Technical data’s
Display dimension
Display readability distance
Digital numbers
Ground segment
Max brake power
Max axel load
Electricity
HEKA AUTO TEST GMBH
E-Mail: [email protected]
b 710 mm x h 820 mm x d 40 mm UA2
25 m minimum
90 mm h
l 2900 mm x b 600 mm x h 40 mm.
10.000 N
4 to standard, 5 to. loaded
U 100 – 240 VAC, 50/60 Hz
Max. 50 W, I max 1,2 A
TEL: 07 61 / 8 10 80
Internet: http://www.heka-online.de
FAX: 07 61 / 8 10 89
01
General
13.07.2000
Certifications
HEKA test lines are certificated in different countries for the officials test.
So in Germany by the RW TÜV Essen.
HEKA is certified also for security by GS Hannover.
HEKA products are manufactured by the norm ISO 9001 TÜV-CERT.
Approved for:
Passenger cars and light trucks
Four wheel drive, permanent 4x4
ABS systems
Tuned cars with spoiler
Trailer one axle and tandem axle
Motorbikes
Tractors
Maintenance
Twice in the year, spring and autumn should the plates for brake and
alignment, be discovered.
Cleaning water drains and check the ball bearings. Caution not remove
the black special crease from the balls.
To the place for the balls, give fresh crease.
The frames should coated with care wax.
The mechanical free play, for the frames must be adjusted to 0,2 mm
in test direction.
Please clean and protect the cover plates, on upper and lower side,
with light car wax.
The test line, will thank you, with long and trouble free life.
Guarantee
HEKA factory guarantee for test line, under normal using.
HEKA allows 3 years guarantee, for all parts, from the date of leaving the
factory.
Caution, there is no guarantee:
1. If lightning destroy electronic parts, sensors and so on.
Please insurance against this risk, for any customer!
2. If water drains closed.
3. If welding works (electric) are done, at parts, near or
connected with the test line!
HEKA AUTO TEST GMBH
E-Mail: [email protected]
TEL: 07 61 / 8 10 80
Internet: http://www.heka-online.de
FAX: 07 61 / 8 10 89
02
Using instruction
13.07.2000
Quick use instruction
The HEKA test line shall be always switched ON.
Display
KEY
Function
Operation modes
0000 gr.0000
E000 gr.0000
A000 gr.0000
A000 gr.0000
gr. 0
Brake plates are ready for test
“
“
“
Toe plates are ready for test
(manual operation)
(manual by one key)
(semi-automatic operat.)
(full-automatic operate.)
Change operating mode (manual, manual one key, semi-automatic, full-automat.)
push “9”, “Green”, “SCR”, per “SCR” you can choose, confirm by “Red”.
Test result storing (manual). Start test if system is ready for and wait for indicating:
1280 gr.1310 push “1”
0840 gr.0780 push “2”
1030 gr.1060 push “3”
+ gr. 1
+ gr. 3
push “5”
push “6”
Storing brake results for front axle
Storing brake results for rear axle
Storing brake results for hand brake
Storing toe result for front axle
Storing toe result for rear axle
Note! The results can be stored, if the coloured result lights are flashing.
II II II II II II
Display reads if data’s already exists.
Display indicating time
Display indicating time Results can be stored only in the indicating time.
If indicating is over, you get last results again by “8”.
Change indicating time
push “9”, “Green”, “4”, than you see the time. Change the time by “4”.
If you have the requested time, confirm by “Red”.
Visual defects
Visual defects push “MENU” Now you can input the number for the visual defect.
Each number shall be confirmed by “Red”.
Weight input
Weight input push “7”
Than you push “6” for each 10 kg
“8” for each 100 kg
and “5” for each 1000 kg, confirm by “7”.
Note. You can input weight always, but before print.
If you give the weight into, than you get efficiency for foot- and hand brake.
Toe tolerance
Toe tolerance push “Green” Now you give the number for the requested tolerance.
See toe list and choose, confirm by “Red”.
HEKA AUTO TEST GMBH
E-Mail: [email protected]
TEL: 07 61 / 8 10 80
Internet: http://www.heka-online.de
FAX: 07 61 / 8 10 89
03
Using instruction
13.07.2000
PRINT SCROLL MENU
CLR
+-,
0
a. Store delete, paper and ready for
new test.
b. Confirmation for inputs
only without weight.
Visual defects input
Print x 1
Print x 2
ABC
DEF
GHI
JKL
1
2
3
4
Ready for new test (no delete)
Hand brake store
Rear brake store
Front brake store
MNO
PQR
STU
VWX
5
6
7
8
Last indicated results again on displ.
Weight input 100 kg
Weight input key an confirmation
Rear toe result store
Weight input 10 kg
Front toe result store
Weight input 1000 kg
YZ
9
Last stored results 1, 2, 3, 5, 6
Toe tolerance 1-9, extra functions
HEKA AUTO TEST GMBH
E-Mail: [email protected]
TEL: 07 61 / 8 10 80
Internet: http://www.heka-online.de
FAX: 07 61 / 8 10 89
04
Toe, brake and
suspension "manual"
13.07.2000
Ready for test
Test front axle
1. Toe and Brake
Store front
Toe front store
Toe and Brake
Key "5"
PRINT SCROLL MENU
CLR
+-,
0
ABC
DEF
GHI
1
2
3
JKL
4
MNO
PQR
STU
VWX
5
6
7
8
YZ
9
Brake front stor
Key "1"
PRINT SCROLL MENU
CLR
+-,
0
ABC
DEF
GHI
1
2
3
JKL
4
MNO
PQR
STU
VWX
5
6
7
8
YZ
9
Ready for test
Test rear axle
2. Toe and Brake
Store rear
Toe rear store
Toe and Brake
Key "6"
PRINT SCROLL MENU
CLR
+-,
0
ABC
DEF
GHI
JKL
1
2
3
4
MNO
PQR
STU
VWX
5
6
7
8
YZ
9
Brake rear store
Key "2"
PRINT SCROLL MENU
CLR
+-,
0
ABC
DEF
GHI
JKL
1
2
3
4
MNO
PQR
STU
VWX
5
6
7
8
YZ
9
Ready for test
Test
3. Hand brake
Store
Hand brake stor
Hand brake
Key "3"
PRINT SCROLL MENU
CLR
+-,
0
ABC
DEF
GHI
1
2
3
JKL
4
MNO
PQR
STU
VWX
5
6
7
8
YZ
9
HEKA AUTO TEST GMBH
E-Mail: [email protected]
TEL: 07 61 / 8 10 80
Internet: http://www.heka-online.de
FAX: 07 61 / 8 10 89
05
Using instruction
13.07.2000
Using instruction
0000 gr. 0000 Brake display shows zero and green light on = Ready to test
gr. 0 Toe display shows zero and green light alight = Ready to test.
Each display shows separately if it is ready for the next test.
Storing of the results are only possible, if they are indicated.
After the indicating time you can not store.
If the indicating time is over you get last results again by Key ”8”.
Than you can store.
Test result storing (manual). Start test if system is ready for and wait for
indicating:
1280 gr.1310 push “1”
0840 gr.0780 push “2”
1030 gr.1060 push “3”
+ gr. 1
+ gr. 3
push “5”
push “6”
Storing brake results for front axle
Storing brake results for rear axle
Storing brake results for hand brake
Storing toe result for front axle
Storing toe result for rear axle
Note! The results can be stored, if the coloured result lights are flashing.
If Brake display shows ready for test and
If toe display shows ready for test, than start with test:
Front axle
Drive vehicle from at least 3 m distance at 5 - 8 km/h.
A straight approach is important.
Before reaching the plates put gear in neutral.
Do not influence steering.
Pass toe plate, when you reach brake plate, brake smoothly till stop.
After coming to stop hold brake pedal for another 2 seconds (suspension).
Wait for the results and the green, amber or red light blinking, than store!
Check that you not touched with rear axle the toe plate!
Rear axle
If displays showing ready, start from your position again.
Pass toe plate, when you reach brake plate, brake smoothly till stop and
hold pedal for 2 seconds. Store results.
Hand brake
You can start if you stopped on the first half of the sensor plates, in the other
case set back on the sensor plate to the beginning of brake plate.
Start from this position and stop with handbrake smoothly with holding
2 seconds more.
You use the speed ( 5 – 8 km/h) and speed is energy.
The energy for brake test is big enough in this procedure and real much bigger
than you have at an roller test stand.
See and compare results at front brake and hand brake, for example!
HEKA AUTO TEST GMBH
E-Mail: [email protected]
TEL: 07 61 / 8 10 80
Internet: http://www.heka-online.de
FAX: 07 61 / 8 10 89
06
Brake
Analyse
13.07.2000
The coloured lights showing the difference of the
maximum brake power left and right, at one axle.
Foot brake
Front / Rear
Hand brake
HEKA AUTO TEST GMBH
E-Mail: [email protected]
Colour
Difference
printed
Red
25 - xx
Not OK.
Yellow
21 - 24
OK.
Green
0 - 20
OK.
Red
50 - xx
Not OK.
Yellow
41 - 49
OK.
Green
0 - 40
OK.
TEL: 07 61 / 8 10 80
Internet: http://www.heka-online.de
Analyse
FAX: 07 61 / 8 10 89
07
Using instruction
13.07.2000
Toe tolerance
Toe tolerance push “Green” Now you give the number for the requested tolerance.
See toe list and choose, confirm by “Red”.
Toe tolerance list
There are 8 fixed tolerances for TOE in the test line:
0
1
2
3
4
5
6
7
8
=
=
=
=
=
=
=
=
=
No tolerance limit
-1 mm
to
-1 mm
to
+1 mm
to
+2 mm
to
-2 mm
to
-1 mm
to
-1 mm
to
-2 mm
to
Input fixed toe tolerance:
Key
“GREEN”
Confirmation by “RED”.
than
+1 mm
+2 mm
+3 mm
+4 mm
+1 mm
-3 mm
-4 mm
-6 mm
number for tolerance 1 ….8
Input free toe tolerance:
Key
“GREEN” + “GREEN” now,
you see left at brake display the lower toe limit and right the upper limit in mm.
The cursor is flashing, left for “–“or “+”, for the symbol “+” it is dark.
“-“ or “+”, you can change by any number, form 0 to 9.
Each given number let the cursor go one step to the right, and the number is registered.
If you want to push the cursor to the right, without change,
than use key ”GREEN”, for each position.
If the free tolerance limit is ok, than confirm, at any position of the cursor, by “Red”.
Toe test:
If a result is within the tolerance, than you get green light at the display and on the
print out is “Toe OK”.
If there are 0,9 mm plus ore minus tolerance, you get yellow light.
If there are more than 0,9 mm plus ore minus than you get red light and on the
print out is “Toe not OK”.
You can store, front toe and rear toe, for print out and PC.
But the tolerances are only for front toe!
HEKA AUTO TEST GMBH
E-Mail: [email protected]
TEL: 07 61 / 8 10 80
Internet: http://www.heka-online.de
FAX: 07 61 / 8 10 89
08
Toe
Analyse
13.07.2000
The coloured lights gives fast information about
correct adjustment.
Colour
Red
Toe
HEKA AUTO TEST GMBH
E-Mail: [email protected]
Tolerance
> 0,9 mm
Analyse
printed
Not OK.
Yellow
+/- < 0,9 mm
OK.
Green
within
OK.
TEL: 07 61 / 8 10 80
Internet: http://www.heka-online.de
FAX: 07 61 / 8 10 89
09
Suspension
Test
13.07.2000
At the HEKA Test Line, you can collect and analyse the dynamic oscillation after braking.
The result give information about the shock condition.
To get the dynamic oscillation after brake, it is requested to hold the brake pedal,
or hand brake lever, 2 seconds after stop.
2
0
Sec
Sec
Brake maximum
Brake maximum
Brake amplitude
Test procedure OK
Suspension
Oscillation
Brake pedal, hand brake lever
was hold 2 seconds.
HEKA AUTO TEST GMBH
E-Mail: [email protected]
Brake amplitude
Test procedure Not OK
Brake pedal, hand brake lever
was not hold and for that no results!
TEL: 07 61 / 8 10 80
Internet: http://www.heka-online.de
FAX: 07 61 / 8 10 89
10
Suspension
Analyse
13.07.2000
Three results will be printed:
1. Oscillation after front brake
2. Oscillation after rear brake
3. Oscillation after hand brake
Each of these results are three amplitudes.
For example:
Oscillation front brake
1.
2.
Brake amplitude
left
3.
Left
Amplitude
Right
21
1.
25
06
2.
08
02
3.
03
Brake amplitude
right
The height of the amplitude is given than a relative number.
It should be: the first amplitude the highest,
the second lower
the third nearly to zero.
As lower the amplitudes are, as better the shock condition.
Left and right should nearly even in the 10 range.
The results with old and new shocks will give you the best experience!
Bad brakes = bad oscillation
Difference
> 30 %
Brake amplitude
left
HEKA AUTO TEST GMBH
E-Mail: [email protected]
If the brake difference on one axle is
bigger than 30%, so you get no results!
On the print you get "XX".
Brake amplitude
right
TEL: 07 61 / 8 10 80
Internet: http://www.heka-online.de
FAX: 07 61 / 8 10 89
11
Operation modes
13.04.2000
You can choose operation modes:
Manual operation
Test steps by IR-Control manual
One key operation
Store by key "5" all test steps.
Sequence is:
1. Front toe and brake
2. Rear toe and brake
3. Hand brake
PRINT SCROLL MENU
CLR
+-,
0
ABC
DEF
GHI
JKL
1
2
3
4
MNO
PQR
STU
VWX
5
6
7
8
YZ
9
Semi automatic
Store automatic
Print signal via IR control
Sequence is:
1. Front toe and brake
2. Rear toe and brake
3. Hand brake
PRINT SCROLL MENU
CLR
+-,
0
ABC
DEF
GHI
1
2
3
JKL
4
MNO
PQR
STU
VWX
5
6
7
8
YZ
9
HEKA AUTO TEST GMBH
E-Mail: [email protected]
TEL: 07 61 / 8 10 80
Internet: http://www.heka-online.de
FAX: 07 61 / 8 10 89
12
Operation modes
13.07.2000
Full automatic
Store and print is automatic
No IR-Control used
Sequence is:
1. Front toe and brake
2. Rear toe and brake
3. Hand brake
Change operation mode
You can change the operation mode as follows:
Key "9" , " " , "Scroll".
Now you use key "Scroll" for change.
If you get your requested mode, confirm by "CLR".
PRINT SCROLL MENU
CLR
+-,
0
ABC
DEF
GHI
JKL
1
2
3
4
MNO
PQR
STU
VWX
5
6
7
8
YZ
9
HEKA AUTO TEST GMBH
E-Mail: [email protected]
TEL: 07 61 / 8 10 80
Internet: http://www.heka-online.de
FAX: 07 61 / 8 10 89
13
Using instruction
13.07.2000
Display indicating time
Any measuring will be shown on the display.
If are there any indicating, this will be as long as:
1. the indicating time is choosen, or
2. indicated results will be stored.
In that case, you would like store results, but the
Indicating time is over and you see zero.
You can store results only, if they indicated on display!
By key “8” you get the result again to the display and
than you can store.
Change indicating time
push “9”, “Green”, “4”, than you see the time. Change the time by “4”.
If you have the requested time on the display,
than you can confirm by “Red”.
Visual defects
Visual defects push “MENU” Now you can input the number for the visual defect.
Each number shall be confirmed by “Red”.
There are 8 defects visible, you can choose by IR control:
Key “MENU” and number
1. Brake - linings
2. Brake mechanism
3. Brake - tubes
4. Brake system defect
5. Shocks front oil loosing
6. Shocks front loose
7. Shocks rear oil loosing
8. Shocks rear loose
Input of any visible defect brake, will change the brake result at print,
always to “Brake not ok!”
Input defect shocks gives at print out always “Shocks are not ok!”
Weight input
It will taken normally the maximum weight of the car.
This weight will given via IR control to the test line.
You can input to any time, in the beginning of the test
ore at the end, but you must do it, before you give signal for print!
Weight input push “7” Than you push “6” for each 10 kg
“8” for each 100 kg
and “5” for each 1000 kg, confirm by “7”.
On the print out, you get the weight of the car,
the efficiency foot brake and the efficiency hand brake,
each in % deceleration.
There will be automatically compared the efficiency
asked from the officials in the country.
Only when you give the weight into, you get efficiency for foot- and hand brake!
HEKA AUTO TEST GMBH
E-Mail: [email protected]
TEL: 07 61 / 8 10 80
Internet: http://www.heka-online.de
FAX: 07 61 / 8 10 89
14
Using instruction
13.07.2000
PC – connection and function
After installation at a PC, connect the test line from RS 232 to COM 2
at the PC via PC – cable.
See disk.
Function is ok, if you get the display at the screen with all indications.
If a car test is completed, than you give the signal PRINT.
Now, on the screen, you get curve-results for front and rear brake
in one display.
F7 = curves or columns
You can choose via:
What is shown, you can print via F 10
The print gives always the numbers of test result and graphics, what
you have chosen at the screen.
For analyse the results use F1 = numeric results
F2 = brake front
F3 = brake rear
F4 = hand brake
F5 = toe
F7 = graphic curves front + rear
F7 = graphic columns front + rear
F7 = graphic curves ………
Caution! F8 = only for change name/car no.
F9 = store of the test results,
please input name/car no.
F10 = print
You print these, what you have on the screen.
HEKA AUTO TEST GMBH
E-Mail: [email protected]
TEL: 07 61 / 8 10 80
Internet: http://www.heka-online.de
FAX: 07 61 / 8 10 89
15
Using instruction
13.07.2000
Program options
Start all options per key
Printer DIN A 4 type choose per key
If you have the correct printer
“9” + ”SCROLL” …
“PRINT” = P O - all txt printer
“PRINT” = P 1 - graphic, 9 pin b/w
“PRINT” = P 2 - graphic, 9 pin colour
“PRINT” = P 3 - graphic, 24 pin b/w
“PRINT” = P 4 - graphic, 24 pin colour
confirm by
”Red – CLR”.
Caution: EPSON printer working with P3 b/w and P4 colour!
Printer function via adapter, connected at socket “printer”.
Printer, no function? At display = pap out means: 1. no paper
2. printer not connected
3. printer not on
At display = Err 13 means: 1. paper trouble
2. other problem /not ready
Start all options per key
“9” + “SCROLL” …
Toe type choose per key
“MENU” C
0 = only 9 /
Speed on / off
“1”
Pb5 0 = off /
Shock test on / off
“2”
P70 0 = off /
Measuring time in seconds
“3”
Pb4 0 = 3 sec./
Hand brake test
at the 1. or 2. plate set, only UA4
“4”
P87 0 = 2. pl. /
Extra program
“5”
P9d 0 = off /
Pb5 0 = 1,0 /
Toe factor
“6”
“7”
P9b 0 = off /
Brake relation front/rear print out
Pedal force measuring, pedal unit
“8”
P79 0 = off /
Brake rear, higher sensibility
“9”
P67 0 = off /
Motorcycle test configuration
“Green” Pb6 0 = off /
For all options confirmation is always “Red - CLR”.
Car types choose per key
Forward per key “MENU”…
1 = 1-8
A5 = on
A5 = on
A5 = 2 sec.
A5 = 1. pl.
A5 = on
A5 = 0,7 mm
A5 = on
A5 = on
A5 = on
A5 = on
“9” + “GREEN” + “MENU”
AAA
= passenger car
LLL
= lorry ( max 4 to per axle)
ttt
= tractor
Mot cyc = motorcycle, choose left / right
Confirmation by key “Red – CLR”.
Test number input
You can input a number for each test, before print via “GREEN” + “MENU”
C O
O O O
Scroll with the keys
“1” ”2” ”3”, confirm “Red-CLR”
Statistic print
You get a statistic print out, for all tested cars before, “9”+“GREEN”+”PRINT”.
HEKA AUTO TEST GMBH
E-Mail: [email protected]
TEL: 07 61 / 8 10 80
Internet: http://www.heka-online.de
FAX: 07 61 / 8 10 89
16
Service
13.07.2000
Trouble Shooting
Display
Problem
Err
10 No zero point
28
228
or
28
0
SE 00 SE00 blinking
SE00 SE00
Date is wrong
steady
What to do
Go to service mode, via key
“GREEN” + “MENU” + “9” + “PRINT” +
“SCROLL” + “1” = brake zero points “UA2”
Zero point left is ok., zero point right is not ok.
Control cable? If destroyed? Renew cable.
If cable ok, renew brake sensor right.
Tests are possible, but you need an actual
System code.
No test possible, you need an actual
System Code. See System code...
If you have, after input new System code,
the same reading (SE0), you need Initial code.
See Initial code.
Caution, you must input the correct date.
After repair make a new start. Turn off the test line and turn on again.
PRINT OUT, FOR TROUBLE SHOOTING!
A printout for searching troubles can be made, by keys “9” + “GREEN” + “GREEN”.
If the hot line HEKA Freiburg get this by fax, we can help.
Date input
Actual Date
Ask for the actual Date via “Enter GREEN”, “SCROLL” = month year
per “CLR - RED” leaving.
If the the date is in the past, adjust to actual.
If the date is in the future, there is no possibility to adjust back. You need Initial code.
The test line has a Date-Limit, for service reason!
Latest after two years, the unit must inspected for exactness.
Ask for the Date-Limit via “Enter green”, “SCROLL”, “MENU” = month year, if you
near to this Date, ask for service with a new System Code!
Per “CLR red” leaving to test mode.
Adjust Date
“Enter GREEN” + “SCROLL”, you see the Date in the unit, and now you can change it
as follows:
Display reads no for
D D M
M Y Y
scrolling per key
“1” ”2” “3” “4” “5” “6”
If you have the correct Date at the display, confirm by “CLR RED”.
(D means day, M means month, Y means year)
HEKA AUTO TEST GMBH
E-Mail: [email protected]
TEL: 07 61 / 8 10 80
Internet: http://www.heka-online.de
FAX: 07 61 / 8 10 89
17
Service
13.07.2000
SYSTEM – CODE
You get the SYSTEM-CODE from HEKA Freiburg by Fax, for that
we need the Unit No.- - - -.
System code input
“Enter GREEN” + “SCROLL” + “MENU” (light red) + “MENU” (light green), now ready
for input System code,
as follows:
Display reads sign
O O O
O O O
“1” ”2” “3” “4” “5” “6”
scrolling per key
If you have the correct System code at the display, confirm by “ CLR RED”.
After input System code, check the actual Date!
INITIAL – CODE
You get the Initial code from HEKA Freiburg by Fax, for that
we need the Unit No.- - - -
Initial code input
“Enter GREEN” + “SCROLL” + “ 9” (light yellow), now ready for input Initial code,
as follows:
Display reads sign
O O O
O O O
scrolling per key
“1” ”2” “3” “4” “5” “6”
If you have the correct Initial code at the display, confirm by
2 x “CLR RED”.
After input the Initial code, check the actual Date!
HEKA AUTO TEST GMBH
E-Mail: [email protected]
TEL: 07 61 / 8 10 80
Internet: http://www.heka-online.de
FAX: 07 61 / 8 10 89
18
Service
13.07.2000
Service
Best, once a year, but latest after two years, the test line must have a maintenance.
See Maintenance, page 02, after maintenance check zero points.
Check zero points first, for brake = 28
for toe = 128
Service function
Use keys as follows:
Display
“Enter GREEN”
C--
- -0
+ “MENU”
CHE
000
+ “9”
SSS
SSS (about 2 seconds)
+ “0”
0000 Red 0000 Brake, Newton indicated, UA2,
+ “SCROLL”
0000 Yellow 0000 Brake, Newton indicated,
+ “1”
28
Red
28 Brake, Zero point, UA2,
+ “2”
28
Yellow
28 Brake, Zero point,
or 2. plate set, if UA4!
1. plate set, only UA4!
255
+ “MENU”
“CLR RED”
HEKA AUTO TEST GMBH
E-Mail: [email protected]
1. plate set, only UA4!
Green 128 Toe, Zero point
+ “5” (“6”)
+ “8”
2. plate set, if UA4!
000 Configuration, ca. 4 seconds
123 Unit no. ca. 2 seconds
for confirmation and restart.
TEL: 07 61 / 8 10 80
Internet: http://www.heka-online.de
FAX: 07 61 / 8 10 89
19
Service
13.07.2000
Calibration
Once a year, but latest after two years, the test line should be calibrated!
For calibration you must use the original HEKA calibration set.
1. Set Calibration tool in position,
2. go to brake Newton indication, see above service function.
3. Give power 1000 kg with the calibration tool set,
the indication should be 980 Newton.
4. Realise the deviation in %
5. Release the power from the calibration tool set.
6. This procedure left and than right.
7. Leave the service function, “CLR RED”. After correction, procedure again.
Calibration correction
For correction the calibration, there are multiplication factors.
The indication for the factor is 100 and means, that the result will multiplied by 1,00.
You get these factors via keys:
“9” + “MENU”
“2”
“3”
“4”
100 Red
Brake left, factor, UA2
or 2. plate set, if UA4!
Red 100
Brake right, factor, UA2
0r 2. plate set, if UA4!
100 Red
Brake left, factor,
1. plate set, only UA4!
Red 100
Brake right, factor,
1. plate set, only UA4!
Via key “1” you get again the factor for Brake left UA2.
Caution, “1” and “2” are the brake factors left and right, for the test line UA2.
Only UA4, there is 1. plate set and 2. plate! That means, in test direction.
Correction a factor,
use key “GREEN” for up, 1,01 - 1,02 - 1,03 …
Use key “9”
for down,
Use key “8” for set back to
0,99 - 0,98 - 0,97 …
1,00.
End of calibration and confirmation by “Red CLR”.
Control print out for calibration factors, per “9” + “GREEN” + “GREEN” (long).
HEKA AUTO TEST GMBH
E-Mail: [email protected]
TEL: 07 61 / 8 10 80
Internet: http://www.heka-online.de
FAX: 07 61 / 8 10 89
20
Placement / Installation
13.07.2000
Transport, dimension, weight
HEKA test lines are packed in one original case 187 cm x 77 cm x 65 cm
Weight, “UNIVERS A2” Gross weight = 350 kg, Net weight = 317 kg.
This case is used one way. Please keep away from wet.
Placement / installation
HEKA test line must have a special place. Any car can and should be tested.
For the HEKA check you need only seconds. The economic possibilities are
enormous.
In the entrance to the garage ore station and an reception area is ideal.
Space needed
Before the HEKA test line 5 m straight and behind an free security area of 5m is requested.
Left and right of the test line minimum 0,5 m space must be planned.
Requirements to the place of installation
Installation outside or inside is possible. All temperatures and all humidity are accepted.
But the Display must be protected against rain and sun!
The place should have a maximum descent gradient of 1%
(1cm height difference of 1m).
3m before and 3m behind, there shall be no obstacle higher than 1,5 cm.
For exact results(specially toe), installation even with floor is recommended.
Energy, electrical connections and drains
See 1.3.electricity. It is recommended to have an extra switch for electric power.
The ground unit must be connected by earth.
Installation even with ground, needs big enough water drain, see also plan.
The display can hang up under the ceiling ore the wall in a good visible distance.
See also plan No. 22 – 27.
HEKA AUTO TEST GMBH
E-Mail: [email protected]
TEL: 07 61 / 8 10 80
Internet: http://www.heka-online.de
FAX: 07 61 / 8 10 89
21
Ground set
even with floor
Scale: 1:15 , Dimensions in [mm]
(Fixation points)
Bremse
Brake
(Fixation points)
13.07.2000
Spur
TOE
HEKA AUTO TEST GMBH
E-Mail: [email protected]
Test
Direction
Bremse
Brake
Spur
TOE
TEL: 07 61 / 8 10 80
Internet: http://www.heka-online.de
FAX: 07 61 / 8 10 89
22
Frame for installation
even with floor
Scale: 1:15 , Dimensions in [mm]
13.07.2000
Brake
Test
Direction
TOE
HEKA AUTO TEST GMBH
E-Mail: [email protected]
Brake
TOE
TEL: 07 61 / 8 10 80
Internet: http://www.heka-online.de
FAX: 07 61 / 8 10 89
23
Water-Drain/Cable
Scale: 1:15
13.07.2000
Brake
Brake
Test
Direction
TOE
HEKA AUTO TEST GMBH
E-Mail: [email protected]
TOE
TEL: 07 61 / 8 10 80
Internet: http://www.heka-online.de
FAX: 07 61 / 8 10 89
24
Frame for installation
even with floor
Scale: 1:15 , Dimensions in [mm]
13.07.2000
Frame
Connection
480
A
B
Frame
Final
480
700
Test-System
600
A-B
Frame
Frame
Level cement
Waterdrain
HEKA AUTO TEST GMBH
E-Mail: [email protected]
TEL: 07 61 / 8 10 80
Internet: http://www.heka-online.de
Waterdrain
FAX: 07 61 / 8 10 89
25
Cable-Plan
Even with floor
13.07.2000
Sicherung
Steckdose
abschaltbar
6A
90-250V
Socket
switch off/on
Fuse
1
Test
Direction
2
A4-Printer
4
5
3
Cable
No.
Discription
1
PC Computer
2
Length (m)
10
15
20
30
A4 Printer
5
10
17
24
3
HEKA - Printer 24V
3
6
12
20
4
Hauptkabel / Maincable 12V
15
20
25
30
5
Zwischenkabel /Connection
3,5
HEKA AUTO TEST GMBH
E-Mail: [email protected]
TEL: 07 61 / 8 10 80
Internet: http://www.heka-online.de
FAX: 07 61 / 8 10 89
26
Connection-Plan
Sensor
R2
Prüfrichtung
Spurpoti
Spurkabel
S
L
2
Rosa S
+
Sensor
L2
13.07.2000
R
2
Grün R2
Weiß Braun +
+
L1
R1
+
L
1
+
-2
L2
R2
S
-1
L1
R1
+
L2
Hauptkabel
zu Elektronikbox
HEKA AUTO TEST GMBH
E-Mail: [email protected]
R
1
(+)
(-2)
(L2)
(R2)
(Spur)
(-1)
(L1)
(R1)
Braun
Weiß
Grau
Grün
Rosa
Rot
Gelb
Blau
TEL: 07 61 / 8 10 80
Internet: http://www.heka-online.de
Brown
White
Grey
Green
Pink
Red
Yellow
Blue
Marron
Blanc
Gris
Vert
Rose
Rouge
Jaune
Bleu
FAX: 07 61 / 8 10 89
27