1
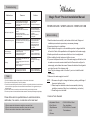
Troubleshooting:
Malfunctions
Reasons
Solution
• No Incoming Water
1. The main water valve does not open
2. Incoming water filter net is clogged
3. Floating ball of water inlet valve in cistern
does not work
1. Turn on the valve
2. Clean the net
3. Readjust the floating ball
• Non-Stop Incoming Water
1. Higher water pressure
2. Floating ball of water inlet valve does
not work
3. Water inlet valve is broken
4. Floating ball of water inlet valve touches
the inwall of cistern
1. Reduce water pressure
2. Readjust the floating ball
3. Call your dealer to replace
inlet valve
4. Adjust the direction of
floating ball
• Inadequate Flushing Water
1. The water level of inlet valve is too low
1. Adjust the water inlet valve
2. The push button does not reach pushing point
to appropriate position
3. Press the wrong button
2. Adjust water level rod
3. Identify small and large
flushing button, or call
your dealer
• Slow Drainage or
Inadequate Suction
1. The drainage outlet is not aligned with the 1. Readjust or reinstall the
outside drainage pipe
product
2. Drainage pipes are obstructed
2. Clean the drainage pipes
3. Inadequate flushing water
3. Adjust the water in cistern
• Leakage
1. The hexangular nuts of water inlet valve
are not fastened
2. The water supply spacer of inlet valve is
damaged
3. The water supply spacer on the bottom of
cistern is damaged
1. Drainage pipes are obstructed
• Overflow From Drainage Pipe 2. Water outlet pipes are obstructed
1. Fasten the nuts
2. Change the water supply
spacers
1. Clean the drainage pipes
2. Clean the water outlet pipes
Note:
1. Do not throw newspaper, diapers, sanitary napkins, or similar articles in the toilet bowl.
2. Do not impact the ceramic part heavily in case of any damage.
3. To maintain the normal flushing function of the toilet, please use a long handle nylon brush and a neutral cleanser
to clean up the bowl or pipes to prevent the accumulation of mineral substances. It is suggested to clean your
toilet once a week.
4. Clean the filter at least once a month to prevent slow water inletting or water blockage in the tank.
5. Do not use any cleanser in the tank, otherwise the rubber accessories in the tank may be damaged, causing leakage
Please follow what is specified below to avoid discoloration,
deformation, fine cracks, or scratches on the toilet seat:
1. Do not expose the toilet seat to sunlight or sources of heat
2. Do not use sharp or abrasive materials to clean the toilet seat
3. Do not use corrosive chemicals to clean the toilet seat
Magic Flush® Product Installation Manual
WHMFL3309-EB • WHMFL3222-EB • WHMFL3351-EB
Before Installing:
1. Read the instructions carefully to be familiar with the tools, fittings and
installation procedures to prevent any unnecessary damage.
2. Inspect product prior to installation
3. Check whether the rough-in on the installation position is aligned with that
of the toilet. Check all the specifications of the pipelines for the water supply.
4. Handle product with care and ensure that the nut is not overtightened.
5. When installing the toilet, make sure the floor is even.
6. If you want to replace the toilet, turn off the water supply and flush the toilet
to make sure no water remains inside the toilet. Remove the soft pipe for
water supply, and unfasten the screws. Remove the toilet and the old gasket
and clean the end of the drainage outlet.
Note: Plug the drainage outlet on the floor if you do not install the toilet
immediately.
7. Make sure the water supply is turned off.
NOTE: 1. We reserve the right to change the features, packing and fittings of
the product without notice.
2. Please keep the installation instructions accessible (including
installation procedure, fitting form, troubleshooting, and notice).
3. Closet flange is not included.
Common Tools Needed:
• Adjustable Wrench
• Pipe Wrench
• Tape Measure
• Drill
• Silicone
• 11/64 Drill Bit for Wood
Floor Installation
• 5/16 Drill Bit for Concrete/
Tile Installation
Installation Procedure:
1. Install Flange and Water Supply Valve
1. Install the water supply valve onto the installation
position according to the dimensions of the product.
2. Align the flange with the drainage outlet
3. Mark the installation positions for screws and drill holes
4. Fix the flange onto the floor
3. Install T# Screw, Mounting Screw
and Connect Pipe
1. Drill holes onto installation position and insert
expandable plastics
2. Make the bottom of connecting pipe face upward, then
cover the flange onto the water outlet tightly. Make sure
the pipe is not plugged.
3. Get two T# screws through the installation holes of the
connecting pipe. Adjust the screws to get the four holes
on the back side of the connecting pipe aligned with the
expandable plastics on the floor. Fix the connecting pipe
and 7# plastic onto the floor as illustrated
4. (con’t) Install Toilet
3. Place the toilet on the floor with screws and plastic
covers, then cover the decoration caps
6. Check Water Refill Pipe
1. Open the cistern cover and make sure the overflow
pipe is inserted into the water refilling pipe
Note: If the water refilling pipe does not insert into the
overflow pipe, the flushing water will be inadequate
Installing Hole for Expandable Plastic 1: 4 Pcs
ǿ 5, height of 1⅛”
Installing Hole for Expandable Plastic 2: 2 Pcs
ǿ 10, height of 2”
Expandable Plastic
Expandable Plastic 2
2. Mark Installation Holes
4. Install Toilet
1. Mark the center line for the drainage outlet
2. Mark the installation position for the mounting
screws and connecting pipe as illustrated below
(drawing for distance between installation holes)
7⅛”
1. Pick up the toilet and make sure the two pieces of
mounting screws are fully through the installing
holes of the toilet
2. Align the center of the toilet with the center line on
the floor and then gently place toilet down
Note: Make sure pipe has gone through the four layers
of sealing rubber spacer of the connecting pipe after
installing the toilet. If it is not fully through, it will have
a bad effect for flushing function
Finished Wall
2”
1⅜” - 2⅜”
3309-EB L=6¼” M= 7½”
3222-EB L=6¼” M= 7”
3351-EB L= 5⅛” M= 8⅝”
Center Line
Center Line
5. Connect Water Supply and Check
Sealing Performance
1. Get the water supply valve and the water inlet with
supply connecting pipe (if the fitting is separated
from the filter, connect the filter first)
2. Turn on the water supply valve and make sure there
is no leakage on any joint. Fastening the nuts can
prevent leakage.
7. Install Toilet Seat
1. Install the toilet seat according to the installation
instruction then coat with a layer of silicone between
the toilet and floor
Note: Do not use the product immediately after completion
of installation. Make sure there is no water around
the product for 24 hours.