1
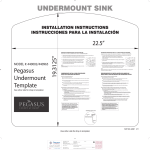
DROP IN SINK
32.375 "
INSTALLATION INSTRUCTIONS
INSTRUCCIONES PARA LA INSTALACIÓN
MODEL #:
441393,
441438, 441394,
441441
441395,
441442, 441396
441443
Pegasus
Drop In
Template
(See other side for undermount template)
IMPORTANT INFORMATION PRIOR TO INSTALLING SINK
Please make sure to make any additional holes in the sink
~ BEFORE INSTALLING ~ .
1.
2.
3.
4.
Additional holes available are pre-punched from
underneath the sink and are marked on top by
stickers at each location. Check position of the
stickers before you knock out the hole.
Put packing materials back into the box and place
the sink on top of the box.
While holding your hand under the sink you will feel
the pre-punched hole. Tap the center of the sticker lightly with a 6 or 8 oz
ball peen hammer.
Trim the hole with the ball peen hammer lightly or use a fine file to clean
up the rough edges. Please make sure you do not make the hole larger
than the pre-punched hole underneath.
NOTE:
Please do not use a drill or any flat type of hammer as this could crack the sink
and void the warranty.
Asegúrese de hacer cualquier orificio adicional en el fregadero
~ ANTES DE LA INSTALACIÓN ~ .
1.
Los orificios adicionales disponibles han sido
perforados previamente desde la parte de abajo del
marcados en la parte superior con etiquetas que
indican cada ubicación. Verifique la posición de las
etiquetas antes de empezar a perforar.
fregadero y están
2.
Coloque los materiales del embalaje dentro de la
caja y ubique el fregadero sobre la misma.
3.
Coloque la mano debajo del fregadero y sentirá el orificio perforado con
anterioridad. Golpee con suavidad en el centro de la etiqueta con un martillo
de bola de 6 u 8 oz. (170 ó 227 g)
4.
Recorte el agujero suavemente con el martillo de bola o bien utilice una lima
fina para emparejar los bordes ásperos. Asegúrese de no hacer un orificio
más grande del que fuera perforado previamente en la parte de abajo.
INSTRUCCIONES DE INSTALACIÓN
ATTENTION INSTALLER
ATENCIÓN INSTALADOR
1.
1. Asegúrese de que el número de modelo de a plantilla coincida con el número de modelo del
fregadero en la caja.
2. Unpack sink and check for damage. If sink is damaged, "DO NOT INSTALL SINK".
Contact your dealer immediately. If installed warranty is not valid.
3. Remove template and leave sink in box until ready to be installed. Position template
to desired location, pay attention to overall size of sink and bowls, relative to position
of cabinet walls, and pull out drawers.
4.
Use masking tape to tape template to countertop.
5.
Drill pilot hole for jig saw and cut on the line.
7.
2.
Put sink into counter.
8.
Tighten down clips in sequence. See Figure 1.
9.
Remove excess sealant from around sink.
Screw
Tornillo
5.
2
Rear
4
7
5
6
8
1
Front
3
Fig. 1 Clamping Sequence
Secuencia de Sujeción
Desempaquete el fregadero y verifique que no esté dañado. Si el fregadero está dañado,
"NO INSTALE EL FREGADERO". Comuniquese con su representante inmediatamente.
Si se lo instala, la garantia no tendrá validez.
3. Retire la plantilla y deje el fregadero en la caja hasta que esté listo para instalarlo. Coloque la
plantilla en la ubicación deseada, preste atención al tamaño total del fregadero y de las tazas,
en relación con la posición de las paredes de los gabinetes y abra los cajones.
4.
6. Flip sink over, making sure area is clean. Add a bead of sealant to the inside edge
around sink. The manufacturer does not assume any responsibility of swelling to
the countertop if not sealed correctly.
21.1875"
NOTA:
No utilice perforadora ni ningún martillo de tipo plano, ya que se podría rajar el
fregadero y, en consecuencia, se anularía la validez de la garantía.
INSTALLATION INSTRUCTIONS
Make sure that the template model number matches the model number of the
sink in the box.
Mounting Clip
Sujetador de Montaje
INFORMACIÓN IMPORTANTE PREVIA A LA INSTALACIÓN DEL
FREGADERO
DROP-IN (TOP MOUNT) INSTALLATION
Utilice cinta adhesiva para pegar la plantilla en Ia mesada.
Perfore el agujero piloto para la sierra de vaivén y corte por la lines.
Countertop
Sink Rim
6. Invierta el fregadero y asegúrese de que el área se encuentre limpia. Agregue una linea de
sellador en el borde interior alrededor del fregadero. El fabricante no asume ninguna
responsabilidad por hinchazón de la mesada si no se selló correctamente.
7.
Coloque el fregadero en la mesada.
8.
Ajuste los sujetadores en secuencia. Ver Figura 1.
9.
Quite el exceso de sellador alrededor del fregadero.
(See other side for undermount template)
Sink Bowl
441413
Part No. 441444
11/11
2/12
UNDERMOUNT SINK
INSTALLATION INSTRUCTIONS
INSTRUCCIONES PARA LA INSTALACIÓN
MODEL #:
441438,
441393, 441441
441394,
441442,
441395, 441443
441396
UNDERMOUNT INSTALLATION
Pegasus
Undermount
Template
(See other side for drop in template)
Countertop
Approximate
1/8" reveal or
ledge
IMPORTANT INFORMATION PRIOR TO INSTALLING SINK
INFORMACIÓN IMPORTANTE PREVIA A LA INSTALACIÓN DEL FREGADERO
Please make sure to make any additional holes in the sink ~ BEFORE INSTALLING ~ .
Asegúrese de hacer cualquier orificio adicional en el fregadero ~ ANTES DE LA INSTALACIÓN ~ .
1.
Additional holes available are pre-punched from underneath the sink and are marked on top by stickers at
each location. Check position of the stickers before you knock out the hole.
2.
Put packing materials back into the box and place the sink on top of the box.
3.
While holding your hand under the sink you will feel the pre-punched hole.
Tap the center of the sticker lightly with a 6 or 8 oz ball peen hammer.
4.
Trim the hole with the ball peen hammer lightly or use a fine file to clean
up the rough edges. Please make sure you do not make the hole larger
than the pre-punched hole underneath.
NOTE:
Please do not use a drill or any flat type of hammer as this could crack the sink
and void the warranty.
2.
Coloque los materiales del embalaje dentro de la caja y ubique el fregadero
sobre la misma.
3.
Coloque la mano debajo del fregadero y sentirá el orificio perforado con
anterioridad. Golpee con suavidad en el centro de la etiqueta con un martillo
de bola de 6 u 8 oz. (170 ó 227 g)
4.
Recorte el agujero suavemente con el martillo de bola o bien utilice una lima
fina para emparejar los bordes ásperos. Asegúrese de no hacer un orificio
más grande del que fuera perforado previamente en la parte de abajo.
NOTA:
No utilice perforadora ni ningún martillo de tipo plano, ya que se podría rajar el fregadero y, en consecuencia,
se anularía la validez de la garantía.
UNDERMOUNT INSTALLATION PROCEDURES
WITH SOLID SURFACE MATERIALS
PROCEDIMIENTOS DE INSTALACIÓN PARA MONTAJE
DESDE ABAJO CON MATERIALES DE SUPERFICIE SÓLIDA
Step 1) For solid surface fabricators only:
Paso 1) Solamente para fabricantes de superficies sólidas:
Secure template from sink carton.
Sujete la plantilla de la caja del fregadero.
Be sure to select the undermount side of the 2-sided template. Note: other side is a drop-in template.
Asegúrese de seleccionar el lado de la plantilla para montar desde abajo, que tiene dos lados.
Nota: el otro lado de la plantilla es para montar el fregadero desde arriba.
Note: All undermount templates supplied are designed such that the cutout equals an approximate
1/8" positive reveal (ledge).
Nota: Todas las plantillas para montar desde abajo suministradas están diseñadas de tal forma que
el calado deja un borde positivo de 0,3175 cm (1/8") (saliente).
Note: If either you (the installer), or your customer prefers a different reveal than the suggested 1/8",
we recommend you (the installer), construct a new template accordingly.
Nota: Si usted (el instalador) o su cliente prefiere un borde distinto al de 0,3175 cm (1/8") sugerido,
le recomendamos a usted (el instalador), diseñar una plantilla nueva según corresponda.
As solid surface materials vary in hardness, please choose the appropriate cutting methods you are
accustomed to.
Dado que la dureza de las superficies sólidas puede variar, seleccione los métodos adecuados
para cortar que acostumbra a utilizar.
Step 2) Installation of undermount granite sink to solid surface:
To install an undermount sink properly, it is recommended that the solid surface material be turned
upside down.
Generally, solid surface fabricators have over the years perfected their own version of:
Temporary locating/positioning pins
Sandwich approach ~ positioning the sink between the solid surface material and
a plywood backing to the solid surface and sometimes pinning the sink between the solid surface and
the vertical cabinet.
Naturally, every fabricator has their own undermounting/installation methods
which may vary from the two listed above.
Now apply the appropriate Silacone adhesive to the sink and place the sink upside down on the solid
surface countertop. Note there are several Silacone adhesives on the market. It is recommended to
use the product that is best suited for the solid surface material.
Sink Bowl
1. Los orificios adicionales disponibles han sido perforados previamente desde la parte de abajo del
fregadero y están marcados en la parte superior con etiquetas que
indican cada ubicación. Verifique la posición de las etiquetas antes de
empezar a perforar.
Carefully position the sink, such that you have a uniform reveal of your choice and now secure the sink in
position by one of the methods stated above. Note: once the Silacone adhesive has set up (per the
manufacturer's instructions) the installation/location pins (if used) can now be removed as the sink is
ready to be used.
* FAUCET INSTALLATION – depending on the overall
thickness of your solid surface, including the thickness
of your Pegasus granite sink, some faucets may not
have adequate shank length. To compensate, it is
recommended that you expand (widen) the pre-drilled
faucet hole in the sink deck, such that the take-up nut
engages the underside of the solid surface,
and not the sink.
Paso 2) Instalación de fregadero de granito montado desde abajo en una superficie sólida:
Para instalar correctamente un fregadero desde la parte de abajo, se recomienda colocar el
material con la superficie sólida boca abajo.
Por lo general, los fabricantes de superficies sólidas han perfeccionado, con el paso del tiempo,
sus versiones de:
Mordazas de ubicación / posicionamiento temporal.
Método sándwich: el fregadero se ubica en posición entre la superficie sólida y una base de madera
contrachapada enfrentada a la superficie sólida; algunas veces se sujeta el fregadero entre la superficie
sólida y el gabinete vertical.
Por supuesto, cada fabricante utiliza sus propios métodos de montaje desde abajo / instalación
que pueden diferir con los dos métodos mencionados anteriormente.
Ahora aplique el adhesivo Silacone al fregadero y coloque el fregadero boca abajo sobre la superficie
sólida. Observe que existen varios adhesivos Silacone en el mercado. Se recomienda usar el producto
más adecuado para la superficie sólida.
Con cuidado ubique el fregadero, dejando el borde uniforme de su elección y sujételo en posición
utilizando uno de los métodos antes mencionados. Nota: Cuando el adhesivo Silacone seque
(según las instrucciones del fabricante) puede retirar las mordazas de instalación temporales
(si las utilizó); el fregadero está listo para usarlo.
* INSTALACIÓN DEL GRIFO: dependiendo del grosor
general de su superficie sólida, incluyendo el grosor de
su fregadero de granito Pegasus, algunos grifos pueden
no tener la longitud del vástago adecuada. Para
compensar esto, se recomienda expandir (ensanchar)
el orificio previamente perforado del grifo en el
fregadero, de tal manera que la tuerca de entrada encaje
en el lado de abajo de la superficie sólida, y no en
el fregadero.
(See other side for drop in template)
441413
Part No. 441444
11/11
2/12