1
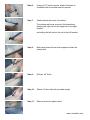
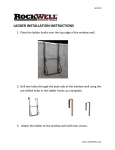
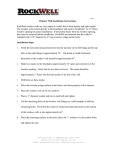
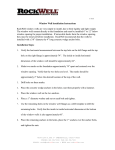
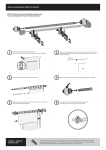
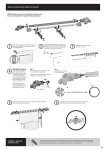
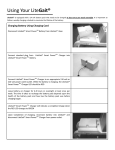
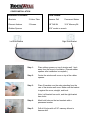
COVER INSTALLATION
Installation kit includes:
Tools needed:
2 Brackets
3 Velcro Tabs
Hammer Drill
Permanent Marker
4 Cement Anchors
3 Screws
1/8” Drill Bit
3/16” Masonry Bit
5/16” socket or wrench
2 Rubber Spacers
Left Side Bracket
Right Side Bracket
Step 1:
Place rubber spacers on top of window well 1 inch
away from the house’s foundation. (Discard rubber
spacers after installation is complete.)
Step 2:
Center the window well cover on top of the rubber
spacers.
Step 3:
Place 2 brackets over the rods extending from the
rear of the window well cover. Make sure the bracket
is against the cover, straight, and level.
Note: Left bracket has a slot, and the right bracket
has a hole.
Step 4:
Mark both holes on the two brackets with a
permanent marker.
Step 5:
Drill all 4 holes with a 3/16” masonry bit and a
hammer drill.
Rev. 1
Step 6:
Using a 5/16” socket wrench, attach 2 brackets to
foundation with 4 provided masonry screws.
Step 7:
Attach window well cover to brackets.
The window well cover mounts to the brackets by
inserting the right rod into the large hole in the right
bracket….
and sliding the left rod into the slot in the left bracket.
Step 8:
Mark spots where the two side supports contact the
window well.
Step 9:
Drill two 1/8” holes.
Step 10:
Secure 3 Velcro tabs with provided screws.
Step 11:
Remove protective plastic sheet.
www.rockwellinc.com