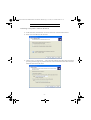
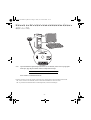
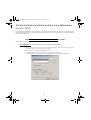
1
1 er COUV KIT.fm Page 1 Lundi, 27. novembre 2006 5:19 17
F2121/F2121L
Network Installation Kit
User Guide
Guide Utilisateur
Manual del Usuario
1
37
73
LU 252813189 Kit Laser Multifonction LAN XEROX GB.book Page 2 Lundi, 27. novembre 2006 4:47 16
LICENSE AGREEMENT FOR THE SOFTWARE
DEFINITION
The Software designates the programs and its associated documentation.
GRANT OF LICENSE
- This license authorises software use for the personal computers. You only have the right to use the software for printout on a single multi-function terminal. You cannot loan or cede the right to use the Software to a third party.
- You are authorised to make one backup copy.
- This license is non-exclusive and non-transferable.
OWNERSHIP
The manufacturer retains ownership of the Software. You only have ownership of the CD-ROM. You may not modify,
adapt, decompile, translate, create a derivative product, lease or sell the Software or the documentation. All rights not
explicitly granted are reserved by the manufacturer.
TERMINATION
This license shall remain valid until it is terminated. You may terminate the license by destroying the program and the
documentation along with any copies thereof. This license shall be terminated automatically if you do not respect the
terms of this license agreement. In case of termination, you agree to destroy all the copies of the program and the
documentation.
WARRANTY
The Software is provided on an "as is" basis, with no explicit nor implied warranties, including but not limited to implied
warranties of merchantability and fitness for a particular purpose. The user shall be liable for all risks involving the
results and performance of the Software. If the program should prove defective, all the repair and restoration expenses
shall be at the user’s expense.
The license holder nonetheless has the following warranty: The CD-ROM on which the Software is recorded will be free
of material or manufacturing defects under normal use and operating conditions for a duration of ninety (90) days from
the date of delivery that appears on your receipt. If a defect on the CD-ROM occurs following an accident or improper
use, the CD-ROM will not be replaced under the terms of this warranty.
LIABILITY
The only responsibility of your dealer and your only recourse is the replacement of any CD-ROM that do not meet the
terms of the warranty, and which have been returned with a copy of your receipt. Neither the manufacturer nor any other
party involved in the creation, development, sale or delivery of this program shall be held liable for any damages
whatsoever, be they direct, indirect or immaterial including, but not limited to, the loss of information, time, operations,
revenue, or customers arising out of the use or inability to use this program.
EVOLUTION
In our constant efforts to improve the program, the manufacturer reserves the right to modify the characteristics of the
Software without prior notice. If the product evolves, your license does not give you the right to free upgrades.
JURISDICTION
This Agreement is governed by the laws of France. Any litigation arising from the interpretation or execution of this
license shall be submitted to the Paris Tribunal.
Due to the on-going evolution in technology, the manufacturer reserves the right to modify the technical characteristics
indicated for this product, at any time and with no prior notice, and/or discontinue production of this product. All brand
and product names may be registered trademarks of their respective holders and are hereby acknowledged.
-2-
LU 252813189 Kit Laser Multifonction LAN XEROX GB.book Page 3 Lundi, 27. novembre 2006 4:47 16
TABLE of CONTENTS
INTRODUCTION ........................................................................... 5
SETTING UP THE F2121/F2121L FOR NETWORK PRINTING .............................. 6
Required configurations .......................................................................................................................................7
Quick Network setup (Auto) ................................................................................................................................7
Quick Network setup (Manual IP) .......................................................................................................................7
SETTING UP THE CLIENT PC FOR NETWORK GDI OR PCL PRINTING ...................... 8
Installing the software on your PC .......................................................................................................................8
Installation of a network printer .........................................................................................................................14
Removing the software from your PC ...............................................................................................................16
SETTING UP THE CLIENT PC FOR NETWORK POSTSCRIPT 3 PRINTING
(POSTSCRIPT® LEVEL 3 LANGUAGE EMULATION)
USING PS PRINTING WILL ALLOW SMOOTHER JOB RECOVERY ...........................17
Adding a network port (if you do not already have one available) ....................................................................17
Installing PS Driver ............................................................................................................................................22
INSTALL INSTRUCTIONS FOR WINDOWS SERVER 2003 .................................24
How to Add a Port on the Windows 2003 Server ..............................................................................................24
Procedure 1 - Creating a Companion Pro Monitor Port Type ................................................................. 24
Procedure 2 - Adding a Companion Pro Monitor Port for the printer ..................................................... 26
Procedure 3 - Adding PCL or GDI Version of FaxCentre 2121 Printer on the Server............................ 27
Optional Procedure 4 - Adding a Postcript Printer on the Server ............................................................ 30
On client PC .......................................................................................................................................................31
Connecting to the printers created on the Server ..................................................................................... 31
NETWORK CONFIGURATIONS .............................................................33
Cable Modem or Corporate Internal Mail Server ..............................................................................................33
Network Setup (Auto) ........................................................................................................................................34
Network Setup (Manual IP) ...............................................................................................................................35
TROUBLESHOOTING ......................................................................36
Printing does not work .......................................................................................................................................36
TECHNICAL CHARACTERISTICS ...........................................................36
-3-
LU 252813189 Kit Laser Multifonction LAN XEROX GB.book Page 4 Lundi, 27. novembre 2006 4:47 16
INFORMATION
ACITS LPR Remote Printing is a registered trademark of the University of Texas, Austin, Texas,USA.
Microsoft® , Windows® 98, Windows® Millenium, Microsoft®
Windows® 2000, Windows® XP and all Microsoft® products indicated in this document are trademarks of
the Microsoft Corporation registered and/or used in the United States and/or other countries.
PCL is a registered trademark of Hewlett Packard
PostScript is a registered trademark of Adobe Systems Incorporated.
All other product marks and names indicated in this document for example or information are registered
trademarks of the respective manufacturers.
-4-
LU 252813189 Kit Laser Multifonction LAN XEROX GB.book Page 5 Lundi, 27. novembre 2006 4:47 16
INTRODUCTION
The print driver described in this manual allows you to install and use the machine you have purchased with this networkconnectable Network kit as a standard printer on your local network.
Your multifunction terminal can also print in PCL® and SG Script 3 (Postscript® Level 3 language emulation) formats
via LAN.
-5-
LU 252813189 Kit Laser Multifonction LAN XEROX GB.book Page 6 Lundi, 27. novembre 2006 4:47 16
SETTING UP THE F2121/F2121L FOR NETWORK
PRINTING
-6-
LU 252813189 Kit Laser Multifonction LAN XEROX GB.book Page 7 Lundi, 27. novembre 2006 4:47 16
REQUIRED
CONFIGURATIONS
Your PC must have at least the following characteristics:
A processor of:
• 500 MHz for Windows 98SE;
• 800 MHz for Windows Me, 2000SP3;
• 1 GHz for Windows XP (Home and Pro).
• CD-ROM drive ;
• a network port or USB connector;
• 600 MB free disk space for installation.
RAM of:
• 128 MB minimum for Windows 98SE, Me and
2000SP3;
• 192 MB minimum for Windows XP (Home
and Pro).
QUICK NETWORK
SETUP
(AUTO)
• Select M2531, then OK.
• Select «Automatic» using arrow button and hit OK.
• Select «IP Address» M2532 and hit OK. Record this IP Address for use during Postcript Installation.
Note:
For more details, see «Network Setup (Auto)» section, page 34.
QUICK NETWORK
SETUP
(MANUAL IP)
• Select M2531, then OK.
• Select «Manual» using arrow button and hit OK.
• Select «IP Address» M2532 and hit OK. Enter the IP Address you wish to use.
Note:
For more details, see «Network Setup (Manual IP)» section, page 35.
-7-
LU 252813189 Kit Laser Multifonction LAN XEROX GB.book Page 8 Lundi, 27. novembre 2006 4:47 16
SETTING UP THE CLIENT PC FOR NETWORK GDI OR
PCL PRINTING
Note:
Once the installation of the Network print driver has been completed (from the CD-Rom), please
refer to "Postscript" section (Page 22) in order to install PostScript print driver.
INSTALLING
THE SOFTWARE ON YOUR
PC
Under Windows 98SE/ME/2000/XP
Turn on your PC. Open an ADMINISTRATOR session except for 98SE and ME environments.
Open the CD-ROM drive, insert the installation CD-ROM and close the drive.
The installation procedure starts automatically (Autorun).
-8-
LU 252813189 Kit Laser Multifonction LAN XEROX GB.book Page 9 Lundi, 27. novembre 2006 4:47 16
A window COMPANION SUITE PRO LM is displayed
Position your cursor on INSTALL PRODUCTS and left-click.
The Install Products screen is displayed.
Place your cursor on ALL PRODUCTS and left-click.
Note: The ALL PRODUCTS installation procedure copies all the software required for running the Companion Suite Pro
kit onto your hard disk, i.e.:
- Companion Suite Pro (Fax and SMS communication software, Scanner software, etc.),
- PaperPort
- Omnipage.
You may already have a version of one of the programs which are on the installation CD-ROM.
In this case, use the CUSTOMIZED installation, select the programs you want to install on your hard disk and confirm your selection.
-9-
LU 252813189 Kit Laser Multifonction LAN XEROX GB.book Page 10 Lundi, 27. novembre 2006 4:47 16
Note: The following two screens are only displayed if your version of Windows Installer is prior to 2.0.
The installation continues and a screen displays a progress bar.
You can interrupt installation by clicking the STOP THE INSTALL button.
After a search and analysis phase of the components on your PC and the multifunction terminal, you must restart
your PC for the applications to run.
Click OK.
When your PC has reinitialized, the InstallShield Wizard displays a progress bar.
You can stop the procedure at any time by clicking the CANCEL button.
- 10 -
LU 252813189 Kit Laser Multifonction LAN XEROX GB.book Page 11 Lundi, 27. novembre 2006 4:47 16
The wizards stops and the welcome screen is displayed.
Click NEXT to start installation of the COMPANION SUITE PRO kit on your PC.
Click YES.
Before copying files onto your hard disk, you must accept the license contract shown. Use the scroll bar to read the
contract fully.
- 11 -
LU 252813189 Kit Laser Multifonction LAN XEROX GB.book Page 12 Lundi, 27. novembre 2006 4:47 16
The final installation is ready to be run.
Click INSTALL.
Companion Suite Pro has been installed on your PC.
A window shows you how far installation has progressed.
In the next displayed screen, click CONTINUE to copy the utilities and programs which accompany the kit
(PaperPort SE and Omnipage SE).
- 12 -
LU 252813189 Kit Laser Multifonction LAN XEROX GB.book Page 13 Lundi, 27. novembre 2006 4:47 16
At the end of the installation you must restart your PC for the system files to be updated.
Make your selection and click FINISH.
Your "Companion Suite Pro" kit has been successfully installed on your PC.
You can start your multifunction terminal's management software by selecting PROGRAMS > COMPANION SUITE
> COMPANION SUITE PRO LM2 > COMPANION - DIRECTOR from the START menu or by clicking the COMPANION
- DIRECTOR icon on the desktop.
Important: If you have a firewall installed, this will ask you, when
the PC is restarted after installation, whether you want
to authorize the MFServices application to access the
network. Click Yes or Authorize (depending on your
firewall) to authorize MFServices.exe to access the
network. NB: Windows XP with Service Pack 2 and
above has a firewall installed by default
- 13 -
LU 252813189 Kit Laser Multifonction LAN XEROX GB.book Page 14 Lundi, 27. novembre 2006 4:47 16
INSTALLATION OF A NETWORK PRINTER
Note: Companion Suite Pro LM2 must be installed to carry out this operation.
Run the application by selecting PROGRAMS > COMPANION SUITE > COMPANION SUITE PRO LM2 > INSTALL
from the START menu.
A NETWORK PRINTER
Click NEXT to run the installation procedure
The following screen shows the list of compatible devices detected on the network.
You can carry out a new search on the network by clicking the REFRESH button.
- 14 -
LU 252813189 Kit Laser Multifonction LAN XEROX GB.book Page 15 Lundi, 27. novembre 2006 4:47 16
Note: It is possible that a device may not be shown in the list. In this case, click the NOT IN THE LIST button. The following window is displayed :
Enter the IP address or the NetBIOS name of the device you want to add. You can test the connection between
the PC and the device by clicking the TEST button. Click OK.
Select the device you want to add from the list. Click NEXT.
A window showing that installation was successful is displayed. Click Finish.
Depending on the configuration of your terminal, select the print language, PCL or GDI_RL. Click NEXT.
The following window lists the different properties of the printer about to be installed. Click NEXT.
- 15 -
LU 252813189 Kit Laser Multifonction LAN XEROX GB.book Page 16 Lundi, 27. novembre 2006 4:47 16
REMOVING THE SOFTWARE FROM YOUR PC
Run program deletion by selecting PROGRAMS > COMPANION SUITE > COMPANION SUITE PRO LM2 > UNINSTALL
from the START menu.
A preparation screen is displayed.
Select REMOVE to delete all files or MODIFY to choose which files (drivers or applications) you want to delete.
Click NEXT.
A confirmation screen is displayed. Confirm by clicking OK.
A screen displays a progress bar.
- 16 -
LU 252813189 Kit Laser Multifonction LAN XEROX GB.book Page 17 Lundi, 27. novembre 2006 4:47 16
At the end of the procedure, you must restart your system. Close all running programs, select YES, I
RESTART MY COMPUTER NOW and click FINISH.
WANT TO
SETTING UP THE CLIENT PC FOR NETWORK
POSTSCRIPT 3 PRINTING
(POSTSCRIPT® LEVEL 3 LANGUAGE EMULATION)
USING PS PRINTING
WILL ALLOW SMOOTHER JOB RECOVERY
Printer port setup in Windows 2000 and XP necessitates administrator rights.
(IF
ADDING
A NETWORK PORT
YOU DO NOT ALREADY HAVE ONE AVAILABLE)
A printer port is the interface through which your computer communicates with the terminal. If you want to print over a
network, you must add a new network port for the terminal. When you use the print server setup, the port is added only
on the print server, which must be running Windows 2000, 2003 Server or XP.
The procedures for adding a network port for the RAW and LPR protocols are described in the table below. The first steps
are identical for the two protocols.
- 17 -
LU 252813189 Kit Laser Multifonction LAN XEROX GB.book Page 18 Lundi, 27. novembre 2006 4:47 16
RAW protocol
LPR protocol
To finish installation of Network GDI driver go to:
Select START>SETTINGS>PRINTERS. In the PRINTERS window, double-click on the ADD
PRINTER icon.
The ADD PRINTER WIZARD screen appears.
Select LOCAL PRINTER, and make sure that the AUTOMATICALLY
PLUG-AND-PLAY PRINTER box is unchecked. Click on NEXT.
Select CREATE A NEW PORT and the STANDARD TCP/IP PORT option in the Type field. Click
on NEXT.
Click on NEXT.
- 18 -
DETECT AND INSTALL MY
LU 252813189 Kit Laser Multifonction LAN XEROX GB.book Page 19 Lundi, 27. novembre 2006 4:47 16
RAW protocol
LPR protocol
Click on NEXT.
Enter the IP address or NetBios name of the terminal in the first field. You can modify the name
characterizing the port in the second field, if you wish. Click on NEXT.
Note: remember this port name for adding the printer later on.
- 19 -
LU 252813189 Kit Laser Multifonction LAN XEROX GB.book Page 20 Lundi, 27. novembre 2006 4:47 16
RAW protocol
LPR protocol
The window indicates that the device has
not been recognized by Windows. Click on
NEXT.
Click on FINISH to complete the addition of
the port.
Click on CANCEL.
The window indicates that the terminal has
not been recognized by Windows. Select
CUSTOM, then click on SETTINGS...
Select LPR and enter AUTO in the QUEUE
NAME field, then click on OK.
Note: Do not enable SNMP.
- 20 -
LU 252813189 Kit Laser Multifonction LAN XEROX GB.book Page 21 Lundi, 27. novembre 2006 4:47 16
RAW protocol
LPR protocol
You can now install the driver on this
newly-added port. See chapter Installing
PS Driver, page 22.
- 21 -
Click on NEXT.
Click on FINISH to complete the addition of
the port.
Click on CANCEL.
You can now install the driver on this
newly-added port. See chapter Installing
PS Driver, page 22.
LU 252813189 Kit Laser Multifonction LAN XEROX GB.book Page 22 Lundi, 27. novembre 2006 4:47 16
INSTALLING PS DRIVER
Connect to the Adobe website, click on DOWNLOADS tab and search for ADOBE POSTSCRIPT3TM.
Double-click on the downloaded file to start the installation of the PS driver.
The LOCAL PORT SELECTION screen appears. Select the "STANDARD TCP/IP PORT" created previously (See
chapter Adding a network port (if you do not already have one available), page 17) and Click on NEXT.
The SELECT PRINTER MODEL screen appears. Click on BROWSE.
Click on UPDATE then click on WIN link.
Select "Adobe Universal PostScript Windows Driver Installer 1.0.06-English" and click on PROCEED
DOWNLOAD the file (winsteng.exe) on your hard disk.
The ADOBE POSTSCRIPT DRIVER INSTALLER screen appears. Click on NEXT.
The text of licence appears. Click on ACCEPT.
The PRINTER CONNECTION TYPE screen appears. Select IT IS DIRECTLY CONNECTED TO YOUR COMPUTER (LOCAL
PRINTER) option (Select this option in spite of the fact that your printer is connected to the network). Click on NEXT.
The BROWSE FOR PRINTER screen appears. Select CD-Rom reader. Search the file from DRIVERS\PPD\ folder and
choose your language.
Click on OK to valid your choice.
Select the SHARED option and fill in the SHARE NAME field with the desired printer name.
Select MFF 18-20 PS and click on NEXT.
Note: if you are installing this driver on a server you must select SHARED.
TO
In the bottom field, select all the operating systems that will be sharing this printer, then click NEXT.
- 22 -
LU 252813189 Kit Laser Multifonction LAN XEROX GB.book Page 23 Lundi, 27. novembre 2006 4:47 16
The Screen below appears if you chose a name longer than 8 characters or not composed of a single continuous
string. Do not worry about this message, just click YES.
The PRINTER INFORMATION screen appears.
You must answer two questions:
- DO YOU WANT TO USE THIS PRINTER AS YOUR DEFAULT PRINTER ? Select YES if you would like to use this printer
as your default printer (Note: You can define this printer as your default printer from START>SETTINGS>PRINTERS
menu).
- WOULD YOU LIKE TO PRINT THE TEST PAGE ? Select YES to print the test page.
Click on NEXT.
The SETUP INFORMATION screen appears.
Click on INSTALL. The installation procedure begins. Follow instruction on the screens.
- 23 -
LU 252813189 Kit Laser Multifonction LAN XEROX GB.book Page 24 Lundi, 27. novembre 2006 4:47 16
INSTALL INSTRUCTIONS FOR WINDOWS SERVER 2003
On Windows 2003 Server, follow the steps below to install the Port and/or drivers on the server. Carrying out this
procedure on other Windows operating systems is also possible but you may not be able to benefit from all Companion
Suite Pro LL features.
HOW
TO
ADD
A
PORT
ON THE
WINDOWS 2003 SERVER
Note: before you start, make sure you have the IP address of the printer available.
Procedure 1 - Creating a Companion Pro Monitor Port Type
1. Insert the COMPANION SUITE PRO CD into the CD-ROM drive. The COMPANION SUITE PRO window
is now displayed. Click on the EXIT hotlink to close the window.
2. On the Start Menu, select Printers and Faxes.
3. When PRINTERS
PROPERTIES.
AND
FAXES screen is displayed, select FILE -> Menu and then select SERVER
- 24 -
LU 252813189 Kit Laser Multifonction LAN XEROX GB.book Page 25 Lundi, 27. novembre 2006 4:47 16
4. On the PRINT SERVER PROPERTIES window, click on the PORTS Tab. Select ADD PORT.
5. Click on NEW PORT TYPE button and create a new port type.
6. Click on BROWSE and navigate to root directory of CD Drive.
- 25 -
LU 252813189 Kit Laser Multifonction LAN XEROX GB.book Page 26 Lundi, 27. novembre 2006 4:47 16
7. Click OPEN.
8. Then click OK on the next screen.
Procedure 2 - Adding a Companion Pro Monitor Port for the printer
1 Select the COMPANION SUITE PRO LM TCP/IP MONITOR port.
2. Click NEW PORT button.
- 26 -
LU 252813189 Kit Laser Multifonction LAN XEROX GB.book Page 27 Lundi, 27. novembre 2006 4:47 16
3. The ADD RAW TCP/IP PORT window is now displayed.
4. Fill in the following information:
a. Desired Name of the Port - Note: Remember this port name for adding the printer later on,
b. IP address of your printer,
c. click OK button.
5. Click on the CLOSE button.
6. Click on the CLOSE button.
Now that you have created a port on the server, you need to add a printer and attach it to this port.
Procedure 3 - Adding PCL or GDI Version of FaxCentre 2121 Printer on the Server
1. On the Server PC, select START -> PRINTERS AND FAXES. The PRINTERS AND FAXES window is now
displayed.
2. Click on ADD A PRINTER.
- 27 -
LU 252813189 Kit Laser Multifonction LAN XEROX GB.book Page 28 Lundi, 27. novembre 2006 4:47 16
3. Click on NEXT and go to the next screen.
4. Select the LOCAL PRINTER ATTACHED TO THIS COMPUTER radio button. Click on the NEXT button.
5. Click on USE THE FOLLOWING PORT and Select the Newly created port from the dropdown menu.
- 28 -
LU 252813189 Kit Laser Multifonction LAN XEROX GB.book Page 29 Lundi, 27. novembre 2006 4:47 16
6. Select the desired driver (GDI = Laser Pro LM or PCL = Laser Pro LM PCL) and click on NEXT.
Note: the PCL driver is recommended, because it is more efficient and has better error recovery.
7. Enter a Printer Name or keep the default name that appears in the PRINTER NAME: field. Click NEXT
button.
- 29 -
LU 252813189 Kit Laser Multifonction LAN XEROX GB.book Page 30 Lundi, 27. novembre 2006 4:47 16
8. Select the SHARE NAME: radio button if you are sharing this printer. Enter the Name of the Printer
on the screen below as shown or keep the default name that appears in that field. Click on the NEXT
button.
9. You can describe the location of this printer which might be useful to other users. See screen below
for information.Note that you may enter comments or leave it blank. Click on the NEXT button.
10. Select the YES radio button to print test page.
Note: Save this test page as you will need the Printer and Server names from this sheet when you
add a printer on the client PC. Click the NEXT button.
11. On the last screen click FINISH button to complete the steps needed to attach a printer to the drivers
on the Windows 2003 Server.
Optional Procedure 4 - Adding a Postcript Printer on the Server
See Installing PS Driver - page 22.
- 30 -
LU 252813189 Kit Laser Multifonction LAN XEROX GB.book Page 31 Lundi, 27. novembre 2006 4:47 16
ON
CLIENT
PC
Connecting to the printers created on the Server
1. On the Start menu, select PRINTERS AND FAXES. Select ADD A PRINTER and click NEXT.
2. Select A NETWORK PRINTER and click NEXT.
3. Select CONNECT TO THIS PRINTER …., then in the NAME field type the printer name (found on the
previously printed test page) as per the format shown on the screen below the field. Then click NEXT
and follow instruction on the screen.
- 31 -
LU 252813189 Kit Laser Multifonction LAN XEROX GB.book Page 32 Lundi, 27. novembre 2006 4:47 16
4. Or: Leave NAME field blank and browse for the printer. You must know the domain or workgroup
of the server sharing the device.
- 32 -
LU 252813189 Kit Laser Multifonction LAN XEROX GB.book Page 33 Lundi, 27. novembre 2006 4:47 16
NETWORK CONFIGURATIONS
CABLE MODEM
OR
CORPORATE INTERNAL MAIL SERVER
Before Starting Email setup:
1. Confirm that an existing operational network utilizing TCP/IP is available
2. Obtain a valid email address for the F2121 from your mail administrator or Internet Service Provider
3. Obtain your mail server or Internet Service Provider’s SMTP server address & DNS server address
Data to setup Email
SMTP mail server Host Name/IP address
Install Requirement
Required
DNS – Domain Name Server Address
Optional
FaxCentre F2121 Email Address
Required
Comments
The SMTP protocol must be enabled at
the mail server. Either the mail server
Host Name or IP address can be used.
If mail server Host Name is used then
must have DNS server address entered.
The F2121 must have its own email
address and the email address is
registered on the SMTP mail server.
Step 1: From a workstation, open your Internet Explorer browser. Type in the URL http://xxx.xxx.xxx.xxx (where
the xxx’s represent the F2121 device’s IP address). If connected properly you should be presented with the F2121
device’s Internet Services Home web page.
Step 2: To setup email configuration via Internet Services. Click ENTER from the Home Page, from the Parameters
web page click Internet initialization, click the Select a Provider dropdown box and choose LOCAL NETWORK.
Type in the Email address that has been reserved for this device. Type in the SMTP server Host Name or IP address.
If using SMTP Host Name then type in the Primary DNS server address. Scroll down the web page and click
Confirm Modifications.
Step 3:
• From the F2121 load the document you want to email into the document feeder face down.
• Select the @ button on the F2121.
• The device will prompt for an E-Mail address. Type in your corporate/internal Email address and press OK.
• Press the Green Start button. Your document will be scanned and sent to you.
The F2121 will print a verification report, Check that the email with document was sent successfully from the F2121
and the email received with attached document from within your mail client.
LIENHYPERTEXTE
- 33 -
LU 252813189 Kit Laser Multifonction LAN XEROX GB.book Page 34 Lundi, 27. novembre 2006 4:47 16
NETWORK SETUP (AUTO)
This document is intended for installing the F2121 on the network using a DHCP server to assign a
TCP/IP address.
Note: If you have not done so, you must enable network connectivity using the Blue Smart Card see Network/LAN kit for
instructions
Before Starting:
1. Confirm that an existing operational network utilizing TCP/IP is available.
2. Confirm that the Ethernet cable is plugged into the FaxCentre F2121 and into an operational Ethernet port on the
network. Note: the Ethernet cable must be Category 5 and the connector must be RJ45 type. This cable is not supplied
by Xerox.
3. Confirm that a DHCP server with available IP addresses is accessible.
Configuring the FaxCentre F2121 with an IP address using AUTO (DHCP): On startup the FaxCentre F2121 Multifunction
device defaults to DHCP to obtain its network configurations. A DHCP server delivers an IP address as well as other
configuration settings to the device. If using a DHCP server to allocate an IP address to the F2121 device then proceed as
follows:
Step 1: Power on the FaxCentre F2121 device, the device will say PLEASE WAIT SEL-CONF.
Step 2: Wait a minute or so while the F2121 device negotiates an IP address. Once an IP address has been assigned, print out
the List of Parameters Page.
To Print the List of Parameters Page:
Note: if the IP address on the
• Select the M button on the F2121
Connectivity report starts with a
• Scroll to 5 PRINT select OK
169.xxx.xxx.xxx then the DHCP
• Scroll to 54 SETUP select OK
server has not properly
The List of Parameters Page will print out.
allocated an address or DHCP
is not enabled on your network.
• Confirm on the printout that an IP address has been allocated
and that it appears to be an appropriate IP address on your
network.
Step 3: Record the IP address allocated and open your Internet Explorer browser. Type in the URL http://xxx.xxx.xxx.xxx
(where the xxx’s represent F2121 device’s IP address). If connected properly you should be presented with FaxCentre F2121
device’s Internet Services web page. If the Internet Services web page does not appear then test connectivity by pinging the IP
address of the FaxCentre F2121 or contacting the local network administrator.
Step 4: Load the Print Drivers on the workstations that will be accessing the FaxCentre F2121 device.
- 34 -
LU 252813189 Kit Laser Multifonction LAN XEROX GB.book Page 35 Lundi, 27. novembre 2006 4:47 16
NETWORK SETUP (MANUAL IP)
This document is intended for installing the F2121 on the network using a static TCP/IP address.
Note: If you have not done so, you must enable network connectivity using the Blue Smart Card see Network/LAN kit for
instructions.
Before Starting:
1. Confirm that an existing operational network utilizing TCP/IP is available.
2. Confirm that the Ethernet cable is plugged into the FaxCentre F2121 and into an operational Ethernet port on the
network. Note: the Ethernet cable must be Category 5 and the connector must be RJ45 type. This cable is not
supplied by Xerox.
Configuring F2121 Static IP Address manually: On startup the FaxCentre F2121 defaults to DHCP to obtain its network
configurations, DHCP will be turned off by manually entering a Static IP.
Before Installing:
Record the following information for use during setup:
TCP/IP Address:
Gateway Address:
Subnet Mask:
Step 1:
Step 2:
•
•
•
•
•
•
To obtain this information
contact your Network System
Administrator
Power on the FaxCentre F2121.
Select the M button on the F2121
Scroll to 2 SETUP and press OK key.
Scroll to 25 NETWORKS and press OK key
Scroll to 253 LOCAL NETWORK and press OK key
Scroll to 2531 CONFIGURATION and press OK key
Scroll to 25311 MANUAL and press OK key at this point it may say “Please Wait”
Step 3: Select the M button and type 2532 this will take you to IP ADDRESS. Enter your IP address -IP addresses are
divided into four octet fields. Pad the IP address with leading zeros to fill out the octet fields.
Eg. 192.010.025.004 would be a valid IP address configuration.
Step 4:
• Select the M button and type 2533 this will take you to the SUBNET MASK. Type in the subnet mask and press
OK key.
• Select the M button and type 2534 this will take you to the GATEWAY. Type in the default gateway associated
to the IP address for the FaxCentre F2121 and press OK key.
Step 5: Print out the List of Parameters Page.
To Print the List of Parameters Page:
• Select the M button on the F2121
• Scroll to 5 PRINT select OK,
• Scroll to 54 SETUP then select OK.
The List of Parameters Page will print out.
Confirm on the printout that the IP Address,
Subnet Mask, and Gateway are correct.
Step 6: From a workstation, open your Internet Explorer browser. Type in the URL http://xxx.xxx.xxx.xxx (where the xxx’s
represent the FaxCentre F2121 device’s IP address). If connected properly you should be presented with the FaxCentre
F2121 device’s Internet Services web page. . If the Internet Services web page does not appear then test connectivity by
pinging the IP address of the FaxCentre F2121 or contacting the local network administrator.
Step 7: Load the Print Drivers on the workstations that will be accessing the FaxCentre F2121 device.
- 35 -
LU 252813189 Kit Laser Multifonction LAN XEROX GB.book Page 36 Lundi, 27. novembre 2006 4:47 16
TROUBLESHOOTING
PRINTING
DOES NOT WORK
Check that the TCP/IP protocol is listed in the network settings of your network board.
Check that the machine can be accessed from your PC via the Network: in an MS-DOS COMMAND box in Windows
95/98/Me or a COMMAND PROMPT in Windows NT/2000/XP, enter the command PING followed by the IP address
or NetBios name of the fax machine (example: PING 127.37.42.6). Press the Enter key to confirm. When the
command is executed, you are informed whether the machine is accessible from your PC.
If the fax machine is not accessible, check your network settings or contact your network administrator.
TECHNICAL CHARACTERISTICS
• Postscript 3 print format (PostScript® level 3 language emulation with configuration
file).
• Network protocols: RAW and LPR.
- 36 -
KIT LAN XEROX US_FRA.book Page 37 Lundi, 27. novembre 2006 4:55 16
F2121/F2121L
Network Installation Kit
Guide Utilisateur
37
KIT LAN XEROX US_FRA.book Page 38 Lundi, 27. novembre 2006 4:55 16
LICENCE D’USAGE DU LOGICIEL
DEFINITION
Le Logiciel désigne les programmes et la documentation associée.
LICENCE
- Cette licence vous permet d’utiliser le Logiciel sur des ordinateurs personnels connectés sur un réseau local. Vous avez
seulement le droit d'utiliser le logiciel pour imprimer sur un terminal multifonction unique. Vous ne pouvez pas prêter
ni céder le droit d’utiliser le Logiciel à un tiers.
- Vous êtes autorisé à effectuer une copie de sauvegarde.
- Cette licence est non exclusive et non transférable.
PROPRIETE
Le fabricant ou ses fournisseurs conservent le droit de propriété du Logiciel. Vous ne devenez propriétaire que du CDROM. Vous ne devez pas modifier, adapter, décompiler, traduire, créer d’oeuvre dérivée, louer ou vendre le Logiciel ou
la documentation. Tous droits non expressément concédés sont réservés par le fabricant ou ses fournisseurs.
DUREE
Cette licence reste en vigueur jusqu’à sa résiliation. Vous pouvez résilier la licence en détruisant le programme et la
documentation, ainsi que leurs copies. Cette licence sera automatiquement résiliée si vous ne respectez pas les modalités
de ce contrat de licence. En cas de résiliation, vous vous engagez à détruire toutes les copies du programme et de la
documentation.
GARANTIE
Le logiciel est fourni « en l’état », sans garanties explicites ou implicites, y compris mais s’en s’y limiter, les garanties
implicites de qualité et d’adaptation à un usage particulier. L’utilisateur sera responsable de tous les risques impliquant
les résultats et les performances du logiciel. Au cas où le programme s’avérerait défectueux, tous les frais de réparation
ou de remise en état seraient pris en charge par l’acheteur.
Le titulaire de la licence bénéficie toutefois de la garantie suivante: le CD-ROM sur lequel le Logiciel est enregistré est
garanti, sans défaut matériel ou de fabrication dans des conditions d’utilisation et de fonctionnement normales pendant
une période de quatre-vingt dix (90) jours à compter de la date de livraison, la copie de votre reçu faisant foi. Dans le
cas où le défaut du CD-ROM se produirait à la suite d’un accident ou d’une mauvaise utilisation, ce CD-ROM ne serait
pas remplacé dans le cadre de la garantie.
RESPONSABILITE
La seule responsabilité de votre revendeur et votre seul et unique recours est le remplacement du CD-ROM qui ne
répondrait pas à la garantie et qui serait renvoyé accompagné d’une copie de votre reçu. Ni le fabricant ni qui que ce soit
impliqué dans la création, la réalisation, la commercialisation ou la livraison de ce programme ne serait être responsable
des dommages directs, indirects ou immatériels, tels que, cette liste n’étant pas limitative, perte d’informations, perte de
temps, perte d’exploitation, perte de revenus, perte de clientèle, à la suite de l’utilisation ou de l’incapacité d’utiliser un
tel programme.
EVOLUTION
Dans un souci d’amélioration constant, le fabricant se réserve le droit de faire évoluer les caractéristiques du Logiciel
sans préavis. En cas d’évolution, votre droit d’utilisation ne vous donne pas droit à des mises à jour gratuites.
LOI APPLICABLE
Cette licence est régie par le droit français. Tout litige découlant de l’interprétation ou de l’exécution de cette licence
sera soumis aux Tribunaux de Paris.
Etant donné l'évolution permanente de la technologie, le fabricant se réserve le droit de modifier les caractéristiques
techniques indiquées pour ce produit, à tout moment, sans avis préalable, et/ou d'interrompre la production de ce produit.
Tous les noms de produits et de marques pouvant être des marques déposées par leurs détenteurs respectifs sont
reconnues dans les présentes.
- 38 -
KIT LAN XEROX US_FRA.book Page 39 Lundi, 27. novembre 2006 4:55 16
SOMMAIRE
INTRODUCTION ..........................................................................41
RÉGLAGE DU TERMINAL F2121/F2121L POUR IMPRESSION RÉSEAU .....................42
Configurations requises ......................................................................................................................................43
Installation rapide du réseau (automatique) .......................................................................................................43
Installation rapide du réseau (IP manuelle) ........................................................................................................43
RÉGLAGE DU PC CLIENT POUR IMPRESSION RÉSEAU GDI OU PCL ........................44
Installation du logiciel sur votre PC ...................................................................................................................44
Sous Windows 98SE/ME/2000/XP ......................................................................................................... 44
Installation d’une imprimante réseau .................................................................................................................50
Suppression du logiciel de votre PC ..................................................................................................................52
RÉGLAGE DU PC CLIENT POUR IMPRESSION RÉSEAU POSTSCRIPT 3
(ÉMULATION DU LANGAGE POSPSCRIPT® NIVEAU 3)
L’IMPRESSION PS OFFRE UNE GESTION DES ERREURS PLUS EFFICACE ....................53
Création d’un port réseau (si vous n’en avez aucun de disponible) ...................................................................53
Installation du Driver PS ....................................................................................................................................58
INSTRUCTIONS D’INSTALLATION POUR WINDOWS SERVER 2003 ........................60
Ajouter un port sur Windows Server 2003 ........................................................................................................60
Procédure 1 - Création d’un type de port Companion Suite Pro Monitor ............................................... 60
Procédure 2 - Ajout d’un port Companion Pro pour l’imprimante.......................................................... 62
Procédure 3 - Ajout d'une version PCL ou GDI de l'imprimante FaxCentre 2121 sur le serveur .......... 63
Procédure 4 (facultative) - Ajout d’une imprimante PostScritpt sur le serveur....................................... 66
Sur le PC client ..................................................................................................................................................67
Connexion des imprimantes créées sur le serveur ................................................................................... 67
CONFIGURATION RÉSEAU .................................................................69
Pour Modem câblé ou serveur email interne professionnel ...............................................................................69
Installation rapide du réseau (automatique) .......................................................................................................70
Installation rapide du réseau (IP manuelle) ........................................................................................................71
INCIDENTS ...............................................................................72
L’impression ne fonctionne pas .........................................................................................................................72
CARACTÉRISTIQUES TECHNIQUES ........................................................72
- 39 -
KIT LAN XEROX US_FRA.book Page 40 Lundi, 27. novembre 2006 4:55 16
INFORMATION
ACITS LPR Remote Printing est une marque déposée de The University of Texas, Austin, Texas, USA.
Microsoft® , Windows® 98, Windows® Millenium, Microsoft®
Windows® 2000, Windows® XP et tous les produits Microsoft® indiqués dans ce document sont des marques
de Microsoft Corporation déposées et/ou utilisées aux États-Unis et/ou dans d’autres pays.
PCL est une marque déposée de Hewlett Packard.
PostScript est une marque déposée de Adobe Systems Incorporated.
Toutes les autres marques et les noms de produits cités à titre d’exemple ou d’information sont des marques
déposées de leurs détenteurs respectifs.
- 40 -
KIT LAN XEROX US_FRA.book Page 41 Lundi, 27. novembre 2006 4:55 16
INTRODUCTION
Le pilote d’impression présenté dans ce livret utilisateur vous permet d’installer et d’utiliser le terminal que vous avez
acquis avec ce Kit réseau connectable en réseau comme une imprimante standard de votre réseau local.
Votre terminal permet également l’impression aux formats PCL® et SG Script 3 (émulation du langage Postscript® niveau
3) via un réseau.
- 41 -
KIT LAN XEROX US_FRA.book Page 42 Lundi, 27. novembre 2006 4:55 16
RÉGLAGE DU TERMINAL F2121/F2121L POUR
IMPRESSION RÉSEAU
- 42 -
KIT LAN XEROX US_FRA.book Page 43 Lundi, 27. novembre 2006 4:55 16
CONFIGURATIONS
REQUISES
Votre PC doit présenter au moins les caractéristiques suivantes :
Un processeur de :
• 500 MHz pour Windows 98SE ;
• 800 MHz pour Windows Me, 2000SP3 ;
• 1 GHz pour Windows XP (éditions familiale et
professionnelle).
• un lecteur de CD-ROM ;
• un port réseau ou un connecteur USB ;
• un espace disque libre de 600 Mo pour l’installation.
Une mémoire vive de :
• 128 MB minimum pour Windows 98SE, Me et
2000SP3 ;
• 192 MB minimum pour Windows XP (éditions
familiale et professionnelle).
INSTALLATION
RAPIDE DU RÉSEAU
(AUTOMATIQUE)
• Sélectionnez M2531, puis OK.
• Sélectionnez « Automatic » à l’aide du bouton fléché et validez par OK.
• Sélectionnez « Address IP » M2532 et validez par OK. Notez l’adresse IP, elle vous sera demandée lors de l’installation Postscript.
Note:
Pour plus de renseignements, voir “Installation rapide du réseau (automatique)”, page 70.
INSTALLATION
RAPIDE DU RÉSEAU
(IP
MANUELLE)
• Sélectionnez M2531, puis OK.
• Sélectionnez « Manual » à l’aide du bouton fléché et validez par OK.
• Sélectionnez « Address IP » M2532 et validez par OK. Entrez l’adresse IP que vous souhaitez utiliser.
Note:
Pour plus de renseignements, voir “Installation rapide du réseau (IP manuelle)”, page 71.
- 43 -
KIT LAN XEROX US_FRA.book Page 44 Lundi, 27. novembre 2006 4:55 16
RÉGLAGE DU PC CLIENT POUR IMPRESSION RÉSEAU
GDI OU PCL
Note:
Après l'installation du pilote d'impression réseau (sur le CD-Rom), référez-vous au paragraphe «
Postscript » (page 58) pour installer le driver d'impression Postscript.
INSTALLATION
DU LOGICIEL SUR VOTRE
PC
Sous Windows 98SE/ME/2000/XP
Démarrez votre PC. Ouvrez une session ADMINISTRATEUR, excepté pour les environnements 98SE et ME.
Ouvrez le lecteur de CD-ROM, insérez le CD-ROM d’installation et fermez le lecteur.
La procédure d’installation démarre automatiquement (exécution automatique).
- 44 -
KIT LAN XEROX US_FRA.book Page 45 Lundi, 27. novembre 2006 4:55 16
La fenêtre COMPANION SUITE PRO LM s’affiche
Positionnez votre curseur sur INSTALLATION DES PRODUITS, puis cliquez avec le bouton gauche.
L’écran Install Products s’affiche.
Positionnez votre curseur sur COMPLÈTE, puis cliquez avec le bouton gauche.
Note: La procédure d’installation COMPLÈTE copie tous les logiciels requis pour l’exécution du kit Companion Suite
Pro sur votre disque dur, c.-à-d. :
- Companion Suite Pro (logiciel de communication fax et SMS, logiciel de numérisation, etc.)
- PaperPort
- Omnipage.
Vous disposez peut-être déjà d’une version de l’un des programmes figurant sur le CD-ROM d’installation.
Dans ce cas, utilisez l’installation PERSONNALISÉE, puis sélectionnez les programmes que vous souhaitez installer sur votre disque dur et confirmez votre sélection.
- 45 -
KIT LAN XEROX US_FRA.book Page 46 Lundi, 27. novembre 2006 4:55 16
Note: Les deux écrans suivants s’affichent uniquement si votre version de Windows Installer est antérieure à 2.0.
L’installation se poursuit et un écran affiche une barre de progression.
Vous pouvez interrompre l’installation en cliquant sur le bouton ARRÊTER L’INSTALLATION.
Après une phase de recherche et d’analyse des composants sur votre PC et le terminal multifonction, vous devez
redémarrer votre PC pour exécuter les applications.
Cliquez sur OK.
Une votre PC réinitialisé, l’Assistant Installation InstallShield affiche une barre de progression.
Vous pouvez arrêter la procédure à tout moment en cliquant sur le bouton ANNULER.
- 46 -
KIT LAN XEROX US_FRA.book Page 47 Lundi, 27. novembre 2006 4:55 16
L’assistant s’arrête et l’écran d’accueil s’affiche.
Cliquez sur SUIVANT pour démarrer l’installation du kit COMPANION SUITE PRO sur votre PC.
Cliquez sur OUI.
Avant de copier les fichiers sur votre disque dur, vous devez accepter le contrat de licence affiché. Utilisez la barre
de défilement pour lire l’intégralité du contrat.
- 47 -
KIT LAN XEROX US_FRA.book Page 48 Lundi, 27. novembre 2006 4:55 16
L’installation finale est prête à l’exécution.
Cliquez sur INSTALLER.
Companion Suite Pro a été installé sur votre PC.
Une fenêtre vous montre la progression de l’installation.
Dans l’écran suivant, cliquez sur CONTINUER pour copier les utilitaires et les programmes qui accompagnent le kit
(PaperPort SE et Omnipage SE).
- 48 -
KIT LAN XEROX US_FRA.book Page 49 Lundi, 27. novembre 2006 4:55 16
A la fin de l’installation, vous devez redémarrer votre PC pour mettre à jour les fichiers système.
Faites votre sélection et cliquez sur TERMINER.
Votre kit « Companion Suite Pro » a été installé avec succès sur votre PC.
Vous pouvez démarrer le logiciel de gestion de votre terminal multifonction en sélectionnant PROGRAMMES >
COMPANION SUITE > COMPANION SUITE PRO LM2 > COMPANION - DIRECTOR à partir du menu DÉMARRER ou en
cliquant sur l’icône COMPANION - DIRECTOR sur le bureau.
Important: Si vous avez installé un pare-feu, celui-ci vous
demandera, une fois le PC redémarré après
l’installation, si vous voulez permettre à l’application
MFServices d’accéder au réseau. Cliquez sur Oui ou
Autoriser (selon votre pare-feu) pour permettre à
MFServices.exe d’accéder au réseau. N.B. : Windows
XP doté du Service Pack 2 et les versions ultérieures
disposent d’un pare-feu installé par défaut
- 49 -
KIT LAN XEROX US_FRA.book Page 50 Lundi, 27. novembre 2006 4:55 16
INSTALLATION D’UNE IMPRIMANTE RÉSEAU
Note: Companion Suite Pro LM2 doit être installé pour effectuer cette opération.
Exécutez l’application en sélectionnant PROGRAMMES > COMPANION SUITE > COMPANION SUITE PRO LM2 >
INSTALLER UNE IMPRIMANTE RÉSEAU à partir du menu DÉMARRER.
Cliquez sur SUIVANT pour exécuter la procédure d’installation
L’écran suivant affiche la liste des périphériques compatibles détectés sur le réseau.
Vous pouvez effectuer une nouvelle recherche sur le réseau en cliquant sur le bouton RAFRAÎCHIR.
- 50 -
KIT LAN XEROX US_FRA.book Page 51 Lundi, 27. novembre 2006 4:55 16
Note: Il est possible qu'un périphérique ne soit pas affiché dans la liste. Dans ce cas, cliquez sur le bouton PAS DANS LA
LISTE. La fenêtre suivante s’affiche :
Entrez l’adresse IP ou le nom NetBIOS du périphérique que vous souhaitez ajouter. Vous pouvez tester la connexion entre le PC et le périphérique en cliquant sur le bouton TEST. Cliquez sur OK.
Sélectionnez le périphérique que vous voulez ajouter à partir de la liste. Cliquez sur SUIVANT.
La fenêtre suivante répertorie les différentes propriétés de l’imprimante à installer. Cliquez sur SUIVANT.
Une fenêtre indiquant que l’installation a réussi s’affiche. Cliquez sur Terminer.
Selon la configuration de votre terminal, sélectionnez la langue de l’imprimante, PCL ou GDI_RL. Cliquez sur
SUIVANT.
- 51 -
KIT LAN XEROX US_FRA.book Page 52 Lundi, 27. novembre 2006 4:55 16
SUPPRESSION DU LOGICIEL DE VOTRE PC
Exécutez la suppression du programme en sélectionnant PROGRAMME > COMPANION SUITE > COMPANION SUITE
PRO LM2 > DÉSINSTALLER à partir du menu DÉMARRER.
Un écran de préparation s’affiche.
Sélectionnez SUPPRIMER pour supprimer tous les fichiers ou MODIFIER pour choisir les fichiers (pilotes ou
applications) que vous souhaitez supprimer. Cliquez sur SUIVANT.
Un écran de confirmation s’affiche. Confirmez en cliquant sur OK.
Un écran affiche une barre de progression.
- 52 -
KIT LAN XEROX US_FRA.book Page 53 Lundi, 27. novembre 2006 4:55 16
A la fin de la procédure, vous devez redémarrer votre système. Fermez tous les programmes en cours d’exécution,
puis sélectionnez OUI, JE VEUX REDÉMARRER MON ORDINATEUR MAINTENANT et cliquez sur TERMINER.
RÉGLAGE DU PC CLIENT POUR IMPRESSION RÉSEAU
POSTSCRIPT 3
(ÉMULATION DU LANGAGE POSPSCRIPT® NIVEAU 3)
L’IMPRESSION PS
OFFRE UNE GESTION DES ERREURS PLUS EFFICACE
La création de port d’imprimante sous Windows 2000 et XP nécessite des droits d’administrateur.
(SI
CRÉATION
D’UN PORT RÉSEAU
VOUS N’EN AVEZ AUCUN DE DISPONIBLE)
Un port d'imprimante est l'interface par laquelle votre ordinateur communique avec le terminal. Si vous souhaitez
imprimer en réseau, il est nécessaire de créer un nouveau port réseau pour le terminal. Lorsque vous utilisez la
configuration du serveur d’impression, le port est créé uniquement sur le serveur d’impression qui doit être équipé de
Windows 2000, 2003 Server ou XP.
Les procédures de création d’un port réseau pour les protocoles RAW et LPR sont décrites dans le tableau ci-dessous. Les
premières étapes sont identiques pour les deux protocoles.
- 53 -
KIT LAN XEROX US_FRA.book Page 54 Lundi, 27. novembre 2006 4:55 16
Protocole RAW
Protocole LPR
Pour terminer l’installation du Pilote réseau GDI :
Sélectionnez DÉMARRER>PARAMÈTRES>IMPRIMANTES. Dans la fenêtre IMPRIMANTES,
double-cliquez sur l’icône AJOUTER UNE IMPRIMANTE.
L’écran Assistant Ajout d’imprimante apparaît.
Cliquez surSUIVANT.
Sélectionnez IMPRIMANTE LOCALE, assurez vous que la case DÉTECTION AUTOMATIQUE
est décochée. Cliquez sur SUIVANT.
ET
INSTALLATION DE L’IMPRIMANTE PLUG-AND-PLAY
Sélectionnez CRÉER UN NOUVEAU PORT et l’option STANDARD TCP/IP PORT dans le champ
Type. Cliquez sur SUIVANT.
- 54 -
KIT LAN XEROX US_FRA.book Page 55 Lundi, 27. novembre 2006 4:55 16
Protocole RAW
Protocole LPR
Cliquez sur SUIVANT.
Saisissez dans le 1er champ l’adresse IP du terminal ou son nom NetBios. Modifiez, si vous le
désirez, le nom qui caractérisera le port dans le 2ème champ. Cliquez sur SUIVANT.
Note: notez ce nom car il sera demandé ultérieurement lors de l'ajout de l'imprimante.
- 55 -
KIT LAN XEROX US_FRA.book Page 56 Lundi, 27. novembre 2006 4:55 16
Protocole RAW
Protocole LPR
La fenêtre indique que le périphérique n’a
pas été reconnu par Windows. Cliquez sur
SUIVANT.
La fenêtre indique que le terminal n’a pas
été reconnu par Windows. Sélectionnez
PERSONNALISÉ,
puis
cliquez
sur
PARAMÈTRES...
Cliquez sur TERMINER pour finir l’ajout du
port.
Sélectionnez LPR et saisissez AUTO dans le
champ NOM DE LA FILE D’ATTENTE, puis
cliquez sur OK.
Cliquez sur ANNULER.
Note: Attention, ne pas activer SNMP.
- 56 -
KIT LAN XEROX US_FRA.book Page 57 Lundi, 27. novembre 2006 4:55 16
Protocole RAW
Protocole LPR
Vous pouvez alors procéder à l’installation
du driver sur ce port nouvellement créé.
Voir la section Installation du Driver PS,
page 58.
- 57 -
Cliquez sur SUIVANT.
Cliquez sur TERMINER pour finir l’ajout du
port.
Cliquez sur ANNULER.
Vous pouvez alors procéder à l’installation
du driver sur ce port nouvellement créé.
Voir la section Installation du Driver PS,
page 58.
KIT LAN XEROX US_FRA.book Page 58 Lundi, 27. novembre 2006 4:55 16
INSTALLATION
DU
DRIVER PS
Connectez-vous au site Adobe, cliquez sur l’onglet TÉLÉCHARGEMENTS et trouvez ADOBE POSTSCRIPT3TM dans
la liste.
Cliquez sur MISE À JOUR, puis cliquez sur le lien WIN.
Double-cliquez sur le fichier téléchargé pour exécuter l’installation du pilote d’impression PS.
Selectionnez Adobe Universal PostScript Windows Driver Installer 1.0.06-Francais et cliquez sur le bouton
PROCÉDER AU TÉLÉCHARGEMENT pour télécharger le fichier (winstfr.exe) sur votre disque dur.
L’écran ADOBE POSTSCRIPT DRIVER INSTALLER apparaît. Cliquez sur SUIVANT
Le texte de la licence apparaît. Cliquez sur ACCEPT.
L’écran Type de connexion imprimante apparaît. Sélectionnez l’option CONNEXION DIRECTE À L’ORDINATEUR
(IMPRIMANTE LOCALE) (sélectionnez cette option, même si vous allez connecter une imprimante réseau).
Cliquez sur SUIVANT.
L’écran Sélection du port local apparaît. Sélectionnez le PORT TCP/IP STANDARD précédemment créé Voir la
section Création d’un port réseau (si vous n’en avez aucun de disponible), page 53). Cliquez sur SUIVANT.
L’écran Sélection d’un modèle d’imprimante apparaît. Cliquez sur PARCOURIR.
L’écran Parcourir à la recherche d’une imprimante apparaît. Sélectionnez votre lecteur de CD-Rom.
Recherchez le fichier de la langue souhaitée depuis le chemin DRIVERS\PPD_LETTER_US, puis choississez votre
langue.
Validez votre choix en cliquant sur le bouton OK.
Sélectionnez MFF 18-20 PS et cliquez sur SUIVANT.
Cochez l'option OUI et indiquez le nom de l'imprimante dans le champ NOM DE PARTAGE.
Note: si vous avez installé le pilote sur le serveur, vous devez sélectionner OUI.
Dans le second champ, sélectionnez les systèmes d'exploitation susceptibles de partager cette imprimante, puis
cliquez sur SUIVANT.
- 58 -
KIT LAN XEROX US_FRA.book Page 59 Lundi, 27. novembre 2006 4:55 16
L'écran ci-dessous s'affiche si vous avez saisi un nom de plus de 8 caractères ou si celui-ci contient des espaces.
Ignorez ce message en cliquant sur OUI.
L’écran INFORMATION SUR L’IMPRIMANTE apparaît.
- VOULEZ-VOUS UTILISER CETTE IMPRIMANTE COMME IMPRIMANTE PAR DÉFAUT ? Sélectionnez OUI si vous
souhaitez définir cette imprimante comme imprimante par défaut. (Note: Vous pouvez définir cette nouvelle
imprimante par défaut depuis le menu DÉMARRER>PARAMÈTRES>IMPRIMANTES).
- VOULEZ-VOUS IMPRIMER LA PAGE DE TEST ? Sélectionnez OUI pour imprimer la page de test.
Cliquez sur SUIVANT.
L’écran INFORMATION SUR L’INSTALLATION apparaît.
Cliquez sur INSTALLER. La procédure d’installation est lancée. Suivez les instructions qui s’affichent à l’écran.
- 59 -
KIT LAN XEROX US_FRA.book Page 60 Lundi, 27. novembre 2006 4:55 16
INSTRUCTIONS D’INSTALLATION POUR WINDOWS
SERVER 2003
Suivez les instructions ci-dessous pour installer un port et/ou des pilotes sur un serveur Windows 2003. Cette procédure
est valable avec d’autres systèmes d’exploitation par contre certaines fonctionnalités du logiciel Companion Suite Pro ne
seront pas disponibles.
AJOUTER
UN PORT SUR
WINDOWS SERVER 2003
Note: avant de commencer, vériifez que vous avez l’adresse IP de l’imprimante.
Procédure 1 - Création d’un type de port Companion Suite Pro Monitor
1. Insérez le CD-ROM Companion Suite Pro dans le lecteur. La fenêtre COMPANION SUITE PRO
s'affiche. Cliquez sur SORTIR pour fermer la fenêtre.
2. Dans le menu DÉMARRER, sélectionnez IMPRIMANTES ET TÉLÉCOPIEURS.
3. La fenêtre IMPRIMANTES ET TÉLÉCOPIEURS s'affiche, comme indiqué ci-dessous.
Sélectionnez FICHIER -> MENU puis PROPRIÉTÉS DU SERVEUR D’IMPRESSION.
- 60 -
KIT LAN XEROX US_FRA.book Page 61 Lundi, 27. novembre 2006 4:55 16
4. Dans la fenêtre PROPRIÉTÉS DU SERVEUR
Sélectionnez AJOUTER UN PORT.
D’IMPRESSION,
cliquez sur l'onglet PORTS.
5. Cliquez sur AJOUTER UNTYPE DE PORT et créez un nouveau type de port.
6. Cliquez sur PARCOURIR et sélectionnez le lecteur de CD ROM.
- 61 -
KIT LAN XEROX US_FRA.book Page 62 Lundi, 27. novembre 2006 4:55 16
7. Cliquez sur OUVIRIR.
8. Cliquez sur OK dans l'écran suivant.
Procédure 2 - Ajout d’un port Companion Pro pour l’imprimante
1. Sélectionnez le port COMPANION SUITE PRO LM TCP/IP MONITOR.
2. Cliquez sur AJOUTER UN PORT.
3. La fenêtre AJOUT D’UN PORT RAW TCP/IP s'affiche.
- 62 -
KIT LAN XEROX US_FRA.book Page 63 Lundi, 27. novembre 2006 4:55 16
4. Renseignez les champs proposés :
a. NOM DU PORT - Remarque : notez ce nom car il sera demandé ultérieurement lors de l'ajout de
l'imprimante,
b. ADRESSE IP DU SERVEUR D’IMPRESSION,
c. Cliquez sur OK.
5. Cliquez sur FERMER.
6. Cliquez sur FERMER.
Une fois le port créé, vous devez ajouter une imprimante et la connecter à ce port.
Procédure 3 - Ajout d'une version PCL ou GDI de l'imprimante FaxCentre 2121 sur le
serveur
1. Sur le PC client, sélectionnez DÉMARRER > IMPRIMANTES
IMPRIMANTES ET TÉLÉCOPIEURS s'affiche.
2. Cliquez sur AJOUTER UNE IMPRIMANTE.
3. Cliquez sur SUIVANT et passez à la fenêtre suivante.
- 63 -
ET TÉLÉCOPIEURS.
La fenêtre
KIT LAN XEROX US_FRA.book Page 64 Lundi, 27. novembre 2006 4:55 16
4. Cochez l'option UNE IMPRIMANTE LOCALE CONNECTÉE À CET ORDINATEUR. Cliquez sur SUIVANT.
5. Cochez l'option UTILISER LE PORT SUIVANT et sélectionnez le port précédemment créé dans le menu
déroulant.
- 64 -
KIT LAN XEROX US_FRA.book Page 65 Lundi, 27. novembre 2006 4:55 16
6. Sélectionnez le pilote souhaité (GDI = Laser Pro LM or PCL = Laser Pro LM PCL) et cliquez sur
SUIVANT.
Note: le pilote PCL est recommandé, car il est plus efficace et offre une meilleure gestion des erreurs.
7. Saisissez le nom de l'imprimante ou conservez le nom affiché par défaut dans le champ NOM
L’IMPRIMANTE. Cliquez sur SUIVANT.
- 65 -
DE
KIT LAN XEROX US_FRA.book Page 66 Lundi, 27. novembre 2006 4:55 16
8. Cochez l'option NOM DU PARTAGE si vous souhaitez partager l'imprimante. Saisissez le nom de
l'imprimante ou conservez le nom affiché par défaut dans ce champ, comme indiqué ci-dessous.
Cliquez sur SUIVANT.
9. Vous pouvez décrire l'emplacement de l'imprimante, à titre d'information pour les autres
utilisateurs. Voir l'écran ci-dessous. Vous pouvez, si vous le souhaitez, saisir des commentaires.
Cliquez sur SUIVANT.
10. Cochez l'option OUI pour imprimer une page de test.
Note : Conservez cette page de test. Celle-ci contient les noms de l'imprimante et du serveur qui
vous seront demandés lors de l'ajout d'une imprimante sur le PC client. Cliquez sur SUIVANT.
11. Dans le dernier écran, cliquez sur TERMINER pour terminer la procédure de liaison d'une imprimante
à des pilotes sur le serveur Windows 2003.
Procédure 4 (facultative) - Ajout d’une imprimante PostScritpt sur le serveur
Voir section Installation du Driver PS, page 58.
- 66 -
KIT LAN XEROX US_FRA.book Page 67 Lundi, 27. novembre 2006 4:55 16
SUR
LE
PC
CLIENT
Connexion des imprimantes créées sur le serveur
1. Dans le menu DÉMARRER, sélectionnez IMPRIMANTES
UNE IMPRIMANTE et cliquez sur SUIVANT.
ET TÉLÉCOPIEURS.
Sélectionnez AJOUTER
2. Sélectionnez UNE IMPRIMANTE RÉSEAU OU... et cliquez sur SUIVANT.
3. Sélectionnez CONNEXION À CETTE IMPRIMANTE…., puis saisissez le nom de l'imprimante (indiqué
dans la page de test précédemment imprimée) dans le champ NOM conformément au format indiqué
dans l'écran ci-dessous. Cliquez sur SUIVANT et suivez les instructions qui s'affichent à l'écran.
- 67 -
KIT LAN XEROX US_FRA.book Page 68 Lundi, 27. novembre 2006 4:55 16
4. OU : Laissez le champ NOM vide et recherchez l'imprimante. Vous devez connaître le domaine ou
le groupe de travail du serveur partageant l'imprimante.
5. Si vous souhaitez définir l'imprimante comme imprimante par défaut, cliquez sur SUIVANT puis sur
TERMINER.
- 68 -
KIT LAN XEROX US_FRA.book Page 69 Lundi, 27. novembre 2006 4:55 16
CONFIGURATION RÉSEAU
POUR MODEM
CÂBLÉ OU SERVEUR EMAIL INTERNE PROFESSIONNEL
Avant de commencer l’installation de l’email:
1. Vérifiez que votre réseau informatique est opérationnel et que vous avez la possibilité d’utiliser le protocole
TCP/IP
2. Procurez-vous une adresse email valide pour le F2121 auprès de votre administrateur email ou de votre
fournisseur d’accès à Internet
3. Procurez-vous l’adresse du serveur SMTP ainsi que l’adresse du serveur DNS de votre administrateur email
ou de votre fournisseur d’accès à Internet
Informations relatives à l’installation de
l’email
L’adresse IP/nom d’hôte du serveur email
SMTP
Nécessité pour
l’installation
Nécessaire
L’adresse du Serveur de Nom de Domaine
- DNS
Facultatif
L’adresse email du FaxCentre F2121
Nécessaire
Remarques
Le protocole SMTP doit être activé sur le
serveur mail. Soit le nom d’hôte du
serveur email ou son adresse IP peuvent
être utilisés
Si vous utilisez le nom d’hôte du serveur
email, vous devrez alors entrer l’adresse
du serveur DNS
Le F2121 doit avoir sa propre adresse
email. Cette adresse email doit être
enregistrée sur serveur mail SMTP.
Etape 1: ouvrez l’explorateur Internet de votre PC. Entrez l’URL http://xxx.xxx.xxx.xxx (où les quatre groupes de xxx
représentent l’adresse IP du FaxCentre F2121). Si la configuration a été correctement effectuée, vous devriez voir
apparaître la page web du service Internet du FaxCentre F2121.
Etape 2: pour configurer l’email via le service Internet. Cliquer sur ENTRER à partir de la page d’accueil. Une fois
sur la page web des paramètres, cliquez sur Internet - initialisation, puis sélectionnez dans la barre déroulante
Sélectionnez un fournisseur, choisir RESEAU LOCAL. Entrez l’adresse email du FaxCentre F2121, puis l’adresse IP
ou le nom d’hôte du serveur SMTP. Si vous avez entré le nom d’hôte du serveur SMTP, tapez également l’adresse du
serveur DNS Principal. Faites défiler la page web et cliquer sur Valider vos modifications.
Etape 3:
• Placer les documents que vous désirez envoyer par email dans le chargeur de documents du F2121, face
retourné.
• Appuyez sur le bouton @ du F2121
• Le FaxCentre demande alors une adresse E-Mail. Entrez votre adresse email interne et appuyez sur OK pour
valider.
Appuyez sur le bouton vert Début. Une fois scanné, votre document vous sera renvoyé.
Le F2121 imprime un rapport de vérification. Vérifiez que l’email contenant votre document a été correctement envoyé
par le F2121 et que le destinataire du mail a bien reçu le document en pièce jointe.
- 69 -
KIT LAN XEROX US_FRA.book Page 70 Lundi, 27. novembre 2006 4:55 16
INSTALLATION
RAPIDE DU RÉSEAU
(AUTOMATIQUE)
Le but de ce document est de vous aider à installer le F2121 sur votre réseau informatique en utilisant un serveur
DHCP pour obtenir automatiquement l’adresse TCP/IP.
Note: si vous n’avez pas procédé ainsi, vous devez d’abord permettre la connexion au réseau en utilisant la carte Blue
Smart. Veuillez vous référer au kit Réseau/LAN pour les instructions.
Avant de commencer:
1. Vérifiez que votre réseau informatique est opérationnel et que vous avez la possibilité d’utiliser le protocole
TCP/IP
2. Vérifiez qu’un câble Ethernet est branché au FaxCentre F2121 ainsi qu’à un port Ethernet opérationnel sur le
réseau. Note: le cable Ethernet doit être de catégorie 5 et le connecteur doit être de type RJ45. Ce câble n’est pas
fourni par Xerox.
3. Vérifiez que vous avez la possibilité d’utiliser un serveur DHCP disposant d’adresses IP disponibles.
Pour configurer le FaxCentre F2121 avec une adresse IP de façon automatique (en utilisant le protocole DHCP): Au
démarrage le FaxCentre F2121 Multifonction utilise par défaut un serveur DHCP pour obtenir sa configuration réseau. Un
serveur DHCP attribue automatiquement une adresse IP ainsi que d’autres paramètres de configuration à un équipement. Si
vous utilisez le protocole DHCP pour obtenir l’adresse IP de votre FaxCentre F2121, veuillez procéder aux étapes suivantes:
Etape 1: allumez le FaxCentre F2121, le message PATIENTEZ S.V.P. AUTOCONF. apparaît.
Etape 2: patientez quelques instants afin que le F2121 puisse obtenir une adresse IP. Une fois que l’adresse IP lui a été
attribué, imprimez la page contenant la liste des paramètres.
Pour imprimer la page contenant la liste des paramètres
Note: si vous constatez sur le
• Appuyez sur le bouton M du F2121
rapport de connectivité que
• Faites défiler jusqu’à 5 IMPRESSION et sélectionnez OK
l’adresse IP commence par
• Faites défiler jusqu’à 54 REGLAGES et sélectionner OK
169.xxx.xxx.xxx, cela signifie que
La liste des paramètres s’imprime
le serveur DHCP n’a pas
• Vérifiez sur le document imprimé qu’une adresse IP a bien été attribué correctement une
adresse IP ou que le protocole
attribué et qu’elle est conforme à votre réseau.
DHCP n’est pas activé sur votre
réseau.
Etape 3: conservez l’adresse IP qui vient d’être attribué à votre équipement et ouvrez l’explorateur Internet de votre PC.
Entrez l’URL http://xxx.xxx.xxx.xxx (où les quatre groupes de xxx représentent l’adresse IP de votre FaxCentre F2121). Si
la configuration a été correctement effectuée, vous devriez voir apparaître la page web du service Internet du FaxCentre
F2121. Si cette page Internet ne s’affiche pas, testez la connectivité TCP/IP en envoyant une requête ping avec l’adresse IP
du Fax Centre F2121 ou en contactant l’administrateur réseau local.
Etape 4: chargez les drivers d’impression sur les PC qui seront reliés au FaxCentre F2121.
- 70 -
KIT LAN XEROX US_FRA.book Page 71 Lundi, 27. novembre 2006 4:55 16
INSTALLATION
RAPIDE DU RÉSEAU
(IP
MANUELLE)
Le but de ce document est de vous aider à installer le F2121 sur votre réseau informatique via une adresse fixe
TCP/IP.
Note: si vous n’avez pas procédé ainsi, vous devez d’abord permettre la connexion au réseau en utilisant la carte Blue
Smart. Veuillez vous référer au kit Réseau/LAN pour les instructions.
Avant de commencer:
1. Vérifiez que votre réseau informatique est opérationnel et que vous avez la possibilité d’utiliser le protocole
TCP/IP.
2. Vérifiez qu’un câble Ethernet est branché au FaxCentre F2121 ainsi qu’à un port Ethernet opérationnel sur le
réseau. Note: le câble Ethernet doit être de catégorie 5 et le connecteur doit être de type RJ45. Ce câble n’est pas
fourni par Xerox.
Pour configurer le F2121 avec adresse fixe IP de façon manuelle: Au démarrage le FaxCentre F2121 utilise par défaut un
serveur DHCP pour obtenir sa configuration réseau. Si vous entrez manuellement une adresse fixe IP, le protocole DHCP
sera désactivé.
Avant de procéder à l’installation:
Conservez les informations suivantes qui vous seront utiles
pendant la procédure d’installation:
L’adresse TCP/IP
L’adresse de la passerelle réseau
L’adresse du masque de sous-réseau
Pour obtenir ces informations,
veuillez contacter votre
administrateur réseau
Etape 1: allumez le FaxCentre F2121.
Etape 2:
• Appuyez sur le bouton M sur le F2121.
• Faites défiler jusqu’à 2 REGLAGES et appuyez sur le bouton OK pour valider.
• Faites défiler jusqu’à 25 RESEAUX et appuyez sur le bouton OK pour valider.
• Faites défiler jusqu’à 253 RESEAU LOCAL et appuyez sur le bouton OK pour valider.
• Faites défiler jusqu’à 2531 CONFIGURATION et appuyez sur le bouton OK pour valider.
• Faites défiler jusqu’à 25311 MANUELLE et appuyez sur le bouton OK pour valider. Le message “PATIENTEZ
S .V.P.” peut apparaître.
Etape 3: appuyez sur le bouton M et entrez 2532 pour accéder à la saisie de l’adresse IP. Entrez votre adresse IP (les
adresses IP sont composées de quatre groupes de chiffres) en complétant par des 0 en début de groupe, les groupes de
chiffres incomplets.
Par ex: 192.010.025.004 est une adresse IP correcte.
Etape 4:
• Appuyez sur le bouton M et entrez 2533 pour accéder au masque de sous-réseau. Entrez l’adresse IP du masque de
sous-réseau et appuyez sur le bouton OK pour valider.
• Appuyez sur le bouton M et entrez 2534 pour accéder à la passerelle réseau. Entrez l’adresse IP de la passerelle
réseau qui est associée par défaut à l’adresse IP du FaxCentre F2121 et appuyez sur le bouton OK pour valider.
Etape 5: imprimez la page contenant la liste des paramètres.
Pour imprimer la page contenant la liste des
paramètres:
• Appuyez sur le bouton M du F2121
• Faites défiler jusqu’à 5 IMPRESSION et
sélectionnez OK
• Faites défiler jusqu’à 54 REGLAGES et
sélectionnez OK
La liste des paramètres s’imprime.
Nous vous conseillons de vérifier sur le
document imprimé que l’adresse IP,
l’adresse IP du masque de sous-réseau et
l’adresse IP de la passerelle réseau sont
correctes.
Etape 6: ouvrez l’explorateur Internet de votre PC. Entrez l’URL http://xxx.xxx.xxx.xxx (où les quatre groupes de xxx
représentent l’adresse IP de votre FaxCentre F2121). Si la configuration a été correctement effectuée, vous devriez voir
apparaître la page web du service Internet du FaxCentre F2121. Si cette page Internet ne s’affiche pas, testez la connectivité
TCP/IP en envoyant une requête ping avec l’adresse IP du FaxCentre F2121 ou en contactant l’administrateur réseau local.
Etape 7: chargez les drivers d’impression sur les PC qui seront reliés au FaxCentre F2121.
- 71 -
KIT LAN XEROX US_FRA.book Page 72 Lundi, 27. novembre 2006 4:55 16
INCIDENTS
L’IMPRESSION NE FONCTIONNE PAS
Vérifiez que le protocole TCP/IP figure bien dans les paramètres réseau de votre carte réseau.
Vérifiez que le terminal est accessible par votre PC via le réseau local : dans une boîte de COMMANDE MS-DOS
sous Windows 95/98/Me, ou INVITE DE COMMANDES sous Windows NT4/2000/XP, tapez la commande PING suivie
de l’adresse IP ou du nom NetBIOS du terminal (exemple : PING 127.37.42.6). Validez par la touche Entrée. Lors
de l’exécution de la commande, il vous est signalé si le terminal est accessible ou pas à partir de votre PC.
S’il ne l’est pas, vérifiez vos paramètres réseau ou contactez votre administrateur réseau.
CARACTÉRISTIQUES TECHNIQUES
• Format d’impression Postscript 3 (émulation du langage PostScript® niveau 3 avec
fichier de configuration).
• Protocoles réseaux : RAW et LPR.
- 72 -
KIT LAN XEROX US_ESP.book Page 73 Lundi, 27. novembre 2006 5:11 17
F2121/F2121L
Network Installation Kit
Manual del Usuario
73
KIT LAN XEROX US_ESP.book Page 74 Lundi, 27. novembre 2006 5:11 17
CONTRATO DE LICENCIA DE SOFTWARE
DEFINICIÓN
El "Software" designa los programas y su correspondiente documentación.
CONCESIÓN DE LA LICENCIA
- La presente licencia autoriza la utilización del software en ordenadores personales. Tan sólo podrá utilizar el software
para imprimir en una única terminal multifuncional. No puede prestar ni ceder el derecho de uso del Software a ningún
tercero.
- Está autorizado a realizar una copia de seguridad.
- La presente licencia no es exclusiva ni transferible.
PROPIEDAD
El fabricante conserva la propiedad del Software. Vd. posee exclusivamente la propiedad del CD-ROM. No podrá
alterar, adaptar, descomponer, traducir ni crear un producto derivado, alquilar ni vender el Software ni su
documentación. Todos los derechos que no se encuentren explícitos pertenecen al fabricante.
RESCISIÓN/FIN
La presente licencia será efectiva hasta su fin. Podrá rescindir la licencia destruyendo el programa y la documentación,
así como cualquier copia del mismo. La presente licencia quedará rescindida automáticamente si infringe los términos
y condiciones del presente contrato de licencia. En caso de finalizarse dicho contrato, se compromete y acepta destruir
todas las copias del programa y de su documentación.
GARANTÍA
El Software ha sido suministrado en estado "tal cual", sin garantías explícitas o implícitas, incluyendo, a título indicativo
y no limitativo, todas las garantías implícitas de comerciabilidad e idoneidad para un fin determinado. El usuario se hará
responsable de todos los riesgos derivados de los resultados y del rendimiento del Software. Si el programa resultase
defectuoso, todos los gastos de reparación y restauración correrán a cargo del usuario.
No obstante lo dicho, el propietario de la licencia contará con la siguiente garantía: El CD-ROM en el cual se graba el
Software carecerá de defectos de tipo material o de fabricación en condiciones normales de uso y de funcionamiento
durante un periodo de noventa (90) días a partir de la fecha de entrega que aparece en su recibo. Si el CD-ROM
presentase algún defecto tras un accidente o un uso inadecuado, el CD-ROM no podrá substituirse en el marco de la
presente garantía.
RESPONSABILIDAD
La única responsabilidad de su distribuidor y su único recurso es la substitución de cualquier CD-ROM que no cumpla
con los términos y condiciones de la presente garantía. Dicho CD-ROM deberá devolverse acompañado de la copia de
su recibo. Ni el fabricante ni cualquier tercero involucrado en la creación, desarrollo, venta o entrega del presente
programa, podrán hacerse responsable de cualquier tipo de daños, ya sean directos, indirectos o inmateriales, incluyendo,
a título indicativo y no limitativo, la pérdida de información, tiempo, operaciones, beneficios o clientes, que se puedan
sufrir debido al uso o a la imposibilidad de uso del programa.
EVOLUCIÓN
Con vistas a mejorar constantemente el programa, el fabricante se reserva el derecho de modificar las características del
Software sin previo aviso. Si el producto evoluciona, su licencia no le da derecho a obtener actualizaciones gratuitas.
JURISDICCIÓN
El presente Contrato está regido por la legislación francesa. Cualquier litigio derivado de la interpretación o de la
ejecución de la presente licencia será juzgado por los tribunales de París.
Debido a la constante evolución de la tecnología, el fabricante se reserva el derecho de modificar las características
técnicas indicadas para el producto, a cualquier momento y sin tener que dar previo aviso alguno, y/o de interrumpir la
producción del presente producto. Todas las marcas y nombres de productos deberán estar registradas como marcas por
sus propietarios respectivos y ser expresamente reconocidas como tal en el presente documento.
- 74 -
KIT LAN XEROX US_ESP.book Page 75 Lundi, 27. novembre 2006 5:11 17
ÍNDICE DE CONTENIDOS
INTRODUCCIÓN ..........................................................................77
CONFIGURACIÓN DE F2121/F2121L PARA LA IMPRESIÓN LAN .........................78
Configuraciones necesarias ................................................................................................................................79
Configuración rápida de la red (automático) .....................................................................................................79
Configuración rápida de la red (IP manual) .......................................................................................................79
CONFIGURACIÓN DEL ORDENADOR PARA UNA IMPRESIÓN LAN GDI O PCL ..............80
Instalar el software en su PC ..............................................................................................................................80
Con Windows 98SE/ME/2000/XP........................................................................................................... 80
Instalación de una impresora de red ...................................................................................................................86
Eliminar el software de su PC ............................................................................................................................88
CONFIGURACIÓN DEL ORDENADOR PARA IMPRESIÓN POSTCRIPT 3 EN RED
(EMULACIÓN DEL LENGUAJE POSTSCRIPT® NIVEL 3) LA IMPRESIÓN PS FACILITARÁ
UNA GESTIÓN DE ERRORES DE IMPRESIÓN MAS EFICIENTE ..............................89
Añadir un puerto de red (si aún no posee uno disponible) .................................................................................89
Instalación del controlador PS ...........................................................................................................................94
INSTRUCCIONES DE INSTALACIÓN PARA WINDOWS SERVER 2003 ......................96
Cómo añadir un puerto en el Servidor Windows 2003 ......................................................................................96
Procedimiento 1 - Crear un Puerto Tipo Companion Pro Monitor.......................................................... 96
Procedimiento 2 - Añadir un Puesto Companion Pro Monitor para la impresora ................................... 98
Procedimiento 3 - Añadir en el servidor una impresora FaxCentre 2121 versión PCL o GDI............... 99
Opcional, procedimiento 4 - Añadir en el servidor una impresora PostScript....................................... 102
En el PC cliente ................................................................................................................................................103
Conectar las impresoras creadas en el Servidor..................................................................................... 103
CONFIGURACIÓN DE LA RED ............................................................ 105
Para módem de cable o servidor de correo corporativo interno ......................................................................105
Configuración rápida de la red (automática) ....................................................................................................106
Configuración rápida de la red (IP manual) .....................................................................................................107
RESOLUCIÓN DE PROBLEMAS ........................................................... 108
La impresora no funciona ................................................................................................................................108
CARACTERÍSTICAS TÉCNICAS ........................................................... 108
- 75 -
KIT LAN XEROX US_ESP.book Page 76 Lundi, 27. novembre 2006 5:11 17
INFORMACIÓN
La impresora a distancia ACITS LPR es una marca registrada de la Universidad de Texas, Austin, Texas,USA.
Microsoft® , Windows® 98, Windows® Millenium, Microsoft®
Windows® 2000, Windows® XP y todos los productos Microsoft® indicados en el presente documento son
marcas registradas del
grupo Microsoft Corporation registradas y/o utilizadas en Estados Unidos y/o en otros países.
PCL es una marca registrada de Hewlett Packard
PostCript es una marca registrada de Adobe Systems Incorporated.
Todos las demás marcas y nombres de productos indicados en el presente documento a título de ejemplo o
información, son marcas registradas de sus fabricantes respectivos.
- 76 -
KIT LAN XEROX US_ESP.book Page 77 Lundi, 27. novembre 2006 5:11 17
INTRODUCCIÓN
El controlador de impresión descrito en el presente manual le permitirá instalar y utilizar la máquina que Vd. ha comprado
con este Kit LAN que se puede conectar en red como a una impresora normal de su red local.
Su terminal multifunciones también le permite imprimir en formatos PCL® y SG Script 3 (emulación del lenguaje
Postscript® nivel 3) a través de una red LAN.
- 77 -
KIT LAN XEROX US_ESP.book Page 78 Lundi, 27. novembre 2006 5:11 17
CONFIGURACIÓN DE F2121/F2121L PARA LA
IMPRESIÓN LAN
- 78 -
KIT LAN XEROX US_ESP.book Page 79 Lundi, 27. novembre 2006 5:11 17
CONFIGURACIONES
NECESARIAS
Su PC debe como mínimo contar con las siguientes características:
Un procesador de:
• 500 MHz para Windows 98SE;
• 800 MHz para Windows Me, 2000SP3;
• 1 GHz para Windows XP (Home y Pro).
• Reproductor de CD-ROM ;
• un puerto de red o un conector USB;
• Espacio libre de 600 MB en el disco duro para
la instalación.
RAM de:
• 128 MB como mínimo para Windows 98SE,
Me y 2000SP3;
• 192 MB como mínimo para Windows XP
(Home y Pro).
CONFIGURACIÓN
RÁPIDA DE LA RED
(AUTOMÁTICO)
• Seleccione M2531, y a continuación OK.
• Seleccione "Automático" con ayuda de las flechas y a continuación pulse OK.
• Seleccione "Dirección IP" M2532 y pulse OK. Guarde esta dirección IP para utilizarla durante la instalación
Postcript.
Nota: Para más información, véase la sección Configuración rápida de la red (automática), page 106.
CONFIGURACIÓN
RÁPIDA DE LA RED
(IP
MANUAL)
• Seleccione M2531, y a continuación OK.
• Seleccione "Manual" con ayuda de las flechas y a continuación pulse OK.
• Seleccione "Dirección IP" M2532 y pulse OK. Introduzca la dirección IP que desea utilizar.
Nota: Para más información, véase la sección Configuración rápida de la red (IP manual), page 107.
- 79 -
KIT LAN XEROX US_ESP.book Page 80 Lundi, 27. novembre 2006 5:11 17
CONFIGURACIÓN DEL ORDENADOR PARA UNA
IMPRESIÓN LAN GDI O PCL
Nota:
Una vez que haya acabado de instalar el controlador de impresión de red (a partir del CD-ROM),
por favor, vaya a la sección "Postcript" (Página 94) para instalar el controlador de impresión
PostScript.
INSTALAR
EL SOFTWARE EN SU
PC
Con Windows 98SE/ME/2000/XP
Encienda su ordenador. Inicie una sesión de ADMINISTRADOR salvo con los entornos de trabajo 98SE y ME.
Abra la unidad de CD-ROM, introduzca el CD-ROM de instalación y cierre la unidad.
EL proceso de instalación empezará automáticamente (Autorun).
- 80 -
KIT LAN XEROX US_ESP.book Page 81 Lundi, 27. novembre 2006 5:11 17
La ventana COMPANION SUITE PRO LM aparecerá en pantalla.
Ubique su cursor en INSTALAR LOS PRODUCTOS y haga clic en el botón izquierdo.
La ventana de Instalación de productos aparecerá en pantalla.
Ubique su cursor en TODO y haga clic en el botón izquierdo.
Nota: El proceso de instalación de TODO copia todo el software necesario para lanzar el kit de Companion Suite Pro en
su disco duro, por ejemplo:
- Companion Suite Pro (Software de comunicación por Fax y SMS, software del escáner, etc.),
- PaperPort
- Omnipage.
Puede que ya posea una versión de algunos programas incluidos en el CD-ROM de instalación.
En este caso, utilice la instalación PERSONALIZADA, seleccione los programas que desea instalar en su disco duro
y confirme su selección.
- 81 -
KIT LAN XEROX US_ESP.book Page 82 Lundi, 27. novembre 2006 5:11 17
Nota: Las dos ventanas siguientes tan sólo aparecerán en pantalla si su versión de Windows Installer es anterior
a la 2.0.
El proceso de instalación continuará y una ventana indicará la barra de progresión.
Podrá interrumpir la instalación pulsando el botón DETENER LA INSTALACIÓN.
Una vez concluida la etapa de análisis y búsqueda de los componentes en su PC y de la terminal multifuncional,
deberá reiniciar su ordenador para lanzar la aplicación.
Pulse OK.
Cuando se haya reiniciado su ordenador, el Asistente de instalación indicará la barra de progresión.
Podrá interrumpir el proceso en cualquier momento pulsando el botón CANCELAR.
- 82 -
KIT LAN XEROX US_ESP.book Page 83 Lundi, 27. novembre 2006 5:11 17
El asistente interrumpirá la instalación y la ventana de bienvenida aparecerá en pantalla.
Pulse SIGUIENTE para iniciar la instalación del kit COMPANION SUITE PRO en su ordenador.
Pulse SÍ.
Antes de copiar los archivos en su disco duro, deberá aceptar el contrato de licencia que aparecerá en pantalla.
Utilice la barra de desplazamiento para leer todo el contrato.
- 83 -
KIT LAN XEROX US_ESP.book Page 84 Lundi, 27. novembre 2006 5:11 17
La instalación final está lista para empezar.
Pulse INSTALAR.
Se ha instalado Companion Suite Pro en su ordenador.
Aparecerá una ventana en pantalla indicándole el progreso de la instalación.
En la próxima ventana, pulse CONTINUAR para copiar las funciones y los programas que acompañan el kit
(PaperPort SE y Omnipage SE).
- 84 -
KIT LAN XEROX US_ESP.book Page 85 Lundi, 27. novembre 2006 5:11 17
Al finalizar la instalación, deberá reiniciar su ordenador para actualizar los archivos de sistema.
Realice su selección y pulse FINALISAR.
Se ha instalado correctamente su kit "Companion Suite Pro" en su ordenador.
Puede iniciar el software de gestión de la terminal multifunción pulsando PROGRAMAS > COMPANION SUITE >
COMPANION SUITE PRO LM2 > COMPANION - DIRECTOR a partir del menú INICIO o pulsando el icono del
COMPANION - DIRECTOR ubicado en su escritorio.
Importante: Si posee una versión gratuita instalada en su
ordenador, al reiniciar el ordenador tras la instalación,
el sistema le preguntará si desea autorizar el acceso a
la red a la aplicación MFServices. Pulse Sí o Autorizar
(en función de su cortafuegos) para autorizar a
MFServices.exe a acceder a la red. Nota: Windows XP
con Service Pack 2 y superior incluye un cortafuegos
instalado de fábrica.
- 85 -
KIT LAN XEROX US_ESP.book Page 86 Lundi, 27. novembre 2006 5:11 17
INSTALACIÓN
DE UNA IMPRESORA DE RED
Nota: Deberá haber instalado Companion Suite Pro LM2 para realizar esta operación.
Lance la aplicación seleccionando PROGRAMAS > COMPANION SUITE > COMPANION SUITE PRO LM2 >
INSTALAR UNA IMPRESORA DE RED a partir del MENÚ Inicio.
Pulse SIGUIENTE para lanzar el proceso de instalación
La ventana siguiente indica la lista de dispositivos compatibles detectados en la red.
Puede lanzar una nueva búsqueda en la red pulsando el botón REFRESH.
- 86 -
KIT LAN XEROX US_ESP.book Page 87 Lundi, 27. novembre 2006 5:11 17
Nota: Puede que algún dispositivo no aparezca indicado en la lista. En este caso, pulse el botón NO ESTÁ EN LA LISTA.
Aparecerá la ventana siguiente en pantalla :
Introduzca la dirección IP o el nombre NetBIOS del dispositivo que desea añadir. Ahora podrá probar la
conexión entre el ordenador y el dispositivo haciendo clic en el botón TEST. Pulse OK.
Seleccione el dispositivo que desea añadir a partir de la lista. Pulse SIGUIENTE.
La ventana siguiente enumera las distintas propiedades de la impresora que va a instalar. Pulse SIGUIENTE.
Una ventana aparecerá en pantalla indicándole que la instalación se ha realizado correctamente. Pulse Terminar.
En función de la configuración de su terminal, seleccione el lenguaje de la impresora, PCL o GDI_RL. Pulse
SIGUIENTE.
- 87 -
KIT LAN XEROX US_ESP.book Page 88 Lundi, 27. novembre 2006 5:11 17
ELIMINAR
EL SOFTWARE DE SU
PC
Lance la eliminación del programa seleccionando PROGRAMAS > COMPANION SUITE > COMPANION SUITE PRO
LM2 > DESINSTALAR a partir del MENÚ Inicio.
Una ventana de preparación aparecerá en pantalla.
Seleccione ELIMINAR para borrar todos los archivos o MODIFICAR para elegir los archivos (controladores o
aplicaciones) que desea borrar. Pulse SIGUIENTE.
Una ventana de confirmación aparecerá en pantalla. Confirme su elección pulsando la tecla OK.
Una ventana muestra la barra de progresión.
- 88 -
KIT LAN XEROX US_ESP.book Page 89 Lundi, 27. novembre 2006 5:11 17
Al final de este proceso, deberá reiniciar su sistema. Cierre todos los programas activos, seleccione SÍ,
REINICIAR MI ORDENADOR AHORA y pulse TERMINAR.
DESEO
CONFIGURACIÓN DEL ORDENADOR PARA IMPRESIÓN
POSTCRIPT 3 EN RED
(EMULACIÓN DEL LENGUAJE POSTSCRIPT® NIVEL 3)
LA
IMPRESIÓN
PS
FACILITARÁ UNA GESTIÓN DE ERRORES DE
IMPRESIÓN MAS EFICIENTE
La configuración del puerto de la impresora en Windows 2000 y XP exige los derechos de administrador.
(SI
AÑADIR
UN PUERTO DE RED
AÚN NO POSEE UNO DISPONIBLE)
Un puerto de impresora es la interfaz a través de la cual se comunicará su ordenador con el terminal. Si desea imprimir
en red, es necesario crear un nuevo puerto de red para el terminal. Cuando utiliza la configuración de servidor de
impresión, el puerto se crea únicamente en el servidor de impresión que debe estar equipado de Windows 2000, 2003
Server o XP.
Los procedimientos de creación de un puerto de red para los protocolos RAW y LPR se describen en el siguiente cuadro.
Las primeras etapas son idénticas para ambos protocolos.
- 89 -
KIT LAN XEROX US_ESP.book Page 90 Lundi, 27. novembre 2006 5:11 17
Protocolo RAW
Protocolo LPR
Para finalizar la instalación LAN GDI, ir a:
Seleccione INICIO> CONFIGURACIÓN> IMPRESORAS. En la ventana de IMPRESORAS, haga doble
clic en el icono AÑADIR IMPRESORA.
La pantalla del ASISTENTE PARA AGREGAR IMPRESORAS aparece.
SeleccioneIMPRESORA LOCAL, cerciórese de que la casilla DETECTAR E INSTALAR MI
IMPRESORA PLUG-AND-PLAY AUTOMÁTICAMENTE esté desactivada. Haga clic en SIGUIENTE.
Seleccione CREAR NUEVO PUERTO y la opción STANDARD TCP/IP PortEN el campo Tipo. Haga
clic en SIGUIENTE.
Haga clic en SIGUIENTE.
- 90 -
KIT LAN XEROX US_ESP.book Page 91 Lundi, 27. novembre 2006 5:11 17
Protocolo RAW
Protocolo LPR
Haga clic en SIGUIENTE.
Escriba en el 1er campo la dirección IP del terminal o su nombre NetBios. Modifique, si lo
desea, el nombre que caracterizará el puerto en el 2do campo. Haga clic en SIGUIENTE.
Nota: tome nota del nombre del puerto para poder añadir la impresora posteriormente.
- 91 -
KIT LAN XEROX US_ESP.book Page 92 Lundi, 27. novembre 2006 5:11 17
Protocolo RAW
Protocolo LPR
La ventana indica que el terminal no ha sido
reconocido por Windows. Haga clic en
SIGUIENTE.
La ventana indica que el terminal no ha sido
reconocido por Windows. Seleccione
PERSONALIZAR, y a continuación pulse
CONFIGURACIÓN...
Haga clic en FINALIZAR para terminar el
añadido del puerto.
Seleccione LPRy escriba AUTO en el campo
NOMBRE DE COLA y luego haga clic en
ACEPTAR.
Haga clic en CANCELAR.
Nota: Atención, no active SNMP.
- 92 -
KIT LAN XEROX US_ESP.book Page 93 Lundi, 27. novembre 2006 5:11 17
Protocolo RAW
Protocolo LPR
Puede proceder ahora a la instalación del
controlador en este puerto recién creado,
véase la sección Instalación del
controlador PS, page 94.
- 93 -
Haga clic en SIGUIENTE.
Haga clic en FINALIZAR para terminar el
añadido del puerto.
Haga clic en CANCELAR.
Puede proceder ahora a la instalación del
controlador en este puerto recién creado,
véase la sección Instalación del
controlador PS, page 94..
KIT LAN XEROX US_ESP.book Page 94 Lundi, 27. novembre 2006 5:11 17
INSTALACIÓN
DEL CONTROLADOR
PS
Conéctese al portal Web de Adobe, hacer clic en DOWNLOADS y buscar en la lista ADOBE POSTSCRIPT3TM.
Haga doble clic en el fichero descargado para empezar la instalación del piloto de impresión PS.
Hacer clic en ACTUALIZAR, luego hacer clic en el enlace WIN.
Seleccione "Adobe Universal PostScript Windows Driver Installer 1.0.06-Spanish" y haga clic en CONTINUAR LA
DESCARGA para descargar el fichero (winstspa.exe) en su disco duro.
La pantalla ADOBE POSTSCRIPT DRIVER INSTALLER aparece.
El contrato de licencia aparece en pantalla. Haga clic en ACEPTAR.
La pantalla TIPO DE CONEXIÓN DE IMPRESORA aparece. Seleccione la opción DIRECTAMENTE A SU ORDENADOR
(IMPRESORA LOCAL). (Seleccione esta opción, incluso si su impresora está conectada a la red) Haga clic en
SIGUIENTE.
La pantalla SELECCIÓN DE PUERTO LOCAL aparece. Seleccione el STANDARD TCP/IP PORT previamente creado
(véase el capitulo CREAR NUEVO PUERTO WINDOWS). Haga clic en SIGUIENTE.
La pantalla SELECCIONAR MODELO DE IMPRESORA aparece. Haga clic en EXAMINAR.
Haga clic en OK para validar su selección.
La pantalla BUSCAR IMPRESORA aparece. Seleccione el lector de CD-Rom. Busque el fichero en la carpeta
DRIVER\PPD\SPANISH y escoja su idioma.
Seleccione MFF 18-20 PS y pulse SIGUIENTE.
Seleccione SÍ y completar el campo RECURSO COMPARTIDO con el nombre de impresora deseado.
Nota: si instala el piloto en un servidor, debe seleccionar SÍ.
Seleccione a continuación todos los sistemas operativos que compartirá esta impresora, luego hacer clic en
SIGUIENTE.
- 94 -
KIT LAN XEROX US_ESP.book Page 95 Lundi, 27. novembre 2006 5:11 17
La pantalla siguiente aparece si usted eligió un nombre de más de 8 caracteres o si el nombre está formado por
varias cadenas de caracteres. Ignorar este mensaje y hacer clic en SÍ.
La pantalla INFORMACIÓN DE LA IMPRESORA aparece.
Debe contestar a dos preguntas:
- ¿DESEA USAR ESTA IMPRESORA COMO PREDETERMINADA? Seleccionar SÍ si desea utilizar esta impresora como
su impresora predefinida (Nota : Puede definir su impresora como impresora predefinida a partir del menú
INICIO>CONFIGURACIÓN>IMPRESORAS).
- ¿DESEA IMPRIMIR UNA PÁGINA DE PRUEBA? Seleccionar SÍ para imprimir la página de prueba.
Haga clic en SIGUIENTE.
La pantalla INFORMACIÓN SOBRE LA INSTALACIÓN aparece.
Pulse INSTALAR. El proceso de instalación empieza. Seguir las instrucciones que aparecen en las pantallas.
- 95 -
KIT LAN XEROX US_ESP.book Page 96 Lundi, 27. novembre 2006 5:11 17
INSTRUCCIONES DE INSTALACIÓN PARA WINDOWS
SERVER 2003
En el Servidor Windows 2003, siga los siguientes pasos para instalar en el servidor el puerto o los controladores. Este
proceso puede realizarse con otros sistemas operativos de Windows, pero ciertas funciones de Companion Suite Pro
pueden resultar inoperantes.
CÓMO
AÑADIR UN PUERTO EN EL
SERVIDOR WINDOWS 2003
Nota: antes de comenzar, cerciórese de que tiene la dirección IP de la impresora.
Procedimiento 1 - Crear un Puerto Tipo Companion Pro Monitor
1. Inserte el CD COMPANION SUITE PRO en la unidad de CD-ROM. Se visualiza la ventana de COMPANION
SUITE PRO. Hacer clic en SALIR para cerrar la ventana.
2. En el menú INICIAR, seleccione IMPRESORAS Y FAXES.
3. La pantalla IMPRESORAS Y FAXES se visualiza como se muestra a continuación.
Seleccione ARCHIVO -> MENU, luego seleccione PROPRIEDADES DE SERVIDOR DE IMPRESIÓN.
- 96 -
KIT LAN XEROX US_ESP.book Page 97 Lundi, 27. novembre 2006 5:11 17
4. En la ventana PROPRIEDADES DE SERVIDOR DE IMPRESIÓN, hacer clic en la lengüeta Puertos".
Seleccione AGREGAR PUERTO.
5. Hacer clic en el botón NUEVO TIPO DE PUERTO y crear un nuevo tipo de puerto.
6. Hacer clic en EXAMINAR y vaya a la raíz del lector de CD-Rom.
- 97 -
KIT LAN XEROX US_ESP.book Page 98 Lundi, 27. novembre 2006 5:11 17
7. Hacer clic en ABRIR.
8. Luego, hacer clic en ACEPTAR en la pantalla siguiente.
Procedimiento 2 - Añadir un Puesto Companion Pro Monitor para la impresora
1. Seleccione el puerto COMPANION SUITE PRO LM TCP/IP MONITOR.
2. Seleccione el botón PUERTO NUEVO.
- 98 -
KIT LAN XEROX US_ESP.book Page 99 Lundi, 27. novembre 2006 5:11 17
3. Se visualiza la ventana ADD RAW (TCP/IP) PORT.
4. Completar las siguientes informaciones:
a. Nombre deseado del Puerto - Nota: Tome nota del nombre del puerto para poder añadir la impresora
posteriormente.
b. Dirección IP del servidor de impresión
c. Hacer clic en el botón OK.
5. Hacer clic en el botón CERRAR.
6. Hacer clic en el botón CERRAR.
Una vez creado el puerto en el servidor, añada una impresora y relaciónela al mismo.
Procedimiento 3 - Añadir en el servidor una impresora FaxCentre 2121 versión PCL
o GDI
1. En su PC cliente, seleccionar INICIAR-> IMPRESORAS Y FAXES. Se visualiza la ventana IMPRESORAS Y
FAXES.
2. Hacer clic en AGREGAR IMPRESORA.
- 99 -
KIT LAN XEROX US_ESP.book Page 100 Lundi, 27. novembre 2006 5:11 17
3. Hacer clic en SIGUIENTE. Ir a la siguiente pantalla.
4. Seleccionar IMPRESORA LOCAL CONECTADA A ESTE EQUIPO. Hacer clic en el botón SIGUIENTE.
5. Hacer clic en USAR EL PUERTO SIGUIENTE y seleccionar el puerto recién creado en el menú desplegable.
- 100 -
KIT LAN XEROX US_ESP.book Page 101 Lundi, 27. novembre 2006 5:11 17
6. Seleccionar el controlador deseado (GDI = Laser Pro LM o PCL = Laser Pro LM PCL), luego hacer clic en
SIGUIENTE.
Nota: se recomienda usar el piloto PCL por su eficiencia y su mejor gestión de errores.
7. Introducir un Nombre de impresora o guardar el nombre predefinido que aparece en el campo NOMBRE DE LA
IMPRESORA. Hacer clic en el botón SIGUIENTE.
8. Si comparte esta impresora, seleccionar NOMBRE DEL RECURSO COMPARTIDO . Introducir el Nombre de la
Impresora en la pantalla siguiente o guardar el nombre predefinido que aparece en el campo. Hacer clic en el botón
SIGUIENTE.
- 101 -
KIT LAN XEROX US_ESP.book Page 102 Lundi, 27. novembre 2006 5:11 17
9. Usted puede describir el emplazamiento de esta impresora lo cual sería útil para otros usuarios. Para mayor
información, ver la pantalla siguiente. Observe que puede introducir comentarios o dejar el campo en blanco.
Hacer clic en el botón SIGUIENTE.
10. Para imprimir la página de prueba, seleccionar SÍ.
11. Nota: Guarde esta página de prueba ya que necesitará los nombres de la impresora y del servidor para añadir una
impresora en el PC cliente. Hacer clic en el botón SIGUIENTE.
12. En la última pantalla, haga clic en el botón CERRAR para completar los pasos necesarios para relacionar una
impresora a los controladores del Servidor Windows 2003.
Opcional, procedimiento 4 - Añadir en el servidor una impresora PostScript
véase la sección Instalación del controlador PS, page 94.
- 102 -
KIT LAN XEROX US_ESP.book Page 103 Lundi, 27. novembre 2006 5:11 17
EN
EL
PC
CLIENTE
Conectar las impresoras creadas en el Servidor
1. En el menú INICIAR, seleccione IMPRESORAS Y FAXES. Seleccione "Add a Printer" y hacer clic en SIGUIENTE.
2. Seleccione UNA IMPRESORA DE RED, luego hacer clic en SIGUIENTE.
3. Seleccione CONNECTARE A ESTA IMPRESORA..., luego en el campo NOMBRE introducir el nombre de la
impresora (podrá encontrar el nombre de la impresora en la página de prueba impresa anteriormente) según el
formato mostrado bajo este campo. Hacer clic en SIGUIENTE y seguir las instrucciones que aparecen en la
pantalla.
- 103 -
KIT LAN XEROX US_ESP.book Page 104 Lundi, 27. novembre 2006 5:11 17
4. O: Dejar el campo NOMBRE en blanco y explorar para buscar la impresora. Usted debe conocer el dominio o el
grupo de trabajo del servidor que comparte el dispositivo.
5. Si la desea como impresora predefinida, hacer clic en el botón SIGUIENTE y luego en el botón TERMINAR.
- 104 -
KIT LAN XEROX US_ESP.book Page 105 Lundi, 27. novembre 2006 5:11 17
CONFIGURACIÓN DE LA RED
PARA
MÓDEM DE CABLE O SERVIDOR DE CORREO CORPORATIVO INTERNO
Antes de comenzar la configuración del correo electrónico:
1. Compruebe la disponibilidad de una red operativa que utilice TCP/IP.
2. Solicite a su administrador de correo o su proveedor de servicios Internet una dirección de correo electrónico
válida para el equipo F2121.
Solicite la dirección de su servidor de correo saliente SMTP o la de su proveedor de servicios Internet y la
dirección del servidor DNS.
Datos para la configuración del correo
Requisito para la
Comentarios
electrónico
instalación
Nombre host / dirección IP del servidor de
Necesario
El protocolo SMTP tiene que ser
correo saliente SMTP
vinculado al servidor. Se pueden utilizar
tanto el nombre host como la dirección IP
del servidor de correo.
DNS, dirección del servidor del nombre de Opcional
Si se utiliza el nombre host del servidor
dominio
de correo se debe introducir la dirección
del servidor DNS.
Dirección de correo electrónico del
Necesario
El aparato F2121 debe tener su propria
FaxCentre F2121
dirección mail, registrada en el servidor
SMTP
Paso 1: Abra desde una estación de trabajo el navegador Internet Explorer. Introduzca el URL http://xxx.xxx.xxx.xxx
(xxx representa la dirección IP del equipo F2121). Con una conexión correcta debería acceder a la página web de
servicios Internet del equipo F2121.
Paso 2: Para configurar el correo electrónico a través de los servicios Internet haga clic en ENTRAR en la página de
inicio y en Internet inicialización en la página de parámetros, entonces haga clic en la ventana deslizante Seleccionar
un proveedor y seleccione RED LOCAL. Introduzca la dirección de correo electrónico reservada para este equipo.
Introduzca el nombre host o dirección IP del servidor de correo saliente SMTP. Si se utiliza el nombre host de SMTP
introduzca la dirección DNS principal del servidor. Haga clic en Confirme sus modificaciones en la parte inferior de
la página web.
Paso 3:
• Introduzca el documento que desea enviar por e-mail en el alimentador de hojas del equipo F2121 con el
anverso hacia abajo.
• Seleccione el botón @ del equipo F2121.
• El equipo solicitará una dirección de correo electrónico. Introduzca su dirección de correo electrónico
corporativa / interna y pulse OK.
• Pulse la tecla verde Inicio. El documento se escaneará y se enviará a usted.
El equipo F2121 imprimirá un informe de verificación. Compruebe que el e-mail se envió desde el equipo F2121 y se
recibió con el documento adjunto correctamente a través de su cliente de correo.
- 105 -
KIT LAN XEROX US_ESP.book Page 106 Lundi, 27. novembre 2006 5:11 17
CONFIGURACIÓN
RÁPIDA DE LA RED
(AUTOMÁTICA)
Este documento se ha confeccionado para la instalación del equipo F2121 en una red utilizando un servidor DHCP
para asignar una dirección TCP/IP.
Nota: si aún no lo ha hecho, deberá habilitar la conectividad en red utilizando la tarjeta inteligente azul Smart Card. Véase
el kit de red/LAN para instrucciones más detalladas.
Antes de comenzar:
1. Compruebe la disponibilidad de una red operativa que utilice TCP/IP.
2. Compruebe que el cable Ethernet está conectado al equipo FaxCentre F2121 y a un puerto Ethernet operativo de la
red. Nota: el cable Ethernet tiene que ser de la categoría 5 y el conector del tipo RJ45. Este cable no se suministra
por parte de Xerox.
3. Compruebe la accesibilidad de un servidor DHCP con dirección IP disponible.
Configuración del equipo FaxCentre F2121 con una dirección IP utilizando AUTO (DHCP): al poner en marcha el
equipo multifunción FaxCentre F2121, se conecta por defecto a DHCP para obtener su configuración de red. Un servidor
DHCP envía al equipo una dirección IP así como otros ajustes de configuración. Si se utiliza un servidor DHCP para
asignar una dirección IP al equipo F2121, proceda de la siguiente manera:
Paso 1: Encienda el equipo FaxCentre F2121 ; el equipo indicará: ESPERE PROCESO DE AUTOCONF.
Paso 2: Espere un minuto aproximadamente mientras que el equipo F2121 gestiona una dirección IP. Una vez asignada la
dirección IP, imprima la página de la lista de parámetros.
Para imprimir la página de la lista de parámetros:
Nota: si en el informe de
• Seleccione el botón M del F2121
conectividad la dirección IP
• Desplácese a 5 IMPRESION y seleccione OK
empieza con 169.xxx.xxx.xxx,
• Desplácese a 54 PARAMETROS y seleccione OK
entonces el servidor DHCP no
Se imprimirá la página de la lista de parámetros.
ha asignado correctamente una
dirección o DHCP no está
• Compruebe en la página impresa que se ha asignado una
habilitado en su red.
dirección IP y que parece ser una dirección IP apropiada para
su red.
Paso 3: Anote la dirección IP asignada y abra el navegador Internet Explorer. Introduzca el URL http://xxx.xxx.xxx.xxx
(xxx representa la dirección IP del equipo F2121). Con una conexión correcta debería acceder a la página web de servicios
Internet del equipo FaxCentre F2121. Si no aparece la página web de servicios Internet, compruebe la conectividad
verificando mediante ping la dirección IP del equipo FaxCentre F2121 o contacte con su administrador de red local.
Paso 4: Cargue los controladores de impresión en la estación de trabajo que accederá al equipo FaxCentre F2121.
- 106 -
KIT LAN XEROX US_ESP.book Page 107 Lundi, 27. novembre 2006 5:11 17
CONFIGURACIÓN
RÁPIDA DE LA RED
(IP
MANUAL)
Este documento se ha confeccionado para la instalación del equipo F2121 en una red utilizando una dirección
TCP/IP estática.
Nota: si aún no lo ha hecho, deberá habilitar la conectividad en red utilizando la tarjeta inteligente azul Smart Card.
Véase el kit de red/LAN para instrucciones más detalladas.
Antes de comenzar :
1. Compruebe la disponibilidad de una red operativa que utilice TCP/IP.
2. Compruebe que el cable Ethernet está conectado al equipo FaxCentre F2121 y a un puerto Ethernet operativo
de la red. Nota: el cable Ethernet tiene que ser de la categoría 5 y el conector del tipo RJ45. Este cable no se
suministra por parte de Xerox.
Configuración manual de la dirección IP del equipo F2121: al poner en marcha el equipo FaxCentre F2121, se conecta
por defecto a DHCP para obtener su configuración de red; DHCP se desactiva introduciendo manualmente un
direccionamiento IP estático.
Antes de la instalación:
Anote los siguientes datos para utilizarlos durante la
configuración:
Dirección TCP/IP:
Dirección de la puerta de enlace Gateway:
Máscara de subred Subnet Mask:
Contacte con su administrador
de sistema de red para obtener
estos datos.
Paso 1: Encienda el equipo FaxCentre F2121.
Paso 2:
• Seleccione el botón M del F2121
• Desplácese a 2 PARAMETROS y pulse la tecla OK
• Desplácese a 25 REDES y pulse la tecla OK
• Desplácese a 253 RED LOCAL y pulse la tecla OK
• Desplácese a 2531 CONFIGURACION y pulse la tecla OK
• Desplácese a 25311 MANUAL y pulse la tecla OK; en este momento puede aparecer el mensaje ESPERE
POR FAVOR
Paso 3: Seleccione el botón M e introduzca 2532 para acceder a DIRECCION IP. Introduzca su dirección IP. Las
direcciones IP están divididas en cuatro campos de octetos. Complete la dirección IP con ceros antepuestos para
rellenar los campos de octetos.
Ejemplo: 192.010.025.004 sería una configuración de dirección IP válida.
Paso 4:
• Seleccione el botón M e introduzca 2533 para acceder a MASCARA SUB. Introduzca la máscara de subred y
pulse la tecla OK.
• Seleccione el botón M e introduzca 2534 para acceder a GATEWAY. Introduzca la puerta de enlace por
defecto asociada a la dirección IP para el equipo FaxCentre F2121 y pulse la tecla Ok.
Paso 5: Imprima la página de la lista de parámetros.
Para imprimir la página de la lista de parámetros:
• Seleccione el botón M del F2121
• Desplácese a 5 IMPRESION y seleccione OK
• Desplácese a 54 PARAMETROS y seleccione
OK
Se imprimirá la página de la lista de parámetros.
Compruebe en la página impresa que la
dirección IP, la máscara de subred y la
puerta de enlace son correctas.
Paso 6: Abra desde una estación de trabajo el navegador Internet Explorer. Introduzca el URL http://xxx.xxx.xxx.xxx
(xxx representa la dirección IP del equipo F2121). Con una conexión correcta debería acceder a la página web de
servicios Internet del equipo FaxCentre F2121. Si no aparece la página web de servicios Internet, compruebe la
conectividad verificando mediante ping la dirección IP del equipo FaxCentre F2121 o contacte con su administrador de
red local LIENHYPERTEXTE.
Paso 7: Cargue los controladores de impresión en la estación de trabajo que accederá al equipo FaxCentre F2121.
- 107 -
KIT LAN XEROX US_ESP.book Page 108 Lundi, 27. novembre 2006 5:11 17
RESOLUCIÓN DE PROBLEMAS
LA
IMPRESORA NO FUNCIONA
Compruebe que el protocolo TCP/IP figura en los parámetros de configuración de red de su tarjeta de red.
Compruebe que el fax sea accesible a partir de su PC a través de la red: En un cuadro de CONTROL de MS-DOS
en Windows 95/98/Me o en una ventana de CONTROL en Windows NT/2000/XP, introzuca el PING de control
seguido de la dirección IP o del nombre NetBios del fax (ejemplo: PING 127.37.42.6). Pulse la tecla Intro para
confirmar. Una vez que haya ejecutado el comando, se le informará si el fax está accesible a partir de su PC.
Si el fax no está accesible, compruebe la configuración de su red o póngase en contacto con su administrador
de red.
CARACTERÍSTICAS TÉCNICAS
• Formato de impresión Postscript 3 (emulación del lenguaje PostScript® nivel 3 con
archivo de configuración).
• Protocolos de red: RAW y LPR.
- 108 -
4eme COUV KIT.fm Page 81 Mardi, 28. novembre 2006 9:50 09
User Guide - Data subject to change without notice
Livret utilisateur - Document non contractuel
Manual del usuario - Documento no contractual
*252781506B