1
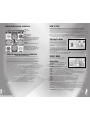
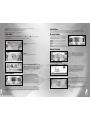
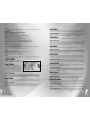
WARNING Before playing this game, read the Xbox 360® Instruction
Manual and any peripheral manuals for important safety and health information.
Keep all manuals for future reference. For replacement manuals, see
www.xbox.com/support or call Xbox Customer Support.
Important Health Warning About Playing Video Games
Photosensitive seizures
A very small percentage of people may experience a seizure when exposed to certain
visual images, including flashing lights or patterns that may appear in video games.
Even people who have no history of seizures or epilepsy may have an undiagnosed
condition that can cause these “photosensitive epileptic seizures” while watching video
games.
These seizures may have a variety of symptoms, including lightheadedness, altered
vision, eye or face twitching, jerking or shaking of arms or legs, disorientation,
confusion, or momentary loss of awareness. Seizures may also cause loss of
consciousness or convulsions that can lead to injury from falling down or striking
nearby objects.
Immediately stop playing and consult a doctor if you experience any of these
symptoms. Parents should watch for or ask their children about the above symptoms—
children and teenagers are more likely than adults to experience these seizures.
The risk of photosensitive epileptic seizures may be reduced by taking the following
precautions: Sit farther from the screen; use a smaller screen; play in a well-lit room;
do not play when you are drowsy or fatigued.
If you or any of your relatives have a history of seizures or epilepsy, consult a doctor
before playing.
Table of Contents
Game Controls....................................................2
Getting Started..........................................................3
How To Play..............................................................5
Mode Select..............................................................5
Game Mode...............................................................6
Party Mode...............................................................8
Quest Mode.............................................................10
Workout Mode........................................................10
Training Mode.........................................................11
Edit Mode................................................................12
DJ Mode.................................................................15
Records..................................................................16
Options...................................................................16
1
GAME CONTROLS
Xbox LIVE
Play anyone and everyone, anytime, anywhere on Xbox LIVE®. Build your profile (your
gamer card). Chat with your friends. Download content at Xbox LIVE™ Marketplace. Send
and receive voice and video messages.
Controller
Connecting
Xbox Guide
Edit Mode
Before you can use Xbox LIVE®, connect your Xbox 360® console to a high-speed Internet
connection and sign up to become an Xbox LIVE® member. For more information about
connecting, and to determine whether Xbox LIVE® is available in your region, go to www.
xbox.com/live/countries.
Edit Mode
Y Up
X Left
Navigate
Menu / Difficulty
B Right/Cancel Selection
A Down / Confirm Selection
Cancel
Up, Down,
Left and Right
movements
Start Game
1. Insert the Xbox 360® Controller into any controller port of the Xbox 360® console. For multiple players, insert
additional controllers.
2. Insert any peripherals (for example, Xbox 360 Memory Units) into controller expansion slots as appropriate.
3. Follow on-screen instructions and refer to this manual for more information about using the Xbox 360® Controller
to play DanceDanceRevolution® UNIVERSE 3.
®
Basic Game Controls
m/q/s/o
Up, Down, Left and Right movements
D-pad
Navigate Menu options
Left Stick and D-pad
Toggle Difficulty
Up
Right / Cancel Selection
Down / Confirm Selection
Left
Buttons used in EDIT MODE.
Cancel
Start Game
Press and hold
> button
1/5
Left Stick and D-pad 7 / 3
Y button
B button
A button
X button
w and x buttons See page 12
< button
> button
Ends the current round and returns to the previous menu.
NOTE: Some button functions may be different depending on the mode you are playing. Follow the on-screen
instructions or refer to the other sections in this instruction manual for more information.
2
Family Settings
These easy and flexible tools enable parents and caregivers to decide which games young
game players can access based on the content rating. For more information, go to www xbox.com/familysettings.
INTRODUCTION
Thank you for purchasing Konami’s DanceDanceRevolution® UNIVERSE 3. For best results,
we recommend that you read through this manual prior to playing the game.
Konami is constantly striving to improve the quality of our products to give our customers the
best gaming experiences possible. As a result, there may be some slight differences between
versions of the same product, depending on when and where you played the game.
DanceDanceRevolution® UNIVERSE 3 is an original game product created by KONAMI
CORPORATION and Konami Computer Entertainment Hawaii, Inc. The parties reserve,
jointly or individually, the copyrights and other intellectual property rights with respect to this
game product.
GETTING STARTED
Setting Up Your XBOX 360® Video Game System
1. Set up your Xbox 360® video game system according to the instructions in its Instruction
Manual.
2. Press the Power button and the status indicator light will light up.
3. Press the Eject button and the disc tray will open.
4. Place the DanceDanceRevolution® UNIVERSE 3 disc on the Disc tray with the label side
facing up and close the disc tray.
5. Follow on-screen instructions and refer to this manual for more information about playing
DanceDanceRevolution® UNIVERSE 3.
To avoid damage to discs or the disc drive
• Insert only Xbox 360®-compatible discs into the disc drive.
• Never use oddly shaped discs, such as star-shaped or heart-shaped discs.
• Do not apply labels, stickers, or other foreign objects to discs.
Saving Data
To save edit data, you must have either a Hard Drive (HDD) or a Memory Unit (MU) for your
Xbox 360® video game system.
3
DANCEDANCEREVOLUTION® CONTROLLER
< : Cancel
> : Start Game/
B
A
: Confirm Selection
: Confirm Selection
Directional Arrows: Step on the arrows that correspond
to the dance steps on the screen. During a freeze arrow,
stand on the corresponding arrow through the entire
duration of the arrow.
<+ > :
Resets the current game and returns to the Title Screen.
NOTE: Some button functions may be different
depending on the mode you are playing. Follow the
on-screen instructions or refer to other sections in this
instruction manual for more information.
USING THE DanceDanceRevolution® CONTROLLER
Caution: Please Read Before Playing
s Please read the manual included with the DanceDanceRevolution® Controller in addition to this manual before use.
s The DanceDanceRevolution® Controller should be used with care to avoid injury. Konami Digital Entertainment
will not be liable for injuries resulting from improper use of the DanceDanceRevolution® Controller.
s Bare feet should be used to operate the DanceDanceRevolution® Controller. Do not use with shoes or stocking feet.
s Persons with heart and respiratory problems, physical impairments (such as, but not limited to, back, joint, foot,
musculature, and circulatory problems) that limit physical activity, are pregnant, or have been advised by their
physician to limit their physical activity should not use the DanceDanceRevolution® Controller.
s Persons under the influence of alcohol, or drugs that could impair a person’s sense of balance, should not use
the DanceDanceRevolution® Controller.
s The DanceDanceRevolution® Controller should be used on a clean, flat surface. Do not use the
DanceDanceRevolution® Controller on concrete, rock or any surface with sharp or abrasive objects.
s Remove furniture or other objects in proximity to the DanceDanceRevolution® Controller, and use it in an area
with plenty of space, away from walls or windows.
s Keep the DanceDanceRevolution® Controller away from open flame and other heat sources.
s Do not use the DanceDanceRevolution® Controller on a wet surface.
s Small children should be monitored at all times when using the DanceDanceRevolution® Controller.
s The cord for the DanceDanceRevolution® Controller should be placed properly to avoid risk of tripping persons.
s lf two DanceDanceRevolution® Controllers are being used, make sure the DanceDanceRevolution® Controllers are
far enough apart to avoid injury to players.
s When the DanceDanceRevolution® Controller is not in use, it should be removed from the playing
area and stored properly.
s The DanceDanceRevolution® Controller is a delicate piece of machinery. Do not dismantle, modify, or
intentionally abuse the DanceDanceRevolution® Controller. Such actions can void your warranty.
s Audio and video disruptions may occur during gameplay due to floor vibrations. Adjust the
location of the DanceDanceRevolution® Controller to correct this problem.
s Please do not play the game at times when the noise or vibrations may disturb your neighbors.
HOW TO PLAY
DanceDanceRevolution® UNIVERSE 3 is a game that combines quick reflexes and timing with dance music. All you
have to do is press the correct directional buttons or Directional Arrows on the DanceDanceRevolution® Controller that
correspond to the arrow(s) on-screen. The correct dance arrow must be pressed when it crosses the permanent arrows
inside the Step Zone. The Step Zone for each player is located in the upper part of the screen.
Build up your dance meter and continue to the next stage by successfully completing the dance steps. However, if you
continue to miss dance arrows, the dance meter level drops. If the meter drops to zero, the game will end.
TIP: Listen to the music as you play and press the arrows to the rhythm of the beat.
TIP: Keep an eye on the bottom of the screen with navigating menus. Controller options will continually scroll through
the navigation bar at the bottom of the screen.
Starting the Game
After the introductory logos are displayed, the Title Screen
will appear. If your gamertag is signed in, then your Xbox
360® console asks you to select a storage device to save
your data to. If you do not have a storage device in your
Xbox 360® console or have not signed in your gamertag,
you cannot unlock extra content, play Quest Mode, or use
Edit Mode. After you make your selection, you return to
the title screen.
Press the A button or the > button to begin. If you are
playing DanceDanceRevolution® UNIVERSE 3 for the
first time, you will automatically go to the Select Mode
screen. From here you may select HOW TO PLAY, GAME MODE, PARTY MODE, QUEST MODE, WORKOUT MODE,
XBOX LIVE™, TRAINING MODE, EDIT MODE, DJ MODE, RECORDS, or OPTIONS. Confirm all selections with the A
button or the > button.
Note: There are many different songs in DanceDanceRevolution® UNIVERSE 3. Some songs cannot be played until specific
mission targets are cleared. Do your best and try to unlock them all!
SELECT MODE
Select Mode Menu is the Main Menu of the game. From
here you can select from 11 different options.
How to Play
Choose from 11 Beginner classes and 22 different Basic classes.
Game Mode
This is the main mode for DanceDanceRevolution®
UNIVERSE 3.
Party Mode – This mode allows players to dance with
and compete against their friends.
ATTACK: A head-to-head competition in which individual directional arrow combos attack or defend against your opponent.
BOMB: A competition where two to four players try to blow up their opponent.
SYNC: A two to four player mode in which all the players must sync their steps perfectly.
FREESTYLE: A mode with one to four players where you can dance to your heart’s content. Make whatever steps you
like, just make sure you stick to the beat. When the big arrow flashes onscreen, enter a Fever and use super-fast steps.
TRIPLE: A one to three player mode where each song uses three dance pads.
QUAD: A one to four player mode where each song uses four dance pads.
POINT: A competition based on step accuracy for one to four players.
SCORE: A high score competition involving one to four players simultaneously.
SPEED: Up to four players compete and race to clear all the arrows first or before the song ends.
NONSTOP: Up to four players test their endurance by playing an extended song mix.
RELAY: A competition mode for up to four players!
Quest Mode: Use your victories to unlock the ability to customize the dance avatar of your dreams. With 60 cities to
visit, you’ll have to hone your skills as you move from venue to venue.
Workout Mode: Configure your workout profile and check your progress by entering WORKOUT MODE. This mode
adds fitness goals while counting the number of calories consumed during play. You can also track your results over a
period of time. Once you enable the game will track burned calories no matter what mode you are playing.
Xbox LIVE®: Go online with Xbox LIVE® to play with friends and compare scores with people around the country.
Training Mode: Training Mode is the perfect place to practice those difficult songs.
4
5
Foot Meter
Edit Mode: Modify an existing routine, or create a new one. Save your custom step-chart and play it later.
DJ Mode: Here you can setup a custom playlist of all your favorite songs.
Records: View a list of your high scores and other achievements in.
Options: Customize the settings to your individual tastes.
The Foot Meter is the scale that has been used to express song difficulty since the original DanceDanceRevolution®
game in arcades. The more arrows next to the feet, the harder the song is. The ratings for BASIC, DIFFICULT, EXPERT,
and ONI are always shown. There are no ratings for BEGINNER and EDIT DATA.
GAME MODE
Groove Radar
At the Select Mode screen, highlight GAME MODE and press the A button or the > button. Select a play style.
Select 4 PANELS or 8 PANELS.
Style Selection: Select a play style. Choose from either 4 PANELS or 8 PANELS.
The Groove Radar is a graphical representation of a
song’s difficulty based on five attributes. A pentagonal
chart graph illustrates the nature of each song at a glance.
As a general rule, when the overall area increases, the
difficulty of the song increases.
STREAM: Overall density in the dance step patterns.
CHAOS: The degree of irregularity/complexity in the
4 PANELS: Single player game that uses
one controller.
step patterns.
FREEZE: The number of freeze arrows in the step
patterns.
AIR: The number of jumps (i.e., player’s airtime) in the step patterns.
VOLTAGE: The degree of maximum density in the dance step patterns.
Music Sorting
By pressing the > button, the songs can be sorted
according to default arrangement, alphabetical order
(ABC), BPM order (BPM), or artist order (ARTIST). Toggle
the different sorting classes by repeatedly pressing the
> button.
8 PANELS
Single player game that uses two controllers.
Character and Difficulty Selection
Access Edit Data
After the style has been selected, choose a character using
By pressing the D-pad 7/3 or the up/down Directional
Arrows on the DanceDanceRevolution® Controller, you
can load customized edit data that was previously saved
to your Xbox 360® Hard Drive or Memory Unit. Scroll
through the difficulties until you see the desired edit.
Press the A button to select the Edit Data and it will
use the customized steps during the game. For more
information on Edit Mode, see p. 12.
the y and z buttons, and then decide on a difficulty
level using the D-pad 7/3. You can also have up to three
additional players join in by pressing A or the > button
on their controllers.
Select Music
After the play style and difficulty level have been
selected, the Select Music Screen will appear. Use the
D-pad 1/5or the left/right Directional Arrows on the
DanceDanceRevolution® Controller to cycle through
the different songs. A preview of each song will play
automatically before a selection is made.
While browsing through different songs, you can also
change the difficulty, view the Foot Meter, and check
out the Groove Radar. When all adjustments are made,
confirm your song selection by pressing the A button.
Change Difficulty
Tapping the D-pad 7/3 or the up/down Directional Arrows on the DanceDanceRevolution® Controller will toggle
6
between the BEGINNER, BASIC, DIFFICULT and EXPERT difficulty settings. The colors associated with these difficulties
are blue (BEGINNER), yellow (BASIC), red (DIFFICULT,) and green (EXPERT). Some songs have an optional difficulty
level called ONI, which appears in purple. Within these difficulty classifications, the foot meter and groove radar rate
the overall complexity of each song. Understanding these two rating systems is helpful when choosing songs that are
appropriate for your skill level.
Arrow Options
Arrow Options can be selected for each song by pressing and
holding down the A button when making a song selection.
An Options Menu will appear on the screen allowing for
various attributes to be adjusted. When playing a multiple
player game, all players can independently set their own
Arrow Options at the same time using the same Options
Menu. When the desired Arrow Options are selected and
finalized, press the A button to exit the menu and begin
playing the previously selected song.
SPEED
Adjust the scrolling speed of the dance steps by 13 levels:
(0.5, 1, 1.5, 2, 2.5, 3, 3.5, 4, 4.5, 5, 6, 7, 8). This selection
does not affect the playback speed of the music.
7
BOOST
When this option is turned ON, dance steps will gradually accelerate to the designated speed as they are scrolled. The
normal default setting is OFF.
APPEARANCE
The appearance of the dance steps during gameplay can be altered here.
Visible: Dance steps are fully visible at all times (default setting).
Hidden: Dance steps will vanish unexpectedly.
Sudden: Dance steps will appear unexpectedly.
Phantom: Dance steps appear unexpectedly and then disappear shortly thereafter.
Stealth: Dance steps are not displayed on-screen at all.
TURN
Here is where dance step patterns can be rearranged.
Off: Dance step patterns are not rearranged (normal default setting).
Mirror: Rotates the dance step patterns 180 degrees.
Left: Rotates the dance step patterns 90 degrees to the left. Not available in Double Mode.
Right: Rotates the dance step patterns 90 degrees to the right. Not available in Double Mode.
Shuffle: Dance steps appear in a random order. Not available in Double Mode.
OTHER
Very fine adjustments to the difficulty can be made here.
Off: No fine adjustments to the difficulty (default setting).
Flat: All dance steps are displayed in the same color.
Solo: Dance steps are displayed in colors based upon beat unit. When playing a two player game, if either player selects
the SOLO option, the option will apply to both players.
Dark: This mode makes you play without a step zone.
Help: Special arrows that increase the dance gauge when hit properly.
Sync Mode
In Sync Mode you can compete with one to three friends or CPU in a challenge to see if you can all synch your steps and
make it through the entire song without missing a step. One Good step rating or lower by any player and the game is over.
STARTING SYNC MODE
To begin Sync Mode, first select it from the Party Mode Menu. Always view the rules that appear on screen, then press
the A button to continue. Next select the number of players for the game. You can have between two to four. If you have
CPU opponents you will have to choose a difficulty level. Last, select a song and get ready to get in sync.
Triple Mode
IIn Triple Mode, one player can play with 12 Panels by using three DanceDanceRevolution® Controllers.
Starting Triple MODE
To begin Triple Mode, first select it from the Party Mode Menu. Always view the rules that appear on screen, the press the
A button to continue. Next choose a difficulty level and song. After these selections you must decide on the order of your
DanceDanceRevolution® Controllers. Press left or right to select a Controller port and then press the A button or the >
button on each controller to confirm. You will need to do this three times.
Quad Mode
In Quad Mode, one player can play with 16 Panels by using four DanceDanceRevolution® Controllers.
MODIFY
Starting QUAD MODE
REVERSE
Point Battle
Cut: This mode simplifies the dance step patterns.
LR-Only: Alters the song’s steps so that they only use the left and right arrows.
All Jumps: Changes all of the song’s steps into jumps.
All Freeze: Changes all of the song’s steps into freeze arrows.
No Jumps: Removes all of the jumps from a song’s steps.
No Freeze: Removes all of the freeze arrows from a song’s steps.
To begin Quad Mode, first select it from the Party Mode Menu. Always view the rules that appear on screen, then press the
A button to continue. Next choose a difficulty level and song. After these selections you must decide on the order of your
DanceDanceRevolution® Controllers. Press left or right to select a Controller port and then press the A button or the >
button on each controller to confirm. You will need to do this four times.
Toggling this option ON makes the dance steps scroll from the top of the screen to the bottom. Toggling it OFF makes
the arrows scroll from the bottom of the top normally.
This is a contest for two to four players where each player starts with 16 points. Each step is measured against the other and
if one player has a better step then their opponent (i.e. “Perfect” over “Great,” “Good” over “Almost”), then a point is taken
away from the player with the poorer step. The first player to lose their points loses the match. You can play Single or Double.
PARTY MODE
STARTING A POINT BATTLE
Attack Mode
Score Battle
In this mode you can choose between ATTACK, BOMB,
SYNC, TRIPLE, QUAD, POINT, SCORE, SPEED, NONSTOP,
FREESTYLE, and RELAY.
In Attack Mode you can compete head-to-head in a
challenge to knock the opponent’s Step Zone down to
0. Use individual arrow direction combos to attack your
opponent or defend yourself against attacks. Get a fivearrow combo of Down Arrows and send your opponent’s
Step Zone down a step. Get five up arrows to recover
from an opponents attack and move your step gauge up
a level. A five-arrow combo of Left Arrows will send a
virus to your opponent so that his next attack or recover will not work. A five-arrow combo of Right Arrows will create a
firewall to block virus attacks.
STARTING ATTACK MODE
To begin Attack Mode, first select it from the Party Mode Menu. Always view the rules that appear on screen, then press
the A button to continue. Remember if you have an additional friend who wishes to play, they can press the A button
to join. If you have any CPU opponents you will have to choose a difficulty level (0 is easiest, 1 is moderate, 2 is medium
and 3 is hardest). Then simply select a song and commence the battle!
Bomb Mode
In Bomb Mode you can compete against one to three opponents in a challenge to avoid the bomb so it blows up your
opponents. You need to get a Five Combo to pass the bomb before its time runs out and it explodes. If you are holding
the bomb at the end of the song you lose.
Starting BOMB Mode
To begin Bomb Mode, first select it from the Party Mode Menu. Always view the rules that appear on screen, the press
the A button to continue. Next select the number of players for the game. You can have between two to four. If you
have CPU opponents you will have to choose a difficulty level. Now just select a song and start passing the bomb.
To start Point Battle, first select it from the Party Mode Menu. Choose your style of play between SINGLE or DOUBLE then
determine the number of players in the game. You may select between two and four players. If you have an additional friend
who wishes to play, they can press the A button to join. If you have a CPU opponent, you will have to choose a difficulty level.
In Score Battle, play Single style to compete against one to three opponents in a challenge to see who can get the highest total
score. In Double style, you play head-to-head against a single opponent.
STARTING A SCORE BATTLE
To start Score Battle, first select it from the Party Mode Menu. Choose your style of play between SINGLE or DOUBLE
then determine the number of players in the game. You may select between two and four players for Single, but only
two for Double. If you have an additional friend who wishes to play, they can press the A button to join. If you have a
CPU opponent, you will have to choose a difficulty level.
Speed Mode
In Speed Mode, up to four players compete in a challenge to see who can finish all the steps of a song first. Hitting an
incorrect step penalizes you by slowing you down.
STARTING SPEED MODE
To start Speed Mode, select it from the Party Mode Menu. Each player who wishes to join must press the A button.
Next set the difficulty for the game. Last, choose a song and get ready for some speedy competition.
Freestyle Mode
Freestyle Mode is where you make up any steps you want, as long as you stay on the beat. Compete with up to three
other players to see who can create the coolest moves. When the big arrow comes up, enter a Fever with fast steps to
get the advantage over your opponents!
STARTING FREESTYLE MODE: To start Freestyle Mode, select it from the Party Mode Menu. Each player who
wishes to join must press the A button.
Nonstop: In Nonstop Mode up to four players compete in a challenge to see who can finish a special extended mix of songs.
STARTING NONSTOP MODE: To start Nonstop Mode, select it from the Party Mode Menu. Each player who wishes to
join must press the A button. Next set the difficulty for the game. Last, choose a song mix and begin dancing.
8
9
Relay Battle
In Relay Battle, up to four players take turns dancing different segments of a song.
STARTING A RELAY BATTLE
XBOX
LIVE®
If you are a subscriber to the Xbox Live
®
service, you can use Xbox Live® to go online and play
DanceDanceRevolution® UNIVERSE 3 and rank your best scores against other players across the country.
Starting an Xbox Live® Game
Select it from the Party Mode Menu. Each player who wishes to join must press the A button. If you have a CPU
opponent, you will have to choose a difficulty level.
To start a game in this mode make sure your gamertag is logged in to Xbox Live® then select Xbox Live® from the Select
Mode Menu.
QUEST MODE
Xbox Live® Menu: From the Xbox Live® menu, you
can select to select PLAYER MATCH, RANKED MATCH, or
VIEW LEADERBOARDS.
Prove to the world that you are the DanceDanceRevolution champion by joining the Dance Dance City tournament! Travel
through Dance Dance City, completing challenges on the street, battles in the clubs, until you make it all the way to Universe
Tower at the heart of the city! Each club has a different challenger that you must defeat to progress. Gain allies by winning
dance challenges at the clubs you’ve conquered. Win all your battles along the way, andyou’ll become Champion of
Dance Dance City!
CONTROLS FOR QUEST MODE
A button B button
X button
Y button
< button
Confirm Selection
Cancel Selection/Back
Enter Shop
Edit Avatar
Exit Quest Mode
Start Your Quest
When beginning Quest Mode remember that your gamertag must be signed in and have a a storage device in your console
in order to play. In this mode you will first design the basic look of your avatar. Then you will travel around dance city, select
a street or club to compete in, and press the [A] button to confirm. At the street level, the reward for completing the song or
challenge is displayed at each stage. At the club and executive
club level, the price for challenging the club is displayed at
each stage.
Editing Your Avatar
You’ll enter the Edit Avatar screen automatically at the start
of Quest Mode. You may edit any avatar feature at any time
during Quest Mode (except when dancing) by pressing
the Y button. Use the D-pad 7/3 or up/down Directional
Arrows on the DanceDanceRevolution® Controller to select
an avatar option to edit, and use the D-pad 1/5 or left/
right Directional Arrows on the DanceDanceRevolution®
Controller to scroll through available choices. You may edit
five options.
GENDER: Select a Male or Female body type.
FACE: Selects different face and body styles for the gender you have selected.
SKIN TYPE: Selects different skin color for the gender you have selected.
HAIR COLOR: Select from the available hair color options for your avatar. More hair colors can be purchased from
the Shop, using money you’ve earned by performing at .
COSTUME: At the beginning of the game, only the Workout costume is available. More costumes can be purchased
from the Shop, using money you’ve earned by
performing.
WORKOUT MODE
Simply play as normal and the game will automatically
track your progress!
Workout Profile
The game supports four workout profiles, one per controller
plug. You can customize the profiles to keep track of your
individual progress. The workout profile has four different
settings:
WEIGHT
Press the D-pad 1/5 or left/right Directional Arrows on the DanceDanceRevolution® Controller to enter your weight. It
will be displayed in pounds as well as kilograms.
WORKOUT SWITCH
Turns Workout Mode ON/OFF. When switched ON your progress will be tracked anytime you play.
WORKOUT RECORD
Press the X button to display your workout record. This is a complete history of your progress.
10
PLAYER MATCH
This selection holds competitions that let you play against
another player without having to worry about it affecting
your standings on the Leaderboards. There are three ways
to enter a Player Match.
Quick Match: This is the fastest way to get started.
Select QUICK MATCH to join the most readily available
game.
Custom Match: Search for an open game with specific settings. You can choose to customize your search by Game
Type, Game Mode, and/or Difficulty.
Create Match: Create a custom game. You can create a private game for friends or a public game to take on all
challengers. Once you’ve selected the match options you like, hit the Y button to create your game. You can choose
customize your the Game Type, Game Mode, and Difficulty of your match. You can also determine the number of Public
Slots and the number of Private Slots.
RANKED MATCH
The competitions in this section, affect your standings on the worldwide DanceDanceRevolution® UNIVERSE 3
Leaderboards. There are three ways to enter a RANKED MATCH.
Quick Match: This is the fastest way to get started. Select QUICK MATCH to join the most readily available game.
Create Match: Create a Ranked Match. Once you’ve selected the match options you like, hit the Y button to
create your game. You can choose customize your Game Type, Game Mode and Difficulty of your match. You can also
determine the number of Public Slots and the number of Private Slots.
VIEW LEADERBOARDS
See the overall ranking of players who’ve engaged in Ranked Match competitions. Players are ranked by games played,
games won, and total points. You can opt to view separate Leaderboards for each of the Ranked Match game modes or an
“Overall” Leaderboard that ranks all game modes together. Filter the Leaderboards to view all current players or only friends.
Controls for Leaderboards
A button
View Gamer Card of highlight name
B button
Exit Leaderboard/Cancel
X button
Toggle Leaderboard Filter
Y button
Toggle Leaderboards Modes
TRAINING MODE
The Training Mode is designed to help you practice songs.
Training Menu
SONG: Select the song you wish to practice by using the
D-pad [left]/[right] or left/right Directional Arrows on the
DanceDanceRevolution® Controller. The song that is currently displayed on the screen will be the song you will practice.
STYLE: Select from SINGLE or DOUBLE.
DIFFICULTY: Choose BEGINNER, BASIC, DIFFICULT, EXPERT or ONI difficulty. It will also cycle through any available
Edit Data for the chosen song.
HANDCLAP: This setting helps you learn the timing needed to hit the arrows correctly by using handclaps.
METRONOME: Here you learn the rhythm needed to hit the arrows correctly by using a Metronome.
TIMING: Instead of Boo, Good, Great and Perfect, this setting tells you the timing of your step with Early, Late, Just
(Perfect) and Miss.
FOOT GUIDE: This suggests which foot you should be using to step on a given arrow. You can toggle this ON/OFF.
MUSIC SPEED: Use this setting to change the tempo of the songs. There are five settings available, with five being the
default regular speed.
PLAY AREA: Choose WHOLE to play the entire song or CUSTOM to play a portion of the song.
START: When practicing a portion of a song, use this setting to choose the starting point.
END: When practicing a portion of a song, use this setting to choose the ending point.
11
EDIT MODE
Step Edit Menu
Edit Mode enables you to create a custom-designed dance
routine and/or video sequence for any song. Dance routines
and video sequences can be saved to a memory unit or
the Xbox 360® hard drive for future playback or editing.
Additionally, the dance routines and/or video sequences can
be used in Game Mode and Training Mode. To edit step data
for a song, select the STEP option. To edit visual data for a
song, select VISUAL.
NEW DATA: Create a new edit file.
SAVE: Save edit data. For newly created data the Data
Manager will be brought up in Save As Mode.
DATA MANAGER: Manage edit data saved on the
Hard Drive.
OPTIONS: Set input type and BGM options. These
settings can be changed in the Options Menu
NOTE: It is recommended that you use a regular Xbox 360
controller when creating edit data in Edit Mode.
®
Input Type: You can set whether the cursor stays in place
(KEEP) or moves to the next line after placing an arrow (NEXT).
BGM: Turns background music ON/OFF during editing.
Data Manager
RECORD OPTIONS: Set various recording options. There are six options to choose from.
Play Type: Select from WATCH, OVER INPUT, SAVE INPUT, JUDGE 1 and JUDGE 2.
Repeat: Set loop play ON/OFF.
Speed: Select the desired playback speed from 1-5 (1 slowest/5 regular).
Metronome: Set the metronome assist function ON/OFF.
Hand Clap: Toggle the hand clap assist function ON/OFF.
Input SFX: Turn the sound effect for entering/erasing an arrow during Over Input or Save Input ON/OFF.
In order to use Edit Mode and create edit data files, you
must use Data Manager. The Data Manager is a convenient
organizational/management system of all edit data files
stored on an Xbox 360® storage device. The Data Manager
ist created on the Xbox 360® storage device the first time
the game is started. You can save up to 150 different edit
data files on the Xbox 360® storage device. You cannot
combine step edits and visual edits within a single edit
data file.
Getting Started
SEQUENCE OPTIONS: Set zoom level, arrow type, and other editing options.
After starting the game for the first time, the Data Manager is created on the Xbox 360 storage device. Select NEW
to get started. First you’ll need to choose a song to edit, then decide if you would like to play Single or Double style.
Next select if Konami sample data will be used or not. If you choose to use sample data then in Step Edit mode you will
import the song’s default BEGINNER, BASIC, DIFFICULT, EXPERT or ONI step patterns. In visual edit mode, you may
import the song’s default video data.
®
Now you can create using Step Edit or Visual Edit! Save your inventive edit data by selecting SAVE from the Edit Menu.
Then choose an empty slot in the Data Manager to save the data. Create a name for the edit data file and you’re set!
Saved edit data can be re-edited after loading the data. To load select LOAD from the pop up menu.
Step Edit Controls
w BUTTON: With this button you can change cursor’s moving units. Red: 1/4th unit, Blue: 1/8th unit, Yellow: 1/16th unit.
x BUTTON: Use this button to place an area mark. Placing two marks in different sections determines the editable area.
y BUTTON: The Area Menu is displayed by pressing this button.
z BUTTON: Press this button to access the Sequence Menu.
D-PAD 7/3: Use these buttons to scroll sequence data. You an also change items in the Select Menu and place or
delete corresponding Up and Down arrows during recording.
D-PAD 1/5: Switch between 1P side or 2P side with these buttons. You can also switch menus, change the menu
select content, and place or delete corresponding Left and Right arrows during recording.
> BUTTON: Begin recording by pressing this button. Press again to stop the recording session.
B BUTTON: Use this button to place Right arrows or delete Right arrows that already exist. You can also cancel the
current command selection.
X BUTTON: This button places Left arrows or deletes Left arrows that already exist.
Y BUTTON: Place Up arrows or delete Up arrows that already exist with this button.
B BUTTON: Use this button to place Down arrows or delete Down arrows that already exist. You can also confirm the
current command selection.
L LEFT STICK: increases scroll speed in the sequence.
C RIGHT STICK: Changes width of the sequence.
AREA OPTIONS: Set options related to editing only a particular segment of a song.
EXIT: End Edit Mode and return to the Main Menu.
Area Options
Access the Area Options using the y button. There are eight options to choose from.
SET AREA – Start: Marks the beginning of the editable area.
End: Marks the end of the editable area
COPY: Copies the selected area to the Clipboard. The Clipboard stores data temporarily in memory for pasting (see PASTE).
PASTE: Places the data stored on the Clipboard beginning at the cursor.
CUT: Deletes the selected area and temporarily stores the data in memory for pasting (see PASTE).
UNDO: Immediately after Recording, up to three previous operations/tasks can be undone. This allows you to correct
your mistakes.
DELETE: All arrows in the selected area will be deleted. Clipboard data will not be deleted unless new data is copied to
the Clipboard.
REVERSE: Arrows in the selected area will be rearranged by three options.
Mirror: All arrows (Up/Down/Left/Right) will be reversed.
Up/Down: Only Up/Down arrows will be reversed.
Left/Right: Only Left/Right arrows will be reversed.
QUANTIZE: This function is helpful in adjusting the placement of the arrows with the timing of the music. Arrows can
automatically be matched to fit the 4th, 8th, or 12th note. Additionally, you can delete all 1/8, 1/12, and 1/16 units by
selecting LITTLE from the Quantize menu.
Most commands cannot be used until two area marks have been set.
Sequence Options
Access Sequence Options by pressing the z button.
Here you can access six options.
PLAYSTYLE: Two different types can be set while editing,
SINGLE and DOUBLE.
ZOOM: Set the view magnification to OFF, 2X or 4X.
When TRIPLE is set to “ON,” the ZOOM selections are
OFF, 2X or 3X.
TRIPLE: Record arrows in 12th note positions. These
arrows cannot be arranged into tempos outside of 12th note timing.
12
FREEZE ARROW
Turn the option to enter freeze arrows ON/OFF during recording. When this option is set to ON, regular arrows cannot
be placed in the edit file.
13
The length of the freeze arrow can be adjusted by aligning the cursor at the beginning point of the freeze arrow and
holding down the corresponding arrow input button (A, B, X, Y) while pressing the D-pad 7/3.
Using Step Edit Data
To delete a freeze arrow, hold down the corresponding arrow input button while pressing the D-pad 7/3 from the
beginning to the end of the freeze arrow. Freeze arrows can also be deleted by positioning the cursor in between the
beginning and end of the freeze arrow and pressing the corresponding arrow input button.
GAME MODE
NOTE: To input a freeze arrow when not recording, hold down the desired arrow input button and wait until the arrow
color turns bright green. Continue holding the desired arrow input button and press the D-pad 7/3 to adjust the
desired length of the freeze arrow.
ARROW TYPE: Change the type of arrow displayed.
CURSOR LEVEL: Adjust the cursor level between 4th, 8th and 16th notes.
Visual Edit Controls
w BUTTON: With this button you can change cursor’s moving units. Red: 1/4th unit, Blue: 1/8th unit, Yellow: 1/16th unit.
x BUTTON: Use this button to place an area mark. Placing two marks in different sections determines the editable area.
Note that you can also determine what types of edits are allowed in an area by setting area marks in different columns.
y BUTTON: The Area Menu is displayed by pressing this button.
z BUTTON: Press this button to access the Sequence Menu.
D-PAD 7/3: Use these buttons to scroll sequence data. You an also change items in the Select Menu.
D-PAD 1/5: Switch between the Movie Clips, Transition, Camera, Dancer Effects, and Light columns with these
buttons. You can also switch menus and change the menu select content. During editing these buttons allow you to
select movie clips for placement, transition type, camera movement, dancer effects, and lighting type.
> BUTTON: Begin recording by pressing this button. Press again to stop the recording session.
A BUTTON: This button confirms the current command selection.
LEFT STICK L: Use this button to increase scroll speed in the sequence.
RIGHT STICK C: This button changes width of the sequence.
Visual Edit Menu
NEW DATA: Create a new edit file.
SAVE: Save edit data. For newly created data the Data
Manager will be brought up in Save As Mode.
DATA MANAGER: Manage edit data saved on the
Hard Drive.
OPTIONS: Set BGM options and view movie clips. These
two settings can be changed in the Options Menu.
BGM: Turns background music ON/OFF during editing.
RECORD OPTIONS: Set various recording options.
At the Song Selection Mcreen press the D-pad 7/3 or up/down Directional Arrows on the DanceDanceRevolution®
Controller to choose the edit file. These are shown in orange and are only available for songs that have edit data available.
TRAINING MODE
On the Training Mode screen, highlight difficulty and press the D-pad 1/5 or left/right Directional Arrows on the
DanceDanceRevolution® Controller to choose the edit file. These are shown in orange and are only available for songs
that have edit data available.
Using Visual Edit Data
If you wish to use your visual edits for a song in Game Mode and Training Mode, you must select the visual edit data
file from the Visual Edit Data Manager, and then select USE V-EDIT DATA. Your edited video then appears whenever you
play the song in Game Mode and Training Mode. You may restore all Game Mode and Training Mode song videos in to
their default state by selecting DEFAULT ALL from the Data Manager menu. For fun, you can randomize all song videos
in Game Mode and Training Mode by selecting RANDOM ALL.
DJ Mode allows you to listen to all of the music in the game and add your own personal twist. You can choose from
one of the preset song lists, use the random song list feature, or create a custom song list with your favorite tracks. DJ
Mode allows you to save two custom song lists.
DJ MODE
Controls for DJ Mode Menu
A button: Confirm Selection, Add Song, Delete Song, or Change Song
B button: Cancel Selection or Back
X button: Edit Playlist
Creating a Custom Song
List
To make a song list first highlight CREATE1 or CREATE2 and press the A button. Scroll through the list of songs and
find one you want to add then press the A button to add it to the song list. To remove a song from the list highlight
it again and press the A button again. Once you are happy with your song list press the B button to return to the
previous menu.
NOTE: You cannot have a song repeat. Each song can only be used one time in a song list.
Once your song list has begun playing, move either the left or right sticks to bring up the turntable display.
LLeft stick and Cright stick
y and z buttons
w and x buttons
Scratch Beats
Cycle Through Scratch Patterns
Adjust Volume of Scratching
Five settings can be changed in the Recording Option Menu.
Play Type: Select from WATCH and MARKER. .
Metronome: Toggle the metronome assist function ON/OFF.
Hand Clap: Turn the hand clap assist function ON/OFF. If ON, you may configure hand claps for the song’s difficulty
level and play style.
Play Style: Set your play style. Choose between SINGLE or DOUBLE.
Difficulty: Select your difficulty.
SEQUENCE OPTIONS: Set zoom and cursor level.
Zoom: Set to x2, x4, or turn OFF.
Cursor Level: Set to 4th, 8th, or 16th beats.
AREA OPTIONS: Set options related to editing only a particular segment of a song. See pg. 24 for a complete description.
EXIT: End Edit Mode and return to the Main Menu.
14
15
RECORDS
Records allows you to examine your achievements from
Party Mode and Game Mode. Use the w and x buttons
to scroll through the eight categories tracked by Records.
These categories are SINGLE (Game Mode), DOUBLE
(Game Mode), TRIPLE (Party Mode), QUAD (Party Mode),
HIGH SCORE (Game Mode), NONSTOP (Party Mode),
NONSTOP COURSE SINGLE (Party Mode), NONSTOP
COURSE DOUBLE (Party Mode), SPEED (Party Mode), and
XBOX LIVE®. The achievements for all songs are tracked
separately by difficulty level, ranging from BEGINNER
scores in the leftmost column to ONI scores in the rightmost. Only scores from single player games are tracked.
Records Controls
w button
x button
D-pad 7/3
D-pad 1/5
B button
A button
Change records category being viewed
Change records category being viewed
Scroll through record data for available songs
Scroll through individual records for each difficulty level
Cancel selection
Confirm selection
OPTIONS
The Options Menu contains a variety of settings that you
can configure to suit your personal tastes. Press the
D-pad 1/5 to cycle through the desired options and press
A or the > button to enter. After you have adjusted your
settings, highlight EXIT and press the B button to return
to the previous menu. Refer to the on-screen instructions
for further information. There are seven options available.
GAME: Adjust game settings.
DANCERS: Choose the default dancer for each player.
SCREEN: Configure the aspect ratio for music video
clips and the gameplay screen.
CREDITS: View the product staff credits
SOUND: Adjust sound settings.
CONTROLLER: Vibration settings, Double Play controller settings, and Dance Dance Revolution Controller settings.
GRAPHIC: Adjust graphic settings.
16
W
K
t
w
i
a
o
a
n
u
T
O
A
F
A
D
S
l
m
f
I
n
e
r
m
w
K
A
2
E
U
C
I
s