1
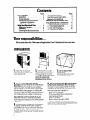
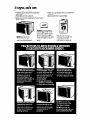
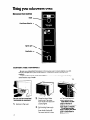
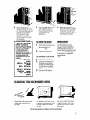
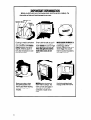
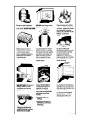
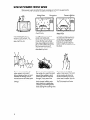
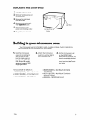
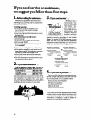
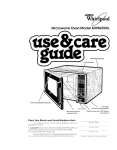
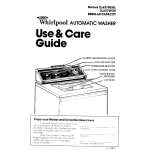
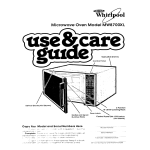
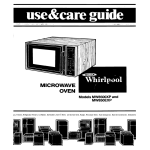
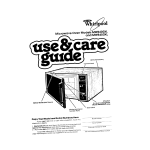
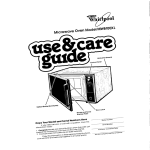
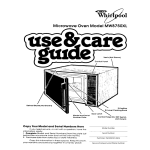
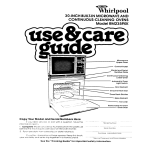
Microwave
Detrc
Oven Model MW82OOXL1
xl
“’
COPY Your Model
’
Model and Serial
Number Plate
and Serial Numbers
\
Door latch
Here
have
this
Model
Number
1. Complete
Model and Serial Numbers (from the plate
behind the microwave
oven door on the oven frame).
2 Purchase date from sales slip (or date installed).
just
Serrol
Number
If you need service,
information
ready:
or call with a question,
Copy this information
in these spaces. Keep this book,
your warranty and sales slip together in a handy place.
Purchase:lnstallation
Serwce
Company
Dole
and
Phone
Number
Contents
Page
Responslbllltles
..
.. . ... . . . 2
..
Installation
..
.
.
‘Proper, Safe Use . . . . . . . . . . . . . . . . . . :
Precautions to Avoid Possi t >le
Exposure to Excessive
Microwave Energy . . . . . . . . . . . . . 3
Using Your Microwave Oven . . . . . .,. . 4
Setting the Controls . .
. . . . .
4
Defrosting . . . . . . . . . . . . . . . . . . .
5
Cleaning the Microwave C)ven
5
Your responsibilities..
Fill out and return
the “MIcrowave
Important Information . .
...
How Microwave Ovens Work
Replacing the Light Bulb .
Buildlng In Your Microwave
Oven
If You Need Service or Assistance.
1.
2.
3.
4.
Before Calling For Assistance.
If You Need Assistance
If You Need Service .
IfYouHaveaProblem
.
.
Page
6
8
9
9
IO
10
t0
. 10
10
.
Reglstratlon
Card”attached
to the oven door.
Installation
1.
Empty the microwave
oven and clean inside it with
a soft, damp cloth.
2. Put the oven on a cart,
counter, table or shelf that is
strong enough to hold the
oven. (The control side of the
unit is the heavy side.
Handllng can be tricky.)
4. For your safety, thlr oven must be
grounded.
DO NOT REMOVE THE THIRD PRONG
FROM THE PLUG. You must have a qualified
electrician
put in the right outlet if yours does
not have the J-prong plug-in, or if the outlet
is not grounded
according
to National Electrical Codes and local codes or ordinances.
The outlet must supply 120 volts, 60 Hz., AC.
When the oven is on, it will use about 1450
watts. It should not share a circuit with another
appliance.
5. Put about one cup (250 mL) of cold water
in a glass container
in the oven. Close the
door. Make sure it locks. Follow the directions
on page 4 to set the oven to COOK for 1%
minutes. When the time is up, the water should
be heated.
2
3. Do not block vents
on the oven.
Blocklng vents can cause
poor cooking results.
6. Fill out and return the “MIcrowave Reglstratlon Card’lattached
to the oven door. If
the card is missing, please send the model
and serial number of your microwave
oven,
with your name and address to...
Whirlpool Corporation
Microwave
Registration
Department
Administrative
Center
2000 U.S. 33 North
Benton Harbor, Michigan
49022
This information will help us reach you if
there is ever a need to pass along information
about your microwave
oven.
Your mlcrowave
l
l
l
must be...
Installed according
to the installation
instructions.
Protected from the weather.
Used only for jobs expected
of home microwave ovens.
l
l
Used only by people who can operate
properly.
Kept clean and in good repair.
DO NOT cook or reheat
NEVERstart the oven
when it’s empty. The
oven can be damaged.
whole eggs in the microwave oven. Steam buildup can cause an egg to
burst. Damage to the oven
or injury to the user may
result.
DO NOT use the oven
until you have read and
ALL the
understand
information
on safe use.
it
Usifhg your fnkrowave oven
Mlcrowave
Oven Controls
TIMER -.
Cook Power Selector
\
Slgnal Light
SETTING
THE CONTROLS
Be sure you understand
the basics of microwave
oven cooking before you start.
Follow the directions
Startwith recipes from your MICRO MENUS Cookbook.
carefully.
NEVER START THE OVEN WHEN IT’S EMPTY. The oven can be damag~ed. For testing,
use at least a cup of water.
Be sure you have read and
understand
the dlrectlons.
1.
2.
Close the door. Make
sure it locks. The oven
won’t work if the door isn’t
closed tightly.
3.
Set cooking times up to
35 minutes by turning the
timer knob clockwise.
The oven light will come
Put food in the oven.
on. Turn counterclockwise to reduce time.
Each mark is 15 seconds for the first 5
minutes. After 5 minutes,
each mark is 1 minute.
To set timer for less
than 1 minute, turn timer
past 1 minute then to
desired time.
4.
Set Cook Power to
desired setting from HI to
LO. Some recipes require
different Cook Powers
for best results. [See
chart.] The lower the
Cook Power, the slower
the cooking.
-COOK POWER CHARTRecipes In the MICRO
MENUS* Cookbook
use Cook Power settings
from HI to LO. Recipes
in other books and
magazines may use
different percentages of
cooking power. The
following chart will be
helpful:
HI-lOO%offull
power
MED-HI - 70% of full
power
MED- SO% of full
power
MED-LO - 30% of full
(DEFROST) power
LO- 15% of full
power
CLEANING
5.
When the set time is up,
the oven will shut off automatically.
You will hear
a bell, the lightwill
go off
and the fan will stop.
TO STOP THE OVEN
DEFROSTING
1.
For defrosting, set Cook
Power Control to DEFROST
(MED-LO) setting. See the
Defrost Guide inside the oven
door or your MICRO MENUS
Cookbook
for suggested
defrost times.
Tmk.
2.
Turn the timer knob counterclockwise
to 0.
OR
Open the oven door.
TO RESTART THE OVEN
1.
2.
3.
Close the oven door.
Set timer (if needed). To
set timer for less than 1
minute, turn timer past 1
minute then to desired
time.
Push the START Button.
THE MICR-
Wipe often with warm sudsy
water and a soft cloth or
sponge.
6.
Push the START Button. The
oven light will stay on.
You will hear a fan running during oven
operation.
UVEN
Be sure to clean the areas
where the door and oven
frame touch when closed
Rinse well.
For stubborn soil, boil a cup
of water in the oven for 2 or 3
minutes. Steam will soften
the soil.
Do not use abrasive
cleaners
or steel
wool
pads.
IMPORTANT
INFORMAIION
Before YOU start using your microwave
oven, read this section
informati&n will hetp yo;&oid
damage to your oven
Metalllc
To test a dish for safe use, put it
into the oven with a cup of
water beslde it. Cook on high
Cook Power for one minute.
staples, metallic
glaze or
trim). Test dinnerware or cookware before using.
It the dish gets hot and the
water stays cool, do not
use It.
Paper can char or burn,
and some plastics can
melt if used when heating
foods for more than 4
minutes.
NEVERstart a microwave
in metal
This
Trlm
the oven. So
can containers
with hldden
metal (twist-ties, foil-lining,
Cooking
carefully.
containers
can damage
oven when it’s empty. The
oven can be damaged.
If
you experiment,
put a
container
of water in the
oven.
NEVERCOOK OR REHEATA
WHOLE EGG. Slice hard
boiled eggs before
heating. Steam build-up in
whole eggs may cause
them to burst and possibly
damage
the oven.
Don’t let anything
touch
the top of the oven cavity
Rough or harsh cleaners
DO NOT store things in the
can scratch or dull the
oven finish. DO NOT USETHEM.
Overcooking
some foods
can cause them to scorch
or flame...especially
foods
like potatoes, popcorn,
snacks, etc. See the MICRO
MENUS’ Cookbook.
-Tmk
Make popcorn
only in
poppers designed
for use
in microwave
ovens.
Follow popper directions.
Results are the popper
manufacturer’s
responsibility.
Liquids heated in certain
containers
may overheat.
The liquid may then splash
out with a loud noise. This
does not harm the oven,
but you should not use
such containers
to heat
liquids again.
Do NOT OVERCOOK
POTATOES. At the end of the
recommended
cooking
time they should be
slightly firm. Wrap in foil
and set aside for 5 minutes.
They will finish cooking
while standing.
USEHOT PADS. Microwave
energy does not heat
containers,
but the hot
food does.
Follow MICRO MENUS*
Cookbook
directions
carefully. If using a
different cookbook,
you
may need to experiment
with times and Cook
Powers.
It is normal for the inside of
the oven door to look wavy
after the oven has been running for a while.
volx!
v
’
If your electric power line
voltage is less than the
normal 120 volts, cooking
times may be longer.
l
l
Double-check
all
settings.
Use the oven only for
defrosting, cooking or
reheating.
It is normal for the signal
lights to flicker while the
microwave
oven is on.
HOW MICROWWE
OVENS WORK
Microwave
ovens are safe. Microwave
energy is not hot. It causes
make its own heat, and it’s this heat that cooks the food.
Ceramic
-1
Microwaves
are like TV
waves or light waves. You
can’t see them, but you can
see what thev do
Microwaves
pass through
glass, paper and plastic
without heating them so food
absorbs the energy. Microwaves bounce off metal pans
so food does not absorb the
energy.
food to
Bottom
Oven’Cavlty
Metal
A magnetron
in the microwave oven produces
microwaves.
The microwaves
move into the oven where
they are scattered
or stirred
by a mode mixer (like a fan].
Microwaves
bounce off
metal oven walls and are
absorbed
by food.
The ceramic
bottom of your
microwave
oven lets microwaves through. Then they
bounce off a metal floor,
back through the ceramic
bottom and are absorbed
by
the food.
Microwaves
may not reach
the center of a roast. The heat
around the outside is what
cooks the roast all the way
through. This is one of the
reasons for letting some
foods (roasts, baked potatoes] stand for a while after
cooking, or for stirring some
foods during the cooking time.
Floor
The microwaves
disturb
water molecules
in the food.
As the molecules
bounce
around bumping
into each
other, heat is made, like rubbing your hands together.
This is the heat that cooks
1.
2.
Unplug
the power
Remove holding
access panel.
cord
screw on
3.
Remove the light bulb
from its socket.
4.
Replace bulb wrth a 40.
watt appliance
bulb.
5.
Replace the access
panel and holding screw.
6.
Plug in the power
It Bulb
Access Panel
Screw
cord
Building tn your miaowave oven
Your microwave’oven
is not limited to carts, counters
are made easy with kits available
from Your dealer.
1.
Build the microwave
oven into a cabinet or
wall by itself or over
built-in single ovens in
the Whirlpool RDE, REE,
RGE, RB and SB model
series or Imperial 7200
single gas ovens.
2.
Ask your dealer for details on...
l
RCK803 (832849) -30-inch
Built-in Kit
l
RCK807 (832850) -27-inch
Built-in Kit
l
RCK710 (832763) -Wall Mount Kit
Attach the microwave
oven to a wall by itself or
with cabinets
over it
l
l
l
-Tmk.
or tables.
3.
Custom
installations
Put the microwave
oven
on the MICRO SHELF.
Hood over a cooktop. The
hood is available
ducted
or as a recirculating
hood, and includes cooktop lights.
RCK811 (832875) -Wall Mount Vent Grille
and Filler Kit
RCK713 (832769) -Wall Mount Cookbook
Storage Cabinet
RH3330XL - MICRO SHELF Hood
Ifyou need service or assistance,
we suggest you follow these four stem:
1
Before calling for assistance.. .
l
3
l
If you need service * . . .
Performance
problems
often result from
little things you can find and fix yourself without tools of any kind.
Whirlpool
has a
nationwide
network of franchised
-
If nothlng operates:
l
l
Is the oven correctly
plugged
into a
live circuit with the proper voltage?
(See page 2.)
Have you checked
the main fuse or circuit
breaker box?
If the mlcrowave
l
l
l
l
If mlcrowave
l
l
l
oven will not run:
Is the timer set?
Is the door firmly closed and latched?
Did you push START?
Did you follow the directions
on pages
and 5 exactly?
4
cooklng tlmes seem too long:
Is the electric supply to your home low or
lower than normal? Your electric company
can tell you if the line voltage is low.
Is the Cook Power at the recommended
setting?
Are you allowing
for more time when cooking more food at one time?
2
warranty
States. To
area, call
telephone
telephone
service,
anywhere
in the United
locate
TECH-CARE service
in your
our CCCL-LINE service
assistance
number (see Step 2) or look in your
directory
Yellow Pages under:
ELECTRICAL
APPLIANCESMAJOR-REPAIRING
A P*RTS
APPLIANCES-HOUSEHOLDMAJOR-SERVICE
6 REPAIR
WHIRLPOOL APPLIANCES
FRANCHISED TECH-CARE SERVICE
SERVICE
XYZ SERVICE CO
123 Maple
OR
WHIRLPOOLAPPLIANCES
FRANCHISED TECH-CARE SERVICE
SERVICE
XYZ SERVICE CO
123 Maple
COMPA,VIES
999.9999
(‘OMPANIES
999.9999
OR
WASHING MACHINES.
6 IRONERS-SERVICING
DRYERS
WHIRLPOOL APPLIANCES
FRANCHISED TECH-CARE SERVICE
l
If you need assistance’.
SERVICE
XYZ SERVICE CO
123 Made
..
Call the Whlrlpool CCCL-LINE n service asslstance telephone number. Dlal free from:
Contlnental U.S. . . . . . . . . (800) 253-1301
Mlchlgan . . . . . . . . . . . . . . . . (600) 632-2243
Alaska 6 Hawall . . . . . . . . (800) 253-l 121
and talk with one of our trained Consultants.
The Consultant
can instruct you in how to obtain satisfactory
operation
from your appliance or, if service is necessary,
recommend
a
qualified
service company
in your area.
4
l
COMPA.VIES
999-9999
Ifyouhaveaprobfem”...
Call our CCCL-LINE service assistance
telephone number (see Step 2) and talk with one
of our Consultants, or if you prefer, write to:
Mr. Guy Turner, Vice President
Whirlpool Corporation
Administrative
Center
2000 US-33 North
Benton Harbor, Ml 49022
If you must call orwrite, please provide: model
number, serial number, date of purchase, and
a complete
description
of the problem.
This
information
is needed
in order to better respond to your request for assistance.
10
Notes
FSP is a registered
trademark
of Whirlpool
Corporation
for
quality parts. look for this
FSP
symbol of quality whenever
you need a replacement
part
’ for your Whirlpool
appliance.
FSP replacement
parts
will fit right and work right, because
they are
made to the same exacting
specifications
used to build every new Whirlpool
appliance.
0
Eenton Harbor, Michigan. Automatic Washers, Clothes Dryers,
Freezers, Relrigerator-Freezers.
lee Makers, Dishwashers.
Buitl-in Ovens and Surtace Unils. Ranges, Microwave Ovens,
Compactors. Room Air Conditioners, Dehumidifiers,
Central
Heating and Air Conditioning Systems.
Part No. 312334
Printed
in U.S.A.