Download Whirlpool RM988PXK User's Manual
Transcript
Whirlpool
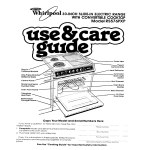
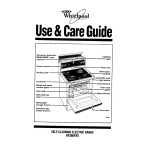
30-INCH FREE-STANDING EYE-LEVEL MICROWAVE LANGE
Model RM988PXK
Control
Defrost
Wore---...
Top Light Switch
Guide
MIcrowave
Oven
Cooktop
Cover
Model and Serial
Number Plate
Plug-In
Surface
Panel
:elain-Enamel
ctor Bowl and
Chrome Trlm Rlng
Unlt
--
Automatic
Lower
Oven Llght Switch
Lock Lever
Broil Element
Oven
Rack
Guide
Element
FIberglass
Heat Seal
\
Removable
Storage Drawer
*Tmk.
Copy
Your Model
If you
information
1. Complete
behind the
2. Purchase
and Serial Numbers
need service, or :-:a11with a
ready:
Model and Serial Numbers
microwave
oven door on the
date from sales slip (or date
question.
Here
have
this
Model
Number
(from the plate
oven frame).
installed).
just
Serial
Number
Copy this information
ir: these spaces. Keep this book,
your warranty and sales slip together in a handy place
See the “Cooking
Guide”for
important
Purchase
Service
safety
ktollatlon
Company
information.
Dote
and Phone
Number
Your responsib2lMes.
l
l
Proper installation
and safe use of your microwave
range are your
personal responsibilities.
Read this”Use and Care Guide”and
the
“Cooking
Guide”carefully
for important
use and safety information.
Installation
You must be sure your range Is...
installed and leveled on a floor
that will hold the weight;
installed in a well-ventilated
area protected
from the
weather;
l
l
l
properly
connected
to the correct electric supply and
grounding.
(See “Installation
Instructions.“)
Proper use
You must be sure your range is...
l
l
l
used only for jobs expected
of home ranges;
used only by people who can
operate
it properly;
properly
maintained.
Contents
Page
Page
Responsibilities
Installation
Proper
Use
Safety
Precautrons
to Avord
Possible
Exposure
to
Excessive
Microwave
Energy
Using the Microwave
Upper
Oven
Setting the Clock
Using the Minute
Timer
Cooking
rn One Cycle
High Cook Power
Lower Cook Powers
Defrostrng
Faster or Slower
Defrosting
Cooking
in Two Cycles
Cooking
Automatically
After Defrosting
Cooking
to a Serving
Time
Serve Trme and the Temperature
Probe
Cooking
wrth the Temperature
Probe
Changing
or Cancelling
Instructions
Other Operating
Hints
Cleaning
the Microwave
Oven
Important
Information
How Microwave
Ovens Work
2
2
2
2
3
Using
Your
Cooktop
The Cooktop
and
Lower
Oven..
Cover
Surface
Unit Controls
The Lower Oven Controls
Bakrng or Roasting
Adjusting
the Oven Temperature
Using the Automatic
MEALTIMER
Brorling
The Lights
The Vents
Cleaning
and Caring
for y&r
Ran&’
Control
Panel and Knobs
Surface
Units and Reflector
DowIs
Removrng
the Storage
Drawer
The Optional
Rotisserie
The Lower Oven Self-Cleanin’g
‘Cycle
Cleaning
Chart
If You Need Servrce
or Assrstance
1 Before Callrng
for Assistance
2 If You Need Assistance
3 If You Need Servrce
4 If You Have a Problem
Coniro’l
Clock
:
:.
:1
:
36
.37
.37
.37
.3a
38
3
Using the miaowave upper oven
Microwave
Oven Controls
The top part of the Control Panel
has the microwave
oven controls.
There are four kinds of controls:
-The Digital Display/Clock,
-Signal
Lights,
-Command
Pads,
- Number Pads.
What each of these does will be
covered
on the following pages, One
note: The Command
and Number
Pads are not buttons. You don’t have
to push them...just touch them.
When you first plug in the range, the
Clock/Display
will show 88:88. If,
after you set the clock (page 51, the
Clock again shows all 8’s, it means
your electricity
was off for a while. Reset the clock.
Read the following pages carefully.
COMMAND
DIGITAL DISPLAY/CLOCK
- it shows you what number
pads you
touched.
tells the oven you are going to cook at less
than full power.
- START tells the oven to start
-DEFROST tells the oven to run at 30% of full
power.
SIGNAL LIGHTS
NUMBER PADS
SETTING
PADS
CLOCK
When the range is first plugged
in, the Clock Dlsplay shows 88:88. If the electric
power ever goes off, the Clock Display WIII also show all 8’s when the power comes
back on.
You can cook or use the Minute Timer without setting the clock, but the display will be
blank after cooking. The oven door must be closed before setting the clock.
DO THIS...
THIS HAPPENS...
The word “ser’will
touching number
within 5 seconds.
1.
Touch CLOCK.
m
2.
3.
glow on the display. Start
pads for the desired time
The Display will show what numbers You
touched in the order you touched them.
This example
shows 3:25.
Touch number pads for
the correct time of day.
q
Touch START.
The START Signal Light will come on to show
that You have touched START.It will go off
In aboclt 5 seconds. The clock is set.
5
The Minute Timer does not start or stop cooking; it works like a kitchen timer. Set in
minutes or seconds and you will hear a beep when the set time is up. The oven door
must be closed before setting the Minute Tlmer.
THIS HAPPENS...
DO THIS...
The MINUTE TIMER Signal Light will come on
and the Display will show a “0.” Within 5
seconds start touching number pads for
the desired time.
The Display will show what numbers you
touched in the order you touched them.
This example
shows 1 minute, 45 seconds
2.
3.
Touch number pads for
minutes and seconds.
The START and MINUTE TIMER Signal Lights
will come on to show that
l you have
touched START;
l the Minute
Timer is running.
The START Light will go off in about 5
seconds.
Touch START.
count
down
The Display counts down the seconds to
show how much time is left on the Minute
Timer.
When the set time is up, a buzzer will sound
and the Display will show the time of day.
1.
The Minute
2.
Opening
3.
If you open oven door and reset the Minute
Minute Timer and to restart the oven.
Timer can be used when the oven is cooking.
the microwave
oven door does not stop the Minute
To change
or cancel
Timer.
Timer touch
START twice
the Minute
Timer:
I. Touch MINUTE TIMER.
2. Touch number 0 to cancel,
or
2. Touch desired new number
Then:
3. Touch START.
pads to change.
to start the
COOKING IN ONE CYCLE
Follow these steps to cook at one power
level’
HIGH COOK POWER
THIS HAPPENS...
DO THIS...
1.
Put food in the oven and
close the door.
The COOK CYCLE 1 Signal Light will come
on and the Display will show 4 O’s
El
a.
2.
Touch COOK CYCLE 1.
The Display will show the numbers you
touched in the order you touched them.
This example
shows 4 minutes, 30 seconds
the cooking
want.
time you
The oven will automatically
4.
cook
at high Cook Power.
The START and COOK CYCLE 1 Signal Lights
will come on to show what you have told
the oven to do. The START Light will go off in
about 5 seconds.
Touch START.
count
down
The Display counts down the time to show
how much cooking time IS left
When the cooking time ends, a buzzer will
sounu 4 times. [You can stop the buzzer
by opening the oven door or touching
CANCEL.) When the buzzer stops, the Display will show the time of day.
LOWER COOK POWERS
for best results, some recipes call for lower Cook Powers. Lowering the Cook Power
slows the cooking. The lower the Cook Power, the slower the cooking. Each number
pad on your microwave
oven stands for a different percentage
of Cook Power. Many
recipes in your MICRO MENUS‘ Cookbook
tell you, by number, which Cook Power to
use. Recipes in other books and magazines
may tell you by name (HI, MED, LO, etc.) or
by percentage
(1 O%, 50%, 8096, etc.].
The following chart gives you the percentage
of Cook Power each number pad
stands for, and the Cook Power name usually used
automatic
9
a
-Tmk.
7
6
5
4
3
2
1
100% of full
90% of full
80% of full
70% of full
60% of full
50% of full
40% of full
30% of full
20% of full
10% of full
power
power
power
power
power
power
power
power
power
power
HIGH
MED-HI
MED
MED-LO
LOW
CONTINUED NEXT PAGE
7
LOWER COOK POWERS. CONTINUED
DO THIS...
1.
THIS HAPPENS...
Put food in the oven and
close the door.
q
The COOK CYCLE 1 Signal Light will come
on and the Display will show 4 0’s.
..
2.
Touch COOK CYCLE 1.
The Display will show the numbers you
touched in the order you touched them.
This example
shows 7 minutes, 30 seconds.
3.
Touch number pads for
the cooking time you
want.
‘.
4.
The COOK POWER Signal Light will come
and the Display will show 2 0’s.
..
Ia
on
Touch COOK POWER.
The Display will show what you touched.
This example
shows 60% of full power.
5.
Touch a number pad for
the Cook Power you
want.
The START, COCK CYCLE 1 and COOK
POWER Signal Lights will come on to show
what you have told the oven to do. The
START Light will go off in about 5 seconds.
6.
Touch START.
count
down
The Display counts down the time to show
how much cooking time is left
For 2 of every 10 seconds, the Display
show the Cook Power you selected.
will
When the cooking time ends, a buzzer will
sound 4 times. [You can stop the buzzer
by opening the door or by touching
CANCEL.] When the buzzer stops, the
Display will show the time of day.
DEFROSTING
Use the defrost setting to thaw frozen food before cooking. For suggested
defrost
times, check the guide on the inside of the oven door or in your MICRO MENUS
Cookbook.
Tmk
THIS HAPPENS...
DO THIS...
1.
Put frozen food in the
oven and close the
door.
q
I
2.
The DEFROST Signal Light will come
the Display will show 4 O’s
‘.
on and
Touch DEFROST.
The Display will show the numbers you
touched in the order you touched them.
This example
shows 2 minutes, 30 seconds.
3.
4.
Touch number
the defrosting
want.
pads for
time you
The START and DEFROST Signal Lights will
come on to show what you have told the
oven to do. The START Light will go off in
about 5 seconds.
Touch START.
count
down
The Display counts down the time to show
how much defrosting time is left
When the defrost time ends, a buzzer will
sound 4 times. (You can stop the buzzer by
opening the oven door or touching
CANCEL.) When the buzzer stops, the
Display will show the time of day.
FASTER OR SLOWER DEFROSTING
When you touch DEFROST, the microwave
oven automatically
uses 30% of full Cook
Power. For slower or faster defrosting, see lower Cook Powers on page 8.
l
Use 20% of full power for slower defrosting.
l
Use 40% of full power for faster defrosting. Defrosting
at Cook Powers higher than
30% can cause some cooking on the outside of the food.
HOLDING OR STANDING TIME:
For best results allow the food to stand for awhile after defrosting.
the temperature
of the food and provide more even defrosting.
This will equalize
9
COOKING IN TWO CYCLES
For best results, some recipes call for one Cook Power for a certain length of time,
and another Cook Power for another length of time. Your oven can be set to change
from one to the other automatically
DO THIS...
1.
2.
8.
ia
THIS HAPPENS...
Put food in the oven
and close the door.
The COOK CYCLE 1 Signal Light will come
on and the Display will show 4 O’s
Touch COOK CYCLE 1.
The Display will show the numbers you
touched in the order you touched them.
This example
shows 3 minutes, 25 seconds.
3.
Touch number pads for
the cooking time you
want in the first cycle.
&I
‘.
4.
.e
The COOK Power Signal Light will come
and the Display will show 2 O’s
on
Touch COOK POWER. If
you want the high Cook
Power, skip to step 6.
The Display will show what You touched
This example
shows 60% of full power.
5.
Touch a number pad for
the Cook Power you
want in the first cycle.
q
.a
6.
The COOK CYCLE 2 Signal Light will come
on and the Display will show 4 0’s.
Touch COOK CYCLE 2.
The Display will show the numbers You
touched in the order you touched them.
This example
shows 4 minutes, 30 seconds.
7.
10
Touch number pads for
the cooking time you
want in the second
cycle.
Iilll
‘.
8.
.a
The COOK POWER Signal Light will come
and the Display will show 2 0’s.
.
on
Touch COOK POWER. If
you want the high Cook
Power, skip to step 10.
The Display will show what you touched
This example
shows 40% of full power.
9.
Touch a number pad for
the Cook Power you
want in the second
cycle.
The START Signal Light will come on for
about 5 seconds.
The COOK CYCLE 4 Light will come on and
stay on while the oven is cooking in the first
cycle. The COOK POWER Light will be on if
you are using a Cook Power other
than high.
count
down
For 2 of every 10 seconds, the Display will
show the Cook Power you selected,
if you
are using a Cook Power other than high.
Iaim
0tP
The Display counts down the cooking time
to show how much time is left in the first
cycle.
5
A buzzer will sound at the end of the first
cycle. You can either open the door to
check the food, or you can let the oven
start the second cycle. If you do open the
door, just close it and push START to restart
the oven.
The
the
The
are
count
down
COOK CYCLE 2 Light WIII come on when
oven starts cooking in the second cycle
COOK POWER Light will come on if you
using a Cook Power other than high.
The Display counts down the cooking time
to show how much time is left in the second
cycle.
For 2 of every 10 seconds, the Display will
show the Cook Power you selected,
if you
are using a Cook Power other than high.
When the second cycle is over, a buzzer
will sound 4 times. (You can stop the buzzer
by opening
the door or touching CANCEL.)
When the buzzer stops, the Display will
show the time of day.
11
COOKING AUTOMATICALLY
The controls cart be set so the microwave
Cycle 1 and even Cycle 2
DO THIS...
1.
3.
q
*
from defrosting
to
THIS HAPPENS...
The DEFROST Signal Light will come
the Display will show 4 0’s.
on and
Touch DEFROST.
Touch number pads for
defrosting time you
want.
In
a.
4.
Touch COOK CYCLE 1.
5.
Touch number pads for
the cooking time you
want in the first cycle.
6.
oven goes automatically
Put frozen food in the
oven and close the door.
I
2.
AFTER DEFROSTING
The COOK CYCLE 1 Signal Light will come
and the Display will show 4 0’s.
on
The COOK POWER Signal Light will come
and the Display will show 2 O’s
on
Touch COOK POWER.
Options: Skip to step 8 it
you want the first cycle
to cook at high power.
Skip to step 12 if you
want only one cycle at
high power.
The Display will show what you touched.
Thus example
shows 60% of full power.
7.
Touch a number pad for
the Cook Power you
want in the first cooking
cycle.
m
The COOK CYCLE 2 Signal Light will come
on and the Display will show 4 O’s
#.
8.
Touch COOK CYCLE 2.
Optlon: Touch START
If cooking In only one
cycle after defrostlng.
The Display will show the numbers you
touched in the order you touched them.
This example
shows 4 minutes, 30 seconds.
9.
Touch number pads for
the cooking time you
want in the second
cooking cycle.
The COOK POWER Signal Light will come
and the Display will show 2 O’s
Billill
..
.a
on
1 O.Touch COOK POWER.
Option: Touch START if
you want the high
Cook Power.
The Display will show what you touched.
This example
shows 40% of full power
11 .Touch
a number pad
for the Cook Power
you want in the
second cooking
cycle.
The START and DEFROST Signal Lrghts will
come on. DEFROST will stay on during the
defrost cycle. START will go off in about
5 seconds.
12.Touch
START.
count
down
The Display counts down the time to show
how much time is left in the defrost cycle
When the defrost cycle is over, the
microwave
oven automatrcally
holds the
food for the same amount of time used for
defrosting.
The Display counts down the
hold time and the HOLD Signal Light will
be on.
When the hold time is over, a buzzer will
sound and the first cooking cycle will start
The COOK CYCLE 1 Signal Light will come
on and stay on during the first cooking
cycle. The COOK POWER Light will also
come on if you are using a Cook Power
other than high.
13
count
The Display counts down the time to show
how much time is left in the first cooking
cycle.
down
When the first cooking cycle is over, a
buzzer will sound and the second cooking
cycle will start. (If only one cooking cycle
is used, 4 buzzes will sound, and the oven
will stop.]
5
0
us
The COOK CYCLE 2 Signal Light will come
on and stay on during the second cooking
cycle. The COOK POWER Light will also
come on if You are using a Cook Power
other than high.
m
The Display counts down the time to show
how much cooking time is left in the
second cycle.
count
down
For 2 of every 10 seconds, the Display will
show the Cook Power you selected, If you
are using a Cook Power other than high.
@0
0$i+j-z
The holdlng time allows food
temperature
to even out all the way
through the food.
To skip the holdlng tlme:
l
l
When the cooking time is over, a buzzer will
sound 4 times. (You can stop the buzzer by
opening the oven door ortouching
CANCEL.) When the buzzing stops, the
Display will show the time of day.
s
Instruct the microwave
oven to DEFROST
and to cook in COOK CYCLE 2, or
Use COOK CYCLE 1 to defrost at 30% Cook
Power; use COOK CYCLE 2 for cooking.
To check or stir foods
during cycles:
I.
2.
3.
4.
between
or
Open the door. The oven will shut off
Check, stir or rotate the food.
Close the door.
Touch START. The oven will go on from
where it stopped.
COOKING TO A SERVING TIME
The microwave
oven controls can be set to start and stop the oven automatically,
even when you are not home. The Serve Time feature allows you to set the time you
want the food to be finished cooking.
DO THIS...
THIS HAPPENS...
m
1.
14
Touch SERVE TIME.
The SERVE TIME Signal Light will come on
and the Display will show 4 O’s Decide
what time you want the food to be done
cooking.
The Display will show the numbers you
touched in the order you touched them.
This example
shows a Serve Time of 6:00
2.
Touch number pads for
the time you want the
food to be ready to
serve.
3.
Touch in the cooking
instructions
needed for
the food to be cooked.
Cook in Defrost, Cook Cycle 1, Cook Cycle
2, or a combination
of them. Use high Cook
Power or lower Cook Powers.
q
If the Display begins flashing, there isn’t
enough time left before the Serve Time for
the oven to do what you told it to do. Touch
CANCEL and start over with a later Serve
Time.
4.
‘1’
\
Touch START.
The START and
stay on. All the
cooking starts,
Display will go
happening.
Extra information:
Make sure the Clock IS set to the right
time of day
l You can’t
set the Serve Time for more than
12 hours after the correct time of day
l
If you open the door before the oven
begins to cook, be sure to retouch START.
l
If you want the mrcrowave
oven to start
cooking when you are not home,
Use foods that will not go bad or spoil
while waiting for cookrng to start Avoid
l
SERVE TIME Signal Lights will
other lights will go off When
the Signal Lights and
on to show what is
using dishes with milk or eggs, cream
soups, cooked meats, poultry or fish, or any
item with baking powder or yeast
Smoked or frozen meats may be used; so
can vegetables,
fruits and casserole-type
foods.
Any food that has to wait for cooking to
start should be very cold or frozen before it
is put in the oven. MOST UNFROZEN FOODS
SHOULD NEVER STAND MORE THAN TWO
HOURS BEFORE COOKING STARTS.
SERVE TIME AND THE TEMPERATURE PROBE
1 Follow instructions on page 16 -17 for pluggrng rn the Temperature
Probe
2 Touch SERVE TIME.
3 Touch the number pads forthe time you
want the food finished
4. Follow instructions on page16-17fortouching in temperature
and cook power
Instructions
5 Touch START.
NOTE. When cooking toward a Serve Trme
while using the Temperature
Probe, the
microwave
oven will start cooking
90 minutes before the Serve Time you set. If
cooking time will be less than 90 minutes,
set a later Serve Time
15
COOKING WITH THE TEMPERIUURE
PROBE
The MEAL SENSOR’ Temperature
Probe takes guesswork out of cooking roasts and
larger casseroles.
The probe is designed
to turn off the oven when it senses the
temperature
you want. For suggested
temperatures
for different foods, see your
MICRO MENUS Cookbook.
Number Pads are used to touch in the final food temperature
you want.
Touch...
1
2
3
4
To Get Approximately...
90 F (32- C]
110-F (43- C)
120 F (49’ C)
130 F (54~ C)
I
I
To Get Approximately...
145-F (63. C)
150-F (66 C]
160°F (71- C]
165-F [ 74- C)
185-F (a5 cl
Touch...
5
6
7
a
9
DO THIS...
I
Socket
1.
Insert at least ’ j of the
temperature
probe into
the food.
DO THIS...
IllIll
..
4.
2.
Place food in the oven
and plug the probe into
the socket on the oven
wall.
3.
Make sure the probe
does not touch any part
of the oven interior. Close
the door.
THIS HAPPENS...
The COOK TEMP Signal Light will come
and the Display will show 2 0’s.
on
Touch COOK TEMP.
The Display will show the number you
touched. This example
uses 6, or a final
cooked temperature
of about 150 F (66 C].
The 0 means the food is still cold
Touch a number pad for
the desired final
temperature.
ElIi!
‘1
6.
.a
.
The COOK POWER Signal Light will come
and the Display will show 2 O’s
on
Touch COOK POWER.
Option: Touch START if
you want to use full
power.
The Display will show what you touched.
This example
shows 60% of full power.
7.
16
Touch the number pad
for the Cook Power you
want.
Tmk
The COOK POWER, COOK TEMP and START
Lights will come on. The START Light will go
off in about 5 seconds, the others will
stay on
m
mm
The lett number on the display shows what
temperature
(number) you selected.
The
right number shows you how the temperature is rising in the food.
Eml
For 2 of every 10 seconds, the Display will
show the Cook Power you selected
If you
are using a Cook Power other than high
When the probe senses the temperature
you selected, the oven shuts off and 4
buzzes sound. (You can stop the buzzer
opening the oven door or touching
CANCEL.) When the buzzes stop, the
will show the time of day.
by
HINTS FOR USING THE TEMPERATURE PROBE
DO...
DON’T...
use hot pads when removrng probe from
food or food from oven.
. unplug probe from socket to turn off oven
light
l stir foods
during cooking when
recommended.
9 stir soups, casseroles
and drinks before
serving.
l cover
roasts with foil and let stand a few
minutes after cooking.
Remove foil if you decide to cook it
longer.
l
l
For casseroles. the tip of
the probe should be in the
center of the food. Stir
foods when recommended. Replace the
probe.
let probe or probe cable touch any part
of the oven interior.
l let probeiouch
foil (if used) Foil can be
kept away from probe with wooden
toothpicks.
Remove foil if arcing occurs
0 use paper, plastic wrap or or plastic containers. They will be in the oven too long.
l
use probe in regular oven
l
force probe into frozen food.
l
use probe for foods that need to simmer.
For I\quids. balance
the
probe on a wooden spoon
or spatula so the tip of the
probe is In the center of
the liquid
For roasts, the tip of the
probe should be in the
center of the largest muscle. but not touching fat or
bone.
17
CHANGING OR CANCELLING INSTRUCTIONS
To change or cancel any instructions you have touched, simply touch CANCEL. All
rnstructrons WIII be cancelled.
The Display WIII show the time of day and you can start
over
If you want to change or cancel instructrons before you have touched START, simply
touch In the new instructions
They will cancel the old ones.
OTHER OPERATING HINTS
These are a number ofthings you can do with your microwave
oven. Some will be
reminders. Others will be mentioned
for the first time.
1. To double check settings while the oven is running, touch the command
pad for the
setting you want to check. The instruction programmed
for that pad will show on
the Display for 5 seconds. Then the Display returns to show what the oven is doing.
2. To stop the oven while It Is running:
l Open
the door. The oven will stop. You can restart it by closing the door and
touching START.
l Touch CANCEL. All instructions
WIII be erased. You must touch in new instructions.
3. If you touch two instructions into the same cycle, the second instructions will erase
the first.
4. When using a Cook Power other than htgh. the Display will show the Cook Power for
2 seconds of every IO during cooking.
5. When Cook Cycle 1 follows Defrost, a holding time equal to the Defrost time will
occur before Cook Cycle 1. Cook Cycle 1 will begin after this automatic
hold time.
CLEANING THE MICROWAVE OVEN
Wipe often with warm sudsy
water and a soft cloth or
sponge.
For stubborn soil. boil a cup
of water in the oven for 2 or 3
minutes. Steam will soften
the soil
Do not use abrasive
18
cleaners
Be sure to clean the areas
where the door and oven
frame touch when closed.
Rinse well.
or steel wool pads.
IMPORTANT
Before you start using your microwave
Inlormot/on
Metallic
WI// he/p
Metolllc
Glaze
you
before
damoge
oven, read this section
to your
carefully.
This
oven.
Trim
Cooking In metal contxlners
can damage
the oven. So
can containers
with hldden
metal (twist-ties, foil-lining.
staples, metallic glaze or
trim). Test djnnerwore
or cook
ware
avoId
INFORMATION
using
Paper can char or bul
and some plastics cali
melt if used when heating
foods for more than 4
minutes
To tes: u d/s,? for safe use, put It
Into the oven with a cup of
water beslde it Cook on high
Cook Power for one minute.
It the dlsh gets hot and the
water stays cool, do not
use It.
NEVER start :ZImlcrowave
?ven weep !t s empty. The
.xen can be damaged
If
~01~ exoerlment.
put a
zontalr-ler or ,water In the
-lven
NEVER COOK OR REHEAT A
WHOLE EGG. Slice hard
boiled eggs before
heating. Steam build-up
in
whole eggs may cause
them to burst and possibly
damage
the oven.
Don’t let anything touch
the top of the oven CaVlty
Continued
next page
19
Rough or harsh cleaners
DO NOT store things in the
can scratch or dull the
oven
‘” /
oven
finish. DO NOT USE THEM.
Overcooking
some foods
can cause them to scorch
or flame...especially
foods
like potatoes, popcorn,
snacks, etc. See the
MICRO MENUS’
Cookbook.
Make popcorn
only In
poppers designed
t,or use
In microwave
ovens
Follow popper direc9ons
Results are the popper
manufacturer’s
responsibility
Liquids heated in certain
containers
may overheat.
The liquid may then splash
out with a loud noise. This
does not harm the #oven,
but you should not use
such containers to heat
liqu+ds again
DO NOT OVERCOOK
POTATOES. At the end of the
recommended
cooking
time they should be
slightly firm. Wrap in foil
and set aside for 5 minutes
They will finish cooking
while standing.
USE HOT PADS. MicriJwave
energy does not heat
containers,
but the pot
food does
Follow MICRO MENUS
Cookbook
directions
carefully
If using a
different cookbook
you
may need to experiment
with times and Cook
Powers
It is normal for the inside of
the oven door to look wavy
after the oven has been running for a while.
volxA
’
e@
l
l
If your electric power line
voltage IS less than the
normal 240 volts, cooklng
times may be longer
Double-check
settlings
all
Use the oven only for
defrosting. cooking or
reheating
It is normal for the signal
lights to flicker while the
microwave
oven 1s on.
-Tmk
HOW MICR-
OVENS WORK
Microwave
ovens are safe. Microwave
energy is not hot. It causes
make its own heat, and it’s this heat that cooks the food.
Stirrer
food to
Glass Shelf
Magnetron
Oven-Cavity
Metal
Microwaves
are like TV
waves or light waves. you
can’t see them, but you can
see what they do.
A magnetron
produces
microwaves.
The microwaves
move into the oven where
they are scattered
around by
a stirrer (like a fan).
Microwaves
bounce off
metal oven walls and are
absorbed
by food.
The glass bottom of your
microwave
oven lets microwaves through. Then they
bounce off a metal floor,
back through the glass bottom and are absorbed
by the
food.
Microwaves
pass through
glass, paper and plastic
without heating them so food
absorbs the energy. Microwaves bounce off metal pans
so food does not absorb the
energy.
Microwaves
may not reach
the center of a roast. The heat
around the outside is what
cooks the roast all the way
through. This is one of the
reasons for letting some
foods (roasts, baked potatoes] stand for a while after
cooking, or for stirring some
foods during the cooking
time.
The microwaves
disturb
water molecules
in the food.
As the molecules
bounce
around bumping
into each
other, heat is made, like rubbing your hands together.
This is the heat that cooks.
Bottom
21
Using your cooktop and lower oven
THE COOK ‘N COUNTER@ RANGE
Your COOK ‘N COUNTER range black glass cover can be folded out of the way when
you are cooking, or unfolded for extra countertop
space when you’re not.
It can be used to cover the back surface units while you are using only the front ones.
The cooktop cover on the COOK ‘N COUNTER range is glass...
-Do not drop it when folding or unfolding it.
- Do not drop anything
on it.
...but it is tempered
glass.
-You can unfold it over surface units that are still hot. [Be careful. The glass can get hot
enough to burn you.] It is not a cutting board surface, or cooking surface.
-You can put hot or cold dishes on it.
For your safety and care of the glass.,.
-Covered
surface units will not heat.
-The oven will not work with half or all of the cooktop cover down, it must be up to allOW
the oven to vent through the right rear surface unit.
TO COVER THE COOKTOP
1.
Pull the center handle
toward you. (You will feel
the latch let go.)
2. Lower the cover to the
3.
Lift the next center handle
and swing it toward you,
lowering the cover to
the cooktop. DO NOT
DROP IT.
3.
Push the cover against
the back. You will feel
the latch take hold.
cooktop. (You may have
to shift your hand.) DO
NOT DROP IT.
TO UNCOVER THE COOKTOP
1.
22
Lift front half at the center.
Lower it over the back
half. DO NOT DROP IT.
2.
Lift at the center again,
swinging the cover away
from you. DO NOT DROP IT.
COOKTOP AND
LOWER OVEN CONTROLS
Set Time Knob
-
Start Time Knob
I
1
Stop Time Knob
Lock Light
Clean
I
Light
Adjustable
Lower
Oven Temperature
Control
Lower
Oven Signal
Light
Surface
Unit Signal
Lights
Surface
Lower
Lower
-
1
Oven Selector
a
Light Switch
,p
Oven
r
I
Unit Control
Cooktop
Manual
C
Light Switch
SURFACE UNIT CONTROLS
Control knobs must
be pushed In before
turning. Turn either
way until the setting
want shows in the
window. Set them anywhere from HI to OFF.
PUSH IN.
Turn to setting.
Until you get used to the settings,
Use HI lo start
foods cooking
or
to bring liquids
to a
boil Surface
unit
will not turn red
If good contact
is
made wlth bottom
of pan.
use the following
Use MED-HI to
hold a rapld boil
or to fry chlcken
or pancakes.
as a gulde.
Use MED for
gravy, puddings
and Icings, or
to cook large
amounts of
vegetables.
Use MED-LO to
keep food cookIng after startlng
it on a higher
setting.
Use LO to keep
food warm until
ready to serve.
Set the heat
higher or lower
wlthln the LO
band to keep
food at the temperature
you
want.
23
THE LOWER OVEN CONTROLS
The lower oven is controlled
by two knobs: the Oven Selector and the Oven
Temperature
Control. Both musf be on a setting for the oven to heal.
THE OVEN SELECTOR
With the Oven Selector on
BROIL, only the top element
heats. (Broiling, pg. 27).
With the Oven Selector on
BAKE, the bottom element
does most of the work. The
top element heats, but does
not turn red. [Baking, pg. 25).
With the Oven Selector
TIMED, the MEALTIMER’
can be used to turn the
on and off automatically.
(MEALTIMER Clock, pg.
on
Clock
oven
26).
*Tmk
THE OVEN TEMPERATURE CONTROL
Use the Oven Temperature
Control to set baking or roasting temperature
when the
Oven Selector is on BAKE or
TIMED.
When both the Oven Selector and Temperature
Control
are on BROIL, the broil element heats all the time. The
BAKING OR ROASTING
Lift rack at front and pull out.
24
Put the rack(s) where you
want them before turning on
the oven
Rack(s) should be placed
* so food can be centered
in
the oven. Always leave at
least 1’ 2 to 2 inches (4-5 cm]
between the sides of the pan
and the oven walls and pans.
For more information,
see the
“Cooking
Guide.”
Oven Temperature
Control
can be set on a temperature
for slower broiling (see Broiling, page 27).
Set the Oven Selector
BAKE.
Put food in the oven. Oven
rock.
walls and door
ADJUSTING
Let the oven preheat until the
Signal light goes off
Set the Oven Temperature
Control to the baking
temperature
you want.
on
will be hot
During baking, the elements
will turn on and off to help
keep the oven temperature
at the setting. The Signal Light
will turn on and off with the
elements.
The top element helps heat
during baking, but does not
turn red.
When baking is done,
both knobs to OFF.
turn
THE OVEN TEMPERATURE CONTROL
Does your new oven seem to be hotter or colder than your old oven at the
same settings? The temperature
setting in your old oven may have changed
gradually
over the years. The accurate
setting of your new oven can seem different. If you think the oven temperature
needs adjusting,
follow these steps:
Locking
1.
3.
Pull the Oven Temperature Control straight off.
2.
To lower the temperature,
move black part of knob
closer to LO. Each notch
equals about 10 F (5 C].
4.
Tighten
the locking
screw.
Replace
Screw
Loosen the locking
screw; NOTICE position
notches.
of
To raise the temperature,
move black part of knob
closer to HI. Each notch
equals about IO’F (5 C).
the knob.
25
USING THE AUTOMATIC
MEALTIMER
CLOCK
The Automatic
MEALTIMER Clock is designed
to turn the lower
at times you set...even when you are not around.
To start and stop baklng
automutlcally:
1.
Put the lower oven rack(s)
where you want them
and place the food in the
oven.
2.
Turn
until
Time
time
4.
Push in and turn the Stop
Time Knob clockwise
to the time you want the
oven to shut off.
5.
Set the Oven Selector
TIMED.
7.
After baking is done,
both knobs to OFF.
To stop baking
oven on and off
turn
8.
the Set Time Knob
the Start and Stop
Dials show the right
of day.
on
3.
Push in and turn the Start
Time Knob clockwise
to the time you want baking to start
6.
Set the Oven Temperature
Control on the baking
temperature
you want.
To stop the oven before
the preset time, turn both
knobs to OFF.
automatically:
1.
Put the oven rack(s) where you want
them and place the food in the oven.
2. Turn the Set Time Knob until the Start and Stop
Time Dials show the right time of day.
3. Push in and turn the Stop Time Knob clockwise to the time you want the oven to shut off
4.
5.
6.
Set the Oven Selector on TIMED.
Set the Oven Temperature
Control on the
baking temperature
you want.
After baking is done, turn both knobs to OFF.
To stop the oven before the preset time,
turn both knobs to OFF.
SPECIAL CAUTION:
Use foods that will not go bad or spoil
while waiting
for cooking
to start. Avoid
using dishes with milk or eggs, cream
soups, cooked
meats or fish, or any item
with baking powder or yeast.
Smoked or frozen meats may be used;
so can vegetables,
fruits and casseroletype foods. Vegetables
can be cooked
in
26
a covered
baking dish with about a halfcup (118 ml) of water for 1 to 1% hours.
Any food that has to wait for cooking
to
start should be very cold or frozen before
it is put in the oven. MOST UNFROZEN
FOODS SHOULD NEVER STAND MORE THAN
TWO HOURS BEFORE COOKING STARTS.
Tmk
1.
Place the rack where
want it for broiling.
you
2.
Put the broiler pan and
food on the rack.
3.
Set the Oven Selector
BROIL.
4.
Set the Oven Temperature
Control on BROIL (or on a
lower temperature
for
slower broiling).
5.
During broiling, the oven
door must be partly
open. A built-in stop will
hold it there.
6.
When broiling is done,
turn both knobs to OFF.
For slower brolllng, set the Oven
instead of BROIL. The broil element
The lower the temperature
setting,
The Oven Selector must be on BROIL and
Suggested
Food
Liver
Frankfurters
Temperature
Control on a temperature
will then turn on and off instead of staying on.
the slower the broiling.
the door partly open for all broiling temperatures.
oven-rack
Beef Steaks
Rare
>
,
Medium
Well done
Beef Steaks
b Rare
Medium
Well Done
Hamburgers
Lamb Chops
Medium
Ham slice, precooked
or tendered
Canadian
Bacon
Pork Rib or Loin Chop
on
positions
and broiling
times
Approximate
Temperature
1st side
Mlnutesset to BROIL
2nd side
Description
inches (cm) from top
of food to Broil Element
l”(2.5 cm]
1 ” (2.5 cm]
1” (2.5 cm]
3" (B cm)
3" (8 cm]
3" (8 cm)
7-9
9-11
II-13
3-5
4-7
5-7
1 l 2” (4 cm]
1 I 2” (4 cm]
1 I 2” (4 cm)
12” (1 cm)
4"-5" (IO-13 cm]
4"-5"(10-13
cm]
4"-5"(10-13
cm]
3" (8 cm)
13-15
17-19
19-21
6-B
6-B
B-l 0
14-16
4-5
1 ” (2.5 cm)
1Y-1”
(l-2.5 cm)
l 2” (1 cm]
3 4“-1 ”
(2-2.5 cm)
2-3 lb.
(l-1.5 kg)
cut in half
whole
fillets
12”-3 4’
(1-2 cm)
3" (8 cm)
6-8
4-5
3" (8 cm]
3" (8 cm]
6-8
6
4-5
4
4"-5"(10-13
cm]
15
10
7"-9"(18-23
3"(8 cml
3" (8 cmj
cm)
25-30
11-16
7-8
10-12
9-14
5-7
3
6-7
3
4-5
J-(8 cm)
4"-5"(10-13
cm]
27
The fights
THE MKROWWE
OVEN LIGHT
The light in the microwave
oven comes on when the oven door is open, when
you set the cooking time, when the oven is on, and when the temperature
probe
is plugged
into the socket.
THE LOWER UVEN LIGHT
The lower oven light will come on when you open the oven door or when you
push the Oven Light switch at the bottom of the control panel. Close the oven
door or push the switch again to shut it off.
To replace
1.
4.
28
the light bulb:
Turn off the electric
at the main power
power
supply.
Replace the bulb with a
40-watt appliance
bulb
available
from most grocery, variety and
hardware
stores.
2.
5.
Remove the bulb cover
by pulling out on the wire
holder and moving it to the
side.
Replace the bulb cover
and snap the wire holder
in place. The bulb must
have this cover when the
oven is being used.
3.
6.
Remove the light bulb from
its socket.
Turn the power back on
at the main power supply.
THE COOKTOP LIGHT
To turn on the fluorescent
light under the upper oven, push the button underthe
control panel marked TOP LITE. Hold it in for a second before letting it go, Push rt
agarn to shut off the lrght
To replace
1.
the light tube:
Turn oft the electrrc power
at morn power supply
2.
Remove the 3 screws and
front metal trim that supports the light cover. The
glass is heavy. Hold it
securely.
3.
With both hands, lower
the front of the cover a
little and pull it straight
toward vou
\
““\ \
\
%
-_
‘.
\
4.
Turn top of fluorescent
tube toward you until it
comes out of the recep
tacles at both ends
5.
Replace
with a 20-watt
cool-white
fluorescent
tube
6.
With both hands, carefully fit the glass cover
into the metal support
trim at the back
7.
Slrde the cover back far
enough for the front to
fit behind the spring tabs
at the ends
8.
Replace the front support
tram and the 3 screws.
9.
Turn electric power back
on at main power supply.
The oven vents
Hot air and moisture escape
from the lower oven through a
vent under the right rear surface
unit. You can cook on the unit.
or keep food warm on it whrle
the oven is on. Plastic utensils
left over the vent can melt.
Do not block the vent. Poor
baking can result
29
Cleaning and caring for your range
SURFACE UNITS AND
REFLECTOR BOWLS
CONTROL PANEL AND KNOBS
REMOVING
1.
First make sure lower oven and surface
unit control knobs are set on OFF. All knobs
pull straight off. Surface unit knobs have
a collar and spring.
1.
2.
2.
Use warm soapy water and a soft cloth to
wipe the panel. Rinse and wipe dry.
3.
Wash knobs and surface
unit collars
warm soapy water. Rinse well and dry.
in
Be sure surface
units are OFF and COOL.
Lift the edge of the unit opposite
the receptacle
just enough to clearthe
reflector
bowl.
3.
Pull the surface
receptacle.
unit straight
4.
Lift dut the reflector
away
from the
ollar
Put small
end
of spring
closest to
control panel.
4.
30
Push knobs straight back on. Make sure
they point to OFF. Make sure the collar and
spring on surface
unit knobs are put together as shown.
bowl and trim ring.
1.
Be sure surface
unit controls
\
2.
Opening
While pushing the surface unit terminal into
the receptacle,
lift a little on the edge of
the unit nearest the receptacle.
5.
When the terminal
is pushed into the receptacle
as far as it will go, the surface unit
will fit into the trim ring.
are OFF.
Receptacle
/
Line up opening
in the reflector bowl and
notch in trim ring with the surface unit
receptacle.
Terminal
3.
4.
Reflector bowls reflect heat back to the
utensils on the surface units. They also help
catch spills. When they are kept clean, they
reflect heat better and look new longer.
If a trim ring gets discolored,
some of the
utensils used may not be flat enough.
Or
some may be too large for the surface unit.
In either case, some of the heat that is meant
to go into or around a utensil goes down
and heats the trim ring. This extra heat can
discolor it.
Hold the surface unit as level as possible
with the terminal
lust started
into the
receptacle.
31
STORAGE DRAWER
The storage drawer is for storing pots and pans. Never store anything that can burn
or melt in the drawer. The drawer is warm when baking in the lower oven. Use care
when handling
the drawer.
REMOVING
THE STORAGE DRAWER
1.
straight
pull drawer
2.
out to
the first stop.
Lift front and pull out to
the second stop.
3.
Lift back slightly and
slide drawer all the way
out.
3.
Lift drawer front to clear
second stop and slide
drawer closed.
REPLACING THE STORAGE DRAWER
Drawer
1.
Slide Rail
Fit ends of Drawer Slide
Rails into drawer guides
both sides of Opening.
2.
on
Litt drawer front and push
in until metal stops (on
drawer slide rails] clear
white stops on drawer
guides.
THE OPTIONAL ROTISSERIE
If you would like a rotisserie for your lower oven,
you can order a kit from your dealer.
The kit includes easy installation
instructions
32
IHELOWERUVENSELF-CLEANINGCYCLE
The lower oven self-cleaning
cycle uses very hlgh heai to burn away
soil. Before you start, make sure you understand
exactly how to use
the cycle safely.
BEFORE YOU START
1.
A\\‘\
I
s+-==czTzI
Ill
Clean areas that may not be cleaned
during the cycle. Use hot water and detergent or a soapy steel-wool pad on...
Clean Frame
l the frame
around the oven
l the inside
of the door, especially
the part
outside the oven seal.
DO NOT try to clean the tlberglass
seal. DO
NOT move lt or bend It.
2.
3.
4.
5.
Remove any pots or pans you may have
stored in the oven. They can’t stand the
high heat.
Wipe out any loose soil or grease. This will
help reduce smoke during the cleaning
Lrlz.sure
the motor socket cover is
closed if your oven has a rotisserie.
Put oven racks on the top two guides. Put
two reflector bowls upslde down on
each. They should not touch each other or
the oven walls.
Clean Door
SPECIAL CAUTIONS
DO NOT block the vent
during the cleaning
cycle.
Air must move freely for
best results
DO NOT use commercial
oven cleaners in your oven.
Damage to the porcelain
finish may occur.
DO NOT touch the oven
during the cleaning
cycle
...it can burn you.
DO NOT force the Lock
Lever The lever is designed
to stay locked until the
oven is cool enough to
safely open.
DO NOT use foil or other
liners in the oven. During
the cleaning
cycle, foil
can burn or melt.
33
1.
Set the Oven Selector
CLEAN.
4.
7.
to
2.
Set the Oven Temperature Control to CLEAN.
Push in the Stop Time
Knob and turn the hand
clockwise
about two
or three hours. [Two hours
for light soil; three or
more for heavier soil.)
5.
Move the Lock Lever o/l
the way lo the right. The
Clean Light will come on
only when the lever is
all the way over.
6.
When the Lock Light
goes off, turn the Oven
Selector and Oven Temperature Control to OFF
8.
Move the Lock Lever
back to the left. Do not
force it. Wait until it will
move easily. This turns off
the Clean Light.
9.
DO NOT TOUCH THE RANGE DURING THE CLEANING
34
3.
Turn
until
Time
time
the Set Time Knob
the Start and Stop
Dials show the right
of dav.
The Lock Light
when the oven
above normal
temperatures.
Lever can’t be
when the Lock
comes on
gets
baking
The Lock
moved
Light is on
After the oven is cool,
wipe off any residue
or ash with a damp
cloth. If needed, touch
up spots with cleanser or
soapy steel-wool pad.
CYCLE. IT CAN BURN YOU.
SPECIAL TIPS
1.
Keep the kitchen well
ventilated
during the
cleaning
cycle to help
get rid of normal heat
odors and smoke.
4.
Oven rocks lose their shine, discolor
and become horder to slide on their
guides when they ore left in the oven
during the cleaning
cycle. To make
them slide easier, polish the edges of
the rocks and rock guides with a soapy
steel-wool pod, rinse well, and wipe
on a thin coot of salad oil.
2.
3.
Clean the oven before
it gets heavily soiled.
Cleaning
a very soiled
oven to kes longer and
results in more smoke
than usual.
5.
If the cleaning
Cycle
doesn’t get the oven as
clean as you
expected,
the cycle
may not hove been set
long enough. Set the
cleaning
time longer
for heavier soil.
To stop the cleaning
cycle after It has
started :
l Turn the Stop Trme Knob clockwise
until the hand points to the right time
of day.
l Turn the Oven
Selector and Oven
Temperature
Control to OFF.
l When the Lock Light turns off, move
the
Lock Lever bock to the left. DO NOT
FORCE IT. Wait until it moves easily.
HOW IT WORKS
During the self-cleaning
cycle, the oven gets much hotter than it does
for baking or broiling...approximately
875” F (468” C). This heat breaks
up grease and soil, and burns it off.
The graph shows approximate
temperatures
and times during a selfcleaning
cycle set for two hours.
SELF-CLEANING
CYCLE -TWO
(Approximate
200
Temperatures
HOUR SETTING
and Times)
427
C
204
C
F
Sl'ART
'A hr.
1 hr
1% hrs.
2 hrs.
Notice that the heating stops when the two-hour setting
while longer for the oven to cool down enough to unlock.
2% hrs
is up, but that it takes a
35
CLEANING
PART
Outside
range
of
WHAT TO USE
Soft cloth, worm soapy
water
Nylon or plastic
scouring pod for stubborn
spots
Surface
units
No cleaning
Porcelainenamel
reflector bowls
Automatic dishwasher or
worm, soapy water
Self-Cleaning
Oven cycle
Chrome
rings
Automatic dishwasher
or
warm, soapy water or plastic
scrubbina
dad
Worm, soapy water$r soapy
steel wool pods
trim
Porcelainenamel broiler
Dan and arid
Control knobs
and chrome
rims
Control
panel
Oven
rocks
Lower oven
door gloss and
outside only
of microwave
oven
Self-Cleaning
Oven
36
required
Worm, sudsy water and
bristle brush
Worm, soapy water
Commercial
alass cleaner
Self-Cleaning
Oven cycle
Warm, soQPy water
or
soQPV
steel wool pods
Worm, soapy water or
plastic scrubbing
pod
Commercial
gloss cleaner
For areas outside SelfCleaning area use worm,
soapy water or soapy steel
wool pods
l
CHART
HOW TO CLEAN
Wipe off regularly
when range
is cool.
Do not allow food containing
acids (such as
vinegar, tomato, lemon juice or milk] to remain
on surface. Acids will remove the glossy finish.
l Do not use abrasive
or harsh cleansers.
l Spotters
or spills will burn off.
l Do not immerse
in water.
l Wipe
out excess spills. Wash with other cooking
utensils for routine cleaning.
l
Place upside down on oven rocks in oven during
Self-Cleanina
Oven cvcle.
l Wash with other
cooking utensils.
0 Do not place in Self-Cleaning
Oven
l
l
l
l
l
l
l
l
l
l
l
Wash with other cooking utensils.
Do not place in Self-Cleaning
Oven
Wash, rinse and dry well.
Do not soak.
Wash, rinse and dry with soft cloth.
Follow directions with cleaner.
Leave in oven during Self-Cleaning
cycle.
Wash. rinse and dry. Use soapy steel wool pads
for stubborn areas.
Make certain oven is cool. Wash, rinse and dry
well with soft cloth.
Follow directions provided
with cleaner
@Clean before using Self-Cleaning
cycle to
prevent burn-on ofsoil.
l
Follow directions given on page 33-35. “Using the
Self-Cleaning
Cycle.”
l Do not use commercial
oven cleaners.
Do not use foil to line the bottom of vow Self-Cleanina
Oven.
Ifyou need service or assistance,
we suggest you follow these four steps:
1 Before
l
calling for assistance.. .
Performance
problems often result from
little things you con find and fix yourself without tools of any kind.
It nothlng operates:
Is the range correctly
plugged
Into a live
circuit with the proper voltage?
(See Installatlon Instructlons.]
l
Hove you checked
the main fuse or circuit
breaker box?
If the mlcrowave
oven will not run:
l
Is the timer set?
l
Is the door firmly closed and latched?
l
Did you touch START?
l
Did you follow the directions
exactly?
If mlcrowave
cooklng times seem too long:
l
Is the electric supply to your home low or
lower than normal? Your electric company
can tell you if the line voltage is low.
l
Is the Cook Power at the recommended
setting?
l Are you allowing
for more time when cooking more food at one time?
If the display shows a time counting down
but the oven Is not cooking...
l
Is the Hold indicator
light on3
l
Is the Minute Timer and no Cook Cycle indlcator light on?
l
Is the oven door closed completely?
If the mlcrowave
oven turns off too soon or
not soon enough when using the probe:
l
Is at least 13 of the probe in the food?
l
Is the probe tip in the center of the food?
l
Is the probe touching
bone or fat?
l
Hove you allowed
roosts to stand for Q few
minutes after cooking?
l
Is the probe plugged
tightly into its socket?
l
Is the Cook Power set where it should be?
l
Is the Meal Sensor set at the end temperature you wont?
If the lower oven will not operate:
l
Is the Oven Selector turned to CI setting
(BAKE or BROIL, but not TIMED)?
l
Is the Oven Temperature
Control turned to a
temperature
setting?
l
Is the COOK ‘N COUNTER up?
If surface unlts will not operate:
l
Hove you checked
main fuse or circuit
breaker box?
l Are surface
units plugged
in all the way?
l
Do the control knobs turn?
l
Is the COOK ‘N COUNTER up7
If surface unit knob or knobs will not turn:
l
Did you push in before trying to turn?
l
Is the spring replaced
as shown on
page 30?
l
If the Self-Cleaning
cycle will not operate:
Are the Oven Selector and the Oven Temperature Control set to “CLEAN?”
l Does the Start rime
Dial show the correct
time of day?
l
Is the Stop Time Dial set ahead to the time
you wont the cleaning
cycle to stop?
l
Is the Lock Lever all the way to the right?
[The Clean Light will come on.]
l
Is the COOK ‘N COUNTER up?
If cooking
results aren’t what you expect:
l
Is the range level?
l Are you using
pans recommended
in the
Cooking Guide?
l
If baking, hove you allowed
1% to 2 inches
(4-5 cm) on all sides of the pans for air
circulation?
l
Does the oven temperature
seem too low or
too high? See “Adjusting the oven temperature control.”
l
Hove you preheated
the oven as the recipe
calls for?
l Are the pans
the size called for in the
recipe?
l Are you following
a tested recipe from a
reliable source?
l
Do the cooking
utensils hove smooth, flat
bottoms?
l
Do the cooking
utensils fit the surface unit
being used?
See the Cooking Guide for more information
on cooking
problems
and how to solve them.
l
2
l
If you need assistance”‘. . .
Call the Whirlpool
COOL-LINE p service assistance telephone
number. Dial free from:
Continental
U.S. . . . . . . . . (800) 253-1301
Michigan
. . . . . . . . . . . . . . . . (800) 632-2243
Alaska 81 Hawaii . . . . . . . . (800) 253-l 121
and talk with one of our trained Consultants.
The Consultant
con instruct you in how to obtain satisfactory
operation
from your applionce or, if service is necessary,
recommend
a
qualified
service company
in your area.
37
3
l
4
If you need service ’ . . .
Whrrlpool
has a
nationwide
network of franchised
TECH-CARE * Service
Companres.
TECH-CARE service
technicians
are
trained to fulfill the
product
warranty
and provide
afterwarranty
servrce.
anywhere
in the United
States. To locate TECH-CARE service
in Your
area, call our COOL-LINE service
assistance
telephone
number (see Step 2) or look in Your
telephone
directory
Yellow Pages under,
PvWRL"OOLAPPLlAkCF:~
FRANCHlSEIJTFl'r
AbE ‘It-J
OR ,: 'h .'11:l, AL‘L, IANCE'
i NA,~11,,
H _I -' ii,
[
\k,ii
,, i c 1,1,,'\
\,i, i
ri; SEnS,c't ":I
> liillid
13 hlarm ‘
I
\i
~.‘.,[,
11 ,m
OR
WASHING
MACHINES
8 IRONERS-SERVICING
38
DRYERS
ii!
II (AR:
‘i::,
,i i , i)\,i',
.,_l,
,I/,
..
If you must call orwrite, please provide: model
number, serial number, date of purchase,
and
a complete
description
of the problem.
This
information
is needed
in order to better respond to Your request for assistance.
/
Iii.
If you have a problem”.
Call our COOL-LINE service assistance
telephone number (see Step 2) and talk with one
of our Consultants, or if you prefer, write to:
Mr. Guy Turner, Vice President
Whirlpool Corporation
Administrative
Center
2000 US-33 North
Benton Harbor, Ml 49022
ELECTRICAL
APPLIANCESMAJOR-REPAIRING
8 PARTS
APPLIANCES-HOUSEHOLDMAJOR-SERVICE
8 REPAIR
l
THIS PAGE
INTENTIONALLY
LEFT
BLANK
FSP is a registered
trademark
of Whirlpool
Corporation
for
quality parts. Look tor this
FSP
symbol ot quality whenever
,~ you need a replacement
part
for your Whirlpool
appliance.
FSP replacement
parts
will fit righl and work right, because
they are
made to the same exacting
specifications
used to build every new Whirlpool
appliance.
0
Thpool
Home
Part No. 311427 Rev. B
Appliances
Eenton Harbor, Michtgan. Automatic Washers, Clothes Dryers,
Freezera. Refrigerator-Freezers,
Ice Msksrs, Dt8hwa#h%fS,
Built-in 0VE%8 and Surlaca Units, Rang%r, Mlcrowava Ovens,
Compactors, Room Air Conditioners, Dehumidllierr.
Cenlral
tieating and Air Condittoning Systems.
Printed
in U.S.A.


