1
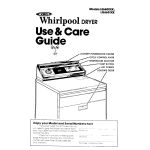
Models
WhirlpOOl
LE6900XK
LG6901XK
DRYER
Use & Care
Guide
I
Copy
with
ready:
Your Model
When
you
a question,
need
have
LAUNDRY
and Serial Numbers
CENTFR
INFORMATION
Here
service,
or call
this information
I. Complete
Model
and Serial Numbers
(from the plate just behind
the door).
2. Purchase
date from sales slip (or date
installed).
Copy
this information
in these
spaces.
Keep
this book
in the Laundry
Information
Center
with your Dryer Guide,
sales slip and warranty.
Purchase
Serwce
Cmpmv
lnsto~lation
and
Phone
Dale
NurmSer
Before using
your Dryer
Please recta +Vs b,,okiet
tc be
bbre i our drver 15 ~rsto~lea clnd used
properly
It $4111
help ,c~i get the best
,esults or3 0ngest
I fe your dryer w3s
Jes gned Tc give
FOR YOUR SAFETY
If you smell gas:
1. Open windows
2. Don’t touch
electrical
switches
3. Extinguish any open
flame
4. Immediately
call
your gas supplier.
You are personally
responsible for making sure that your dryer...
Is walled
by a qualifted
installer
Is ~~Malled ir a7 area protected
from
*he tie&her
l Is properly
instS=lllea 0W leveled
or a
Nell ventilated
roar‘
or o floor thc~
car suppor’
the he g++
0 Is ocotec
ir G- 3reo
hhere the te-,
peroture
IS 3bcLe 45 F : - 2 Cj
l Is connected
tr the rIghI+ rcind of ou’iet
etectr c supply uq3 groui3ing
l is properly
car ‘rlected
tc fuel and
exhaust sysems
0 Is used only fol Iobs r- ormolly
expected
of horrle clothes dryers
l Is properly
mo~nta~rned
l is not rur where
fhee 7031~ be explo
we fumes
l Is :#ct used
bv ztMareT~ ;r anyone
unable to operate
It pY)perly
Remove
t?e (-Ynsumer
buk
%Ji3e label before J5 ‘#g pour drver +
LVIN t3e eosler to e-n3VtT
YZiipe out ‘he ~r,,r~ ,VIT~ 12 33-r r
ci~3n ‘0 rem-wv
‘11“
. , LS‘
l
l
Please
read this manual
Follow the InstructIons
to neip
y#ou get the best drying
results
Save the manual
for future use
SPECIAL INSTRUCTIONS: See the
Dryer Guide for drying tips, intormation about permanent
press and
knits, instructions
for drying special
items and for things not to be dried in
your dryer.
,
\
FOR YOUR SAFmY
Do not store or use
gasoline or other
flammable
vapors and
liquids in the vicinity of
this or any other
appliance.
,
^i
\
I
Contents
Before
Using Your Dryer
Loading
Your Dryer
Understanding
Your Dryer
Lint Screen
Using Your Dryer
Setting
Drying
Times
Selecting
Cycles
and
Temperature
Settings
Using the Automatic
Settings
FLUFF AIR
TUMBLE PRESS Control
If You Need Service
or Help
1 Sefore C311i’-Ng for Servi’ce
T ‘f c’ou ‘veeu Service
? If v’ou Hove o ProbIer
3
2
5
?
,.
A
7
8
3
loading
Dryer
your
,+--
F=r best drying resbI+s and energy
sor’ dryer loads carefully
Separate
loads
accordng
to
+he type of fabric and weight
For
example
l Dry heave
fabrics
(denims. towels,
cottons)
separately
from light fabrics
(permanent
press, syrthetlcs]
l Separate
lint givers (towels
sweatshirts, etc ) from lint takers (synthetics,
blends, permanent
press]
l Keep
dark colors and lIgh+ colors
separate
l Keep
colorfast
items awav from noncolorfast
fabrics
Allow
room for Items to tumble
freely The load WIII dry faster with fewer
wrinkles
When drying permanent
press,
dry smaller-than-normal
loads for the
best wrinkle removal
Use a mesh bag to hold small
items such as baby socks
Read the Dryer Guide
for more
hints on sorilng and loading
lint Screen
The lint screen IS under the Ild on
top of The dryer
C/ecr; the !lnt screen before etch
iood A screen that’s blocked
by lint
can cause longer dryng times
savings,
To remove the screen, open the
IId and pull the screen straight out Roll
the lint off the screen wtth your fingers.
DO NOT rinse the screen
or wash
iv. Wet lint IS hard to remove.
When replacing
the screen, push
It firmly Into place
Close the IId.
Using Your Dryer
1.
Put the sorted load in the dryer
and close the door tightly.
2.
Turn the Cycle Control
the cycle you want.
Knob to
Use the Automatic
Cycles for most
loads Star? with the pointer at the
middle of an Automatic
Cycle
See
page 6 for more InformatIon
l
NOTE: In the Automatic
Cycles, the
Cycle Con!rol Knob does not keep
moving
It starts and stops, depending on the heat ond the dryness of
the load
Use TIMED DRYING for drying a certain
number of minutes, or for damp drying,
fluffing, or tumbling
Items without ar
l
3.
Set TEMPERATURE SELECTOR.
Turn the TEMPERATURE SELECTOR to
the drying temperature
needed
for the
load See page 5 for suggested
settings
l
4.
Push the Start Button.
Make sure the door IS closed and the
Cycle Control IS set If the door IS
opened
during the cycle, the dryer WIII
stop To restart
the dryer, close the
door and push the Start Button
l
5.
To stop the dryer:
Open the door
l Or, turn the Cycle
Control Knob to one
of the OFF positIons
l To change
the setting
while the
dryer is running,
turn the Cycle Control
Knob, either way. so It points to the setting you want
l
IMPORTANT
To help reduce wrinkling. take the load from the dryer OS
soon as tumbling
stops. This IS very
Important
for permanent
press, knits
and other svnthetlc
fabrics
Setting
Times
Drying
Modern
dryers are designed
with
drying temperatures
needed
to safely
handle
modern
fabrics
Cool-down
times have been added
to heat settlngs You might notlce slightly longer
drying times
The time it takes to dry a load
depends
on
l
The kind of fabric its weight
and the
sue of the iood A large load of leans
WI/I take a lot longer to dry than a small
load of light synthetics
l
The amount
of moisture in the iood
Towels hold a lot of moisture,
synthetics
don’t. Synthetics
dry faster.
l
Temperature
of the rinse woter Cold
rinses help save on energy and wrinkles,
but a cold load WIII take sltghtly longer
to dry than a warm one
l
Amount of //nt on the screen
A full lint
screen slows the air flow and can make
drying time longer.
l
Room temperature
The dryer heats
room air If the room air temperature
IS not above 45 F (7 2 C). the automatic
cycle WIII not advance
the timer and
shut off the dryer. Use Timed Drying as a
temporary
way of drying a load Dr\/ing
times WI/I be longer due to the cold air.
Removal
of wrinkles may be poor
l
Proper insfaiiot~on
ond exhaust sys
terns For the fastest possible
drying
time, InstallIng and exhausting
your
dryer properly
is important
See installation instructions
Be careful
not to overdry. Overdrying can cause
shrinkage,
damage
to some fabrics
and static
cling.
T
\
I
4
/
3
2
SELECTING CYCLES AND TEMPERATURE SETTINGS
Choose
the correc’
settings
occordlng
tcthe
chart
be’oti
DRYING CYCLE
TYPE OF LOAD
COTTONS
-tA:.‘fl
:1[3
Beaspre,ads
MAt’J;:!
G--~lt
d’apers
PERMANENT
$ 1 L L)
""?b'"[
mc’tress
+cwems
paas
S-’
Sh’rts
h;Jrk clcthes
AUTOMATIC
REGULAR
UC!’ +s
dresses
sheets
AUTOMATIC
REGULAR
PRESS
2.7
',t
Irk
ur’l*orms
aresses
KNITS
e:a,-~~~~t c;,w’~ i (3TT;jN’
:PYOhS
slacks
pole shirts e’c
Gs+l,?/t St+etc
AND
etc
S /NTHE‘
B,-ENDS
DELICATELY
CONSTRUCTED
:2 or 3 panels]
_‘ :14ii;S
: wer’e
gLENi<
l(polyester
blouses,
FABRICS
~ Sheer
slacki
+tc
T-sh rts
at-v
;
dresses
Cu-toIns
FOAM RUBBER ARTICLES
Follows bras etc
To damp
dry clothes for lronlrlg
set control
In the TIMED
MIXED LOADS
If you dry a mixes 1x1~3 of various
fabric
When dyer stops remove
TEMPERATURE
SELECTOR
PERM’T
HEAVY
PERM’T
HEAVY
PRESS
HIGH
PRESS
HIGH
AUTOMATIC
PERMANENT
PRESS,
AUTOMATIC
PERMANENT
PRESS
PERM’T PRESS
HEAVY HIGH
AU’OMATIC
PERMANENT
PRES:
AUTOFY1ATlC
PERMANENT
PRESS
PERM T PRESS ~
HEAVY HIGH
AUTOMATIC
PERMANENT
PRESS
KNITS GENTLE
LOW
TIMED
DRYING
PERM T PRESS ~
HEAVY HIGH
KNITS GENTLE ~
LOW
DRYING
FLUFF~AIR
Cycle for15 to 25 minutes
weights
of fabrics.
select the cycle for the lighter
the dry articles
and reset the control
weight
~
Using the
Automatic
Settings
With AUTOMATIC
REGULAR and
AUTOMATIC
PERMANENT PRESS, you
select how dry you want the load to be
When the load is as dry as the setting
you hove selected
the cycle control Will
advance
toward
ending the cycle
Use the AUTOMATIC
REGULAR
Cycle to dry most famrly loads
During
tne last five mrnutes of the drying cycle,
the rood IS tumbled
without heat Thus
helps make the load easrer to handle
Use the AUTOMATIC
PERMANENT
PRESS Cycle to dry permanent
press.
knits and other synthetrc fabrics
The last
10 mrnutes of the dryrng cycle are without heat This cool-down
time helps
keep wrrnkles from setting In
For the frrst few loads, set the
Cycle Control Knob to point in the middle between
VERY DRY and LESS DRY
FLUFF AIR
This temperature
setting IS Useful
for fluffing bedding,
pillows and clothing, or dusting drapes
It is also best
to use when damp-dryng
heatsensitive Items
FLUFF AIR should be used for
such Items as plastic shower curtains
or tablecloths.
rubber-backed
rugs,
some pillows, stuffed toys, etc
l
Turn the TEMPERATURE SELECTOR to
FLUFF AIR
l
Turn the Cycle Control Knob to the
number of mrnutes you want In the
PERMANENT PRESS Cycle.
l
Push the Start Button
TUMBLE PRESS ’
Control
This setting IS useful for removing
wrinkles from packing
In suitcases
or
closets TUMBLE PRESS WIII help put them
bock Into their pre-set shape
l
Set Cycle Control Knob to TUMBLE
When the dryer stops, feel the
Items in the load If they are about how
you like them, keep using this setttng
If the Items are drrer than you like,
use a setting nearer LESS DRY or COOL
DOWN the next time you dry a load like
that
If the Items are not as dry OS you
want, use a setting nearer VERY DRY the
next time you dry o load like that
After dryrng a few loads. you will
find a favorite
setting to use
Set TEMPERATURE SELECTOR to
PERM’T PRESS HEAVY HIGH
l
Push the Start Button
For best results. TUMBLE PRESS
only a few Items at a time, put them on
hangers or fold them as soon OS the
dryer stops
l
If You Need
Service or Help,
We Suggest You
Follow These
Three Steps:
1. Before
calling
for service
-;iTk%
,- ,53-:
,
L*
IS the dryer door closed
*ightly’
Your
dwer has a switc’
by t?e door that
shuts off tpe dryer f ‘he door 1s
opened
. 3ld YOU pusq
;‘2$
ibe Start Bution“
l
.L
Cqeck
circuit breakers
or‘fuses in t-e
fuse box
DRYER RUNS BUT DOES XQ- HLAE,
0 Is the Cycle Control
Knot2 set corm
rectly’
[The last 5 minutes are coci~
down lime In AJTOMATIC_
REGULAR
the lost 10 minutes In AUTOMATIC
PERMANENT
PRESS are without
?eat
l Is It a gas
dryer’
See I‘ ihe gas 1s
turned or If not turr t% Cycle Car
trol Knob io OFF Tcrr 3r’ the gas
and wait five rnlq,ltes for the automatIc swltci- to reset ‘hen try siartirg
it again
l Is ‘i or
elecirlc
layer’
Iheck
t7e
circblt breakers
or ‘dses r: the fuse
box An electric
dryer h”ll “love +wi
fuses If one IS bl=wr
-1e dryer l?av
run but not heat
DRYING TIME IS LONG-E? -IHAN LSLAL
l Check
ihe IInt screerl
Remove
In+
Keep the screerl clean for bes’
drying resu!ts or:d i!mes
l Modern
dryers are designed
to d&
at ihe cooler temperatures
needed
by modern
fabrics
They may neec
more time than vou ore \,sed iz
l
?o,:‘-, +errpera*.,rt- : I’ -:
l
If you need
service
:
...
Problems
ore sometImes
causea
by I ttle things you C:CI~ correct
tiithok,+
tools Check this I st betore
you cali
for service
DRYER DOES NOT X1>
0 Is electric
power
cord plugged
sr 1
2.
If your WHIRLPOOLappliance
ever
needs service anywhere
In the United
States, help ISjust a phone call cwoy
to your nearest Whirlpool
franchised
TECH-CARE
service representative
Whirlpool
maintains
a nailonwlde
retwork
of franchised
TECH-CARE service companies
to fulfill your warranty
and provide
after-warranty
service and
maintenance
to keep your WHIRLPOOL
appliance
In peak condition
You’ll find your nearest TECH-CARE
service company
llsted in your local
telephone
book Yellow Pages under
APPLIANCES ~ HOUSEHOLD - MAJOR SERVICE & REPAIR Should
you not
find a listing,
dial the Whirlpool
COOL-LINE”
service
assistance
tollfree telephone
number:
Continental
U.S.
Dial (800) 253-1301
In Michigan
Dial (800) 632-2243
Alaska
and
Hawaii
Dial (800) 253-l 121
If you move...To
make sure that your
appliance
IS correctly
Installed and to
Insure iis conflnued
satisfactory
operation,
please telephone
your
r,eoresi TECH-CARE”
service company
for ~nstallai~on or to get the name of a
quaIlfled
installer
(Installation
cost ~111.
of course, be paid by you )
Helpful hinfs...You cm help your
TECH-CARE service representative
give
vou faster service If you Include the
model and serial number of your
appliance
when requesting
service
41~0. retain your sales slip and warranty
to verify your warrontv
status
FSP IS o reglslered
trademark
of Whirlpool
Corporation
for
quallty
parts
Look for this
FSP
symbol
of quollty
whenever
you need
o replacement
part
R for your
Whirlpool
appliance
FSP replacement
parts
WIII 111 right
and work
right.
because
they
are
mode
to the some
exocttng
speclflcatlons
used
to build
every
new WhIrlpool
appliance
0
Benlon Harbor Mlchlgan
Aulomallc Washers Clolhes Dryers
Freezers
Relrlgeralor
Freezers
Ice Makers
DIshwashers
Bwll~~n Ovens and Surlace Unlls Ranges Microwave Ovens
Compactors. Room hfr Condllloners
Dehumldltlers
Central
Healmg and AI! Condlllonlng Systems
Ouahty Our way of hfe.
Part No
691265
PrInted IV U S A