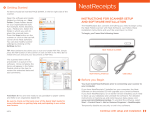
1
Get Organized.
PROFESSIONAL
USER
GUIDE
& Installation Guide
NeatReceipts Professional User Guide
NeatReceipts Professional User Guide
Quick! How Do I...
Install NeatReceipts? . . . . . . . . . . . . . . . . . . . . . . . . . . . . . . .10
Scan my first receipt?
. . . . . . . . . . . . . . . . . . . . . . . . . . . . . .14
Improve scanned receipt images? . . . . . . . . . . . . . . . . . . . . . .21
Delete a receipt image? . . . . . . . . . . . . . . . . . . . . . . . . . . . . .26
Save a receipt image as a graphic file? . . . . . . . . . . . . . . . . . .27
Find the last few receipts I scanned? . . . . . . . . . . . . . . . . . . . .31
Welcome to NeatReceipts Professional
NeatReceipts Professional is the only all-in-one combination
scanner/software that scans and reads receipts and
business cards quickly and accurately.
SCANS
• Captures digital images of receipts, business cards and
almost any other document
ANALYZES
• Proprietary interface pulls key information from receipts
and business cards
ORGANIZES
• Easily exports data to: Quicken, QuickBooks, Microsoft
Money, Excel, Outlook, PDF and more
• Tracks and manages personal and business information
• Tax Organizer groups tax related receipts for tax
preparation
Get organized.
Find a receipt I scanned last month? . . . . . . . . . . . . . . . . . . . .31
Print a receipt image? . . . . . . . . . . . . . . . . . . . . . . . . . . . . . .35
Split a receipt into multiple transactions? . . . . . . . . . . . . . . . . .37
Export (share) a receipt? . . . . . . . . . . . . . . . . . . . . . . . . . . . .39
Edit a vendor name? . . . . . . . . . . . . . . . . . . . . . . . . . . . . . . .44
Edit a list? . . . . . . . . . . . . . . . . . . . . . . . . . . . . . . . . . . . . . . .44
Create a new Folder? . . . . . . . . . . . . . . . . . . . . . . . . . . . . . . .54
Find a Folder I created a few months ago? . . . . . . . . . . . . . . . .62
Export/Share a Folder? . . . . . . . . . . . . . . . . . . . . . . . . . . . . . .64
Run a Folder Report? . . . . . . . . . . . . . . . . . . . . . . . . . . . . . . .76
Scan a business card? . . . . . . . . . . . . . . . . . . . . . . . . . . . . . .83
Save a business card as a graphic file?
. . . . . . . . . . . . . . . . . .86
Edit contact information? . . . . . . . . . . . . . . . . . . . . . . . . . . . .88
Add a photo to a contact? . . . . . . . . . . . . . . . . . . . . . . . . . . . .93
Find a contact? . . . . . . . . . . . . . . . . . . . . . . . . . . . . . . . . . . .95
Exchange Contacts with Plaxo? . . . . . . . . . . . . . . . . . . . . . . . .99
Exchange Contacts with MS Outlook? . . . . . . . . . . . . . . . . . . . .99
Assign a Receipt to a Tax Catgory?
. . . . . . . . . . . . . . . . . . . .104
Generate a Report in the Tax Organizer?
. . . . . . . . . . . . . . . .107
Use the Tax Assignment Wizard? . . . . . . . . . . . . . . . . . . . . . .111
Scan a document? . . . . . . . . . . . . . . . . . . . . . . . . . . . . . . . .117
Copyright ©2007 NeatReceipts - All rights reserved.
This manual may not be copied, photocopied, reproduced, translated,
or converted to any electronic or machine-readable form in whole or in
parts without prior written approval of NeatReceipts.
NeatReceipts • 1-866-NEATREC • [email protected]
3401 Market St., Ste. 120, Philadelphia, PA 19104
Guide written and designed by Karin Rex / ComputerEase ([email protected]).
Find a document?
. . . . . . . . . . . . . . . . . . . . . . . . . . . . . . . .128
Print a document? . . . . . . . . . . . . . . . . . . . . . . . . . . . . . . . .133
Use the NeatReceipts Copier? . . . . . . . . . . . . . . . . . . . . . . . .140
Backup the NeatReceipts database? . . . . . . . . . . . . . . . . . . . .141
NeatReceipts Professional User Guide
Table of Contents
NeatReceipts Professional User Guide
Section 4: Mastering Folders . . . . . . . . . . . . . . . . . . . . . . . . . . . . .51
About This Section . . . . . . . . . . . . . . . . . . . . . . . . . . . . . . . . . . . .51
Section 1: Read This Section First . . . . . . . . . . . . . . . . . . . . . . . . . .7
About Folders
. . . . . . . . . . . . . . . . . . . . . . . . . . . . . . . . . . . . . . .51
Why Should I Read This Section First? . . . . . . . . . . . . . . . . . . . . . . .7
Creating Expense Reports . . . . . . . . . . . . . . . . . . . . . . . . . . . . . . .53
About NeatReceipts Professional . . . . . . . . . . . . . . . . . . . . . . . . . . .8
Working with Folders . . . . . . . . . . . . . . . . . . . . . . . . . . . . . . . . . .54
About This User Guide . . . . . . . . . . . . . . . . . . . . . . . . . . . . . . . . . .8
Working with the User Profile
Where Can I Find Additional Information? . . . . . . . . . . . . . . . . . . . . .9
Printing and Sorting Folders . . . . . . . . . . . . . . . . . . . . . . . . . . . . .59
Section 2: Getting Started . . . . . . . . . . . . . . . . . . . . . . . . . . . . . . .10
About This Section . . . . . . . . . . . . . . . . . . . . . . . . . . . . . . . . . . . .10
Installing NeatReceipts Professional . . . . . . . . . . . . . . . . . . . . . . . .10
Starting NeatReceipts for the First Time . . . . . . . . . . . . . . . . . . . . .11
. . . . . . . . . . . . . . . . . . . . . . . . . . . .58
Finding Saved Folders . . . . . . . . . . . . . . . . . . . . . . . . . . . . . . . . . .61
Sharing (Exporting) Folders . . . . . . . . . . . . . . . . . . . . . . . . . . . . . .64
Importing Folders . . . . . . . . . . . . . . . . . . . . . . . . . . . . . . . . . . . . .76
Running Folder Reports . . . . . . . . . . . . . . . . . . . . . . . . . . . . . . . . .76
Personalizing Folder Columns and Fields . . . . . . . . . . . . . . . . . . . . .79
Exploring the Receipt Organizer Window . . . . . . . . . . . . . . . . . . . . .12
Scanning Your First Receipt . . . . . . . . . . . . . . . . . . . . . . . . . . . . . .14
Section 3: Working with Receipts . . . . . . . . . . . . . . . . . . . . . . . . .17
About This Section . . . . . . . . . . . . . . . . . . . . . . . . . . . . . . . . . . . .17
About Scanning Receipts . . . . . . . . . . . . . . . . . . . . . . . . . . . . . . . .17
Overview of the NeatReceipts Scanning Process . . . . . . . . . . . . . . .18
Scanning a Receipt . . . . . . . . . . . . . . . . . . . . . . . . . . . . . . . . . . . .18
Improving Receipt Images
. . . . . . . . . . . . . . . . . . . . . . . . . . . . . .21
Exploring the Scan Tab . . . . . . . . . . . . . . . . . . . . . . . . . . . . . . . . .23
Working with Receipt Images
. . . . . . . . . . . . . . . . . . . . . . . . . . . .24
Section 5: Using the Business Card Organizer
. . . . . . . . . . . . . . .81
About This Section . . . . . . . . . . . . . . . . . . . . . . . . . . . . . . . . . . . .81
About the Business Card Organizer . . . . . . . . . . . . . . . . . . . . . . . .81
Accessing the Business Card Organizer . . . . . . . . . . . . . . . . . . . . . .81
Exploring the Business Card Organizer Window . . . . . . . . . . . . . . . .82
Scanning a Business Card . . . . . . . . . . . . . . . . . . . . . . . . . . . . . . .83
Working with Business Card Images . . . . . . . . . . . . . . . . . . . . . . . .85
Working with Contacts . . . . . . . . . . . . . . . . . . . . . . . . . . . . . . . . .87
Finding Contacts . . . . . . . . . . . . . . . . . . . . . . . . . . . . . . . . . . . . .95
Importing & Exporting Contacts . . . . . . . . . . . . . . . . . . . . . . . . . . .97
Working with Receipt Rows . . . . . . . . . . . . . . . . . . . . . . . . . . . . . .27
Clearing Receipt Rows
. . . . . . . . . . . . . . . . . . . . . . . . . . . . . . . . .31
Section 6: Using the Tax Organizer
. . . . . . . . . . . . . . . . . . . . . .103
Finding Saved Receipts . . . . . . . . . . . . . . . . . . . . . . . . . . . . . . . . .31
About This Section . . . . . . . . . . . . . . . . . . . . . . . . . . . . . . . . . . .103
Printing, Sorting, and Splitting Receipts . . . . . . . . . . . . . . . . . . . . .35
About the Tax Organizer . . . . . . . . . . . . . . . . . . . . . . . . . . . . . . .103
Sharing (Exporting) Receipts . . . . . . . . . . . . . . . . . . . . . . . . . . . . .39
Accessing the Tax Organizer . . . . . . . . . . . . . . . . . . . . . . . . . . . .103
Importing Receipts . . . . . . . . . . . . . . . . . . . . . . . . . . . . . . . . . . . .41
Exploring the Tax Organizer Window . . . . . . . . . . . . . . . . . . . . . . .104
Running Receipt Reports . . . . . . . . . . . . . . . . . . . . . . . . . . . . . . . .41
Assigning Receipts to Tax Categories . . . . . . . . . . . . . . . . . . . . . .104
Editing Vendor Names and Other Lists . . . . . . . . . . . . . . . . . . . . . .44
Generating Reports in the Tax Organizer . . . . . . . . . . . . . . . . . . . .107
Personalizing Receipts Grid Columns and Fields . . . . . . . . . . . . . . . .46
Working with Reports in the Tax Organizer . . . . . . . . . . . . . . . . . .108
Understanding User Rules . . . . . . . . . . . . . . . . . . . . . . . . . . . . . . .44
Working with the Tax Assignment Wizard . . . . . . . . . . . . . . . . . . .111
Section 1
NeatReceipts Professional User Guide
Section 7: Using the Document Organizer . . . . . . . . . . . . . . . . . .115
About This Section . . . . . . . . . . . . . . . . . . . . . . . . . . . . . . . . . . .115
About the Document Organizer . . . . . . . . . . . . . . . . . . . . . . . . . .115
Accessing the Document Organizer
. . . . . . . . . . . . . . . . . . . . . . .116
Exploring the Document Organizer . . . . . . . . . . . . . . . . . . . . . . . .116
Scanning a Document . . . . . . . . . . . . . . . . . . . . . . . . . . . . . . . . .117
Setting Up Document Folders (e.g. for Recipes) . . . . . . . . . . . . . . .119
Working with Document Images . . . . . . . . . . . . . . . . . . . . . . . . . .119
Working with Document Rows . . . . . . . . . . . . . . . . . . . . . . . . . . .124
Clearing Document Rows . . . . . . . . . . . . . . . . . . . . . . . . . . . . . . .128
Finding Saved Documents . . . . . . . . . . . . . . . . . . . . . . . . . . . . . .128
Printing Documents . . . . . . . . . . . . . . . . . . . . . . . . . . . . . . . . . .133
Personalizing Document Grid Columns and Fields . . . . . . . . . . . . . .134
Read This
Section First
Sharing (Exporting) Documents . . . . . . . . . . . . . . . . . . . . . . . . . .137
Importing Documents . . . . . . . . . . . . . . . . . . . . . . . . . . . . . . . . .139
Using the NeatReceipts Copier . . . . . . . . . . . . . . . . . . . . . . . . . . .140
Section 8: Appendix . . . . . . . . . . . . . . . . . . . . . . . . . . . . . . . . . . .141
Backing Up and Restoring the NeatReceipts Database . . . . . . . . . .141
Finding Missing Key Data in Folders & Receipts . . . . . . . . . . . . . . .144
Finding Missing Key Data in Folders & Documents . . . . . . . . . . . . .144
Manually Changing Scan Settings . . . . . . . . . . . . . . . . . . . . . . . . .145
Scanning & Image Troubleshooter . . . . . . . . . . . . . . . . . . . . . . . .147
NeatReceipts to Plaxo Field Mapping . . . . . . . . . . . . . . . . . . . . . . .150
NeatReceipts to Outlook Field Mapping . . . . . . . . . . . . . . . . . . . . .150
NeatReceipts Column Mapping Chart . . . . . . . . . . . . . . . . . . . . . .151
Why Should I Read This Section First?
We know you’re excited about using this program (who wouldn’t be?),
but it is important that you take a moment or two to review a few
things before you get started. Reading this section of the user guide
first will help you get up and running quickly -- and without making any
frustrating mistakes.
OK, I’m Reading...What’s Next?
First, read through the rest of this section to learn how this user guide
is organized. By doing this you will know which sections are “must
reads” and which sections you can skip for now.
Then, read Section 2: Getting Started to install your software and
scan your first receipt.
Columns and Fields (Alphabetical by Organizer) . . . . . . . . . . . . . . .151
Caring for the NeatReceipts Scanner
. . . . . . . . . . . . . . . . . . . . . .159
What’s in the NeatReceipts Box? . . . . . . . . . . . . . . . . . . . . . . . . .160
Checking for Software Updates . . . . . . . . . . . . . . . . . . . . . . . . . .160
Getting Help . . . . . . . . . . . . . . . . . . . . . . . . . . . . . . . . . . . . . . .160
NOTE: If you absolutely, positively cannot take the time
to read this section and learn how the user guide is
organized, feel free to go directly to Section 2: Getting
Started. However, DO NOT skip section 2 -- skipping it
may end up costing you more time later troubleshooting
installation issues.
Index . . . . . . . . . . . . . . . . . . . . . . . . . . . . . . . . . . . . . . . . . . . . . .162
7
Section 1: Read This Section First
NeatReceipts Professional User Guide
About NeatReceipts Professional
If you are buried in a pile of receipts as you read this,
NeatReceipts Professional will help you climb out.
NeatReceipts Professional can help you maintain an
official record of both work-related and personal
expenses. NeatReceipts Professional
features the Receipt Organizer,
which is used to organize receipts and
finances, the Business Card Organizer, which is
used to quickly extract and organize contact
information from business cards, the Tax
Organizer, which is used to group tax-related receipts
for tax preparation, and the Document Organizer, which is used for
saving non-financial papers such as warranties and recipes.
About this User Guide
This user guide has been carefully designed to help you install and use
the program quickly and easily. It’s written in a conversational tone to
put you at ease. [Insert deep breath here.] At times, you may even be
slightly amused. Don’t let this worry you -- it doesn’t mean you can’t
take us seriously; it just means that we’ve read a few manuals
ourselves and know how overwhelmingly indecipherable and boring
they can be. Our program is different, and so is our manual.
How this User Guide is Organized
There are 8 sections in this user guide. You are currently reading
Section 1: Read this First. (Thank you for following directions!) The
remaining sections are described in the table below:
Section 2:
Section 3:
Section 4:
Section 1: Read This Section First
Section 6:
Section 7:
Section 8:
Using the Tax Organizer details how to let the
NeatReceipts Tax Organizer group tax related receipts.
Using the Document Organizer covers working with
documents, including scanning, editing, sorting, finding,
printing, combining, emailing, exporting, and more.
Everyone should review this section.
Appendix contains information on backing up and
restoring the NeatReceipts database, checking for
software updates, and getting help with NeatReceipts
Professional.
Software Conventions
NeatReceipts lets you use a variety of conventions for selecting
commands including the following:
• pull-down menus
• right-clicking (shortcut menus)
• icons
• buttons
As with other programs, there is usually more than one way to work,
so don’t be afraid to explore the possibilities!
Manual Conventions
Throughout the manual, menu and submenu choices are specified by
using a right angle bracket (>) to separate each command. Help >
NeatReceipts on the Web > Support would indicate that you would
first choose NeatReceipts on the Web from the Help menu and then
choose Support from the NeatReceipts on the Web submenu.
Where Can I Find Additional Information?
In addition to this user guide, there are other ways for you to learn
more about this program.
Help Files
Setup Instructor
Troubleshooting
Support
Updates
User Guide
Choose NeatReceipts Help from the Help file
to access a searchable help database.
Choose Help > NeatReceipts Setup
Instructor.
A general troubleshooting FAQ can be found by
choosing Help > NeatReceipts on the Web >
Support. A Scanning & Image Troubleshooter can
be found by choosing Help > Scanning & Image
Troubleshooter.
Choose Help > NeatReceipts on the Web >
Support.
Choose Help > Check for Updates.
You are here!
Section 1: Read This Section First
9
8
Section 5:
Getting Started tells you exactly what to do to install
the program and scan your first receipt. DO NOT
SKIP THIS SECTION as it is important that you
complete the installation in the correct order.
Working with Receipts gets you into the nitty gritty of
scanning receipts, including scanning, editing,
personalizing, sorting, finding, printing, emailing,
exporting, and more. Everyone should review this section.
Mastering Folders covers every aspect of creating and
working with Folders, including saving, finding, modifying,
editing, printing, deleting, sorting, emailing, and more.
Review this section to understand how to use the
program for everyday management of receipts and
finances.
Using the Business Card Organizer reviews how to
scan and extract key information from business cards,
export contact information, and work with Action Items.
NeatReceipts Professional User Guide
Getting
Started
Section 2
NeatReceipts Professional User Guide
WARNING: Do not plug in scanner until prompted to do
so during installation.
4.
NeatReceipts Scanner Prompt
NOTE: During installation you may see one or more
Digital Signature Not Found alerts. In each case, click
YES to continue the installation.
About This Section
5.
Section 2: Getting Started walks you through installing the program,
connecting the scanner, touring the scanner, and scanning your first
receipt.
Everybody who will be installing the software should read this
section as it is important that the installation is completed in the
correct order. If you have already installed the software (using the
Quick Start Card) you can skip to Section 3: Working with Receipts.
These instructions will get you up and running with NeatReceipts
quickly and easily. You will need:
NeatReceipts software CD
NeatReceipts scanner
Calibration paper
USB cable
Restart your computer and log on as the administrator (if you have
multiple users on your PC).
2.
Disable anti-virus software.
Temporarily disable any anti-virus or security software
(REQUIRED). Exit any applications running on your PC.
3.
Insert the NeatReceipts CD.
Follow on screen instructions.
1.
Launch NeatReceipts.
Click on the NeatReceipts icon on your desktop, or go to the
Start menu and select it from your list of programs.
2.
When prompted, select a NeatReceipts View Mode.
• Choose Personal Use Only if you will use NeatReceipts for
tracking and organizing personal expenses only.
• Choose Business and Personal Use if you will use
NeatReceipts to track and organize both business and personal
expenses.
Section 2: Getting Started
NOTE: Choosing Personal Use Only hides a number of
columns that pertain only to business use, such as Total
Reimbursable and Total Paid by Company. If needed,
the user mode can be changed later by choosing
Personalize > Rules. For more information on Columns
by View Mode, see Section 8: Appendix > Columns
and Fields.
Section 2: Getting Started
1
1
1
0
1.
Register online.
Complete the online registration when prompted (OPTIONAL).
Completing the registration form makes you eligible for free
customer support, free updates until the next major version is
released and a 1-Year Warranty on the NeatReceipts scanner.
Starting NeatReceipts for the First Time
Installing NeatReceipts Professional
•
•
•
•
When prompted, plug the NeatReceipts scanner into an available
USB port on your PC and then click on OK. The scanner is always
on; there is no power switch.
NeatReceipts Professional User Guide
NeatReceipts Professional User Guide
Choosing the NeatReceipts View Mode
3.
Advanced Find
Provides a method for locating saved receipts
and folders. In addition to date searches, you
can search by project, amount, payment type,
category, vendor tax category, client (Business
& Personal view only), and others.
Folders Grid
Allows you to create and manage Folders. By
default, not all columns are displayed in the
Folders grid. You can choose to show or hide
columns as needed (using the Tools menu).
Receipts Grid
Displays a list of receipts in the currently
selected Folder(s). By default, not all columns
are displayed in the Receipts grids. You can
choose to show or hide columns as needed
(using the Tools menu).
Information Tabs
Allows you to supply additional information
about a Folder or receipt. The fields on the
tabs change, depending on what is selected in
the grids above.
When prompted, type your first and last name and click DONE.
The NeatReceipts Program opens in the Receipt Organizer window.
4.
View the NeatReceipts Setup Instructor. It will have you up and
running with NeatReceipts in a manner of minutes! Do not skip
the Setup Instructor -- it’s worth the time invested!
Folders Grid
Exploring the Receipt Organizer Window
The Receipt Organizer window is used to organize receipts and finances
for both business and personal expenses. Folders let you save and
organize scanned receipt images. Additionally, you can apply profile
information and comments to folders in the Information Tabs area.
Scan Tab
Receipts Grid
Tabs and Grids in the Receipt Organizer
The left side of the Receipt Organizer window displays three tabs:
Scan, Find Receipts, and Advanced Find. The right side of the
Receipt Organizer displays the Folders Grid (top), the Receipts Grid
(middle), and the Information Tabs (bottom). Each of these areas is
described and pictured on the next page.
Scan
Information Tabs
The Receipt Organizer Window
Provides a method for locating saved receipts.
You can search for receipts based on Receipt
Date and Folder Type.
Section 2: Getting Started
Section 2: Getting Started
3
1
1
2
Find Receipts
Allows you to specify the number of pages to
scan (default is 1), page through multiple
page receipts, and zoom, delete, or rotate a
scanned receipt. The Scan tab also contains
the Image Viewer, which displays the
currently selected scanned receipt.
NeatReceipts Professional User Guide
NeatReceipts Professional User Guide
Scanning Your First Receipt
Before scanning for the very first time, you will need to calibrate your
scanner. Choose Scan > Calibrate NeatReceipts Scanner and follow
the onscreen instructions.
Scanning your first single-sided receipt involves three simple tasks, as
shown in the graphic below:
A.
Create or select
a Folder
B.
Scan a receipt into
the Folder
C.
Verify data / Add a
vendor name
B.
Scan a receipt into
the Folder
Feed the receipt face down into the far right side of the scanner
(under the document icon). You can position the receipt vertically or
horizontally. For faster scanning, position the receipt so that its widest
side is being drawn into the scanner (usually horizontally), as shown
below. The image will rotate automatically if necessary.
Faster!
Back of
Receipt
Back of
Receipt
Each of the steps outlined in the above graphic are described in detail
on the next few pages. Note that before scanning a receipt, you need
to select the “container” into which the receipt will be scanned, stored,
and organized. In NeatReceipts, all receipts are scanned into a
Folder. If there are no folders in the grid, one will be created for you
when you scan your first receipt.
A.
For faster scanning,
position the receipt
so that the widest
side is being drawn
into the scanner (as
shown by receipt B)
A
B
Place receipt face
down when
scanning
Scanner with Receipts
Create or select
a Folder
(Note that above receipts are pictured face down,
as they should be positioned prior to scanning.)
In the top grid, select an existing Folder, or create a new one by
choosing File > New > Folder.
A Folder is simply an electronic version of a physical filing receptacle,
like a drawer in a filing cabinet, for example. You can use folders to
organize any type of expenses. For example, you can create a Folder to
track expenses for a family trip or home improvement project. You can
manage your business, groceries, school supplies or medical expenses
using separate Folders. You can use NeatReceipts to organize your
soon-to-be-paperless life in any way you like!
Choose Scan > Scan New Receipt.
Alternatively, you can click on the Scan button
(top
right corner of the Scan tab), or press the Scan button on top of the
scanner.
If you have more than one scanner connected to your computer, you
will be asked to select a scanner. Be sure to select the appropriate
scanner.
Section 2: Getting Started
Section 2: Getting Started
5
1
1
4
When scanning is complete, the image will appear in the Image Viewer
and a new receipt row will be added to the Receipts Grid.
NeatReceipts Professional User Guide
C.
Verify data / Add a
vendor name
Each time a receipt is scanned into a Folder, a new row is added to the
Receipts Grid. Where possible, key data from the receipt is
automatically placed into the appropriate columns within the row.
NeatReceipts attempts to read the following fields:
•
•
•
•
•
•
•
Transaction date
Total amount
Payment type
State sales tax (USA)
Vendor name
Category
PST/QST and GST/HST sales tax (Canada)
After each scan you will want to review and verify the data. To modify
any of the information, click in a grid cell and edit as necessary.
NeatReceipts has a built in vendor database of over 1500 popular
stores, restaurants, and hotels that it can recognize. Each vendor name
is automatically associated with an expense category, such as
"Restaurant".
Although NeatReceipts may not have the name of your neighborhood
supermarket in its database, you can easily add it so that it will
recognize it the next time. To add a vendor name simply click into the
vendor name field and type it in. If you enter an expense category for
that vendor name, it will remember that as well.
IMPORTANT: Note that NeatReceipts currently does not
read vendor names that are stylized text or logos, only
plain text. Keep this in mind when adding vendor names
as you must type them exactly as they appear on the
receipt.
NOTE: Additional information on managing vendor
names can be found in Section 3: Working with
Receipts.
1
6
That’s it! NeatReceipt automatically saves the receipt for you. (How’s
that for convenient?!)
Section 2: Getting Started