1
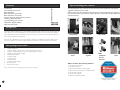
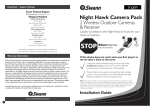
English
Help Desk / Support Details
Swann Technical Support
All Countries E-mail: [email protected]
Telephone Helpdesk
UNITED STATES toll free
877-274-3695
(Sun-Thurs, 2pm-10.30pm PST)
USA Exchange & Repairs
562-777-2551
(Mon-Fri, 9am-5pm PST)
AUSTRALIA toll free
1300 13 8324
(Mon-Fri, 9am-5.30pm Aus EST)
International
+61 3 8412 4610
(Mon-Fri, 9am-5.30pm Aus EST)
DVR4-Net-PLUS
4 Camera Digital Video Recorder
For Network & Web Monitoring with USB
See http://www.worldtimeserver.com for information on different time zones
and the time in Melbourne Australia compare to your local time.
Warranty Information
Swann Communications warrants this product against defects in workmanship and material for
a period of one (1) year from it’s original purchase date. You must present your receipt as
proof of date of purchase for warranty validation. Any unit which proves defective during the
stated period will be repaired without charge for parts or labour or replaced at the sole
discretion of Swann. The repair or replacement will be warranted for either ninety days or the
remainder of the original one year warranty period, whichever is longer. The end user is
responsible for all freight charges incurred to send the product to Swann’s repair centres. The
end user is responsible for all shipping costs incurred when shipping from and to any country
other than the country of origin. The warranty does not cover any incidental, accidental or
consequential damages arising from the use of or the inability to use this product. Any costs
associated with the fitting or removal of this product by a tradesman or other person or any
other costs associated with its use are the responsibility of the end user. This warranty applies
to the original purchaser of the product only and is not transferrable to any third party.
Unauthorised end user or third party modifications to any component or evidence of misuse
or abuse of the device will render all warranties void.
If this device does not work when you first plug it in,
do not take it back to the store.
Contact the Swann Helpdesk using our fast e-mail service
[email protected] or call us on one of the Toll-Free
numbers shown on the back cover of this booklet.
Most problems can be quickly and easily fixed with
a quick chat with one of our friendly technical staff.
(Toll-Free available in the US and Australia only)
Installation Guide
www.swannsecurity.com
8
Contents
Introduction
Your package comes with
Basic Operation
Basic Operation (continued)
Basic Operation (continued)
Tips for using your Swann Security Camera
Installing a Hard Disk Drive
Tips for locating your cameras
Help Desk / Support Details
Warranty Information
Tips for locating your cameras
2
2
3
4
5
5
6
7
Back Cover
Back Cover
You should position your cameras to cover the areas most exposed to risk. See our
suggestions below for some ideas:
Take note that the Twin Value Camera will require a waterproof housing to protect it
from the elements if used outdoors. Direct exposure to the effects of the weather will
void the warranty.
Introduction
The Swann DVR-4-Net-Plus is a 4 channel Digital Video Recorder which has many advance features
which allow you to record footage from up to 4 security cameras to a hard drive for later playback.
With a Broadband Internet connection you can even view your cameras from another location on a
PC running the Netviewer application.
1. Doorways
2. Windows
3. Car Parks
4. Verandahs
5. Reception
areas
6. Cash
register
7. Mix
dummies
& real
cameras
8. Under
eaves
With the new USB feature you can now transfer incidents to a USB Memory Stick to allow you to
view your images on your PC or to give footage to the Police or other law enforcement bodies.
Your package comes with ...
•
•
•
•
•
•
•
•
•
•
•
1 x DVR-4-Net-Plus
1 x Power Adapter (design may vary from depending on country)
1 x Power Cable (design may vary from depending on country)
6 x BNC to RCA gender changers
1 x IR Remote Control
1 x Software CD
1 x User Manual
1 x HDD Caddy
2 x Keys for HDD Caddy
Security Stickers
This Instruction Sheet
If any of these items are missing, please contact your retailer.
INSTALLATION
Where to Place The Security Stickers:
1. On your front window
2. On side windows
3. Near entrance points - doors, gates
4. Next to a dummy camera mounted outside
5. On the front counter
6. On the cash register
7. Next to an obvious camera
Design of sticker subject to
change without notice.
2
7
Installing a Hard Disk Drive
Basic Operation
Please note: For instructions on how to jumper your hard disk drive (HDD) to “master”, please
refer to the information found on the label on top of the hard drive or visit the hard disk drive
manufacturers website.
Also note that the key must be in the locked position for the hard disk drive to work. If the key is
left in the unlocked position the power to the hard drive is switched off.
Open the cover of the hard disk enclosure and
unlock it using the supplied key. When unlocked
the key will be vertical as shown.
6
Carefully lift the handle on the front of the caddy
and remove it from the housing.
Slide the top cover of the caddy towards the back
(the end with the connector) and remove it.
Prepare your hard drive by setting the jumper to
Master. Check the label of the hard drive for
information on how to do this.
Place your hard drive in the caddy and then
connect the data cable to the socket on your hard
drive.
Connect the power connector to the power
socket on your hard drive. The connector fits
with the cut off corners at the top.
Slide the top cover of the caddy towards the end
with the handle to replace it.
Replace the caddy into the housing pushing on
both sides to ensure a solid connection, then turn
the key to the horizontal position to lock it.
1.Start the DVR4Net - Plus
After starting the DVR, please ensure the DVR's input video (NTSC/PAL) and your TV/Monitor
(NTSC/PAL) are both set to the same standard. NTSC for USA & Canada, PAL for Australia, UK and
most of Europe.
Fit the hard drive to the removable caddy and insert the removable caddy into the housing, then
lock it up (turn the hard disk lock to the right) and connect the power which will then boot the DVR
and it will start to work.
2.Turn off the DVR4Net - Plus
Only turn off the DVR when the system is inactive. Do not to turn off the DVR while playing or
doing the System Setup. Turning off the DVR while recording may cause the recording to corrupt,
and can cause the HDD to be unreadable in some cases.
Push the Record button to stop recording or push Stop button to stop playing or exit from
System Setup menu, then turn off the power.
If do not wish use the DVR for a long time, you should remove the power cord from the electrical
outlet and store the unit where it will not be damaged.
3.Normal Recording
Connect the power to all related equipment; ensure that there is video input using direct connection
to your TV or VCR.
Push the Display button to check spare space of the hard disk, if there is not much space,
please consider changing your hard disk first or select Overwrite mode.
Check recording parameter setup before recording; select video quality, frame rate.
Note that you cannot change record setting during the process of recording.
Manual recordings are the normal recording condition. Under the manual mode
(non-schedule status), pushing the Record button will record all channel’s video.
Push the Record button to begin recording, four channels will start simultaneous recording.
While in normal recording mode, push the Record or Stop button, and enter the right password, to
stop recording.
During the process of recording if the hard disk is full and the system is set to automatic
overwrite, the recording will not be interrupted but the DVR will automatically begin to overwrite
recorded video from the earliest (oldest) recorded area. If the system is set to overwrite disabled, it
will stop recording once the HDD is full.
4.Alarm Recording
Alarm recording is not started by manually pushing the Record button, it is automatically activated
once Schedule mode is enabled.
Alarm recording can be activated by alarm input signal or motion, if the connection of alarm input
equipment is correct, stable and reliable, and the alarm settings are correct.
For recording to be activated by exterior input signal or motion detection the system must be set to
Schedule Mode active and that period is set to “A” in Record Schedule setup. You must also set the
menu of Alarm Setup for exterior input alarm, and the alarm enable setting of that channel must be
set to “ON”. For Motion Alarm, the motion enable setting of that channel must set “ON”, and set
the area for motion detection must be set.
3
Basic Operation (continued)
If Schedule mode is disabled the system will not start recording on alarm. Setting schedule on
or off is achieved through pushing the SCHEDULE button on the front panel or remote, but not
through the System Setup menu and window. When the unit is in Schedule Mode active, the
character “S” will display on the screen. Alarm video recording can’t be stopped by pushing the
RECORD or STOP button while Schedule Mode is active. To ensure that once Schedule Mode is
set to on that the schedule cannot be accidentally stopped there is a password protection to stop
Schedule Mode. You must press the SCHEDULE button then enter the correct password to turn
Schedule Mode off.
Check Alarm Recording setup before recording; confirm the video quality and the frame rate, as
the record setting can’t be changed during the recording process.
As long as the alarm input signal is correctly set the alarm recording will continue during the period
of time set up by A/M REC TIME, and when the outside the time period the alarm recording
automatically stops.
5.Time Recording
Time recording starts and stops recording automatically according to the pre-arranged time period.
It is applied to a fixed timetable, for example business hours time recording (or outside business
hours time recording) with fixed start/stop time.
To start the Time Recording function you must have a record schedule setup beforehand. When
this is done, push the SCHEDULE button on the front panel to set schedule mode to on and the
schedule symbol “S” will display on the screen. The Time Recording mode will not work unless
you activate Schedule Mode.
To make Time Recording mode active the system must be set to Schedule Mode active and that
period is set to “T” in Record Schedule setup.
In Time Record mode, you must push the SCHEDULE button then enter the password to stop
time recording.
Because Time recording is reliant on the system being set with the correct time, you must adjust the
time to your correct local time before using this function.
6.Playback
Push the PLAY button and the system will begin to play the images recorded from the start of the
most current recording.
If the recording is playing, push the PAUSE button to pause playing, push the PLAY button again to
resume normal play.
To use Fast Forward playing or Fast Backward playing, push the FORWARD or REW button while
the recording is playing to see faster playback. Push the PLAY button to return to normal speed
playing from the current place.
Continuous pushing of the FORWARD button will change the fast-forward between five levels of
speed (X2, X4, X8, X16, X32) in sequence. Continuously pushing the REW button will change the
fast backward playback between four levels of speed (X2, X4, X8, X16) in sequence.
During playback mode, press the Single Frame Forward button to play a frame at a time, and hold
the button in to continually play one frame at time while the button is held.
During playback mode, press the Single Frame Rewind button to play back a frame at a time, and
hold the button in to continually play one frame at time while the button is held.
Push the PLAY button again to resume normal playback speed, or push the STOP button to stop
playing.
4
Basic Operation (continued)
7.Search Play
Push the Search button to display the Search Play window on the screen.
TIME SEARCH: search recording by the time you enter.
EVENT SEARCH: search recording by event list.
START STOP SEARCH: search recording by start and stop segments.
Push the UP or DOWN button to move the cursor, then push the ENTER button to enter the sub
menu you have highlighted. Push the SEARCH button again to quit the search menu.
8. Time Search
Move the cursor to Time Search, then push the ENTER button and the Time Search window will
appear, as illustrated as below.
Push the LEFT or RIGHT button to move the cursor, push + and - button to modify the time, then
push the ENTER button to start play from the time you selected. Push the SEARCH button again to
return to the Search Play menu.
If the time you enter doesn’t match recorded video, the DVR will automatically play the video
closest to the time you enter.
START: the first time you record.
END: the end time of the last recording, you must enter a time between start and end. If the HDD
has been overwritten, the start time may not be correct.
9. Password Reset
Press the “pause” button 12 times on the front panel and it will reset the DVR's password to
the factory default password of (0000).
10. Changing the On Screen Display (OSD) language
You can change the OSD language from the default English to French or Spanish by following
the steps below.
To change the OSD language, enter the menu system by pressing the MENU button on the
front of the DVR and correctly input your password.
Highlight the “SYSTEM SET” option, and press the ENTER button.
Select “MENU LANGUAGE” and press the ENTER button.
Push the ADD or DEC buttons to change the language and press the ENTER button to select
your language.
Now fully exit the menu system and restart your DVR.
5