1
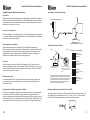
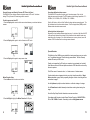
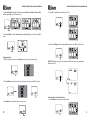
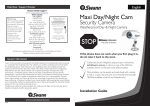
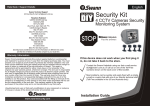
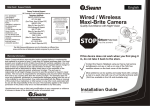
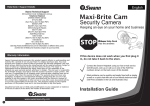
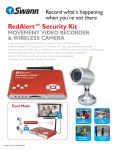
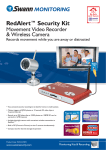
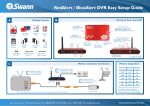
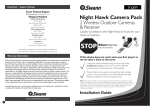
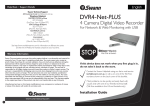
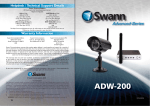
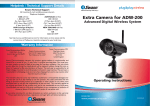
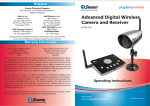
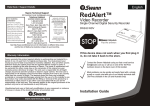
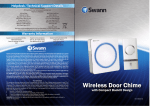
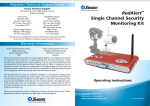
English
Help Desk / Support Details
Swann Technical Support
All Countries E-mail: [email protected]
Telephone Helpdesk
UNITED STATES toll free
FCC WARNING
1-800-627-2799
STATEMENT
1-877-274-3695
This device complies
(Su, 2pm-10pm US PT)
with Part 15 of FCC Rules.
(M-Th,
6am-10pm US PT)
Operation is subject to the
(F 6am-2pm US PT)
following two conditions:
USA Exchange & Repairs
(1) This device may not
562-777-2551
cause harmful interference
(M-F, 9am-5pm US PT)
and
AUSTRALIA toll free
(2) this device must
1300 138 324
accept any interference
(M 9am-5pm AUS ET)
received, including
interference that may
(Tu-F 1am-5pm AUS ET)
cause undesired operation
(Sa 1am-9am AUS ET)
New Zealand toll free
0800 479 266
International
+61 3 8412 4610
WARNING: IMPORTANT
NOTICE ABOUT CORRECT
USE OF POWER ADAPTER
The correct orientation
for the enclosed power
adapter is in a vertical
or floor mount position.
Wireless Security Kit
Single Channel Digital Security Recorder
L’orientation correcte pour
L’adapteur secteur fourni
est dans une position
verticale ou planchermonte.
La orientacion correcta para
el adaptador electrico incluido
es en posicion vertical o instalado
en el suelo.
See http://www.worldtimeserver.com for information on different time zones
and the time in Melbourne Australia compare to your local time.
Warranty Information
Swann warrants this product against defects in workmanship and material for a
period of one (1) year from it’s original purchase date. You must present your
receipt as proof of date of purchase for warranty validation. Any unit which proves
defective during the stated period will be repaired without charge for parts or
labour or replaced at the sole discretion of Swann. The repair or replacement will
be warranted for either ninety days or the remainder of the original one year
warranty period, whichever is longer. The end user is responsible for all freight
charges incurred to send the product to Swann’s repair centres. The end user is
responsible for all shipping costs incurred when shipping from and to any country
other than the country of origin. The warranty does not cover any incidental,
accidental or consequential damages arising from the use of or the inability to use
this product. Any costs associated with the fitting or removal of this product by a
tradesman or other person or any other costs associated with its use are the
responsibility of the end user. This warranty applies to the original purchaser of the
product only and is not transferrable to any third party.
Unauthorised end user or third party modifications to any component or evidence
of misuse or abuse of the device will render all warranties void.
www.swannsecurity.com
RedAlert™
If this device does not work when you first plug it
in, do not take it back to the store.
Contact the Swann Helpdesk using our fast e-mail service
[email protected] or call us on one of the Toll-Free
numbers shown on the back cover of this booklet.
Most problems can be quickly and easily fixed with a simple
e-mail or a quick chat with one of our friendly technical staff.
(Toll-Free available in the US and Australia only)
Installation Guide
RedAlert Digital Video Recorder Manual
RedAlert DVR Specifications
Table of Contents
Table of Contents
Package Contents
Using the SD Card Slot
Connecting the Camera Power Supply
Changing the Camera Channels
Changing the Wireless Camera Channel on the DVR
2
2
2
3
3
3
Changing Cameras and Viewing 2 Cameras PIP (Picture-in-Picture)
Motion Detection Setup
Choosing Video or Photo Recording
TV Mode and Picture Quality Settings
Advanced Motion Detection Setup
Viewing and Deleting Saved Images
Changing Folders
Connecting additional wireless cameras
Achieving the best wireless signal
Tips and Troubleshooting
RedAlert Specifications
Wireless Outdoor Camera Specifications
4
4
5-6
7
8-10
11
12
13
13
13
15
15
Package Contents
- RedAlert DVR
- Antenna
- DVR Power Supply
- Instruction Manual
- Easy Setup Guide
- Wireless Outdoor Camera (WOC)
- WOC Power Supply
- SD Card
- Video Out Cable
- Video In Cable
Using the SD Card Slot
Insert an SD card with label facing up into the RedAlert DVR. The DVR can handle SD
cards up to 2GB. Once the card is inserted the DVR will save recordings to the SD card.
You can playback images on a monitor directly from the RedAlert or insert the card into a
card reader on your computer to view recordings. Recordings are saved as AVI for videos
and JPEG for still images.
SD
Note: When an SD card is
inserted, an icon appears
showing it is detected by the
RedAlert. All images will now
be recorded to the SD card.
SD
If onboard memory or SD memory is full, the DVR will automatically overwrite the oldest
images or video first ensuring the DVR keeps recording.
2
RedAlert Digital Video Recorder Manual
1 Video Output
1 Video Input
Wireless Channel Frequencies: 2414, 2432, 2450 & 2468MHz
Built in 4 CH Wireless Receiver (DVR records only 1 camera at a time)
Operating Power: 5V DC
Preset to NTSC or PAL Depending on Region (manually adjustable)
16MB internal memory
Output Format - AVI, JPEG
Maximum SD Capacity - 2GB
Recording Format:
AVI Video 10s
JPEG images
Recording Resolution: JPEG 640 X 480
AVI 320 X 240
Wireless Outdoor Camera Specifications
Channels:
Operating Power:
Power Consumption:
Size:
Antenna:
Transmitting Range:
Weight:
Operating Temperature:
Sensor:
Horizontal Resolution:
Minimum Illumination:
Lens:
2414, 2432, 2450 & 2468MHz
8/9V DC
65-110mA
54 x 43mm (21/8” x 17/10”)
Omni-directional
20-30m (conditions may limit)
73/4oz (220 grams)
32° - 122°F ~ (0° - 50°C)
1/3”(8.5mm) Color CMOS
380 TV lines
1 Lux@ f1.2
(5.6mm) 60 degrees
NOTE:
All jurisdictions have specific laws and regulations relating to the use of
cameras. Before using any camera for any purpose, it is the buyer’s
responsibility to be aware of all applicable laws and regulations that prohibit
or limit the use of cameras and to comply with the applicable laws and
regulations.
The legality of watching people other than yourself changes from country to
country and even state to state. Contact your local government's privacy
information body or your local Police for more information on what if any
restrictions you may face.
15
RedAlert Digital Video Recorder Manual
Troubleshooting Your Wireless Outdoor Camera
RedAlert Digital Video Recorder Manual
Connecting the Camera Power Supply
Poor Picture:
Realign antennas until image quality improves, slightly adjust the position of the Camera or
Receiver. Change the location of the Camera, or use a different height or angle to see if the
image improves. In some cases interference may be caused by another device on a similar
frequency to the channel you are using.
Camera Power Adaptor (8V)
Lines only - no clear picture:
Check to confirm there is no microwave oven or other 2.4GHz equipment operating close by
ie; Cordless Telephones, Wireless Baby Monitors, Wireless LAN equipment etc . Make sure
the Receiver is on the correct channel.
Picture ghosting or interference:
Some home appliances such as Wireless LANs, 2.4GHz portable telephones and
Microwave ovens operate on or near the 2.4GHz frequency. If you receive interference from
such an appliance, try moving the Camera or Receiver to location further away from the
appliance or in the event of interference from a Wireless LAN device, try changing the
Wireless LAN to a different channel to improve the signal quality.
Night Hawk Camera with Stand
Changing the Camera Channels
Fig. (1)
Fig. (2)
Frequency Channel Settings
Channel 1
Both switches up
2414MHz
1
1
2
2
No picture:
Check the receiver to confirm it is turned ON and make sure the A/V connection of the
Receiver is not plugged into the Audio Out socket. Make sure the Receiver is on the correct
channel. Check to ensure the camera is plugged in and has power. Check that the channel
on the receiver is the set to Channel x.
Red haze over picture:
In some cases where the sun shines into the front of the camera a faint red glow can be
seen. Move the camera to a shaded location, or fit a hood to stop sunlight entering the
camera lens directly.
Channel 2
Left up & Right down
2432MHz
Unscrew front case at the seam
anti-clockwise to remove
Front view of lens with switches
in top left, note the numbers 1 &
2 indicated at the bottom of the
switch
Changing these switch settings changes the frequency that
the camera transmits on. Once you have set the channel on
the camera, select the same channel on your RedAlert. If you
experience interference try different channels. Make sure
multiple cameras are set to different frequencies so you can
use them in the same area with the DVR.
1
2
Channel 3
Left down & Right up
2450MHz
1
2
Channel 4
Both switches down
2468MHz
1
2
Foreground is dark while background is too bright:
Changing the Wireless Camera Channel on Your DVR
If the camera is looking from a dark area towards a light area in some cases the automatic
exposure can find it difficult to balance the image correctly. Change the location of the
camera so that the point of greatest interest has the largest area of the image.(if you want to
see the bright area, move the camera so that almost all of the screen shows this area. If you
want to see the darker area, move the camera so that most of the image shows this area.
To change wireless channels on your DVR, push the SET button on the front casing. The
light indicates the current wireless channel i.e. CH1, CH2, CH3, CH4. Push the display
button (DISP) to change views between your wired and wireless cameras.
14
3
RedAlert Digital Video Recorder Manual
RedAlert Digital Video Recorder Manual
Changing Cameras and Viewing 2 Cameras PIP (Picture-in-Picture)
The RedAlert DVR can display a wired and wireless camera in PIP mode. Note when
viewing PIP only the main full screen image will be recorded.
To switch cameras and view PIP
1. Press the Display button once to switch camera views between your wired and wireless
cameras.
Connecting additional wireless cameras
The RedAlert DVR is capable of receiving up to 4 wireless cameras. Note only the
displayed camera can be recorded. The DVR operates on the following frequencies: CH1 2414MHz, CH2 - 2432MHz, CH3 - 2450MHz, CH4 - 2468MHz.
Push the Set button on the front of the RedAlert to change wireless camera channels. The
light indicators show the active wireless channel. Push the display button (DISP) to switch
between wired and wireless camera mode.
Achieving the best wireless signal
Depending on local conditions wireless signals may vary. A clear line of sight from the DVR
to the camera will achieve the best image. Walls, metals and other wireless devices may
impact the quality of an image. If too much interference occurs on any channel, move the
camera or DVR to another location or change camera channels.
2. Press the Display button again to view both cameras in PIP mode.
Tips and Shortcuts
3. Press the Display button again to swap camera views.
The RedAlert unit has 16MB of memory installed for viewing saved images on your monitor
only. For additional storage an SD card is strongly recommended. The unit will accept
standard SD cards up to 2GB in size.
Transfer your images from the SD card to your computer via a card reader (not included).
Video files are saved as AVI files and photos are saved as JPEG files which can be read by
the most computers.
The DVR can record 1 camera at a time, i.e. 1 wired camera or 1 wireless camera.
Motion Detection Setup
1. Press the Menu button to enter menu interface.
If motion detection does not appear to detect your subject, lower the sensitivity or Target
Value as described on page 8 and try expanding the region of motion or bounding box size
as described on page 6.
Use the Up Arrow to quickly turn motion detection on or off when viewing a live image.
Use the Down Arrow to switch between photo and video recording when viewing a live
image.
Consult the Easy Setup Guide for information on camera connections.
2. Press Left/Right to highlight the Motion Detection On/Off option.
4
For assistance with this product contact Swann Technical Support on 1-800-627-2799 in
USA or 1300 13 8324 in Australia. Alternatively, email us at [email protected]
13
RedAlert Digital Video Recorder Manual
4. Press Left/Right to highlight the desired option (Delete One, Delete All, Format, Exit)
and then press OK to confirm the selection.
RedAlert Digital Video Recorder Manual
3. Press OK to toggle Motion Detection ON or OFF.
5. Press Left/Right to select Confirm (check) or Cancel (X) option, and then press OK to
select.
4. Press the Left/Right buttons to highlight Exit and then press OK to exit the menu.
Changing Folders
1. While in playback mode press the Display button to bring up the folder listing.
SHORTCUT: When viewing your camera press the UP arrow to quickly toggle Motion
Detection ON/OFF.
2. Press Up/Down to choose the folder you want to see, and then press OK to confirm.
Choosing Video or Photo Recording
1. Press the Menu button to enter menu interface.
5. Press Mode to exit playback and return to live view.
12
5
RedAlert Digital Video Recorder Manual
RedAlert Digital Video Recorder Manual
2. Press the Left/Right buttons to highlight Capture Format Photo/AVI (Video).
11. Press Left/Right to highlight the Exit option and then press OK to return menu
interface.
SHORTCUT: To exit or go to previous menus press the Menu button on the DVR
3. Press OK to toggle Photo or AVI (video) recording.
Viewing and Deleting Saved Images
1. When viewing a live image press Mode to enter playback mode and view saved images.
4. Press the Left/Right buttons to highlight Exit and then press OK to exit the menu.
2. Press Left/Right to switch between images.
SHORTCUT: When viewing your camera press the DOWN arrow to quickly toggle between
Photo or Video.
3. To delete an image, in playback mode press Menu to bring up the delete menu.
6
11
RedAlert Digital Video Recorder Manual
8. Press Left/Right in the Setup menu and highlight Motion Detect Sensitivity and press
OK.
RedAlert Digital Video Recorder Manual
TV Mode and Picture Quality Settings
1. Press the Menu button to enter menu interface.
9. This screen shows the bounding box where motion will be detected.
2. Press Left/Right to highlight Setup and then press OK.
Current Value is the level of motion that is currently being detected on a scale of 0~99
where 0 is no motion and 99 is the highest level of motion.
Target Value is the level of motion required to set off motion detection. For motion to be
detected the Current Value must be higher than the Target Value.
3. Press OK to toggle TV mode from PAL/NTSC.
NOTE: The default setting is NTSC in North America and PAL for Europe/Australasia
10. Press Left/Right to set the Target Value (or sensitivity) between 0~99. Adjust the
sensitivity to the level needed for your conditions. Press OK to return to the Setup menu.
4. Press Left/Right to highlight the picture Quality option.
Note: In our example above, Target Value is set to 10. Motion will only be recorded when the level of motion (Current
Value) in the bounding box reaches 10 or more.
10
7
RedAlert Digital Video Recorder Manual
5. Press OK to toggle High/Low image quality. If you are trying to conserve memory space
use Low otherwise the High setting is recommended.
RedAlert Digital Video Recorder Manual
4. Press Left/Right to highlight Motion Detect Count in the Setup menu. Motion Detect
Count indicates how many photos will be taken per motion detection.
Note: This feature applies to photo recording only
Advanced Motion Detection Setup
1. From the Setup menu, press the Left/Right buttons to highlight Motion Detection Area
and press OK.
2. Press Left/Right to change the size of the area of detection (Large, Medium or Small
Box) and then press OK. Motion will be detected only within the box selected.
3. Press Up/Down/Left/Right to move detection box to a region you would like to detect
motion and then press OK to confirm and return to the Setup menu.
8
5. Press OK to change the Motion Detect Count. This value can be set to 1, 3 or 5 photos
taken per motion detection event.
6. Next, press Left/Right to highlight Motion Detect Interval. This setting indicates the
pause in seconds between two separate motion events.
7. Press OK to change the pause or delay to 1, 3 or 5 seconds between motion events.
9