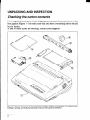
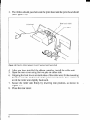
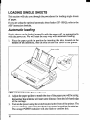
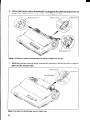
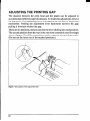
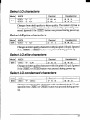
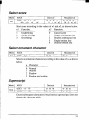
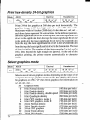
1
NX-2420
MULTI-FONT
NX-2420
RAINBOWICOLOUR
USERS MANUAL
NOT INTENDED FOR SALE
Federal Communications Commission
Radio Frequency Interference Statement
This equipment has been tested and found to comply with the limits for a Class B digital device, pursuant
to Part 15 of FCC Rules. These limits are designed to provide reasonable protection against harmful
interference in a residential installation. This equipment generates, uses and can radiate radio f
uency
energy and, if not installed and used in accordance with the instructions, may cause harmful inte3 etmce
to radio communications.
However, there is no guarantee that interference will not occur in a particular
installation. If this equipment does cause harmful interference to radio or television reception, which can
be determined by turning the equipment off and at, the user is encouraged to try to correct the
interference by one or more of the following measures:
Reorient or relocate the receiving antenna.
- Increase the separation between the equipment and receiver.
- Connect the equipment into an outlet on a circuit different from that to which the receiver is
connected.
Consult the dealer or an experienced radiofl
technician for help.
l
l
Unauthorized modifications of this product by the user will void his authority
unless expressly approved by the patty responsible for compliance.
For compliance
with the Federal Noise Interference
to operate the equipment
Standard, this equipment requires a shielded cable.
The above statement applies only IO prinkrs marketed in the USA.
Statement of
Department of Communications
Radio Interference Regulations
The Canadian
This digitalapparatus
does not exceed the Class B limits for radionoise emissions from digital apparatus
set out in the Radio Interference Regulations of the Canadian Department of Communications.
Le present appareil numerique n’&nen pas de bruits radio&ctriques
depassant les limites applicables
aux appareils numeriques de la classe B prescrites darts le Rtglement sur le brouillage radio&crrique
Cdicd par le minisbe des Communications
du Canada.
The above statement applies only lo printers m&led
in Canado.
Trademark Acknowledgements
NX-2420, XB-2410, NX-2410, SPC-8K, SF-lODQ, RH-1OZ: Star Micronics Co., Ltd.
IBM PC, PC-AT, PC-XT, Proprinter X24E, Proprinter X24, PC-DOS: International Business Machines Co .
Microsoft % ASIC, MS-DOS: Microsoft Corporation
LQ-860, LQ-850: Seiko Epson Corp.
NOTICE
l
All rights reserved. Reproduction of any part of this manual in any form whatsoever without
STAR’s express permission is forbidden.
l The contents of this manual are subject to change without notice.
. All efforts have been made to ensure the accuracy of the contents of this manual at the time of
~;e~;e$wever,
should any errors be detected, STAR would greatly appreciate being informed
.
The above notwithstanding,
STAR can assume no responsibility
0 Copyright 1990 Star Micronics Co., Ltd.
for any errors in this manual.
HOW TO USE THIS MANUAL
This manual is organized into nine chapters. To learn how to make the best
use of your printer you are urged to read through chapters 1 through 3. The
remaining chapters may be treated as a reference guide for programming
operations, etc. It assumes a degree of knowledge of the operation of
computers (for instance, it assumes you know about hexadecimal numbers).
The chapters are as follows:
‘I
Chapter 1 -
Setting up the printer
This chapter explains how to get the printer unpacked and set up. Read this
chapter before you do anything else.
Chapter 2 -
Control panel operations
There are a number of controls on the front panel which perform various
functions related to paper handling, print modes and font selection.
After getting set up, read this chapter and try out the various procedures in
it to find out how the printer works.
Chapter 3 -
Default settings
This chapter explains how to USCthe Electronic DIP Switch (EDS) mode to
make system settings on the printer.
Chapter 4 t.
Printer control commands
This chapter explains the different emulations provided by your printer, and
the software commands used to drive it. This section is of use if you are
writing or modifying programs to take advantage of the printer’s features.
Chapter 5 -
Download characters
This chapter explains the procedures to create your own characters.
Chapter 6 -
MS-DOS and your printer
Since the PC or PC-AT family of computers running under MS-DOS is
currently the most popular configuration of microcomputer, we have included a few hints and tips to help you use your printer with such systems.
Since virtually all PCs are sold with a Microsoft BASIC interpreter, we have
also included some hints, and a sample program in this language to
demonstrate the capabilities of the printer.
Chapter 7 -
Troubleshooting and maintenance
This section gives a checklist of points to check if your printer is not working
in the expected way. It also includes details of some routine maintenance
operations you can carry out yourself. It is not, however, a complete service
manual. Call a qualified service engineer if you are unsure of your ability to
carry out any maintenance or servicing operations.
Chapter 8 -
Specifications
This section gives the specifications of your printer.
Chapter 9 -
Character sets
These charts show the different character sets available.
FEATURES OF THE PRINTER
This printer has a full complement of features, making it an excellent partner
for a personal computer. It supports the IBM/Epson printer commands and
character sets, enabling it to print just about anything your computer can
generate, both text and graphics. Some of its main features are the following:
l
Versatile paper handling
Single sheets, fanfold forms, and multi-part forms (up to 5ply) are all
accepted, and you can use either push/pull tractor or friction feed. (You can
load fanfold forms from the nzar with push tractor, or fanfold forms and
multi-part forms from the bottom with pull tractor.) A special feature
enables you to keep fanfold forms parked in readiness while printing on
other paper.
l
Six bright colors
Magenta, cyan, violet, yellow, orange, and green add a color dimension to
your printed output by the color version printer.
l
Large variety of fonts and sizes
The printer has one draft font, one High-Speed Draft font and five LQ fonts
(Roman, Sanserif, Courier, Prestige and Script), italics for all styles, plus
condensed print, bold print, double-sized print, and quadruple-sized print.
l
Extensive software support
Since it is compatible with the Epson and IBM printers, it works with any
software that supports those printers. That includes most word-processing
and graphics programs, spread-sheets, and integrated software packages.
l
Easy operation
Indicator displays and beep tones provide immediate, easy to understand
feedback when you press the buttons on the control panel. ‘Ihe five buttons
can operate in combinations to perform a surprising variety of functions,
including micro-alignment.
l
Easy can2 and maintenance
The ribbon cartridge can be replaced in seconds the print head in a few
minutes.
TABLE OF CONTENTS
Chapter 1 SETTING UP THE PRINTER
Locating the Printer
Unpacking and Inspection
Checking the carton contents
Identifying printer parts
Setting Up
Mounting the platen knob
Installing the ribbon cartridge and the roller unit
Installing the optional cartridge
Connecting the printer to your computer
Loading Single Sheets
Automatic loading
Manual loading
Loading and Parking Fanfold Forms
Loading the paper from the rear of the printer
Loading the paper from the bottom of the printer
Paper parking
Paper unparking
Loading Multi-Part Forms
Adjusting the Printing Gap
Chapter 2 CONTROL PANEL OPERATIONS
Buttons and Indicators
ON LINE button
PAPER FEED button
SET/EJECT/PARK button
PITCH button
FONT button
Power-Up Functions
Short test mode
Long test mode
Print arca test mode
Stay in panel pitch
Stay in panel font
Stay in panel pitch and font
Hexadecimal dump
Switch Combination Functions
Form feed
Top of form
1
1
2
2
3
4
4
4
8
9
10
10
12
13
13
16
17
18
19
20
23
23
24
24
25
25
26
27
27
28
29
29
29
29
30
32
32
. 32
Forward micro-feed
Reverse micro-feed
Changing the auto loading value
Clearing the buffer/All reset
Selecting the print color
Store macro definition
Chapter 3 DEFAULT SETTINGS
How to set the EDS mode
Functions of the EDS settings
Bidirectional test/Adjustment mode
Chapter 4 PRINTER CONTROL COMMANDS
Font Control Commands
Character Set Commands
Character Size and Pitch Commands
Vertical Position Commands
Horizontal Position Commands
Graphics Commands
Download Character Commands
Color Selection Commandes
Other Printer Control Commands
Chapter 5 DOWNLOAD CHARACTERS
Defining Your Own Characters with Standard Mode
Assigning the character data
Assigning a value of character space
Sample program
Defining Your Own Characters with IBM Mode
Assigning the download character set
Assigning the character dot pattern
Assigning the Index Table data
Sample program
Chapter 6 MS-DOS AND YOUR PRINTER
Installing Application Software with Your Printer
Embedding Printer Commands
Programming the Printer with DOS Commands
Programming with BASIC
How the program works
33
33
33
34
3.5
35
37
37
38
43
45
46
52
55
61
68
73
76
81
81
85
85
86
87
88
90
90
91
93
94
97
97
98
100
103
108
Chapter 7 TROUBLESHOOTING
AND MAINTENANCE
Troubleshooting
Power supply
Printing
Paper feeding
Maintenance
Replacing the Print Head
111
111
112
112
114
117
117
Chapter 8 SPECIFICATIONS
119
Chapter 9 CHARACTER
123
124
126
127
128
128
130
131
132
133
134
135
136
137
SETS
Standard Character Set #l
Standard Character Set #2
International Character Sets
IBM Character Set #2
Code page #437 (U.S.A.)
Code page #850 (Multi-lingual)
Code page #860 (Portuguese)
Code page #861 (Icelandic)
Code page #863 (Canadian French)
Code page #865 (Nordic)
IBM Character Set #l
IBM Special Character Set
Proportional Spacing Table
INDEX
149
COMMAND SUMMARY
153
Chapter 1
SETTING UP THE PRINTER
Subjects covered in Chapter 1 include . Locating the printer
. Unpacking and inspection (part names)
l
Setting up and connecting
l
Loading single sheets
l
Loading and parking fanfold forms
. Adjusting the printing gap
LOCATING THE PRINTER
Before you start unpacking and setting up your printer, make sure that you
have a suitable place on which to locate it. By “a suitable place”, we mean:
l
A firm, level surface which is fairly vibration-free
l
Away from excessive heat (such as direct sunlight, hearers, etc)
l
Away from excessive humidity
l
Away from excessive dust
l
Supply it with “clean” electricity. Do not connect it to the same circuit as
a large, noise-producing appliance such as a refrigerator.
. Make sure the line voltage is the voltage specified on the printer’s
identification plate.
l
To disconnect the printer the plug has to be disconnected from the wall
socket, which has to be located close to the printer, and easy to access.
. Install the printer where there is sufficient room for the paper and any
paper being fed in or printed out.
l
If you are connecting your printer with a parallel cable, make sure that the
cable is within 2m (6ft) of the printer. An RS-232 connection using the
optional SPC-8K interface can be made over longer distances.
UNPACKING AND INSPECTION
Checking the carton contents
Now unpack the contents of the shipping carton, and check each item in the
box against Figure l-l to make sure that you have everything (there should
be six items).
If any of these items are missing, contact your supplier.
Figure T-l.Checktomakesureyou
haveall sixitems: 1) Printer.2) Paperguide,3) RolleruniL4)
5) Ribbon cartridge, and 6) Manual set (User’s manual, User’s guide and Sticker).
2
Platen knob,
The optional accessories which you may have ordered with your printer are:
l
Font cartridges (FC-lZ, FC-2Z, FC-3Z, FC-4Z)
l
RAM cartridge (RC-32Z)
l
Serial-Parallel converter (SPC-8K)
l
Automatic sheet feeder (SF- 1ODQ)
l
Roll paper holder (RH-IOZ)
/den tifying printer parts
Make an external inspection of the printer. Note the locations of the
following parts in Figure l-2.
Figure
7-Z. The printer’s external parts
Roller unit:
Release lever:
Top cover:
Rear cover:
Entry slot:
Control panel:
Power switch:
Interface connector:
holds the paper against the platen.
releases the platen. This lever must be back for
single sheets, and forward for fanfold forms.
protects the print head and other internal parts.
protects the tractor feed mechanism.
for inserting single sheets of paper.
controls various printer functions.
turns power on and off.
for connecting the computer to the printer.
3
SETTING UP
Place the printer in the desired location, and remove all packing material
from inside the top cover. This packing material is intended to prevent
damage to the printer while in transit. You will want to keep all the packing
material, along with the printer carton, in case you have to move the printer
to a new location.
Mounting the platen knob
The platen knob is packed into a recess of the packing material which held
your printer inside the carton. Be sure to remove the knob from the
packaging.
Mount the knob on the platen shaft, which is on the right-hand side of the
printer. Rotate the knob on the shaft before pushing the knob fully into
position.
haten knob
F/gun, 1-3. Mounting the platen knob
Installing the ribbon cartridge and the roller unit
Remove the top cover by lifting up the front (using the two grips on either
side), and pulling the cover towards you (see Figure l-4). Now install the
ribbon. (If you want the color printer to print in black only, install the optional
monochrome ribbon cartridge, Z24HD or LZ24.)
NOTE: Turn off the power switch when you replace the ribbon cartridge.
4
.
Figum 1-4. Removing the top cover
1. Turn the tension knob clockwise on the ribbon cartridge to tighten the
ribbon if it is slack.
2. Guide the ribbon between the print head and the silver print head shield,
making certain that the spindles on the cartridge holder fit into the
sockets on the cartridge itself.
Figutu
T-5. installing the ribbon cartridge
5
3. The ribbon should pass between the print head and the print head shield
(see Figure 1-6).
I
Figure I-6. Pass the ribbon between the print head and print head shield
4. After you have installed the ribbon cartridge, install the roller unit.
5. Open the rear cover using the two pits on either side.
6. Gripping the lock levers on both sides of the roller unit, fit the mounting
brackets onto the shaft inside of the printer mechanism. You will need
to tilt the roller unit slightly backward.
7. Secure the roller unit firmly by lowering into position, as shown in
Figure l-7.
8. Close the rear cover.
6
-
Hgure 1-7. Install the roller unit onto the printer
To replace the top cover, insert the tabs into the slots on the printer case.
Swing the front edge down to close the cover.
Leave the top cover closed during normal operation. The cover keeps out
dust and dirt and reduces the printer’s operating sounds. Open the cover only
to change the ribbon or make an adjustment.
7
Ins falling the optional cartridge
This printer has five built-in LQ fonts, and a 7 K-byte (30 K-byte for color
printer) printing buffer.
You can add more fonts or expand the printing buffer by installing optional
cartridges (Font catridge or RAM cartridge).
To install or change a cartidge, follow the procedure below.
1. Turn off the power switch at the front of the printer, and remove the top
cover.
2. Remove the connector cover at the right side of the printer.
3. Rush out the cap from the connector cover.
NOTE : Keep this cap in a safety place.
Figure 7-8. Slide the cartridge into the slot with the power switch off.
!
/
1
I
i!
/I
[
t
4. Install the connector cover into the printer.
5. Insert the cartridge into the slot of the connector cover, and slide it all the
way in.
NOTE:Remount the cap on the connector cover if you do not use the
optional cartridge.
8
Connecting the printer to your computer
Connect the printer to your computer using a standard parallel interface
cable. On a PC or PC/AT-type computer, this means that you use the 25-pin
D-type connector at the computer end, and the Amphenol-type 36pin connector at the printer end. The configuration of the printer’s connector is
given in Chapter 8 should you need a cable for connection to another
computer.
If you need to connect to a serial port, use the optional Serial-Parallel converter, SPC-8K.
I
Figure 1-9. Connecting the interface cable
Plug the printer into a suitable outlet. However, DO NOT turn on the power
switch at the front of the printer yet.
NOTE:To disconnect the printer the plug has to be disconnected from the
wall socket, which has to be located close to the printer, and easy to
access.
LOADING SINGLE SHEETS
This section will take you through the procedures for loading single sheets
of paper.
If you are using the optional automatic sheet feeder (SF-lODQ), refer to the
ASF instruction booklet.
Automatic loading
Single sheets can be loaded manually with the power off, or automatically
with the power on. We will start the easy way with automatic loading.
1. Place the paper guide in position by inserting the tabs, located on the
bottom of the assembly, into the slots on the rear cover of the printer.
Figure I-10. Mounting the paper guide for single sheets
2. Adjust the paper guides to match the size of the paper you will be using.
Remember that printing will start some distance from the left-hand edge
of the carriage.
3. Turn on the power using the switch located at the front of the printer. The
printer will beep, indicating that there is no paper in position for printing.
The orange POWER indicator will also flash to confirm this.
10
4. Make sure that the release lever is back.
If fanfold paper is already mounted in the printer, press the ( SETpkEillp
button to park the paper in the off-line state, then move the release lever
backwards.
5. Place a single sheet between the guides, placing the side on which you
want to print towards the back of the printer. Gently push the paper down
in the guides until you feel it stop.
6. Now press the ( SE&/f&CT
) button. The paper will be fed into the printer
and adjusted past the print head to a position ready for printing.
7. If you want to set the paper to a different position, set the printer off-line
by pressing the ( ON LINE ) button, then set the paper by using the
micro-feed function. (For details, refer to Chapter 2.)
Adjustable
paper guide
Figure I-17. Loading a single sheet
Manual loading
It is also possible to load paper manually while the printer’s power is off. The
procedure is:
1. Place the paper guide in position by inserting the tabs, located on the
bottom of the assembly, into the slots on the rear cover of the printer.
2. Check that printer power is off and the release lever is back.
3. Adjust the paper guides to match the size of paper you will be using.
Remember that printing will start some distance from the left-hand edge
of the carriage.
4. Place a single sheet between the guides, placing the side on which you
want to print towards the back of the printer. Gently push the paper down
in the guides until you feel it stop.
5. Turn the platen knob clockwise until the front edge of the paper comes
out from under the top cover.
6. If the paper is not straight, move the release lever forward, then
straighten the paper by hand and move the release lever back.
12
LOADING AND PARKING FANFOLD FORMS
Fanfold forms have holes along the sides and perforations between the
sheets. They are also called sprocket forms, punched forms, or just plain
“computer paper”. This printer accepts forms up to 10” wide. This section
will take you through the procedures for loading, parking and unparking
fanfold forms.
NOTE: To get good line-feeding, put l-inch space (non-printing area)
around a perforation.
.
Loading the paper from the rear of the printer
You can load the fanfold paper either from the rear or from the bottom of the
printer. If you are going to load the paper from the bottom, refer to the next
section.
1. Place a stack of fanfold paper behind and at least one page-length below
the printer.
2. Turn the printer’s power OFF.
3. Push the release lever forward. This has the effect of releasing the paper
from the platen roller, and engaging the tractor feed.
4. Remove the paper guide and put it aside for the moment.
5. Remove the rear cover using the two pits on either side, and push backwards as in Figure l-12.
I
Figure 7-72. Removing the rear cover
6. Move the tractor units downwards by gripping the positioning levers on
both side of the tractor unit as shown in Figure 1-13.
Figure T-73. Move the tractor units downwards for loading the paper from the rear
7. With the tractor covers open, mount the paper by aligning holes with the
pins on the tractor unit.
lamp level
FigUf.9
14
1-14.
Mount the tantold paper over the tractor units.
8. Adjust the spacing of the tractor units by sliding them along the bar, using
the clamp lever at the back of each unit to release and lock them in
position. When the clamp lever is up, the unit is released, and when it is
down, the unit is locked.
9. Now close the tractor covers, again making sure that the paper holes are
aligned with the pins on the tractor units. If they are not aligned properly,
you wilI have problems with paper feeding, possibly resulting in tearing
and jamming of the paper.
10. Turn on the power using the switch located at the front of the printer. The
printer will beep, indicating that the paper is not yet fully loaded. The
orange POWER indicator will also flash to confirm this.
ll.Nowpressthe
( SC~~&C’1 button. The paper will be fed and adjusted
past the print head to a position ready for printing.
12. If you want to set the paper to a different position, set the printer off-line
by pressing the ( ON LINE 1 button, then set the paper by using the
micro-feed function. (For details, refer to Chapter 2.)
13. Replace the rear cover, and mount the paper guide in the horizontal
position shown in Figure l-15, so that it will separate the printed from
the unprinted paper.
Figure 7-75. Mounting the paper guide for fanfold forms
15
F
Loading the paper from the bottom of the printer
You can load the fanfold paper from the bottom of the printer with the
following procedure.
1. Remove the top cover and the roller unit.
2. Open the rear cover using the two pits at the side, and push backwards.
3. Grip the positioning levers on both side of the tractor unit, and pull the
unit upwards as shown in Figure l-l 6.
Figure l-16. Pull up the tractor unit for bottom feeding
4. Place a stack of fanfold paper below the printer.
5. With the tractor covers open, mount the paper from the bottom of the
printer, by aligning holes with the pins on the tractor unit.
6. Adjust the spacing of the tractor uni ts by sliding them along the bar, using
the clamp lever at the back of each unit to release and lock them in
position. When the lever is up, the unit is released, and when it is down,
the unit is locked.
16
Figure 7-77. Install the roller unit after mounted the fanfold paper from the bottom of the printer.
7. Now close the tractor covers, again making sure that the paper holes are
aligned with the pins on the tractor units. If they are not aligned properly,
you will have problems with paper feeding, possibly resulting in tearing
and jamming of the paper.
8. Remount the roller unit and replace the rear cover and the top cover.
Paper parking
After loading fanfold paper from the rear of the printer, you do not have to
unload it when you want to print on a single sheet. The printer will “park”
it for you if you follow the procedure below.
1. To begin paper parking, start with power ON, fanfold paper loaded in
printing position, and the release lever forward.
2. Press the ( ON LINE )button on the control panel to set the printer offline. ON LINE indicator will turn off.
3. Tear off the printed form at the last perforation, leaving not more than
about half a page showing above the top cover. If necessary, press the
(PAPER FEED) button to feed paper forward until a perforation is located
just above the top cover, and tear there.
17
I button on the control panel.
4. Press the ( 5E’phE&C’
The printer will automatically feed the fanfold form backward until the
paper is completely free of the platen.
5. Move the release lever to the back.
6. Mount the paper guide in the upright position.
Now you can load single sheets either automatically or manually, as
explained previously. The fanfold paper remains parked at the back of the
printer.
NOTE: You cannot park the fanfold paper if you have loaded it from the
bottom of the printer.
Paper unparking
When you want to resume using fanfold paper, the procedure is as follows.
1.
2.
3.
4.
Remove all single sheets from the printer.
Mount the paper guide in the horizontal position.
Move the release lever to the front.
1 button. The printer will automatically feed the
Press the C SFTpf&CT
parked fanfold paper back into position for printing.
NOTE: The printer beeps intermittently if you move the release lever while
the paper is loaded.
18
LOADING MULTI-PART FORMS
You can print on continuous multi-part forms with the built-in tractor unit.
You can use multi-part forms that have up to five parts including the original
when the Multi-part mode is selected with the EDS setting. (For details,
please refer to Chapter 3.)
It is recommended to use forms jointed by dotted orpasting under the normal
office condition.
L
Multi-part forms should be pressure sensitive, and should not be used in the
friction feed. (Bottom feed with the pull-tractor is recommended.)
NOTE: When printing continuous multi-part forms, care should be taken,
as the edges of the paper might be damaged.
The tolerance between the dotted or pasted position and other
positions must be less than 0.05 mm.
19
ADJUSTING
THE PRINTING GAP
The distance between the print head and the platen can be adjusted to
accommodate different paper thicknesses. To make this adjustment, remove
the top cover. The adjustment lever is located at the left side of the printer
mechanism. Pushing the adjustment lever backwards narrows the gap;
pulling it forwards widens the gap.
There are six positions, and you can feel the lever clicking into each position.
The second position from the rear is the one most commonly used for single
sheets of paper. Try different positions until you get the best printing results.
(Do not set the lever out of the marked positions.)
Adjustment
lever
I
Figure I-18. Location of the adjustment lever
The following table provides the recommended lever positions for each
paper types as a reference.
Weight (g/m2)
(Each paper)
Thickness (mm)
Recommended
(Total)
Lever position
52 - 82
0.07 - 0.10
2nd
83-90
0.11 - 0.12
3rd
2-PlY
40 - 58
0.12 - 0.16
3rd
0.18 - 0.20
3rd
3-PlY
40-58
0.21 - 0.25
4th
4th
40 - 58
0.24 - 0.26
4-PlY
0.27 - 0.30
5th
Paper Type
Single
5-PlY
40-58
0.30 - 0.33
0.34 - 0.35
1
5th
6th
NOTE: Pressure sensitive paper is recommended for the multi-part paper.
Multi-part mode is recommended when using the 4-ply and 5-ply
paper. (Refer to Chapter 3.)
21
MEMO
Chapter 2
CONTROL PANEL OPERATIONS
The control panel buttons can be pressed individually to perform the operations indicated by their names. Other functions can be achieved by holding
these buttons down when you turn the printer’s power on, or by pressing the
control panel buttons in combination.
This chapter explains all the button and indicator functions.
Pause printing
Feed paper (fast and slow, forward and reverse)
Park fanfold forms
9 Set the top-of-form position
Select the print pitch
Select a font
Print test patterns
Prevent software from changing the panel pitch and font selections
Print a hexadecimal dump
. Clear the printer’s buffer
Change the print color (color printer only)
Store macro definition
l
l
l
l
l
l
l
l
l
l
BUTTONS AND INDICATORS
The printer is equipped with five buttons on the control panel. From left to
right they are,(W)
and (PITCH)(smaller buttons), and ( SEp’#p ?
(PAPER FEED), and ( ON LINE )(larger buttons).
The following is a brief guide to the buttons and indicators on the control
panel.
I
ON LINE button
The ( ONLINE ) button sets the printer on-line and off-line. The status
changes each time you press the button.
When the printer is on-line, it can receive and print data from the computer.
When the printer is off-line, it stops printing and sends the computer a signal
indicating that it cannot accept data.
The printer powers up in the on-line status if paper is loaded, If paper is not
loaded, the printer powers up off-line with the POWER indicator flashing.
When you load paper, the POWER indicator stops flashing, and the printer
goes on-line.
You will want to press the (
ON LINE
) button:
Before and after any other panel operation
l
The other panel buttons operate only in the off-line state. Press the
( ON LINE > button to go off-line. After performing the panel
operation(s), press the ( ON LINE ) button again to go back on-line.
To pause during printing
l
If you press the ( ON LINE ) button during printing, the printer stops
printing and goes off-line, allowing you to check the printout or change
a control panel setting. Printing resumes when you press the ( ON LINE )
button again to go back on-line.
l
To cut fanfold forms at the end of printing
When using fanfold forms, you can hold the ( ON LINE > button down
for one second. In addition to going off-line, the printer also feeds the
paper forward approximately two inches. This allows you to cut it off just
below the last line printed.
When you press the ( ON LINE ) button again to go back on-line, the
paper feeds backward stopping where you left off.
NOTE:This function is valid only when the buffer is empty.
PAPER FEED button
If you press this button while off-line, the paper will feed forward. If you
hold the button down, the printer will perform consecutive line feeds.
24
-
If you alSO press the ( ON LINE ) button while you are line-feeding, t.he
paper will feed automatically to the top of the next page. This is explained
later.
If you press this button while on-line, this will alternately flash the QUIET
indicator on and off. When in Quiet mode with the QUIET indicator lit, the
printer will print slightly slower, but at a reduced noise level.
SET/EJECT/PARK button
NOTE: This button has no effect if the bottom feed mode is selected.
Pressing this button causes the printer to begin paper loading if the paper has
not loaded while in the off-line state.
If the paper has been loaded, this button results in different functions depending on the position of the release lever.
If the mlcase lever is forward for fanfold forms, pressing this button parks
the forms.
If the release lever is back for single sheets, pressing this button ejects the
paper.
PITCH button
This button allows you to select the printing pitch. Remember that the printer
must be off-line for you to do this. Successive presses of this button will
illuminate (and select) the following options in order (Note that semicondesed pitch is not available in the IBM mode):
Pitch
Pica (10 CPI)
Elite (12 CPI)
Semi-condensed (15 CPI)
Condensed pica (17 CPI)
Condensed elite (20 CPI)
Proportional
Condensed proportional
Indicator(s)
10 CPI
12 CPI
15 CPI
10 CPI, COND
12 CPI, COND
PROP
PROP, COND
25
FONT button
This button selects the font to be printed. Draft font is selected at power-up
unless the default settings are changed. To change to HS Draft (High-Speed
Draft) or one of the LQ (Letter Quality) fonts, set the printer off-line, then
press the CFONt, button repeatedly until the indicators beside the desired
selection illuminate. The selections cycle in the following order:
Font
Draft
Roman
Sanserif
Courier
Prestige
script
Option
High-Speed Draft
Indicator(s)
HS-DRAFT, ROMAN
ROMAN
ROMAN, COURIER
COURIER
COURIER, SCRIPT
SCRIPT
OPTION
HS-DRAFT
The Option Font selection will be skipped unless a font cartridge is installed.
POWER-UP FUNCTIONS
In addition to their normal functions, all the control panel buttons have
special functions that operate if you hold them down while switching power
on.
Badlrectmnal
Test/Adjustment
Figure Z-2. Power-up functions of control panel
Short test mode
If the printer is turned on while the c ONLINE 1 button is pressed, the
printer will enter the short self-test mode. The printer will print the version
number of the printer’s ROM, followed by seven lines of the character set.
Each line will be offset by one character from the one before it. The final
result will be something like Figure 2-3. (If the color ribbon is used with
color printer, each line prints in a different color.)
Figure Z-3. Short self-test
Since the self-test occupies the full width of the carriage, ir is recommended
that the printer is loaded with the widest paper possible to avoid damage to
the print head and/or platen.
27
I
t
Long test mode
If the printer is turned on while the (PAPERFEED) button is pressed, the
printer will enter the long self-test mode. The printer will print the version
number of the printer’s ROM and the current EDS settings, followed by the
whole character set printed in each font and pitch available.
The test cycles endlessly, so you must turn the power off to stop it.
Since the self-test occupies the full width of the carriage, it is recommended
that the printer is loaded with the widest paper possible to avoid damage to
the print head and/or platen. In addition, the total number of lines printed is
considerable, more than can be accomodated on a single sheet, so fanfold
paper is recommended for this test.
Print area test mode
By holding the( SE&E&CT
1 button down during power-up, the printer will
enter the print area test mode. This way, you can find out how many lines on
your paper are available for printing. The printer will print the first line
message, then print the last line message after feeding to the bottom of the
page.
If you have loaded the fanfold paper, only the first line message is printed.
Stay in Panel Pitch
By holding the (PITCH)button down during power-up, the print pitch can
only be selected from the control panel. This prevents software interference.
You will hear an acknowledging beep as power comes on.
After the beep tone, you can set the printer off-line, select a print pitch, then
return to on-line and start printing. The pitch you selected will not be reset
or otherwise changed by any commands your software may issue.
Stay in Panel Font
By holding the (FONT) button during power-up, fonts can only be selected
from the control panel. This prevents software interference. There will be an
acknowledging beep as power comes on, after which you can set the printer
off-line, select a font, then return to the on-line state and begin printing. The
selected font will not be changed by any commands your software may issue.
Stay in Panel Pitch and Font
If you want to protect both the pitch and font settings from software changes,
press both the (PITCH)and (FONT1buttons during power-up. There will be
two acknowledging beep tones.
Pressing these buttons during power-up does not prevent you from making
any number of changes later from the control panel.
29
Hexadecimal dump
This feature is useful for programmers who are debugging printing programs and want to see the actual codes the printer is receiving. (Some
computers change the codes the programmer intended.)
In this mode, all data received will be printed in a hexadecimal dump format,
rather than the control codes being acted on as command codes.
This mode is accessed with the following procedure:
SEJ&l~“’ )buttons down,
1. While holding both the(PAPER FEED)and(
turn power ON. A beep tone will be heard.
2. Begin printing. ln place of the usual printout you will get a formatted
dump showing exactly what data the printer receives. Each line presents
sixteen characters, their hexadecimal codes to the left and printable characters printed on the right.
3. At the end of the hexadecimal dump, set the printer off-line with the
( 0N LINE ) button. This is necessary to print the last line.
The following BASIC program is a simple test you can run in hexadecimal
mode:
10
20
30
40
50
60
LPRINT WIDTH “LPT1:“.255
FOR I=0 TO 255
LPRINT CHR$(I);
NEXT I
LPRINT
END
If your system passes the codes directly to the printer without changing
them, you will get a printout like Figure 2-5.
00
10
20
30
40
01
11
21
31
41
02
12
22
32
42
03
13
23
33
43
04
14
24
34
44
05
15
25
35
45
06
16
26
36
46
07
17
27
37
47
08
18
28
38
48
09
19
29
39
49
OA
1A
2A
3A
4A
08
1B
ZB
38
48
OC
1C
2C
3C
4C
50
60
70
80
90
A0
BO
CO
51
61
71
81
91
Al
Bl
Cl
52
62
72
82
92
A2
RZ
C2
53
63
73
83
93
A3
B3
C3
54
64
74
84
94
A4
84
C4
55
65
75
85
95
A5
B5
C5
56
66
76
86
96
A6
B6
C6
57
67
77
87
97
A7
B7
C7
58
68
70
88
98
A8
B8
C8
59
69
79
89
99
A9
89
C9
5A
6A
7A
8A
9A
AA
BA
CA
58
6B
78
8B
9B
AB
BB
CB
DO
01
D7
03
04
D5
D6
07
D8
D9
DA
EO
FO
OD
El
Fl
OA
EZ
F2
E3
F3
E4
F4
E5
F5
E6
F6
E7
F7
E8
F8
E9
F9
EA
FA
QW.S2-5. Sample hexadecimal
30
dump
OD
1D
2D
3D
4D
OE
1E
2E
3E
4E
OF
1F
2F
3F
4F
. . .
. . . . . . . . . . . .
.,,.____.,..__..
!“#$%a’()*+,-./
0123456789:;<=>?
QABCDEFGHIJKLMNO
5C
6C
7C
8C
9C
AC
BC
CC
50
60
70
8D
9D
AD
BD
CD
5E
6E
7E
8E
9E
AE
BE
CE
5F
6F
7F
8F
9F
AF
BF
CF
PQRSTUVWXYZ
‘abcdefghijklmno
pqrstuvwxyz(;)-.
._.__....___....
.,___.._,.._._..
. . . .
. .
DB
DC
DD
DE
DF
EB
FB
EC
FC
ED
FD
EE
FE
EF
FF
. . . . . .
[\I
. .
. . . .
.
. . . .
. . .
. . . .
.
. . . .
.._.___.__,_._._
. . .
. . .
^-
.
.
. .
.
.
Most BASICS, however, are not quite that straightforward. For example, the
IBM-PC will give you a printout similar to Figure 2-6.
L..
00
OF
20
30
40
50
60
01
10
21
31
41
51
61
02
11
22
37
42
52
62
03
12
23
33
43
53
63
04
13
24
34
44
54
64
05
14
25
35
45
55
65
06
15
26
36
46
56
66
07
16
27
37
47
57
67
08
17
28
38
48
58
68
09
58
29
39
49
59
69
OA
19
2A
3A
4A
5A
6A
OB
1B
26
38
46
58
68
OC
1C
2C
3C
4C
5C
6C
OD
1D
20
30
40
5D
60
OA
1E
2E
3E
4E
5E
6E
OE
1F
2F
3F
4F
5F
6F
. .
. . . . . . .
. . . . . . . .
. . .
‘i”#$%as()*+,-./
0123456789::<=>?
@ABCDEFGHIJKLMNO
PQRSTUVWXYZ[\]-‘abcdefghijklmno
70
80
90
A0
71
81
91
Al
72
82
92
A2
73
83
93
A3
74
84
94
A4
75
85
95
A5
76
86
96
A6
77
87
97
A7
78
88
98
A8
79
89
99
A9
7A
8A
9A
AA
78
8B
96
AB
7C
8C
9C
AC
70
8D
9D
AD
7E
BE
9E
AE
7F
8F
9F
AF
pqrstuvwxyz(()--.
. .
. . . . . . .
. .
.
. . .
. . . . . . . . . . . .
. . . . . . . . . . . . . . . .
BO
co
Bl
Cl
82
83
CT.2 c3
B4
c4
85
c5
86
cs
87
c7
B8
C8
B9
CQ
BA
CA
BB
CB
BC
CC
BD
CD
BE
CE
BF
CF
. . . . . . . . . . . . . . . .
. . . . . . . . . . . . . . . .
DO
EO
FO
OD
Dl
El
Fl
OA
D2
E2
F2
04
E4
F4
D5
E5
F5
D6
E6
F6
D7
E7
F7
D8
E8
F8
D9
E9
F9
DA
EA
FA
DB
EB
FB
DC
EC
FC
DD
ED
FD
DE
EE
FE
DF
EF
FF
. . . . . . . . . . . .
. . .
. . . . . . . . . . . . . . . .
. . . . . . . . . . . . . . . .
.
03
E3
F3
. . . .
Figure 2-8. Sample hexadecimal dump with IBM-PC
When the IBM-PC BASIC interpreter sends hex code OD (carriage return)
it adds an extra hex OA (line feed). Hex code 1A (end-of-file) also gets
special treatment: the interpreter does not send it at all. This can cause
problems with graphics or download character data. However, you can solve
this problem by changing line 30 in the preceding program and adding the
coding shown below.
Coding for IBM-PC with monochrome display:
30 GOSUB 100
100 X=INP(&H3BD)
110 OUT &H3BC,I
120 RETURN
c
:IF X<128 THEN 100
:OUT &H3BE,S
:OUT &H3BE,J
Coding for IBM-PC with color adapter:
30 GOSUB 100
100 X=INP(&H379)
110 OUT &H378,1
120 RETURN
:IF X<128 THEN 100
:OUT &H37A,5
:OUT &H37A,4
31
r
SWITCH COMBINATION FUNCTIONS
Several additional functions can be achieved by pressing the control panel
buttons in combinations.
-
Top of Form
Figutu 2-7. Switch combination functions of control panel
Form feed
If you are using single sheets, this operation ejects the current page. If you
are using fanfold forms, it feeds to the top of the next page.
1. Press the ( ON LINE 1 button to set the printer off-line.
2. Press the (PAPER FEED) button and hold it down. The printer will start
performing successive line feeds.
3. While holding the (PAPER FEED) button down, press the( ON LINE )
button, then release both buttons at the same time. The printer will
smoothly eject the current page.
Top of form
When you power on the printer, the top-of-form position is automatically set
to the current position. If this is not where you want the top of the page to be,
you can change the top-of-form position as follows:
1. Press the ( ON LINE > button to set the printer off-line.
2. Move the paper to the desired top-of-form position by pressing the
(PAPER FEED) button, or by performing a forward or reverse micro-feed.
32
3. Press and hold the ( ON LINE > button.
4. While holding the ( ON LINE )button down, press the (PITCH)button,
then release both buttons at the same time. The printer will beep to
indicate that the top-of-form position has been set.
Forward micro-feed
For fine alignment, you can feed the paper forward in very small increments
as follows:
1. Press the ( ON LINE ) button to set the printer off-line.
2. Press the ( ON LINE ) button again and hold it down.
3. While holding the ( ON LINE ) button down, press the (PAPERFEED)
button. The paper will start advancing in a series of small steps. When
you want to stop, release both buttons.
Reverse micro-feed
You can also feed the paper in small increments in reverse, to return to a
higher position on the same page.
NOTE: With fanfold forms, do not try to rctum to a previous page. The per-
foration may catch inside the printer and cause a jam.
1. Press the
) button to set the printer off-line.
) button again and hold it down.
3. While holding the ( ON LINE ) button down, press the ( =u+E=’ )
button. The paper will start moving backwards in a series of small steps.
When you want to stop, rclcasc both buttons.
(
ON LINE
2. Press the (
ON LINE
Changing the auto loading value
Normally, the printer automatically loads the paper one line from the top
edge.
If you want to change this value, follow this procedure:
1. Load the paper using the ( Sy&~CT ) button.
2. Change the print position using the micro feed function.
The line on the card holder helps you to align the baseline of characters
to be printed.
3. After you get the desired position, press the ( ON LINE ) button to save
the value.
This value will remain unless you power off the printer. If you want to retain
this value even after you turn off the power, store it using the Macro
Definition function, which is described below.
Note that you can only change this value immediately after loading paper. If
you feed paper, you cannot change the auto loading value.
Clearing the buffer/All reset
The printer stores received data in a large memory buffer. This creates a
problem when you want to abandon a printing job and restart: the printer may
be holding more data in its buffer than it has actually printed, and this
unprinted data must be cleared out before restarting. Turning power off is one
way to clear the buffer, but there is another way:
1. Halt the printing program on the computer. If printing stops immediately,
the buffer is clear and the rest of this procedure is unnecessary. If printing
does not stop, continue as follows:
2. Press the ( ON LINE > button to set the printer off-line. Printing will
now stop, but there may be data remaining in the buffer.
3. Press and hold the( ON LINE > button.
4. While pressing the C ON LINE > button down, press and hold the
(FONT) button. Continue holding these two buttons down. In one second
you will hear a beep tone signaling that the buffer has been cleared.
If you hold these buttons more two seconds, you will hear three beep
tones signaling that the printer has been initialized to the power-on
default settings.
5. Release these buttons, make any necessary control panel settings, then set
the printer back on-line.
It is essential to halt the printing program on the computer before you go offline. Otherwise, when you go back on-line the computer will start sending
data again and the printer will continue printing, with missing data where the
buffer was cleared.
NOTE : If you are using the SPC-8K, Serial-Parallel Converter, reset the
converter by pressing the red Clear button on it before you reset the
printer.
34
Selecting the print color
Normally, the color printer prints with black even if the color ribbon is
installed.
Without the aid of software, you can change the printing color as follows:
1. Press the ( ON LINE ) button to set the printer off-line.
2. Press the (FONT) button and hold it down.
button, press the ( SLAd&’1 ) button.
3. While holding them
button, one of the indicators of
Each time you press the
FONT or PITCH will blink to show the current color as shown below.
4. Release both buttons after you set the desired printing color.
If you want to save the selected color for later use, store it using the
Macro Definition.
NOTE:This function is valid only when the color ribbon is installed into the
color printer.
Store Macro Definition
You can store the current settings to the printer for later use with the
following procedure:
1. Press the( ON LINE ) button to set the printer off-line.
2. Press the (FONT) button and hold it down.
3. While holding the (FONT)button down, press the (HiDI) button and
hold them down until you hear two beep tones.
4. Release both buttons at the same time after the two beep tones to store
the current setting.
If you release these buttons after three beep tones, the macro is cleared.
NOTE: You can store the following settings with this procedure.
Current Font and Pitch
Current auto-loading amount for cut sheet
Current auto-loading amount for continuous paper
Current auto-loading amount in ASF mode
l
l
l
l
l
Current print color (color printer only)
Data to be stored are controlled in Standard mode and IBM mode separately.
For example, the data stored in the Standard mode are not effective in the
IBM mode, and vice versa.
Chapter 3
DEFAULT SETTINGS
Most printers use a bank of DIP (Dual In-line Package) switches inside the
printer to achieve various functions. However, this printer can change the
power-up default settings by using the Electronic DIP Switch (EDS) mode.
This chapter explains how to use the EDS mode.
HOW TO SET THE EDS MODE
The EDS mode has 25 kinds of functions you can set as the power-on default.
To enter the EDS mode, turn the printer on while simultaneously holding the
Sk&f&CT) , (PAPER FEED] and ( ON LINE 1 buttons.
In EDS mode, the indicators and the buttons on the control panel are used
as shown below in Figure 3- 1.
l
l
l
Use thecmbutton
to select the Bank Number. One of the FONT indicators will illuminate to show the selected Bank Number.
Use the (PITCH)button to select the Switch Number. One of the PITCH indicators will illuminate to show the selected Switch Number.
The QUIET indicator shows the cut-tent setting.
If you want to set it ON, press the (
.
l
Press
the(PAPER
Press the(
FEED
ON LINE
se&f&CT ) button.
button to print out the current settings.
) button to save the new settings and to exit the EDS
mode.
Figure 3-7. Button and indicator functions in the EDS mode
FUNCTIONS OF THE EDS SElTlNGS
The printer is factory-set with all EDS switches in the ON position. These
are the standard settings. By changing the settings, you can alter various
printer functions to match your requirements. The following questions will
help you choose the proper settings.
r
c-5
D-l
D-2
D-3
D-4
D-5
E-l
E-2
E-3
E-4
E-5
38
(Not Used)
Character Table
(Standard mode)
(IBM mode)
IBM Code page or
International
Character Set
(Not Used)
LQ Font Selection
(Not Used)
Graphics
IBM #2
(See below)
(See below)
Italics
IBM #l
Switch A-l: Do you want to use the printer in Standard mode or IBM
mode?
Select the mode compatible with your computer and software. In Standard
mode the prinlcr operates like the Epson LQ-860. In IBM mode it operates
like the IBM Proprintcr X24E. The ON position selects Standard mode. The
OFF position selects IBM mode.
Switch A-2: Does your software download characters to the printer?
‘..-
In order to download characters this switch must be in the OFFposition. The
printer then uses its RAM memory for storing character patterns and
provides only a one-line print buffer. If you leave this switch ON, the printer
uses its RAM memory as an input buffer, allowing the computer to send data
faster than the printer prints.
NOTE: When you want to download characters with IBM mode by the
monochrome version printer, you must install the optional RAM
cartridge (RC-322). Otherwise, you cannot download even if this
switch is set OFF.
Switch A-3: Do you want an automatic line feed?
If you leave this switch in the ON position, a separate line-feed code is
required from your computer to obtain a line feed.
If you move this switch to the OFF position, the printer performs both a
carriage return and Iine feed each time it receives a carriage-return code.
Most computer systems send a line feed code, or both a carriage rctum and
line feed, at the end of each line, so this switch should be left ON.
If you get double lint spacing when you expect single spacing, or if lines
overprint each other, try changing the setting of this switch.
Switch A-4: Are you going to use the automatic sheet feeder (ASF)?
In order to use the automatic sheet feeder SF-lODQ, move this switch to the
OFF position. Otherwise leave it ON.
Switch A-S: Arc you going to print dot graphics uni-directionally?
When printing in dot graphics mode, the printer may either print bidirectionally (in alternate directions) forspccd or in one direction only (unidirectional
for increased accuracy). For practically all purposes, however, bidirectional
printing is sufficiently accurate. In order to print uni-directionally, move this
switch to the OFF position.
39
Switch B-l: Are you going to print on multi-part paper?
You can use up to 3-ply paper when this switch is ON. If you want to print
on 4-ply or 5-ply paper, set this switch to the OFF position.
Switch B-2: Do you want the printer to stop printing at the end of the paper,
or to keep printing?
When this switch is OFF the printer ignores the paper-out detector and prints
down to (and beyond) the bottom edge. Otherwise leave it ON.
Switch B-3: Do you want to advance paper automatically at the end of
printing?
You can select the Tear Off function with this switch OFF.
When using fanfold paper, the Tear Off function allows you to tear off one
sheet of paper without fully advancing the following sheet.
Switch B-4: This switch is used for technical purpose only. Leave this
switch ON.
Switch B-5: Which type of printing area do you want to use for single
sheets?
This printer can use two types of printing arca format for single sheets.
By putting the switch ON (“Type A”), the top of the first line of printing will
start l/6 inch from the top ofthe paper, and the printed area will end l/6 inch
from the bottom of the paper.
By putting the switch OFF (“Type B”), the first line of printing will start at
one inch from the top of the paper, and the printed area will end 6 mm from
the bottom of the printer.
Switches C-l and C-2: Which print mode do you want to set?
These switches sclcct the default print pitch and the fonts as shown below.
Print Mode
C-l
c-2
1OCPIDRAFT
1OCPIHS DRAFT
17CPI DRAFT
1OCPI LQ
ON
ON
OFF
OFF
ON
OFF
ON
OFF
NOTE: If you change these switches after you have stored the macro, these
settings will override the macro setting.
40
-
Switches C-3 and C-4: What is the page length of your paper?
I
j
(
Leave these switches ON if you will bc using 1l-inch forms. You will need
to change the switches if you will be using a different page length as shown
below:
Switch D-l: The action of this switch depends on the mode chosen with
switch A-l.
If you sclccted Standard mode, do you want italic or graphic
characters?
Move this switch OFF to print italics in the Standard character set. If you
leave this switch in the ON position, in place of italics you will get the
graphic characters, international characters, and mathematical symbols of
IBM character set #2. See Chapter 9, character codes 128 to 254.
If you selected IBM mode do you want IBM character set #l or#2?
ON selects character set #2, which is for computers with an S-bit interface
(the most common kind). OFF selects character set #l, for computers with
a 7-bit interface.
/
6
/
i
1
t
i
j
I
L
Switches D-2 to D-4:Do you want an intcmational character set or IBM
code page?
International character sets differ in their assignment of 14 character codes
in the Standard Italic character set. See the character tables at the back of this
manual. With these switches you can sclcct one of eight character sets as
follows:
41
Except in the Standard Italic character set, these switches select the default
character code page as shown below:
IBM Code Page
D-2
D-3
D-4
IBM Code Page
D-2
D-3
D-4
#437 U.S.A.
ON
ON
ON
#863
Canadian French
ON
ON
OFF
#850 Multi-lingual
OFF
ON
ON
#865 Nordic
OFF
ON
OFF
#860 Portuguese
ON OF’F ON
(Reserved)
ON
OFF OFF
#861 Icelandic
lOFFlOl?FI
loFFloFFloml
ON 1 (Reserved)
Switches E-l to E4:Which font do you want to print as the default Letter
Quality?
These switches allows you to choose the default font selected when LQ
mode is selected, as shown below.
OCR-B*
OFF
ON
OFF
ON
Orane*
OFF
ON
OFF OFF
OCR-A*
ON
OFF
OFF
ON
Orator*
OFF OFF OFF
ON
Cinema*
ON
OFF
OFF OFF
Code 39*
OFF OFF
OFF OFF
Optional fonts (marked with an asterisk) can be selected only when the corresponding font cartridge is installed in the printer.
If the corresponding font cartridge is not installed, then Roman is selected.
42
BIDIRECTIONAL
TEST/ADJUSTMENT
MODE
This mode is used to adjust the alignment of the print head on successive
bidirectional passes. After a period of some months, your printer may work
itself out of alignment on left and right printing passes. This will be most
evident in graphics printing. This mode will probably be used very rarely.
1. Turn the printer off and then turn it on again while holding down the
“F;f&“’ > and ( ON LINE ) buttons. The printer will then print
something like the following:
*** DOT ADJUSTMENT
0 :
LQ
SETTING ***
////////////////////////////////////////
2. The printer will feed the paper forwards and backwards during this
operation, allowing you to view the paper for optimum alignment.
3. To adjust the printing, use the( SE:~,+k~‘~ )and (PAPER FEED) buttons.
1 >button will move the second pass to the left. The
The( 51f&dkL
(PAPER FEED)
button will move the second pass to the right.
*'* DOT ADJUSTMENT
LQ
SET&y
P
1
(PAPERFEED
0 :
'iQ
-1 :
)-2Q
0 :
SETTING ***
////////////////////////////////////////
,,,,//111,1,,,,1,,1,111111111111111111//
,,,,,,,,1,,,1,,,////11/////////111//1/1/
////////////////////////////////////////
4. When the two passes are aligned with each other to form one continuous
line, the bidirectional alignment test is completed.
5. To change the mode for which the bidirectional adjustment is performed,
press the ( ON LINE ) button. This will cycle between “LQ”,
“DRAFT” and “DRAFT COND”.
Repeat the process for all print modes.
***,DOT ADJUSTMENT
LQ
SL&&&C'
(PAPER~Q
(
ON LINE
'iQ
mRAFT
(PAPER FEED*~~~~
S'Jsf&C' /RAFT
0 :
-1
:
SETTING ***
////////////////////////////////////////
,//,,,,,,/,,,//,,,,,/1///////1/1/1111111
1111,1111,,,,11,,,,,,,,,,,,,,,,,,,,,,,,,
0 :
////////////////////////////////////////
0
////////////////////////////////////////
:
+1 :
1((11111((;1~(11111(111111/1111/1(1(:111
0 :
////////////////////////////////////////
6. To save the corrected values and to exit from this mode, press the (
button.
l
** DOT ADJUSTMENT
LQ
////////////////////////////////////////
-1 :
/,///,,,///,/,,,///,/1/1//////1111111111
11,,111,,,1,,,,11111111111111111/111/1/1
SE&f&C'
/Q
(PAPER FEEDwQ
(
ON LINE
-RAFT
(PAPERFEED
SETTING ***
0 :
0 :
////////////////////////////////////////
0
:
////////////////////////////////////////
:
1111~l111~1/1~11/111(1111111111111//11:/
+I
SE&E&CT
-RAFT
(
ON L'NE
<PITCH)
44
/RAFT
cotm
-;cTI END .tS
0 :
////////////////////////////////////////
0 :
1/lll/lllllllll1lllllllllllllllllllllllllllllllllllllllllllllll
Chapter
4
PRINTER CONTROL COMMANDS
The printer has two emulation modes: Standard mode and IBM mode.
In standard mode, the printer emulates the functions of the Epson LQ-860.
In IBM mode, the printer emulates the IBM Proprinter X24E. Additional
command codes are included as a superset of these emulations.
The emulation is changed by means of EDS switch A- 1. When ON, the
printer will be in standard mode, and when OFF, the printer will be in IBM
mode (see Chapter 3). It is not possible to change the emulation mode by
means of software control.
This chapter describes the printer’s control commands. Some commands are
common to both the standard and IBM modes. In the descriptions of the commands, all commands will be categorized by function. The name of each
command is followed by a table like the one below:
Mode
Std.
ASCII
Decimal
<ESC>
“x”
<ESC>
“X” <l>
“1”
Hexadecimal
27 120 49
1B
70 31
27 120
1B
78 01
1
Mode:
Indicates the mode in which the command is recognized.
Std. Standard mode (EDS switch A-l on)
IBM IBM mode (EDS switch A-l off)
Both Both standard and IBM modes
ASCII:
Indicates the ASCII coding of the command.
Control characters are enclosed in pointed brackets: For example, <l> means character code 1.
Decimal:
Gives the command in decimal character codes.
Hexadecimal:
Gives the command in hexadecimal character
codes.
i
Parameters for which values must be supplied are indicated by italic letters
such as n.
45
FONT CONTROL COMMANDS
Select draft quality characters
Mode
Bo*
Std.
Decimal
ASCII
“(”
“(3.
“F”
“)”
<ESC>
“x”
<ESC>
“X” co>
“)”
Hexadecimal
40 40 70 41 41 57
“9”
“0”
28 28 46 29 29 39
27 120 48
18 78 30
27 120
18
0
78 00
Changes from letter quality to draft quality. Ignored if the (FONT)
button was pressed during power-up.
Select draft pica characters
IMode (
1 Decimal
ASCII
1 IBM 1 <ESC>
“I”
<0>
1 27 73
1
0
Hexadecimal
IlB4900
1
1
Changes to draft quality characters with pica pitch (10 cpi). Ignored
if the (FONT)or (FVTWbutton was pressed during power-up.
Select draft elite characters
Mode
ASCII
IBM
<ESC>
Decimal
“I”
<8>
27 73
Hexadecimal
8
1B
49
08
Changes to draft quality characters with elite pitch (12 cpi). Ignored.
if the (FONT) or (PITCH)button was pressed during power-up.
Select draft condensed characters
Mode
ASCII
IBM
<ESC>
Decimal
“I”
<DLE>
27 73 16
Hexadecimal
1B
49
10
Changes to draft quality characters with condensed pitch (17 cpi).
Ignored if the (FONT) or GiEFi) button was pressed during
power-up.
46
‘-
Select L Q characters
Mode
Std.
Hexadecimal
Decimal
ASCII
<ESC>
“x”
“1”
<ESC>
“X1’ <l>
27 120 49
1B
78 31
27 120
1B
78 01
1
Changes from draft quality to letter quality. The initial LQ font is
Roman unless a different font has been selected by a preceding command. Ignored if the (FONT) button was pressed during power-up.
Select LQ pica characters
Mode
ASCII
IBM
<ESC>
Decimal
“I”
<2>
27 73
Hexadecimal
2
1B 49
02
Changes to letter quality characters with pica pitch (10 cpi). Ignored
if the (FONT) orbutton was pressed during power-up.
Select LQ elite characters
Mode
ASCII
IBM
<ESC>
Decimal
“I”
<LF>
27 73
10
Hexadecimal
1B 49 OA
Changes to letter quality characters with elite pitch (12 cpi). Ignored
if the @BiT) or (PITCH)button was pressed during power-up.
Select LQ condensed characters
Mode
ASCII
IBM
<ESC>
Decimal
"I"
<Dc2>
27 73 18
Hexadecimal
1B 49
12
Changes to letter quality characters with condensed pitch (17 cpi).
Ignored if the (FONT) or (PITCH)button was pressed during powerup*
Select LQ proportional
Mode
ASCII
IBM
<ESC>
characters
Hexadecimal
Decimal
“I”
27 73
<3>
3
18 49 03
Changes to letter quality characters with proportional pitch. Ignored
if the m
or (ml
button was pressed during power-up.
Select LQ font
Decimal
Hexadecimal
Mode
ASCII
Both
<ESC>
‘I?
n
27 107
n
18 6B
n
<FS>
“C”
n
28 67
n
1C
n
Std.
43
Selects an LQ font according to the value of n. In draft mode, this
command remains dormant and takes effect later when LQ is
selected. Ignored if the (-3
button was pressed during powerup or the corresponding font is not installed.
n
0
1
2
3
4
5
6
7
Font
Roman
Sanserif
Courier
Prestige
script
OCR-B
OCR-A
Orator
(Option)
(Option)
(Option)
n
8
9
10
11
12
13
14
15
Font
Orator 2
TW-Light
Letter Gothic
Blippo
H-Gothic
Orane
Cinema
Code 39
(Option)
(Option)
(Option)
(Option)
(Option)
(Option)
(Option)
(Option)
Select font
IMode 1
1 Both
1
ASCII
“(9.
1 Decimal
“(9,
“F’
‘.),,
‘.),9
n
1
Hexadecimal
Changes a font according to the value of n. Ignored if the (K5K)
button was pressed during power-up.
n
0
1
2
48
Font
Roman
Sanserif
Courier
I
I 40 40 70 41 41 n 1 28 28 46 29 29 n I
n
3
4
9
Font
Prestige
script
Draft
Select italic characters
Mode
ASCII
Std.
<ESC>
Decimal
Hexadecimal
27 52
“4”
1B
34
Causes subsequent characters to be printed in italics.
Select upright characters
Mode
ASCII
Std.
<ESC>
Decimal
Hexadecimal
27 53
“5”
1B
35
Stops italic printing and causes subsequent characters to be printed
upright.
Emphasized printing
Mode
ASCII
Both
<ESC>
Decimal
Hexadecimal
27 69
“E”
18 45
Causes subsequent characters to be emphasized by adding extra
thickness to vertical strokes.
Cancel emphasized printing
Mode
ASCII
Both
<ESC>
Decimal
Hexadecimal
27 70
“F”
IB 46
Cancels emphasized printing.
Double-s trike printing
I
ASCII
<ESC>
“G”
Decimal
1 27 71
)
Hexadecimal
I
I
1 1B 47
Causes subsequent characters to be printed in double-strike mode
with a slight vertical paper motion in between, causing a thickening
of horizontal strokes.
For bold print, use of double-strike is recommended in LQ mode,
and combined use of emphasized and double-strike is recommended in draft mode.
49
Cancel double-s trike printing
Mode
ASCII
Both
<ESC>
Decimal
“H”
Hexadecimal
1B 48
27 72
Cancels double-strike printing.
Start underlining
Mode
Both
ASCII
Decimal
<ESC>
“-”
<ESC>
‘I-” <l>
“1”
Hexadecimal
27 45 49
27 45
1
IB 2D 31
1B 2D
01
Causes subsequent characters to be underlined. IBM block graphics
characters and spaces skipped by horizontal tabulation are not
underlined.
Stop underlining
Mode
Both
Decimal
ASCII
<ESC>
“-”
<ESC>
“-" <0>
“0”
Hexadecimal
27 45 48
1B 2D
30
27 45
0
1B 2D
00
Stops underlining.
S tarf 0 verlining
Mode
ASCII
IBM
<ESC>
“ _ ” “1”
27 95 49
Decimal
1B 5F
Hexadecimal
31
<ESC>
“ _ ” <l>
27 95
1B 5F
01
1
Causes subsequent characters to be overlined. Spaces skipped by
horizontal tabulation are not overlined.
Stop 0 vet-lining
Mode
ASCII
Decimal
IBM
<ESC>
‘I-”
<ES&
tip" <O>
“0”
Stops overlining.
50
Hexadecimal
27 95 48
IB 5F
30
27 95
1B 5F
00
0
.-
Select score
Mode
Std.
Hexadecimal
Decimal
ASCII
<ESC>
“-”
“(”
CO7
cl7
27 40 45
<37
nl
0
n2
1 nl
3
1B
n2
28 2D
00
03
01 nl
n2
Start score according to the values of nl and n2, as shown below.
nl
1
2
3
n2
0
1
2
5
6
Function
Underlining
Strike-through
Overlining
Function
Cancel score
Single continuous line
Double continuous line
Single broken line
Double broken line
Select ornament character
Mode
ASCII
Std.
<ESC7
Hexadecimal
Decimal
“q”
n
27 113
n
IB
71
n
Selects an ornament character according to the value of n, as shown
below.
n
0
1
2
3
Character
Normal
Outline
Shadow
Shadow and outline
Superscript
Hexadecimal
Decimal
Mode
ASCII
Both
<ESC>
“S”
<ESC>
“S" <07
“0”
27 83 48
IB
27 83
18 53 00
0
53 30
Causes subsequent characters to be printed as superscripts. Does not
change the character pitch.
51
Subscript
1 Decimal
IMode 1 ASCII
Both
<ESC>
“S”
<ESC>
“S" <l>
“1”
1
Hexadecimal
27 83 49
1B
53 31
1
1B
53 01
27 83
Causes subsequent characters to be printed as subscripts. Does not
change the character pitch.
Cancel superscript
Mode 1
or subscript
ASCII
Both I <ESC>
Decimal
1 27 84
“T”
Hexadecimal
I IB 54
Stops printing superscripts or subscripts and returns to normal
printing.
CHARACTER
SET COMMANDS
Select standard character set
Selects the standard character set. This is the power-up default in
Standard mode if EDS switch D-l is OFF.
Select IBM character set
Selects an IBM character set. This is the power-up default in IBM
mode.
52
1
Select character set #I
Mode
ASCII
Both
<ESC>
Decimal
27 55
“7”
Hexadecimal
1B
37
Selects character set #l.
Select character set #2
Mode
Both
Decimal
ASCII
<ES6
27 54
“6”
Hexadecimal
1B
36
Selects character set #2.
Select international
Mode
Std.
character set
ASCII
<ES&
Decimal
“R”
n
27 82
Hexadecimal
n
1B
52
n
Selects an international character set in the Standard character set
according to the value of n.
n
0
1
2
3
4
5
6
7
Character set
U.S.A
France
Germany
England
Denmark I
Sweden
Italy
Spain I
n
8
9
10
11
12
13
14
64
Character set
Japan
Norway
Denmark II
Spain II
Latin America
Korea
Irish
Legal
The first eight of these character sets (from U.S.A. to Spain I) can
be selected as power-up defaults by EDS switches D-2 to D-4.
Y
j
t
53
Select IBM code page
Mode
Both
ASCII
Decimal
<ESC> “[” “T” <4> <0>
nl
n2
CO> CO>
Hexadecimal
27 91 84
0
4
0 nl
0
n2
18 58
00
54 04
00
nl
00
n2
Changes the code page of the current IBM character set according
to the values of nl and n2.
nl
n2
1
3
181
82
3
3
3
3
92
93
95
97
Code page
#437 U.S.A.
#850 Multi-lingual
#860 Portuguese
#86 1 Icelandic
#863 Canadian French
#865 Nordic
These code pages can be selected as power-up defaults by EDS
switches D-2 to D-4.
Enable printing
Mode
ASCII
IBM
<ESC>
of all character codes
Hexadecimal
Decimal
7”
nl
n2
27 92 nl
n2
I IB 5C nl
n2
Enables printing of all characters in the IBM character set, including
those assigned to character codes which are normally considered
control codes. This command remains in effect for the next nl + n2
x 256 characters, where nl and n2 are numbers between 0 and 255.
During this interval no control functions are executed. If a code with
no assigned character is received, the printer prints a space.
Enable printing
character
Mode
ASCII
IBM
<ESC>
of all character
Decimal
“ h”
27 94
This command operates like <ES0
effect for only one character.
54
codes on next
Hexadecimal
1B 5E
‘T’ except that it remains in
Select slash zero
Mode
Std.
ASCII
<ESC>
<ESC>
Decimal
Hexadecimal
“ _ ” “1”
27 126 49
1B 7E
31
"- "
27 126
IB 7E
01
<17
1
Causes subsequent zero characters to be overprinted with a slash
(0).
Select normal zero
Mode
Std.
ASCII
Decimal
Hexadecimal
<ESC>
“ - " "0"
27 126 48
IB 7E
30
<ESC>
“- ”
27 126
1B 7E
00
<()7
0
Causes subsequent zero characters to be printed normally (0),
without a slash.
CHARACTER SIZE AND PITCH COMMANDS
Pica pitch
Mode
ASCII
Std.
<ESC>
IBM
<DC27
Decimal
“I”’
Hexadecimal
27 80
1B
18
12
50
In Standard mode, changes from either elite or semi-condensed to
pica pitch (10 cpi) or from condensed elite to condensed pica (17
cpi). In IBM mode, changes from either elite or condensed to pica
(10 cpi). Ignored if theGTTWbutton was pressed during power-up.
Elite pitch
Mode
ASCII
Std.
<ESC>
“M”
Decimal
IBM
<ESC>
“:”
27
Hexadecimal
77
1B 4D
27 58
1B 3A
Changes from either pica or semi-condensed to elite pitch (12 cpi)
or from condensed pica to condensed elite (20 cpi). Ignored if the
(PITCH)button was pressed during power-up.
9
Semi-condensed
Mode
ASCII
Std.
<ESC>
pitch
Decimal
Hexadecimal
27 103
“g”
1B
67
Changes from either pica or elite to semi-condensed pitch (15 cpi).
Ignored if the (PITCH)button was pressed during power-up.
Condensed printing
Mode
Both
ASCII
Decimal
<Sb
<ESC>
<Sb
Hexadecimal
15
OF
27 15
1B OF
Changes from pica to condensed pica (17 cpi) or from elite to
condensed elite (20 cpi). Ignored if the (PITCH1button was pressed
during power-up.
Cancel condensed printing
IModel
ASCII
1
1 Both 1 <DC2>
Decimal
1
1 18
Hexadecimal
1
I 12
I
In Standard mode, changes from condensed pica to normal pica or
from condensed elite to normal elite. In IBM mode, always changes
to normal pica. Ignored if the (PITCH)button was pressed during
power-up.
Expanded printing
IMode 1
Both
ASCII
1
<ESC>
“W” “1”
<ESC>
"W"
<l>
Decimal
1
27 87 49
1 27 87
1
Hexadecimal
1B
57 31
1 1B
57 01
Causes subsequent characters to be expanded to double width.
Cancel expanded printing
Mode
Both
Decimal
ASCII
<ESC>
“w”
<ESC>
“W” <0>
“0”
Hexadecimal
27 87 48
1B
57
27 87
1B
57 00
0
Stops expanded printing and returns to normal width.
56
30
1
Expanded printing
Mode
Both
for one line
Decimal
ASCII
14
<so>
27
<ESC> <SO>
Hexadecimal
OE
14
18 OE
Causes subsequent characters in the current line to be expanded to
double width. Characters return to normal width after the next line
feed (<LF>). The <DC4>, <VT>, <FF>, and <ES0 “W” 0 commands also cancel expanded printing.
Cancel one-line expanded printing
Mode
ASCII
Both
<DC4>
Decimal
20
Hexadecimal
14
Stops one-line expanded printing set with <SO> or <ES0
Does not cancel <ES0 “W” 1.
<SO>.
Select character width
Mode
ASCII
Std.
<FS>
Decimal
“E”
28 69
n
Hexadecimal
n
1c
45
n
Select a character width according to the value of n as shown below.
n
0
1
2
Character width
Normal-wide
Double-wide
Triple-wide
Select proportional
Mode
Std.
IBM
spacing
Decimal
ASCII
Hexadecimal
“p”
“P”
“1”
27 112 49
1B
<ESC>
<l>
27 112
1
1B
70 01
<ESC>
“p”
<l>
27 80
1
1B
50 01
<ESC>
70 31
Causes subsequent characters to be proportionally spaced. Ignored
if the (PITCH)button was pressed during power-up.
57
Select fixed spacing
Mode
Hexadecimal
“p” “0”
“p” <o>
27 112 48
1B
70 30
<ESC>
27 112
0
1B
70 00
<ESC>
“P” <O>
27 80
0
1B
50
Std. - <ESC>
IBM
Decimal
ASCII
00
Causes subsequent characters to be printed with fixed character
spacing. Ignored if the(piK%“button was pressed during power-up.
Select master print mode
Mode
ASCII
Std.
<ESC>
Decimal
LL,..
.
n
27 33
n
Hexadecimal
1B
21
n
Selects a combined print mode according to the value of n. The
value of n is the sum of the values given below for the desired characteristics.
Examples: n = 1 gives elite; n = 9 (1 + 8) gives emphasized elite; II
= 137 (1 + 8 + 128) gives underlined emphasized elite.
Function
Underline
Italic
Expanded
Double strike
Emphasized
Condensed [*]
Proportional [*]
Elite [*I
n value
128
64
32
16
8
4
2
1
[*I Ignored if the (PITCH)button was pressed during power-up.
Increase character spacing
Mode
ASCII
Std.
<ESC>
Decimal
<SP>
n
27 32
n
Hexadecimal
1B
20
n
Increases the space between characters by n dots, where n is a
number from 0 to 127. Used in microjustification.
58
Select double or quadruple size
Mode
ASCII
Std.
<ESC>
Decimal
“h”
27 104
n
Hexadecimal
n
1B
68
n
Selects the size of subsequent characters as shown below. Extrahigh characters align along the cap-line of normal characters, with
the base line temporarily moving down. Line spacing is temporarily
doubled when n = 1 and quadrupled when n = 2.
n Effect
0 Normal size
1 Double-high, double-wide
2 Quadruple-high, quadruple-wide
Select character size
Mode
Both
ASCII
“(”
“(”
Decimal
“S”
“>”
“>”
n
40 40 83 41 41 n
Hexadecimal
28 28 53 29 29 n
Selects a combination of character height and width according to the
value of n, as below. Does not move the base line.
n
0
1
2
3
Character width
Single width
Double width
Single width
Double width
Print double-height
Character height
Single height
Single height
Double height
Double height
characters
Prints subsequent characters at double height without moving the
base line, and without changing the line spacing.
59
Return to normal height
Terminates double-height printing and prints subsequent characters
at normal height.
Select character height, width, and line spacing
Mode
IBM
ASCII
Decimal
<ESC> “[” “@” <4> <0>
<O> <O>
n
m
27 91 64
0
0
Hexadecimal
4
0
1B 5B
nm
00
40
00
04 00
n
m
Selects a combination of character height, width, and line spacing
according to the value of n and m, as below. Does not move the base
line.
n
0
1
2
16
17
18
32
33
34
m
1
2
60
Line spacing
Character height
Unchanged
Unchanged
Unchanged
Single
Single
Single
Double
Double
Double
Unchanged
Single height
Double height
Unchanged
Single height
Double height
Unchanged
Single height
Double height
Character width
Single width (same as <ES0 “w” 0)
Double width (same as cESC> “W” 1)
VERTICAL POSITION COMMANDS
Set line spacing to l/8 inch
Mode
ASCII
Both
<ESC>
Decimal
Hexadecimal
27 40
“0”
1e
30
Sets the distance the paper advances or reverses in subsequent line
feeds to l/8 inch.
i ,.
Set line spacing to 7160 or 7/72 inch
Mode
ASCII
Both
<ESC>
Decimal
Hexadecimal
1B
27 49
“1”
31
Sets the distance the paper advances or reverses in subsequent line
feeds to 7/60 inch (standard mode) or 7/72 inch (IBM mode).
Set line spacing to l/6 inch
Mode
ASCII
Std.
<ESC>
Decimal
Hexadecimal
27 50
“2”
1B
32
Sets the distance the paper advances or reverses in subsequent line
feeds to l/6 inch.
Set line spacing to n/360 inch
Mode
Std.
1 Decimal
ASCII
-
Hexadecimal
<ES&
“+”
n
27 43
n
IB 28
n
IFS>
“3”
n
28 51
n
1C
n
33
Sets the distance the paper advances or reverses in subsequent line
feeds to n/360 inch, where R is between 0 and 255.
61
Set base unit for line spacing
Mode
IBM
ASCII
<ESC>
<o>
Decimal
“[”
‘T’
<o>
<4>
<o>
n
<o>
Hexadecimal
27 91 92
0
0
4
0
0
1B 58 5C
n
00
00
04 00
00
n
Sets the base unit for the line spacing commands, cESC> “3” and
<ESC> “J”. If the value of n is 180, the base unit is set to l/l 80”. If
the value of n is 216, the base unit is set to l/216”. If otherwise
specified, this command is ignored. This command becomes effective only after <ES0 “3” or <ES0 “J” is received, The default
base unit is set to l/216”.
Set line spacing to n/180 inch or n/216 inch
Mode
ASCII
Both
<ESC>
Decimal
“3"
n
27 51
n
Hexadecimal
1B
33
n
Sets the distance the paper advances or reverses in subsequent line
feeds to n/l80 inch or n/216 inch, where n is between 0 and 255. If
n= 0, in Standard mode the line-feed distance is set to 0, but in IBM
mode this command is ignored.
Set line spacing to n/60 inch or n/72 inch
Mode
ASCII
Both
<ESC>
Decimal
“A”
n
27 65
n
Hexadecimal
IB 41
n
In Standard mode, sets the distance the paper advances or reverses
in subsequent line feeds to n/60 inch, where n is between 0 and 255.
If n =O, the line spacing is set to 0.
In IBM mode, this command defines the distance the paper advances or reverses in subsequent line feeds to n/72 inch, where n is
between 1 and 85. The new line spacing does not take effect until the
next <ESC> “2” command.
62
‘I
Execute <ES&
Mode
ASCII
LBM
<ESC>
“cA”
Decimal
“2”
27 50
Hexadecimal
1B
32
Sets the line spacing to the value defined by the last preceding
<ES0 “A” command. Sets the line spacing to l/6 inch if there is
no preceding <ES0 “A” command.
Line feed
Mode
ASCII
Both
<LF>
Decimal
10
Hexadecimal
OA
Prints the current line and feeds the paper to the next line. See the
preceding commands for the line spacing.
Reverse line feed
Mode
Decimal
ASCII
Hexadecimal
Std.
<ESC> <LF>
27
10
18 OA
IBM
<ESC>
27 93
1B 5D
“1”
Prints the current line and feeds the paper in the reverse direction to
the preceding line. See the preceding commands for the line
spacing. Ignored when friction feed is used.
Select forward feed mode
Mode 1
ASCII
Std. 1
<FS>
Decimal
“F’
I 28 70
Hexadecimal
1 1C
46
Cancels the reverse feed mode and selects forward feed mode. This
is the default setting at power-on.
Select reverse feed mode
Mode
ASCII
Std.
<FS>
Decimal
“R”
28 a2
Hexadecimal
1C
52
Selects reverse feed mode. Reverses the direction of all vertical
movements. Ignored when friction feed or bottom feed is used.
63
Perform one n/l804nch or n/216=inch line feed
Mode
ASCII
Both
<ESC>
Decimal
“J”
27 74
n
Hexadecimal
1B 4A
n
n
Feeds the paper once by n/l 80 inches or n/216 inches, where n is
between 1 and 255. Does not move the print position right or left in
the standard mode. Does not change the line-spacing setting.
Perform one n/180-inch reverse line feed
Mode
ASCII
Std.
<ESC>
Hexadecimal
Decimal
“j”
27 106
n
IB 6A
n
n
Feeds the paper once by n/l 80 inches in the reverse direction, where
n is between 1 and 255. Does not move the print position right or left.
Does not change the line-spacing setting.
Feed paper n lines
Mode
Std.
Hexadecimal
Decimal
ASCII
<ESC>
“f’
“1”
n
27 102 49
n
1B 66
<ESC>
“f’
cl>
n
27 102
n
1B
1
31
n
66 01
n
Feeds the paper n lines from the current line, where n is between 0
and 127.
Set top of page at current position
Mode
ASCII
IBM
<ESC>
Hexadecimal
Decimal
1B
27 52
“4”
34
Sets the current position as the top-of-page position. Note that this
can also be done from the control panel.
Set page length to n lines
Mode
ASCII
Both
<ESC>
Decimal
“C”
n
27 67
n
Hexadecimal
1B 43
n
Sets the page length to n lines in the current line spacing, where n
is between 1 and 127 in Standard mode or between 1 and 64 in IBM
mode. Changing the line spacing later does not alter the physical
page length. The current line becomes the top of the page.
Set page length to n inches
Mode
ASCII
Both
cESC>
Decimal
“C”
-co>
Hexadecimal
27 67
n
0
1B 43 00
n
n
Sets the page length to n inches, where n is between 1 and 32 in
Standard mode or between 1 and 64 in IBM mode. The current line
becomes the top of the page.
Set bottom margin
. ..
Mode 1
I
)
ASCII
t Both 1 <ESC>
I
“N”
n
Decimal
1 27 70
)I
n
Hexadecimal
IlB4E
1
n
Sets the bottom margin to n lines, where n is between 1 and 127 in
Standard mode or between 1 and 255 in IBM mode. The bottom
margin is reset when you change the page length.
Cancel bottom margin
Mode
ASCII
Both
<ESC>
Decimal
“0”
27 79
Hexadecimal
1B 4F
Cancels the bottom margin.
Form feed
Mode
ASCII
Both
<FF>
Decimal
12
Hexadecimal
oc
Feeds the paper to the top of the next page according to the current
page length, and moves the print position to the left margin. When
the automatic sheet feeder (ASF) is selected (EDS switch A-4 is
OFF), this command ejects the current page.
65
Return to top of current page
Mode
Std.
ASCII
Decimal
Hexadecimal
27 12
<ESC> <FF>
1B OC
Feeds the paper backward to the top of the current page. Ignored
when friction feed is used.
Disable paper-out detector
Mode
ASCII
Both
<ESC>
Decimal
Hexadecimal
27 56
“8”
1B 38
Causes the printer to disregard the signal sent by the paper-out
detector, enabling printing to the bottom of the paper. Overrides the
setting of EDS switch B-2,
Enable paper-out detector
Mode
ASCII
Both
<ESC>
Decimal
Hexadecimal
27 57
“9”
1B
39
Causes the printer to stop printing before the end of the paper.
Overrides the setting of EDS switch B-2.
Set vertical tab stops
Mode
Both
ASCII
<ES6
Decimal
“B”
nl
n2
<O>
27 66 nl n2
Hexadecimal
... 0
1B 42 nl n2
... 00
Cancels all current vertical tab stops and sets new vertical tab stops
at lines nl, n2, etc., where nl, n2, etc. are numbers between 1 and
255. A maximum of 16 vertical tab stops can be set. The tab stops
must be specified in ascending order; any violation of ascending
order terminates the tab stop list. Standard termination is by the <O>
control code. The vertical tab stops are set in terms of the current line
spacing and do not move if the line spacing is changed later.
-
Set vertical tab stops every n lines
Mode
Std.
Hexadecimal
Decimal
ASCII
<ESC>
“e”
“1”
n
27 101 49
n
1B
65 31
n
<ESC>
“e”
cl>
n
27 101
n
1B
65 01
n
1
Cancels all current vertical tab stops and sets new tab stops every n
lines, where n is between 2 and 127.
Set vertical tab stops in channel
Mode
Std.
Decimal
ASCII
<ESC>
“b”
n0
n2
nl
.. .
<o>
27 98 no nl
n2 .
0
Hexadecimal
1B
62 n0
n2
nl
... 00
Cancels all current vertical tab stops in channel n0, (where n0 is
between 0 and 7) and sets new vertical tab stops in this channel. (A
channel is a set of vertical tab stops selected by the <ES0 “/”
command.) See <ES0 “B” for parameters nl, n2, .. . CO>.
Select vertical tab channel
Mode
ASCII
Std.
<ESC>
Decimal
y’
n0
27 47 no
Hexadecimal
1B 2F n0
Selects a set of vertical tab stops designated by a channel number
(n0) from 0 to 7. The tab stops in each channel are set by <ES0 “b”.
Vertical tab
Mode
ASCII
Decimal
Hexadecimal
Both
<VT>
11
OB
Feeds the paper to the next vertical tab stop and moves the print
position to the left margin. Performs a line feed if no vertical tabs are
set, as at power-up. Feeds to the top of the next page if vertical tabs
are set but the current line is at or below the last vertical tab stop.
HORIZONTAL POSITION COMMANDS
Set left margin
Mode
ASCII
Std.
<ESC7
Decimal
“1”
n
27 108
Hexadecimal
lB6C
n
n
Sets the left margin at column n (where n is between 0 and 255) in
the current character pitch (pica pitch if proportional spacing is
selected). The left margin does not move if the character pitch is
changed later. The left margin must be at least two columns to the
left of the right margin and within the limits below:
Pica
Elite
Semi-condensed
Condensed pica
Condensed elite
Expanded pica
Expanded elite
Expanded semi-condensed
Expanded condensed pica
Expanded condensed elite
OIn576
O<_n191
OSn5114
0 5 n I 130
0 5 n I 152
OlnS38
OIn145
05n157
02n564
O<n176
Set right margin
Mode
ASCII
Std.
<ESC7
Decimal
“Q”
n
27 81
Hexadecimal
n
1B
51
n
Sets the right margin at column n in the current character pitch (pica
pitch if proportional spacing is currently selected). Column n
becomes the last characterpositionin the line. The right margin does
not move if the character pitch is changed later. The right margin
must be within the limits below:
Pica
Elite
Semi-condensed
Condensed pica
Condensed elite
Expanded pica
Expanded elite
Expanded semi-condensed
Expanded condensed pica
Expanded condensed elite
68
4SnI80
51n596
65 n I
120
71~11137
8 I n I 160
2Sn140
35nS48
3<n<60
4InS68
45nS80
-
Set left and right margins
[Mode 1
ASCII
1 IBM 1 <ESC>
“X”
nl
n2
1 Decimal
1
127
IlB
88nln2
Hexadecimal
1
58&d
1
Sets the left margin at column nl and the right margin at column n2.
See the preceding commands for margin restrictions and other
notes.
Carriage return
Mode
ASCII
Both
<CR>
Decimal
Hexadecimal
13
OD
Prints the current line and returns the next print position to the left
margin. If EDS switch A-3 is OFF, also performs a line feed.
Set automatic line feed
[Mode 1
ASCII
1 IBM t
<ESC>
1 Decimal
“5”
<l>
1 27 53
1
1
Hexadecimal
I
Ill33501
Causes the printer to perform both a carriage return and line feed
each time it receives a <CR> code. This command takes priority
over EDS switch A-3.
Cancel automa tic line feed
Mode
IBM
Decimal
ASCII
<ESC>
“5”
<0>
27 53
Hexadecimal
0
1B
35 00
Causes the printer to perform only a carriage return when it receives
a <CR> code. This command takes priority over EDS switch A-3.
Backspace
Mode
ASCII
Decimal
Hexadecimal
Both
CBS>
8
08
Moves the print position one column to the left. Ignored if the print
position is at the left margin. This command can be used to
overstrike or combine characters.
69
Left justify
Mode
Std.
ASCII
Decimal
<ESC>
“a”
“0”
27 97 48
18
Hexadecimal
61 30
<ESC>
“a”
CO>
27 97
iB
61
0
00
Aligns subsequent text with the left margin, leaving the right margin
ragged.
Center text
Mode
Std.
Decimal
ASCII
<ESC>
“a”
“1”
<ESC>
“a” cl>
Hexadecimal
27 97 49
IB
61 31
27 97
1B
61 01
1
Centers subsequent text between the left and right margins.
Right justify
Mode
ASCII
Decimal
Hexadecimal
Std.
<ESC>
“a”
“2”
27 97 50
IB
<ESC>
“a”
<2>
27 97
1B 61 02
2
61 32
Aligns subsequenttext with the right margin, leaving the left margin
ragged.
Full justify
Mode
ASCII
Std.
<ESC>
<ES&-
Hexadecimal
Decimal
“a”
“a”
“3”
27 97 51
1B 61
<3>
27 97
1B
3
33
61 03
Aligns subsequent text between the left and right margins.
70
-
Set horizontal tab stops
Mode
Both
Decimal
ASCII
<ESC>
“D”
nl
n2
...
-CO>
Hexadecimal
27 68 nl n2
.. .
0
1B 44 nl n2 ,..00
Cancels all current horizontal tab stops and sets new tab stops at
columns nl, n2, etc. in the current character pitch (pica pitch if proportional spacing is currently selected), where nl, n2, etc. are
numbers between 1 and 255. The maximum number of horizontal
tab stops allowed is 32 in Standard mode and 64 in IBM mode. The
tab stops must be specified in ascending order; any violation of
ascending order terminates the tab stop list. Standard termination is
by the CO>control code. To clear all tab stops, specify <ES0 “D”
<o>.
E
‘XL..
Set horizontal tab stops every n columns
Mode
Std.
Decimal
ASCII
Hexadecimal
<ESC>
“e”
“0”
n
27 101 48
n
1B
65 30
n
<ESC>
“e”
<O>
n
27 101
n
1B
65 00
n
0
Cancels all current horizontal tab stops and sets new tab stops every
n columns, where n is between 1 and 127.
I
Reset all tab stops
Mode
ASCII
IBM
<ESC>
Decimal
“R”
27 82
Hexadecimal
IB
52
Resets the horizontal tab stops to their power-up values in which a
tab stop is set every 8 column starting at column 9. Also clears all
vertical tab stops.
Horizontal tab
Mode
ASCII
Decimal
Hexadecimal
Both
<HT>
9
09
Moves the print position to the next horizontal tab stop. Ignored if
there is no next horizontal tab stop in the current line. Note that when
underlining is selected, spaces skipped by horizontal tabulation are
not underlined.
Relative horizontal tab
Mode
ASCII
Std.
<ESC>
Decimal
‘T’
nl
27 92 nl
n2
Hexadecimal
IB 5C nl
n2
n2
Moves the print position right or left a specified distance (maximum
8 inches). Ignored if the resulting position is beyond the right or left
margin. The formulas for the distance and direction are as follows:
If n2 is between 0 and 63, the print head moves right by (nl + n2 x
256) dots.
If you want to move the print head to the left, nl and n2 are obtained
by subtracting the value from 65536, and dividing the result into
high and low bytes.
Relative horizontal tab in inches
Mode
ASCII
IBM
<ESC>
Decimal
“d”
nl
27 100 nl
n2
Hexadecimal
1B 64 nl
n2
n2
Sets the next print position to (nl +n2 x 256)/120 inches from the
current position.
Ignored if this position is beyond the right margin. The maximum
position is 8 inches.
Absolute horizontal tab in inches
Mode
ASCII
Std.
<ESC>
Decimal
“$”
nl
Hexadecimal
27 36 nl
n2
n?
IB
24 nl
n2
Sets the next print position to (nl + n2 x 256)/60 inches from the left
margin on the current line. Ignored if this position is beyond the
right margin. The maximum position is 8 inches.
Absolute horizontal tab in columns
)
IMode 1 ASCII
Std.
Decimal
I
<ES6
“f’
“0”
n
27 102 48
n
<ESC>
“f’
<O>
n
27 102
n
0
Hexadecimal
IlB
IB
66 30
n
66 00
n
Moves the next print position to column n from the left margin,
where n is between 0 and 127.
72
)
GRAPHICS COMMANDS
Print normal-density g-bit graphics
Mode
Both
ASCII
<ESC>
Decimal
“K”
nl
ml
n2
m2
. ..
Hexadecimal
27 75 nl n2
ml m2 . . .
IB 48 nl n2
ml m2 . .
Prints bit-image graphics at 60 dots per inch horizontally. The
graphic image is 8 dots high and nl + n2 x 256 dots wide. Maximum
width is 8 inches (480 dots). ml, m2, ... are the dot data, each a lbyte value from 0 to 255 representing 8 vertical dots, with the most
significant bit at the top and the least significant bit at the bottom.
The number of data bytes must be nl + n2 x 256. Dots beyond the
right margin are ignored. At the end of bit-image printing the printer
returns automatically to character mode.
Print double-density g-bit graphics
Mode
Both
ASCII
<ESC>
Decimal
‘I”
nl
ml
n2
m.2
...
Hexadecimal
27 76 nl n2
ml m2 . . .
IB 4C nl n2
ml m.2 . . .
Prints bit-image graphics at 120 dots per inch horizontally (maximum 960 dots wide). See <ES0 “K” for other information.
Print double-density, double-speed g-bit graphics
Mode
Both
ASCII
<ESC>
Decimal
“Y” nl
n2
ml
m2
27 89 nl
.
ml
Hexadecimal
n2
m2
..
1B
59 nl
ml
n2
m2
Prints bit-image graphics at 120 dots per inch horizontally (maximum 960 dots wide), skipping every second dot in the horizontal
direction. See <ES& “K” for other information.
Print quadruple-density g-bit graphics
Mode
Both
ASCII
<ESC>
Decimal
“Z”
ml
nl
n2
m2
...
27 90 nl n2
ml m2 . . .
Hexadecimal
IB 5A nl td
ml m2 . .
Prints bit-image graphics at 240 dots per inch horizontally (maximum 1920 dots wide), skipping every second dot in the horizontal
direction. See <ES0 “K” for other information.
73
Print hex-density 24-bit graphics
Mode
Std.
Decimal
ASCII
“Z”
<FS>
ml
nl
m2
n2
m3
.. .
28 90 nl ni?
ml m2 m3
.
Hexadecimal
1C 5A nl
ml
m2
d
m3
.. .
Prints 24-bit dot graphics at 360 dots per inch horizontally. The
graphics image is 24 dots high and nZ + n2 x 256 dots wide.
Maximum width is 8 inches (2880 dots). In the data ml, m2, m3 .. .
each three bytes represent 24 vertical dots. In the leftmost position,
the most significant bit of ml is the top dot; the least significant bit
of ml is the eighth dot from the top; the most significant bit of m2
is the ninth dot; the least significant bit of m2 is the sixteenth dot
from the top; the most significant bit of m3 is the seventeenth dot
from the top; the least significant bit of m3 is the bottom dot. The rest
of data is similar. The number of data bytes must be 3 x (nl + n2 x
256). Dots beyond the right margin are ignored. At the end of dot
graphics printing, the printer returns automatically to character
mode.
Se/ect graphics mode
Mode
Std.
Decimal
ASCII
<ES&-
n0
‘I*”
n2
ml
nl
m2
...
27 42 no nl
n2 ml m2 . . .
Hexadecimal
IB 2A n0 nI
n2 ml m2 . . .
Selects one of eleven graphics modes depending on the value of nO
and prints bit-image graphics in this mode. See <ES0 “K” (for 8bit graphics) or <FS> “Z” (for 24-bit graphics) for information on
nl, n2, ml, m2, . ..
n0
0
1
2
3
4
6
32
33
38
39
40
74
Graphics mode
8-bit Normal-density
8-bit Double-density
8-bit Double-density, double-speed
8-bit Quadruple-density
8-bit CRT graphics, mode I
8-bit CRT graphics, mode II
24-bit Normal-density
24-bit Double-density
24-bit CRT graphics
24-bit Triple-density
24-bit Hex-density
( 60 dots per inch)
(120 dots per inch)
(120 dots per inch)
(240 dots per inch)
( 80 dots per inch)
( 90 dots per inch)
( 60 dots per inch)
(120 dots per inch)
( 90 dots per inch)
(180 dots per inch)
(360 dots per inch)
-
Seiecf graphics mode
Mode
IBM
Decimal
ASCII
<ESC> “[‘I “g”
nl
m0
ml
m2
n2
.. .
Hexadecimal
27 91 103 nl n2
m0 ml m2 .. .
iB 58
67 nl
n2
m2 .. .
m0 ml
Selects one of eight graphics modes depending on the value of m0
and prints dot graphics in this mode. The graphics image is (nl + n2
x 256) - 1 dots wide. See <ESC> “K” (for g-bit graphics) or <FS>
“Z” (for 24-bit graphics) for information on ml, m2, ...
mO
0
1
2
3
8
9
11
12
Graphics mode
g-bit Normal-density
g-bit Double-density
g-bit Double-density, double-speed
g-bit Quadruple-density
24-bit Normal-density
24-bit Double-density
24-bit Triple-density
24-bit Hex-density
( 60 dots per inch)
(120 dots per inch)
(120 dots per inch)
(240 dots per inch)
( 60 dots per inch)
(120 dots per inch)
(180 dots per inch)
(360 dots per inch)
Convert graphics density
Mode
Std.
&SC>
Hexadecimal
Decimal
ASCII
“?”
n
m
27 63
n
m
IB 3F
n
m
Converts graphics defined by subsequent cESC> “K”, <ESC> “L”,
<ESC> “Y” or <ES0 “2” commands to a density mode defined by
<ES0 “*“. n is “K”, “L”, “Y” or “Z”, indicating the mode to be
converted. m is a code from CO>to c4> or c6> indicating one of the
modes of <ES0 “*“.
75
k
DOWNLOAD CHARACTER COMMANDS
Define download characters
Mode
Std.
ASCII
Decimal
<ESC> “8~” <O>
nl
n2
m0
ml
m2
dl
d2
27 38
n2
dx
dl
Hexadecimal
0 nl
m0 ml
m2
d2
. . . dx
16 26 00 nl
n2 m0 ml m2
dl d2 .
dx
Defines one or more new characters and stores them in RAM for
later use. EDS switch A-2 must be OFF; otherwise RAM is used as
an input buffer, not downloading characters, and this command is
ignored.
nZ is the character code of the first character defined and n2 is the
character code of the last character defined. nZ must be equal to or
less than n2.
The data for each character start with three bytes specifying proportional spacing attributes: the first byte, m0, specifies the left of the
character; the second byte, ml, specifies the character width; the
third byte, m2, specifies the right of the character. These values
must not exceed the following maximum limits:
-
-
Next comes the dot data. Normal character height is 24 dots, so there
must be 3 x ml bytes of dot data. If the printer is in super/subscript
mode, however, the character height is 16 dots, so there must be 2
x ml bytes of dot data.
Each data byte indicates eight vertical dots, with the most significant bit being the top dot, and the least significant bit being the
bottom dot.
For further details, please refer to chapter 5.
76
Define download characters
Decimal
ASCII
<ESC>
“='I nl
n3
n2
<o>
n4
"#"
dl
m9
d2 “’
.. .
Hexadecimal
35
n?n4
On5
mlm2
...m9
n5
m2
ml
27 61 nl n2
ak
dl
d2
a5
1B 3D nl nl 23
n3 n4 00 n5
ml m2
. m9
dl
d2
dx
Defines new characters and stores them in RAM for later use. EDS
switch A-2 must be OFF and the optional RAM cartridge, RC-32Z,
must be installed; otherwise RAM is used as an input buffer, not
downloading characters, and this command is ignored.
Downloading characters in IBM mode requires Dot Pattern data and
Character Index Table data. Dot Pattern data controls which pins
fire when printing a character. Index Table data is placed in a
“lookup table” that provides information on where Dot Pattern data
is stored in memory and defines certain attributes of the character.
(nl + n2 x 256) give the number of bytes to be downloaded.
n3 and n4 indicate the low order and high order addresses in which
data is to be stored. n3 should be 15 and n4 should be 128 for this
printer.
n5 determines the character mode to be downloaded, as shown
below:
ml through m9 indicate Index Table data.
ml and m2 indicate the adress where Dot Pattern is stored. ml is the
high-order byte. m3 indicates the number of columns in the character memory, and m4 indicates the number of columns in the
character.
m.5 through m9 are compression mask bits. Data compression
allows the efficient use of memory in storing downloaded characters providing space for more characters than would be available
without compression. The printer repeats the previous dot column
in the current column when the current column compression mask
bit is set to 1.
It is necessary to define all of Index Table data before the Dot Pattern
data to download many characters.
dl, d2, .. . dr is the Dot Pattern data being downloaded.
Each data byte indicates eight vertical dots, with the most significant bit being the top dot, and the least significant bit being the
bottom dot.
Copy character set from ROM into RAM
Mode
ASCII
std.
<ESC>
Hexadecimal
Decimal
Y’
CO>
n
co>
27 56
0
n
0
lB3AOO
nOO
Copies the selected character set with n, as shown below, to the
corresponding download character RAM area, overwriting any
download data already present. Ignored when EDS switch A-2 is
ON.
n Font
0 Roman
1 Sanserif
2 Courier
3 Prestige
4 script
5 OCR-B
6 OCR-A
7 Orator
n Font
(Option)
(Option)
(Option)
8
9
10
11
12
13
14
15
Orator 2
TW-Light
Letter Gothic
Blippo
H-Gothic
Orane
Cinema
Code 39
(Option)
(Option)
(Option)
(Option)
(Option)
(Option)
(Option)
(Option)
Select download character set
Hexadecimal
Mode
ASCII
std.
<ESC>
‘I%” “1”
27 37 49
Decimal
IB
25 31
<ESC>
“%‘I <I>
27 37
1B
25 01
1
Selects the download character set. Ignored when EDS switch A-2
is ON.
Shift download character area
Shifts the download character area defined between 0 to 127 to the
area between 128 to 255.
78
-
Select draft pica download character set
Mode
ASCII
IBM
<ESC>
Hexadecimal
Decimal
“I" <4>
27
73
4
1B
49 04
Selects the download character set, draft quality, and pica pitch
(1Ocpi). Ignored if the (FONT) button was pressed during power-up
or if EDS switch A-2 is ON.
Select draft elite download character set
‘. ^_
Mode
IBM
ASCII
Decimal
<ESC>
27 73 12
“I” <FF>
Hexadecimal
16
49 oc
Selects the download character set, draft quality, and elite pitch (12
cpi). Ignored if the (FONT) button was pressed during power-up or
if EDS switch A-2 is ON.
Select draft condensed download characters
Mode
ASCII
IBM
<ES3
Decimal
“I”
<DC4>
27
Hexadecimal
73 20
18
49
14
Selects the download character set, draft quality, and condensed
pitch (17 cpi). Ignored if the (FONT)button was pressed during
power-up or if EDS switch A-2 is ON.
Select LQ pica download characters
Mode
ASCII
IBM
<ESC>
Hexadecimal
Decimal
“I" <6>
27
73
6
IB
49 06
Selects the LQ download character set with pica pitch (10 cpi).
Ignored if the (FONT] button was pressed during power-up or if
EDS switch A-2 is ON.
Select L Q elite download characters
Mode
ASCII
IBM
<ESC>
Decimal
“I” <so>
27
73 14
Hexadecimal
1B 49 OE
Selects the LQ download character set with elite pitch (12 cpi).
Ignored if the -button
was pressed during power-up or ifEDS
switch A-2 is ON.
Select LQ condensed download characters
Mode
ASCII
IBM
<ESC>
Decimal
“I”
<sYN>
27
Hexadecimal
73 22
1B
49
16
Selects the LQ download character set with condensed pitch (17
cpi). Ignored if the (FONT) button was pressed during power-up or
if EDS switch A-2 is ON.
Select L Q proportional download characters
Mode
ASCII
IBM
<ESC>
Decimal
“I”
<7>
27 73
Hexadecimal
7
1B
49 07
Selects the LQ download character set with proportional pitch.
Ignored if the (FONTJbutton was pressed during power-up or if EDS
switch A-2 is ON.
Select ROM character set
Mode
Std.
ASCII
Decimal
<ESC>
“%”
“0”
<ESC>
“c/o” <0>
Hexadecimal
27 37 48
1B
25 30
27 37
IB
25 00
0
Stops using the download character set and returns to the built-in
ROM character set. Ignored when EDS switch A-2 is ON.
80
‘-
I‘2
1
f
COLOR SELECTION COMMANDS
The commands in this section are valid only with the color printer.
Select print color
Mode
Both
ASCII
(
1. 9, ‘I( 31 UC.9
<ESC>
“I”
Hexadecimal
Decimal
“)”
“)”
n
n
40 40 67 41 41 n
20 26 43 29 29 n
27 114
18
n
72
n
Selects the printing color according to the value of n as shown
below. Ignored if the color ribbon is not installed.
n
0
1
2
3
Color
Black
Magenta
cyan
Violet
n
4
5
6
Color
Yellow
Orange
Green
OTHER PRINTER CONTROL COMMANDS
Set MSB to I
IMode 1
ASCII
1 Std. 1 <ESC>
“>”
1 Decimal
1
1 27 62
1 1B 3E
Hexadecimal
I
I
Sets the most significant bit of each subsequent byte received to 1,
allowing users with a 7-bit interface to access characters with ASCII
codes greater than 127.
Set MSB to 0
Mode
ASCII
Std.
<ESC>
Decimal
“=‘I
27 61
Hexadecimal
1B 3D
Sets the most significant bit of each subsequent byte received to 0.
81
Accept MSB as is
Mode
ASCII
Std.
<ESC>
Decimal
Hexadecimal
27 35
“#”
1B
23
Cancels the preceding commands and accepts the most significant
bit as it is sent to the printer.
Delete last character sent
Mode 1
Decimal
ASCII
1127
Std. I <DEL>
Hexadecimal
1 7F
Deletes the last character received. Ignored if the last character
received has already been printed, or if the last character received
was all or part of a command.
Cancel last line
IMode I
)
ASCII
Decimal
1 24
1 Both I <CAN>
I
Hexadecimal
I 18
1
I
Deletes the last line currently present in the print buffer.
Set printer off-line
Mode
ASCII
Std.
<DC3>
IBM
<ESC>
Decimal
“Q”
“S”
Hexadecimal
19
13
27 81 36
1B 51
24
Sets the printer off-line. The printer disregards all subsequent
characters and commands except <DCl>, which returns it to the online state. The printer’s ON LINE indicator does not go off.
Set printer on-line
Mode
ASCII
Both
<DCl>
Decimal
17
Hexadecimal
11
Returns the printer to the on-line state, allowing it to receive and
process all subsequent characters and commands. This command is
ignored if the printer was set off-line by pressing the ( ON LINE >
button on the control panel.
82
Stop printing
Mode
ASCII
IBM
<ESC>
Decimal
27
‘j”
Hexadecimal
106
IB 6A
Prints the entire contents of the input buffer, then sets the printeroffline. The ( ONLINE > indicator on the control panel goes off.
Bell
Mode
Both
Decimal
ASCII
Hexadecimal
7
<BEL>
07
Sounds a brief beep tone from the printer’s beeper.
Bidirectional printing
Mode
Both
Decimal
ASCII
<ESC>
“U”
“0”
<ESC>
“U” <O>
Hexadecimal
27 05 48
IB
55 30
27 85
1B
55 00
0
Causes subsequent printing to be done in the normal bidirectional
mode, which is faster than unidirectional printing.
Unidirectional printing
Mode
Both
Decimal
ASCII
<ESC>
“U”
<ESC>
“U” <l>
“1”
Hexadecimal
27 05 49
1B
55 31
27 85
1B
55 01
1
Causes subsequent printing to be done unidirectionally, ensuring
maximum vertical alignment precision. Ignored when EDS switch
A-5 is set ON.
One-line unidirectional printing
Mode
ASCII
Std.
<ESC>
Decimal
‘I<”
27 60
Hexadecimal
1B 3C
Immediately returns the print head to the left margin, then prints the
remainder of the line from left to right. Normal bidirectional
printing resumes on the next line. Ignored when EDS switch A-5 is
ON.
Manual feed
I
IMode 1 ASCII
<ESC>
Both
u(,.
<EM>
27 25
<0>
“0"
,,(,,
Decimal
‘3"
‘3" 1 40
40
1
Hexadecimal
0
1B
48
41 41 1 28
)
19 00
28
30
29 29
Selects manual sheet feeding even when the optional automatic
sheet feeder is mounted. Ignored if EDS switch A-4 is ON (ASF
inactive).
Auto feed
Decimal
ASCII
Mode
Bo*
27 25
<ESC> <EM> <4>
“(9,
“(”
"4"
“)"
")"
40
40
Hexadecimal
4
52
41 41
IB
19 04
28
28
34
-
29 29
Selects the automatic sheet feeder. Ignored if EDS switch A-4 is ON
(ASF inactive).
Eject paper from ASF
Mode
Decimal
ASCII
Bo*
<ESC> <EM>
“(7,
“(93
Hexadecimal
27 25 02
“R”
"R"
“)"
“)"
40
40
82
41 41
1B
19 52
28
28
52
29 29
Ejects the current page. Ignored if EDS switch A-4 is ON (ASF inactive).
Set print start position on ASF
Mode
Decimal
ASCII
<ESC>
Bo*
“(”
“(”
<EM>
"T"
“T”
“)"
n
“)"
n
Hexadecimal
27 25 04 n
1B 19 54 n
40 40 84 41 41 n
28 28 54 29 29 n
-
Skips n/6 inches at the top of the page, where n is equal to or greater
than 1. Ignored if EDS switch A-4 is ON (ASF inactive).
Reset printer
1 Decimal
/Mode 1 ASCII
Both
Std.
(
<ESC>
“@”
27 64
<FS>
“@”
1 28 64
I
Hexadecimal
1B 40
11c
40
Reinitializes the printer. Clears the print buffer and returns settings
to their power-up values. Does not clear the input buffer or change
ASF selections.
84
I