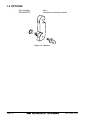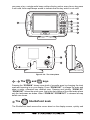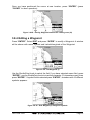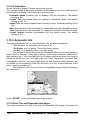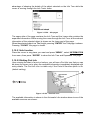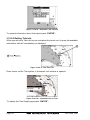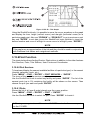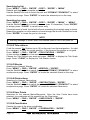
1
CP150C
GPS Chart plotter
Owner's Manual
TABLE OF CONTENTS
1. INTRODUCTION
........................................................................................................ 9
1.0 GENERAL INFORMATION .................................................................................... 9
1.1 PACKING LIST ....................................................................................................... 9
1.2 OPTIONS
...................................................................................................... 10
2. GETTING STARTED
...................................................................................................... 11
2.0 INSTALLING THE CHART PLOTTER ................................................................. 11
2.1 INSTALLING THE ANTENNA .............................................................................. 12
2.2 CONNECTING POWER ....................................................................................... 12
2.3 OPTIONAL C-MAP NT+ CARTOGRAPHY .......................................................... 13
2.4 INSERTING THE C-CARD ................................................................................... 13
2.5 CONTROLS AND INDICATORS ......................................................................... 14
2.5.0 Controls and Connections .......................................................................... 14
2.6 TURNING POWER ON AND OFF ....................................................................... 17
2.7 CHANGING SHIP ICONS .................................................................................... 17
2.8 ADJUSTING CURSOR SPEED ........................................................................... 17
2.9 CHANGING THE DISPLAY PALETTE ................................................................ 18
2.10 CHANGING LIGHT AND CONTRAST ............................................................... 18
2.11 ADJUSTING THE TIME ..................................................................................... 18
2.12 ENTERING IN A MARK FROM A POSITION .................................................... 19
2.13 NAVIGATING TO A MARK ................................................................................ 19
2.14 ENTERING LORAN TD’S .................................................................................. 20
2.15 TRANSFER MARKS FROM PC OR OTHER GPS ........................................... 20
2.16 SELECTING NORTH UP OR COURSE UP ...................................................... 21
2.17 CUSTOMIZING DATA WINDOWS ON CHART PAGE ..................................... 21
2.17.0 Selecting Data Window layout .................................................................. 22
2.17.1 Customizing Data box ............................................................................... 22
2.18 CUSTOMIZING DATA WINDOWS ON ANY PAGE .......................................... 22
2.19 PAGES
...................................................................................................... 23
2.19.0 Selecting pages ........................................................................................ 23
2.20 HOME MODE VS. CURSOR MODE ................................................................. 23
2.20.0 Cursor Mode ............................................................................................. 23
2.20.1 Home Mode ............................................................................................... 24
3. ADVANCED OPERATON ................................................................................................... 25
3.0 CHART PAGE25
3.1 NAVIGATION DATA PAGE ................................................................................. 25
3.2 HIGHWAY PAGE ................................................................................................. 26
3.3 CELESTIAL PAGE ............................................................................................... 26
3.4 GPS STATUS PAGE ............................................................................................ 27
3.5 VHF RADIO DSC LOG PAGE ............................................................................. 27
3.6 NMEA DISPLAY PAGES ..................................................................................... 28
3.6.0 Display page ............................................................................................... 28
3.6.1 Data page .................................................................................................... 29
3.6.2 Depth Trend page ....................................................................................... 29
3.6.2.0 Page selection ............................................................................... 29
3.7 CREATING AND USING MARKS ....................................................................... 30
3.7.0 Marks
...................................................................................................... 30
3.7.0.0 Creating a New Mark ..................................................................... 30
Page 4
GPS Chart 150C
3.7.0.1 Editing a Mark ................................................................................ 30
3.7.0.2 Deleting a Mark .............................................................................. 31
3.7.0.3 Moving a Mark ............................................................................... 31
3.7.0.4 Locating a Mark ............................................................................ 32
3.8 CREATING AND USING ROUTES ..................................................................... 32
3.8.0 Creating a new Route ................................................................................. 32
3.8.1 Deleting a Waypoint .................................................................................... 32
3.8.2 Moving a Waypoint ..................................................................................... 33
3.8.3 Inserting a Waypoint into a Route .............................................................. 34
3.8.4 Editing a Waypoint ...................................................................................... 35
3.8.5 Route Report page (Information on a Route) ............................................. 36
3.8.6 User Points List page (Information on Waypoints) .................................... 37
3.8.7 Deleting a Route ......................................................................................... 39
3.8.8 Following a Route ....................................................................................... 40
3.8.9 Reversing a Route ...................................................................................... 40
3.8.10 Selecting Route Color ............................................................................... 40
3.9 GOTO FUNCTION ............................................................................................... 40
3.9.0 Goto Cursor ................................................................................................. 40
3.9.1 Goto Mark On the Chart Screen ................................................................. 41
3.9.2 Goto Mark or Waypoint using the User Point List ...................................... 41
3.9.3 Goto Route .................................................................................................. 41
3.9.4 Stopping navigation .................................................................................... 41
3.10 MOB FUNCTION ................................................................................................ 41
3.10.0 Using MOB function .................................................................................. 41
3.10.1 Deleting MOB ............................................................................................ 42
3.11 TRACK PLOTTER FUCTIONS .......................................................................... 42
3.11.0 Selecting Time and Distance .................................................................... 42
3.11.1 Selecting a track line color ........................................................................ 42
3.11.2 Turning on or off the Track plotter ............................................................ 42
3.11.3 Saving a track to memory ......................................................................... 43
3.11.4 Displaying track ......................................................................................... 43
3.11.5 Deleting track ............................................................................................ 43
3.12 MAINTENANCE ................................................................................................. 43
3.13 SPECIFICATIONS ............................................................................................. 44
3.13.0GPS Receiver Specifications .................................................................... 45
3.13.1GPS Antenna Specifications ..................................................................... 45
3.13.1.0Physical Constructions ................................................................. 45
3.13.1.1Cable & Connector ....................................................................... 45
3.13.1.2Overall Performance (antenna element, LNA & coax cable) ...... 45
3.13.1.3Enviromental ................................................................................. 45
3.14 TECHNICAL ...................................................................................................... 46
3.14.0System Test ............................................................................................... 46
3.14.0.0RAM Menu .................................................................................... 46
3.14.0.1DIM Menu ..................................................................................... 47
3.14.0.2Cartridges ..................................................................................... 47
3.14.0.3Serial Ports ................................................................................... 48
3.14.1 NMEA Input/Output ................................................................................... 49
3.14.1.0 Setup of NMEA output sentences ............................................... 50
3.14.1.1 NMEA2 RTCM Input .................................................................... 51
3.14.1.2 Dual Station Operation (Master Slave) ....................................... 51
3.15 TERMS AND FUNCTIONS ................................................................................ 52
3.15.0User Points Handling functions ................................................................. 52
3.15.0.0Marks ............................................................................................ 53
GPS Chart 150C
Page 5
3.15.0.1Waypoints and Routes ................................................................. 53
3.15.0.2Destination point ........................................................................... 53
Route Following ............................................................................ 53
3.15.0.3MOB .............................................................................................. 53
3.15.0.4Measure DST- BRG ..................................................................... 53
3.15.0.5Information on User Points .......................................................... 54
3.15.0.6User Points List ............................................................................ 54
3.15.0.7Route Report ................................................................................ 55
3.15.1Track History .............................................................................................. 55
3.15.2Input/Output ............................................................................................... 55
3.15.2.0GPS Data ..................................................................................... 55
3.15.2.1Instruments Data .......................................................................... 56
3.15.2.2NMEA-0183 output (Autopilot output) .......................................... 56
3.15.3 Data Display .............................................................................................. 56
3.15.3.0Data Window on Chart page ........................................................ 56
3.15.3.1GPS Status page ......................................................................... 56
3.15.3.2 Navigation page ........................................................................... 57
3.15.3.33D Highway Display ..................................................................... 58
3.15.3.4Other pages .................................................................................. 58
About page ................................................................................... 58
3.15.4User Settings ............................................................................................. 58
3.15.4.0Map Customization ....................................................................... 58
3.15.4.1 Display Settings ........................................................................... 59
3.15.4.2Customize Map ............................................................................ 59
Marine Settings ............................................................................ 59
Depth Settings .............................................................................. 60
Land Settings ............................................................................... 61
Chart Settings ............................................................................... 61
3.15.4.3General Setup .............................................................................. 62
3.15.4.4Fix ................................................................................................. 63
3.15.4.5Navigate ........................................................................................ 63
3.15.4.6Compass ...................................................................................... 64
3.15.4.7Input / Output ................................................................................ 64
3.15.4.8Alarms .......................................................................................... 64
3.15.4.9Simulation ..................................................................................... 66
3.15.5 Automatic Info ........................................................................................... 66
3.15.5.0Info Tree and Expanded Info pages ............................................. 66
3.15.5.1Info function .................................................................................. 67
3.15.5.2Getting Port Info ........................................................................... 67
3.15.5.3Getting Tide Info ........................................................................... 68
3.15.6Find Function ............................................................................................. 69
3.15.6.0Port Services ................................................................................ 69
3.15.6.1Ports ............................................................................................. 69
Searching by list ........................................................................... 70
Searching by name ...................................................................... 70
3.15.6.2Tide stations ................................................................................. 70
3.15.6.3Wrecks ......................................................................................... 70
3.15.6.4Obstructions ................................................................................. 70
3.15.6.5User Points ................................................................................... 70
3.15.6.6Coordinates .................................................................................. 70
INDEX
Page 6
...................................................................................................... 71
GPS Chart 150C
FCC Compliance Statement
This device complies with Part 15 of the FCC limits for Class A digital devices. This
equipment generates, uses, and can radiate radio frequency energy and, if not
installed or used in accordance with the instructions may cause harmful interference with radio communications.
There is no guarantee that interference will not occur in a particular instance. If
this equipment does cause harmful interference to other equipment, try to correct
the problem by relocating the equipment.
Consult an authorized STANDARD HORIZION dealer or other qualified service
technician if the problem cannot be corrected. Operation is subject to the following
conditions: (1) This device cannot cause harmful interference, and (2) this device
must accept any interference received, including interference that may cause
undesired operation.
Congratulations on you purchase of the GPS Chart CP150C! Whether this is your first
chart plotter, or if you have other STANDARD HORIZON equipment, the STANDARD
HORIZON organization is committed to ensuring your enjoyment of this chart plotter.
STANDARD HORIZON technical support personnel stand behind every product we
sell, and our Product Support team invites you to contact us should you require
technical advice or assistance, at 714/827-7600.
GPS Chart 150C
Page 7
WARNING!!!
Electronic charts displayed by the chart plotter are believed to be accurate
and reliable, but that are not intended to be a substitute for the official
charts, which should remain your main reference for all matters related to
the execution of safe navigation.
For this reason we would like to remind you that you should carry on board
and use the official published and approved nautical charts.
CAUTION
- The chart plotter is designed for maritime use. Please give attention to
avoid water intrusion into the C-MAP NT+ C-CARD cartridge holder.
- Extensive exposure to heat may result in damage to the chart plotter.
- The chart plotter contains dangerous high voltage circuits which only
experienced technicians can handle.
- STANDARD HORIZON will not be liable for errors contained herein, or
for incidental or consequential damages in connection with the performance or use of this material.
Copyright 2002. STANDARD HORIZON All rights reserved. Printed in Italy.
No part of this publication may be reproduced or distributed in any form or by any
means, or stored in a database or retrieval system, without prior written permission of
the publisher.
CODE: A7SH5c 210a736 - 290302
Page 8
GPS Chart 150C
1. INTRODUCTION
1.0 GENERAL INFORMATION
The CP150C is a precision-crafted, high-performance receiver for the Global Positioning System (WAAS GPS) constellation of satellites, providing precise location data
with a host of navigation features. Idea for nautical use and sealed against water
ingress. The CP150C is housed in a rugged, impact-resistant case with outstanding
ergonomic design, for effortless operation.
The advanced features of the CP150C include:
•
Direct sunlight viewable color LCD display.
•
C-MAP NT or NT+ cartography compatible
•
600 Waypoints (Marks) / 30 Routes storage
•
User selectable data fields
•
NMEA Data pages
•
2 NMEA Output and 3 Inputs
•
Connections to and from STANDARD HORIZON DSC VHF’s for
Distress and Position Request calls
•
3 year limited warranty, lifetime flat rate.
1.1 PACKING LIST
When the package containing the chart plotter is first opened, please check for the
following contents. If any parts are missing contact the dealer this chart plotter was
purchased from. Accessories and replacement parts may be ordered from STANDARD
HORIZON’s Parts Department at 714/827-7600 or via the web at
www.standardhorizon.com.
-
Replacement part
TT150001CP
RR150002CP
TT90000001
UU90000001
RR15000001
QQ150001CP
U50003870
EECP150002CP
EE150002EP
GPS Chart 150C
Item
External bracket (Includes the knob)
Dust cover
Power data cable
Flush mounting screws
Flush mount template
Antenna
Owner’s Manual
Quick reference guide
C-MAP NT handbook
Page 9
1.2 OPTIONS
-
Part Number
RR150003CP
Item
Overhead mounting bracket
Figure 1.2 - Bracket
Page 10
GPS Chart 150C
2. GETTING STARTED
2.0 INSTALLING THE CHART PLOTTER
The CP1150C can be bracket mounted or flush mounted. If you decide to overhead
bracket mount the CP150C, STANDARD HORIZON offers a overhead mounting
bracket part number RR150003CP that will be needed for this installation.
For Flush mounting, please use the template and hardware supplied.
Figure 2.0 - Installing/removing chart plotter
Figure 2.0a - Optional overhead mounting bracket
GPS Chart 150C
Page 11
2.1 INSTALLING THE ANTENNA
Choose a location for the antenna that has a clear view of the sky. Ensure there are
no major obstructions or fixtures in the immediate proximity to the antenna. The
antenna relies on direct “line of sight” satellite reception. If you are unsure that the
chosen location is suitable it may be advisable to mount the antenna in a temporary
manner to verify correct operation. The thread used on the antenna (1 inch, 14 TPI)
is an industry standard thread used on a wide range of mounting brackets, including
the swivel joints commonly used for angled surfaces. However due to the manufacturing process of these mounting brackets you may see that there is some slop when
tightening down the antenna to the bracket. This is of no concern however as the
antenna must be tightened until the antenna stops rotating on the antenna mounting
bracket.
The antenna design also allows for easy flush mounting.
1. Drill a ¾ inch hole in an area that was verified to receive satellite signals well.
2. Unscrew the base of the antenna and remove the gasket.
3. Thread the cable though the hole and route to the plotter.
4. Apply a small coat of RTV to the underside of the antenna where the model
number sticker is located.
5. Insert the shaft of the antenna into the hole.
Figure 2.1 - GPS Antenna
2.2 CONNECTING POWER
Before making connections to the chart plotter, check for the correct voltage (10-18V
dc), the correct polarity and be sure the 2A fuse is wired in series on the Black wire.
Connecting the fuse in the black wire protects the NMEA data output wires from
becoming damaged if they are accidentally touched to the red wire (+battery
connection). If the other wires are not used or if the installer is aware of this the fuse
may be used on the red wire from the chart plotter.
Page 12
GPS Chart 150C
Figure 2.2 - Power On
2.3 OPTIONAL C-MAP NT+ CARTOGRAPHY
STANDARD HORIZON has taken advantage of C-MAP’s experience with professional navigation, by allowing the use of the refined and improved cartography called NT +.
The new cartography of NT+ makes creative use of colors, patterns and icons to
increase the familiarity and usability of the much larger coverage database of NT +. NT+
is supplied by C-MAP in four sizes Local, Standard, Wide and SuperWide. For
convenience the older NT and the NT+ are both compatible with all STANDARD
HORIZON chart plotters. Contact C-MAP USA at (508) 477-8010 or visit www.cmap.com for further information on NT+.
2.4 INSERTING THE C-CARD
Hold the card by the long inclined side so that you can see the C-MAP label.
Figure 2.4 - Inserting C-CARD (I)
Open the door, gently push the C-CARD into the slot: push the C-CARD in as far as
it will go, then close the door.
GPS Chart 150C
Page 13
Figure 2.4a - Inserting C-CARD (II)
NOTE
Throughout this Owner's Manual, the keys are noted in Capital bold letters with
quotes, example “ENTER”. Menu operations are in Capital bold letters that are
underlined, example: ADVANCED SETUP.
For an example “MENU” + ADVANCED SETUP + “ENTER” + INPUT/OUTPUT
+ “ENTER” means:
1. Press the
key.
2. Use the ShuttlePoint knob
3. Press the
key.
4. Use the Shuttlepoint
5. Press the
to select the ADVANCED SETUP menu item.
to select the INPUT/OUTPUT menu item.
key.
2.5 CONTROLS AND INDICATORS
NOTE
This section defines each control of the chart plotter. For instructions, refer to
Getting Started and Advanced Operation sections of this Owner's Manual.
2.5.0 Controls and Connections
The chart plotter is controlled by using the 10 keys located on the front panel of the
CP150C. There is also a ShuttlePoint knob to move the cursor across the screen. As
Page 14
GPS Chart 150C
you press a key, a single audio beep confirms the key action; every time a key press
is not valid, three rapid beeps sound to indicate that the key action is not valid.
Figure 2.5.0 - The chart plotter
-
The
and
keys
Pressing the “ZOOM IN” shows more detail of a smaller area, by changing the chart
scale and zooming in on your display. Press “ZOOM OUT” to change the scale and
show a wider, otherwise less detailed view. Pressing and holding “ZOOM IN”/
“ZOOM OUT” allows the quick zoom, that is the fast change of the chart scale where
only the land areas are drawn. When “ZOOM IN”/“ZOOM OUT” is released all map
details are shown.
The
ShuttlePoint knob
The ShuttlePoint knob moves the cursor about on the display screen, quickly and
GPS Chart 150C
Page 15
accurately. It also scrolls the desired option in the menu page(s). It allows to exit from
Home mode to Cursor mode. When into menu pages moving it to right selects the
desired option, as “ENTER”, moving it to the left exits from menu, as “CLEAR”.
The
key
Press “ENTER” to select the desired option or to confirm selection.
The
key
Press “CLEAR” to set Home mode. Also press “CLEAR” to exit from menu or data
windows or to leave a menu without making changes, to abort selected function or to
step backward from a selection made in the menu.
The
key
Selects the Main Menu. When in menu mode, moving the ShuttlePoint knob to the right
enters a selection, moving the knob to the left clears the function.
If pressing “MENU” for 3 seconds from map display activates Edit mode to choose
data to be shown in General, 1 Line Small, 1 Line Large, 2 Lines Small, Highway or
Compass windows.
If pressing “MENU” for 3 seconds from Data pages (Navigation, Highway, GPS
Status, NMEA Display) allows to customize all data fields shown in the selected page.
The
key
Allows the user to select a Destination point (Target) at the cursor or a saved Route
or Mark.
The
key
Places Mark under the cursor position (in Home mode Mark is placed under the ship's
position).
The
key
Places Waypoints to make Routes.
The
key and Lamp/Contrast
Press “PWR” to turn the chart plotter On. Press and hold “PWR” down (once the chart
plotter has been turned On) for 3 seconds turns the chart plotter Off.
Press and immediately release “PWR” to adjust light and contrast of the display.
The
key
Sets MOB (Man OverBoard).
C-CARD slot.
Page 16
GPS Chart 150C
GPS Antenna connector
Power and I/O connector.
2.6 TURNING POWER ON AND OFF
Press and hold “PWR” for 1 second to turn on. The chart plotter emits one rapid beep
and the Start-Up pages are displayed.
Figure 2.6 - Start-Up pages
To turn off, press and hold “PWR” for 3 seconds, a countdown timer will appear on
the screen. If you release “PWR” before the countdown timer reaches zero, the chart
plotter will remain on.
2.7 CHANGING SHIP ICONS
The ships icon can be changed to the following:
Figure 2.7 - Ships icons
To change the icons press “MENU” + GENERAL SETUP + “ENTER” + SHIP ICON
+ “ENTER”.
2.8 ADJUSTING CURSOR SPEED
The cursor speed may be changed from moving slowly, medium or fast. The cursor
speed can be controlled on the Chart page and also within the menus. To change the
cursor speed:
Press “MENU” + GENERAL SETUP + “ENTER” + CURSOR SPEED + “ENTER”.
GPS Chart 150C
Page 17
2.9 CHANGING THE DISPLAY PALETTE
The color of the screen has 4 selections: Normal, Classic, Night and Sunlight. To
change the Palette:
Press “MENU” + GENERAL SETUP + “ENTER” + PALETTE + “ENTER” +
SUNLIGHT (or other) + “ENTER”
2.10 CHANGING LIGHT AND CONTRAST
Press and immediately release “PWR” (do not press and hold the key, or the POWER
OFF message will appear): moving the ShuttlePoint knob to the left/right will change
the intensity of the light and moving the knob up or down will change the LCD contrast.
2.11 ADJUSTING THE TIME
The time information supplied by the GPS satellites is in Universal Time Coordinates
(UTC or Greenwich England Mean Time). To change the chart plotter to read the
correct time, first you must figure out the offset and if it is daylight savings time. For
example on the West coast of the United States or Pacific Standard Time the offset
needed would be –08:00 or –07:00 for daylight savings time, Eastern Standard Time
–05:00 or –04:00 for daylight savings time.
To change press “MENU” + GENERAL SETUP + “ENTER” + TIME REFERENCE
+ “ENTER”, select +00:00, change the number for the desired offset.
Figure 2.11 - Adjusting Time
NOTE
This map is for time offsets in standard time. For daylight saving time subtract one
hour from the offset time shown.
Page 18
GPS Chart 150C
2.12 ENTERING IN A MARK FROM A POSITION
The 150C has the capability of storing up to 600 points. To enter in a point from a list
of positions:
Using the Chart page:
1. On the Chart page, press “MARK” to make a Mark at your current location.
2. Press “ENTER” for more options.
3. Select EDIT and press “ENTER”.
4. Move the ShuttlePoint knob to the left until the Latitude and Longitude is
highlighted and press “ENTER”.
5. Press the up or down position on the ShuttlePoint knob to change the
numbers, press the left or right position on the ShuttlePoint knob to step to
the next number.
6. Press “ENTER” to move to the next line.
7. Repeat step 5 to enter the Longitude.
8. Press “ENTER” when finished and “CLEAR” to resume normal operation.
Another way to do this is:
1. Move the cursor until the Latitude and Longitude is close to the position you
want to enter.
2. Press “ZOOM IN” to a low scale .02 NM. Move the cursor to the exact
position and press “MARK”.
3. Press “ENTER” to edit the Mark (change icon and name).
With the User Points List:
1. Select the User Points List and press “MARK”.
2. Move the ShuttlePoint knob to the left until the Latitude and Longitude is
highlighted and press “ENTER”.
3. Press the up or down position on the ShuttlePoint knob to change the
numbers, press the left or right position on the ShuttlePoint knob to step to
the next number.
4. Press “ENTER” to move to the next line.
5. Repeat step 3 to enter the Longitude.
6. Press “ENTER” when finished and “CLEAR” to resume normal operation.
NOTE
While underway, you can mark you current position simply by pressing “MARK”.
It is also possible to set a new Mark from the User Points List page by pressing
“MARK”.
2.13 NAVIGATING TO A MARK
There are two ways to do this.
Placing cursor over Target:
1. On the Chart page move the cursor over the top of a Mark or Waypoint
GPS Chart 150C
Page 19
contained in a Route.
2. Press “GOTO”; you will notice a bearing line from the vessels position and
the Target Mark or Waypoint.
Using User Points list:
1. On the Chart page, move the cursor to an open area.
2. Press “GOTO”. A pop-up screen will be shown with selections to go to the
CURSOR, ROUTE or MARK.
3. Select the item desired and press “ENTER” (example Mark).
4. The USER POINTS LIST is shown. Move the cursor to highlight the desired
Mark and press “GOTO”. You will notice a circle will be placed around the
Icon of the selected Mark, this indicates the Goto function is activated for the
selected Mark.
5. Press “CLEAR” to revert to the Chart page to navigate to the selected point.
2.14 ENTERING LORAN TD’S
The chart plotter must first be put into the TD mode. After all the Marks are entered into
the chart plotter, the setting should be set back to “ddd.mm.mmm”, to convert the TD
into Latitude/Longitude readings.
1. Press “MENU” and select ADVANCED SETUP + “ENTER” + NAVIGATE
+ “ENTER” + COORDINATE SYSTEM + “ENTER” + TD, press “ENTER”.
2. Select the Chain and the Pair of the Loran and press “ENTER”.
3. Press “CLEAR” until the Chart page is shown.
4. Press “MARK” to make a Mark at your current location.
5. Press “ENTER” for more options.
6. Select EDIT and press “ENTER”.
7. Press the ShuttlePoint knob to the left until the TD’s are highlighted and
press “ENTER”.
8. Move the ShuttlePoint knob up or down to change the numbers, press the
left or right position on the ShuttlePoint knob to step to the next number.
9. Press “ENTER” to move to the next line.
10.Repeat step 8 to enter the second line.
11.Press “ENTER” when finished and “CLEAR” to resume normal operation.
NOTE
1. If the TD numbers are quite a bit off, the Pair letters may be backward. Reversing
the two letters solves this problem. Example Y&Z, Change to Z&Y.
2. If the position is still off, select ALTER and turn it on.
Press “MENU” + ADVANCED SETUP + “ENTER” + NAVIGATE + “ENTER” +
COORDINATE SYSTEM + “ENTER” + TD + “ENTER” + ALTER.
2.15 TRANSFER MARKS FROM PC OR OTHER GPS
In order to use this feature you must have navigation software that is NMEA
compatible.
Page 20
GPS Chart 150C
To upload Marks from the chart plotter to the PC, a serial 9-pin cable with a DB9
connector must be used. The pin-out of the cable is:
PC DB 9 connection
Pin 2 Receive
Pin 3 Transmit
Pin 5 Signal ground
Chart plotter connection
Chart plotter connection
to NMEA 1
to NMEA 2
Brown
White
Blue
Gray
Green
Green
After the Marks have been entered into the GPS Utility program and the program has
been setup to output NMEA 4800 Baud data:
A. Receive points from the GPS Utility Program
1. Press “MENU” and select USER POINTS LIST, press “ENTER”.
2. Move the ShuttlePoint knob and select RECEIVE, press “ENTER”.
3. On the GPS Utility program send the Marks.
B. Transmit saved Marks to the GPS Utility program (good for backup)
1. Press “MENU” and select USER POINTS LIST, press “ENTER”.
2. Move the ShuttlePoint knob and select SEND, press “ENTER”.
3. On the GPS Utility program receive the Marks.
2.16 SELECTING NORTH UP OR COURSE UP
Press “MENU” + ADVANCED SETUP + “ENTER” + NAVIGATE + “ENTER” + MAP
ORIENTATION + “ENTER” + COURSE UP + “ENTER”. Press “CLEAR” 3 times to
go back to the Chart page.
2.17 CUSTOMIZING DATA WINDOWS ON CHART PAGE
On the Chart page the default window shown is called General. This window contains
navigation information helpful to assist you in navigation. The CP150C also has the
capability to customize the layout of window as show in the figures below.
Figure 2.17 - Data window layout
GPS Chart 150C
Page 21
2.17.0 Selecting Data Window layout
Press “MENU”, select GENERAL SETUP from menu, then press “ENTER”, select
DATA WINDOW and press “ENTER”. Choose the desired data window layout to be
shown with the ShuttlePoint knob and press “ENTER”. Selections are None, 1 Line
Small, 1 Line Large, 2 Line Small, Highway, Compass. See previous Figure 2.17.
2.17.1 Customizing Data box
It is possible to select the data of each box within a Data Window (except for Highway
and Compass).
1. Press and hold “MENU” for 3 seconds.
The first data box will turn gray and its frame drawn bold. To choose a
different data box move the ShuttlePoint knob to the left or right.
2. To choose and edit the data within the box press “ENTER” to show a drop
down menu. Move the Shuttlepoint knob to select the item (ex: COG) and
press “ENTER”.
NOTE
If the selected data type (ex: COG) has different units of measure the list of units
will automatically be shown to the left of the main drop down menu after pressing
“ENTER”.
3. Press “CLEAR” when finished to store the selections.
See previous Figure 2.17.
2.18 CUSTOMIZING DATA WINDOWS ON ANY PAGE
On the Chart, Navigation, Highway and the NMEA Display all the data windows can
be customized.
1. Press and hold “MENU”. You will notice the background of one of the data
windows turns from black to clear.
2. Moving the ShuttlePoint knob to the right or the left will select the data
window you would like to customize.
3. Press “ENTER” to show the available selections for the data window.
4. Move the ShuttlePoint knob to highlight the desired selection and press
“ENTER”.
5. Repeat 2-4 until the data windows are customized.
6. Press “CLEAR” to store the values.
Page 22
GPS Chart 150C
Figure 2.18 - Edit mode
2.19 PAGES
Seven different pages can be shown on the CP150C as shown below:
Figure 2.19 - Screen display pages
2.19.0 Selecting pages
To select the 7 pages shown above, press “MENU”, move the ShuttlePoint knob to
select the desired page and press “ENTER”.
2.20 HOME MODE VS. CURSOR MODE
The CP150C has two cursor modes of operation on the Chart page.
2.20.0 Cursor Mode
You will notice when the Chart page is selected and fix is received, that your position
will be shown by . If you move the ShuttlePoint knob in any direction a cursor will be
shown. The cursor can be moved anywhere on the page (called panning) and if moved
over the top of certain items will show description of the item. This function is used to
GPS Chart 150C
Page 23
look around at other points on the chart, or Route planning.
While in this mode the position of the vessel will move right off the edge of the screen.
The CP150C must be in Home Mode for this function to operate. Press “CLEAR” to
enable Home Mode function.
2.20.1 Home Mode
When a fixed is received the vessels position will be shown by a . When in Cursor
Mode and “CLEAR” is pressed, the chart plotter will center the chart on the received
boat position. If the received position changes the map moves so that the chart is
always centered on the vessel’s position. Zooming In / Out is centered on the vessel’s
position.
Page 24
GPS Chart 150C
3. ADVANCED OPERATON
Now that you are familiar with the basic key operation of the CP150C, we will discuss
the more advance operations in detail.
3.0 CHART PAGE
“MENU” + CHART + “ENTER”
The Chart page is the main page of the chart plotter. From this page the user can select
the desired map, get information about cartographic objects on the maps, see the
vessel position, its direction and speed, place points (Marks, Waypoints), set a
destination point, record its past course etc. The chart plotter is provided with
worldwide background cartography while the detailed charts of the desired area are
available on data cartridges.
To customizing data window and box refer to section 2.17.0 and 2.17.1.
Figure 3.0 - Charts and general text area
3.1 NAVIGATION DATA PAGE
“MENU” + NAVIGATION + “ENTER”
This page is useful for to show information when heading to a destination.
This page shows a compass ruler, fixed position and the most relevant navigation
information. Compass ruler showing Course Over Ground and Bearing to destination
(1) and Lat/Lon (2) fields are fixed fields and cannot be changed. The last six fields (3,
4, 5, 6, 7, 8) are selectable. The default values are DST, GRG, TTG, XTE, SOG, and
COG. These data fields can be changed, refer to section 2.18.
GPS Chart 150C
Page 25
Figure 3.1 - Navigation Data page
3.2 HIGHWAY PAGE
“MENU” + HIGHWAY + “ENTER”
Shows a 3D Highway and the most relevant navigation information. It is possible to
customize all fields show in the page as described in section 2.18.
The scale of the Highway display can be changed by pressing “ZOOM IN” / “ZOOM
OUT”. The ranges available are 0.2, 0.5, 1.0, 2.0, 4.0 and 10 NM.
Figure 3.2 - Highway page
3.3 CELESTIAL PAGE
“MENU” + CELESTIAL + “ENTER”
This page displays the Moon Phases, Sunrise/Sunset time and Low Water/High
Water level at the current location.
The day can be moved in the calendar by moving the ShuttlePoint knob to the left/right;
“ZOOM IN” / “ZOOM OUT” change the month; “ENTER” changes the time.
Page 26
GPS Chart 150C
Figure 3.3 - Celestial page
3.4 GPS STATUS PAGE
“MENU” + GPS + “ENTER”
NOTE
To skip this page when the power is turned on press “CLEAR” or wait for a few
moments and the CP150C will change to the Chart page after a GPS Fix is received.
Figure 3.4 - GPS Status page
3.5 VHF RADIO DSC LOG PAGE
“MENU” + DSC + “ENTER” + LOG + “ENTER”
Used when connected to a STANDARD HORIZON VHF capable of outputting NMEA
DSC information. There are two selectable pages: Distress Call and Position Request
Call. The CP150C stores VHF Digital Selective Calls in the appropriate pages for fast
recall and review on the Chart page.
GPS Chart 150C
Page 27
Figure 3.5 - DSC LOG - Distress Call page
Figure 3.5a - DSC LOG - Position Request page
3.6 NMEA DISPLAY PAGES
NOTE
Some data fields will not operate unless the chart plotter is interfaced with another
NMEA instrument. See section 3.14.1 for connections.
The chart plotter is capable of displaying information from the following devices that
have a NMEA output: Depth Sounder, Speed Log, Temperature, Wind speed and
direction along with GPS information.
3.6.0 Display page
“MENU” + NMEA DISPLAY + “ENTER” + DISPLAY + “ENTER”
The number of fields shown is selectable by moving the ShuttlePoint knob to the right
or left. It is possible to customize all fields shown in the page as described in section
2.18.
Page 28
GPS Chart 150C
Figure 3.6.0 - NMEA Display page
3.6.1 Data page
“MENU” + NMEA DISPLAY + “ENTER” + DATA + “ENTER”
This page is useful to confirm that there is NMEA data being fed into the chart plotter
from an external NMEA device (ex: depth sounder). Pressing “ENTER” starts/stops
the page update. Pressing “ZOOM IN” changes port.
Figure 3.6.1 - NMEA Data page
3.6.2 Depth Trend page
The chart plotter is capable of graphically showing information from the following
NMEA devices: Depth sounder, Wind Speed and Temperture. There is also a graph
that records Speed Over Ground from the GPS.
3.6.2.0 Page selection
To select the pages follow the procedures below:
a. Depth Trend page
“MENU” + NMEA DISPLAY + “ENTER” + DEPTH TREND + “ENTER”
b. Wind Speed Trend page
“MENU” + NMEA DISPLAY + “ENTER” + WIND SPEED TREND + “ENTER”
c. Temp Trend page
“MENU” + NMEA DISPLAY + “ENTER” + TEMP TREND + “ENTER”
d. SOG Trend page
“MENU” + NMEA DISPLAY + “ENTER” + SOG TREND + “ENTER”
GPS Chart 150C
Page 29
3.7 CREATING AND USING MARKS
Marks can be a stand alone position or can be linked to a Route. The difference
between a Mark and a Waypoint is that when a Mark is contained within a Route and
the Route is deleted, Marks are not deleted, however Waypoints are.
You may place a Mark by
a. Moving the ShuttlePoint knob to a location and pressing “MARK”.
b. To mark you present position, press “MARK”.
c. Moving the Cursor to a location on the chart and pressing “MARK”. Then
enter in the Latitude and Longitude using the EDIT function.
3.7.0 Marks
Every time you place the cursor over a Mark the following functions will be shown on
a pop up box: Delete, Move, Edit, Directory.
3.7.0.0 Creating a New Mark
From the Chart page
Moving the cursor to a open area on the chart and pressing “MARK” will place a Mark
at that location. An pop up information window will be shown with icon type, name,
coordinates, Distance and Bearing to the current location.
From the User Points List
To select User Points List page follow the procedure (a) or (b):
a. Press “MENU”, select USER POINTS LIST and press “ENTER”.
b. Move the cursor over a Mark. A pop up information window will be shown.
Press “ENTER” and select DIRECTORY from the pop up information
window and press “ENTER”.
User Points List will be shown. Press “MARK”. A pop up information window will be
shown with icon type, name, coordinates, Distance and Bearing to the current location.
Press “MARK” to accept. The new Mark is added in the User Points List page.
3.7.0.1 Editing a Mark
Place the cursor over the top of the Mark and press “ENTER”. Select EDIT and press
“ENTER”. An information pop up window will appear to modify the icon, name of the
Mark and coordinates of the existing Mark:
a. Select the name field using the ShuttlePoint knob, press “ENTER” and use
the ShuttlePoint knob to change the name of the Mark, when finished press
“ENTER”.
b. If the icon symbol field is selected, press “ENTER”: a window with 16
different icon symbols will appear. Use the ShuttlePoint knob to select the
icon symbol and press “ENTER”.
c. If the coordinates field is selected, press “ENTER” and then use the
ShuttlePoint knob to enter in the new Latitude and Longitude.
d. If the Color field is selected, press “ENTER”. A window with 8 different colors
appears, use the ShuttlePoint knob to select the preferred color and press
“ENTER”.
Page 30
GPS Chart 150C
3.7.0.2 Deleting a Mark
Move the cursor over the Mark to be deleted. A pop up information window will be
shown. Press “ENTER” and select DELETE from the pop up information window and
press “ENTER”.
3.7.0.3 Moving a Mark
Figure 3.7.0.3 - Moving Mark (I)
Place the cursor over the top to Mark to be moved and press “ENTER". Select MOVE
and press “ENTER”. By moving the cursor with the ShuttlePoint knob a dotted line
connecting the Mark with the new position will appear. When the Mark is at the desired
position press “ENTER” to place the Mark at that position.
Figure 3.7.0.3a - Moving Mark (II)
Figure 3.7.0.3b - Moving Mark (III)
GPS Chart 150C
Page 31
3.7.0.4 Locating a Mark
To select User Points List page follow the procedure (a) or (b):
a. Press “MENU”, select USER POINTS LIST and press “ENTER”.
b. Move the cursor over a Mark. A pop up information window will be shown.
Press “ENTER” and select DIRECTORY from the pop up information
window and press “ENTER”.
The User Points List will be shown. Using the ShuttlePoint knob up or down to select
the Mark you want to locate on the Chart page. Move the ShuttlePoint knob left or right
to select LOCATE and press “ENTER”. The Chart page will be shown with the cursor
on the top of the Mark you located.
3.8 CREATING AND USING ROUTES
To create a Route:
a. Move the cursor to a position that you want to place the starting point of the
Route and press “ROUTE”. This places a Waypoint on the chart. A pop up
window will appear showing information related to the Waypoint.
b. To change the name of the Route press “ENTER”, select EDIT, press
“ENTER” again and edit the name using the ShuttlePoint knob.
c. To place the first leg of the Route, move ShuttlePoint knob to the position
of the first leg and press “ROUTE”.
d. Repeat these steps until all the legs of the Route are shown on the Chart
page.
Figure 3.8 - Route planning
3.8.0 Creating a new Route
To create a new Route press “MENU" and select ROUTE + SELECT and press
“ENTER”. Move the Shuttlepoint knob to select an open Route position (example
Route 2) and press “ENTER”. Repeat the steps in 3.8 to create a new Route.
3.8.1 Deleting a Waypoint
Place cursor on Waypoint:
Page 32
GPS Chart 150C
Figure 3.8.1 - Deleting Waypoint (I)
Press “ENTER”. Select DELETE and press “ENTER”: select YES and press
“ENTER” (select NO and press “ENTER” to abort operation). The Waypoint is
deleted and a new line between previous and next Waypoint is shown:
Figure 3.8.1a - Deleting Waypoint (II)
3.8.2 Moving a Waypoint
Place cursor on Waypoint. Press “ENTER”. Select MOVE and press “ENTER”. Use
the ShuttlePoint knob to move the cursor. A dotted line, connecting the Waypoint to
the new position, is shown:
Figure 3.8.2 - Moving Waypoint (I)
To place the Waypoint in the new position, choose the new place and press “ENTER”
(“CLEAR” to abort the move), Waypoint appears in the new position:
GPS Chart 150C
Page 33
Figure 3.8.2a - Moving Waypoint (II)
3.8.3 Inserting a Waypoint into a Route
Every time you place the cursor on the segment connecting two existing Waypoints
of a Route the following functions are available: insert Waypoint, report, delete Route.
Place cursor on Route leg:
Figure 3.8.3 - Placing Waypoint between two existing ones (I)
Press “ENTER”. Select INSERT and press “ENTER”. The line between the two
Waypoints is turned into a dotted line: move the cursor to the new position. The line
will "rubber-band", drawing a dotted line between the last Waypoint and the cursor,
and another dotted line between the cursor and the next Waypoint:
Figure 3.8.3a - Placing Waypoint between two existing ones (II)
Page 34
GPS Chart 150C
Once you have positioned the cursor at new location, press “ENTER” (press
“CLEAR” to abort operation):
Figure 3.8.3b - Placing Waypoint between two existing ones (III)
3.8.4 Editing a Waypoint
Press “ENTER”. Select EDIT and press “ENTER” to modify a Waypoint. A window
will be shown with name, symbol and Latitude/Longitude of the Waypoint:
Figure 3.8.4 - Edit Waypoint (I)
Use the ShuttlePoint knob to select the field. If you have selected name field, press
“ENTER”: use the ShuttlePoint knob to insert the character (10 characters max), then
press “ENTER”. If symbol field is selected press “ENTER”; a window with 16 different
symbols appears:
Figure 3.8.4a - Edit Waypoint (II): Waypoint symbols
GPS Chart 150C
Page 35
Use the ShuttlePoint knob to select the symbol and press “ENTER”. If selecting
coordinates field, press “ENTER” and use the ShuttlePoint knob to insert the value,
press “ENTER” to store. If Color field is selected, press “ENTER”. A window with 8
different colors appears, use the ShuttlePoint knob to select the preferred color and
press “ENTER”. Then press “CLEAR” to exit and save the new information.
Figure 3.8.4b - Edit Waypoint (III)
3.8.5 Route Report page (Information on a Route)
Place cursor on Waypoint. Press “ENTER”. Select REPORT and press “ENTER”.
Also it is possible to select the Route Report page by pressing “MENU” + ROUTE +
“ENTER” + REPORT + “ENTER”.
Figure 3.8.5 - Route Report page
If there are more than 8 Waypoints shown, use the ShuttlePoint knob to scrool down
to see other points.
Selecting Route: Place cursor on Waypoint + “ENTER” + REPORT + “ENTER”
+ SELECT + “ENTER”
Use the ShuttlePoint knob to select the Route identifier and press “ENTER”. Data
related to the selected Route are shown on the screen.
Page 36
GPS Chart 150C
Naming Route: Place cursor on Waypoint + “ENTER” + REPORT + “ENTER” +
NAME + “ENTER”
Use the ShuttlePoint knob to insert the Route name and press “ENTER”.
Selecting Route Color: Place cursor on Waypoint + “ENTER” + REPORT +
“ENTER” + COLOR + “ENTER”
A window with 8 different colors appears, use the ShuttlePoint knob to select the
preferred color and press “ENTER”.
Reversing Route: Place cursor on Waypoint + “ENTER” + REPORT + “ENTER”
+ INVERT + “ENTER”
Reversing a Route plan is most typically used to return to the point where the Route
originally started.
Deleting Route: Place cursor on Waypoint + “ENTER” + REPORT + “ENTER” +
CLEAR + “ENTER”
A window is opened: select YES and press “ENTER” to confirm (select NO and press
“ENTER” otherwise).
Changing Speed & Fuel values: Place cursor on Waypoint + “ENTER” + REPORT
+ “ENTER” + SPEED/FUEL + “ENTER”
It is possible to modify the Speed and Fuel consumption values, respectively by
selecting SPEED and FUEL. Insert value by using the ShuttlePoint knob and pressing
“ENTER”.
NOTE
Speed and fuel are made by the user to assist in estimating approximate travel time
and fuel consumption for each Route.
3.8.6 User Points List page (Information on Waypoints)
"MENU" + USER POINTS LIST + "ENTER"
Figure 3.8.6 - User Points List page
GPS Chart 150C
Page 37
If the page contains more than 7 User Points, the list continues in the next pages.
Move up/down the ShuttlePoint knob to select the User Point you wish.
User Point Icon: “MENU” + USER POINTS LIST + “ENTER” + ICON + “ENTER”
This mode is used to sort by icon type. A window is shown with two options. Choose
SELECT and press “ENTER” to sort by icon type:
Figure 3.8.6a - User Point icon
Choose one of the 16 icons available, press “ENTER”: the first User Point with this
icon is shown.
Figure 3.8.6b - User Point icon
Otherwise choose ALL and press “ENTER” to show all icons (see Figure 3.8.6).
Finding User Point: “MENU” + USER POINTS LIST + “ENTER” + FIND + “ENTER”
Allows finding the point on the list by entering the User Point name by moving the
ShuttlePoint knob. If ICON is set to ALL the search is performed in the whole list,
otherwise is performed among the User Points with the selected icon.
Locating User Point: “MENU” + USER POINTS LIST + “ENTER” + LOCATE +
“ENTER”
Allows locating selected point on the Chart page.
Editing User Point: “MENU” + USER POINTS LIST + “ENTER” + EDIT + “ENTER”
Allows editing name, symbol, color and position of the selected User Point. The
coordinates of any User Point belonging to the active Route cannot be changed.
Page 38
GPS Chart 150C
Sorting User Points: “MENU” + USER POINTS LIST + “ENTER” + SORT +
“ENTER”
Allows sorting of the User Points names. After pressing “ENTER” a window is shown
with two options: A-Z ASCENDING and Z-A DESCENDING. Choose the preferred
order and press “ENTER”. The User Points are sorted by the selected order.
Selecting User Points List: “MENU” + USER POINTS LIST + “ENTER” + MODE
+ “ENTER”
Allows the display mode of User Points on the Chart page. A window is shown with six
options: SHOW (User Points is shown on the charts), ICON (only the User Point icon
is shown; User Point label is hidden), HIDE (the User Point is not shown), SHOW ALL
(all User Points are shown on the charts), ICON ALL, (all the User Points icon are
shown; User Points label are hidden), HIDE ALL (all User Points are hidden). The
selected mode for the User Point appears in the last right column of the table (see
Figure 3.8.6).
Deleting selected User Point: “MENU” + USER POINTS LIST + “ENTER” +
DELETE + “ENTER”
Deletes the selected User Point. A warning message appears, select YES and press
“ENTER” (“CLEAR” otherwise). If the selected point is the Target (Destination), the
chart plotter shows a warning message saying that the function cannot be executed.
The Target must be deactivated before deleting the selected point. Also if the selected
point belongs to the active Route (the Route with the Target) it cannot be deleted.
Deleting All User Points: “MENU” + USER POINTS LIST + “ENTER” + DELETE
ALL + “ENTER”
Deletes all User Point in the list. A warning message appears, select YES and press
“ENTER” (“CLEAR” otherwise). If one of the points is the Target (Destination), the
chart plotter shows a warning message saying that the function cannot be executed.
The Target must be deactivated before deleting the selected point. Note that deleting
User Points also Routes are deleted.
Sending User Points: “MENU” + USER POINTS LIST + “ENTER” + SEND +
“ENTER”
Allows sending all User Points in the list to an external device (depending on selected port).
Receiving User Points: “MENU” + USER POINTS LIST + “ENTER” + RECEIVE +
“ENTER”
Allows reading User Points from the NMEA input port (NMEA sentence WPL and
RTE).
3.8.7 Deleting a Route
Place cursor on Waypoint. Press “ENTER”. Select DELETE ROUTE and press
“ENTER”. A window is opened: select YES and press “ENTER” to confirm (select NO
and press “ENTER” otherwise).
GPS Chart 150C
Page 39
3.8.8 Following a Route
With the Route shown on the Chart page, move the cursor to the starting Waypoint
in the Route and press “GOTO”. You will notice that a line will be drawn from your
present position to the selected Waypoint which indicates the chart plotter is not going
to that Waypoint in the Route. After you reach the Waypoint the chart plotter will
automatically switch the next Waypoint in the Route.
3.8.9 Reversing a Route
To reverse a Route, press “MENU”, select ROUTE and press “ENTER”. Then select
REVERSE and press “ENTER”. The Route is now reversed.
3.8.10 Selecting Route Color
To select Route color, press “MENU”, select ROUTE and press “ENTER”. Then
select COLOR and press “ENTER”: a window is opened; use the ShuttlePoint knob
to select the color among the 8 colors available. Press “ENTER” to confirm. The Route
appears on the screen colored by the selected color. It is possible to select a different
color for any Route.
3.9 GOTO FUNCTION
This function allows you to start navigating to a point using the ShuttlePoint knob
directly on the Chart page.
3.9.0 Goto Cursor
Moving the ShuttlePoint knob to the desired location to navigate to and press
“ENTER”. A pop up Goto window will be shown. Using the ShuttlePoint knob select
CURSOR and press “ENTER”. You are now navigating to the cursors location and
will notice that a circle with a flag appears and DEST appears on the chart. There is
also a bearing line from your position to the Destination point.
Figure 3.9.0 - Placing Destination on Cursor
Page 40
GPS Chart 150C
3.9.1 Goto Mark On the Chart Screen
Moving the ShuttlePoint knob over the top of a Mark to navigate to and press “GOTO”.
You are now navigating to the selected Mark location and will notice that a circle with
a flag with the Mark's name appears on the chart. There is also a bearing line from your
position to the Destination point.
3.9.2 Goto Mark or Waypoint using the User Point List
Press “MENU” and using the ShuttlePoint knob select USER POINTS LIST and press
“ENTER”. Move the Shuttlepoint knob to select the desired point and press “GOTO”.
You will notice that a circle is draw around the SYM (symbol) type. Press “CLEAR” to
revert to the Chart page. You are now navigating to the User Point.
NOTE
To quickly pull up the User Point List, move the ShuttlePoint knob to an open area
on the Chart page and press “GOTO”. Using the ShuttlePoint knob select MARK
and press “ENTER”. The User Point List will be shown.
3.9.3 Goto Route
Move the ShuttlePoint knob to an open area on the Chart page and press “ENTER”.
Using the ShuttlePoint knob select ROUTE and press “ENTER”. A pop up Route
window will be shown. Select the desired Route with the ShuttlePoint knob and press
“ENTER”. You are now navigating to the first Waypoint in the Route and will notice
that a circle with a flag appears on the chart. There is also a bearing line from your
position to the first Waypoint.
3.9.4 Stopping navigation
To stop navigation press “GOTO” at any time will show a pop up Warning window.
Using the ShuttlePoint knob select STOP and press “ENTER”.
The START Selection will show the GO TO pop up window, where you can choose
another Destination point or Route to go to.
3.10 MOB FUNCTION
During navigation, the “MOB” feature provides one-touch method of storing a location
(such as a point were a crew member fell overboard). In this mode, the chart plotter
places a MOB point and all the data shown is related to navigating back to this point,
allowing you to retrace you path to the MOB point efficiently.
3.10.0 Using MOB function
Press “MOB” to place the MOB mark at the ship's coordinates.
GPS Chart 150C
Page 41
3.10.1 Deleting MOB
Place the cursor over the MOB mark icon, press “ENTER”, select DELETE and press
“ENTER” again.
3.11 TRACK PLOTTER FUCTIONS
The chart plotter can be setup to record the vessels track as the vessel is moving. The
chart plotter is capable of logging the track via time or distance. The chart plotter can
store up to 5 tracks with a total of 1000 points.
3.11.0 Selecting Time and Distance
Before you use the track plotter function it is important that you set up it to log the points
either by time or distance. To select press “MENU”, select TRACK and press
“ENTER”, select STEP UNIT and press “ENTER”. Use the ShuttlePoint knob to
select Time or Distance and press “ENTER” .
After you selected Time or Distance the next item you will need to select the interval
that the chart plotter will lay down the track.
a. If you have selected Time interval from STEP UNIT in the above step, using
the Shuttlepoint knob to select TIME and press “ENTER”. A popup menu
will appear with time selections, move the ShuttlePoint knob to the desired
selection and press “ENTER”.
b. If you have selected Distance interval from STEP UNIT in the above step,
using the Shuttlepoint knob to select DISTANCE and press “ENTER”. A
popup menu will appear with time selections, move the ShuttlePoint knob
to the desired selection and press “ENTER”.
3.11.1 Selecting a track line color
The chart plotter has 8 different line colors that you can choose for the track plotter.
To select from press “MENU”, select TRACK, press “ENTER”, use the ShuttlePoint
knob to select LINE COLOR, press “ENTER” and choose the color using the
ShuttlePoint knob.
3.11.2 Turning on or off the Track plotter
Press “MENU”, select TRACK and press “ENTER”, select TRACKING and press
“ENTER”.
NOTE
It is not possible to use the track function if the chart plotter is not receiving a fix.
Page 42
GPS Chart 150C
3.11.3 Saving a track to memory
The chart plotter has the capability to store 5 track histories. To store a track press
“MENU’, select TRACK and press “ENTER”, select ACTIVE TRACK and press
“ENTER”. Select track the next position you want to save the next track to and press
“ENTER”.
3.11.4 Displaying track
The chart plotter has the capability to enable or disable the displaying of track. Press
“MENU’, select TRACK and press “ENTER”, select VISIBLE and press “ENTER”.
Select ON to display track on chart (otherwise select OFF) and press “ENTER”.
3.11.5 Deleting track
Deletes all tracks. Press “MENU’, select TRACK and press “ENTER”, select
DELETE and press “ENTER”. A warning window appears: select YES and press
“ENTER”to confirm (select NO otherwise).
3.12 MAINTENANCE
The chart plotter does not turn On. The voltage or the polarity may not be correct.
Make sure that the correct voltage (10-18 volt dc) is present. Check also that the
polarity is correct. Refer to the Section 2.2.
The chart plotter does not get a valid fix. The GPS Antenna may not be in a open
sky position or the antenna cable may not be properly connected. Make sure that no
metal obstacle is placed around the GPS Antenna acting as a shield for the antenna
and disconnect and connect again the antenna cable to the chart plotter. If, after 15
minutes, the chart plotter does not get the fix, turn it Off and On again.
The chart plotter does not turn Off. The chart plotter may be in an unpredictable
status. If, after pressing “PWR” (for at least 3 seconds) the chart plotter does not turn
Off, turn Off the voltage.
The chart plotter screen becomes very dark after a long exposure to direct
sunlight. The internal temperature is very high. Control the contrast. Refer to the
Section 2.10. Protect the chart plotter from direct sunlight.
The chart plotter does not respond to any command. The chart plotter may be in
an unpredictable status. Try to turn Off, and then turn On. If the problem persists, erase
the memory *see Section 3.14.0.0) or remove power from the battery.
External devices are not receiving data from the chart plotter. The connections
or the Software settings may not be right. Check the connections or the settings.
GPS Chart 150C
Page 43
3.13 SPECIFICATIONS
Power consumption
: 750mA max @12V
Power supply
: 10 - 18 Volt dc, 9 Watt max
Interface
: Input/Output Interface NMEA-0183
Display
: TFT Color LCD (active area 5") sunviewable tecnology
Display Resolution
: 320 x 240 pixels
Cartography
: C-MAP NT+ C-CARD
Operating temperature range : 0/+55 degrees Celsius
Storage temperature
: -20/+70 degrees Celsius
Water Resistence
: splash-proof
Memory
: Non volatile with battery backup
Keyboard
: Silicon rubber, backlight
Weight
: 700 gr. (2 pounds)
Marks/Waypoints
Waypoints/Routes
Track Points
: 600
: respectively 20/30
: 1000
Figure 3.13 - Chart plotter Dimensions [mm/inch]
Page 44
GPS Chart 150C
3.13.0GPS Receiver Specifications
Receiver
: L1, C/A code
Channels
: 12
Max Solution Update Rate: 10/sec.
Cold Start (avg)
: < 45 sec.
Warm Start (avg)
: < 40 sec.
Hot Start (avg)
: 8 sec.
3.13.1GPS Antenna Specifications
3.13.1.0 Physical Constructions
Physical Constructions
Dimensions
Weight
Color
Mounting
: Polycarbonate radome, connector for easy mount,
rubber-O-ring between top radome and base for waterproof.
: 60mm in diameter x 38mm in height.
: 65grams (w/o cable & connector).
: Ivory white.
: Flush-mount with double threaded bolt or flag-pole
mount with plastic adapter tubing that converts its base
into 1'-14 threaded cap.
3.13.1.1 Cable & Connector
RF cable
Pulling strength
Connector
: 10 meter RG174/U
: 6 Kg @ 5sec. molded plastic on connector end for
strain relief.
: SMA
3.13.1.2 Overall Performance (antenna element, LNA & coax cable)
Center Frequency
Gain
Noise Figure
Axial Ratio
Bandwidth
VSWR
Output Impedance
:
:
:
:
:
:
:
1575.42 Mhz
25 dB typical.
2.0 max.
3 dB max.
2MHz min.
2.0 max.
50 Ohm
:
:
:
:
-40° C~ +85° C.
-50° C~ +90° C.
95% non-condensing.
100% waterproof.
3.13.1.3 Enviromental
Operating Temperature
Storage Temperature
Relative Humidity
Water Resistance
GPS Chart 150C
Page 45
3.14 TECHNICAL
3.14.0System Test
If you have connected your chart plotter according to the instructions, and chosen the
proper menu selection for your device, and are still having problems with your chart
plotter, the extended auto-test should help determine the problem. Make sure the
chart plotter is turned Off. While pressing and holding any other key, turn the chart
plotter On. A new menu will appear on the display:
Figure 3.14.0 - System Test
Use the ShuttlePoint knob to select the desired test. Choose the test press “ENTER”.
To exit from any submenu press “CLEAR”. To exit from the System Test turn Off the
chart plotter.
3.14.0.0 RAM Menu
This test verifies the integrity of the memories and if desired during this test all the
internal memory can be erased and the default setting restored.
Figure 3.14.0.0 - RAM Menu
RAM Test
To verify the integrity of the RAM. If on the screen the message ERROR appears, the
RAM is physically damaged. Contact your Dealer or STANDARD HORIZON.
RAM Clear
To clear internal memory. If the chart plotter exhibits unusual operations, or appears
to be malfunctioning, it may be possible to correct the problem by clearing RAM.
Page 46
GPS Chart 150C
This operation will erase all Marks, Routes, stored track plots and Destinations. It will
also return all selections (Input Data Format, Autopilot selection, etc.) to original
default values. To confirm clear RAM press “ENTER” again (but if at this time you do
not wish to clear RAM press “CLEAR”).
3.14.0.1 DIM Menu
To select the desired value for brightness and keypad light.
Figure 3.14.0.1 - DIM Menu
Contrast
Each time you move the ShuttlePoint knob to right, the screen will decrease
brightness, move it to the left to increase brightness.
Backlight
The second option allows to set the backlight. Operates in similar mode as Contrast.
3.14.0.2 Cartridges
To check the C-CARD and its connector.
Figure 3.14.0.2 - C-CARD Menu
Background ROM
To test the WorldWideBackground. If there is not a malfunction, the code of the
Background and the message "OK" are shown, but if the Background is defective the
message "Faulty" is shown.
GPS Chart 150C
Page 47
C-CARD Test
To test the C-CARD. There are three possible situations:
1. if there is a C-CARD inserted in the slot and there is not a malfunction, the name
of the C-CARD zone and the message "OK" are shown.
2. if there is a C-CARD inserted in the slot, but it is a defective C-CARD, the name
of the C-CARD zone and the message "Faulty" are shown.
3. if there is not any C-CARD inserted in the slot, the message "not present" is shown.
C-CARD Connector
Indicates if there is a malfunction in the connector.
3.14.0.3 Serial Ports
If you are having problems receiving data from the position-finding instrument, this test
should help determine the problem.
Figure 3.14.0.3 - Serial Ports Menu
Change Parameters
To change the parameters of the serial interface. This menu allows to select the Port
(Signal Source) between EXT.PORT or DIFF.INPUT, the Baud Rate between 300,
1200, 2400, 4800 or 9600, the Data Bits (Word Length) between 7 or 8, the Parity
between even, odd or none, the Stop Bits between 1 or 2, the Polarity between "+"
or "-". Default settings are: Port = EXT.PORT, Baud Rate = 4800, Data Bits = 8, Parity
= none, Stop Bits = 1, Polarity = +.
Input Data Display
To allow the chart plotter to act as a computer terminal and display the incoming data
exactly as it is received.
If the data displayed on the screen is unrecognizable, you may have selected the
wrong input parameters for your particular receiver, for example, Baud Rate 9600
instead of Baud Rate 4800. Check your receiver manual to be sure that you have
selected the proper parameter. If the screen is blank, you may have a broken
connection, and no data is being received or you may have connected the device to
the other input port.
Use “ZOOM IN” to stop (or continue after pause) data displaying, “ENTER” to show
data in hex or ASCII mode (normal or small) and “CLEAR” to exit.
Page 48
GPS Chart 150C
3.14.1 NMEA Input/Output
The chart plotter has 3 NMEA Outputs and 2 inputs. Pinout and wiring examples are
shown on the following pages:
GPS Chart 150C
Page 49
The NMEA outputs are provided to send signal to a wide range of other NMEA
electronics capable of receiving the following sentences:
GLL, VTG, BWC, WCV, APA, APB, BOD, XTE, RMA, RMB, RMC, GGA and HSC.
3.14.1.0 Setup of NMEA output sentences
The output sentences of each port of the chart plotter can be customized. There are
3 output ports: NMEA1 OUTPUT, NMEA2 OUTPUT and AUTOPILOT OUTPUT. To
select the sentences the following procedure can be used:
Page 50
GPS Chart 150C
Press “MENU”, select ADVANCED SETUP, press “ENTER”, select INPUT/OUTPUT,
press “ENTER” select NMEA1OUTPUT, NMEA2 OUTPUT or AUTOPILOT OUTPUT.
Move the ShuttlePoint knob up or down to choose the sentence and press “ENTER”.
A popup window will be shown with on or off selections, use the Shuttlepoint knob to
select and press “ENTER”. After the NMEA sentences have been setup, press
“CLEAR” 4 times to return to the Chart page.
3.14.1.1 NMEA2 RTCM Input
The chart plotter has the capability to be connected to a external Differential GPS
beacon receiver with an RTCM output of 1200, 2400, 4800, 9600, 19200 or 38400
baud rates. By selecting RTCM the Differential Correction Source is automatically set
to External RTCM. If RTCM2/RTCM input is different from NMEA or RTCM 4800, the
NMEA2 Output is stopped and a warning message will be shown. The default setting
is NMEA.
Press “MENU”, select ADVANCED SETUP, press “ENTER”, select INPUT/OUTPUT
select “ENTER”, select NMEA2/RTCM INPUT, press “ENTER”, select the appropriate baud rate and press “ENTER”.
The NMEA inputs are capable of listening to Depth sounders, wind speed and
direction instruments, temperature instruments and VHF’s for DSC position request
and send functions.
3.14.1.2 Dual Station Operation (Master Slave)
The CP150C is capable of dual station operation, meaning the two CP150C’s can be
mounted at two separate locations and receive GPS fix from one antenna.
In fact, if the CP150C is selected as the SLAVE any STANDARD HORIZON GPS Chart
Plotter (CP150, CP160 or CP170C) or any GPS capable of outputting NMEA (RMC
or GLL and VTG) can be connected to the CP150C for dual station operation.
SETUP:
MASTER
Press the “MENU” + ADVANCE SETUP + “ENTER” + INPUT OUTPUT + “ENTER”+
INTERNAL GPS SETUP + “ENTER”+ OPERATING MODE+ “ENTER” + MASTER
+ “ENTER”
GPS Chart 150C
Page 51
SLAVE
Press the “MENU” + ADVANCE SETUP + “ENTER” + INPUT OUTPUT + “ENTER”
+ INTERNAL GPS SETUP + “ENTER” + OPERATING MODE + “ENTER”+ SLAVE
+ “ENTER”
TRANSFERING USER POINTS:
STANDARD HORIZON Chart Plotters can transfer User Points between plotters:
User Point List Send/Receive
To use this function the Blue wire of the Master must be connected to the Brown wire
of the Slave.
Sending User Points from Master to Slave:
1.On the Slave: Press “MENU” + USER POINTS LIST + “ENTER”+ RECEIVE +
“ENTER”. This enables the receive mode on the Slave. The Slave will listen 2 minutes
for the user points to be sent from the Master.
2.On the Master: Press “MENU” + USER POINTS LIST + “ENTER”+ SEND +
“ENTER”.
Sending User points from Slave to Master:
1.On the Master: Press “MENU” + USER POINTS LIST + “ENTER”+ RECEIVE +
“ENTER”. This enables the receive mode on the Slave. The Slave will listen 2 minutes
for the user points to be sent from the Master.
2.On the Slave: Press “MENU” + USER POINTS LIST + “ENTER” + SEND +
“ENTER”.
NOTE
When sending or receiving user points the autopilot NMEA output and the receiving
of GPS Satellite signal is disabled.
3.15 TERMS AND FUNCTIONS
3.15.0User Points Handling functions
User Points are geo-referenced objects that can be placed on the Chart page by the
user. Typical User Points are Marks and Waypoints. User Points have selectable
shape, label and color.
Example of typical User Point shapes:
Figure 3.15.0 - User Points icons
User Point colors is to be chosen amongst the colors not already used to fill the charts
(Depth areas, Attention area, in order to make User Points better visible when placed
on the charts).
Page 52
GPS Chart 150C
3.15.0.0 Marks
Marks are individual points typically placed under the cursor position or by entering
their coordinates manually. Marks are identified by an icon and an alphanumeric label
(10 characters). Marks can be moved to different locations, can be deleted and their
label and icon can be changed.
In STANDARD HORIZON chart plotters Marks can be linked to Routes.
3.15.0.1 Waypoints and Routes
Waypoints are points belonging to a Route. Waypoints are like Marks but they are
always linked to other Waypoints to build a Route.
Many chart plotters allow linking existing User Points (Marks or Events) to the Route.
The user can delete each Waypoint of the Route individually, delete the whole Route,
move Waypoints of the Route and insert new Waypoints between existing ones.
STANDARD HORIZON chart plotters allows storing Routes of 20 – 30 Waypoints
each.
3.15.0.2 Destination point
The Destination point is the point to which the vessel is navigating. It can be placed
in any location on the map. If the cursor is on a Mark or a Waypoint in a Route the
Destination will be placed on the selected User Point.
If the Destination is not placed on any existing User Point the chart plotter creates a
“direct” Destination that will be deleted when the navigation to is stopped.
Route Following
Placing the Destination on a Waypoint allows Route following. The user can decide
the Route following direction.
When the Destination is reached, the chart plotter changes the Destination to the next
Waypoint on the Route.
3.15.0.3 MOB
MOB is a special Event that identifies the Man Over Board. It is placed at the vessel’s
position. Normally when the MOB marker is placed the chart plotter stops navigation
to the selected Destination point (if present) and sets the MOB as new Destination.
3.15.0.4 Measure DST- BRG
Allows measuring the Distance and the Bearing between two points on the Chart page.
This function may be turned on and off by:
“MENU” + GENERAL SETUP + “ENTER” + MEASURE DST & BRG + “ENTER” +
ON (or OFF) + “ENTER”
To use this function:
1. Press “CLEAR” until th Chart page is shown.
2. Move the cursor to the first point and press “ENTER”.
3. Move the cursor to the secind point that you want to measure the Distance between
and press “ENTER”. A pop up window will be shown that indicates the distance
between the two points and the bearing from one point to the other.
GPS Chart 150C
Page 53
3.15.0.5 Information on User Points
Placing the cursor over any User Point a pop up window showing Information related
to the object found is shown on the Chart page.
Example of pop up window with information on a Mark, Distance and Bearing from
current vessel’s position to the selected Mark are show as well.
- Mark:Icon, Name and Coordinates
Figure 3.15.0.5 - C-CARD Menu
- Waypoint:
Icon, name, Route number and Coordinates
Figure 3.15.0.5a - Waypoint window
- Route Leg: Route Number, Previous and Next Waypoint names
3.15.0.6 User Points List
The User Points List contains the list with all User Points stored in the chart plotter
memory. It shows User Point’s Type (Mark, Waypoint) Icon, Label, Coordinates and
Distance and Bearing from current vessel’s position and Mode.
Figure 3.15.0.6 - User Points list
Functions allowed from the User Points List:
- Display User Points List by icon type.
- Search any User Point in the List.
- Locate any User Point on the maps.
- Edit the selected User Point.
- Sort User Points List.
- Select mode of display User Point on the Chart page.
- Delete the selected User Point.
- Delete all User Points.
- Send all User Points in the List to an external device.
- Receive User Points from the NMEA input port.
Page 54
GPS Chart 150C
- Activate the navigation (assign the Destination) to the selected User Point.
3.15.0.7 Route Report
Shows Waypoints position and label, Distance and Bearing between Waypoints, ETE,
Fuel consumption of the selected Route.
Figure 3.15.0.7 - Route Report page
Functions allowed from the Route Report:
- Change the selected Route.
- Edit the name of the Route.
- Reverse the Route direction.
- Delete the Route.
- Enter estimated fuel consumption rate.
- Enter estimated cruise speed.
- Select the color of the Route.
3.15.1Track History
Track History function allows recording the actual vessel’s past course. The recorded
track is plotted on the charts.
The functions allowed on the track history are:
- Enable/Disable recording.
- Enable/Disable track display on the Chart page.
- Select the active track: Track history can be organized in different track records
(Normally 1 to 5 tracks).
- Select the recording interval: Track history can be stored by Time Range (E.g. 1
second to 10 minutes) or by Distance (E.g. 0.01 NM to 10 NM).
- Select the track line pattern..
- Delete the active track.
- Delete all recorded tracks.
- Display available/used track points (percentage or absolute value).
- Select the track color instead of the track line pattern.
3.15.2Input/Output
3.15.2.0 GPS Data
The chart plotter outputs NMEA-0183 data provided by the GPS: Vessel’s position,
GPS Chart 150C
Page 55
Speed Over Ground, Course Over Ground, etc.
3.15.2.1 Instruments Data
The STANDARD HORIZON chart plotters can be connected to other instruments
(Depth, Wind, Compass etc) sending NMEA-0183 data or other proprietary data
formats.
The chart plotter reads the following NMEA-0183 sentences from the instruments:
DBT, DPT, HDG, HDM, HDT, MTW, MWV, VHW, VWR, VWT, RTE, WPL.
Data received from the instruments can be shown on dedicated Data Pages or Trend
Graphs (Depth, Wind Speed and Direction graph etc).
Example of SOG graph shown on a dedicated page:
Figure 3.15.2.1 - SOG Graph page
3.15.2.2 NMEA-0183 output (Autopilot output)
STANDARD HORIZON chart plotter can be connected to other instruments (autopilots, data repeaters etc). The chart plotter sends the following set of NMEA-0183
sentences: APA, APB, BWC, GGA, GLL, RMA, RMB, RMC, VTG, BOD, WCV, XTE,
HDG, HSC. The set of NMEA sentence sent by the chart plotter can be customized
(see Input / Output settings).
3.15.3 Data Display
3.15.3.0 Data Window on Chart page
(See Sections 2.17 and 2.18).
3.15.3.1 GPS Status page
Shows GPS satellites information; Fix status, Time and Date, WASS or DGPS
information (Fix Status Icon filed).
Page 56
GPS Chart 150C
Figure 3.15.3.1 - GPS Status page
The Signal Status can be:
ACQUIRING: The GPS is trying to get a valid position Fix.
GPS 2D: The GPS is receiving at least 2 valid satellites signals.
GPS 3D: The GPS is receiving at least 3 valid satellites signals.
DGPS 2D / 3D: The GPS is receiving a 2D or 3D position and the Differential
Correction.
WAAS 2D / 3D: The GPS is receiving a 2D or 3D position and the correction from the
WAAS satellite.
HDOP: Horizontal Dilution Of Precision.
VDOP: Vertical Dilution Of Precision.
3.15.3.2 Navigation page
Shows Compass Ruler with SOG and COG, Fix position and the most relevant
navigation information: Distance, Bearing, TTG, Course, Speed and Depth Normally
all data pages can be customized. The user can select amongst the following data:
Distance To Go, Bearing To Go, XTE, Time To Go, Depth, Log Speed, Compass
Heading, Velocity Made Good, Water Temperature, True Wind Speed, True Wind
Direction, Apparent Wind Speed, Apparent Wind Direction, Trip Log, Date, Time,
Altitude.
Example of Navigation Data page displaying:
A Compass Ruler, Fix position, SOG, Bearing, Time To Go, Distance to Go and Cross
Track Error.
Figure 3.15.3.2 - Navigation Data page
GPS Chart 150C
Page 57
3.15.3.3 3D Highway Display
Shows the 3D highway and the most relevant navigation information (E.g. Distance,
Bearing, TTG, Course, and Speed). The user can customize all six fields shown on the
page.
All data pages can be customized. The user can select amongst the following data:
Distance To Go, Bearing, XTE, Time To Go, Depth, Log Speed, Compass Heading,
Velocity Made Good, Water Temperature, True Wind Speed, True Wind Direction,
Apparent Wind Speed, Apparent Wind Direction, Trip Log, Date, Time, Altitude.
Figure 3.15.3.3 - Highway page
3.15.3.4 Other pages
About page
Shows the System information: Software version, NT+ Library, Bios, Kernel, File
System and Internal GPS. Cartridges in use (type, name and code) and displays user
data availability on the internal memory.
3.15.4User Settings
3.15.4.0 Map Customization
STANDARD HORIZON has taken advantage of C-MAP’s experience with professional navigation, by allowing the use of the refined and improved cartography called NT +.
The new cartography of NT+ makes creative use of colors, patterns and icons to
increase the familiarity and usability of the much larger coverage database of NT +. NT+
is supplied by C-MAP in four sizes: Local+, Standard+, Wide+ and SuperWide+ (some
product types are only available in certain markets. Refer to local NT+ catalogs for
availability in your area). For convenience the older NT and the NT+ are both
compatible with all STANDARD HORIZON chart plotters. Contact C-MAP USA at
(508) 477-8010 or visit www.c-map.com for further information on NT+.
STANDARD HORIZON has incorporated new functions to aid your navigation and to
improve the look and feel of the data display to closely resemble actual Charts. The
following sections will discuss each of the improvements.
Page 58
GPS Chart 150C
3.15.4.1 Display Settings
With a NT+ chart installed, the display of the chart plotter is visually communicated
to navigators as never before. To simplify the customization of the chart display, the
map settings are now re-organized in modes allowing the user to choose the
preferred setting. Pre-programmed settings are user selectable from Full, Simple,
Fishing, Low and Custom. The default setting is Custom. The custom selection
allows the user to customize the chart to users preferences. The chart below shows
the selections for each mode:
Setting
Names
Nav-Aids
Light Sectors
Attention Areas
Tides + Currents
Seabed Type
Ports + Services
Tracks + Routes
Underwater Objects
Depth Areas
Depth Areas <
Depth Areas >
Depth Lines + Soundings
Depth Lines + Soundings <
Depth Lines + Soundings >
Rivers + Lakes
Natural Features
Landmarks
Cultural Features
Lat/Lon Grid
Chart Boundaries
Cartography
Mixing Level
Objects Overlap
Full
On
US
On
On
On
On
On
On
On
On
0005
0030
On
9999
0000
On
On
On
On
On
On
On
On
Off
Simple
On
US
Off
On
On
Off
On
Off
Off
On
0005
0030
On
0005
0000
On
Off
On
Off
Off
Auto
On
Off
On
Fishing
On
US
Off
On
Off
On
Off
Off
Off
On
0005
0030
On
9999
0000
Off
Off
Off
Off
On
Off
Off
On
Off
Low
Off
US
Off
Off
Off
Off
Off
Off
Off
Off
0005
0030
Off
0005
0000
Off
Off
Off
Off
Off
Off
On
Off
On
Custom
N/A
N/A
N/A
N/A
N/A
N/A
N/A
N/A
N/A
N/A
N/A
N/A
N/A
N/A
N/A
N/A
N/A
N/A
N/A
N/A
N/A
N/A
N/A
N/A
3.15.4.2 Customize Map
This function allows the user to customize the following selections. If any of the
settings are changed while in the Customize Map mode, when exiting the chart plotter
will show a prompt “Do you want to change Display Mode to Custom?”. Select YES
or NO and press “ENTER” to confirm.
Marine Settings
The Marine Settings menu controls the details shown from a C-MAP NT+ or NT
C-CARD. New selections in the software include the selection of US or International
Nav-Aids and simplified versions of each. Tide and Current and Light Sectors can be
enabled or disabled from this menu.
Names: Enables / Disables the display of names on the maps. The default setting
is On.
GPS Chart 150C
Page 59
Nav-Aids: US / US Simple / INT / INT Simple / Off. The default setting is US. When
selected it affects Lights, Signals, Buoys & Beacons display.
- INT(ernational): Draws Nav-Aids using international symbology. All components of Complex Objects are shown.
- INT(ernational) Simplified: Shows Complex Object with one icon only. Noncomplex Nav-Aids are shown using international symbology.
- US: Draw Nav-Aids using NOAA symbology. All components of Complex
Objects are shown.
- US Simplified: Shows Complex Object with one icon only. Non-complex NavAids are shown using NOAA symbology.
- Off: Lights, Signals, Buoys & Beacons are no longer displayed on the charts.
Light Sectors: Enables / Disables the display of Light Sectors. The default setting
is On.
Attention Areas: Enables / Disables the display of Attention Areas (areas in which
special attention by the mariner is required, due to some natural or man-made
hazards or sailing regulations and restrictions). The default setting is On. The
Attention Areas will always be contour only when On.
Tides & Current:Enables / Disables the display of Tides and Currents. The
default setting is On. When tide and currents display is disabled, the Tide
Stations search cannot be activated (see Section 3.15.5.3).
Seabed Type: Enables / Disables the display of Seabed Type. The default setting
is On.
Ports & Services: Enables / Disables the display of Ports and Services (areas
along shore with facilities for mooring, downloading and uploading ships,
generally sheltered from waves and winds). The default setting is On. When
Ports and Services display is disabled, the Port By Name and Port Services
search cannot be activated (see Section 3.15.5.2 and 3.15.6).
Tracks & Routes: Enables / Disables the display of Tracks and Routes (recommended and established routes for ships at sea, including traffic separation
schemes, deep waters routes…). The default setting is On.
Underwater Objects: Enables / Disables the display of underwater objects
(objects like e.g. obstruction, wreck, cable…). The default setting is On.
Depth Settings
The Depth Settings menu controls the depth information shown on the Chart page.
Depth Areas: Enables / Disables the display of Depth Areas. The default setting
is On.
Depth Areas >: Sets a min reference depth value. The default setting is 5 Ft.
Depth Areas <: Sets a max reference depth value. The default setting is 00005 Ft.
Depth Lines & Soundings: Enables / Disables the display of Depth Lines and
Soundings. The default setting is On.
Depth Lines & Soundings >: Sets a min reference depth & soundings value. The
default setting is 00000 Ft.
Depth Lines & Soundings <: Sets a max reference depth & soundings value. The
default setting is 01000 Ft.
Page 60
GPS Chart 150C
Land Settings
The Land Settings menu controls the level of cartographic details shown.
Rivers & Lakes: Enables / Disables the display of Rivers and Lakes. The default
setting is On.
Natural Features: Enables / Disables the display of the Natural Features (any
topographic feature formed by the action of natural process e.g. coastlines,
relief…). The default setting is On.
Cultural Features: Enables / Disables the display of the Cultural Features (any
man-made topographic features e.g. built-up area, roads…). The default setting
is On.
Landmarks: Enables / Disables the display of the Landmarks (any prominent
object such as monument, building, silo, tower, mast,… on land which can be
used in determining a location or a direction). The default setting is On.
Chart Settings
The Chart Settings menu controls the details shown from a C-MAP C-CARD.
Lat/Lon Grid: Enables / Disables the display of the Latitude and Longitude grid.
The default setting is On.
Chart Boundaries: Enables / Disables the display of the Chart Boundaries. Auto
setting instead, allows showing only boundaries for the next four charts contained on the C-CARD. The default setting is On.
Cartography: Enables / Disables the Cartography. The default setting is On.
Used to zoom-in and pan everywhere regardless the existence of data. While
in "virtual cartography" (Cartography Off), by setting Cartography On from
menu, the chart plotter displays the previous scale level with charts. Again while
in Cartography On, the chart plotter will work in the same way also when you exit
from the charts coverage, panning with the cursor or because of a ship position
change. When in Cartography Off, it is also possible to have virtual cartography
between two subsequent scale levels with charts.
Mixing Levels: Enables / Disables the Mixing Levels. The default setting is Off.
When the map coverage at the current zoom level does not fill the entire screen,
the chart plotter draws the rest of the map expanding the cartographic information read from, at most, two zoom levels above the current zoom level. For this
reason the map is drawn three times: firstly it draws the two levels before the
current level and then the current level. The area covered by the cartographic
data read from the previous levels is identified by a dotted pattern. When the
cursor is moved on an area not covered by data of the current level and the
Cartography item is switched Off, the chart plotter zooms out to the first level
covered by cartographic data. When the Cartography item is switched On, the
cursor can be moved on the areas obtained from the previous levels but no
information is provided on the objects found on that area since it is considered
not suitable for navigation at that scale level.
NOTE
The Mixing Levels function works only with the new NT+ C-CARDs. It also affects
the speed of the redraw of the screen. If this function is not used it maybe disabled.
GPS Chart 150C
Page 61
Declutter:Enables / Disables the Declutter. The default setting is Off. When it is
On removes overlapping text (e.g. Names, Spot Soundings etc.).
3.15.4.3 General Setup
Language: Allows changing the language for menus and data screens.
Keypad beep: Enables / Disables the audible beep.
Palette: Normal / Classic / Night / Sunlight. Sets the Palette to be used to enhance
the visibility of the screen depending on the surrounding light condition.
- Normal: is recommended when the chartplotter is not exposed to the direct
sunlight. When this mode is set the maps are displayed in order to use colors
as similar as possible to the ones used in the original paper charts.
- Classic: is also recommended when the chartplotter is not exposed to the direct
sunlight. The colors used are the same colors used on NT cartography.
- Night: is recommended when the environment is dark in order to reduce the
glare of the display. The chartplotter displays maps and screen in darker colors.
- Sunlight: is designed to enhance the visibility of the screen when the
chartplotter is exposed to the sunlight. The maps are much brighter than in the
other modes and the depth areas are filled with white color so different depth
areas are not easily distinguishable.
Auto Info: select the type of Automatic Info (Off/On Points/On All). See Section
3.15.5.
Time Line: Sets the type of display for the Time Line. The Time Line is a graphical
indication of the direction in which the vessel is heading. The Time Line origin
is the vessel’s position so the time line movement is synchronized with the
vessels Icon. Time Line course is given by the value of COG (Course Over
Ground) and its length is proportional to the SOG (Speed Over Ground). When
the Time Line is set to Infinite the line crosses the whole screen.
- Off: the Time Line is not shown.
- Value: Allows entering the Time Line length.
Time Reference: UTC / Local (Local Offset). Allows choosing UTC or Local Time
display. When Local Time is set the Local Time offset can be entered.
Data Window: choose the preferred data window layout. See Section 2.15.0.
Time Format: 12 / 24 hours. Allows switching 12 or 24 hours time format.
Date Format: MM-DD-YY / DD-MM-YY. Allows choosing Date Format Month-DayYear / Day-Month-Year.
Zoom Type: select the preferred mode to change chart scale: BY ZOOM and BY
SCALE. When BY ZOOM is selected, pressing the “ZOOM IN” shows more
detail of a smaller area, by changing the chart scale and zooming in on your
display. Press “ZOOM OUT” to change the scale and show a wider, otherwise
less detailed view. When BY SCALE is selected, when “ZOOM IN” or “ZOOM
OUT” is pressed the chart plotter will show the zoom window: pressing the
“ZOOM IN”/“ZOOM OUT” or moving the ShuttlePoint knob up/down moves the
scale and bar graph, press “ENTER” to zoom to the scale. Press “CLEAR” to
quit the zoom window and keep the selected chart scale.
Page 62
GPS Chart 150C
NOTE
Due to the cartography contained in the C-MAP NT+ C-CARD there will be multiple
charts shown within the same scale range.
Measure DST & BRG: allows measuring the Distance and Bearing between two
points.
Ship Icon: select the preferred icon (among 5 choices) to display ship on the Chart
page.
Cursor Speed: select the preferred speed among Low, Medium and High for the
cursor in the Chart page and in the menu page.
Units of Measure: allows customization of Disatnce, Speed, Depth and Altitude.
3.15.4.4 Fix
Fix Correction: Enables / Disables the correction of the received fix position.
Compute Correction: Corrects fixes from the positioning instrument. By placing
the cursor on the ship's real position and selecting this option, the error is
calculated and internally memorized for appropriate correction, but not applied.
Correction Offset: Allows entering the correction to the received fix position.
Position Filter: Attenuate the fix position error.
Speed Filter: Attenuate the fix position error.
3.15.4.5 Navigate
Map Datum: Allows selecting any datum reference from the ones available on the
chart plotter. The chart plotter allows selecting about 100 different datum. The
default Map Datum is WGS84. C-MAP charts are saved in WGS84 datum. The
Map Datum selection switches to the selected reference datum applying the
datum offsets stored with the charts.
Map Orientation
- North Up: The top of the map is fixed to North.
- Course Up: The top of the map is oriented to the current Course value.
- Track Up: The top of the map is oriented to the current Navigation Leg.
Map Orientation Resolution: 5 – 30 degrees defines the maximum variation of
the reference angle after which the map changes its orientation.
Coordinate System
- Ddd mm.mm: Degrees minutes and hundreds of minutes.
- Ddd mm.mmm: Degrees minutes and thousands of minutes.
- Ddd mm.sss: Degrees minutes and seconds.
- TD: TD function allows converting GPS coordinates to Loran-C coordinates
and vice versa. Any position can be displayed or entered in TDs. The chart
plotter allows choosing one of the (about) 30 Loran-C chains and allows
selecting the two TD stations (Slave 1 and Slave 2). A correction to the TD values
can be applied by entering the correction offset (ASF1 and ASF2) to the slaves.
(ASF=Additional Secondary phase Factor )
- Select Loran Chain
- Select Slave1
GPS Chart 150C
Page 63
- Select Slave2
- Switch Alternate solution
- Set ASF1
- Set ASF2
3.15.4.6 Compass
Bearings: Magnetic/True. Allows selection of the reference used in calculating
bearings. Switches Magnetic / True bearings display. When Magnetic bearings
option is set, the chart plotter applies the selected Magnetic Variation (Auto –
Manual) to the True degrees to convert from True to Magnetic bearings.
Variation: Auto – Value. Selects the type of magnetic variation to be applied in the
conversion between true and magnetic bearings.
- Auto: allows applying the magnetic variation calculated by the chart plotter or
the one received from the GPS (if available).
- Value: allows the user to enter a magnetic variation that will be applied in the
conversions.
Calibration: Allows setting the compass deviation (+/- 20 degrees) for the eight
compass sector.
Figure 3.16.5.6 - Highway page
3.15.4.7 Input / Output
Internal GPS Setup
- Restart GPS: Restarts all GPS processes.
- Operating Mode: Selects Slave or Master Operating Mode.
- Static Navigation: Sets up a threshold for the speed. When the speed
received from the positioning device is under that threshold, the chartplotter
displays zero.
- Differential Correction Source: None / RTCM / WAAS.
- - None: No correction applied.
- - RTCM 104 Input.
- - WAAS: Correction from WAAS satellite. WAAS (Wide Area Argumentation System) is a system at the moment composed by 2
satellites that reduces the fix position error down to +/- 5 meters. The
WAAS satellites Ids are numbered 120 and higher.
For all other items see Section 3.14.1.
3.15.4.8 Alarms
Allows setting Arrival, XTE, Depth, Anchor and Grounding alarms.
The chart plotter sounds an acoustic alarm and shows a warning message when any
of the above alarms goes off.
Arrival Alarm: Sets and acoustic alarm to sound when the vessel is approaching
the destination. The user can select the desired alarm range or disable the
alarm.
Page 64
GPS Chart 150C
XTE Alarm: Sets an acoustic alarm to sound when the vessel is deviating from a
defined course. The user can select the desired alarm range or disable the
alarm.
Depth Alarm: Sets an acoustic alarm to sound when the received depth value
(from a depth sounder with NMEA output) is too shallow. The user can select the
desired depth alarm limit or disable the alarm (a line representing the depth
alarm limit is drawn on the Depth Graph).
Anchor Alarm: Sets an alarm to sound when the ship moves off a selected
location. The user can select the desired alarm range or disable the alarm.
Audible Alarm: Enable disable the alarm beep.
Grounding Alarm: The chart plotter is provided with a function that, by querying
the maps data, verifies potential danger to navigation due to shallow water, land,
rocks, obstructions and shoreline constructions. The maps are scanned periodically (every 10 seconds).
When the Grounding Alarm is active, the chart plotter scans an area in front of
the boat. This area is identified by a triangle drawn in front of the boat icon whose
direction is determined by the current boat heading. The length of the triangle
is user selectable and its angle is 30 degrees.
If any of the above objects are found, the chart plotter notifies the danger on a
dedicated warning message box in the Grounding Alarm Report page.
Entering a value in the Grounding Alarm item activates the Grounding Alarm.
The Grounding Alarm is switched Off by default after a Master Reset. Once the
Grounding Alarm has been activated, a warning message is shown.
NOTE
- The Grounding Alarm function only operates with the new NT+ C-CARDs. It also
affects the speed of the redraw of the screen. If this function is not used it may
be disabled.
- When any of the objects checked are found for the first time, the chart plotter
shows a pop up window to alert the user of the possible danger. The name of each
new dangerous object found is reported in the warning window. In the Grounding
Alarm Report page the relative item has a tick marker next to it, to identify the
dangerous object currently detected. If in the next search cycle the same objects
are found again, the alarm window will not be shown. Instead, if in the next
searches the objects found before are no longer detected, their relevant item in
the Grounding Alarm Report page is cleared (note that in this case, if the same
object type is found again later, the Alarm will be shown). The chart plotter shows
an icon on the charts that identifies when a Grounding Alarm is detected.
Grounding Alarm Range: Allows setting the length of the sector to be detected
among 0.25, 0.5, 1.0 Nm. The default setting is 0.25 Nm. When any of the
searched objects is found in the scanned area, a tick marker is printed on the
relative box in the Grounding Alarm Report page to identify which dangerous
objects have been currently detected.
Grounding Alarm Report: Allows displaying the report of the dangerous objects
currently detected.
GPS Chart 150C
Page 65
3.15.4.9 Simulation
Allows simulating Vessel Position, speed and course.
The simulated path is generally a straight course starting from the current position
assumed by the cursor at the Simulation activation time.
Simulation Mode: Enables (On) or disables (Off) the Simulation. The default
setting is Off.
Course: Sets the desired value for heading in Simulation mode. The default
setting is 000° M.
Speed: Sets the value for speed in the Simulation mode. The default setting is 01.0
Kts.
Date: Sets the date of the simulated fix. Inserts date using the ShuttlePoint knob.
Time: Sets the time of the simulated fix. Inserts time using the ShuttlePoint knob.
Cursor Control: Enables (On)/disables (Off) the cursor control. The default
setting is Off.
3.15.5 Automatic Info
The type of Automatic Info is user selectable. The possible settings are:
- Off: disabled, no automatic info shown at all.
- On Points: only on points. This is the default setting.
- On All: on all objects (points, lines and areas).
The Automatic Info On Points shows information when the cursor is placed on
points (as Port Services, Tides, lights, wrecks, rocks, buoys, beacons, obstructions,
land markers, etc.). The Automatic Info On All shows information when the cursor is
placed on points, on lines (as Depth contours, Traffic Separation, Territorial Sea,
Cartographic Lines etc.) on areas (Depth, Built-up, Sea, Attention, Restricted etc.) and
on names (on the beginning of the text -hot spot- or on any of the characters of the
name -name message box-).
The details on Land, Source of Data, Cartographic Area and Spot Soundings
are not shown.
Figure 3.15.5 - Automatic Info on Points
Press “ENTER” to see information about that object.
3.15.5.0 Info Tree and Expanded Info pages
This page combines the Info Tree and the Expanded Info pages; this gives the
Page 66
GPS Chart 150C
advantage of showing the details of the object selected on the Info Tree while the
cursor is moving through the Info Tree’s items.
Figure 3.15.5.0 - Info pages
The upper side of the page contains the Info Tree and the Lower side contains the
expanded information. While moving the cursor through the Info Tree, all the relevant
information of the selected object is shown on the lower part of the page.
When the selected object is a Tide Height, pressing “ENTER” the Tide page is shown.
Pressing “CLEAR” the page is closed.
3.15.5.1 Info function
Place the cursor in any place you want and press “MENU”, select INFORMATION
from menu, then press “ENTER” to show the Info Tree and Expanded Info page.
3.15.5.2 Getting Port Info
Upon viewing the chart of a port or harbour, you will see a Port Info icon that you can
be place the cursor on to query the available information immediately displayed with
many details. The Port Info icon is visible only if the Ports & Services option is On
(default setting).
Figure 3.15.5.2 - Port Info icon
The available information is shown in the Automatic Info window where icons of the
available services are shown:
GPS Chart 150C
Page 67
Figure 3.15.5.2a - Automatic Info window
To expand information about that object press “ENTER”.
3.15.5.3 Getting Tide Info
When you will see a Tide Info icon you can place the cursor on it to query the available
information that will immediately be displayed.
Figure 3.15.5.3 - Tide Info icon
Place cursor on the Tide symbol, a Automatic Info window is opened:
Figure 3.15.5.3a - Automatic Info on Tide
To display the Tide Graph page press “ENTER”:
Page 68
GPS Chart 150C
Figure 3.15.5.3b - Tide Graph
Using the ShuttlePoint knob, it is possible to move the cursor anywhere on the graph
and display the time, height (vertical cursor) and draught (horizontal cursor) on a
particular graph point. Also use “ZOOM IN” or “ZOOM OUT” to go to previous or next
day and “ENTER” to set date (move the ShuttlePoint knob up/down to insert the
desired number and move it left/right to move cursor to left/right, press “ENTER”).
NOTE
Tide graphs are an approximation of the tide and they should be used in conjunction
with traditional tide tables and navigational methods.
3.15.6Find Function
The chart plotter allows finding Wrecks, Obstructions in addition to the other features
Port Services, Ports, Tide Stations, User Points and Coordinates.
3.15.6.0 Port Services
To locate and display the nearest available facilities of a particular type (i.e. the nearest
Hospital, sailmaker, bank, etc.).
Press “MENU” + FIND + “ENTER” + PORT SERVICES + “ENTER”.
The icons of the available services are shown.
Use the ShuttlePoint knob to select any facility and press “ENTER”. The list of the
nearest ports (up to 10) containing the facility will be shown on the screen. Then
choose the port you want and press “ENTER”.
3.15.6.1 Ports
Shows the list of all (max 8 ports) placed near the cursor position.
Press “MENU” + FIND + “ENTER” + PORT + “ENTER”.
Use the ShuttlePoint knob to select the port. Press “ENTER” to locate it.
NOTE
A Warning message is shown if there is no C-CARD inserted or there are no ports
on the C-CARD.
GPS Chart 150C
Page 69
Searching by list
Press “MENU” + FIND + “ENTER” + PORT + “ENTER” + “MENU”
Rebuild and display the complete ports list.
Use the ShuttlePoint knob to select the port and “ZOOM IN”/“ZOOM OUT” to select
next/previous page. Press “ENTER” to locate the selected port on the map.
Searching by name
Press “MENU” + FIND + “ENTER” + PORT + “ENTER” + “MENU” + “MENU”
Use the ShuttlePoint knob to insert port name (max 15 characters). Press “ENTER”
to accept; press “CLEAR” to cancel name entry.
If inserted name is found, the list with all ports containing the inserted name is shown.
Repeat the operation to refine search or move through the list with ShuttlePoint knob.
Press “ENTER” to locate the port on the map.
NOTE
A Warning message is shown when the inserted name is not in the ports list.
3.15.6.2 Tide stations
Finds the nearest Tide Stations (up to 10) on the map, from the boat position - if a valid
fix is received - or from the cursor position - if the received fix position is not good.
Press “MENU” + FIND + “ENTER” + TIDE STATIONS + “ENTER”.
A new window will appear in few seconds.
Choose the Tide Stations you want and press “ENTER” to display the Tide Graph
page. Press “CLEAR” to display the Tide Station chosen.
3.15.6.3 Wrecks
Searches for Nearest Wrecks:
Press “MENU” + FIND + “ENTER” + WRECKS + “ENTER”.
Use the ShuttlePoint knob to select the port and “ZOOM IN”/“ZOOM OUT” to select
next/previous page. Press “ENTER” to locate the selected Wreck on the map.
3.15.6.4 Obstructions
Searches for Nearest Obstructions.
Press “MENU” + FIND + “ENTER” + OBSTRUCTIONS + “ENTER”.
Use the ShuttlePoint knob to select the port and “ZOOM IN”/“ZOOM OUT” to select
next/previous page. Press “ENTER” to locate the selected Obstruction.
3.15.6.5 User Points
Searches for the nearest Marks/Waypoints. Once the User Points have been
selected, its coordinates will be centered on the Chart page.
Press “MENU” + FIND + “ENTER” + USER POINTS + “ENTER”.
3.15.6.6 Coordinates
Centers the map at the given coordinates.
Press “MENU” + FIND + “ENTER” + COORDINATES + “ENTER”.
Page 70
GPS Chart 150C
INDEX
A
About page ............................................ 58
Accessories ............................................. 9
Adding New Mark .................................. 30
Alarm Range .......................................... 65
Alarm settings ........................................ 64
Anchor Drag Alarm ................................ 65
Antenna ................................................. 12
Arrival Alarm .......................................... 64
Attention Areas ...................................... 60
Audible Alarm ........................................ 65
Automatic Info ....................................... 66
Autopilot output ...................................... 56
B
Bearings .......................................... 64, 66
beep ....................................................... 15
C
C-CARD .......................................... 13, 16
C-CARD slot .......................................... 16
Cartography ........................................... 61
Cartridges .............................................. 47
Celestial page ........................................ 27
Chain ...................................................... 20
Changing Fuel ....................................... 37
Changing Speed .................................... 37
Chart ...................................................... 22
Chart Boundaries ................................... 61
Chart page ...................................... 21, 25
chart plotter ............................................ 15
chart plotter Off ...................................... 16
chart plotter On ...................................... 16
Chart Settings ........................................ 61
Color ............................................... 30, 36
Compass Calibration ............................. 64
Compute Correction .............................. 63
contrast ........................................... 16, 18
Coordinate System ................................ 63
Coordinates ........................................... 70
Correction Offset ................................... 63
Course ................................................... 66
create a Route ................................ 30, 32
Cultural Features ................................... 61
cursor ..................................................... 15
Cursor Control ....................................... 66
Cursor Mode ................................... 16, 23
Cursor Speed ......................................... 63
GPS Chart 150C
Customize Map ...................................... 59
Customizing Data box ........................... 22
D
Data Display .......................................... 56
Data page ....................................... 16, 29
Data Window ........................... 21, 56, 62
Date ....................................................... 66
Date Format ........................................... 62
Declutter ................................................ 62
Deleting All User Points ........................ 39
Deleting Mark ......................................... 31
Deleting MOB ........................................ 42
Deleting Route ................................ 37, 39
Deleting track ......................................... 43
Deleting Waypoint ................................. 32
Depth Alarm ........................................... 65
Depth Areas ........................................... 60
Depth Areas < ........................................ 60
Depth Areas > ........................................ 60
Depth Lines & Soundings ...................... 60
Depth Lines & Soundings < ................... 60
Depth Lines & Soundings > ................... 60
Depth Settings ....................................... 60
Depth Trend page .................................. 29
Destination ........................ 16, 39, 40, 53
Differential GPS ..................................... 51
DIM Menu .............................................. 47
Dimensions ............................................ 44
Display page .......................................... 28
Display Resolution ................................. 44
Displaying track ..................................... 43
Distance ................................................. 42
Distress Call .......................................... 27
DSC LOG ............................................... 28
DUAL STATION .................................... 51
E
Edit Mark ................................................ 19
Edit mode ....................................... 16, 23
Editing User Point .................................. 38
Editing Waypoint ................................... 35
Expanded Info pages ............................. 66
F
features .................................................... 9
Find Function ......................................... 69
Finding User Point ................................. 38
Page 71
Fix Correction ........................................ 63
Fix Settings ............................................ 63
Following a Route .................................. 40
Fuel ........................................................ 37
G
Goto ....................................................... 40
Goto Cursor ........................................... 40
Goto function ......................................... 20
Goto Mark .............................................. 41
Goto Route ............................................ 41
GPS .................................... 9, 18, 27, 56
GPS Antenna connector ....................... 17
GPS Antenna Specifications ................. 45
GPS Data ............................................... 55
GPS Receiver Specifications ................ 45
GPS Status page ............................ 27, 56
Grounding Alarm ................................... 65
Grounding Alarm Report ....................... 65
H
Highway ................................................. 22
Highway Display .................................... 58
Highway Page ........................................ 26
Home Mode ........................................... 24
I
I/O connector ......................................... 17
Info function ........................................... 67
Info on Route ......................................... 36
Info on User Point .................................. 54
Info on Waypoint ................................... 37
Info Tree ................................................ 66
Input/Output ........................................... 55
Input/Output settings ............................. 64
Inserting C-CARD .................................. 13
Inserting Waypoint ................................. 34
Installing ................................................. 11
Instruments Data ................................... 56
Interface ................................................. 44
Internal GPS On/Off .............................. 64
K
key ......................................................... 14
Keyboard ............................................... 44
Keyboard beep ...................................... 62
Keypad beep .......................................... 62
L
Land Settings ......................................... 61
Landmarks ............................................. 61
Language ............................................... 62
Lat/Lon Grid ........................................... 61
Page 72
light ................................................. 16, 18
Light Sectors .......................................... 60
Locating Mark ........................................ 32
Locating User Point ............................... 38
Loran ............................................... 20, 63
M
Magnetic Variation ................................. 64
Main Menu ............................................. 16
Man OverBoard ..................................... 16
Map Customization ................................ 58
Map Datum ............................................ 63
Map Orientation .............................. 21, 63
Marine Settings ...................................... 59
Mark ................ 9, 16, 19, 30, 41, 44, 53
Measure DST & BRG ..................... 53, 63
Memory .................................................. 44
Mixing Levels ......................................... 61
MOB ......................................... 16, 41, 53
Modify Waypoint .................................... 35
Moving Mark .......................................... 31
Moving Waypoint ................................... 33
N
Names ................................................... 59
Naming Route ........................................ 37
Natural Features .................................... 61
Nav-Aids ................................................ 60
Navigation .............................................. 22
Navigation Data page ..................... 26, 57
NMEA .............................................. 28, 39
NMEA Data page ................................... 29
NMEA Display ........................................ 22
NMEA Display page .............................. 29
NMEA Input/Output ............................... 49
NMEA-0183 output ................................ 56
NMEA2 RTCM Input .............................. 51
O
Obstructions .......................................... 70
P
Packing list .............................................. 9
Pair ......................................................... 20
Palette .................................................... 62
pattern .................................................... 42
PC .......................................................... 21
place the MOB ....................................... 41
Port Info ................................................. 67
Port Services ......................................... 69
Ports ...................................................... 69
Ports & Services ............................. 60, 67
Position Filter ......................................... 63
GPS Chart 150C
Position Request Call ............................ 27
Power ..................................................... 17
Power On ............................................... 13
R
RAM Menu ............................................. 46
Receiving User Points ........................... 39
removing ................................................ 11
replacement parts .................................... 9
Resolution .............................................. 44
Reversing Route .................................... 37
Route ........................... 9, 16, 32, 44, 53
Route Color ..................................... 37, 40
Route Following ..................................... 53
Route name ........................................... 37
Route planning ...................................... 32
Route Report ......................................... 55
Route Report page ......................... 36, 55
RTCM ..................................................... 51
S
Saving a track ........................................ 43
Screen display pages ............................ 23
Seabed Type ......................................... 60
Selecting Route ..................................... 36
Sending User Points .............................. 39
Serial Ports ............................................ 48
SETUP ................................................... 17
Ship Icon ................................................ 63
ShuttlePoint knob ........................... 14, 15
Simulation Mode .................................... 66
slot ......................................................... 16
SOG Graph page ................................... 56
SOG Trend page ................................... 29
Sorting User Points .............................. 39
Speed ............................................. 37, 66
Speed & Course Filter ........................... 63
Speed Unit ............................................. 63
Start-Up page ........................................ 17
Stopping navigation ............................... 41
Storage temperature ............................. 44
System Settings .................................... 62
System Test ........................................... 46
Tides & Current ..................................... 60
Time ................................................ 42, 66
Time Format .......................................... 63
Time Line ............................................... 62
Time Reference ..................................... 62
track ................................................ 42, 55
Track History ......................................... 55
track line pattern .................................... 42
Track Points ........................................... 44
Tracks & Routes .................................... 60
turn off .................................................... 17
turn on .................................................... 17
U
Underwater Objects ............................... 60
User Point ....................................... 37, 70
User Point Icon ...................................... 38
User Points Handling ............................. 52
User Points List ................ 20, 32, 41, 54
User Points List page ............................ 37
User Points Mode .................................. 39
User Settings ......................................... 58
UTC ........................................................ 18
V
VHF Digital Selective Calls ................... 27
voltage ................................................... 12
W
Water Resistence .................................. 44
Waypoint ............... 9, 16, 32, 37, 44, 53
Waypoint symbols ................................. 35
Weight .................................................... 44
WGS84 .................................................. 63
Wind Speed Trend page ....................... 29
WPL ....................................................... 39
Wrecks ................................................... 70
X
XTE Alarm ............................................. 65
Z
zoom ...................................................... 15
Zoom Type ............................................. 62
T
Target ...................................... 16, 19, 39
TD ................................................... 20, 63
Temp Trend page .................................. 29
Temperature .......................................... 44
text area ................................................. 25
Tide Graph ............................................. 68
Tide Info ................................................. 68
Tide stations .......................................... 70
GPS Chart 150C
Page 73