1
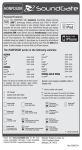
CAUTION
CRZNAUX2
DO NOT INSTALL IN LOCATIONS WITH HIGH MOISTURE OR DUST
Moisture or dust may result in product failure.
The SoundGate CRZNAUX2 lets you connect a ZuneTM digital media
player directly to the factory radio in the Chrysler Corporation
vehicles listed below. The CRZNAUX2 supplies power, charges, and
provides direct audio input for your Zune Device
HAVE THE WIRING AND INSTALLATION DONE BY EXPERTS
The wiring and installation of this product requires special technical skills and experience.
The SoundGate CRZNAUX2 utilizes sophisticated microprocessor
control, ultra-reliable surface-mount construction, and advanced software design to flawlessly
integrate with Chrysler audio systems. Your Zune device’s audio can be selected from your factory
radio’s controls. An optional remote control (sold separately) allows control of all Zune device
functions.
The CRZNAUX2 works in the following vehicles:
DODGE (CONTINUED)
1999–2004
1998–2004
1999–2003
2000–2005
2001–2006
2001–2006
Neon / SRT
Ram Pickup 1500/2500/3500
Stratus
2001–2004
2001–2003
2001–2006
1998–2004
PLYMOUTH
DODGE
Dakota
Durango
Grand Caravan
Intrepid
2000–2005
2002–2005
2001–2005
TROUBLESHOOTING
Should this product fail to operate properly, please contact your Dealer or SoundGate Technical Support via email at
[email protected] or via phone at +1-800-256-0808.
JEEP
Grand Cherokee
Liberty
Wrangler
Prowler
If you experience problems, call SoundGate Technical Support
at +1-800-256-0808, or email us at [email protected].
1999–2004
2002–2005
2003–2005
2002
CRZNAUX2 Overview
RCA component A/V outputs. Connect the audio outputs to the matching locations of the CRZNAUX2
components on the next page.
Yellow = Video
Red = Audio Right
White = Audio Left
www.soundgate.com
Rev 20080404
WARNING
DO NOT DISASSEMBLE OR ALTER
Doing so may result in an accident, fire, or electric shock.
Do not block your view
Do not mount product or any added audio/video equipment where it can block your view through the windshield or block your view
of dashboard indicators and displays.
Do not block safety devices
Do not mount product or any added audio/video equipment where it can obstruct the operation of any safety device, such as the
airbag.
Distraction warning
Do not allow product or any added audio/video equipment to distract you while you are driving.
Zune Dock Connector. Connect to
ZuneTM digital media player.
Optional remote control (available
separately). Allows full control of a
connected Zune device’s functions.
Power connector. Connect black wire to baremetal chassis. Connect red wire to a +12V
switched (ignition) power source.
BEFORE WIRING, DISCONNECT THE CABLE FROM THE NEGATIVE BATTERY TERMINAL
Before starting any installation work , wait 90 seconds after turning the ignition switch to the LOCK position and disconnecting the negative (-) terminal from the battery. The
supplemental restraint system (SRS), or airbag(s) is equipped with a backup power source. If installation work is started less than 90 seconds after disconnection of the negative
(-) battery terminal, the SRS may deploy. When the negative (-) terminal cable is disconnected from the battery, the clock and audio systems’ memory may be erased. Before
starting installation work, make a record of the clock and audio systems’ memory settings. When installation is complete, reset the clock and audio systems to their previous
settings. Power tilt, power telescopic steering column, power seats, power mirrors, power shoulder belt anchorage, and other power accessories may or may not be equipped
with a memory function; consider keeping a record of these settings as well.
When installation is complete, readjust the features to their previous settings.
Inline fuse. The red wire of the power connector is fused
to protect your Zune device and vehicle systems. This wire
requires a 12V, 1500mA fuse.
CRZNAUX2 Harness Option A
300M
Concorde
LHS
PT Cruiser
Sebring
Town and Country Van
CHECK YOUR LOCAL LAWS
Some States/Provinces or other governmental jurisdictions (such as cities) may have laws that prohibit the operation of a video
screen within the sight of the driver. If you have purchased such a product, you should use the product only in locations where it is
legal to do so, and if you do use the product, set up the screen so it is only visible to passengers.
10-pin Male Connector. Only one of the harnesses
below should be used. See the instructions on page 4 for
installation details.
CHRYSLER
FOLLOW THE OPERATIONAL AND INSTALLATION MANUALS.
YOU SHOULD READ AND FAMILIARIZE YOURSELF THOROUGHLY WITH THE FOLLOWING INFORMATION PRIOR TO INSTALLING AND
USING THIS UNIT. IN ADDITION, YOU MUST CAREFULLY READ AND FOLLOW THE INSTALLATION SCHEMATICS AND INSTRUCTIONS
FOR THE PRODUCT AND THE VEHICLE IN WHICH IT IS BEING INSTALLED. FAILURE TO FOLLOW INSTALLATION INSTRUCTIONS MAY
DAMAGE THE PRODUCT AND THE VEHICLE, WILL VOID THE PRODUCT WARRANTY, AND MAY VOID THE VEHICLE WARRANTY.
Connect the RCA Left (white) and Right (red)
audio cables (from the component-set on
page 2) to the CRZNAUX2 module.
Features
CRZNAUX2 Module
USE ONLY SPECIFIED ACCESSORY PARTS
Use of other than specified parts may damage product internally.
8-pin Male DIN Connector and +12V Constant Wire. Only one of the
harnesses shown should be used. See the instructions on page 4 for
installation details.
Purpose
CRZNAUX2 Harness Option B
DO NOT ALLOW CABLES TO BECOME ENTANGLED IN SURROUNDING OBJECTS
Cables or wiring that obstruct or get caught on places such as the steering wheel, shift lever, brake pedals, etc. can be extremely
hazardous.
Never use a backup power supply (such as another battery) during installation work in an attempt to avoid losing these memory settings.
2
3
Installation
BEFORE YOU BEGIN:
1. Turn the ignition off.
2. Ensure the factory radio is turned off.
Installation
1
Gain access to the factory radio’s rear panel. The CRZNAUX2 connects directly
to the rear panel of the factory radio. Full or partial disassembly of the dash will be
necessary. If you are unsure of this procedure, please consult a factory service manual or have the work
performed by a mobile electronics specialist. Pay special attention to warnings or instructions regarding
working near airbags, other safety devices, or security systems.
2
Connect the appropriate CRZNAUX2 harness to the factory radio. The
CRZNAUX2 comes with two vehicle-specific harnesses. Carefully review both
harness options on page 3 and compare both harnesses with the connectors on your factory radio’s rear
panel. Use the harness that matches your radio’s connectors. Plug the male connector of the appropriate
CRZNAUX2 harness into the matching location on the factory radio’s rear panel.
If your vehicle requires Harness Option B, shown on page 3, you must also connect the attached
yellow wire. Connect the yellow wire to a constant +12V power source (vehicle battery). We DO NOT
recommend the +12V constant in the factory radio harness due to the possibility of excessive voltage
drop during vehicle starting.
Operation
Controlling your Zune device
The CRZNAUX2 will not provide control of your Zune device unless you attach the optional remote, which
is available separately. Please visit www.soundgate.com or your local mobile audio dealer for details on
the CRZNAUX2 remote’s availability.
Why SoundGate
have the edge...
Activating the CRZNAUX2
1. Turn on the ignition and factory radio.
2. Ensure that your Zune device is connected and playing audio.
3. Wait several seconds for the factory radio and the CRZNAUX2 to synchronize. Press the MODE
button on your factory radio.
The factory radio’s display will report Disc 1, Track 1—you should hear audio from your Zune
device through your vehicle’s audio system.
NOTE
If the radio’s display does not report Disc 1, Track 1 after pressing the MODE button and
you do not hear music from your Zune device, turn the radio and ignition off. Disconnect
the CRZNAUX2 harness from the factory radio’s rear panel. Wait 30 seconds, then
reconnect the harness. Repeat steps 1–3 above.
This initialization process, if necessary at all, will only need to be performed during the
initial installation.
Dealers
The technologies used in today’s vehicles
are as sophisticated as any laptop
computer. At SoundGate we believe these
new technologies are full of opportunities
for mobile electronic dealers across the
nation. We make it a high priority to not
only research these new systems, but to
understand them and their impact on the
aftermarket car audio industry. Armed with
this knowledge, we are well equipped to
help you integrate new components into
these systems with our innovative, highperformance interfaces and unparalleled
technical support.
Ask your autosound
specialist about
these other exciting
SoundGate products...
• Auxiliary Input Interfaces and Docking
Stations which allow you to input
audio from MP3 Players, DVD/Video,
Satellite Radio, and more to OEM
and aftermarket car audio systems
• High-performance Radio Replacement
• Interfaces for seamlessly
integrating new receivers or CD
players into OEM audio systems
• Competition-Grade Interfaces
for adding amplifiers
• Remote Audio Control Interfaces
that let you control aftermarket
receivers and CD players from
your factory rear seat, or steeringwheel mounted audio controls.
4. To deactivate the CRZNAUX2 and switch your radio back to its normal mode, simply press the MODE
button.
3
Assemble the components shown on page 2 and connect them to the
CRZNAUX2 module. Use the diagrams on pages 2 and 3 to assemble the
components that will connect to and control your Zune device.
• And many others!
Power connector wiring. Connect the black wire of the power connector shown on page 3
to a clean, bare-metal chassis ground. When in doubt, measure the resistance between potential grounding
points and the vehicle battery using a multimeter. Choose a grounding point with equivalent resistance
as other grounded components in the audio system. Connect the red wire to a +12V switched (ignition)
power source. This wire requires a 12V, 1500mA inline fuse. MAKE CERTAIN THAT REPLACEMENT FUSES
MATCH THESE SPECIFICATIONS.
4
Mount all components. Mount the CRZNAUX2 module behind or under the dash
(mounting hardware not included). Be careful not to drill into wiring or vehicle
mechanisms. You are solely responsible for securely fastening the CRZNAUX2 in your vehicle. Make
certain that wires and cables cannot be damaged by screws, clips, or sharp, exposed pieces of metal.
Ensure that the Zune dock connector is left in a convenient place for connection to your Zune device.
Plug the Zune dock connector in straight. Do not insert the connector at an angle or wiggle the connector
during insertion.
www.soundgate.com
Please read the Operation section on the following page and test the installation before reassembling the
vehicle dash, trim panels, and audio systems.
4
Zune™ and the Zune™ logo are trademarks of the
Microsoft group of companies.
5
Copyright© 2004-2008 SoundGate®. All Rights
Reserved. SoundGate® is a registered trademark of
Stillwater Designs, Inc. All other trademarks are the
property of their respective owners.
6