1
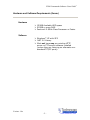
FW40 Commander™ RIA Users Guide© Version – 1.0a www.technovare.com © Copyright 2006, Technovare Systems, Inc. FW40 Commander Software Users Guide© Table of Contents Getting Started .................................................................................................................... 1 Introduction to FW40 Commander Server Software ...................................................... 1 Package Contents ............................................................................................................ 1 Hardware and Software Requirements (Server) ............................................................. 2 Hardware..................................................................................................................... 2 Software ...................................................................................................................... 2 Browser Requirements (Client) ...................................................................................... 3 Installation and Setup.......................................................................................................... 4 Overview......................................................................................................................... 4 Destination Folders ......................................................................................................... 4 Main Folder................................................................................................................. 4 HTTP Document Root ................................................................................................ 4 Installation Procedure ..................................................................................................... 5 Preparation .................................................................................................................. 5 Installation................................................................................................................... 6 Setup ............................................................................................................................... 9 Edit Index.html ........................................................................................................... 9 Using the Software............................................................................................................ 10 Server-Side Controls..................................................................................................... 10 Starting the Services ................................................................................................. 10 Stopping the Services................................................................................................ 10 Rich Internet Application (Client Browser).................................................................. 11 Settings Screen.......................................................................................................... 12 Adding Devices..................................................................................................... 13 Creating Groups .................................................................................................... 14 Adding Devices to Groups.................................................................................... 15 Uploading Media Files to Server .......................................................................... 16 Registering Streams .............................................................................................. 17 Creating Playlists .................................................................................................. 18 Main Screen .............................................................................................................. 19 Upgrading Firmware............................................................................................. 20 Performing a Self Test .......................................................................................... 21 Formatting a FW40D HDD .................................................................................. 22 Turning Displays “On” or “Off”........................................................................... 23 Playing Files.......................................................................................................... 24 Playing Streams .................................................................................................... 25 Playing Playlists.................................................................................................... 26 Scheduling Events................................................................................................. 27 Displaying and Saving Logs ................................................................................. 28 Managing Local Media ......................................................................................... 29 Version- 1.0a -i– www.technovare.com FW40 Commander Software Users Guide© Getting Started Introduction to FW40 Commander Server Software The FW40 Commander Server Software provides a simple to use, yet powerful, method of control for all FW40 and FW40D equipped Sony displays over IP based networks. The FW40 Commander Server Software package contains everything needed to turn an ordinary PC running Windows NT/XP into a powerful server that will host the FW40 Commander Rich Internet Application (RIA). Package Contents The packing box should contain the following items: ¾ FW40 or FW40D Unit ¾ CD containing o Installation Software o Users Guide (this document) o Soft copy of Quick Start Guide o Sample Media Clips o Open-source third-party Software ¾ Quick Start Guide ¾ Warranty Card ¾ Registration Card Version- 1.0a -1– www.technovare.com FW40 Commander Software Users Guide© Hardware and Software Requirements (Server) Hardware ¾ 150MB Available HDD space ¾ 512MB or more RAM ¾ Pentium4 2.5GHz Class Processor or Faster Software ¾ Windows™ XP with SP2 ¾ .NET 2.0 Library ¾ Must not have any pre-existing HTTP server or FTP server software installed (unless they are listening on alternate nonstandard TCP/IP ports). Version- 1.0a -2– www.technovare.com FW40 Commander Software Users Guide© Browser Requirements (Client) Due to the Adobe™ Flash content of the RIA, the web client interface is best viewed with: ¾ Flash Player 8 or Newer o http://www.adobe.com/ ¾ Internet Explorer 6 or Newer o http://www.microsoft.com/ Version- 1.0a -3– www.technovare.com FW40 Commander Software Users Guide© Installation and Setup Overview Because the task of setting up and configuring a full-blown PHP5 and MySQL4 enabled Apache2™ HTTP server can be a daunting task, the installer will handle all of the complex configuration and setup tasks for you. The installer will install and configure the following third party software packages onto the target system: ¾ Apache™ 2.2.3 ¾ MySQL™ 5.0.24a ¾ PHP 5.1.6 ¾ phpMyAdmin 2.9.0.1 ¾ FileZilla™ FTP Server 0.9.18 ¾ OpenSSL 0.9.8d Please make sure that there are not any preexisting versions of any of the aforementioned third party packages. Destination Folders Main Folder The target directory on the system is fixed at “C:\FW40Cmdr”. All installed software will be contained within this directory. HTTP Document Root The “Document Root” of the Apache™ HTTP server will be “C:\FW40Cmdr\www”. Version- 1.0a -4– www.technovare.com FW40 Commander Software Users Guide© Installation and Setup, continued Installation Procedure Preparation 1. Make sure none of the following software packages are already installed. If they are, then uninstall them before proceeding. o Any HTTP Server listening to Port 80 Apache IIS etc o Any FTP Server listening to Port 21 o MySQL (All versions) 2. Close all other applications that might be running. Version- 1.0a -5– www.technovare.com FW40 Commander Software Users Guide© Installation and Setup, continued Installation 3. Insert Installation CD into Target PC’s CD ROM drive. Once you select the “Install SW” option on the CD Menu, the installation process should start. In case it does not, then browse to the CD drive in “My Computer” and run “setup.exe” to begin the installation process. 4. Follow the “On Screen” instructions. 5. If there were no problems detected by the Compatibility Checker, you should see this dialog: If there were any problems detected, then they will be listed in the Compatibility Checker log. You must take care to clear up the problems or else the installer will refuse to install the software. It gives you the chance to retry the compatibility check as many times as you need. Version- 1.0a -6– www.technovare.com FW40 Commander Software Users Guide© Installation and Setup, continued 6. There will be a series of Question popup dialog boxes near the end of the installation process. They are related to the FileZilla FTP server installation. Please answer them as shown below: Version- 1.0a -7– www.technovare.com FW40 Commander Software Users Guide© Installation and Setup, continued 7. You should see the following screen if all was successful. Version- 1.0a -8– www.technovare.com FW40 Commander Software Users Guide© Installation and Setup, continued Setup Edit Index.html Open the file “c:\FW40Cmdr\www\Index.html”. Replace both instances of “localhost” with the IP Address (or domain name) of your server on the LAN. If you do not know the IP Address, then open a “cmd” window and type “ipconfig”. This can be done using a string replacement feature of any text editor by replacing “localhost” with “192.168.0.10” (as an example IP Address). Version- 1.0a -9– www.technovare.com FW40 Commander Software Users Guide© Using the Software Server-Side Controls Starting the Services The newly installed services (Apache2, MySQL, FW40CmndrWinService, FileZilla) should all be started after a successful installation and upon any subsequent reboots of the server. If, for some reason, the services are not running, you can restart them by: Start->All Programs->FW40CmdrServer->Start Services Stopping the Services Before uninstalling, or if you just want the take the server offline, you need to stop the FW40Commander Windows Service and the other services by: Start->All Programs->FW40CmdrServer->Stop Services Version- 1.0a - 10 – www.technovare.com FW40 Commander Software Users Guide© Using the Software, continued Rich Internet Application (Client Browser) Now that your server is online, you should enter the domain name or IP Address of your server into your browser’s address bar. This resulting Rich Internet Application is the main point of control for the system. Any web client that is able to access your server, can also serve as a point of control for the system. Version- 1.0a - 11 – www.technovare.com FW40 Commander Software Users Guide© Using the Software (Settings) Settings Screen The Settings Screen provides the functions needed to add devices, streams, files, and create playlists to name a few. The following tabbed pages exist under the Settings screen: ¾ Devices ¾ Groups ¾ Files ¾ Streams ¾ Playlists Version- 1.0a - 12 – www.technovare.com FW40 Commander Software Users Guide© Using the Software (Settings), continued Adding Devices Step 1: Enter a name for the new device Step 3: Press the “Add” button Step 2: Enter the IP Address For in. the will the ease of use, the default Port setting of 53484 is already filled It does not need to be changed unless you need to access device though a router from a WAN. If this is the case, you need to perform the following alternate steps to add each of devices: 1. Decide upon a unique port number that is not already in use by the router. (i.e. it is not already being forwarded from the WAN to the LAN.) 2. Configure your router to forward the unique port number you chose in step 1 from the WAN side to port 53484 and the IP Address of the device on the LAN side. 3. Enter the following values into the form above and press “Add” once for each device you would like to add: • Name: A unique identifier. • IP Address: The IP Address of the router on the WAN. • Port: The port number you chose in step 1. Version- 1.0a - 13 – www.technovare.com FW40 Commander Software Users Guide© Using the Software (Settings), continued Creating Groups Step 1: Enter a name for the new group Step 2: Press the “Create Group” Button Groups are a convenient way of organizing devices. Once a group is made, you can control all devices within that group as a unit. Version- 1.0a - 14 – www.technovare.com FW40 Commander Software Users Guide© Using the Software (Settings), continued Adding Devices to Groups Step 2: Select the Device(s) you would like to add to the group Step 1: Select the group to edit Step 3: Press this button to add. You can also add other groups to the group by following the same general procedure except selecting groups to add instead of devices. Version- 1.0a - 15 – www.technovare.com FW40 Commander Software Users Guide© Using the Software (Settings), continued Uploading Media Files to Server Step 1: Enter a name Step 2: Select the type of file. Step 3: Press “Upload” All media files that you would like to play on any devices, will need to be registered and uploaded to the server via this screen. If you attempt to upload a file greater than 100MB, then an alternate FTP upload method will appear. When this occurs, you will be required to drag and drop the large file into the FTP browser that will pop up. Once the transfer has completed, the file will be registered and ready for use. An alternate way to add Video files is to copy them directly to the following directory on the server that is running the FW40 Commander Software: C:\FW40Cmdr\www\uploads\video They will be detected and registered automatically. Version- 1.0a - 16 – www.technovare.com FW40 Commander Software Users Guide© Using the Software (Settings), continued Registering Streams Step 1: Enter a name Step 2: Enter a UDP Multi-cast Address with a port number Step 3: Select the format of the stream Step 4: Press “Apply” All streams must be registered in order to be able to play them manually, as part of a playlist, or as a scheduled event. The format of the stream is saved for information purposes only. Version- 1.0a - 17 – www.technovare.com FW40 Commander Software Users Guide© Using the Software (Settings), continued Creating Playlists Step 2: Select Playlist Step 3: Enter Entry Information and then press “Apply” Step 1: Enter a name and press “Create” A playlist is a powerful method for creating synchronized content across several displays. Once you create one, you also have the option of creating new ones based upon the entries in any pre-existing one. Version- 1.0a - 18 – www.technovare.com FW40 Commander Software Users Guide© Using the Software (Main) Main Screen The Main Screen provides active controls for playing files, streams, playlists as well as displaying real-time status of all devices. The following tabbed pages exist under the Main screen. ¾ Configuration o General o Maintenance ¾ Display Control ¾ Player Control ¾ Scheduling ¾ Logging ¾ Local Media The first logical place to start, if you are just getting started, would be to add new devices using the Settings->Devices page (Next section). Version- 1.0a - 19 – www.technovare.com FW40 Commander Software Users Guide© Using the Software (Main), continued Upgrading Firmware Step 2: Browse for Update Step 1: Select a Device Step 3: Transfer File Following the procedure shown above will start a process which will update a device or group of devices with a new firmware image. Please make sure that the file you upload is compatible with the device(s) you plan on updating with it. When the firmware upgrade process begins, the device(s) will become inoperative for ~7minutes while they download the image from the server and burn it into their Flash. You can track the progress in the Device Info tree. Version- 1.0a - 20 – www.technovare.com FW40 Commander Software Users Guide© Using the Software (Main), continued Performing a Self Test Step 2: Select Test Type Step 1: Select a Device Step 3: Start Test Following the procedure shown above will start a process which will initiate a self-test on a device or group of devices. You can track the progress in the Device Info tree. The results will be in the device’s log file. Version- 1.0a - 21 – www.technovare.com FW40 Commander Software Users Guide© Using the Software (Main), continued Formatting a FW40D HDD Step 2: Enter Format Hard Drive Key* Step 1: Select a Device Step 3: Format HDD Following the procedure shown above will start a process which will format the HDD of a device. This is a necessary first step for the FW40D type devices to become operational. You can track the progress in the Device Info tree. * The Format Hard Drive Key can be found on the Quick Start Guide that accompanying the unit. Version- 1.0a - 22 – www.technovare.com FW40 Commander Software Users Guide© Using the Software (Main), continued Turning Displays “On” or “Off” Step 1: Select a Device or Group Step 2: Press “On or “Off” * This is the manual method for controlling the display power state of a device or a group of devices. Playlists and scheduled events can also change the display power state. * Please note that it can take up to 30 seconds for a display to turn on/off and stabilize. There is no need to press the “On” or “Off’ button again if the display does not immediately turn on or off. Version- 1.0a - 23 – www.technovare.com FW40 Commander Software Users Guide© Using the Software (Main), continued Playing Files Step 2: Use these controls to select a file to Play. Step 1: Select a Device or Group Step 3: Press “Start” This is the manual method for controlling the player state of a device or a group of devices. This control will only be enabled for FW40D devices and groups that only contain FW40D devices. The list of files to select from is comprised of all the files local to a particular device. For a group, it is comprised of the ‘intersection’ set of files within a group. Version- 1.0a - 24 – www.technovare.com FW40 Commander Software Users Guide© Using the Software (Main), continued Playing Streams Step 1: Select a Device or Group Step 2: Select a Stream. Step 3: Press “Start” This is the manual method for controlling the streaming player state of a device or a group of devices. The stream must be registered via the Settings screen for it to appear in the Select Stream list. Version- 1.0a - 25 – www.technovare.com FW40 Commander Software Users Guide© Using the Software (Main), continued Playing Playlists Step 1: Select a Device or Group Step 2: Select Playlist. Step 3: Press “Start” This is the manual method for controlling the player state of a device or a group of devices. The list of playlists to select from depends upon whether the selected device is a FW40 or a FW40D device. If it is a FW40D, then all available playlists will be displayed. If not, then only the playlists that do not contain file type media, will be displayed. The same holds true for the type of group that is selected. Only if the group is comprised of only FW40D devices, will all available playlists be displayed. Version- 1.0a - 26 – www.technovare.com FW40 Commander Software Users Guide© Using the Software (Main), continued Scheduling Events Step 1: Select a Device or Group Step 2: Select a Date Step 3: Use these controls to create a new Scheduled Event This is screen in which you can create scheduled events. This ability to schedule files or playlists that contain files will only be enabled for FW40D devices and groups that only contain FW40D devices. The list of files to select from is comprised of all the files local to a particular device. For a group, it is comprised of the ‘intersection’ set of files within a group. Version- 1.0a - 27 – www.technovare.com FW40 Commander Software Users Guide© Using the Software (Main), continued Displaying and Saving Logs Step 1: Select a Device or Group Step 2: View Log Step 3: Download Log file. The activities of a device or group can be viewed from this screen. Also, you may Clear or Save the log if you desire. The results of any device self-tests will be displayed here as well. Version- 1.0a - 28 – www.technovare.com FW40 Commander Software Users Guide© Using the Software (Main), continued Managing Local Media Step 2: Select file on server Step 1: Select a Device or Group Step 3: Transfer selected file to Device or Group Once there are files uploaded to the server from the Settings->File screen, you should be able to transfer them to individual FW40D devices from this screen. This is a necessary step if you need to play the file from the device since the file must be present on its local HDD in order to do so. This screen shows you what files are on each device and allows you to transfer files from the server to a device or group. If you select the Playlist Mode, then you will be able to see all files on the server that are part of a particular playlist to more easily transfer them all to a device or group. Version- 1.0a - 29 – www.technovare.com