1
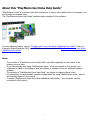
PlayMemories Home Help Guide
About this “PlayMemories
Home Help Guide”
What you can do with
“PlayMemories Home”
Starting/Exiting the program
About this “PlayMemories Home Help Guide”
“PlayMemories Home” is a software suite that enables you to import videos
and photos to a computer, and then browse and manage them.
This “PlayMemories Home Help Guide” describes basic operation of this
software.
Importing videos and photos
from your camera to a
computer
Viewing videos and photos
Printing photos
Creating a disc from videos
Editing photos
Editing videos
Using more advanced
features of “PlayMemories
Home”
For more advanced advice, refer to “PlayMemories Home Help Guide
(Additional Help Online).” Also, for Frequently Asked Questions (FAQ) about
“PlayMemories Home,” refer to “PlayMemories Home Help Guide
(Additional Help Online).”
Copyright 2011 Sony Corporation
Notes
The contents of “PlayMemories Home Help Guide” may differ
depending on the version of the software you are using.
If you have already been using “PlayMemories Home,” when you
connect a new camera, new functions are added to the software, and the
software is updated if there are additional features available.
The contents of “PlayMemories Home Help Guide” are subject to
change without notice.
For information on recommended computer configurations for using
“PlayMemories Home,” refer to the Operating Guide of your camera.
To access “PlayMemories Home Help Guide (Additional Help Online),”
your computer must be connected to the Internet.
1
2
About this “PlayMemories Home Help Guide”
“PlayMemories Home” is a software suite that enables you to import videos and photos to a computer, and
then browse and manage them.
This “PlayMemories Home Help Guide” describes basic operation of this software.
For more advanced advice, refer to “PlayMemories Home Help Guide (Additional Help Online).” Also, for
Frequently Asked Questions (FAQ) about “PlayMemories Home,” refer to “PlayMemories Home Help Guide
(Additional Help Online).”
Notes
The contents of “PlayMemories Home Help Guide” may differ depending on the version of the
software you are using.
If you have already been using “PlayMemories Home,” when you connect a new camera, new
functions are added to the software, and the software is updated if there are additional features
available.
The contents of “PlayMemories Home Help Guide” are subject to change without notice.
For information on recommended computer configurations for using “PlayMemories Home,” refer to
the Operating Guide of your camera.
To access “PlayMemories Home Help Guide (Additional Help Online),” your computer must be
connected to the Internet.
3
What you can do with “PlayMemories Home”
Using “PlayMemories Home,” you can perform the following operations.
Importing videos and photos from your camera to a computer
You can import videos and photos recorded on your camera by connecting your camera to a computer.
Viewing videos and photos
You can manage videos and photos recorded on your camera by date, and select videos or photos you
want to view as thumbnails.
Printing photos
You can print selected photos. You can also print photos with the date information.
Editing photos
You can correct photos, such as applying red-eye reduction, or edit videos (Only for models that support
this function).
Creating a disc (Only for models that support this function)
You can create a disc that can be played back with a player or a computer from previously recorded videos.
Notes
Even if the video or photo can be imported to “PlayMemories Home,” some functions may not work
properly on it.
The functions you can use may differ, depending on the camera you are using. Also, the content of
the help may differ, depending on the functions supported by your camera.
Back to top
4
Starting/Exiting the program
Starting the program
You can use the following procedure to start the program.
Select [Start] - [All Programs] - [
PlayMemories Home].
Exiting the program
You can use one of the following procedures to exit the program.
Click the [File] menu, and click [Exit].
Click the close button [X] at the upper-right corner of the window.
Back to top
5
Importing videos and photos from your camera to a computer
You can import videos and photos recorded on your camera by connecting your camera to a computer.
1. Turn on your camera, and connect it to the computer.
The video/photo import window is displayed on the screen of the computer.
2. Select the destination drive and folder, and the import method.
If you select [Select files to import], select videos or photos to be imported from the
video/photo selection area. By double-clicking a video or photo, you can enlarge it.
If you click [Settings] and put a check in the [Delete imported media files from the device or
media] checkbox, videos and photos will be deleted from your camera after they have been
imported to your computer.
3. Click [Import].
When the import of the data is completed, the main window is displayed.
Hints
For details on the import window, see Parts and controls of the import window.
For how to connect your camera to a computer, refer to the supplied Operating Guide.
If you connect your camera to your computer using a Wi-Fi connection, videos and photos will be
imported to the computer only if you select the video import function on your camera. Only videos
and photos that have not previously been imported will be imported in this operation, and a progress
indicator will be displayed on the window. (Only for models that support the Wi-Fi import function of
“PlayMemories Home”)
Notes
If you are using a camera that does not have a USB power supply function, we recommend that you
use an AC Adaptor as the power source. If you do not have or cannot use an AC adaptor, use a fully
charged battery.
If you have not put a check in the [Import with PlayMemories Home when a device is connected]
checkbox on the window displayed when you selected [Settings] - [Import] in the [Tools] menu, the
import window will not be displayed. In this case, start “PlayMemories Home,” and click
(Import
Media Files) on the top of the main window.
Back to top
6
7
Viewing videos and photos
You can browse videos and photos imported to a computer sorted by the date and time they were taken
(Calendar view).
1. In [Media file locations] (A) on the main window, click the drive, folder, or camera connected, where
the videos or photos you want to view are saved.
2. Click [Year], [Month], or [Day] (B) to switch the display, and display thumbnails of the videos or
photos you want to view.
3. Double-click the thumbnail of the video or photo you want to enlarge.
The selected video or photo is enlarged.
When you select a video, the slider and the playback control buttons appear and playback starts.
When you select a photo
When you select a video
8
Hints
Click
at the bottom left of the window to switch the window to Folders view that sorts videos and
photos by specified folders.
For details on the main window, see Parts and controls of the main window.
When you double-click a video or photo in [Cameras and media], the video or photo is enlarged in
another window.
Note
To view the videos or photos saved on a computer with “PlayMemories Home,” you have to specify
the folders where the videos or photos are saved. If you want to specify a folder other than [My
Pictures] which is usually specified in advance, select [Add Folders] from the [File] menu, and select
the folder where the videos or photos you want to view are saved.
Back to top
9
Printing photos
You can print selected photos. You can also print photos with the date information.
1. In the main window, select the photo you want to print.
You can also print photos while the display is enlarged.
2. Click
(Print) at the top of the window.
The print window is displayed.
3. Select the printer you want to use, the paper size, and the printing options.
4. Click [Print].
The printing process begins.
Hints
To print photos with the date information, put a check in the [Print date taken] checkbox in the print
window.
When you put a check in the [Zoom the image until the print area is full (Part of the image may be
cut.)] checkbox in the print window, you can print the full printable area of the image. However,
portions of the image may be trimmed off.
Depending on the type of printer you are using, you can choose to apply borderless printing or Exif
Print to your prints.
If ICM is set to ON in the printer driver settings, automatic color management printing is performed.
Notes
Videos cannot be printed. Capture still images from the videos, and print them.
RAW data files cannot be printed. Convert RAW files into JPEG, and print them.
Back to top
10
PlayMemories Home Help Guide (Additional Help Online)
About this “PlayMemories
Home Help Guide (Additional
Help Online)”
What you can do with
“PlayMemories Home”
Starting/Exiting the program
Importing videos and photos
from your camera to a
computer
About this “PlayMemories Home Help Guide
(Additional Help Online)”
“PlayMemories Home” is a software suite that enables you to import videos
and photos to a computer, and then browse and manage them.
This “PlayMemories Home Help Guide (Additional Help Online)” describes
basic to advanced use of this software. You can also see Frequently Asked
Questions in this Help.
Viewing videos and photos
Printing photos
Creating a disc from videos
Editing photos
Editing videos
Using more advanced
features of “PlayMemories
Home”
Frequently Asked Questions
(FAQ)
Additional settings/Others
Copyright 2011 Sony Corporation
Notes
The contents of “PlayMemories Home Help Guide (Additional Help
Online)” may differ depending on the version of the software you are
using.
If you have already been using “PlayMemories Home,” when you
connect a new camera, new functions are added to the software, and the
software is updated if there are additional features available.
The contents of “PlayMemories Home Help Guide (Additional Help
Online)” are subject to change without notice.
For information on recommended computer configurations for using
“PlayMemories Home,” refer to the Operating Guide of your camera.
To access “PlayMemories Home Help Guide (Additional Help Online),”
your computer must be connected to the Internet.
11
12
Parts and controls of the import window
When you connect your camera to a computer, “PlayMemories Home” starts, and the video/photo import
window is displayed.
A Import
source
The model name of the camera
connected is displayed. By clicking ,
you can select other connected devices
from the drop-down list.
B Import
method
Select the method to be used for
importing. When you select [Select files
to import], the video/photo selection
area is displayed.
C Import
button
Click to start import of the videos and
photos.
D Destination The destination drive is displayed. By
drive
clicking , you can select the
destination drive from the drop-down
list.
E Destination The destination folder for imported
folder
videos and photos is displayed. By
clicking , you can display the name of
the destination folder currently set and
a history of the destination folders to
which you have imported videos and
photos before. When you click
[Browse], the folder selection window is
displayed, and you can select the
destination folder.
F Settings
You can change various settings, such
as whether to delete videos and photos
imported to a computer from the
camera, whether to turn off the camera
automatically after import, whether to
import videos and photos automatically
13
using Wi-Fi, or whether to retain a GPS
track log, etc.
Functions that your camera
supports may differ depending on
the model.
Back to top
14
Parts and controls of the main window
A Tool area
B Media file locations
C Display switching area
D Thumbnail icons
A Tool area
(Main)
(Import
Media Files)
(Print)
(Create
Discs)
(Edit)
(Share
Publicly)
(Share
Privately)
Click to display the main window.
Click to import videos or photos to a computer.
Click to print a photo.
Click to create discs.
Click to edit a video or photo.
Click to upload videos or photos to sharing
services.
Click to upload videos or photos to a “Personal
Space” Sharing Group, or to send videos or
photos via e-mail using “Personal Space.” (Only
for regions supporting “Personal Space”)
B Media file locations
Cameras and Click to display videos and photos stored on the
media
camera connected or on recording media, such
as memory cards or discs.
Hard Disk
Click to display videos and photos saved on a
Drive
drive of the computer or an external hard disk
drive.
C Display switching area
/
Click to switch view modes between
Folders and Calendar.
15
Click to display the Map View.
[Year]/[Month]/[Day] Click to sort videos or photos by the
year, month, or day they were taken.
Click to display videos as a series of
thumbnail images made up of individual
frames selected at a predetermined
time interval. Click the button again to
hide the thumbnail images.
Click to display the properties of the
selected video or photo.
You can adjust the thumbnail size by
moving the slider.
/
Click
to switch the view to details.
Click to switch the view to
thumbnails.
D Thumbnail icons
Video with high definition image quality (HD)
Edited video
RAW data
RAW+JPEG data
Photo with GPS location information
Sweep Multi Angle photo
Video recorded in 3D/3D still image/3D Sweep
Panorama photo
Video to which the segment played back with Highlight
playback is saved
Main image in a burst group
Video or photo imported last time
Indicated when unable to find a photo or video. If you
do not need to display this icon, you can clear it by
selecting the [View] menu - [Refresh], or the [Tools]
menu - [Update Database].
Indicated when unable to display a photo or video.
Back to top
16
About this “PlayMemories Home Help Guide (Additional Help
Online)”
“PlayMemories Home” is a software suite that enables you to import videos and photos to a computer, and
then browse and manage them.
This “PlayMemories Home Help Guide (Additional Help Online)” describes basic to advanced use of this
software. You can also see Frequently Asked Questions in this Help.
Notes
The contents of “PlayMemories Home Help Guide (Additional Help Online)” may differ depending on
the version of the software you are using.
If you have already been using “PlayMemories Home,” when you connect a new camera, new
functions are added to the software, and the software is updated if there are additional features
available.
The contents of “PlayMemories Home Help Guide (Additional Help Online)” are subject to change
without notice.
For information on recommended computer configurations for using “PlayMemories Home,” refer to
the Operating Guide of your camera.
To access “PlayMemories Home Help Guide (Additional Help Online),” your computer must be
connected to the Internet.
17