1
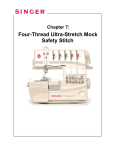
MODEL CG-590
COMMERCIAL GRADE
SEWING MACHINE
WO R K B O O K
Congratulations on the purchase of your new SINGER®
Sewing Machine! This commercial grade sewing machine
is ideal for all types of sewing, including fashion sewing,
home decorating, quilting and crafts. Your machine is
designed to deliver the ultimate combination of power,
performance and durability.
This workbook has been created as a tool for learning
various sewing techniques, which you can apply to your
own projects. We are certain that your creativity will be
inspired, and that you will have many hours of sewing
enjoyment with this easy-to-use machine, feature-packed
machine!
Enjoy!
The SINGER® Education Department
SINGER® is a registered trademark of the Singer Company Ltd.
2004 Singer Sewing Company
All Rights Reserved.
Part # 640 5052550GM
©
Straight Stitch
Straight Stitch for Topstitching
Create Quilted Fabric
Speed Basting
Making Piping
Attaching Purchased Piping
Centered Zippers
Satin Stitch Applique
Lace Insertion
Button Sewing
Four-Step Buttonholes
Free-Motion Monogramming
Free-Motion Embroidery
Blindstitch Hem
Attaching Beaded Trims
Mending with Multi-Stitch Zigzag
Crazy Quilting
Straight Stretch Stitch for Woven Fabrics
Straight Stretch Stitch for Stretch Fabrics
Ribbing Application
Overedge Stitching
Seam Allowence with Stretch Overedge Seam Stitch
Attaching Elastic
Sewing with a Wing Needle
Twin Needle Sewing
Applying Ribbon with a Twin Needle
Sewing on Leather
1
2
3
4
5
6
7
9
11
13
15
17
19
21
23
24
25
26
27
28
29
30
31
32
33
34
35
Decorative Stitching
Joining Fabric with Herringbone Stitch
Decorative Stippling
Scallop Edges
Narrow Hem
Gathering with the Cording Foot
Applying Trims, Cords & Braids
Shirring with the Gathering Foot
Using the Even Feed Foot to Sew Multiple Fabric Layers
Using the Even Feed Foot to Sew Plaid Fabrics
Using the Even Feed Foot to Sew Pile Fabrics
Sewing with the Side Cutter
Sewing with the Ruffler
\
36
37
38
39
40
41
42
43
45
46
47
48
50
Heavy Duty Commercial Grade
CG-590
Up to 1100 Stitches-PerMinute Sewing Speed
Machine sews faster than a standard sewing machine.
Electronic Foot Control
Guarantees consistent speed with no jump starts.
Includes a regulating dial that allows for slower speeds,
regardless of the pressure applied.
60% Stronger Motor
The motor is stronger than a standard sewing machine
motor, which means it can sew heavyweight fabrics with
ease.
Sewing pins won’t damage the steel surface of the
machine free arm. This feature is particularly beneficial
for quilting.
Steel Plate on Machine
Bed
Duratec™ Frame
A SINGER® Exclusive. This provides rigid support and
helps prevent rusting.
Double Insulated
Double insulation protects against electric shock by
creating a non-conducting barrier between the operator
and the electrical components inside.
Finger Guard
Provides additional protection to keep fingers from
getting too close to the needle area. This is especially
helpful and desirable for high speed sewing.
Free Arm
Provides professional results and easy access to cuffs,
collars, pant hems and other difficult-to-reach areas.
Automatic Needle
Threader
Effortless threading of the machine, including the eye of
the needle.
Drop Feed
By moving the drop feed lever, conveniently located in
the front of the machine, the feed dogs lower for free
motion embroidery, stippling, or attaching a button. No
plates or covers required, just push a lever.
Utility Stitches
A variety of stitches for fashion sewing, home dec and
quilting.
Stretch Stitches
Specially designed stitches that add strength and
flexibility to seams, especially useful when sewing on
knitwear and super-stretch fabrics.
Additional Decorative and
Stretch Stitches
An extensive variety of stitches for fabric
embellishment, quilting, and more.
6mm Stitch Width
Most stitches can be set for a maximum width of 6mm.
Touch-N-Wind™ Declutch
Bobbin Winder
Automatic Built-In Four
Step Buttonhole
Needle bar easily disengages for winding the bobbin.
Balance Adjustment Dial
Guarantees control for even stitching of buttonholes
and stretch stitches, even on difficult fabrics.
Infinitely Variable Stitch
Length and Width
Adjustment
Settings for length and width can be adjusted as
desired, to suit any project.
Multiple Needle Positions
Needle position can be changed for individual
projects, such as inserting zippers or cording and
topstitching.
Jam-Resistant Bobbin System
This is a system in which the bobbin case actually
floats above the hook, precluding thread jams. The
machine will not jam, even when sewing on sheer
fabric or no fabric at all!
Top-Loading Drop-In Bobbin
The bobbin conveniently inserts-no bobbin cases to
remove or adjust. It is easy to monitor the thread
supply.
Extra-High Presser Foot Lifter
There are 2 heights to the presser foot lifter. The
second height offers ¼” more clearance, which is
needed when placing multiple layers of bulky fabric
under the presser foot.
Thread Cutter
Located for precise thread cutting, eliminating the
extra step of cutting thread with scissors.
Automatic Pressure System
This feature automatically adjusts the pressure for
sewing on fabrics from the lightest weight tricots to
the heaviest denim, to maximize feed accuracy.
Twin Needle Capable
Stitches are automatically adjusted for twin needle
sewing by just moving a lever.
Suction Cup Machine Base
Holds the machine securely to the table, even when
sewing at maximum speed.
Built In Accessory Storage
A back panel storage area for accessories is
conveniently located in the freearm extension bed.
Accessories
Special Purpose Presser Foot
Buttonhole Presser Foot
Blindstitch Hem Presser Foot
Zipper Foot
General Purpose Foot
Finger Guard
Needle Pack
Bobbins
Buttonhole sewing is a 4-step simple process that
provides reliable results.
Self-Lubricating
Because the machine is permanently lubricated, there is
no need to oil the machine, and no oil gets on fabric.
25 Year Limited Commercial, Peace of mind knowing the machine has a 25 year
School and Home Warranty limited warranty.
Portable
Machine has a built-in carry handle, making it easy to
transport the machine.
Cabinet Mountable
Machine can be mounted into a cabinet.
\
SINGER® is a registered trademark of the Singer Company Ltd.
2004 Singer Sewing Company.
All Rights Reserved.
©
Straight Stitching
The Straight Stitch is generally used to join seams or do topstitching. It is the
most basic of the stitches and is the most commonly used. For a longer stitch
or for thicker fabrics, lengthen the Stitch Length.
Machine Set-Up:
Stitch:
Pattern Selector:
Stitch Width:
Stitch Length:
Presser Foot:
Needle Position:
Straight Stitch
A
1, no width
3-4
General Purpose Foot
Center
Materials:
(2) 4” x 4” pieces of cotton, right sides together
Procedure:
Place fabrics under the foot, matching the raw
edges with the ⅝” seam guide.
Sew the length of the fabric.
Use the Reverse Button to reinforce the seam.
1
Straight Stitch for Topstitching
The Straight Stitch can be sewn “on top” of the fabric so that the stitches are
visible. This is different from using the straight stitch to join a seam hidden
inside the project. A topstitch provides a decorative touch while holding the
seam allowances flat. It is also sturdy and durable.
Machine Set-Up:
Stitch:
Pattern Selector:
Stitch Width:
Stitch Length:
Presser Foot:
Needle Position:
Straight Stitch
A
1, no width
3-4
General Purpose Foot
Center
Materials:
(1) 5” x 5” piece of cotton
Procedure:
Press a 1” hem on one side of the edge.
Align the folded edge to the edge of the foot.
Sew.
Use the Reverse Button to reinforce the seam.
2
Create Quilted Fabric
Create your own quilted fabric with the Straight Stitch. Texture can be added to
plain fabric by just adding consecutive rows of straight stitches!
Machine Set-Up:
Stitch:
Pattern Selector:
Stitch Width:
Stitch Length:
Presser Foot:
Needle Position:
Straight Stitch
A
1, no width
3-4
General Purpose Foot
Center
Materials:
(2) 5” x 5” pieces of cotton with batting between the two fabrics,
creating a quilt-type sample
Procedure:
Sew diagonally from the top left corner to the bottom right corner.
Use the Reverse Lever to reinforce the seam.
Position the foot’s edge so that it rides on the previous row of stitching.
Sew successive rows using the edge of the foot to ensure even spacing and
straight lines.
Change the direction, sew diagonally from the top right corner to the
bottom left corner.
3
Speed Basting
Basting is used to temporarily hold fabrics together. Stitch length and tension
are adjusted to create a looser stitch. This stitch can easily be removed with a
seam ripper or simply pulled out.
Machine Set-Up:
Stitch:
Pattern Selector:
Stitch Width:
Stitch Length:
Presser Foot:
Tension:
Needle Position:
Straight Stitch
A
1, no width
5
General Purpose Foot
Adjust the tension setting to a smaller number
Center
Materials:
(2) 4” x 4” pieces of cotton, right sides together
Procedure:
Place under the foot, matching the raw edges with the ⅝” seam guide.
Sew the length of the fabric.
Use the seam ripper to remove a portion of the basting, or simply pull the
bobbin thread to completely remove basting.
4
Making Piping
Piping adds a beautiful finish to projects such as pillows, sleeve edges, collars
and more. The design of the Zipper Foot allows for the needle to stitch very
closely to the edge of the foot. This is important when inserting zippers,
applying piping or when topstitching close to the fabric’s edge. Only the
Straight Stitch can be used when sewing with the Zipper Foot.
Machine Set-Up:
Stitch:
Pattern Selector:
Stitch Width:
Stitch Length:
Presser Foot:
Needle Position:
Straight Stitch
A
1, no width
3-4
Zipper Foot
Center
Materials:
5” x 6” home décor fabric
7” piping cord
Procedure:
Fold fabric, wrong sides together.
Place piping inside of the fold.
On the right side of the fabric, sew a straight stitch close to the piping.
Note: The Zipper Foot can be attached right or left, allowing for
the piping to be inserted from either side.
5
Attaching Purchased Piping
Attach pre-packaged piping to make a bold finish on home decorating
projects, crafts or garments.
Machine Set-up:
Stitch:
Pattern Selector:
Stitch Width:
Stitch Length:
Presser Foot:
Needle Position:
Straight Stitch
A
1, no width
3-4
Zipper Foot
Center
Materials:
(2) 3” x 6” pieces of home décor fabric
7” pre-packaged piping
Procedure:
Place fabric right sides together.
Place piping between the fabrics, matching the piping’s raw edge with
the fabric’s raw edges.
Piping Raw Edges
Stitching Line
Raw Edge of Fabric
On the wrong side of the fabric, sew a straight stitch close to the piping.
Note: The Zipper Foot can be attached right or left, allowing for
the piping to be inserted from either side.
6
Centered Zippers
There are several ways of inserting zippers. The pattern envelope of the
project or garment will designate the best type of zipper application, as well as
the length and type of zipper to use. Most applications require a zipper foot.
Machine Set-Up:
Stitch:
Pattern Selector:
Stitch Width:
Stitch Length:
Straight Stitch
A
1, no width
For basting: 5
For stitching: 3-4
Presser Foot:
Zipper Foot
Tension:
For basting: loosen the tension
For stitching: 3
Needle Position:
Start with needle in left position
The needle can be moved to the left or right. This will allow stitching closer to
the zipper than when the needle is in the center position.
Materials:
(1) 7” zipper
(2) 8” x 4” pieces of medium weight fabric
Transparent tape
Fabric glue stick
Procedure:
Place fabric under the foot, matching the raw edges with the ⅝” seam
guide.
Starting at the top of the fabric, baste 7”. Then change the stitch length
to 3 and finish seaming the remaining length of the fabric.
7
Press the seam open. Finish raw edges if necessary.
Apply glue stick lightly on the right side of the zipper.
Place the zipper face-down, so that the zipper’s coils or teeth are
directly over the machine-basted seam. Pin in place, if necessary.
Spread fabric flat, right side up and place ½” wide transparent or
perforated marking tape on top of the centered seam line. The tape
should be the length of the zipper (7” long for this exercise).
Replace the Standard Presser Foot with the Zipper Foot. Adjust the
foot to the left of the needle.
On the right side of the fabric, stitch around the zipper. Pivot the fabric
on the needle at the corners, using the edge of the tape as a guide.
Turn fabric to right side and remove the tape and the basting. Press.
8
Satin Stitch Appliqué
Satin Stitching is a series of closely spaced zig-zag stitches. Satin Stitching
can be used for monograms, embroidery and appliqué work to produce a
smooth satin-like appearance. Try a rayon thread for a smoother looking
finish.
Machine Set-Up:
Stitch:
Pattern Selector:
Stitch Width:
Stitch Length:
Presser Foot:
Needle Position:
Zigzag Stitch
A
2-3
0.5-1
Special Purpose Foot (J)
Center
Materials:
2” x 3” cotton fabric for appliqué
2” x 3” fusible stabilizer
6” x 6” cotton foundation fabric
6” x 6” tear-away stabilizer
Procedure:
Press the fusible stabilizer onto the appliqué.
Fuse the appliqué onto the cotton foundation fabric.
(Fusing the appliqué into place will keep the appliqué from shifting
while stitching.)
Place a tear-away stabilizer underneath the fabric. (This is used to
ensure quality stitching when using dense stitches.)
Place the applique under the foot, so that half of the stitch will form on the
applique and half on the base fabric.
Sew around the applique.
Widen the stitch width to 4 and change the stitch length to below 1.
.
9
Sewing around the applique again, covering the previous stitching.
.
Sewing over an applique twice is not always necessary, however, it
does give a beautiful full-covered effect.
10
Lace Insertion
Insert lace into a special occasion garment or a home decorating project
to create a beautiful heirloom keepsake.
Machine Set-Up:
Stitch:
Pattern Selector:
Stitch Width:
Stitch Length:
Presser Foot:
Needle Position:
Zigzag Stitch
A
2-3
1
Special Purpose Foot (J)
Center
Materials:
5” x 3” of batiste
6” strip of lace
60-80 weight fine cotton thread
Procedure:
Spray starch and iron the lace and batiste.
Center the lace right side up, lengthwise on batiste.
Stitch lace to fabric by sewing a zigzag stitch down both edges of the
lace. Try to just clear the heading of the lace.
11
Carefully cut under the lace down the center.
Back side of fabric
Lace
Turn these raw edges back away from the lace, then finger press.
Finish fabric’s edges by sewing a small zigzag through all layers, being
careful not to catch too much lace.
Turn fabric over and trim excess fabric seam allowances away.
Note: A nice touch can be added by stitching a row of decorative
stitches down each side of the lace.
12
Button Sewing
Use your sewing machine to sew on buttons, snaps or hooks with ease.
This is especially helpful when making a large project where several
buttons need to be attached, such as a shower curtain that has button tabs.
Machine Set-Up:
Stitch:
Pattern Selector:
Stitch Width:
Stitch Length:
Feed Dogs:
Presser Foot:
Needle Position:
Zigzag Stitch
A
Determined by button
(width between the holes is usually 3mm)
N/A
Lowered Feed Dogs
Button Sewing Foot*
Center
Materials:
Home décor fabric or shirting
One 2-hole button
Liquid fray preventer
Procedure:
Lower the Feed Dogs
Fold fabric in half and place under presser foot.
Position the button on the fabric so that the holes in the button are
between the toes of the foot.
*The Button Sewing Foot is optional.
Check with your SINGER® Retailer.
13
Lower the presser foot to hold the button in place.
Turn the hand wheel forward, adjust so that the needle goes into the
right or left hole.
Adjust the stitch width dial to fine tune the swing of the needle into the
opposite hole.
Recheck the swing of the needle into the opposite hole and then use the
foot control to sew 5-6 stitches.
Before removing the button and fabric from the machine, set machine
to straight stitch. Leave width at current setting and stitch in place for
three stitches. This forms a tie-off on the back side to secure the
button.
Apply a liquid fray preventer on the backside of fabric on the knots.
Trim threads after they dry, being careful not to cut thread knots.
14
Four-Step Buttonholes
The built-in buttonhole is divided into four different steps. This simple process
provides reliable results for buttonholes on garments, home decorating projects
and crafts.
Machine Set-Up:
Stitch:
Step One of the 4-step buttonhole
Pattern Selector:
A
Stitch Width:
Changes automatically
Stitch Length:
Step #1 of Buttonhole Dial
Presser Foot:
Buttonhole Foot
Needle Position:
Changes automatically
(See manual for complete machine set-up for buttonholes.)
Materials:
Home décor fabric with interfacing or tear-away stabilizer
Disappearing fabric marking pen or tailor chalk (for marking size
of buttonhole)
Button (to establish length of buttonhole)
Liquid fray preventer
Procedure:
Fold fabric in half crosswise, with interfacing or stabilizer placed
between layers.
Lay button on fabric and mark the top and bottom of the button.
This will establish the starting and ending point of the buttonhole.
Place the fabric under the foot, matching the foot’s red mark with the
top mark on the fabric.
15
Turn Pattern Selection knob to Step One of the Four-Step buttonhole.
Sew, and the machine will stitch the right side of the buttonhole.
Stop sewing when the needle reaches the fabric mark which indicates
the bottom of the buttonhole.
Turn Pattern Selection knob to Step Two of the Four-Step buttonhole.
Sew 5 to 6 stitches, bartacking the bottom of the buttonhole.
Turn Pattern Selection knob to Step Three of the Four-Step buttonhole.
Sew, and the machine will stitch in reverse, making the left side of the
buttonhole.
Stop sewing when the needle reaches the fabric mark which indicates
the top of the buttonhole.
Turn Pattern Selection knob to Step Four of the Four-Step buttonhole.
Sew 5 to 6 stitches, bartacking the top of the buttonhole.
Cut open buttonhole and use a liquid fray preventer to reinforce the
buttonhole.
16
Free-Motion Monogramming
Monogramming adds a personal and professional touch to garments, home
decorating items and craft projects. When monogramming, the feed dogs are
covered, allowing for free-motion sewing.
Machine Set-Up:
Stitch:
Pattern Selector:
Stitch Width:
Stitch Length:
Feet Dogs:
Presser Foot:
Needle Position:
Zigzag Stitch
A
2
N/A
Lowered
Embroidery/Darning Foot*
(or remove the foot completely )
Center
Materials:
Embroidery hoop
8” x 8” cotton with an iron-on interfacing
Fabric marking pen
Procedure:
Using the fabric marking pen, draw the desired monogram letter.
Place fabric in the embroidery hoop, making sure the fabric is taut.
Place the hoop under the foot, positioning the needle over the starting
point of the monogram.
Lower the presser foot.
17
Turn the hand wheel forward to bring up the bobbin thread though the
fabric. Sew a few securing stitches at the starting point.
Firmly hold the hoop with both hands.
Press the foot controller and guide the hoop so that the needle stitches
on the drawn letter.
Maintain a consistent sewing speed and move the fabric slowly.
Coordinate sewing speed and movement of hoop.
Note: When the feed dogs are covered, the fabric will not
automatically feed. Feeding of the fabric is controlled manually.
*The Embroidery/Darning Foot is optional. Check with your SINGER® retailer.
18
Free-Motion Embroidery
Free-motion embroidery is an elegant embellishment. The embroidery
can be extremely detailed, such as the embroidery on a bridal gown.
It also can be as simple as a row of flowers on kitchen linens.
Machine Set-Up:
Stitch:
Pattern Selector:
Stitch Width:
Stitch Length:
Feet Dogs:
Presser Foot:
Needle Position:
Zigzag Stitch
A
2 or smaller
N/A
Lowered
Embroidery/Darning Foot*
or remove the foot completely
Center
Materials:
Embroidery hoop
8” x 8” cotton with an iron-on interfacing
Fabric marking pen
Procedure:
Using the fabric marking pen, draw the desired design or trace a simple
design.
Place fabric in the embroidery hoop, making sure the fabric is taut.
Place the hoop under the foot, positioning the needle over the starting
point of the design.
Lower the presser foot.
Turn the hand wheel forward to bring up the bobbin thread though the
fabric. Sew a few securing stitches at the starting point.
19
Firmly hold the hoop with both hands.
Press the foot controller and guide the hoop so that the needle stitches
on the drawn letter.
Maintain a consistent speed and move the fabric slowly. Coordinate
sewing speed and movement of hoop.
Note: When the feed dogs are lowered, the fabric will not automatically
feed. Feeding of fabric is controlled manually.
*The Embroidery/Darning Foot is optional. Check the with your SINGER® retailer.
20
Blindstitch Hem
A Blindstitch Hem is a fast way to finish hems securely on skirts or pants.
It also makes a great choice when hemming large projects such as
curtains or bed skirts. Use matching thread to help the stitches blend into the
fabric, hence becoming “blind” or invisible.
Machine Set-Up:
Set-up for Step 1 (to finish raw edges)
Stitch:
Zigzag Stitch
Pattern Selector:
A
Stitch Length:
1.0
Stitch Width:
3
Presser Foot:
Blindstitch Hem Foot
Needle Position:
Center
Set-up for Step 2 (to baste the fold)
Stitch:
Straight Stitch
Pattern Selector:
A
Stitch Length:
4
Stitch Width:
0
Tension Dial:
2
Presser Foot:
Standard Foot
Needle Position:
Center
Set-up for Step 3 (to create the hem)
Stitch:
Blindstitch
Pattern Selector:
B
Stitch Length:
2-3
Stitch Width
3-4
Tension Dial:
2
Presser Foot:
Blindstitch Hem Foot
Needle Position:
Center
Materials:
Medium weight woven fabric
Procedure:
Sew a Zigzag to finish one of the fabric’s raw edges.
21
Fold under 1” and baste in place.
Position fabric with wrong side facing up, and turn the hem back to the
right side, creating a soft fold at the top edge of the hem. The bulk of
the fabric is to the left of the foot.
Begin stitching, making sure the forward stitches fall near the ¼” fold,
and the needle swing just bites into the fold, catching only 2 or 3
threads.
Note: Always use matching thread to help “hide” the stitches.
22
Attaching Beaded Trims
Adding a trim is an easy way to enhance almost any project! The look of a
denim jacket can be changed with a row of trim around the bottom edge. A
pair of capri pants can be dressed up by sewing a beaded trim around each
pant hem. Home decorating projects such as pillows, bedspreads or table
runners can have a “face-lift” by just adding a beaded trim.
Machine Set-Up:
Stitch:
Pattern Selector:
Stitch Width:
Stitch Length:
Presser Foot:
Needle Position:
Multi-Stitch Zigzag
C
4-5
3
Special Purpose Foot (J)
Center
Materials:
Beaded trim
Home décor fabric
Procedure:
Press and sew a 1” hem in the fabric, using a straight stitch.
Place fabric on machine with wrong side facing up.
Place trim header on fabric’s edge, right side facing down.
Sew on the the trim’s header.
23
Mending with Multi-Stitch Zigzag
The Multi-Stitch is a three-step zigzag stitch. It is stronger than a traditional
zigzag stitch and is used for mending, reinforcing a seam, darning, applying
elastic and many other techniques. It is ideal when mending tears.
Machine Set-Up:
Stitch:
Pattern Selector:
Stitch Width:
Stitch Length:
Presser Foot:
Needle Position:
Multi-Stitch Zigzag
C
2-5
0.5-1
Special Purpose Foot (J)
Center
Materials:
2” x 2” denim square
5” x 5” denim, cut a 1” tear in center of denim
Procedure:
Use the small denim square as a backing to add reinforcement.
Stitch directly over the tear. Turn handwheel to lower needle into the fabric.
Pivot 180 degrees and sew again.
24
Crazy Quilting
Crazy Quilting is done by stitching scraps of velvets, silks, cottons, satins and
other fine fabrics onto a foundation fabric. The fabrics are various shapes.
The fabric edges are then embellished with decorative stitches, often done with
decorative threads. This technique is popular and can be used in wearable art,
home decorator projects and more.
Machine Set-Up:
Stitch:
Pattern Selector:
Stitch Width:
Stitch Length:
Presser Foot:
Needle Position:
Decorative Stitches
B, C, D, E, F, G or H
Adjust according to preference
Adjust according to preference
Special Purpose Foot (J)
Center
Materials:
Fabric scraps
Foundation fabric or paper
Various decorative threads
Procedure:
Crazy-piece the scraps onto the
foundation fabric or paper, starting
from the center and working outward.
Select desired decorative stitch and center the stitching over the seam
lines.
Use rayon, metallic or other decorative threads, as desired.
25
Straight Stretch Stitch
for Woven Fabrics
This stitch is wonderful for built-in strength! It is ideal when sewing heavyweight fabrics or when it is desired to have a bolder-looking straight stitch. Try
it as a topstitch on jeans, a home decorating project, or when an extra-strong
seam is needed, such as in children’s clothing.
Machine Set-Up:
Stitch:
Pattern Selector:
Stitch Width:
Stitch Length:
Presser Foot:
Needle Position:
Straight Stretch Stitch
A
1, no width
Stretch Setting
Special Purpose Foot
Center
Materials:
Denim, folded in half
Stretch Setting
Procedure:
Stitch the two layers.
Note: Slowly turn the handwheel and watch the needle repeat each
stitch 3 times. By repeating the stitch, the stitch is much stronger.
26
Straight Stretch Stitch
for Stretch Fabrics
In the 1970’s, fabrics that had stretch were introduced. Previously, only woventype fabrics were available for home sewers. When a standard straight stitch is
sewn on stretch fabric, it will “pop” or break when the fabric is stretched.
Special stitches were created to allow “no-pop” sewing on stretch fabrics, and
these stitches are called Stretch Stitches or Flexi-stitches. Today, stretch
fabrics are used to make exercise outfits, dance customs, swimsuits and much
more. As the fabrics of these garments stretch, so do the stitches!
Machine Set-Up:
Stitch:
Pattern Selector:
Stitch Width:
Stitch Length:
Presser Foot:
Needle Position:
Straight Stretch Stitch
A
1, no width
Stretch Setting
Special Purpose Foot
Center
Materials:
Knit fabric, folded in half
Procedure:
Stitch the two layers.
Stretch Setting
Note: After sewing, notice how the stitch stretches with the fabric.
27
Ribbing Application
The Overedge Stretch Stitch makes sewing seams on knits look as though they
were finished on a serger. This stitch is stronger and more durable than
overlock/serger stitching. The stitch incorporates a straight stitch and a finishing
stitch into one operation. This allows for professional finish on projects, and is
especially popular on sweatshirts.
Machine Set-Up:
Stitch:
Pattern Selector:
Stitch Width:
Stitch Length:
Presser Foot:
Needle Position:
Overedge Seam Stitch
D
5
Stretch Setting
Special Purpose Foot (J)*
Center
Stretch Setting
Materials:
6” x 6” Medium to heavy weight knit fabric or polar fleece
3” x 6” Ribbing
Procedure:
Cut a curve in the knit fabric to resemble a neckline.
Fold ribbing in half lengthwise.
Starting at the left side of the knit curve, place ribbing on front side of
curve.
Match all 3 cut edges and place under the presser foot.
Line up fabric edges with guide on foot and stitch the length of the seam.
Stretch ribbing slightly to fit the cut edges of the knit.
When finished, lift foot and pull threads and fabric straight back behind
foot and trim.
*The Overedge Foot is optional. Check with your SINGER® Retailer.
28
Overedge Stitching
When joining two pieces of fabric, it is usually necessary to finish the edges.
This prevents raveling of the fabric and provides for a professional finish.
Machine Set-Up:
Stitch:
Pattern Selector:
Stitch Width:
Stitch Length:
Presser Foot:
Needle Position:
Overedged Seam Stitch
D
5
Stretch Setting
Special Purpose Foot (J)
Center
Stretch Setting
Materials:
(2) pieces of woven fabric
Procedure:
Right sides together, place the fabric under the foot.
Align the fabric’s edges with the foot’s edge.
Sew, joining two pieces of fabric and finishing the edges in one
operation.
*The Overedge Foot is optional. Check with your SINGER® Retailer.
29
Seam Allowances with Stretch
Overedged Seam Stitch
This technique is ideal for making an unlined garment or when the seam
allowances may show. All the edges are finished prior to construction. This
prevents raveling of the fabric and makes a professional finish on woven and
knit fabrics.
Machine Set-Up:
Stitch:
Pattern Selector:
Stitch Width:
Stitch Length:
Presser Foot:
Needle Position:
Overedged Seam Stitch
D
5
Stretch Setting
Special Purpose Foot (J)*
Center
Materials:
(2) 4” x 3” pieces of heavy woven fabric
Stretch Setting
Procedure:
Place one piece of fabric under the foot, aligning the fabric edge
so that the stitch forms just on the edge of the fabric.
Place the second piece of fabric under the foot, aligning the fabric
edge so that the stitch forms just on the edge of the fabric. Sew.
Change to the Standard Foot and set machine for a straight stitch.
With right sides together, join the two pieces of fabric with a ⅝” seam
allowance.
Open seam flat and press.
*The Overedge Foot is optional. Check with your SINGER® Retailer.
30
Attaching Elastic
Elastic can be applied directly to the fabric, such as when making lingerie.
If the elastic is ⅜” wide or less, the elastic can be placed into the General
Purpose Foot’s opening, making it easier to evenly stretch the elastic while
sewing.
Machine Set-Up:
Stitch:
Pattern Selector:
Stitch Width:
Stitch Length:
Presser Foot:
Needle Position:
Honeycomb Stitch
C
5
2-3
General Purpose Foot
Center
Materials:
Nylon Tricot 4” x 8”
⅜” wide elastic strip, cut 7” long
Stretch Setting
Procedure:
Thread elastic through the needle-opening hole in the foot.
Pull 2-3” of elastic to the back of the foot, enough to firmly grasp.
Position fabric under the foot.
Sew, gently pulling the elastic while sewing.
31
Sewing with a Wing Needle
Use a Wing Needle to create a beautiful heirloom look on pillowcases, napkins,
or special occasion garments. A Wing Needle is very wide and makes a large
opening or hole in the fabric every time it stitches. Several different types of
stitches can be used. For best results, use a stitch with forward-back
movement, so that the needle penetrates the same hole more than once.
Machine Set-Up:
Stitch:
Pattern Selector:
Stitch Width:
Stitch Length:
Presser Foot:
Needle:
Needle Position:
Zigzag Stitch
A
1-2
3-5
Special Purpose Foot (J)
Wing Needle*
Center
Materials:
Linen or other natural fiber fabric, spray-starched for added firmness
60-80 weight sewing thread
60-80 weight sewing thread in bobbin
Procedure:
Pull one or two threads to establish a guideline for stitching.
Stitch along the pulled threads. Notice the pronounced holes that are
created by the stitching.
Note: An alternative method is to trace a design onto fabric using
chalk, water-soluble or air soluble marker. (Use stencils, templates or
create a design.) Stitch along the drawn lines of the design.
* Wing Needle is an optional accessory. Check with your SINGER® Retailer.
32
Twin Needle Sewing
By using a Twin Needle, two parallel rows of stitching can be sewn at the same
time. A straight stitch using a twin needle sewing creates a sporty hem on knit
wear, a sophisticated top-stitch or a decorative embellishment.
Machine Set-Up:
Stitch:
Pattern Selector:
Stitch Width:
Stitch Length:
Presser Foot:
Needle:
Needle Position:
Straight Stitch
A
1, no width
3-5
Special Purpose Foot or General Purpose Foot
Twin Needle*
Center
Materials:
5” x 5” piece of medium weight fabric, with a stabilizer ironed on
Procedure:
Insert the second spool pin.
Both spools of thread follow the same threading path until they reach
the eye of the needle. Thread each needle separately.
Slowly sew a row of stitching on the right side of the fabric.
Maintain a slow consistent speed to ensure accurate stitching.
Note: When sewing with a stitch that has width (such as a zigzag or
decorative stitch) and the twin needle, always test that the needle does
not hit the foot, by turning the hand wheel manually.
*Twin needle is an optional accessory. Check with your SINGER® Retailer.
33
Applying Ribbon with a Twin Needle
By using a Twin Needle, two parallel rows of stitches can be used to
attach a ribbon while stitching.
Machine Set-Up:
Stitch:
Pattern Selector:
Stitch Width:
Stitch Length:
Presser Foot:
Needle:
Needle Position:
Straight Stitch
A
1, no width
5
Transparent Satin Foot or Standard Foot
Twin Needle
Center
Materials:
5” x 5” piece of lightweight woven fabric, with a stabilizer ironed on
6” long piece of ¼” wide satin ribbon
Procedure:
Insert the second spool pin.
Both spools of thread follow the same threading path until they reach
the eye of the needle. Thread each needle separately.
Insert the ribbon through the openings in the presser foot. Pull the
ribbon under the foot and then to the back of the foot.
Slowly sew a row of stitching on the right side of the fabric.
Maintain a slow consistent speed to ensure accurate stitching.
*Twin Needle is an optional accessory. Check with your SINGER® Retailer.
34
Sewing on Leather
Leather can add a bold accent to a garment, home decorating or craft project.
Leather does not ravel, so there is no need to finish the seam edges.
Machine Set-Up:
Stitch:
Pattern Selector:
Stitch Width:
Stitch Length:
Presser Foot:
Needle:
Needle Position:
Straight Stitch
A
1, no width
3
Special Purpose Foot (J)
or General Purpose Foot
Leather Needle*
SINGER PN#260-203286089S198, Wedge Point Needle
Center
Materials:
Fashion leather
Procedure:
Finger press a 1” hem in the leather.
Sew, using the seam guides to ensure straight stitching.
NOTE:
The optional Roller Foot or Even Feed Foot feeds the leather, vinyl or suede
through the machine more easily.
* The Leather needle is optional. Check with you SINGER® Retailer.
35
Decorative Stitching
Your sewing projects can have diversity, originality and creativity by adding
one or more of the available decorative stitches. By embellishing a project with
decorative stitches you can create an original work of art.
Machine Set-Up:
Stitch:
Pattern Selector:
Stitch Width:
Stitch Length:
Presser Foot:
Needle Position:
Domino Stitch
F
5
1
Special Purpose Foot (J)
Center
Materials:
(1) 4” x 4” piece of cotton
(1) 4” x 4” piece of stabilizer
Stretch Setting
Procedure:
Place stabilizer behind the cotton piece.
Sew across the fabric.
Use the Reverse Button to reinforce the seam.
36
Joining Fabric with the Herringbone
Stitch
Your sewing projects can have diversity, originality and creativity by adding
one or more of the available decorative stitches. By embellishing a project with
decorative stitches you can create an original work of art. The Herringbone
Stitch is often used to join pieces of fabric and decorative top-stitching.
Machine Set-Up:
Stitch:
Pattern Selector:
Stitch Width:
Stitch Length:
Presser Foot:
Needle Position:
Herringbone Stitch
H
5
Stretch Setting
Special Purpose Foot (J)
Center
Materials:
(1) 4” x 4” pieces of lawn
(1) 5” long piece of 1” wide lace
Stretch Setting
Procedure:
Spray starch and iron the lace and batiste.
Center the lace right side up, lengthwise on the lawn.
Stitch lace to fabric by sewing the decorative stitch down both edges of the
lace.
37
Decorative Stippling
The Double Action Stitch simulates free-motion stippling. It is a creative way to
decorate craft projects, home decorating projects or wearable art. Try stitching
fabric prior to appliqué to create texture to the appliqué fabric.
Machine Set-Up:
Stitch:
Pattern Selector:
Stitch Width:
Stitch Length:
Presser Foot:
Needle Position:
Double Action Stitch
G
5
Stretch Setting
Special Purpose Foot (J)
Center
Materials:
(2) 4” x 4” pieces of cotton
(1) 4” x 4” piece of batting
Stretch Setting
Procedure:
Place the batting between the cotton pieces.
Sew several rows of the Double Action Stitch.
38
Scalloped Edge
The delicate scallop stitch creates a beautiful , graceful edging for dresses,
blouses, lingerie and children’s clothes. It also makes an distinctive decorative
edge finish to home linens.
Machine Set-Up:
Stitch:
Pattern Selector:
Stitch Width:
Stitch Length:
Presser Foot:
Needle Position:
Scallop Stitch
E
5
1 or below
Special Purpose Foot (J)
Center
Materials:
(1) 4” x 4” Light weight fabric, such as lawn
(1) 3” x 5” Rinse-away stabilizer
30 weight decorative thread
Procedure:
Fold fabric in half.
Place stabilizer under fabric fold, extending 1” beyond fabric edge.
Stitch a row of Scallop stitches. Align center of foot on the folded edge.
Trim away excess stabilizer, then rinse with water to remove remaining
stabilizer.
39
Narrow Hem
The edge of a ruffle, the hem on a napkin and the edge of a prom dress are all
perfect examples of where it is beneficial to use the Rolled Hem Foot. The foot
has a “scroll” that helps roll the fabric’s edge over, hiding the raw edges and
creating a small professional finish hem. Soft fabrics roll best.
Machine Set-Up:
Stitch:
Pattern Selector:
Stitch Width:
Stitch Length:
Presser Foot:
Needle Position:
Straight Stitch
A
1, no width
3
Rolled or Narrow Hem Foot*
Center
Materials:
Medium to light weight fabric
Procedure:
Press a ⅛” hem to approximately 1 inch of the fabric’s edge.
Stitch the small hem into place with a straight stitch.
Leave the needle in the fabric, but lift the presser foot.
Guide the fabric into the scroll of the foot.
Lower foot and continue to sew, holding the thread tails firmly.
Hold fabric taut and slightly up to help the fabric to “roll” into the scroll.
*The Rolled/Narrow Foot is optional. Check with your SINGER® Retailer.
40
Gathering with the Cording Foot
This technique is great for heavy fabrics such as in home decorating or
textured fabrics that do not gather easily. The Cording Foot holds the cord
in place, so stitching is effortless. Adjusting gathers is easy, and there is no
danger that the cord will break in the middle of the project.
Machine Set-Up:
Stitch:
Pattern Selector:
Stitch Width:
Stitch Length:
Presser Foot:
Needle Position:
Zigzag Stitch
A
3
3
Cording Foot*
Center
Materials:
10” long strand of fine cord
Home décor fabric
Procedure:
Place a single cord in the center groove of the foot.
Secure the cord by tying a knot at the back of the foot.
Place the fabric under the foot.
Sew a test to ensure that the Zigzag stitches are sewing over the cord,
not into the cord. The Zigzag stitch is making a casing for the cord.
After stitching is finished, pull the cord which will
draw up or gather the fabric.
Adjust the gathers evenly by sliding the fabric along the
cord.
Sew a straight stitch to secure the gathers into
place.
*The Cording Foot is optional. Check with your SINGER® Retailer.
41
Applying
Trims, Cords or Braids
.
Use the Cording Foot to easily apply thin cords to add textured to wearable art
fashions or home decorating projects. The foot holds the cords in position, so
that it is effortless to stitch them into place. There are several decorative cords
available, each creating a different effect. Experiment with various cords and
stitches!
Machine Set-Up:
Stitch:
Pattern Selector:
Stitch Width:
Stitch Length:
Presser Foot:
Needle Position:
Multi-Zigzag
C
3
3
Cording Foot*
Center
Materials:
Three strands of thin cording
Home Décor fabric
Procedure:
Thread one decorative cord through each of the foot’s three grooves
or slots.
Secure the three cords at the back of the foot by tying a knot.
Place the fabric under the foot and sew.
The foot will hold all the cords in place as they are sewn into the fabric.
*The Cording Foot is optional. Check with your SINGER® Retailer.
42
Shirring with the Gathering Foot
Gathering fabric means to draw the fabric up on a thread to create fullness.
Shirring consists of three or more rows of gathers. Use only sheer or soft
fabrics for this technique. The specially designed Shirring Foot pushes fabric
into even folds under the needle. The stitch then holds the fabric folds securely.
Machine Set-Up:
Stitch:
Pattern Selector:
Stitch Width:
Stitch Length:
Tension:
Presser Foot:
Needle Position:
Straight Stitch
A
1, no width
5
Fullness is regulated by stitch length
Increase the tension
Gathering Foot*
Center
Materials:
Lightweight fabric, such as batiste
Procedure:
Pull one to two threads on the fabric’s crosswise grain, to create a
guide for straight stitching.
*The Gathering Foot is optional. Check with your SINGER® Retailer.
43
Turn the handwheel to ensure the needle is correctly positioned. It should
line up with the Gathering Foot’s needle opening.
Sew a row on top of the “pulled” line.
Use the foot's edge as a guide to sew the next row of stitching. Rows
will be ¼” apart if the foot is used as a guide.
Sew 3 or 4 more rows.
Do not clip thread ends until it is determined if any fine adjustments
are needed to make the gathers even-looking.
44
Using the Even Feed Foot
to Sew Multiple Fabric Layers
The Even Feed Foot has its own set of feed dogs that work in conjunction with
the machine’s feeding system to improve the flow of the fabric. This is particularly important when sewing several layers of fabric, such as in quilting. The
Even Feed Foot “pulls” the top layer or layers of fabric through at the same
speed as the machine’s feed dogs are pulling the bottom layer or layers of fabric, making for more even feeding!
Machine Set-Up:
Stitch:
Pattern Selector:
Stitch Width:
Stitch Length:
Presser Foot:
Needle Position:
Straight Stitch
A
1, no width
3
Even Feed Foot*
Center
Materials:
(2) 5” x 5” pieces of cotton with batting between the two pieces
Procedure:
Sew from one edge to the other.
Top Fabric
Batting
Bottom Fabric
The Even Feed Foot is optional. Check with your SINGER® Retailer.
45
Using the Even Feed Foot to Sew Plaid
Fabrics
Machine Set-Up:
Stitch:
Pattern Selector:
Stitch Width:
Stitch Length:
Presser Foot:
Needle Position:
Straight Stitch
A
1, no width
3
Even Feed Foot*
Center
Materials:
(2) 5” x 5” pieces of plaid or striped fabric
Procedure:
Match plaids, right sides together
Sew the two pieces together using the built-in seam guide on the
machine to maintain a consistent seam allowance.
*The Even Feed Foot is optional. Check with your SINGER® Retailer.
46
Using the Even Feed Foot to Sew Pile
Fabrics
The Even Feed Foot is great for sewing on fake fur for coat accents, costumes
or stuffed animals.
Machine Set-Up:
Stitch:
Pattern Selector:
Stitch Width:
Stitch Length:
Presser Foot:
Needle Position:
Straight Stitch
A
1, no width
3
Even Feed Foot*
Center
Materials:
(2) 5” x 5” pieces of fake-fur
Procedure:
Sew the two pieces together using the built-in seam guide on the
machine to maintain a consistent seam allowance.
Push the fur into the seam.
*The Even Feed Foot is optional. Check with your SINGER® Retailer.
47
Sewing with the Side Cutter
The side cutter is an attachment that will trim the excess fabric while sewing.
A Zigzag-type stitch must be used.
Machine Set-Up:
Stitch:
Pattern Selector:
Stitch Width:
Stitch Length:
Presser Foot:
Needle Position:
Zigzag
A
5
1-2
Side Cutter*
Center
Materials:
(2) 5” x 4” pieces of wool type fabric
Procedure:
Cut a 1” x 1” notch in the fabric.
The cutter’s blades “cut” before the needle stitches. Be sure to position
the fabric under the needle before beginning to sew.
Place the fabric OVER the first metal platform and UNDER the second
metal platform. If the cutter is not cutting, it is usually due to the fabric
not being placed OVER the first platform.
View: Looking down at cutter
Turn the hand-wheel to ensure the the needle does not hit the stitch
finger. The stitch width may need to be adjusted.
*The Side Cutter is optional. Check with your SINGER® Retailer.
48
Slowly sew and gently guide the fabric.
Adjust the stitch length according to fabric. Certain fabrics will cut
better or more cleanly than others. This is due to the nature of the fabric.
The cutter works best if not more than 1” is being trimmed away.
49
Sewing with the Ruffler
The Ruffler attachment quickly and easily produces professional looking ruffles
on garments, home decorating projects and craft items.
Machine Set-Up:
Stitch:
Pattern Selector:
Stitch Width:
Stitch Length:
Presser Foot:
Needle Position:
Straight Stitch
A
1, no width
7
Ruffler*
Center
Materials:
3” x 10” piece of lightweight cotton
3” x 5” piece of lightweight cotton
Procedure:
Set the Ruffler for the desired amount of “ruffles”.
Set the Ruffler for the desired depth of the ruffles.
*The Ruffler is optional. Check with your SINGER® Retailer.
50
Place the fabric under the Ruffler. Place fabric in the guide plate.
Remember to lower the presser foot lever.
Lightly push the cloth feed plate towards the back of the machine.
Place the longer piece of fabric under the foot and beneath the shorter
piece of fabric. Place right sides together.
Slowly sew. Watch the Ruffler feed the fabric to make even ruffles. The
bottom piece of fabric will feed slower than the top piece.
51