1
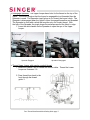
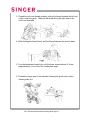
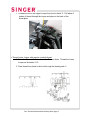
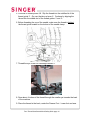
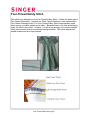
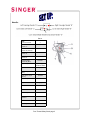
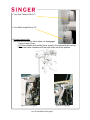
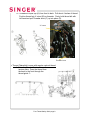
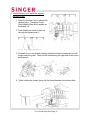
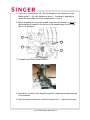
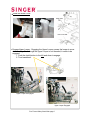
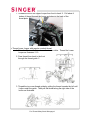
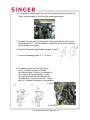
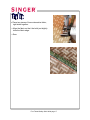
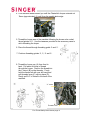
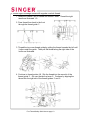
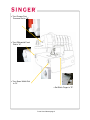
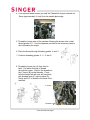
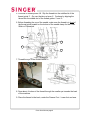
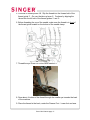
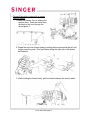
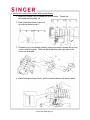
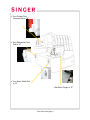
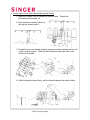
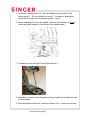
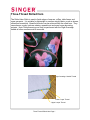
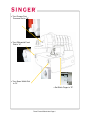
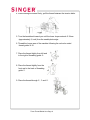
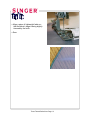
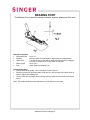
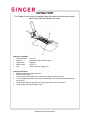
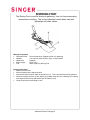
Chapter 7:
Four-Thread Ultra-Stretch Mock
Safety Stitch
Four-Thread Ultra-Stretch Mock Safety Stitch
The Four-Thread Ultra-Stretch Mock Safety Stitch is stronger than the Three-Thread
Ultra-Stretch Mock Safety Stitch. The additional thread provides added strength to
the seam and is good choice for knits as well as wovens. This stitch works well when
applying ribbing to a garment. Ribbing is often seen on cuffs, collars and waistbands
of active wear. This stitch requires two needle threads and two looper threads.
Four-Thread Ultra-Stretch Mock Safety Stitch page 1
Needle:
Set at:
ATD:
Auto Tension Dial
“A”
Left Cover Stitch
Needle “C”
Not Threaded
Middle Cover Stitch
Needle “D”
Not Threaded
Right Cover Stitch
Needle “E”
Not Threaded
Overedge Left
Needle “A” (Orange)
Threaded
Overedge Right
Needle “B” (Blue)
Threaded
Upper Looper
(Green)
Looper Engaged
and Threaded
Spreader
Disengaged
Lower Looper
(Red)
Threaded
Chain Stitch Looper
(Brown)
Not Threaded
Upper Looper Clutch
“L”
Upper Knife
Seam Guide Plate
Engaged
Not Installed
Use Knife Guide
Seam Width Dial
“N”
Stitch Length Dial
“N”
Presser Foot
Pressure
“N”
Differential Feed Dial
“N”
Stitch Finger
“N”
Four-Thread Ultra-Stretch Mock Safety Stitch page 2
Sweatshirt sample
Four-Thread Ultra-Stretch Mock Safety Stitch page 3
Turn Auto Tension Dial to “A”.
Turn Stitch Length Dial to “N”.
Engage Upper Knife.
The knife will not trim the fabric when it is disengaged.
1. Open Looper Cover.
2. Pull the movable knife holder (silver screw) to the right as far as it will go.
3. Turn the holder clockwise until the knife clicks into a lock position.
Upper Knife Disengaged
Upper Knife Engaged
Four-Thread Ultra-Stretch Mock Safety Stitch page 4
Turn Presser Foot
Pressure Dial to “N”.
Turn Differential Feed
Dial to “N”.
Turn Seam Width Dial
to “N”.
Set Stitch Finger to “N”.
Four-Thread Ultra-Stretch Mock Safety Stitch page 5
Install the Knife Cover.
Engage Upper Looper. Engaging the Upper Looper causes the looper to move
when sewing. Even though the Upper Looper is not threaded, it needs to be
engaged.
1. Push the clutch button to the left and down to engage.
2. Turn handwheel.
Upper Looper Disengaged
Upper Looper Engaged
Four-Thread Ultra-Stretch Mock Safety Stitch page 6
Disengage Spreader. The Upper Looper has a hole for the thread on the top of the
looper. If the stitch requires that the looper be engaged but not threaded then the
Spreader is used. The Spreader simply plugs-in (or closes) the looper’s hole. The
Spreader is disengaged when the Upper Looper is engaged/operative and threaded.
The Spreader is used with a stitch that requires only one looper thread. With
the help of the Spreader the single looper thread wraps around the fabric’s edge.
1. Lower the white handle on the Spreader to open the eye of the Upper
Looper.
Eye of Looper
Spreader Engaged
Spreader Disengaged
Thread Upper Looper with regular overlock thread .
1. Raise the Presser Foot to release the tension disks. Thread the Lower
Looper as illustrated 1-9.
2. Pass thread from back to the
front through the thread
guide .
Four-Thread Ultra-Stretch Mock Safety Stitch page 7
3. Thread the top cover thread guide by pulling the thread towards the left until
it slips under the guide. Then pull the thread along the right side of the
button as illustrated.
4. While holding the thread firmly, pull the thread between the tension disks.
5. Turn the handwheel toward you until the lower looper extends 5-10mm
(approximately ½ inch) from the needle plate edge.
6. Thread the looper area of the machine following the green color coded
thread guides 4-9.
Four-Thread Ultra-Stretch Mock Safety Stitch page 8
7. Thread the hole in the Upper Looper from front to back . Pull about 4
inches of thread through the looper and place to the back of the
throat plate.
Thread Lower Looper with regular overlock thread.
1. Raise the Presser Foot to release the Tension disks. Thread the Lower
Looper as illustrated 1-10.
2. Pass thread from back to the front through the thread guide
Four-Thread Ultra-Stretch Mock Safety Stitch page 9
.
3. Thread the top cover thread guide by pulling the thread towards the left until
it slips under the guide. Then pull the thread along the right side of the
button as illustrated.
4. While holding the thread, firmly pull the thread between the tension disks.
5. Turn the handwheel toward you until the lower looper extends 5-10mm
(approximately ½ inch) from the needle plate edge.
6. Thread the looper area of the machine following the red color coded
thread guides 4-10.
7. Place the thread slighty from left and
to the right of threading guide .
8. Place the thread slightly from the
front and to the back of threading
guide .
9. Place the thread through
,
,and
.
Four-Thread Ultra-Stretch Mock Safety Stitch page 10
10. Thread the looper eye (A) from front to back. Pull about 4 inches of thread.
Position thread into V cutout (B) on threader. Firmly hold thread tail with left
hand and pull Threader lever (C) up into place (D).
“V” cutout
Threader Lever
NOTE: Make sure the Upper Looper
thread is behind the Lower Looper
thread.
Thread Right Overedge needle with regular overlock thread.
1. Raise the Presser Foot to release the tension disks. Thread the right
needle as illustrated 1-9.
2. Pass thread from back to the front
through the thread guide .
Four-Thread Ultra-Stretch Mock Safety Stitch page 11
3. Thread the top cover thread guide by pulling the thread towards the left until
it slips under the guide. Then pull the thread along the right side of the
button as illustrated.
6
4. Continue to thread points 4-8. Slip the thread into the rear slot of the
thread guide . Go over the take up lever . Continue by slipping the
thread into the right slot of the thread guides and .
5. Before threading the eye of the needle, make sure the thread is behind
the thread guide located on the bottom of the needle clamp.
6. Thread the eye of the Overedge Right Needle
.
Four-Thread Ultra-Stretch Mock Safety Stitch page 12
Thread Left Overlock needle with regular thread.
1. Raise the Presser Foot to release the tension disks. Thread the
left needle as illustrated 1-9.
2. Pass thread from back to the front
through the thread guide .
3. Thread the top cover thread guide by pulling the thread towards the left until
it slips under the guide. Then pull the thread towards the right side of the
button as illustrated.
4. While holding the thread firmly, pull the thread between the tension disks.
Four-Thread Ultra-Stretch Mock Safety Stitch page 13
5. Continue to thread points 4-8. Slip the thread into the middle slot of the
thread guide . Go over the take up lever . Continue by slipping the
thread into the middle slot of the thread guides and .
6. Before threading the eye of the needle, make sure the thread is behind
the thread guide located on the bottom of the needle clamp.
7. Thread the eye of the Left Overedge Needle
.
8. Draw about 4 inches of the thread through the needle eye towards the back
of the machine.
9. Place the thread to the back, under the Presser Foot. Lower foot and sew.
Four-Thread Ultra-Stretch Mock Safety Stitch page 14
Fold ribbing lengthwise.
Place ribbing on top of fleece.
Align the fabric so that the knife just slightly
trims both the ribbing and fleece fabric
edges.
Sew, stretching the ribbing as needed.
Four-Thread Ultra-Stretch Mock Safety Stitch page 15
Chapter 8:
Four-Thread Safety Stitch
Four-Thread Safety Stitch
This stitch is an alternative to the Five-Thread Safety Stitch. It offers the same type of
Two-Thread Chainstitch. However the Three-Thread Overlock is now replaced by a
Two-Thread Overedge finish. The Four-Thread Safety Stitch is appropriately used
when sewing a medium weight woven fabric. Because there is one less thread being
used, the stitch is less bulky. However, it is still strong enough not to require straight
stitch reinforcement from a conventional sewing machine. This stitch requires two
needle threads and two looper threads.
Four-Thread Safety Stitch page 1
Needle:
Set at:
ATD:
Auto Tension Dial
Left Cover Stitch
Needle “C”
Middle Cover Stitch
Needle “D” (Orange)
“I”
Not Threaded
Threaded
Right Cover Stitch
Needle “E”
Not Threaded
Overedge Left
Needle “A”
Not Threaded
Overedge Right
Needle “B” (Blue)
Threaded
Upper Looper
Looper Engaged
and Not Threaded
Spreader
Engaged
Lower Looper
(Red)
Threaded
Chain Stitch Looper
(Brown)
Threaded
Upper Looper Clutch
Upper Knife
Seam Guide Plate
“L”
Engaged
Not Installed
Seam Width Dial
“N”
Stitch Length Dial
“N”
Presser Foot
Pressure
“N”
Differential Feed Dial
“N”
Stitch Finger
“N”
Four-Thread Safety Stitch page 2
Turn Auto Tension Dial to “I”.
Turn Stitch Length Dial to “N”.
Engage Upper Knife.
The knife will not trim the fabric when it is disengaged.
1. Open Looper Cover.
2. Pull the movable knife holder (silver screw) to the right as far as it will go.
3. Turn the holder clockwise until the knife clicks into a lock position.
Upper Knife Disengaged
Four-Thread Safety Stitch page 3
Upper Knife Engaged
Turn Presser Foot
Pressure Dial to “N”.
Turn Differential Feed
Dial to “N”.
Turn Seam Width Dial
to “N”.
Set Stitch Finger to “N”.
Four-Thread Safety Stitch page 4
Install the Knife Cover.
Engage Upper Looper. Engaging the Upper Looper, causes the looper to move
when sewing. Even though the Upper Looper is not threaded it needs to be
engaged.
1. Push the clutch button to the left and down to engage.
2. Turn handwheel.
Upper Looper Disengaged
Upper Looper Engaged
Four-Thread Safety Stitch page 5
Engage Spreader. The Upper Looper has a hole for the thread on the top of the
looper. If the stitch requires that the looper be engaged, but not threaded then the
Spreader is used. The Spreader simply plugs-in (or closes) the looper’s hole. The
Spreader is disengaged when the Upper Looper is engaged/operative and threaded.
The Spreader is used with a stitch that requires only one looper thread. With
the help of the Spreader the single looper thread wraps around the fabric’s edge.
1. Raise the white handle on the Spreader to insert the tip into the eye of the
Upper Looper.
Eye of Looper
Spreader Disengaged
Spreader Engaged
Thread Lower Looper with regular overlock thread.
1. Raise the Presser Foot to release the tension disks. Thread the Lower
Looper as illustrated 1-10.
2. Pass thread from back to the front
through the thread guide .
Four-Thread Safety Stitch page 6
3. Thread the top cover thread guide by pulling the thread towards the left until
it slips under the guide. Then pull the thread along the right side of the
button as illustrated.
4. While holding the thread, firmly pull the thread between the tension disks.
5. Turn the handwheel toward you until the lower looper extends 5-10mm
(approximately ½ inch) from the needle plate edge.
6. Thread the looper area of the machine following the red color coded
thread guides 4-10.
7. Place the thread slighty from left and
to the right of threading guide .
8. Place the thread slightly from the
front and to the back of threading
guide .
9. Place the thread through
,
,and
.
Four-Thread Safety Stitch page 7
10. Thread the looper eye (A) from front to back. Pull about 4 inches of thread.
Position thread into V cutout (B) on threader. Firmly hold thread tail with
left hand and pull Threader lever (C) up into place (D).
“V” cutout
Threader Lever
Thread Chainstitch Looper with regular overlock thread.
1. Raise the Presser Foot to release the
tension disks. Pass the thread from
the back to the front through the
thread guide .
Four-Thread Safety Stitch page 8
2. Thread the top cover thread guide by pulling the thread towards the left
until it slips under the guide. Then pull thread along the right side of the
button, as illustrated.
3. While holding the thread, firmly pull the thread between the tension disks.
4. Turn the hand wheel toward you until the Chainstitch Looper extends out
10mm (approximately ½”) from the needle plate edge.
5. Thread the looper area of the machine following the brown color-coded
thread guides 4-11. Use the tweezers provided in the accessory case to
aid in threading the looper.
Four-Thread Safety Stitch page 9
6. Place the thread through threading guide
7. Continue threading guides
,
,
and
and
.
.
8. Thread the looper eye (A) from front to back. Pull about 4 inches of thread
through the looper. Position the thread into the V cutout (B) on the threader.
Firmly hold the thread tail with your left hand and pull threader lever (C) up
into place (D). Gently pull 5-6” of thread to the back of the machine.
“V” cutout
Threader lever
Thread Right Overedge with regular overlock thread.
1. Raise the Presser Foot to release the tension disks. Thread the right
needle as illustrated 1-9.
2. Pass thread from back to the front
through the thread guide .
Four-Thread Safety Stitch page 10
3. Thread the top cover thread guide by pulling the thread towards the left until
it slips under the guide. Then pull the thread along the right side of the
button as illustrated.
6
4. Continue to thread points 4-8. Slip the thread into the rear slot of the
thread guide . Go over the take up lever . Continue by slipping the
thread into the right slot of the thread guides and .
5. Before threading the eye of the needle, make sure the thread is behind
the thread guide located on the bottom of the needle clamp.
6. Thread the eye of the Right Overedge Needle
Four-Thread Safety Stitch page 11
.
Thread Middle Cover Stitch with regular
overlock thread.
1. Raise the Presser Foot to release the
tension disks. Thread the Cover
Stitch Middle/Chain Stitch needle as
illustrated 1-9.
2. Pass thread from back to the front
through the thread guide .
3. Thread the top cover thread guide by pulling the thread towards the left until
it slips under the guide. Then pull the thread along the right side of the button
as illustrated.
4. While holding the thread, firmly pull the thread between the tension disks.
Four-Thread Safety Stitch page 12
5. Continue to thread points 4-8. Slip the thread into the middle slot of the
thread guide . Go over the take up lever . Continue by slipping the
thread into the middle slot of the thread guides and .
6. Before threading the eye of the needle, make sure the thread is in front of
the thread guide located on the bottom of the needle clamp for the Cover
Stitch or Chainstitch.
6
7
4
8
5
7. Thread the eye of the middle needle
.
8. Draw about 4 inches of the thread through the needle eye towards the back
of the machine.
9. Place the thread to the back, under the Presser Foot. Lower foot and sew.
Four-Thread Safety Stitch page 13
Place two pieces of broadcloth right sides
together.
Align the fabric so that that the knife just
slightly trims the fabric edge.
Sew.
Four-Thread Safety Stitch page 14
Chapter 9:
Five-Thread Safety Stitch Wide
Five-Thread Safety Stitch Wide
This stitch is a combination of a Two-Thread Chainstitch and a Three-Thread Overlock
Stitch. It is suitable for woven fabrics and provides a durable seam for heavy weight
fabrics such as denim and terrycloth. Using this strong safety stitch eliminates the
need to reinforce the seam with a conventional sewing machine straight stitch. The
Presser Foot Pressure Adjusting Dial makes it simple to sew on all weights of fabrics.
The Five-Thread Safety Stitch can have a width of 2.8mm or 5.6mm, depending on
which overlock needle position is chosen.
Set at:
Five-Thread Safety Stitch
Wide
Five-Thread Safety Stitch Wide page 1
Five-Thread Safety Stitch
Narrow
Needles:
ATD:
Auto Tension Dial
“B”
Left Cover Stitch
Needle “C”
Not Threaded
Middle Cover Stitch
Needle “D” (Orange)
Right Cover Stitch
Needle “E”
Threaded
Not Threaded
Overedge Left
Needle “A” (Blue)
Threaded
Overedge Right
Needle “B”
Not Threaded
Upper Looper
(Green)
Looper Engaged
and Threaded
Spreader
Not Used
Lower Looper
(Red)
Threaded
Chain Stitch Looper
(Brown)
Threaded
Upper Looper Clutch
“L”
Upper Knife
Engaged
Seam Guide Plate
Not Installed
Seam Width Dial
“N”
Stitch Length Dial
“N”
Presser Foot
Pressure
“N”
Differential Feed Dial
“N”
Stitch Finger
“N”
Five-Thread Safety Stitch Wide page 2
Turn Auto Tension Dial to “B”.
Turn Stitch Length Dial to “N”.
Engage Upper Knife.
The knife will not trim the fabric when it is disengaged.
1. Open Looper Cover.
2. Pull the movable knife holder (silver screw) to the right as far as it will go.
3. Turn the holder clockwise until the knife clicks into a lock position.
Upper Knife Disengaged
Five-Thread Safety Stitch Wide page 3
Upper Knife Engaged
Turn Presser Foot
Pressure Dial to “N”.
Turn Differential Feed
Dial to “N”.
Turn Seam Width Dial
to “N”.
Set Stitch Finger to “N”.
Five-Thread Safety Stitch Wide page 4
Install the Knife Cover.
Engage Upper Looper. Engaging the Upper Looper causes the looper to move
when sewing. Even though the Upper Looper is not threaded, it needs to be
engaged.
1. Push the clutch button to the left and down to engage.
2. Turn handwheel.
Upper Looper Disengaged
Upper Looper Engaged
Five-Thread Safety Stitch Wide page 5
Disengage Spreader. The Upper Looper has a hole for the thread on the top of the
looper. If the stitch requires that the looper be engaged but not threaded, then the
Spreader is used. The Spreader simply plugs-in (or closes) the looper’s hole. The
Spreader is disengaged when the Upper Looper is engaged/operative and threaded.
The Spreader is used with a stitch that requires only one looper thread. With
the help of the Spreader the single looper thread wraps around the fabric’s edge.
1. Lower the white handle on the Spreader to open the eye of the Upper
Looper.
Eye of Looper
Spreader Engaged
Spreader Disengaged
Thread Upper Looper with regular overlock
thread.
1. Raise the Presser Foot to release the
tension disks. Thread the Lower
Looper as illustrated 1-9.
2. Pass thread from back to the
front through the thread
guide .
Five-Thread Safety Stitch Wide page 6
3. Thread the top cover thread guide by pulling the thread towards the left until
it slips under the guide. Then pull the thread along the right side of the
button as illustrated.
4. While holding the thread, firmly pull the thread between the tension disks.
5. Turn the handwheel toward you until the lower looper extends 5-10mm
(approximately ½ inch) from the needle plate edge.
6. Thread the looper area of the machine following the green color coded
thread guides 4-9.
Five-Thread Safety Stitch Wide page 7
7. Thread the hole in the Upper Looper from front to back . Pull about 4
inches of thread through the looper and place to the back of the
throat plate.
Thread Lower Looper with regular overlock thread.
1. Raise the Presser Foot to release the tension disks. Thread the Lower
Looper as illustrated 1-10.
2. Pass thread from back to the front
through the thread guide .
3. Thread the top cover thread guide by pulling the thread towards the left until
it slips under the guide. Then pull the thread along the right side of the
button as illustrated.
Five-Thread Safety Stitch Wide page 8
4. While holding the thread, firmly, pull the thread between the tension disks.
5. Turn the handwheel toward you until the lower looper extends 5-10mm
(approximately ½ inch) from the needle plate edge.
6. Thread the looper area of the machine following the red color coded
thread guides 4-10.
7. Place the thread slighty from left and
to the right of threading guide .
8. Place the thread slightly from the
front and to the back of threading
guide .
9. Place the thread through
,
and
.
Five-Thread Safety Stitch Wide page 9
10. Thread the looper eye (A) from front to back. Pull about 4 inches of thread.
Position thread into V cutout (B) on threader. Firmly hold thread tail with left
hand and pull Threader lever (C) up into place (D).
“V” cutout
Threader Lever
NOTE: Make sure the Upper Looper thread is
behind the Lower Looper thread.
Five-Thread Safety Stitch Wide page 10
Thread Chainstitch Looper with regular
overlock thread.
1. Raise the Presser Foot to release the
tension disks. Pass the thread from
the back to the front through the
thread guide .
2.Thread the top cover thread guide by pulling the thread towards the left until
it slips under the guide. Then pull thread along the right side of the button
as illustrated.
3. While holding the thread, firmly pull the thread between the tension disks.
Five-Thread Safety Stitch Wide page 11
4. Turn the hand wheel toward you until the Chainstitch Looper extends out
10mm (approximately ½ inch) from the needle plate edge.
5. Thread the looper area of the machine following the brown color-coded
thread guides 4-11. Use the tweezers provided in the accessory case to
aid in threading the looper.
6. Place the thread through threading guides
7. Continue threading guides
,
,
and
and
.
8. Thread the looper eye (A) from front to
back. Pull about 4 inches of thread
through the looper. Position the thread into
the V cutout (B) on the threader. Firmly
hold the thread tail with left hand and pull
threader lever (C) up into place (D). Gently
pull 5-6” of thread to the back of the machine.
“V” cutout
Threader Lever
Five-Thread Safety Stitch Wide page 12
.
Thread Left Overlock needle with regular thread.
1. Raise the Presser Foot to release the tension disks. Thread the
left needle as illustrated 1-9.
2. Pass thread from back to the front
through the thread guide .
3. Thread the top cover thread guide by pulling the thread towards the left until
it slips under the guide. Then pull the thread along the right side of the
button as illustrated.
4. While holding the thread firmly, pull the thread between the tension disks.
Five-Thread Safety Stitch Wide page 13
5. Continue to thread points 4-8. Slip the thread into the foward slot of the
thread guide . Go over the take up lever . Continue by slipping the
thread into the left slot of the thread guides and .
6. Before threading the eye of the needle, make sure the thread is behind
the thread guide located on the bottom of the needle clamp.
7. Thread the eye of the Left Overedge Needle
.
8. Draw about 4 inches of the thread through the needle eye towards the back
of the machine.
9. Place the thread to the back, under the Presser Foot. Lower foot and sew.
Five-Thread Safety Stitch Wide page 14
Thread Middle Cover stitch needle with regular overlock thread.
1. Raise the Presser Foot to release the tension disks. Thread the Cover
Stitch Middle/Chain Stitch needle as illustrated 1-9.
2. Pass thread from back to the front
through the thread guide .
3. Thread the top cover thread guide by pulling the thread towards the left until
it slips under the guide. Then pull the thread along the right side of the button
as illustrated.
4. While holding the thread firmly, pull the thread between the tension disks.
Five-Thread Safety Stitch Wide page 15
5. Continue to thread points 4-8. Slip the thread into the middle slot of the
thread guide . Go over the take up lever . Continue by slipping the
thread into the middle slot of the thread guides and .
6. Before threading the eye of the needle, make sure the thread is in front of
the thread guide located on the bottom of the needle clamp for the Cover
Stitch or Chainstitch.
7. Thread the eye of the middle needle
.
8. Draw about 4 inches of the thread through the needle eye, under the
Presser Foot and then towards the back of the machine.
9. Place the thread to the back, under the Presser Foot. Lower foot and sew.
Five-Thread Safety Stitch Wide page 16
Place two pieces of home decorative fabric,
right sides together.
Align the fabric so that the knife just slightly
trims the fabric edge.
Sew.
Five-Thread Safety Stitch Wide page 17
Chapter 10:
Five-Thread Safety Stitch Narrow
Five-Thread Safety Stitch Narrow
This stitch is a combination of a Two-Thread Chainstitch and a Three-Thread Overlock
Stitch. It is suitable for woven fabrics and provides a durable seam for heavy weight
fabrics such as denim and terrycloth. Using this strong and stable safety stitch
eliminates the need to reinforce the seam with a conventional sewing machine straight
stitch. The Pressure Adjusting Dial makes it simple to sew on all weights of
fabrics. The Five-Thread Safety Stitch can have a width of 2.8mm or 5.6mm
depending on which overlock needle position is chosen.
Hint: Try a wider stitch width (6.5)
for thicker fabrics such as Terrycloth.
Five-Thread Safety Stitch Narrow page 1
Needles:
Set at:
ATD:
Auto Tension Dial
Left Cover Stitch
Needle “C”
“A”
Not Threaded
Middle Cover Stitch
Needle “D” (Orange)
Threaded
Right Cover Stitch
Needle “E”
Not Threaded
Overedge Left
Needle “A”
Not Threaded
Overedge Right
Needle “B” (Blue)
Threaded
Upper Looper
(Green)
Looper Engaged
and Threaded
Spreader
Disengaged
Lower Looper
(Red)
Threaded
Chain Stitch Looper
(Brown)
Threaded
Upper Looper Clutch
Upper Knife
“L”
Engaged
Seam Guide Plate
Not Installed
Use Knife Cover
Seam Width Dial
“N”
Stitch Length Dial
“N”
Presser Foot
Pressure
“N”
Differential Feed Dial
“N”
Stitch Finger
“N”
Five-Thread Safety Stitch Narrow page 2
Turn Auto Tension Dial to “A”.
Turn Stitch Length Dial to “N”.
Engage Upper Knife.
The knife will not trim the fabric when it is disengaged.
1. Open Looper Cover.
2. Pull the movable knife holder (silver screw) to the right as far as it will go.
3. Turn the holder clockwise until the knife clicks into a lock position.
Upper Knife Disengaged
Upper Knife Engaged
Five-Thread Safety Stitch Narrow page 3
Turn Presser Foot
Pressure dial to “N”.
Turn Differential Feed
Dial to “N”.
Turn Seam Width Dial
to “N”.
Set Stitch Finger to “N”.
Five-Thread Safety Stitch Narrow page 4
Install the Knife Cover.
Engage Upper Looper. Engaging the Upper Looper causes the looper to move
when sewing. Even though the Upper Looper is not threaded it needs to be
engaged.
1. Push the clutch button to the left and down to engage.
2. Turn handwheel.
Upper Looper Disengaged
Upper Looper Engaged
Five-Thread Safety Stitch Narrow page 5
Disengage Spreader. The Upper Looper has a hole for the thread on the top of the
looper. If the stitch requires that the looper be engaged, but not threaded then the
Spreader is used. The Spreader simply plugs-in (or closes) the looper’s hole. The
Spreader is disengaged when the Upper Looper is engaged/operative and threaded.
The Spreader is usually used with a stitch that requires only one looper thread. With
the help of the Spreader the single looper thread wraps around the fabric’s edge.
1. Lower the white handle on the Spreader to open the eye of the Upper
Looper.
Eye of Looper
Spreader Engaged
Spreader Disengaged
Thread Upper Looper with regular overlock
thread .
1. Raise the Presser Foot to release the
tension disks. Thread the Lower
Looper as illustrated 1-9.
2. Pass thread from back to the
front through the thread
guide .
Five-Thread Safety Stitch Narrow page 6
3. Thread the top cover thread guide by pulling the thread towards the left until
it slips under the guide. Then pull the thread along the right side of the
button as illustrated.
4. While holding the thread firmly, pull the thread between the tension disks.
5. Turn the handwheel toward you until the lower looper extends 5-10mm
(approximately ½ inch) from the needle plate edge.
6. Thread the looper area of the machine following the green color coded
thread guides 4-9.
Five-Thread Safety Stitch Narrow page 7
7. Thread the hole in the Upper Looper from front to back . Pull about 4
inches of thread through the looper and place to the back of the
throat plate.
Thread Lower Looper with regular overlock thread.
1. Raise the Presser Foot to release the Tension disks. Thread the Lower
Looper as illustrated 1-10.
2. Pass thread from back to the front
through the thread guide .
3. Thread the top cover thread guide by pulling the thread towards the left until
it slips under the guide. Then pull the thread along the right side of the
button as illustrated.
Five-Thread Safety Stitch Narrow page 8
4. While holding the thread firmly, pull the thread between the tension disks.
5. Turn the handwheel toward you until the lower looper extends 5-10mm
(approximately ½ inch) from the needle plate edge.
6. Thread the looper area of the machine following the red color coded
thread guides 4-10.
7. Place the thread slighty from left and
to the right of threading guide .
8. Place the thread slightly from the
front and to the back of threading
guide .
9. Place the thread through
,
and
.
Five-Thread Safety Stitch Narrow page 9
10. Thread the looper eye (A) from front to back. Pull about 4 inches of thread.
Position thread into V cutout (B) on threader. Firmly hold thread tail with left
hand and pull Threader lever (C) up into place (D).
“V” cutout
Threader Lever
NOTE: Make sure the Upper Looper thread is
behind the Lower Looper thread.
Five-Thread Safety Stitch Narrow page 10
Thread Chainstitch Looper with regular
overlock thread.
1. Raise the Presser Foot to release the
tension disks. Pass the thread from
the back to the front through the
thread guide .
2.Thread the top cover thread guide by pulling the thread towards the left until
it slips under the guide. Then pull thread along the right side of the button
as illustrated.
3. While holding the thread firmly, pull the thread between the tension disks.
Five-Thread Safety Stitch Narrow page 11
4. Turn the hand wheel toward you until the Chainstitch Looper extends out
10mm (approximately ½ inch) from the needle plate edge.
5. Thread the looper area of the machine following the brown color-coded
thread guides 4-11. Use the tweezers provided in the accessory case to
aid in threading the looper.
6. Place the thread through threading guide
7. Continue threading guides
,
,
and
and
.
.
8. Thread the looper eye (A) from front to
back. Pull about 4 inches of thread
through the looper. Position the thread into
the V cutout (B) on the threader. Firmly
hold the thread tail with your left hand and
pull threader lever (C) up into place (D).
Gently pull 5-6” of thread to the back of the
machine.
“V” cutout
Threader lever
Five-Thread Safety Stitch Narrow page 12
Thread Right Overedge needle with regualar overlock thread.
1. Raise the Presser Foot to release the tension disks. Thread the right
needle as illustrated 1-9.
2. Pass thread from back to the front
through the thread guide .
3. Thread the top cover thread guide by pulling the thread towards the left until
it slips under the guide. Then pull the thread along the right side of the
button as illustrated.
4. Continue to thread points 4-8. Slip the thread into the rear slot of the
thread guide . Go over the take up lever . Continue by slipping the
thread into the right slot of the thread guides and .
Five-Thread Safety Stitch Narrow page 13
5. Before threading the eye of the needle, make sure the thread is behind
the thread guide located on the bottom of the needle clamp.
6. Thread the eye of the Right Overedge Needle
.
Thread Middle Cover stitch needle with regular overlock thread.
1. Raise the Presser Foot to release the tension disks. Thread the Cover
Stitch Middle/Chain Stitch needle as illustrated 1-9.
2. Pass thread from back to the front
through the thread guide .
Five-Thread Safety Stitch Narrow page 14
3. Thread the top cover thread guide by pulling the thread towards the left until
it slips under the guide. Then pull the thread along the right side of the button
as illustrated.
4. While holding the thread firmly, pull the thread between the tension disks.
5. Continue to thread points 4-8. Slip the thread into the middle slot of the
thread guide . Go over the take up lever . Continue by slipping the
thread into the middle slot of the thread guides and .
Five-Thread Safety Stitch Narrow page 15
6. Before threading the eye of the needle, make sure the thread is in front of
the thread guide located on the bottom of the needle clamp for the Cover
Stitch or Chainstitch.
7. Thread the eye of the middle needle
.
8. Draw about 4 inches of the thread through the needle eye towards the back
of the machine.
9. Place the thread to the back, under the Presser Foot. Lower foot and sew.
Five-Thread Safety Stitch Narrow page 16
Place two pieces of terrycloth right
sides together.
Align the fabric so that that the
knife just slightly trims the fabric
edge.
Sew.
Five-Thread Safety Stitch Wide page 17
Chapter 11:
Cover Hem (Cover Stitch) Narrow
Cover Hem Narrow
This professional Cover Hem is a necessary requirement for today’s sewing.
The stitch is often seen in ready-to-wear garments. Two needles create parallel
rows of topstitching and one looper sews an edge finish on the underneath side.
Depending on which needle position is selected, the width can be 5.6mm wide or
2.8mm wide.
Middle Cover Needle Thread
Left Cover Needle Thread
Cover Stitch Looper Thread
Cover Hem Narrow page 1
Needles:
Set-up:
ATD:
Auto Tension Dial
“K”
Left Cover Stitch
Needle “C” (Orange)
Threaded
Middle Cover Stitch
Needle “D” (Blue)
Threaded
Right Cover Stitch
“E” Needle
Not Threaded
Overedge Left
“A” Needle
Not Threaded
Overedge Right
“B” Needle
Not Threaded
Upper Looper
(Green)
Spreader
Lower Looper
Looper
Disengaged and
Not Threaded
Not Used
Not Threaded
Chain Stitch Looper
(Brown)
Threaded
Upper Looper Clutch
“C”
Upper Knife
Seam Guide Plate
Non-working
Position
Installed
Seam Width Dial
“N”
Stitch Length Dial
“N”
Presser Foot
Pressure
“N”
Differential Feed Dial
“N”
Stitch Finger
“R”
Cover Hem Narrow page 2
Cover Hem Narrow
Turn Auto Tension Dial to “K”.
Turn Stitch Length Dial to “2.5”.
Disengage Upper Knife. The knife will not trim the fabric when it is disengaged.
1. Open Looper Cover.
2. Pull the movable knife holder (silver screw) to the right as far as it will go.
3. Turn the holder counter clockwise until the knife clicks into a lock
position.
Upper Knife Engaged
Upper Knife Disengaged
Cover Hem Narrow page 3
Turn Presser Foot
Pressure Dial to “N”.
Turn Differential Feed
Dial to “N”.
Turn Seam Width Dial
to “N”.
Set Stitch Finger to “R”.
Cover Hem Narrow page 4
Install the Seam Guide Plate. The Seam Guide Plate provides a flat surface for the
fabric and seam guides. It can only be used when the knife and the lower looper are
disengaged. The Seam Guide Plate is used when sewing the Chainstitch, Cover
Stitch and the Triple Cover Stitch.
1. Open looper cover.
2. Remove Knife Cover by pulling it toward you.
3. Slide the Seam Guide Plate into place.
Disengage Upper Looper. By disengaging the Upper Looper, the looper no longer
moves when sewing. It is nonoperative. If the looper was still engaged it would hit
the Seam Guide Plate.
1. Turn handwheel until the Upper Looper is in the
highest position.
2. Push the clutch button to the left and up to
disengage.
Upper Looper Engaged
Upper Looper Disengaged
Cover Hem Narrow page 5
Thread Chainstitch Looper with a regular
overlock thread.
1. Raise the Presser Foot to release the
tension disks. Pass the thread from
the back to the front through the
thread guide .
2. Thread the top cover thread guide by pulling the thread towards the left until
it slips under the guide. Then pull thread along the right side of the button
as illustrated.
3. While holding the thread firmly, pull the thread between the tension disks.
Cover Hem Narrow page 6
4. Turn the hand wheel toward you until the Chainstitch Looper extends out
10mm (approximately ½ inch) from the needle plate edge.
5. Thread the looper area of the machine following the brown color-coded
thread guides 4-11. Use the tweezers provided in the accessory case to
aid in threading the looper.
6. Place the thread through threading guides
7. Continue threading guides
,
,
and
and
.
8. Thread the looper eye (A) from front to
back. Pull about 4 inches of thread
through the looper. Position the thread into
the V cutout (B) on the threader. Firmly
hold the thread tail with your left hand and
pull threader lever (C) up into place (D).
Gently pull 5-6” of thread to the back of the
machine.
“V” cutout
Threader Lever
Cover Hem Narrow page 7
.
Thread Middle Cover needle with regular
overlock thread.
1. Raise the Presser Foot to release the
tension disks. Thread the Cover
Stitch Middle/Chain Stitch needle as
illustrated 1-9.
2. Pass thread from back to the front
through the thread guide .
3. Thread the top cover thread guide by pulling the thread towards the left until
it slips under the guide. Then pull the thread along the right side of the button
as illustrated.
4. While holding the thread firmly, pull the thread between the tension disks.
Cover Hem Narrow page 8
5. Continue to thread points 4-8. Slip the thread into the middle slot of the
thread guide . Go over the take up lever . Continue by slipping the
thread into the middle slot of the thread guides and .
6. Before threading the eye of the needle, make sure the thread is in front of
the thread guide located on the bottom of the needle clamp for the Cover
Stitch or Chainstitch.
6
7
4
8
5
7. Thread the eye of the middle needle
.
8. Draw about 4 inches of the thread through the needle eye towards the back
of the machine.
9. Place the thread to the back, under the Presser Foot. Lower foot and sew.
Cover Hem Narrow page 9
Thread Left Cover Stitch needle with regular thread.
1. Raise the Presser Foot to release the tension disks. Thread the
left needle as illustrated 1-9.
2. Pass thread from back to the front
through the thread guide .
3. Thread the top cover thread guide by pulling the thread towards the left until
it slips under the guide. Then pull the thread along the right side of the
button as illustrated.
4. While holding the thread firmly, pull the thread between the tension disks.
Cover Hem Narrow page 10
5. Continue to thread points 4-8. Slip the thread into the forward slot of the
thread guide . Go over the take up lever . Continue by slipping the
thread into the left slot of the thread guides and .
6. Before threading the eye of the needle, make sure the thread is in front of
the thread guide located on the bottom of the needle clamp.
7. Thread the eye of the Left Cover Stitch Needle
.
8. Draw about 4 inches of the thread through the needle eye towards the back
of the machine.
9. Place the thread to the back, under the Presser Foot. Lower foot and sew.
Cover Hem Narrow page 11
Press a 1” hem into a knit fabric.
Lift the Presser Foot to the highest
position.
Position the fabric right side up and under
the needles.
Align the fabric so that that the fabric fold is
1” to the right of the needles. Use markings
on cover for positioning and guiding fabric.
Lower the Presser Foot.
Turn the handwheel to assist in the stitch
forming on the fabric. When sewing the
Cover Hem Stitch it is necessary to have
fabric under the needles while sewing.
Sew, using the seam guides for a straight
hem and to ensure the fabric’s raw edge
is finished.
As the machine sews it will finish the fabric’s
raw edge and sew two rows of topstitching.
Cover Hem Narrow page 12
Chapter 12:
Cover Hem (Cover Stitch) Wide
Cover Hem Wide
This professional Cover Hem stitch is a necessary requirement for today’s sewing.
The stitch is often seen in ready-to-wear garments. Two needles create parallel
rows of top stitching and one looper sew an edge finish on the underneath side.
Depending on which needle position is selected the width can be 5.6mm wide or
2.8 mm wide.
Left Cover Needle Thread
Right Cover Needle Thread
Cover Stitch Looper Thread
Cover Hem Wide page 1
Needle:
Set at:
ATD:
Auto Tension Dial
Left Cover Stitch
Needle “C” (Orange)
“H”
Threaded
Middle Cover Stitch Needle “D”
Not Threaded
Right Cover Stitch
Needle “E” (Green)
Threaded
Overedge Left
Needle “A” (Orange)
Threaded
Overedge Right
Needle “B” (Blue)
Threaded
Upper Looper
Spreader
Lower Looper
Chain Stitch Looper
(Brown)
Upper Looper Clutch
Upper Knife
Seam Guide Plate
Looper Disengaged
and Not Threaded
Not Used
Not Threaded
Threaded
“C”
Non-working
Position
Installed
Seam Width Dial
“N”
Stitch Length Dial
“N”
Presser Foot
Pressure
“N”
Differential Feed Dial
“N”
Stitch Finger
“R”
Cover Hem Wide part 1
Double Chain Stitch
Turn Auto Tension Dial to “H”.
Turn Stitch Length Dial to “N”.
Disengage Upper Knife. The knife will not trim the fabric when it is disengaged.
1. Open Looper Cover.
2. Pull the movable knife holder (silver screw) to the right as far as it will go.
3. Turn the holder counter clockwise until the knife clicks into a lock
position.
Upper Knife Engaged
Upper Knife Disengaged
Cover Hem Narrow page 3
Turn Presser Foot
Pressure Dial to “N”.
Turn Differential Feed
Dial to “N”.
Turn Seam Width Dial
to “N”.
Set Stitch Finger to “R”.
Cover Hem Wide page 4
Install the Seam Guide Plate. The Seam Guide Plate provides a flat surface for the
fabric and seam guides. It can only be used when the knife and the lower looper are
disengaged. The Seam Guide Plate is used when sewing the Chainstitch, Cover
Stitch and the Triple Cover Stitch.
1. Open Looper Cover.
2. Remove Knife Cover by pulling it toward you.
3. Slide the Seam Guide Plate into place.
Disengage Upper Looper. By disengaging the Upper Looper the looper no longer
moves when sewing, it is nonoperative. If the looper was still engaged it would hit
the Seam Guide Plate.
1. Turn handwheel until the Upper Looper is in the
highest position.
2. Push the clutch button to the left and up to
disengage.
Upper Looper Engaged
Upper Looper Disengaged
Cover Hem Wide page 5
Thread Chainstitch Looper with a regular
overlock thread.
1. Raise the Presser Foot to release the
tension disks. Pass the thread from
the back to the front through the
thread guide .
2.Thread the top cover thread guide by pulling the thread towards the left until
it slips under the guide. Then pull thread along the right side of the button
as illustrated.
3. While holding the thread firmly, pull the thread between the tension disks.
Cover Hem Wide page 6
4. Turn the hand wheel toward you until the Chainstitch Looper extends out
10mm (approximately ½ inch) from the needle plate edge.
5. Thread the looper area of the machine following the brown color-coded
thread guides 4-11. Use the tweezers provided in the accessory case to
aid in threading the looper.
6. Place the thread through threading guide
7. Continue threading
guides , , and
and
.
.
8. Thread the looper eye (A) from front to back. Pull about 4 inches of thread
through the looper. Position the thread into the V cutout (B) on the threader.
Firmly hold the thread tail with your left hand and pull threader lever (C) up
into place (D). Gently pull 5-6” of thread to the back of the machine.
“V” cutout
Threader Lever
Cover Hem Wide page 7
Thread Right Cover Stitch needle with regular thread.
1. Raise the Presser Foot to release the tension disks. Thread the
left needle as illustrated 1-9.
2. Pass thread from back to the front
through the thread guide .
3. Thread the top cover thread guide by pulling the thread towards the left until
it slips under the guide. Then pull the thread along the right side of the
button as illustrated.
4. While holding the thread firmly, pull the thread between the tension disks.
Cover Hem Wide page 8
5. Continue to thread points 4-8. Slip the thread into the middle slot of the
thread guide . Go over the take up lever . Continue by slipping the
thread into the middle slot of the thread guides and .
6. Before threading the eye of the needle, make sure the thread is in front of
the thread guide located on the bottom of the needle clamp.
7. Thread the eye of the Right Cover Stitch Needle
.
8. Draw about 4 inches of the thread through the needle eye towards the back
of the machine.
9. Place the thread to the back, under the Presser Foot. Lower foot and sew.
Cover Hem Wide page 9
Thread Left Cover Stitch needle with regular thread.
1. Raise the Presser Foot to release the tension disks. Thread the
left needle as illustrated 1-9.
2. Pass thread from back to the front
through the thread guide .
3. Thread the top cover thread guide by pulling the thread towards the left until
it slips under the guide. Then pull the thread along the right side of the
button as illustrated.
4. While holding the thread firmly, pull the thread between the tension disks.
Cover Hem Wide page 10
5. Continue to thread points 4-8. Slip the thread into the front slot of the
thread guide . Go over the take up lever . Continue by slipping the
thread into the left slots of the thread guides and .
6. Before threading the eye of the needle, make sure the thread is in front of
the thread guide located on the bottom of the needle clamp.
7. Thread the eye of the Left Cover Stitch Needle
.
8. Draw about 4 inches of the thread through the needle eye towards the back
of the machine.
9. Place the thread to the back, under the Presser Foot. Lower foot and sew.
Cover Hem Wide page 11
Press a 1” hem into a knit fabric.
Lift the Presser Foot to the highest
position.
Position the fabric right side up and under
the needles.
Align the fabric so that that the fabric fold is
1” to the right of the needles.
Lower the Presser Foot.
Turn the handwheel to assist in the stitch
forming on the fabric. When sewing the
Cover Hem Stitch it is necessary to have
fabric under the needles while sewing. Sew
off onto a scrap fabric.
Sew using the seam guides for a straight
hem and to ensure the fabric’s raw edge is
finished.
As the machine sews it will finish the fabic’s
raw edge and sew three rows of topstitching.
Cover Hem Wide page 12
Chapter 13:
Triple Cover Hem Stitch
Triple Cover Hem
This innovative stitch provides a very wide 5.6 mm professional and creative triple
topstitch to sewing projects. Three needles create parallel rows of topstitching and
one looper sews an edge finish on the underneath side. This is ideal for heavier
fabrics traditionally used in home decorating. It also adds a unique accent for
garment construction. In addition to sewing on woven fabrics, the Triple Cover Hem
makes a beautiful topstitch and a strong hem on stretch fabrics. This stitch emulates
hem finishing as seen on ready-to-wear garments.
:
Triple Cover Hem page 1
Needles:
Set at:
ATD:
Auto Tension Dial
“J”
Left Cover Stitch
Needle “C” (Orange)
Threaded
Middle Cover Stitch Needle “D” (Blue)
Threaded
Right Cover Stitch
Needle “E” (Green)
Threaded
Upper Looper
Spreader
Lower Looper
Looper Disengaged
and Not Threaded
Not Used
Not Threaded
Chain Stitch Looper
(Brown)
Threaded
Upper Looper Clutch
“C”
Upper Knife
Seam Guide Plate
Non-working
Position
Installed
Seam Width Dial
“N”
Stitch Length Dial
“N”
Presser Foot
Pressure
“N”
Differential Feed Dial
“N”
Stitch Finger
“R”
Triple Cover Hem page 2
Turn Auto Tension Dial to “J”.
Turn Stitch Length Dial to “N”.
Disengage Upper Knife. The knife will not trim the fabric when it is disengaged.
1. Open Looper Cover.
2. Pull the movable knife holder (silver screw) to the right as far as it will go.
3. Turn the holder counter clockwise until the knife clicks into a lock
position.
Upper Knife Engaged
Upper Knife Disengaged
Triple Cover Hem page 4
Turn Presser Foot
Pressure Dial to “N”.
Turn Differential Feed
Dial to “N”.
Turn Seam Width Dial
to “N”.
Set Stitch Finger to “R”.
Triple Cover Hem page 4
Install the Seam Guide Plate. The Seam Guide Plate provides a flat surface for the
fabric and seam guides. It can only be used when the knife and the lower looper are
disengaged. The Seam Guide Plate is used when sewing the Chainstitch, Cover
Stitch and the Triple Cover Stitch.
1. Open Looper Cover.
2. Remove Knife Cover by pulling it toward you.
3. Slide the Seam Guide Plate into place.
Disengage Upper Looper. By disengaging the Upper Looper the looper no longer
moves when sewing. It is nonoperative. If the looper was still engaged it would hit
the Seam Guide Plate.
1. Turn handwheel until the Upper Looper is in the
highest position.
2. Push the clutch button to the left and up to
disengage.
Upper Looper Engaged
Upper Looper Disengaged
Triple Cover Hem page 5
Thread Chainstitch Looper with a regular
overlock thread.
1. Raise the Presser Foot to release the
tension disks. Pass the thread from
the back to the front through the
thread guide .
2. Thread the top cover thread guide by pulling the thread towards the left until
it slips under the guide. Then pull thread along the right side of the button
as illustrated.
3. While holding the thread firmly, pull the thread between the tension disks.
Triple Cover Hem page 6
4. Turn the hand wheel toward you until the Chainstitch Looper extends out
10mm (approximately ½ inch) from the needle plate edge.
5. Thread the looper area of the machine following the brown color-coded
thread guides 4-11. Use the tweezers provided in the accessory case to
aid in threading the looper.
6. Place the thread through threading guides
7. Continue threading
guides , , and
and
.
.
8. Thread the looper eye (A) from front to back. Pull about 4 inches of thread
through the looper. Position the thread into the V cutout (B) on the threader.
Firmly hold the thread tail with your left hand and pull threader lever (C) up
into place (D). Gently pull 5-6” of thread to the back of the machine.
“V” cutout
Threader Lever
Triple Cover Hem page 7
Thread Right Cover Stitch needle with regular thread.
1. Raise the Presser Foot to release the tension disks. Thread the
left needle as illustrated 1-9.
2. Pass thread from back to the front
through the thread guide .
3. Thread the top cover thread guide by pulling the thread towards the left until
it slips under the guide. Then pull the thread along the right side of the
button as illustrated.
4. While holding the thread firmly, pull the thread between the tension disks.
Triple Cover Hem page 8
5. Continue to thread points 4-8. Slip the thread into the rear slot of the
thread guide . Go over the take up lever . Continue by slipping the
thread into the right slot of the thread guides and .
6. Before threading the eye of the needle, make sure the thread is in front of
the thread guide located on the bottom of the needle clamp.
7. Thread the eye of the Right Cover Stitch Needle
.
8. Draw about 4 inches of the thread through the needle eye towards the back
of the machine.
9. Place the thread to the back, under the Presser Foot. Lower foot and sew.
Triple Cover Hem page 9
Thread Middle Cover needle with regular
overlock thread.
1. Raise the Presser Foot to release the
tension disks. Thread the Cover
Stitch Middle/Chain Stitch needle as
illustrated 1-9.
2. Pass thread from back to the front
through the thread guide .
3. Thread the top cover thread guide by pulling the thread towards the left until
it slips under the guide. Then pull the thread along the right side of the button
as illustrated.
4. While holding the thread, firmly pull the thread between the tension disks.
Triple Cover Hem page 10
5. Continue to thread points 4-8. Slip the thread into the middle slot of the
thread guide . Go over the take up lever . Continue by slipping the
thread into the middle slot of the thread guides and .
6. Before threading the eye of the needle, make sure the thread is in front of
the thread guide located on the bottom of the needle clamp for the Cover
Stitch or Chainstitch.
6
7
4
8
5
7. Thread the eye of the middle needle
.
8. Draw about 4 inches of the thread through the needle eye towards the back
of the machine.
9. Place the thread to the back, under the Presser Foot. Lower foot and sew.
Triple Cover Hem page 11
Thread Left Cover Stitch needle with regular thread.
1. Raise the Presser Foot to release the tension disks. Thread the
left needle as illustrated 1-9.
2. Pass thread from back to the front
through the thread guide .
3. Thread the top cover thread guide by pulling the thread towards the left until
it slips under the guide. Then pull the thread along the right side of the
button as illustrated.
4. While holding the thread firmly, pull the thread between the tension disks.
Triple Cover Hem page 12
5. Continue to thread points 4-8. Slip the thread into the forward slot of the
thread guide . Go over the take up lever . Continue by slipping the
thread into the left slot of the thread guides and .
6. Before threading the eye of the needle, make sure the thread is in front of
the thread guide located on the bottom of the needle clamp.
7. Thread the eye of the Left Cover Stitch Needle
.
8. Draw about 4 inches of the thread through the needle eye towards the back
of the machine.
9. Place the thread to the back, under the Presser Foot. Lower foot and sew.
Triple Cover Hem page 13
Press a 3” hem into a woven home
decorator fabric.
Lift the Presser Foot to the highest
position.
Position the fabric right side up and
under the needles.
Align the fabric so that that the fabric
fold is 1” to the right of the needles.
Lower the Presser Foot.
Turn the handwheel to assist in the stitch
forming on the fabric. When sewing the
Triple Hem Stitch it is necessary to have
fabric under the needles while sewing.
Sew using the seam guides for a straight
hem and to ensure the fabric’s raw edge
is finished.
As the machine sews it will finish the
fabic’s raw edge and sew three
rows of topstitching.
Triple Cover Hem page 14
Chapter 14:
Three-Thread Rolled Hem
Three-Thread Rolled Hem
The Rolled Hem Stitch is used to finish edges of scarves, ruffles, table linens, and
some garments. It is suitable for lightweight to medium weight fabrics, such as sheers,
silkies and broadcloth. Beautiful pintucks can be achieved with the rolled hem. They
can enhance a yoke, heirloom sewing, wearable art and even home decorating
projects. Note: Rolled hemming can only be performed with the Right Overedge
needle all other needles must be removed.
Right Overedge Needle Thread
Lower Looper Thread
Upper Looper Thread
Three-Thread Rolled Hem Page 1
Needles:
Set at:
ATD:
Auto Tension Dial
“C”
Left Cover Stitch
Needle “C”
Not Threaded
Middle Cover Stitch
Needle “D”
Not Threaded
Right Cover Stitch
Needle “E”
Not Threaded
Overedge Left
Needle “A”
Not Threaded
Overedge Right
Needle “B” (Blue)
Upper Looper
(Green)
Threaded
Looper Engaged
and Threaded
Spreader
Not Used
Lower Looper
(Red)
Threaded
Chain Stitch Looper
(Brown)
Upper Looper Clutch
Upper Knife
Seam Guide Plate
Not Threaded
“L”
Engaged
Not Installed
Use Knife Cover
Seam Width Dial
“N”
Stitch Length Dial
“1”
Presser Foot
Pressure
“N”
Differential Feed Dial
“N”
Stitch Finger
“R”
Three-Thread Rolled Hem Page 2
Turn Auto Tension Dial to “C”.
Turn Stitch Length Dial to “1”.
Engage Upper Knife. The knife will not trim the fabric when it is disengaged.
1. Open Looper Cover.
2. Pull the movable knife holder (silver screw) to the right as far as it will go.
3. Turn the holder clockwise until the knife clicks into a lock position.
Upper Knife Disengaged
Three-Thread Rolled Hem Page 3
Upper Knife Engaged
Turn Presser Foot
Pressure Dial to “N”.
Turn Differential Feed
Dial to “N”.
Turn Seam Width Dial
to “N”.
Set Stitch Finger to “R”.
Three-Thread Rolled Hem Page 4
Install the Knife Cover.
Engage Upper Looper. Engaging the Upper Looper causes the looper to move
when sewing. Even though the Upper Looper is not threaded it needs to be
engaged.
1. Push the clutch button to the left and down to engage.
2. Turn handwheel.
Upper Looper Disengaged
Upper Looper Engaged
Three-Thread Rolled Hem Page 5
Disengage Spreader. The Upper Looper has a hole for the thread on the top of the
looper. If the stitch requires that the looper be engaged, but not threaded then the
Spreader is used. The Spreader simply plugs-in (or closes) the looper’s hole. The
Spreader is disengaged when the Upper Looper is engaged/operative and threaded.
The Spreader is used with a stitch that requires only one looper thread. With
the help of the Spreader the single looper thread wraps around the fabric’s edge.
1. Lower the white handle on the Spreader to open the eye of the Upper
Looper.
Eye of Looper
Spreader Engaged
Thread Upper Looper with regular overlock thread.
1. Raise the Presser Foot to release
the tension disks. Thread the Lower
Looper as illustrated 1-9.
2. Pass thread from back to the
front through the thread
guide .
Three-Thread Rolled Hem Page 6
Spreader Disengaged
3. Thread the top cover thread guide by pulling the thread towards the left until
it slips under the guide. Then pull the thread along the right side of the
button as illustrated.
4. While holding the thread firmly, pull the thread between the tension disks.
5. Turn the handwheel toward you until the lower looper extends 5-10mm
(approximately ½ inch) from the needle plate edge.
6. Thread the looper area of the machine following the green color coded
thread guides 4-9.
Three-Thread Rolled Hem Page 7
7. Thread the hole in the Upper Looper from front to back . Pull about 4
inches of thread through the looper and place to the back of the
throat plate.
Thread Lower Looper with regular overlock thread.
1. Raise the Presser Foot to release the tension disks. Thread the
Lower Looper as illustrated 1-10.
2. Pass thread from back to the front
through the thread guide .
3. Thread the top cover thread guide by pulling the thread towards the left until
it slips under the guide. Then pull the thread along the right side of the
button as illustrated.
Three-Thread Rolled Hem Page 8
4. While holding the thread firmly, pull the thread between the tension disks.
5. Turn the handwheel toward you until the lower looper extends 5-10mm
(approximately ½ inch) from the needle plate edge.
6. Thread the looper area of the machine following the red color coded
thread guides 4-10.
7. Place the thread slighty from left and
to the right of threading guide .
8. Place the thread slightly from the
front and to the back of threading
guide .
9. Place the thread through
,
and
.
Three-Thread Rolled Hem Page 9
10. Thread the looper eye (A) from front to back. Pull about 4 inches of thread.
Position thread into V cutout (B) on threader. Firmly hold thread tail with left
hand and pull Threader lever (C) up into place (D).
“V” cutout
Threader Lever
NOTE: Make sure the Upper Looper thread is
behind the Lower Looper thread.
Three-Thread Rolled Hem Page 10
Thread Right Overedge needle with regular overlock thread.
1. Raise the Presser Foot to release the tension disks. Thread the right
needle as illustrated 1-9.
2. Pass thread from back to the front
through the thread guide .
3. Thread the top cover thread guide by pulling the thread towards the left until
it slips under the guide. Then pull the thread along the right side of the
button as illustrated.
4. While holding the thread firmly, pull the thread between the tension disks.
Three-Thread Rolled Hem Page 11
5. Continue to thread points 4-8. Slip the thread into the rear slot of the
thread guide . Go over the take up lever . Continue by slipping the
thread into the right slots of the thread guides and .
8. Before threading the eye of the needle, make sure the thread is
behind the thread guide located on the bottom of the needle clamp.
9. Draw about 4 inches of the thread through the needle eye towards the back
of the machine.
10. Place the thread to the back, under the Presser Foot. Lower foot and sew.
Three-Thread Rolled Hem Page 12
Align a piece of lightweight fabric so
that the fabric’s edge is being slightly
trimmed by the knife.
Sew.
Three-Thread Rolled Hem Page 13
Chapter 15:
Additional Presser Feet
BLIND HEM FOOT
The Blind Hem Foot is used for hemming skirts, pants and other sewing projects
in one easy operation. It is recommended for use on stretch or textured fabrics.
1
2
Machine Preparation
• Differential Feed:
• Needles:
• Upper Knife:
• Stitch Length:
• Foot:
Set to “N”
Use the right needle only
Engaged
Set to 3 or 4
Attach (snap-on) Blind Hem Foot
Sewing Instructions
• Fold fabric as illustrated, and insert it under the presser foot
• Line up the edge of the fold with the guide plate (2)
• Adjust the positioning of the fold of the fabric with the adjustment screw (1)
• The fold of the fabric must always be in line with the left needle
• Begin to sew, keeping the fold of the fabric along guide plate (2)
Additional Presser Feet page 1
CORDING FOOT
The Cording Foot is used for sewing piping (cording) between two layers of
fabric in one easy operation.
Machine Preparation
• Differential Feed:
• Needles:
• Upper Knife:
• Stitch Length:
• Foot:
Set to “N”
You may use both the right and left needle, or left only
Engaged
Set to “N”
Attach (snap-on) Cording Foot
Sewing Instructions
• Raise the presser foot
• Set the needle(s) at the highest position
• Layer the piping between the two layers of fabric so that the piped edge lays towards the
inside of the fabric
• Line up the edge of the fabric along the upper knife
• The piping (cording) must line up with the groove in the presser foot (guide 1)
• Lower the presser foot and begin to sew
Note: Make sure the piping follows the groove of the Cording Foot as you sew.
Additional Presser Feet page 2
ELASTIC FOOT
The Elastic Foot is used for inserting elastic into a seam. It can be used for
swimwear, lingerie and other sewing projects.
Machine Preparation
• Differential Feed:
• Needles:
•
• Upper Knife:
• Stitch Length:
• Foot:
Set to “N”
Use both the right & left needle for wider elastic, right needle for narrow
elastic
Engaged
Set to 3 or 4
Attach (snap-on) elastic foot
Sewing Instructions
• Set the needles at the highest position
• Raise the presser foot
• Loosen screw (2), which will allow the brake (1) to be raised
• Insert the elastic tape (3) into the foot under the brake and run it through to the back of the foot
• Tighten screw (2); the more you tighten, the more pressure will be added to the brake (1),
causing the elastic to stretch even more
• Lay the seam under the presser foot, lining up the fabric to sew a 5/8” seam
• Lower the presser foot and begin to sew
• When seam is complete, continue to sew over the elastic for approximately 1 to 2 inches. Cut
elastic and remove from machine.
Additional Presser Feet page 3
BEADING FOOT
The Beading Foot is used for sewing on beads, sequins, pearls and thick cord.
Machine Preparation
• Differential Feed: Set to “N”
• Needles:
Use left needle for large beads, or right needle for smaller beads
• Upper Knife:
You may choose to work with or without the upper knife (If engaging
the knife, be careful not to cut the beads as you sew)
• Stitch Length:
Set to 3 or 4
• Foot:
Attach (snap-on) Beading Foot
Sewing Instructions
• Pull the beads along guides 1 and 2 through the back of the foot
• Raise the presser foot and place fabric under the foot, with the edge of the fabric lined up
with the edge of the Beading Foot
• Lower presser foot and begin sewing, slowly at first to make sure the beads are well positioned
Note: The needle should penetrate the fabric at 1.5mm away from the edge.
Additional Presser Feet page 4
TAPING FOOT
The Taping Foot is used for inserting a tape into seams that will stretch easily.
Inserting the tape will stabilize the seam.
3
Machine Preparation
• Differential Feed:
• Needles:
• Upper Knife:
• Stitch Length:
• Foot:
Set to “N”
Use both the right and left needle
Engaged
Set to “N”
Attach (snap-on) Taping Foot
Sewing Instructions
• Set the needles at the highest position
• Raise the presser foot
• Insert the tape into the guide (1), and pull it through to the back of the foot
• You may adjust the position of the tape in relationship to the needles by turning the adjusting screw (3)
• Lay the seam under the presser foot, lining up the fabric to sew a 5/8” seam
• Lower the presser foot and begin to sew
Additional Presser Feet page 4
SHIRRING FOOT
The Shirring Foot is used for shirring or gathering. Use it on home decorating
accessories or clothing. This foot provides best results when used with
lightweight and sheer fabrics.
Machine Preparation
• Differential Feed:
• Needles:
• Upper knife:
• Stitch Length:
• Foot:
Set to the maximum (highest number ) for gathering
You may use either the left or right, or both needles
Engaged
Set to 3 or 4
Attach (snap-on) Shirring Foot
Sewing Instructions
• Raise the presser foot
• Set the needle(s) at the highest position
• Place bottom layer of fabric under the presser foot (1). This is the fabric that will be gathered.
• Place the top layer of fabric (2) into opening (3) located at the front of the Shirring Foot, making
sure edges of both the top and bottom layer of fabrics line up
• Lower the presser foot and begin to sew
Additional Presser Feet page 6