1
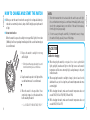
English
ENGLISH
FEATURES
CONTENTS
page
FEATURES....................................................................................................... 5
HOW TO CHARGE AND START THE WATCH............................................... 6
TIME/CALENDAR SETTING........................................................................... 8
GUIDELINE OF CHARGING TIME/ACCURACY............................................ 10
ENERGY DEPLETION FOREWARNING FUNCTION..................................... 12
NOTE ON POWER SUPPLY............................................................................ 13
HOW TO OPERATE THE SCREW LOCK TYPE CROWN ............................. 13
ROTATING BEZEL........................................................................................... 14
SPECIFICATIONS............................................................................................ 15
I For the care of your watch, see “TO PRESERVE THE QUALITY OF
YOUR WATCH” in the attached Worldwide Guarantee and Instruction
Booklet.
English
CAL. V110, V111, V145, V181 & V182
n POWERED BY LIGHT ENERGY
n NO NEED FOR BATTERY CHANGE
n L AST S FOR 2 TO 6 MONT HS A F T ER FULL C H A RG E ( D EP ENDS ON T H E
CALIBRE)
n ENERGY DEPLETION FOREWARNING FUNCTION (FOR CAL. V111, V145, V181,
V182 ONLY)
n INSTANT-START FUNCTION (FOR CAL. V145, V181, V182 ONLY)
n OVERCHARGING PREVENTION FUNCTION
l Calibre number of your watch
Please check the case back of your watch to
find its calibre number inscribed on it. As
illustrated at right, the calibre number of your
watch is the 4-digit number to the left of the
hyphen mark.
Calibre No.
V145-0A00
AQ
English
1. E x p o s e t h e w a t c h t o s u n l i g h t o r s t r o n g
artificial light.
•
When the watch has stopped operating, the second
hand will start moving at 2-second intervals.
▲
2. Keep the watch exposed to the light until the
second hand moves at 1-second intervals.
▲
3. W h e n t h e w a t c h i s c h a r g e d a f t e r i t h a s
completely stopped, set the date and time
before wearing the watch.
•
See “GUIDELINE OF CHARGING TIME/ACCURACY” .
NOTES:
1. When the instant-start function is activated after the watch is exposed to light,
the second hand starts moving at 2-second intervals immediately, but the energy
stored in the rechargeable battery is not sufficient. If the watch is turned away
from the light, it may stop operating.
2. It is not necessary to charge the watch fully. It is important, however, to charge
the watch sufficiently, especially in case of initial charge.
English
HOW TO CHARGE AND START THE WATCH
● When you start the watch or when the energy in the rechargeable battery is
reduced to an extremely low level, charge it sufficiently by exposing the watch
to light.
● Instant-start function:
When the watch is exposed to sunlight or strong artificial light (of more than
1,000 lux), it will start operating immediately with the second hand moving at
2-second intervals.
CAUTION
Caution for charging
● When charging the watch, do not place it too close to a photoflash
light, spotlight, incandescent light or other light sources as the watch
temperature will become extremely high, causing damage to the parts
inside the watch.
● When exposing the watch to sunlight to charge it, do not leave it on the
dashboard of a car, etc. for a long time, as the watch temperature becomes
extremely high.
● While charging the watch, make sure the watch temperature does not
exceed 50 °C. (For Cal. V110, V145, V181 and V182)
● While charging the watch, make sure the watch temperature does not
exceed 60 °C. (For Cal. V111)
English
l Models with two/three hands
Hour hand
Second hand
1. Pull out the crown to the first click.
2. Turn the crown to set the desired time.
3. Push back the crown completely (in
accordance with a time signal for a
three-hand model.)
Minute hand
l Models with date
1. Pull out the crown to the first click and
set the previous day's date.
Calendar
NOTES:
1. Do not set the date between 9:00 p.m. and 1:00 a.m. Otherwise, it may not
change properly.
• If it is necessary to set the date during that time period, first change the time
to any time outside it, set the date and then reset the correct time.
2. When setting the hour hand, check that AM/PM is correctly set.
• The watch is so designed that the date changes once in 24 hours. Turn the
hands past the 12 o’clock marker to determine whether the watch is set for the
A.M. or P.M. period. If the date changes, the time is set for the A.M. period. If the date does not change, the time is set for the P.M. period.
3. When setting the minute hand, first advance it 4 to 5 minutes ahead of the desired
time and then turn it back to the exact minute.
4. It is necessary to adjust the date at the end of February and 30-day months.
English
TIME/CALENDAR SETTING
2. Pull out the crown to the second click
w he n the s e c on d hand i s a t the 12
o'clock position.
3. Turn the crown until the desired date
appears.
4. Turn the crown to set the hour and
minute hands to the desired time.
5. Push back the crown completely in
accordance with a time signal.
English
V110
V111
V145
Environment/Lightsource (lux)
A (minutes ) B (hours) C (hours) A (minutes) B (hours) C (hours)
A (minutes ) B (hours) C (hours) A (minutes) B (hours) C (hours)
General offices/ Fluorescent light (700)
50
16
140
180
60
-
50
11
175
75
6
82
30W20cm/ Fluorescent light (3000)
11
3.5
30
35
10
180
10
2
40
18
1.3
20
Cloudy weather/Sunlight (10000)
3
0.9
8
12
4
60
3
0.5
10
5
0.3
5
Fair weather/Sunlight (100000)
1
0.3
2
2
0.5
10
1
0.2
3
2
0.2
2.1
Expected life per charge from full
charge to stoppage
Loss/gain (monthly rate)
Operational temperature range
10
u The watch operates while charging
V181/V182
A: Time to charge 1 day of power B: Time required for steady operation
C: Time required for full charge
5 months
6 months
Less than 20 seconds when the watch Less than 15 seconds when the watch
is worn on your wrist at a normal
is worn on your wrist at a normal
temperature range (5 ºC to 35 ºC)
temperature range (5 ºC to 35 ºC)
-5 ºC to 50 ºC
-10 ºC to 60 ºC
6 months
2 months
Less than 20 seconds when the watch is worn on your wrist at a normal
temperature range (5 ºC to 35 ºC)
-5 ºC to 50 ºC
v The above table provides only a general guideline.
electricity by converting light
received on the dial to electrical
energy. It cannot properly operate
unless the remaining energy is
sufficient. Place or store the watch
in a location receiving light etc., to
sufficiently charge electricity.
English
GUIDELINE OF CHARGING TIME/ACCURACY
• When the watch is stopped or
the second hand starts moving
at 2-second intervals (for models
with a second hand,) charge the
watch by exposing it to light.
• The time required for charging
the watch varies depending on
the calibres. Check the caliber
of your watch engraved on the
back cover.
• It is recommended that the
watch be charged for as long as
the charging time "B" to assure
the stable movement of the
watch.
11
English
NOTE ON POWER SUPPLY
● When the energy stored in the rechargeable battery is reduced to an extremely
low level, the second hand starts moving at 2-second intervals instead of the
normal 1-second intervals.
● This watch is provided with a rechargeable battery for exclusive use with
the watch. Unlike conventional battery-powered watches, therefore, battery
replacement is not necessary.
● The solar cell is a clean energy source, having no adverse effect on the natural
environment.
● In that case, recharge the watch as soon as possible by exposing it to light.
Otherwise, the watch may stop operating in about 3 days. (For recharging the
watch, see “HOW TO CHARGE AND START THE WATCH”)
v TO PREVENT THE ENERGY DEPLETION
• When wearing the watch, make sure that the watch is not covered by
clothing.
• When the watch is not in use, leave it in a bright place as long as possible.
* Make sure that the watch temperature does not exceed 50 °C.
English
ENERGY DEPLETION FOREWARNING FUNCTION
CAUTION
● Never insert a conventional silver oxide battery in your watch as it may
explode, generate an intense heat or catch fire. The watch is so designed
that if a wrong bat ter y is installed in the watch, the watch will not
operate.
HOW TO OPERATE THE SCREW LOCK TYPE
CROWN (for models with screw lock type crown)
l To unscrew the crown:
Turn the crown counterclockwise. (Then, pull it out for time/calendar setting)
12
l To screw in the crown:
With the crown at the normal position, turn it clockwise while pressing it.
13
English
SPECIFICATIONS
l The rotating bezel can show up to 60 minutes of elapsed time.
1
2
3
4
5
6
1. Turn the rotating bezel to align its "
mark with the minute hand.
"
2. Read the number on the rotating bezel
that the minute hand points to.
Start
Elapsed time
30 minutes
have elapsed.
Note: For some models, the rotating bezel rotates only counterclockwise.
14
Frequency of crystal oscillator ........... Loss/gain (monthly rate)
For Cal. V110, V145, V181, V182.... For Cal. V111................................... Operational temperature range
For Cal. V110, V145, V181, V182.... For Cal. V111................................... Driving system..................................... Power supply....................................... Additional function
For Cal. V145, V181, V182.............. 32,768 Hz (Hz = Hertz … Cycles per second)
±20 seconds at normal temperature range
(5 °C to 35 °C/ 41 °F to 95 °F)
±15 seconds at normal temperature range
(5 °C to 35 °C/ 41 °F to 95 °F)
English
ROTATING BEZEL (for models with rotating bezel)
–5 °C to 50 °C/ 23 °F to 122 °F
–10 °C to 60 °C/ 14 °F to 140 °F
Step motor
Manganese titanium-lithium rechargeable battery
Instant-start function, energy depletion forewarning
function and overcharging prevention function
For Cal. V111................................... Energy depletion forewarning function and overcharging
prevention function
For Cal. V110...................................... Overcharging prevention function
7 IC (Integrated Circuit) ......................... C-MOS-IC, 1 piece
• The specifications are subject to change without prior notice for product
improvement.
15