1
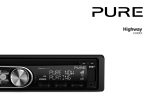
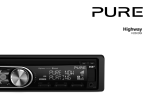
Highway
300Di
Installation Manual
Safety instructions
Warning
Fit the unit and the antenna in a position that does not obscure the driver’s view.
Fit the unit securely.
Do not fit the unit or the antenna in such a way that may interfere with the safe operation of the vehicle, the deployment of air bags or other safety equipment.
Avoid objects or liquids getting into the unit.
Do not remove screws from or open the unit casing.
Do not operate the unit while driving.
Read this manual fully before operating the unit, including all safety notices.
Caution
To reduce the risk of theft, remove the controller from your vehicle, or position it out of sight, before leaving your vehicle unattended.
WARNING
This WARNING symbol is used throughout this manual to indicate a potentially serious risk to your personal safety. Obey all safety notices that accompany this symbol to avoid possible injury or death.
Contents
2
Kit list
3
Considerations before starting
4
Installation checklist
6
Wiring diagram
7
Fit cables and connections
8
Installer settings
8
Spare parts
1
Kit list
The following items are included in the Highway 300Di kit as standard:
•Highway 300Di Controller
•Highway 300Di Main Unit
•Highway 300Di Controller bracket with captive cable
•Highway 300Di Controller mount with adjustable angle
•Wiring loom with ISO connectors
•USB extension lead
•2 x 3.5mm to 3.5mm jack audio cable
•Coaxial FM antenna loop through cable
•Self adhesive controller bracket mounting pad
•Owner’s manual
•Product registration card
2
Considerations before starting
Minimum vehicle requirements
•Fitted audio system including aux-in or FM antenna connection.
•Standard 12V power system - not suitable for 24V systems.
Recommended for best result
•Using an antenna which is grounded to the vehicle bodywork will enhance performance.
•Check that the latest version of software is installed. To find out which version your unit has installed: Press the
button, select Settings > Software update. Visit http://support.pure.com to see if there is a later software version available. Download the file and copy it to a USB stick. For instructions on how to install a
software update see page 15 of the Owner’s manual.
Antenna positioning
•Read the fitting instructions supplied with the chosen antenna carefully for optimum positioning.
•Take care with antenna positioning if the windscreen has a metallic coating, tinting or heating. Specific antenna instructions may apply.
Main unit positioning
Consider length of the controller cable and USB/aux audio extension and possible routing, whether access is required to unit after fitting and distance from
antenna and suitable power connection (avoid using safety critical power circuits such as airbag/ABS system etc).
Controller positioning
•Consider usability and visibility from driving seat, possible mounting points/brackets, cable length and routing to main unit.
•Decide on connection to head unit - aux in or FM and whether FM pass-through is required.
3
Installation checklist
Before installation
•Check that the supplied antenna cable will reach or use a suitable
antenna extension (2.5m cable available from Pure).
•Discuss controller placement with the customer - consider cable length
to attach to controller box and accessibility and visibility from the drivers
seat.
Review car and existing audio installation and discuss options with customer:
Decide on where to mount the main unit and controller:
•Check where the existing tuner is fitted (on some cars this may be in the
boot) and consider where the Highway main unit might be installed.
•Check and agree suitable locations for the USB extension cable
(recommended for all installs as used for iPod/MP3 player connection
and software updates) and optional auxiliary input (3.5 mm) cable.
•Check for auxiliary inputs on the existing audio system which might be
used by Highway
•Discuss controller placement with the customer - consider cable length to
attach to controller box and accessibility and visibility from the drivers seat.
Decide on which antenna type with the customer:
•Best – external digital antenna with grounding to vehicle bodywork (e.g.
Pure Active Through Glass Antenna).
•Good – internal digital antenna with grounding to vehicle bodywork (e.g.
Pure Active Film Antenna).
•Alternative – other antenna – magnetic roof mounted mast or factory
fitted digital antenna.
4
During installation
Make sure the USB extension is installed in a convenient location.
Make sure the 3.5mm auxiliary input cable is installed in a convenient location.
Adjust the FM transmit frequency if required (In Australia this should be set to 88.6 MHz) see page 16 of the Owner’s manual.
After installation
Check that Highway is functioning as expected.
Once correct function of all connections has been checked, fasten connectors to main unit with cable ties as required and securely mount the main unit in place.
Route and tie any cables securely in place and replace any trim panels.
Select Restore defaults from the Settings menu to reset any changes made during testing. (See page 15 of the Owner’s manual).
Update the software installed, if required, see page 3.
Hand over to the owner
Give them the kit (Packaging, Owner’s manual, Registration card)
Explain which installation method has been used and why.
Demo main functions including - Selecting digital stations, changing FM frequency used, connecting and iPod/USB device/aux in.
5
Wiring diagram
Brown
4
12V Permanent battery supply (with series fuse holder) Red
5
Nav_Tel_Audio_GND
Pink
6
12V Switched ignition (with series fuse holder)
Orange
7
Car mute (with crimp)
Yellow
8
Ground
Black
6
Mute
Function
Colour
1
Mute 1 (with crimp)
White
2
Mute 2 (with crimp)
Yellow
3
Mute 3 (with crimp)
Blue
4
12V Switched ignition (with series fuse holder)*
Orange
5
Not used
Green
6
Cabin illumination
Brown
7
12V Permanent battery supply (with series fuse
holder)*
Red
8
Ground
Black
Optional alternative
Highway 300Di
internal film antenna
or mag mount
external antenna**
A
USB extension cable
(supplied)
B ISO connector pins
Pin
Digital Radio
Antenna In
Cabin illumination
FM Antenna In
Grey
3
Antenna Out
Nav_Phone_Mute
Aux In
Purple
2
Line Out
Colour
Nav_Tel_Audio+
Controller
Function
1
Power In
Pin
USB
A Highway 300Di power connector pins
1
3
5
7
2
4
6
8
2
4
6
8
1
3
5
7
Power loom
(supplied)
Fuse holders for
permanent 12V and
switched 12V.*
B
B
5 6 7 8
1 2 3 4
Aux-in cable
(3.5mm
supplied)
Head unit aux-in
connection cable
controller (3.5mm
to dual phono or
3.5mm) †
Existing vehicle
FM antenna†
FM loop-through
cable (supplied)†
Vehicle head unit
Highway 300Di controller bracket (supplied)
Optional Highway 300Di
active antenna with optional
L-band antenna strip**
* On some vehicles switched and permanent live connections may be reversed. Open the fuse holders and swap the connectors if required.
** Highway 300Di only supports approved Pure 5V antennas. Standard 12V automotive digital antennas will not work on Highway 300Di.
† If connected to car stereo aux-in then FM antenna connections to Highway 300Di are not required.
Fit cables and connections
1. Fit USB extension and aux in cables
Route the USB extension (used for MP3/iPod connection) and aux-in
cable form e.g. the glove box, to where you will fit the main unit, as
required. Note that even if this cable is not required for use with music
devices, it is recommended that it is installed to enable easy access to the
USB socket for software updates.
2. Fit connections to the head unit
Slide out the head unit and connect aux-in cable from Highway or connect
the FM pass-through cable and reroute the existing FM antenna cable and
the pass through cable to where you will fit the main unit. Antenna adapters
(Fakra/ISO/DIN) or extensions may be required.
Note: If the Line out connection on Highway is used the FM transmit/pass
through is disabled.
3. Connect the power loom
Connect the supplied loom to the vehicle’s system ensuring the Highway
300Di power connector is positioned where you will fit the main unit.
Note: The supplied loom provides a permanent live and ignition controlled
live feed to Highway but also offers other connections that may not be
required. Ensure any unused wires are safely taped up and securely tied.
4. Mount the controller
1. Run the cable for the controller from where you will fit the main unit
to the desired mounting position e.g. on the dashboard and mount
the bracket as required - either using the supplied sticky pad, swivel
bracket or third party mounting bracket.
2. Once secure - click the controller onto the controller bracket making
sure it is securely mounted.
5. Connect all cables to the main unit
1. Connect all cables to the main unit and trial fit it in place.
2. Slide the head unit back into place.
6. Check operation/setup
1. As soon as the power is connected, Highway 300Di will switch
on automatically, once it has started up it will ask you to select a
language.
2. Turn the Select knob to browse and press the knob to choose your
preferred language.
3. An autotune will be performed to scan for digital stations and Highway
will tune to a digital station when complete.
4. Switch on the head unit and select the aux-in source or FM radio
depending on fitting method.
5. Check all sources/connections work.
7
Installer settings
Installer settings are provided to enable the initial setup, to prevent unintentional
changing, these appear in a hidden menu. To access the installer settings:
1.Press
, , , , in quick succession.
2. Turn the Select knob to browse through the following options and
press the Select knob to choose one.
Antenna input source
Choose the required source depending on the type of antenna you are using:
Connector 8 (powered) Choose this if using the external active antenna or the internal film antenna .
Connector 8 (unpowered) Choose this if using the mag-mount antenna.
Connector 7
Choose this if using an existing car antenna.
Note: Unless the existing car antenna is specifically designed for digital radio
reception, performance is likely to be very poor to unusable.
FM pass-through
Choose from two FM pass-through connection options:
Disabled
Enabled
Highway 300Di output effectively replaces all FM
stations when Highway is switched on (Default).
Highway 300Di output is blended in to the FM
waveband, alongside normal broadcast FM stations.
Software upgrade
Use this option to update Highway 300Di’s software if you have an update
available and loaded on a USB stick. See the Owner’s manual for more details.
Factory reset
Use this option to reset all settings including the installed settings above to
defaults.
Autotune
Performs a scan for digital stations as per initial start-up.
Spare parts
Spares and accessories are available for Highway 300Di. To order a spare part or accessory from the UK, please e-mail: [email protected].
To order a spare part or accessory from Australia, please e-mail: [email protected].
8
www.pure.com
connect.pure.com
www.facebook.com/pure
Pure UK Headquarters
Imagination Technologies Ltd.
Home Park Estate
Kings Langley
Herts, WD4 8LZ
United Kingdom
www.pure.com
http://support.pure.com
Pure Australasia Pty Ltd
PO Box 5049
Wonga Park
Victoria 3115
Australia
[email protected]
http://support.pure.com/au
103YS