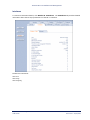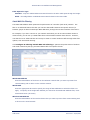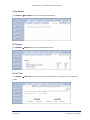
1
TSUNAMI MP.11 Installation and Management CPN 63708 Issue Date: 02/05/2003 Tsunami MP.11 Installation and Management Notices COPYRIGHT ©2003 Proxim Corporation, Sunnyvale, CA. All rights reserved. Covered by one or more of the following U.S. patents: 5,231,634; 5,875,179; 6,006,090; 5,809,060; 6,075,812; 5,077,753. This manual and the software described herein are copyrighted with all rights reserved. No part of this publications may be reproduced, transmitted, transcribed, stored in a retrieval system, or translated into any language in any form by any means without the written permission of Proxim Corporation. TRADEMARKS Tsunami, Proxim, and the Proxim logo are trademarks of Proxim Corporation. All other trademarks mentioned herein are the property of their respective owners. Contents CPN 63708 2 Issue Date: 02/05/2003 Tsunami MP.11 Installation and Management Contents Copyright ................................................................................................................. 2 Trademarks .............................................................................................................. 2 CHAPTER 1. OVERVIEW................................................................................................. 4 Wireless Network Topologies ....................................................................................... 5 CHAPTER 2. INSTALLATION .......................................................................................... 7 Identifying Network Topology and Equipment ................................................................ 7 Finding a Suitable Location ......................................................................................... 7 Installation ............................................................................................................... 8 Switching On the MP.11.............................................................................................12 Installing Documentation and Software........................................................................13 Mounting the MP.11 ..................................................................................................14 CHAPTER 3. MANAGEMENT OVERVIEW........................................................................ 17 MP.11 IP Address .....................................................................................................17 Web Interface Overview ............................................................................................20 Command Line Interface Overview ..............................................................................21 CHAPTER 4. BASIC MANAGEMENT ............................................................................... 24 Rebooting and Resetting............................................................................................25 General Settings.......................................................................................................26 System Configuration ................................................................................................27 IP Configuration .......................................................................................................28 Monitoring Settings...................................................................................................32 Security Settings ......................................................................................................34 Upgrading the MP.11.................................................................................................36 CHAPTER 5. WEB INTERFACE ...................................................................................... 37 Status.....................................................................................................................37 Configure ................................................................................................................38 Monitor ...................................................................................................................51 Commands ..............................................................................................................57 CHAPTER 6. COMMAND LINE INTERFACE .................................................................... 60 Introduction.............................................................................................................60 Using Command Help ................................................................................................60 Viewing and Changing Parameters ..............................................................................61 Entering Strings .......................................................................................................61 Working with Tables..................................................................................................62 CHAPTER 7. PROCEDURES ........................................................................................... 64 TFTP Server Setup ....................................................................................................64 Image File Download.................................................................................................65 Configuration Backup ................................................................................................66 Configuration Restore................................................................................................67 Soft Reset to Factory Default......................................................................................68 Hard Reset to Factory Default.....................................................................................68 Forced Reload ..........................................................................................................69 Image File Download with the Bootloader.....................................................................69 CHAPTER 8. SPECIFICATIONS ..................................................................................... 72 Hardware Specifications.............................................................................................72 Radio Specifications ..................................................................................................73 CHAPTER 9. TROUBLESHOOTING ................................................................................ 74 LED Indicators .........................................................................................................74 MP.11 Connectivity Issues .........................................................................................75 Setup and Configuration ............................................................................................78 GLOSSARY.................................................................................................................... 81 Contents CPN 63708 3 Issue Date: 02/05/2003 Tsunami MP.11 Installation and Management Chapter 1. Overview The Tsunami MP.11 is a flexible wireless Outdoor Router that lets you design solutions for point-topoint links and point-to-multipoint networks. The MP.11 is a product family, comprising several products (such as the mp.11 2411 Base Station and the MP.11 2411 Residential Subscriber unit). For simplification, all products that are part of the MP.11 Product Family are referred to as MP.11. Some of the key features of the MP.11 are: ▪ The use of a highly optimized protocol for outdoor situations ▪ Routing and bridging capability ▪ Asymmetric bandwidth management ▪ Management through a Web Interface, a Command Line Interface (CLI), or Simple Network Management Protocol (SNMP) Before installing and using the MP.11, Proxim recommends you review the following chapters of this manual first: Chapter 1 “Overview” (this chapter) This chapter gives an overview of the content of this manual as well as wireless network topologies and combinations that can be built with the MP.11. Chapter 2 “Installation” on page 7 This chapter gives detailed installation instructions for the MP.11. Chapter 3 “Management Overview” on page 17 This chapter explains how to access the MP.11 to manage it for configuration or maintenance. Chapter 4 “Basic Management” on page 24 This chapter explains the most common settings used to manage the MP.11. Chapter 5 “Web Interface” on page 37 This chapter depicts the Web Interface in a hierarchical manner, so you can easily find details about each item. Chapter 6 “Command Line Interface” on page 60 The Command Line Interface (CLI) is an alternative to the Web Interface. This chapter tells you how to obtain help about commands and how to handle strings, tables, and so on. The remaining chapters contain supplementary information you may not need immediately. If you are already familiar with this type of product, you can use the “Quick Install Guide” to install the MP.11. Chapter 1. Overview CPN 63708 4 Issue Date: 02/05/2003 Tsunami MP.11 Installation and Management WIRELESS NETWORK TOPOLOGIES You can use the MP.11 to set up the following types of topologies: ▪ ▪ Point-to-Point Link (below) Point-to-Multipoint Network (on page 6) A link between two locations always consists of a Base and a Satellite station. A station is a radio set up as either a Base Station or a (Residential) Subscriber Unit. A Base station can, depending upon its configuration, connect to one or more Satellite stations. A Satellite station, however, can only connect to one Base station. Point-to-Point Link With a Base and a Satellite station or QuickBridge 11 kit, it is easy to set up a wireless Point-to-Point link as depicted in the following figure. The Point-to-Point link function lets you set up a connection between two locations as an alternative to: ▪ Leased lines in building-to-building connections ▪ Wired Ethernet backbones between wireless access points in “hard-to-wire” environments Chapter 1. Overview CPN 63708 5 Issue Date: 02/05/2003 Tsunami MP.11 Installation and Management Point-to-Multipoint Network If you want to connect more than two buildings, you can set up a single Point-to-Multipoint network with a single Base interface and multiple Satellite interfaces, as depicted in the following figure. In this figure, the system is designed as follows: ▪ The central building b is equipped with a Base interface, connected to either an omni-directional, or a wide angle antenna. ▪ The two other buildings a and c are both equipped with a Satellite interface connected to a directional antenna. Chapter 1. Overview CPN 63708 6 Issue Date: 02/05/2003 Tsunami MP.11 Installation and Management Chapter 2. Installation This chapter describes the steps required to install the MP.11 installation steps, such as: ▪ Identifying Network Topology and Equipment below ▪ Finding a Suitable Location below ▪ Installing the MP.11 on page 9 ▪ Switching On the MP.11 on page 12 ▪ Installing Documentation and Software on page 13 ▪ Mounting the MP.11 on page 14 Note: The installation does not cover the mounting and connection of antennas. See the Tsunami MP.11 Antenna Installation Guide. If you are already familiar with this type of product, you can use the Quick Install Guide for streamlined installation procedures. IDENTIFYING NETWORK TOPOLOGY AND EQUIPMENT The MP.11 can be used in various network topologies and combinations. You find more details in “Wireless Network Topologies” in Chapter 1 on page 5. Make sure all equipment is available before installing the MP.11. The required equipment depends upon the wireless network topology that you want to build. The MP.11 is designed for indoor placement. You can connect the MP.11 to an outdoor antenna installation with an optional antenna kit. See the Tsunami MP.11 Antenna Installation Guide for details. WARNING! If you want to connect the MP.11 to an outdoor antenna system, consult the appropriate manufacturers’ documentation for additional regulatory information, safety instructions, and installation requirements. FINDING A SUITABLE LOCATION To make optimal use of the MP.11, you must find a suitable location for the hardware. The radio range of the MP.11 largely depends upon the position of the antenna. Proxim recommends you do a site survey, observing the following requirements, before mounting the MP.11 hardware. ▪ If you do not use Active Ethernet, the unit must be connected to a grounded AC power outlet (100-240 VAC) with the supplied power adapter. ▪ The location must allow easy disconnection of the unit from the power outlet if necessary. Chapter 2. Installation CPN 63708 7 Issue Date: 02/05/2003 Tsunami MP.11 Installation and Management ▪ The unit must not be covered and the air must be able to flow freely around the unit. ▪ The unit must be kept away from vibration, excessive heat, and humidity, and kept free from dust. ▪ The installation must conform to local regulations at all times. INSTALLATION The MP.11 supports two power methodsan AC power outlet and Active Ethernet. The power supply accepts an input AC voltage in the range of 100-240 VAC. The installation procedure on page 9 provides instructions for attaching both the power and Ethernet connectors. WARNING! For your own safety, use only the power cord supplied with the unit. The metal case of the MP-11 must be grounded through the ground connection that is provided on the metal case. The antenna grounding, the surge arrestor, and the MP.11 housing must be bonded together and grounded in one location to avoid ground current loops. In situations without an external antenna (for example, during a desk tryout), the antenna cable is not required. The Product Package Each MP.11 comes with the following: ▪ One metal base for ceiling or desktop mounting (includes two screws) ▪ Mounting hardware º º Four 3.5 mm x 40 mm screws Four 6 mm x 35 mm plugs ▪ One power supply ▪ One Tsunami MP.11 Installation CD-ROM containing: º Software Installation Package (starts automatically when CD is inserted in CD-ROM drive; can be started by double-clicking SETUP.EXE. º Online Help º Documentation (Quick Install Guide, Installation and Configuration Guide) º ScanTool (a utility with which you can obtain or set the IP address of the MP.11 for access; see “ScanTool” on page 17 for more information). Chapter 2. Installation CPN 63708 8 Issue Date: 02/05/2003 Tsunami MP.11 Installation and Management º TFTP Server (which lets you transfer files across the network). You can download configuration and license files as well as image files for embedded software upgrades, and you can upload files from the MP.11 for backup. Here downloading means transferring files to the MP.11 and uploading means transferring files in the opposite direction. Note: All software CD-ROMs that come with your Tsunami products include a readme.txt or readme.html file. This file contains information about the software version and drivers. You are advised to print and ready the readme file prior to installing your Tsunami products, as it may contain additional information that was not available when this document was printed. Installing the MP.11 To install the MP.11: 1. Unpack the unit and accessories from the shipping box. 2. If you intend to install the unit free-standing, or if you intend to mount it to the ceiling, use a Phillips screwdriver to attach the metal base to the underside of the unit. The metal base and screws are provided (see “Mounting the MP.11” on page 14 for more information). Chapter 2. Installation CPN 63708 9 Issue Date: 02/05/2003 Tsunami MP.11 Installation and Management 3. Unlock the unit’s cable cover. To release the cable cover, press down on the cable cover lock located in the front center of the unit. 4. Remove the cable cover. 5. Remove the front cover from the unit (the side with the LED indicators, shown in the figure on left); then remove the back cover (figure on right). Chapter 2. Installation CPN 63708 10 Issue Date: 02/05/2003 Tsunami MP.11 Installation and Management 6. Connect one end of an Ethernet cable to the Ethernet port. The other end of the cable should not be connected to another device until after installation is complete. º Use a straight-through Ethernet cable if you intend to connect the router to a hub, switch, patch panel, or Active Ethernet power injector. º 7. Use a cross-over Ethernet cable if you intend to connect the router to a single computer. If you are not using Active Ethernet, or you want to connect the router to Active Ethernet and AC power simultaneously, attach the AC power cable to the router’s power port. Once attached, the power cable locks into place. To disconnect the power cable, slide back the black plastic fitting and gently pull the cable from the connector. 8. Connect the free end of the Ethernet cable to a hub, switch, patch panel, Active Ethernet power injector, or an Ethernet port on a computer. 9. If using AC power, connect the power cord to a power source (such as a wall outlet) to turn on the unit. 10. Place the unit in the final installation location (see “Mounting the MP.11” on page 14 for details). 11. Replace the back cover, front cover, and cable cover. Be careful to avoid trapping the power and Ethernet cables when replacing the cable cover. Attaching a Kensington Security Lock (Optional) If so desired, you can attach a Kensington lock to secure the cable cover into place. This protects the unit from unauthorized tampering. The MP.11 enclosure includes a Kensington Security Slot for use with a Kensington locking mechanism. When properly installed, a Kensington lock can prevent unauthorized personnel from stealing the MP.11. In addition, the Kensington lock secures the cable cover in place, which prevents tampering with the Ethernet and power cables. Chapter 2. Installation CPN 63708 11 Issue Date: 02/05/2003 Tsunami MP.11 Installation and Management The Kensington Security Slot is shown in the following figures (the figure on the left shows the slot with the cable cover attached; the figure on the right shows the slot with the cable cover removed). For information about Kensington security solutions, go to http://www.kensington.com . SWITCHING ON THE MP.11 The MP.11 can be powered by a power supply or by Active Ethernet through an Active Ethernet splitter. Depending upon the powering method, you can switch the MP.11 on by: ▪ Plugging the power cord of the power supply into an AC power outlet ▪ Connecting the Active Ethernet splitter to the Ethernet cabling When the power is switched on, the MP.11 performs start-up diagnostics. When the start-up is completed, the LEDs show the operational state of the MP.11. The following table shows the status of the LEDs when the MP.11 is operational. In the event the POWER LED is red, something is wrong; check your setup. Power Ethernet Link Wireless Link OFF when no power is present or malfunctioning OFF when not connected. OFF wireless interface is up properly, but no wireless link established. Green when power is present and the unit is operational. Amber when the unit has a failure (try Reload to fix the problem). Red when there is a fatal error in the unit. Chapter 2. Installation CPN 63708 Green when connected at 10 Mbps. Blinking Green when data sent. Amber when connected at 100 Mbps. Blinking Amber when data sent. Red when there is an error in data transfer. Green immediately after connecting a link. Blinking Green when data sent. Amber when in Forced Reload state. Red when the wireless interface is down. Blinking Red when there is a data packet error (loss). 12 Issue Date: 02/05/2003 Tsunami MP.11 Installation and Management INSTALLING DOCUMENTATION AND SOFTWARE The MP.11 also comes with documentation and software on a CD-ROM. To install the documentation and software on a computer or network: 1. Place the CD-ROM in a CD-ROM drive. The installer normally starts automatically. You can also start the installer manually by running the setup.exe program in the root directory of the CD-ROM. 2. Click the Install Help and Software button and perform the necessary steps. The CD-ROM contains the following documentation and software: Online help This is the help for the Web Interface. It is stored on your computer or network so it is always available. The help is launched by clicking the question mark button in the Web Interface. Documentation Documentation also is available in an electronic (PDF) form. ScanTool The ScanTool program is a utility with which you can obtain or set the IP address of the MP.11 for access. See “ScanTool” on page 17 for details. TFTP server The TFTP (Triusingl File Transfer Protocol) server lets you transfer files across the network. You can download configuration and license files, as well as image files for embedded software upgrades, and you can upload files from the MP.11 for backup. Here downloading means transferring files to the MP.11 and uploading means transferring files in the opposite direction. Chapter 2. Installation CPN 63708 13 Issue Date: 02/05/2003 Tsunami MP.11 Installation and Management MOUNTING THE MP.11 The following are the mounting options for the MP.11: ▪ Desktop Mount ▪ Wall Mount ▪ Ceiling Mount Desktop Mounting This procedure consists of attaching the metal base to the MP.11 unit. See “Installing the MP.11” on page 9. Wall Mounting Follow these steps to mount the MP.11 on a wall. 1. Identify the location where you intend to mount the unit. Note: For best results, mount the unit vertically (the antenna can be pointing up or down but not sideways; see the following illustration). The illustration on the left shows the unit installed upside down with the antenna pointing down; the illustration on the right shows the unit installed right side up with the antenna pointing up. 2. Unplug the MP.11’s power supply, if necessary. 3. Use a Phillips screwdriver to remove the metal base from the underside of the MP.11, if necessary. 4. Press down on the cable cover lock to release the cable cover (see “Installing the MP.11” on page 9 for illustrations). 5. Remove the cable cover from the unit (see “Installing the MP.11” on page 9 for illustrations). 6. Remove the front cover from the unit (see “Installing the MP.11” on page 9 for illustrations). 7. Remove the back cover from the unit (see “Installing the MP.11” on page 9 for illustrations). Chapter 2. Installation CPN 63708 14 Issue Date: 02/05/2003 Tsunami MP.11 Installation and Management 8. Place the back cover on the mounting location and mark the center of the three mounting holes. 9. Remove the cover from the wall and drill a hole at each of the locations you marked above. Each hole should be wide enough to hold a mounting plug (which is 6 mm x 35 mm). 10. Insert a plug into each hole. The MP.11 comes with four 6 mm x 35 mm plugs; you only need to use three of these when wall-mounting the unit. 11. Insert a screw into each of the mounting holes molded into the back cover. The MP.11 comes with four 3.5 mm x 40 mm pan-head screws; you only need to use three of these when wallmounting the unit. 12. Insert the screws into the wall plugs. Use a screwdriver to tighten the screws and attach the back cover to the wall. In the following example, the back cover is mounted upside down (the two holes are at the bottom). 13. Attach Ethernet and power cables to the MP.11 unit, if necessary. 14. Snap the unit into the back cover. In the following example, the unit is mounted upside down and its antenna is facing down. 15. Replace the front cover. 16. Replace the cable cover. 17. Turn on the MP.11 (see “Switching On the MP.11” on page 12). Chapter 2. Installation CPN 63708 15 Issue Date: 02/05/2003 Tsunami MP.11 Installation and Management Ceiling Mounting Follow these steps to mount the MP.11 to a ceiling. 1. Unplug the MP.11’s power supply, if necessary. 2. Use a Phillips screwdriver to attach the metal base to the underside of the MP.11, if necessary. See “Installing the MP.11” on page 9 for an illustration. 3. Feed a mounting screw through each of the four rubber feet. The MP.11 comes with four 3.5 mm x 40 mm pan-head screws. 4. Remove the screws from the rubber feet. 5. Turn the MP.11 upside down and position the base against the ceiling where you want to mount the unit. 6. Mark the center of the four mounting holes in the rubber feet. 7. Set the MP.11 aside and drill a hole at each of the locations you marked above. Each hole should be wide enough to hold a mounting plug (6 mm x 35 mm). 8. Insert a plug into each hole. The MP.11 comes with four 6 mm x 35 mm plugs. 9. Insert the screws into the holes you made previously in the rubber feet. 10. Insert the screws into the wall plugs. Use a screwdriver to tighten the screws and attach the MP.11’s metal base in the ceiling Chapter 2. Installation CPN 63708 16 Issue Date: 02/05/2003 Tsunami MP.11 Installation and Management Chapter 3. Management Overview This chapter describes how to gain access to the MP.11 for configuration and management. Three interfaces are provided for viewing or changing the MP.11’s settings: Web Interface on page 20 The Web Interface is a graphical interface based upon Web pages from a built-in Web server. Command Line Interface on page 21 The Command Line Interface (CLI) is a text-based interface using typed commands. SNMP You also can use the Simple Network Management Protocol (SNMP) to configure and manage the MP.11. See “SNMP” on page 42 for setup procedures. Connecting to the MP.11 requires a direct physical connection with an Ethernet cross-over cable, a serial RS-232C cable, or a connection through the network. For the serial connection, you can use only the CLI to configure and manage the MP.11. The other connections allow the use of the Web Interface as well as of the CLI. These other connections require the IP address of the MP.11 before you can use the Web Interface or the CLI. See “MP.11 IP Address” below for more information. You can also manage the MP.11 without an IP address by accessing the MP.11 through the serial port with a terminal program such as HyperTerminal. Note: The MP.11 includes integrated management that makes the OR Manager obsolete. The OR Manager is suitable only for the OR- 500, OR- 1000, and OR- 1100. MP.11 IP ADDRESS Because each network is different, an IP address suitable for your network must be assigned to the MP.11. You will need the IP address of the MP.11 to use its Web Interface or the CLI for configuration and management. The MP.11 either obtains its IP address automatically through DHCP or it must be set manually. With ScanTool, you can find out the current IP address of the MP.11 and, if necessary, change it so that is appropriate for your network. ScanTool The IP address of the MP.11 on the connected local network can be set and retrieved using ScanTool. Other basic parameters can be managed as well. ScanTool is included on the documentation and software CD-ROM. Chapter 3. Management Overview CPN 63708 17 Issue Date: 02/05/2003 Tsunami MP.11 Installation and Management Static or Dynamic IP Address The MP.11 can use either a static or dynamic IP address. ▪ Static IP address: The MP.11 uses the IP address you have set manually. ▪ Dynamic IP address: The MP.11 receives its IP address from a DHCP server when it is switched on or rebooted. Static IP Address The MP.11 is shipped with the static IP address 10.0.0.1 configured. If you want to set the IP address manually: 1. Run ScanTool on a computer connected to the same LAN subnet as the MP.11, or directly connected to the MP.11 with a cross-over Ethernet cable. ScanTool scans the subnet for MP.11 units and displays the found units in the main window. The following figure shows an example of the main window. If necessary, click Rescan to re-scan the subnet and update the display. 2. Select the MP.11 for which you want to set the IP address and click Change. The Change dialog window is displayed, as shown in the following window. Chapter 3. Management Overview CPN 63708 18 Issue Date: 02/05/2003 Tsunami MP.11 Installation and Management 3. Ensure that Static is selected as the IP Address Type and fill in the IP Address and Subnet Mask suitable for the LAN subnet to which the MP.11 is connected. 4. Enter the Read/Write Password (the default value is public) and click OK to confirm your changes. The respective MP.11 reboots to make the changes effective. Dynamic IP Address with DHCP To obtain the IP address: 1. Run ScanTool on a computer connected to the same LAN subnet as the MP.11, or directly connected to the MP.11 with a cross-over Ethernet cable. 2. Locate the MP.11 for which you want to obtain the IP address. You can find the current IP address in the IP Address column. The MP.11 initially is set with a static IP address of 10.0.0.1. Chapter 3. Management Overview CPN 63708 19 Issue Date: 02/05/2003 Tsunami MP.11 Installation and Management WEB INTERFACE OVERVIEW The Web Interface provides a graphical user interface with which you can easily configure and manage the MP.11. This section describes only how to access the Web Interface; the Web Interface itself described in “Chapter 4. Basic Management” on page 24 and “Chapter 5. Web Interface” on page 37. To use the Web Interface, you need only the IP address of the MP.11. See “MP.11 IP Address” on page 17 for details. Note: If the connection is slow or you are not able to connect, ensure that you are not using a proxy server for the connection with your Web browser (using the Internet Explorer Tools option). To access the MP.11 with a Web browser, start your Web browser and enter the IP address of the MP.11. The Web address should appear as http://<ip address> (for example, http://10.0.0.1). A window such as the following is displayed. Do not fill in the User Name, enter only the password and click OK. The default password is public. The System Status window of the Web Interface is displayed. You now have access to the Web Interface of the MP.11 with which you can configure and manage it. Chapter 3. Management Overview CPN 63708 20 Issue Date: 02/05/2003 Tsunami MP.11 Installation and Management COMMAND LINE INTERFACE OVERVIEW The Command Line Interface (CLI) is a text-based interface with which you can configure and manage the MP.11 by entering commands. This section describes only how to access the CLI; the interface itself is described in “Chapter 6. Command Line Interface” on page 60. The CLI can be used as an alternative to the Web Interface. You can, for example, quickly change the settings of the MP.11 by running commands in a batch. The CLI is accessible through the: ▪ Ethernet port connected through the network or with a cross-over Ethernet cable between the computer and the MP.11 ▪ Serial port of the MP.11 Ethernet Port To use the CLI through the Ethernet port, you must have a telnet program and the IP address of the MP.11. On most computers, the telnet program is called telnet. See “MP.11 IP Address” on page 17 for details. To access the MP.11 through Ethernet: 1. From the Windows Start menu, select Run; enter telnet followed by the IP address, as shown in the following sample Run command window. 2. Click OK to start the telnet program. 3. You are prompted for your password: Please enter password: 4. Enter the password (the default password is public). You can now use the CLI. Chapter 3. Management Overview CPN 63708 21 Issue Date: 02/05/2003 Tsunami MP.11 Installation and Management Serial Port You can also use the CLI through the serial port of the MP.11 with a terminal program such as HyperTerminal. You can use this method for cases in which other access methods cannot be used, or when the IP address of the MP.11 cannot be set or retrieved. Also see “Hard Reset to Factory Default” on page 68. To use the CLI through the serial port of the MP.11 the following items are required: ▪ A serial RS-232C cable with a male and a female DB-9 connector. ▪ An ASCII terminal program, such as HyperTerminal. Proxim recommends you switch off the MP.11 and the computer before connecting or disconnecting the serial RS-232C cable. To access the MP.11 through the serial port: 1. Start your terminal program. 2. Set the following connection properties; then connect: COM port (For example, COM1 or COM2, to which the MP.11 serial port is connected.) Bits per second 9600 Data bits 8 Stop bits 1 Flow control none Parity none Line ends carriage return with line feed 3. Press the RESET button on the MP.11 unit. The terminal program displays Power On Self Test (POST) messages. After approximately 90 seconds it displays: Please enter password: 4. Enter the password. The default password is public. You can now use the CLI. Chapter 3. Management Overview CPN 63708 22 Issue Date: 02/05/2003 Tsunami MP.11 Installation and Management HyperTerminal Connection Properties The serial connection properties can be found in HyperTerminal as follows: 1. Start HyperTerminal and select Properties from the File menu. 2. In the Connect using: drop-down list, select Direct to Com1 (depending upon the COM port you use) and click Configure…; a window such as the following is displayed. 3. Make the necessary changes and click OK. 4. From the Hyperterminal Properties window, click the Settings tab; then click ASCII Setup…; a window such as the following is displayed. 5. Ensure that Send line ends with line feeds is selected and click OK. 6. Click OK again to exit the Properties window. HyperTerminal is now correctly configured. Chapter 3. Management Overview CPN 63708 23 Issue Date: 02/05/2003 Tsunami MP.11 Installation and Management Chapter 4. Basic Management This chapter describes the initial setup of the MP.11, which lets you set up and monitor the basic features of the MP.11. In most cases, setting up these basic features is sufficient. A full overview of the Web Interface is provided in “Chapter 5. Web Interface” on page 37; “Glossary” on page 81 provides a brief explanation of the terms used. The following topics are discussed in this chapter: ▪ Rebooting and Resetting on page 25 ▪ General Settings on page 26 ▪ Monitoring Settings on page 32 ▪ Security Settings on page 34 ▪ Upgrading the MP.11 on page 36 To use the Web Interface for configuration and management, you must access the MP.11. With ScanTool you can determine the unit’s current IP address. Then enter http://<ip address> in your Web browser. See “Chapter 3. Management Overview” on page 17 for details. The Web Interface consists of Web page buttons and tabs. A tab can also contain sub-tabs. The following figure shows the convention used to guide you to the correct tab or sub-tab. The Web Interface also provides online help, which is stored on your computer (see “Installing Documentation and Software” on page 13 for details). Launch help by clicking the question mark button in the Web Interface. Chapter 4. Basic Management CPN 63708 24 Issue Date: 02/05/2003 Tsunami MP.11 Installation and Management REBOOTING AND RESETTING Some configuration changes require a restart. There are several ways to restart the MP.11, which are described in the following sub-sections. Applying Changes Some changes you make become effective only when the MP.11 is rebooted. A reboot stores configuration information in non-volatile memory and then restarts the MP.11 with the new values (see “Soft Reset to Factory Default” on page 26). In some cases, the MP.11 reminds you that a reboot is required for a change to take effect. You do not must reboot immediately; you can reboot after you have made all your changes. Rebooting When you reboot, the changes you have made become effective and the MP.11 is restarted. The changes are saved automatically in non-volatile memory before the actual reboot takes place. To reboot: 1. Click Commands Î Reboot. 2. Enter the number of seconds to wait before the reboot actually takes place. 3. Click the Reboot button. The MP.11 restarts the embedded software after the entered time has passed. During reboot, you are redirected to a page showing a counting down timer, and you are redirected to the Status page after the timer counts down to 0 (zero). The CLI is disconnected during reboot. Related CLI command: reboot <number of seconds> Resetting Hardware If the MP.11 does not respond for some reason and you are not able to reboot, you can restart by means of a hardware reset. This restarts the MP.11 hardware and embedded software. The last saved configuration is used. The MP.11 automatically saves its configuration every two minutes. Any changes that you have made in the meantime are lost. To reset the hardware, press and release the RESET button on the MP.11 unit with, for example, a pencil. Chapter 4. Basic Management CPN 63708 25 Issue Date: 02/05/2003 Tsunami MP.11 Installation and Management Soft Reset to Factory Default If necessary, you can reset the MP.11 to the factory default settings. Resetting to the default settings requires you to again configure the MP.11. To reset to factory default settings: 1. Click Commands Î Reset. 2. Click the Reset to Factory Default button. The device configuration parameter values are reset to their factory default values. If you do not have access to the MP.11, you can use the procedure described in “Hard Reset to Factory Default” on page 68 as an alternative. Related CLI command: set sysresettodefaults 1 GENERAL SETTINGS This section describes the MP.11 general settings, including displaying the System Status and the configuration of system and IP parameters. System Status To view the current system status, click the Status button. The Status window is the first page you see when you log in. Related CLI command: show system Chapter 4. Basic Management CPN 63708 26 Issue Date: 02/05/2003 Tsunami MP.11 Installation and Management SYSTEM CONFIGURATION The system configuration page lets you change the MP.11’s system name, location name, and so on (see the following System Configuration window). These details help you to distinguish this MP.11 from other routers, and lets you know whom to contact in case of problems. To go to this page, click the Configure button and the System tab. You can enter the following details: Name This is the system name for easy identification of the MP.11. Location This field can be used to describe the location of the MP.11, for example “Main Lobby.” Contact Name, Contact Email, and Contact Phone In these fields, you can enter the details of the person to contact. Mode of Operation Lets you choose one of two operating modes for your device: Bridge mode or Routing mode. The following fields are described as follows: ObjectID This field shows the OID of the product name in the MIB. Ethernet MAC Address The MAC address of the Ethernet interface of the device. Chapter 4. Basic Management CPN 63708 27 Issue Date: 02/05/2003 Tsunami MP.11 Installation and Management Descriptor Shows the product name and firmware build version. Up Time How long the device has been up and running. Related CLI commands: show system set sysloc <location> set sysctemail <contact e-mail> set sysname <name> set sysctname <contact name> set sysctphone <contact phone> IP CONFIGURATION The IP Configuration window lets you change the MP.11 IP parameters. These settings differ when the MP.11 is in router mode. To go to this page, click the Configure button, the Network tab, then the IP Configuration tab. If the device is configured in Bridge mode, you can set the following parameters: IP Address Assignment Type Select Static if you want to assign a static IP address to the MP.11; select Dynamic to have the device run in DHCP client mode, which gets an IP address automatically from a DHCP server over the network. If you do not have a DHCP server or if you want to manually configure the IP settings, set this parameter to Static. You can set the remaining parameters only when the IP Address Assignment Type is set to Static. Chapter 4. Basic Management CPN 63708 28 Issue Date: 02/05/2003 Tsunami MP.11 Installation and Management IP Address The static IP address of the MP.11 (default IP address is 10.0.0.1). Subnet Mask The mask of the subnet to which the MP.11 is connected (default subnet mask is 255.0.0.0). Default Router IP Address The IP address of the default gateway. Default TTL The default time-to-live value. Related CLI commands: set set set set ipaddrtype <static/dynamic> ipaddr 1 ipaddress <IP address> ipaddr 1 ipsubmask <subnet mask> ipaddr 1 ipgw <gateway IP address> or, for example: set ipaddr 1 ipaddress <IP address> ipsubmask <subnet mask> Interfaces The Configure ÎInterfaces pages let you change the MP.11 Ethernet and wireless parameters. The Wireless – Slot A tab is displayed by default when you click the Interfaces tab. Wireless Slot To configure the wireless interface, click: Configure Î Interfaces Î Wireless Slot The wireless interface can be placed in one of the following modes (selected from the Interface Type drop-down box. ▪ WORP Base ▪ WORP Satellite (See “WORP Base and WORP Satellite Mode” on page 30 for more information.) Chapter 4. Basic Management CPN 63708 29 Issue Date: 02/05/2003 Tsunami MP.11 Installation and Management The wireless interface settings differ per mode. WORP Base and WORP Satellite Mode You can change the following parameters: Interface Type The interface type can be Worp Satellite or Worp Base. Base Station System Name The name found on the system page of the Base Station to which this satellite is connecting. If blank, this satellite can connect to any Base Station. Network Name A network name is name given to a network so that multiple networks can reuse the same frequency without problems. A satellite can only register to a base if it has the same Network Name. Note that the Network Name is sent without encryption and should not be used as security option; please use the Network Secret instead. Frequency Channel The frequency channel the MP.11 uses for communicating with remotes. The frequency channel can be set in the range 1 to 11 for the USA and Canada, or 1 to 13 for Europe, or 1 to 14 for Japan (see “Radio Specifications” on page 73). Data Rate The rate at which data is to be transferred. The default data rate is 11 Mbps. Chapter 4. Basic Management CPN 63708 30 Issue Date: 02/05/2003 Tsunami MP.11 Installation and Management Maximum Satellites (only WORP Base) This is the maximum number of satellites that can register to a base. It is limited by the license. Registration Timeout This is the registration process time-out of a satellite on a base. Default is 3 seconds. Retries The maximum number of registrations a satellite can make per time unit. Network Secret A network secret is a secret password given to all nodes of a network. A satellite can only register to a base if it has the same Network Secret. The Network Secret is sent encrypted and can be used as a security option. Also see “Network Name.” Input Bandwidth Limit This parameter limits the data traffic received from the wireless interface. Output Bandwidth Limit This parameter limits the data traffic from the MP.11 to wireless stations. Related CLI commands: set wif 3 channel 10 set wif 3 netname <network name> Ethernet Port To configure the Ethernet interface, click Configure Î Interfaces Î Ethernet. You can set the desired speed and transmission mode from this tab. ▪ ▪ ▪ Half-duplex means that only one side can transmit at a time. Full-duplex allows both sides to transmit. Auto-duplex selects the best transmission mode for the given configuration. Chapter 4. Basic Management CPN 63708 31 Issue Date: 02/05/2003 Tsunami MP.11 Installation and Management The recommended setting is auto-speed-auto-duplex. You can also limit the traffic of the Ethernet interface by setting the input and output bandwidth parameters. Related CLI Commands: show ethernet show ethermacaddr set ethernet 1 etherspeed <autospeedauto/autospeedhalf/ 100auto/100full/100half/10full/10half> set ethernet 1 ethrxbwlimit <multiple of 64Kbps e.g. 32 = 2Mbps> set ethernet 1 ethtxbwlimit <multiple of 64Kbps e.g. 32 = 2Mbps> MONITORING SETTINGS The MP.11 offers various facilities to monitor its operation and interfaces. Only the most significant monitoring categories are mentioned here. Wireless To monitor the wireless interfaces, click Monitor Î Wireless. This tab lets you monitor the general performance of the radio and the performance of the WORP Base or WORP Satellite interfaces. Chapter 4. Basic Management CPN 63708 32 Issue Date: 02/05/2003 Tsunami MP.11 Installation and Management Interfaces To monitor transmission details, click Monitor Î Interfaces. The Interfaces tab provides detailed information about the IP-layer performance of the MP.11 interface. Related CLI commands: show wif show worp show worpcfg Chapter 4. Basic Management CPN 63708 33 Issue Date: 02/05/2003 Tsunami MP.11 Installation and Management SECURITY SETTINGS To prevent misuse, the MP.11 provides wireless data encryption and password-protected access. It is important to set the encryption parameters and change the default passwords. Encryption You can protect the wireless data link by using encryption. Both ends of the wireless data link must use the same parameter values. To set the encryption parameters, click: Configure Æ Security Æ Encryption. You can set the following encryption parameters: Encryption Status This parameter enables or disables WEP encryption. Key Length The encryption key length determines the level of security and must always be set. The values that can be set depend upon the radio type. MP.11 always has a “GOLD” card allowing 128-bit encryption. For backward compatibility, the 40 bits encryption is available (but is never used with WORP). Encryption Key 1 – 4 These WEP encryption keys require an alphanumeric value. The length of the value depends upon the Key Length parameter. Encrypt Data Transmissions Using This parameter determines which encryption key is used. Chapter 4. Basic Management CPN 63708 34 Issue Date: 02/05/2003 Tsunami MP.11 Installation and Management Related CLI commands: show wifsec set wifsec 3 encryptkey1 <key 1> set wifsec 3 encryptkeytx <1 - 4> set wifsec 3 encryptallowdeny <enable/disable> Passwords Access to the MP.11 is protected with passwords. The default password is public. Using Telnet to Change Passwords To change the telnet password, click Configure Î Telnet. Enter the new password in the Password field; repeat it in the Confirm field and click OK. Related CLI commands: show telnet set tellogintout <login timeout> set telport <port number> set telsessions <maximum number of sessions> set telsessiontout <inactivity timeout> Using the Web Interface to Change Passwords To change the password of the Web Interface, click Configure Î HTTP. Enter the new password in the Password field; repeat it in the Confirm field and click OK. Related CLI commands: show http set httppasswd <password> set httpport <port number> set httpstatus <0 - 15> Using SNMP to Change Passwords You can set a read and a read-and-write password for SNMP. The password used during login determines the type of access. You can change these passwords as follows: Click Configure Î SNMP. Enter the new password in the Password field; repeat it in the Confirm field and click OK when you are done. Related CLI commands: show snmp set snmprpasswd <read password> set snmprwpasswd <read/write password> set snmpstatus <0 - 15> Chapter 4. Basic Management CPN 63708 35 Issue Date: 02/05/2003 Tsunami MP.11 Installation and Management UPGRADING THE MP.11 The MP.11 is equipped with embedded software that can be updated. Updates can be found on our website: http://www.proxim.com Updating the embedded software is described in “Image File Download” on page 65. A TFTP server is required to transfer the file to the MP.11. Chapter 4. Basic Management CPN 63708 36 Issue Date: 02/05/2003 Tsunami MP.11 Installation and Management Chapter 5. Web Interface This section covers the Web Interface of the MP.11. The interface is described hierarchically according to the buttons on the left side of the Web page: ▪ Status ▪ Configure ▪ Monitor ▪ Commands For an introduction to the basics of MP.11 management, see “Chapter 4. Basic Management” on page 24. STATUS The Status tab is displayed automatically when the user logs into the Web Interface. It can also be accessed by clicking the Status button on the left side of the window. The Status tab shows the System Status and the System Traps. System Status In this section, the basic system status is shown, including the version number of the embedded software. Chapter 5. Web Interface CPN 63708 37 Issue Date: 02/05/2003 Tsunami MP.11 Installation and Management Systems Traps This section shows the status of system traps. System traps occur when the MP.11 encounters irregularities. Deleting system traps has no effect on the operation of the MP.11. System traps are also sent to an SNMP manager station (if so configured). CONFIGURE Use the Configure section to change the settings of the MP.11. There are nine tabs in this section. 1) System Click Configure Î System. In this section, you can enter or view the basic system information. These settings do not influence the operation of the MP.11, with the exception of System Mode. System Mode sets the MP.11 as bridge (layer 2) or as router (layer 3). See on page 27 for more information. Chapter 5. Web Interface CPN 63708 38 Issue Date: 02/05/2003 Tsunami MP.11 Installation and Management 2) Network IP Configuration Click Configure Î Network Î IP Configuration to view and configure local IP address information. When the MP.11 is in bridge mode, only one IP address is needed. This IP address can also be changed with ScanTool. In routing mode, both Ethernet and wireless interfaces require an IP address. DHCP Relay Agent Chapter 5. Web Interface CPN 63708 39 Issue Date: 02/05/2003 Tsunami MP.11 Installation and Management Click Configure Î Network Î DHCP R A to enable the MP.11 DHCP relay agent. When enabled, the DHCP relay agent forwards DHCP requests to the set DHCP server. To add entries to the table of DHCP Relay Agents, click “Click to Add Table Entries”; the following window is displayed. Enter the Server IP Address and any optional comments; click Add. To edit or delete entries in the table, click “Click to Edit/Delete Table Entries”; make your changes and click OK. IP Routing Click Configure Î Network Î IP Routing to display the IP routing table. Users can add routes or delete existing routes. This page is available only in router mode. Chapter 5. Web Interface CPN 63708 40 Issue Date: 02/05/2003 Tsunami MP.11 Installation and Management 3) Interfaces Wireless Slot A Click Configure Î Interfaces Î Wireless Slot A to change the wireless interface settings. Ethernet Click Configure Î Interfaces Î Ethernet to set the Ethernet speed, duplex mode, and input and output bandwidth limits. Chapter 5. Web Interface CPN 63708 41 Issue Date: 02/05/2003 Tsunami MP.11 Installation and Management The Base Station must not be configured at a higher data rate as any of the SUs, as the timeout of the Base Station is determined by its data rate. If one of the SUs has a lower data rate than the Base Station, it causes a timeout on all the longer data frames. It is okay if some (nearby) SUs are at a higher data rate than the Base Station. 4) SNMP Click Configure Î SNMP to set passwords, set trap host IP addresses, and limit access to the MP.11 management interface. You can enable: All Interfaces, Only Ethernet, Only Slot A, or None. Chapter 5. Web Interface CPN 63708 42 Issue Date: 02/05/2003 Tsunami MP.11 Installation and Management Trap Groups The user can enable or disable different types of traps in the system. By default, all traps are enabled. IP Access Table Entries in this table show which wireless stations are allowed to use SNMP, HTTP, and telnet management interfaces. To add an entry, click Add; then specify the IP address and mask of the wireless stations to which you want to grant access. For example, 172.17.23.0/255.255.255.0 allows access from all wireless stations with an IP address in the 172.17.23.xxx range. Ensure that the wireless station you use is the first entry in the table. Trap Host Table This table shows the SNMP management stations to which the MP.11 sends system traps. 5) Telnet Click Configure Î Telnet to manage telnet parameters, including password and time out. Note: To use HyperTerminal for CLI access, make sure to check “Send line ends with line feeds” in the ASCII Setup window. Chapter 5. Web Interface CPN 63708 43 Issue Date: 02/05/2003 Tsunami MP.11 Installation and Management 6) Serial Click Configure Î Serial to change the serial port settings. 7) HTTP Click Configure Î HTTP to view or change Web Interface parameters, including password and time out. Chapter 5. Web Interface CPN 63708 44 Issue Date: 02/05/2003 Tsunami MP.11 Installation and Management 8) Security MAC Authentication Click Configure Î Security Î MAC Auth to build a list of authorized wireless stations that can register at the MP.11 and access the network. RADIUS Authentication Click Configure Î Security Î RADIUS Auth to set the IP address of the RADIUS server containing the central list of MAC addresses allowed to access the network. Chapter 5. Web Interface CPN 63708 45 Issue Date: 02/05/2003 Tsunami MP.11 Installation and Management In large networks with multiple MP.11 devices, you can maintain a list of MAC addresses on a centralized location using a RADIUS authentication server that grants or denies access. If you use this kind of authentication, you must specify at least the primary RADIUS server. The backup RADIUS server is optional. Encryption Click Configure Î Security Î Encryption to set encryption keys for the data transmitted and received by the MP.11. Note that all network devices must use the same encryption parameters. 9) Filtering Click Configure Î Filtering to configure packet filtering and Spanning Tree. Packet filtering can be used to control and optimize network performance. Chapter 5. Web Interface CPN 63708 46 Issue Date: 02/05/2003 Tsunami MP.11 Installation and Management Ethernet Protocol Filter The Ethernet Protocol Filter blocks or forwards packets based upon the Ethernet protocols they support. The Ethernet Protocol Filter Table is already filled. Click Configure Î Filtering Î Ethernet Protocol Filter to enable or disable certain protocols in the table. To add an entry to the table, click “Click to Add Entries,” enter the protocol name and number, and click the Add button. To edit or delete table entries, click “Click to Edit/Delete Table Entries,” make your changes or deletions, and click OK. Ethernet Protocol Filtering Blocks or forwards packets based upon the Ethernet protocols they support: Ethernet: Packets are examined at the Ethernet interface. Wireless: Packets are examined at the Wireless interface. All Interfaces: Packets are examined at both interfaces. Disabled: The filter is not used. Chapter 5. Web Interface CPN 63708 47 Issue Date: 02/05/2003 Tsunami MP.11 Installation and Management Filter Operation Type Passthru: Only the enabled Ethernet Protocols listed in the Filter Table pass through the bridge. Block: the Bridge blocks enabled Ethernet Protocols listed in the Filter Table. Static MAC Pair Filtering The Static MAC Address Filter optimizes the performance of a wireless (and wired) network. The filter is an advanced feature that lets you limit the data traffic between two specific devices (or between groups of devices based upon MAC addresses) through the wireless interface of the MP.11. For example, if you have a server on your network with which you do not want wireless clients to communicate, you can set up a Static MAC Filter to block traffic between these devices. However, note that this is an advanced filter and it may be easier to control wireless traffic through other filter options, such as Protocol Filtering. Click Configure Î Filtering Î Static MAC Pair Filtering to optimize the performance of wireless and wired networks by denying unwanted data traffic from specific devices. Wired MAC Address Enter the MAC address of the device on the Ethernet network that you want to prevent from communicating with a device on the wireless network. Wired Mask Enter the appropriate bit mask to specify the range of MAC addresses to which this filter is to apply. To specify on the single MAC address you entered in the Wired MAC Address filter, enter FF:FF:FF:FF:FF:FF (all zeroes). Wireless MAC Address Enter the MAC address of the wireless device that you want to prevent from communicating with a device on the wired network. Chapter 5. Web Interface CPN 63708 48 Issue Date: 02/05/2003 Tsunami MP.11 Installation and Management Wireless Mask Enter the appropriate bit mask to specify the range of MAC addresses to which this filter is to apply. To specify only the single MAC address you entered in the Wireless MAC Address file, enter FF:FF:FF:FF:FF:FF (all zeroes). Comment Enter related information. The entry is enabled automatically when saved. To edit an entry, click Edit. To disable or remove an entry, click Edit and change the Status field from Enable to Disable or Delete. Spanning Tree A Spanning Tree is used to avoid redundant communication loops in networks with multiple bridging devices. Bridges do not have an inherent mechanism to avoid loops, because having redundant systems is a necessity in certain networks. However, redundant systems can cause Broadcast Storms, multiple frame copies, and MAC address table instability problems. Click Configure Î Filtering Î Spanning Tree to create redundant, hot-standby networks and to prevent network loops. If enabled, Spanning Tree prevents loops by disabling redundant links. If a link becomes unavailable, it automatically enables a redundant link. Complex network structures can create multiple loops within a network. The Spanning Tree configuration blocks certain ports on MP.11 devices to control the path of communication within the network, avoiding loops and following a Spanning Tree structure. Chapter 5. Web Interface CPN 63708 49 Issue Date: 02/05/2003 Tsunami MP.11 Installation and Management For more information about Spanning Tree protocol, see Section 8.0 of the IEEE 802.1d standard. The Spanning Tree configuration options are advanced settings. Proxim recommends you leave these parameters at their default values unless you are familiar with the Spanning Tree protocol. Storm Threshold Storm Threshold is an advanced Bridge setup option that you can use to protect the network against data overload by: ▪ Specifying a maximum number of frames per second as received from a single network device (identified by its MAC address) ▪ Specifying an absolute maximum number of messages per port The Storm Threshold parameters let you specify a set of thresholds for each port of the MP.11, identifying separate values for the number of broadcast messages per second and Multicast messages per second. When the number of frames for a port or identified station exceeds the maximum value per second, the MP.11 ignores all subsequent messages issued by the particular network device, or ignores all messages of that type. Click Configure Î Filtering Î Storm Threshold to prevent broadcast/multicast overload. Per Address Threshold Enter the maximum allowed number of packets per second. Ethernet Threshold Enter the maximum allowed number of packets per second. Wireless Threshold Enter the maximum allowed number of packets per second. Chapter 5. Web Interface CPN 63708 50 Issue Date: 02/05/2003 Tsunami MP.11 Installation and Management Broadcast Protocol Filtering Click Configure Î Filtering Î Broadcast Protocol Filtering to deny specific IP broadcast, IPX broadcast, and multicast traffic. You can configure whether this traffic must be blocked for Ethernet to wireless, wireless to Ethernet, or both. MONITOR Use this section of the interface to obtain detailed information about the settings and performance of the MP.11. There are 10 tabs in the Monitor section. 1) Wireless General Click Monitor Æ General to monitor the general performance of the wireless interface. Chapter 5. Web Interface CPN 63708 51 Issue Date: 02/05/2003 Tsunami MP.11 Installation and Management WORP Click Monitor Æ WORP to monitor the performance of the WORP Base or WORP Satellite interfaces. Chapter 5. Web Interface CPN 63708 52 Issue Date: 02/05/2003 Tsunami MP.11 Installation and Management 2) ICMP Click Monitor Æ ICMP to view the number of ICMP messages send and received by the MP.11. It includes ping, route, and host unreachable messages. 3) Radius Click Monitor Æ Radius to view information about the traffic exchanged with a RADIUS server. Chapter 5. Web Interface CPN 63708 53 Issue Date: 02/05/2003 Tsunami MP.11 Installation and Management 4) Per Station Click Monitor Æ Per Station to view the following information: 5) Features Click Monitor Æ Features to view the following information: 6) Link Test Click Monitor Æ Link Test to find out which wireless stations are in range and to check their link quality. Chapter 5. Web Interface CPN 63708 54 Issue Date: 02/05/2003 Tsunami MP.11 Installation and Management 7) Interfaces Click Monitor Æ Interfaces to view detailed information about the IP-layer performance of the MP.11 interfaces. The following figure shows the Wireless interface. When you click the Ethernet tab, the same information is provided for the Ethernet interface. 8) IP ARP Table Click Monitor Æ IP ARP Table to view the mapping of the IP and MAC addresses of all radios registered at the MP.11. This information is based upon the Address Resolution Protocol (ARP). Chapter 5. Web Interface CPN 63708 55 Issue Date: 02/05/2003 Tsunami MP.11 Installation and Management 9) Learn Table Click Monitor Æ Learn Table to view all MAC addresses the MP.11 has detected on an interface. The Learn Table displays information relating to network bridging. It reports the MAC address for each node that the device has learned is on the network and the interface on which the node was detected. There can be up to 10,000 entries in the Learn Table. This tab is only available in bridge mode. 10) IP Routes Click Monitor Æ IP Routes to view all active IP routes of the MP.11. These can be either static or dynamic (obtained through RIP). This tab is only available in router mode, and you can add routes only when in router mode. Chapter 5. Web Interface CPN 63708 56 Issue Date: 02/05/2003 Tsunami MP.11 Installation and Management COMMANDS This section describes the commands that you can perform with the Web Interface. There are five tabs in the Commands section. 1) Download Click Commands Æ Download to download image, configuration, and license files to the MP.11. Server IP address Enter the TFTP Server IP address. (Double-click the TFTP server icon on your desktop and locate the IP address assigned to the TFTP server.) File Name Enter the name of the file to be downloaded. File Type Config, image, bootloader, or license. File Operation Download or Download and Reboot. Chapter 5. Web Interface CPN 63708 57 Issue Date: 02/05/2003 Tsunami MP.11 Installation and Management 2) Upload Click Commands Æ Upload to upload a configuration file from the MP.11. 3) Reboot Click Commands Æ Reboot to restart the embedded software of the MP.11. Configuration changes are saved and the MP.11 is reset. CAUTION: Rebooting the unit causes all users currently connected to lose their connection to the network until the MP.11 has completed the restart process and resumed operation. Chapter 5. Web Interface CPN 63708 58 Issue Date: 02/05/2003 Tsunami MP.11 Installation and Management 4) Reset Click Commands Æ Reset to restore the configuration of the MP.11 to the factory default values. You can also reset the MP.11 from the RESET button located on the side of the unit. Because this resets the MP.11’s current IP address, a new IP address must be assigned. CAUTION: Resetting the MP.11 to its factory default configuration permanently overwrites all changes made to the unit. The MP.11 reboots automatically after this command has been issued. 5) Help Click Commands Æ Help to set the location of the help files of the Web Interface. If the help files cannot be found, pressing the ? button results in an error message. Upon installation, the help files are installed in the C:\Program Files\Proxim\Tsunami MP.11 folder. If you want to place these files on a shared drive, copy the Help folder to the new location and specify the new path in the Help Link box. Chapter 5. Web Interface CPN 63708 59 Issue Date: 02/05/2003 Tsunami MP.11 Installation and Management Chapter 6. Command Line Interface INTRODUCTION The Command Line Interface (CLI) provides a text-based interface with which you can configure and manage the MP.11 using commands. You can enter these commands or submit them in the form of a script to allow batch processing. Accessing the CLI was previously discussed in “Command Line Interface Overview” on page 21. This chapter provides details about: ▪ Using Command Help below ▪ Viewing and Changing Parameters on page 61 Boot Loader Command Line Interface The Boot Loader is started when the MP.11 is switched on or reset, and is responsible for starting the embedded software. The Boot Loader CLI (which has only a limited set of commands) is available when the MP.11 embedded software is not running. USING COMMAND HELP You can show CLI help by entering help at the command prompt. The CLI also provides contextspecific help. To provide help in a specific situation, enter ?. You can get help as follows: ? Lists all available commands. s? Lists all commands beginning with an s. set Shows the definition and a syntax example of the set command. set ? Shows the parameter name of the set command that must be entered at the position of the question mark. In this case you must enter a space before the ?. For example: download ? <TFTP IP Address> download 10.0.0.2 ? <File Name> download 10.0.0.2 image.bin ? <file_type (config/image/Boot Loader/license)> download 10.0.0.2 image.bin image set ip? Lists all parameters of the set command beginning with ip. Note that the Boot Loader CLI does not have command help. Chapter 6. Command Line Interface CPN 63708 60 Issue Date: 02/05/2003 Tsunami MP.11 Installation and Management VIEWING AND CHANGING PARAMETERS You can view and change MP.11 parameters with the SHOW and SET commands, respectively. These commands are described below. Show Command The show command lets you view parameter and statistical values. You can view a single parameter, a group of parameters, or a table with parameters. A table consists of rows with similar parameters. Example: To view all system parameters: show system This shows the current values of the system parameters. Set Command The set command lets you change parameter values. You can change a single parameter value and you can also modify a group of parameters, or a table with parameters. If a parameter requires more than one value, the values must be separated by spaces. Example: To set the MP.11 IP address parameter: set ipaddrtype static set ipaddr 1 ipaddress 10.0.0.12 Some parameter values change only when the MP.11 is rebooted. In these cases, the CLI warns you that a reboot is required for the change to take effect. ENTERING STRINGS If you need to enter a string with spaces, you must use single or double quotes. For example, there is no need for quotes in the following because the string does not contain spaces: set sysname Lobby The following string, however, requires quotes because of the space between the words Front and Lobby. set sysname “Front Lobby” Chapter 6. Command Line Interface CPN 63708 61 Issue Date: 02/05/2003 Tsunami MP.11 Installation and Management WORKING WITH TABLES In some cases, parameters are stored in tables whose rows contain similar parameters. Command arguments involving tables have the following syntax: <table name> <row> <parameter 1 name> <value 1> … <parameter n name> <value n> Viewing Table Contents You can view the contents of a table as follows: show <table name> Example: show snmpipaccesstbl This command displays all parameter values of the SNMP IP access table (snmpipaccesstbl). Creating a Table Row You can create a table row as follows: set <table name> 0 <parameter 1 name> <value 1> … <parameter n name> <value n> When you create a table row, you must use 0 as row index. Only the mandatory parameters are required. Optional parameters automatically receive the default value unless a value is given. Example: set snmpipaccesstbl 0 ipaddr 10.0.0.10 submask 255.255.0.0 This command adds a row to the SNMP IP access table (snmpipaccesstbl) with the IP address (ipaddr) and subnet mask (submask) parameters, which are respectively assigned 10.0.0.10 and 255.255.0.0. Modifying a Table Entry If you want to change a table entry, you must indicate the index of the table row and the parameter that must be modified. Example: set snmpipaccesstbl 1 ipaddr 10.0.0.11 This command changes the IP address (ipaddr) at row index 1 of the SNMP IP access table (snmpipaccesstbl) into 10.0.0.11. Chapter 6. Command Line Interface CPN 63708 62 Issue Date: 02/05/2003 Tsunami MP.11 Installation and Management Modifying Several Table Entries You can also modify several table entries at once by indicating the index of the table row and the parameters that must be modified. With the search command, you can see which parameters are in the table. Example: set snmpipaccesstbl 1 ipaddr 10.0.0.12 submask 255.255.255.248 cmt “First Row” Enabling, Disabling, or Deleting a Table Row You can also enable, disable, or delete a row in a table. The syntax of this command is: <table name> <row> <enable/disable/delete>, or <table name> <row> status <1/2/3> Example 1: The following command enables the row at index 2 of the SNMP IP access table (snmpipaccesstbl). set snmpipaccesstbl 2 enable Example 2: The following command disables the row at index 2 of the SNMP IP access table (snmpipaccesstbl). The status codes have the following meaning: 1 is enable, 2 is disable, 3 is delete. set snmpipaccesstbl 2 status 2 Chapter 6. Command Line Interface CPN 63708 63 Issue Date: 02/05/2003 Tsunami MP.11 Installation and Management Chapter 7. Procedures This chapter contains a set of procedures, as described in the following table: Procedure Description TFTP Server Setup Prepares the TFTP server for transferring files to and from the MP.11. This procedure is used by the other procedures that transfer files. Image File Download Upgrades the embedded software. Configuration Backup Saves the configuration of the MP.11. Configuration Restore Restores a previous configuration through configuration file download. Soft Reset to Factory Default Resets the MP.11 to the factory default settings through the Web or Command Line Interface. Hard Reset to Factory Default In some cases, it may be necessary to revert to the factory default settings (for example, if you cannot access the MP.11 or you lost the password for the Web Interface. Force Reload Completely resets the MP.11 and erases the embedded software. Use this procedure only as a last resort if the MP.11 does not boot and the “Hard Reset to Factory Default” procedure did not help. If you perform a “Forced Reload,” you must download a new image file as described in “Image File Download with the Boot Loader.” Image File Download with the Boot Loader If the MP.11 does not contain embedded software, or the embedded software is corrupt, you can use this procedure to download a new image file. TFTP SERVER SETUP To download or upload a file, you must connect to the computer with the TFTP server through the MP.11’s Ethernet port. This can be any computer in the network or a computer connected to the MP.11 with a cross-over Ethernet cable. For information about installing the TFTP server, see “Installing Documentation and Software” on page 13. Ensure that the upload or download directory is correctly set, the required file is present in the directory, and the TFTP server is running. The TFTP server must be running only during file upload and download. You can check the connectivity between the MP.11 and the TFTP server by pinging the MP.11 from the computer that hosts the TFTP server. The ping program should show replies from the MP.11. Chapter 7. Procedures CPN 63708 64 Issue Date: 02/05/2003 Tsunami MP.11 Installation and Management IMAGE FILE DOWNLOAD In some cases, it may be necessary to upgrade the embedded software of the MP.11 by downloading an image file. To download an image file through the Web Interface: 1. Set up the TFTP server as described in “TFTP Server Setup” on page 64. 2. Access the MP.11 as described in “Web Interface Overview” on page 20. 3. Click: Commands Æ Download. 4. Fill in the following details: Server IP Address <IP address TFTP server> File Name <image file name> File Type Image File Operation Download 5. Click OK to start the file transfer. The MP.11 downloads the image file. The TFTP server program should show download activity after a few seconds. When the download is complete, the MP.11 is ready to start the embedded software. CLI Image File Download To download an image file: 1. Set up the TFTP server as described in “TFTP Server Setup” on page 64. 2. Access the MP.11 as described in “Command Line Interface Overview” on page 21. 3. Enter the following command: download <IP address TFTP server> <image file name> image The MP.11 downloads the image file. The TFTP server program should show download activity after a few seconds. When the download is complete and the system rebooted, the MP.11 is ready to start the embedded software. Chapter 7. Procedures CPN 63708 65 Issue Date: 02/05/2003 Tsunami MP.11 Installation and Management CONFIGURATION BACKUP You can back up the MP.11 configuration by uploading the configuration file. You can use this file to restore the configuration or to configure another MP.11 (see “Configuration Restore” on page 67). To upload a configuration file through the Web Interface: 1. Set up the TFTP server as described in “TFTP Server Setup” on page 64. 2. Access the MP.11 as described in “Web Interface Overview” on page 20. 3. Click Commands Æ Upload. 4. Fill in the following details: Server IP Address <IP address TFTP server> File Name <configuration file name> File Type Config File Operation Upload 5. Click OK to start the file transfer. The MP.11 uploads the configuration file. The TFTP server program should show upload activity after a few seconds. When the upload is complete, the configuration is backed up. CLI Configuration File Upload To upload a configuration file: 1. Set up the TFTP server as described in “TFTP Server Setup” on page 64. 2. Access the MP.11 as described in “Command Line Interface Overview” on page 20. 3. Enter the following command: upload <IP address TFTP server> <configuration file name> config The MP.11 uploads the configuration file. The TFTP server program should show upload activity after a few seconds. When the upload is complete and the system rebooted, the configuration is backed up. Chapter 7. Procedures CPN 63708 66 Issue Date: 02/05/2003 Tsunami MP.11 Installation and Management CONFIGURATION RESTORE You can restore the configuration of the MP.11 by downloading a configuration file. The configuration file contains the configuration information of an MP.11. To download a configuration file through the Web Interface: 1. Set up the TFTP server as described in “TFTP Server Setup” on page 64. 2. Access the MP.11 as described in “Web Interface Overview” on page 20. 3. Click: Commands Æ Download. 4. Fill in the following details: Server IP Address <IP address TFTP server> File Name <configuration file name> File Type Config File Operation Download 5. Click OK to start the file transfer. The MP.11 downloads the configuration file. The TFTP server program should show download activity after a few seconds. When the download is complete and the system rebooted, the configuration is restored. CLI Configuration File Download To download a configuration file: 1. Set up the TFTP server as described in “TFTP Server Setup” on page 64. 2. Access the MP.11 as described in “Command Line Interface” on page 21. 3. Enter the following command: download <IP address TFTP server> <configuration file name> config The MP.11 downloads the configuration file. The TFTP server program should show download activity after a few seconds. When the download is complete and the system rebooted, the configuration is restored. Chapter 7. Procedures CPN 63708 67 Issue Date: 02/05/2003 Tsunami MP.11 Installation and Management SOFT RESET TO FACTORY DEFAULT If necessary, you can reset the MP.11 to the factory default settings. Resetting to default settings means that you must configure the MP.11 anew. To reset to factory default settings using the Web Interface: 1. Click Commands Æ Reset. 2. Click the Reset to Factory Default button. The device configuration parameter values are reset to their factory default values. If you do not have access to the MP.11, you can use the procedure described in “Hard Reset to Factory Default” below as an alternative. CLI Soft Reset to Factory Defaults To reset to factory default settings: set sysresettodefaults 1 HARD RESET TO FACTORY DEFAULT If you cannot access the unit or you have lost its password, you can reset the MP.11 to the factory default settings. Resetting to default settings means you must configure the MP.11 anew. To reset to factory default settings, press and hold the RELOAD button on the MP.11 unit for about 10 seconds. The MP.11 reboots and restores the factory default settings. To access the MP.11 see “Chapter 3. Management Overview” on page 17. Chapter 7. Procedures CPN 63708 68 Issue Date: 02/05/2003 Tsunami MP.11 Installation and Management FORCED RELOAD With Forced Reload, you reset the MP.11 to the factory default settings and erase the embedded software. Use this procedure only as last resort if the MP.11 does not boot and the “Reset to Factory Defaults” procedure did not help. If you perform a Forced Reload, you must download a new image file with the Boot Loader (see “Image File Download with the Boot Loader” below). Caution! The following procedure erases the embedded software of the MP.11. An image file must be downloaded either with the ScanTool or with the Boot Loader CLI through the serial port to make the MP.11 functional again. To do a forced reload: 1. Press the RESET button on the MP.11 unit; the MP.11 resets and the LEDs flash. 2. Press and hold the RELOAD button on the MP.11 unit for about 20 seconds until the POWER LED lights amber; the MP.11 is erased completely and only the Boot Loader remains available. 3. Follow the procedure “Image File Download with the Boot Loader” to download an image file. IMAGE FILE DOWNLOAD WITH THE BOOTLOADER The following procedures download an image file to the MP.11 after the embedded software has been erased with Forced Reload or when the embedded software cannot be started by the Boot Loader. A new image file can be downloaded to the MP.11 with Scan Tool or the Command Line Interface through the MP.11 serial port. In both cases, the file is transferred through Ethernet with TFTP. Because the CLI serial port option requires a serial RS-232C cable, Proxim recommends the ScanTool option. ScanTool To download an image file with the ScanTool: 1. Set up the TFTP server as described in “TFTP Server Setup” on page 64. 2. Run ScanTool on a computer that is connected to the same LAN subnet as the MP.11. ScanTool scans the subnet for MP.11 units and displays the found units in the main window. If necessary, click rescan, to re-scan the subnet and update the display. 3. Select the MP.11 to which you want to download an image file and click Change. 4. Ensure that IP Address Type Static is selected and fill in the following details: º IP Address and Subnet Mask of the MP.11. º TFTP Server IP Address and, if necessary, the Gateway IP Address of the TFTP server. º Image File Name of the file with the new image. Chapter 7. Procedures CPN 63708 69 Issue Date: 02/05/2003 Tsunami MP.11 Installation and Management 5. Click OK to start the file transfer. The MP.11 downloads the image file. The TFTP server program should show download activity after a few seconds. When the download is complete, the MP.11 is ready to start the embedded software. To access the MP.11 see “Chapter 3. Management Overview” on page 17. Command Line Interface To use the CLI through the serial port of the MP.11 you need the following items: ▪ A serial RS-232C cable with a male and a female DB-9 connector. ▪ An ASCII terminal program such as HyperTerminal. Proxim recommends you switch off the MP.11 and the computer before connecting or disconnecting the serial RS-232C cable. To download an image file: 1. Set up the TFTP server as described in “TFTP Server Setup” on page 64. 2. Start the terminal program (such as HyperTerminal), set the following connection properties, and then connect: COM port Bits per second Data bits Stop bits Flow control Parity 3. (for example COM1 or COM2, to which the MP.11 serial port is connected) 9600 8 1 None None Press the RESET button on the MP.11 unit; the terminal program displays Power On Self Test (POST) messages. 4. When the Sending Traps to SNMP manager periodically message is displayed after about 30 seconds, press the ENTER key. 5. The command prompt is displayed; enter the following commands: set ipaddr <IP address MP.11> set ipsubmask <subnet mask> set ipaddrtype static set tftpipaddr <IP address TFTP server> set tftpfilename <image file name> set ipgw <gateway IP address> reboot Chapter 7. Procedures CPN 63708 70 Issue Date: 02/05/2003 Tsunami MP.11 Installation and Management For example: set ipaddr 10.0.0.12 set ipsubmask 255.255.255.0 set ipaddrtype static set tftpipaddr 10.0.0.20 set tftpfilename image.bin set ipgw 10.0.0.30 reboot The MP.11 reboots and downloads the image file. The TFTP server program should show download activity after a few seconds. When the download is complete, the MP.11 is ready for configuration. To access the MP.11 see “Chapter 3. Management Overview” on page 17. Note that the IP configuration in normal operation differs from the IP configuration of the Boot Loader. Chapter 7. Procedures CPN 63708 71 Issue Date: 02/05/2003 Tsunami MP.11 Installation and Management Chapter 8. Specifications This chapter provides Hardware and Radio Specifications. HARDWARE SPECIFICATIONS Physical Specifications (without metal base) Dimensions (h x w x l) 3.5 x 17 x 21.5 cm (1.5 x 6.75 x 8.5 in.) Weight 0.68 kg (1.5 lb.) Electrical Specifications Using the Power Adapter Voltage (Input) 100 to 240 VAC (50-60 Hz) @ 0.4 A Voltage (Output) 12 VDC Power Consumption 10 Watts (maximum) Using Active Ethernet Input Voltage 42 to 60 VDC Output Current 200mA at 48V Power Consumption 10 Watts Environmental Specifications Operating Temperature 0º to 55º C ambient temperature (without plastic cabinet) Operating Humidity 95% maximum (non-condensing) Storage Temperature -20º to +75º C ambient temperature Storage Humidity 95% maximum (non-condensing) Interfaces Ethernet 10/100 Base-TX, RJ-45 female socket Serial port Standard RS-232C interface with DB-9, female connector Active Ethernet Category 5, foiled, twisted pair cables must be used to ensure compliance with FCC Part 15, subpart B, Class B requirements. Standard 802.3af pin assignments. Wireless Chapter 8. Specifications CPN 63708 Mini PC Card 72 Issue Date: 02/05/2003 Tsunami MP.11 Installation and Management RADIO SPECIFICATIONS Channel Frequencies The following table shows the channel allocations that vary from country to country. Values listed in bold indicate default channels and frequencies. Channel ID FCC/World (GHz) ETSI (GHz) France (GHz) Japan (GHz) 1 2.412 2.412 -- 2.412 2 2.417 2.417 -- 2.417 3 (default in most countries) 2.422 2.422 -- 2.422 4 2.427 2.427 -- 2.427 5 2.432 2.432 -- 2.432 6 2.437 2.437 -- 2.437 7 2.442 2.442 -- 2.442 8 2.447 2.447 -- 2.447 9 2.452 2.452 -- 2.452 10 2.457 2.457 2.457 2.457 11 (default in France) 2.462 2.462 2.462 2.462 12 -- 2.467 2.467 2.467 13 -- 2.472 2.472 2.472 14 2.484 For regulatory information, check the Regulatory Flyer included with the product. Chapter 8. Specifications CPN 63708 73 Issue Date: 02/05/2003 Tsunami MP.11 Installation and Management Chapter 9. Troubleshooting This chapter helps you to isolate and solve= problems with your MP.11. In the event this chapter does not provide a solution or the solution does not solve your problem, please check our website: http://www.proxim.com Before you start troubleshooting, it is important that you have checked the details in the user’s guides and manuals. For details about RADIUS, TFTP, terminal and telnet programs, and Web browsers, please refer to their appropriate documentation. The following sections can help to solve your problem: ▪ LED Indicators below ▪ MP.11 Connectivity Issues on page 75 ▪ Setup and Configuration on page 78 In some cases, rebooting the MP.11 clears the problem. If nothing else helps, consider a “Soft Reset to Factory Defaults” (on page 26) or a “Forced Reload” (on page 69). The Forced Reload option requires you to download a new image file to the MP.11. LED INDICATORS The MP.11 has three active LED indicators; the fourth LED is not used at this time. The LEDs are shown in the following figure and described in the table. Chapter 9. Troubleshooting CPN 63708 74 Issue Date: 02/05/2003 Tsunami MP.11 Installation and Management Power Ethernet Link Wireless Link OFF when no power is present or malfunctioning OFF when not connected. OFF wireless interface is up properly, but no wireless link established. Green when connected at 10 Mbps. Green when power is present and the unit is operational. Blinking Green when data sent. Amber when connected at 100 Mbps. Amber when the unit has a failure (try Reload to fix the problem). Blinking Amber when data sent. Red when there is a fatal error in the unit. Red when there is an error in data transfer. Green immediately after connecting a link. Blinking Green when data sent. Amber when in Forced Reload state. Red when the wireless interface is down. Blinking Red when there is a data packet error (loss). MP.11 CONNECTIVITY ISSUES The issues described in this section relate to the connections of the MP.11. MP.11 Does Not Boot The MP.11 shows no activity (the power LED is off). 1. Ensure that the power supply is properly working and correctly connected. 2. Ensure that all cables are correctly connected. 3. Check the power source. 4. If you are using an Active Ethernet splitter, ensure that the voltage is correct. Serial Link Does Not Work The MP.11 cannot be reached through the serial port. 1. Check the cable connection between the MP.11 and the computer. 2. Ensure that the correct COM port is used. 3. Start the terminal program; set the following connection properties (also see “HyperTerminal Connection Properties”), and then connect. COM port Bits per second Data bits Stop bits Flow control Parity Line ends 4. For example, COM1 or COM2, to which the MP.11 serial port is connected 9600 0 1 None None Carriage return with line feed Ensure that the MP.11 and the computer use the same serial port configuration parameters. Chapter 9. Troubleshooting CPN 63708 75 Issue Date: 02/05/2003 Tsunami MP.11 Installation and Management 5. Press the RESET button on the MP.11 unit. The terminal program displays Power On Self Tests (POST) messages and displays the following after approximately 90 seconds: Please enter password: HyperTerminal Connection Properties The serial connection properties can be found in HyperTerminal as follows: 1. Start HyperTerminal and select Properties from the File menu. 2. Select Direct to Com 1 in the Connect using: drop-down list (depending upon the COM port you use); then click Configure. A window such as the following is displayed: 3. Make the necessary changes and click OK. 4. Click the Settings tab and then ASCII Setup…. A window similar to the following is displayed: 5. Ensure that Send line ends with line feeds is selected and click OK twice. HyperTerminal is now correctly configured. Chapter 9. Troubleshooting CPN 63708 76 Issue Date: 02/05/2003 Tsunami MP.11 Installation and Management Setup and Configuration Ethernet Link does not work First check the Ethernet LED; ▪ Dim is “no media connected.” ▪ Green and steady is 10 Base-T ▪ Amber and steady is 100 Base-T ▪ Blinking Green or Amber is traffic Verify pass-through versus errors over cable. Cannot use the Web Interface: 1. Open a command prompt window and enter ping <ip address MP.11> (for example ping 10.0.0.1). If the MP.11 does not respond, make sure that you have the correct IP address. If the MP.11 responds, the Ethernet connection is working properly, continue with this procedure. 2. Ensure that you are using one of the following Web browsers: º Microsoft Internet Explorer version 5.0 or later. º Netscape version 6.0 or later. 3. Ensure that you are not using a proxy server for the connection with your Web browser. 4. Ensure that you have not exceeded the maximum number of Web Interface or CLI sessions (with the CLI command show pelsessions). 5. Double-check the physical network connections. Use a well known unit to ensure the network connection is properly functioning. 6. Perform network infrastructure troubleshooting (check switches, routers, and so on). Chapter 9. Troubleshooting CPN 63708 77 Issue Date: 02/05/2003 Tsunami MP.11 Installation and Management SETUP AND CONFIGURATION The following issues relate to setup and configuration problems. Lost the MP.11 Password If you lost your password, you must reset the MP.11 to the default settings. See “Hard Reset to Factory Default” on page 68. The default password is public. If you record your password, keep it in a safe place. The MP.11 Responds Slowly If the MP.11 takes a long time to become available, it could mean that: ▪ No DHCP server is available. ▪ The IP address of the MP.11 is already in use. Verify that the IP address is assigned only to the MP.11. Do this by switching off the MP.11 and then pinging the IP address. If there is a response to the ping, another device in the network is using the same IP address. If the MP.11 uses a static IP address, switching to DHCP mode could remedy this problem. Also see “Dynamic IP Address with DHCP” on page 19. ▪ There is too much network traffic. Web Interface Does Not Work If you cannot connect to the MP.11 through the network: 1. Connect a computer to the serial port of the MP.11 and check the SNMP table. The SNMP table can restrict telnet or HTTP access. For more information, see “Serial Port” on page 22. 2. Open a command prompt window and type: ping <ip address MP.11> (for example ping 10.0.0.1) If the MP.11 does not respond, ensure that you have the correct IP address. If the MP.11 responds, the Ethernet connection is working properly, continue with this procedure. 3. 4. Ensure that you are using one of the following Web browsers: º Microsoft Internet Explorer version 5.0 or later º Netscape version 6.0 or later Ensure that you are not using a proxy server for the connection with your Web browser (with the CLI command show pelsessions). 5. Ensure that you have not exceeded the maximum number of Web Interface sessions. Chapter 9. Troubleshooting CPN 63708 78 Issue Date: 02/05/2003 Tsunami MP.11 Installation and Management Command Line Interface Does Not Work If you cannot connect to the MP.11 through the network: 1. Connect a computer to the serial port of the MP.11 and check the SNMP table. The SNMP table can restrict telnet or HTTP access. For more information, see “Serial Port” on page 22. 2. Open a command prompt window and enter: ping <ip address MP.11> (for example ping 10.0.0.1). º If the MP.11 does not respond, ensure that you have the correct IP address. º If the MP.11 responds, the Ethernet connection is working properly, continue with this procedure. 3. Ensure that you have not exceeded the maximum number of CLI sessions. TFTP Server Does Not Work With TFTP, you can transfer files to and from the MP.11. Also see “TFTP Server Setup” on page 64. If a TFTP server is not properly configured and running, you cannot upload and download files. The TFTP server: ▪ ▪ ▪ ▪ Can be situated either local or remote. Must have a valid IP address. Must be set for send and receive without time-out. Only must be running during file upload and download. If TFTP server does not upload or download files, it could mean: ▪ ▪ ▪ ▪ The TFTP server is not running. The IP address of the TFTP server is invalid. The upload or download directory is not correctly set. The file name is not correct. Online Help Is Not Available Online help does not appear when the ‘Question mark’ button is clicked in the Web Interface: 1. Make sure that the Help files are installed on your computer or server. Also see “Installing Documentation and Software”. 2. Verify if the path of the help files in the Web Interface refers to the correct directory. See “Help” on page 59. Chapter 9. Troubleshooting CPN 63708 79 Issue Date: 02/05/2003 Tsunami MP.11 Installation and Management Changes Do Not Take Effect Changes made in the Web Interface do not take effect: 1. Restart your Web browser. Log into the MP.11 again and make changes. Reboot the MP.11 when prompted to do so. 2. Wait until the reboot is completed before accessing the MP.11 again. Chapter 9. Troubleshooting CPN 63708 80 Issue Date: 02/05/2003 Tsunami MP.11 Installation and Management Glossary ARP The Address Resolution Protocol (ARP) is intended to find the MAC address belonging to an IP address. Authentication method The process the MP.11 uses to decide whether a station that wants to register is allowed or not. IEEE 802.11 specifies two forms of authentication: open system and shared key; WORP only supports shared key because of security constraints. Authentication server “Shared Secret” This is a kind of password shared between the MP.11 and the RADIUS authentication server. This password is used to encrypt important data exchanged between the MP.11 and the RADIUS server Authentication server authentication port This is a UDP port number (default is 1812), which is used to connect to the authentication server for obtaining authentication information. Backbone The central part of a network; the backbone network connects all remote and sub networks to each other and to the central infrastructure (such as the mail server, Internet gateway, and so on). Base If an interface is running in Outdoor mode (WORP), it is either a base or a satellite interface. A base interface controls the communication on the channel and is located in the central part of the network cell. Multiple satellites can connect to one base; two bases cannot communicate with each other. Broadcast Storm A broadcast storm is a large series of broadcast packets (most often caused by wrong network configuration) that severely impact the network performance. Client IP Address Pool This a pool of IP addresses from which the MP.11 can assign IP addresses to clients, which perform a DHCP Request. Configuration Files A configuration file contains the MP.11 configuration details. Configuration items include among others the IP address and other network-specific values. Configuration files may be uploaded to a TFTP server for backup and downloaded into the MP.11 for restoring the configuration. Glossary CPN 63708 DHCP Relay Agent A feature of the MP.11 that intercepts DHCP requests from clients and forwards them to a DHCP server. For the client, the DHCP Relay Agent of the MP.11 functions like a DHCP server. This enables DHCP requests to pass router boundaries; for example, it is not required to have a DHCP server on every IP subnet. Domain Name Server (DNS) A domain name server is an Internet service that translates domain names into IP addresses. For example, www.ietf.org will be translated in 4.17.168.6. Download Downloading a file means copying a file from a remote server to a device or host. In case of the MP.11 downloading means transferring a file from a TFTP server to the MP.11. Downstream Downstream means a data stream from the central part of the network to the end user. See also upstream. Dynamic Host Configuration Protocol Dynamic Host Configuration Protocol (DHCP) is a method to dynamically assign IP addresses. If DHCP is enabled, the device or computer will broadcast a request that will be answered by a DHCP Server. Encryption Encryption is a means of coding data with a key before sending it across a network. The same key must be used to decode the information at the receiver. This way prevents unauthorized access to the data that is send across the network. Ethernet Ethernet is the most widely installed Local Area Network (LAN) technology. The MP.11 supports both 10 and 100 Mbps and half and full duplex. Gateway A gateway is network device that connects multiple (IP) networks to each other. A gateway can perform protocol conversion. Group A group is logical collection of network parameters. For example, the System Group is composed of several parameters and tables giving system information of the MP.11. All items for a group are grouped under one tab of the Web Interface and start with the same prefix for the command line interface. 81 Issue Date: 02/05/2003 Tsunami MP.11 Installation and Management HTTP Parameter Hypertext Transfer Protocol (HTTP) is the protocol to transport Web pages. When you access the Internet with your browser, the HTTP protocol is used for data transport (http://www.Tsunamiwireless.com). When you access the MP.11 using the Web Interface, HTTP is used to transport the information. A parameter is fundamental value that can be displayed and changed. For example, the MP.11 must have a unique IP address and the PC Cards must know which channels to use. You can view and change parameters with the Web Interface, command line interface and SNMP. ICMP Password Internet Control Message Protocol (ICMP) is used by computers and devices to report errors encountered during processing packets, and to perform other IPlayer functions, such as diagnostics (‘ping’). The MP.11 is password protected. To access the MP.11 you need to enter a password before you can view or change its settings. The default password is ‘public’. Image Ping The image is the binary executable of the embedded MP.11 software. To update the MP.11 you must download a new image file. Ping is a basic Internet program that lets you verify if a particular computer or device with a certain IP address is reachable. If the computer or device receives the ping packet, it responds which gives the ping program the opportunity to display the round-trip time. IP Address A unique numerical address of a computer attached to the Internet or Intranet. An IP (Internet Protocol) address consists of a network part and part for a host (computer) number. An IP address is represented by four numbers in the range 0 - 255 separated by dots: for example 10.0.10.1 and 172.21.43.214. See also subnet mask. LAN A Local Area Network (LAN) is a network of limited size to which computers and devices can connect so that they can communicate with each other. License file A license file is used to enable certain features of the MP.11. The MP.11 already has a license file when it is shipped. When more features become available, you can purchase a license file and download it to the MP.11 to enable these additional features. Remote A remote is a base or a satellite interface. For a base interface, the number of remotes is the number of satellites registered; for a satellite interface, there will be only one remote, which is the base. RIP Routing Information Protocol (RIP) is used between routers to update routing information so that a router automatically ‘knows’ which port to use for a certain destination IP address. Router Routers forward packets from one network to another based on routing information. A router uses a dynamic routing protocol like RIP or static routes to base its forwarding decision on. MAC Address Satellite A MAC (Media Access Control) address is a globally unique network device address, which is hardware bound. It used to identify a network device in a LAN. A MAC address is represented by six two-digit hexadecimal numbers (0 - 9 and A - F) separated by colons: for example 00:02:2D:47:1F:71 and 00:D0:AB:00:01:AC. If an interface is running in outdoor mode (WORP), it is either a base or a satellite interface. Satellite interface behavior is controlled by the base to which it is registered. Satellites are located in the remote locations of a network cell. Multiple satellites can connect to one base; two satellites cannot communicate with each other. See also WORP and base. Management Information Block (MIB) A Management Information Block (MIB) is a formal description of a set of network objects that can be managed with the Simple Network Management Protocol (SNMP). A MIB can be loaded by a management application so that it knows the MP.11 specific objects. . ScanTool A computer program that can be used to retrieve or set the IP address of a locally connected MP.11. Network Mask See subnet mask. Glossary CPN 63708 82 Issue Date: 02/05/2003 Tsunami MP.11 Installation and Management Simple Network Management Protocol (SNMP) Trap A protocol used for the communication between a network management application and the devices it is managing. The network management application is called the SNMP manager; the devices it manages have implemented SNMP agents. Not only the MP.11 but also almost every network device contains a SNMP agent. The manageable objects of a device are arranged in a Management Information Base, also called MIB. The Simple Network Management Protocol (SNMP) allows managers and agents to communicate for accessing these objects. A trap is used within SNMP to report an unexpected or unallowable condition. Spanning Tree Protocol (STP) Triusingl File Transfer Protocol (TFTP) Triusingl File Transfer Protocol (TFTP) is a lightweight protocol for transferring files that is like a simple form of File Transfer Protocol (FTP). A TFTP client is implemented on the MP.11; using the upload and download commands, the MP.11 can respectively copy a file to or from a TFTP server. TFTP server software is provided on the MP.11 CDROM. The Spanning Tree Protocol (STP) can be used to create redundant networks (“hot standby”) and to prevent loops. If enabled, spanning tree prevents loops by disabling redundant links; if a link fails, it can automatically enable a backup link. Upload Subnet Mask Upstream A subnet mask is a bit mask that defines which part of an IP address is used for the network part and which part for a host (computer) number. A subnet mask is like an IP address represented by four numbers in the range 0 - 255 separated by dots. When the IP address 172.17.23.14 has a subnet mask of 255.255.255.0, the network part is 172.17.23 of the host number is 14. See also IP address. Upstream means a data stream from the end users to the central part of the network. See also downstream. Table WORP Tables hold parameters for several related items. For example, you can add several potential managers to the SNMP IP access table. Tables can be displayed using with the Web Interface, command line interface and SNMP. The Wireless Outdoor Router Protocol (WORP) was designed to optimize long distance links and multipoint networks with Hidden Node effect to eliminate collisions and loss of bandwidth. Uploading a file means copying a file from a network device to a remote server. In case of the MP.11 uploading means transferring a file from the MP.11 to a TFTP server. See also download. WEP The Wired Equivalent Privacy (WEP) algorithm is the standard encryption method used to protect wireless communication from eavesdropping. Topology Topology is the physical layout of network components (cable, stations, gateways, hubs, and so on). Glossary CPN 63708 83 Issue Date: 02/05/2003