1
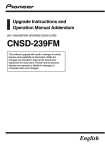
Precaution
Upgrade Instructions and
Operation Manual Addendum
Precaution
! Map database (including POI) and
Gracenote® Database are renewed.
= For details of the updated data, refer to
Renewal data.
! “Driver’s View” mode on the map view
and the “3D” setting in “Close Up View”
are not available.
= For details of the voice commands, refer
to Unavailable command (Only for AVICHD1BT and AVIC-HD3).
The other operations are essentially the same
as those at the time you purchased the hardware. Use Operation Manual included in the
hardware package as your primary reference.
! Read the entire manual before upgrading
the programme of your navigation system.
! The screens shown in the examples may
differ from the actual screens.
The actual screens may be changed without notice for performance and function
improvements.
2012 HDD NAVIGATION UPGRADE DISC
CNDV-1100HD
Models to be upgraded
This software upgrade will result in changes to certain
features and availability of information. While the
changes are intended to improve the overall user
experience for most users, Pioneer and its licensors
disclaim any warranty or liability for damages in
connection with such changes.
This package can upgrade the software programme and database of the following models:
AVIC-HD1BT, AVIC-HD3, AVIC-HD3 II
English
PIONEER ELECTRONICS (USA) INC.
P.O. Box 1540, Long Beach, California 90801-1540, U.S.A.
TEL: (800) 421-1404
© 2012 PIONEER CORPORATION.
All rights reserved.
Be sure to read the
following descriptions
For customers using AVIC-HD3 or AVICHD3 II
By upgrading the navigation system with
these discs, following points are changed.
Licence agreement
This provides a licence agreement of this software. Be sure to read this before using the
software.
Printed in Belgium
<KYTZX> <12E00000>
<CRB3938-A> EU
13-MAN-CNDV1100-GB
1 GRANT OF LICENCE
Pioneer grants to you a non-transferable, nonexclusive licence to use the software installed
on the Pioneer products (the “Software”) and
the related documentation solely for your own
personal use or for internal use by your business, only on such Pioneer products.
For customers use the hardware
upgraded by other upgrade packages
By upgrading the navigation system with
these discs, following points are changed.
Map database (including POI) and Gracenote®
Database are renewed.
= For details of the updated data, refer to Renewal data.
For customers using AVIC-HD1BT
By upgrading the navigation system with
these discs, the points described in this manual are changed.
PIONEER EUROPE NV
Haven 1087, Keetberglaan 1, B-9120 Melsele, Belgium/Belgique
TEL: (0) 3/570.05.11
Other precautions
This provides the important precautions for
using this software.
For customers use the hardware
upgraded by CNDV-800HD
Read the instruction relevant to AVIC-HD3 II.
For customers upgrading the
hardware for the first time
1-1, Shin-ogura, Saiwai-ku, Kawasaki-shi,
Kanagawa 212-0031, JAPAN
THIS IS A LEGAL AGREEMENT BETWEEN
YOU, AS THE END USER, AND PIONEER
CORP. (JAPAN) (“PIONEER”). PLEASE READ
THE TERMS AND CONDITIONS OF THIS
AGREEMENT CAREFULLY BEFORE USING
THE SOFTWARE INSTALLED ON THE
PIONEER PRODUCTS. BY USING THE SOFTWARE INSTALLED ON THE PIONEER PRODUCTS, YOU AGREE TO BE BOUND BY THE
TERMS OF THIS AGREEMENT. THE SOFTWARE INCLUDES A DATABASE LICENCED BY
THIRD PARTY SUPPLIER(S) (“SUPPLIERS”),
AND YOUR USE OF THE DATABASE IS COVERED BY THE SUPPLIERS’ SEPARATE
TERMS, WHICH ARE ATTACHED TO THIS
AGREEMENT (refer to TERMS AND CONDITIONS FOR THE TOMTOM DATA). IF YOU DO
NOT AGREE WITH ALL OF THESE TERMS,
PLEASE RETURN THE PIONEER PRODUCTS
(INCLUDING THE SOFTWARE, AND ANY
WRITTEN MATERIALS) WITHIN FIVE (5) DAYS
OF RECEIPT OF THE PRODUCTS, TO THE
AUTHORISED PIONEER DEALER FROM
WHICH YOU PURCHASED THEM.
For customers use the hardware
upgraded by CNDV-700HD
Read the instruction relevant to AVIC-HD3.
This manual is a supplementary document
that summarises the points that will be renewed after upgrading your navigation system
by using this package. The operations other
than those described in this manual are basically the same as those at the time you purchased the hardware. Use the Operation
Manual included in the hardware package as
your primary reference.
PIONEER CORPORATION
PIONEER CNDV-1100HD
About the database
This provides some notes for the map database and the date when it was recorded.
For customers who have
previously upgraded the hardware
Manual overview
DO NOT LOSE SUPPLIED “MEDIA NUMBER CARD”.
If “MEDIA NUMBER CARD” is lost, re-creation of the
“MEDIA NUMBER” is not possible. Also you must
submit the “MEDIA NUMBER CARD” for repairs. The
card is necessary as proof of authenticity if service is
required (including recovery).
This package is unique, and cannot be installed on
more than one unit.
Web-connected computer is required for online
issuance of password.
Licence agreement
Engb
Engb
Licence agreement
Licence agreement
You shall not copy, reverse engineer, translate,
port, modify or make derivative works of the
Software. You shall not loan, rent, disclose,
publish, sell, assign, lease, sublicence, market
or otherwise transfer the Software or use it in
any manner not expressly authorised by this
agreement. You shall not derive or attempt to
derive the source code or structure of all or
any portion of the Software by reverse engineering, disassembly, decompilation, or any
other means. You shall not use the Software to
operate a service bureau or for any other use
involving the processing of data for other persons or entities.
Pioneer and its licensor(s) shall retain all copyright, trade secret, patent and other proprietary ownership rights in the Software. The
Software is copyrighted and may not be copied, even if modified or merged with other products. You shall not alter or remove any
copyright notice or proprietary legend contained in or on the Software.
You may transfer all of your licence rights in
the Software, the related documentation and a
copy of this Licence Agreement to another
party, provided that the party reads and agrees
to accept the terms and conditions of this Licence Agreement.
2 DISCLAIMER OF WARRANTY
The Software and related documentation are
provided to you “AS IS”. PIONEER AND ITS LICENSOR(S) (for the purpose of provisions 2
and 3, Pioneer and its licensor(s) shall be collectively referred to as “Pioneer”) MAKES AND
YOU RECEIVE NO WARRANTY, WHETHER EXPRESS OR IMPLIED, AND ALL WARRANTIES
OF MERCHANTABILITY AND FITNESS FOR
ANY PARTICULAR PURPOSE ARE EXPRESSLY EXCLUDED. SOME COUNTRIES DO
NOT ALLOW EXCLUSION OF IMPLIED WARRANTIES, SO THE ABOVE EXCLUSION MAY
NOT APPLY TO YOU. The Software is complex
and may contain some nonconformities, defects or errors. Pioneer does not warrant that
Engb
the Software will meet your needs or expectations, that operation of the Software will be
error free or uninterrupted, or that all nonconformities can or will be corrected. Furthermore, Pioneer does not make any
representations or warranties regarding the
use or results of the use of the Software in
terms of its accuracy, reliability or otherwise.
Some countries do not allow the exclusion or
limitation of incidental or consequential damages, so the above limitation or exclusion
may not apply to you. This warranty disclaimer
and limitation of liability shall not be applicable to the extent that any provision of this
warranty is prohibited by any country or local
law which cannot be pre-empted.
3 LIMITATION OF LIABILITY
IN NO EVENT SHALL PIONEER BE LIABLE
FOR ANY DAMAGES, CLAIM OR LOSS INCURRED BY YOU (INCLUDING, WITHOUT LIMITATION, COMPENSATORY, INCIDENTAL,
INDIRECT, SPECIAL, CONSEQUENTIAL, OR
EXEMPLARY DAMAGES, LOST PROFITS, LOST
SALES OR BUSINESS, EXPENDITURES, INVESTMENTS, OR COMMITMENTS IN CONNECTION WITH ANY BUSINESS, LOSS OF
ANY GOODWILL, OR DAMAGES) RESULTING
FROM THE USE OF OR INABILITY TO USE
THE SOFTWARE, EVEN IF PIONEER HAS
BEEN INFORMED OF, KNEW OF, OR SHOULD
HAVE KNOWN OF THE LIKELIHOOD OF
SUCH DAMAGES. THIS LIMITATION APPLIES
TO ALL CAUSES OF ACTION IN THE AGGREGATE, INCLUDING WITHOUT LIMITATION
BREACH OF CONTRACT, BREACH OF WARRANTY, NEGLIGENCE, STRICT LIABILITY, MISREPRESENTATION, AND OTHER TORTS. IF
PIONEER’S WARRANTY DISCLAIMER OR
LIMITATION OF LIABILITY SET FORTH IN THIS
AGREEMENT SHALL OR FOR ANY REASON
WHATSOEVER BE HELD UNENFORCEABLE
OR INAPPLICABLE, YOU AGREE THAT
PIONEER’S LIABILITY SHALL NOT EXCEED
FIFTY PERCENT (50 %) OF THE PRICE PAID BY
YOU FOR THE ENCLOSED PIONEER PRODUCT.
4 EXPORT LAW ASSURANCES
You agree and certify that neither the Software
nor any other technical data received from
Pioneer, nor the direct product thereof, will be
exported outside the country or district (the
“Country”) governed by the government having
jurisdiction over you (the “Government”) except as authorised and as permitted by the
laws and regulations of the Government. If the
Software has been rightfully obtained by you
outside of the Country, you agree that you will
not re-export the Software nor any other technical data received from Pioneer, nor the direct product thereof, except as permitted by
the laws and regulations of the Government
and the laws and regulations of the jurisdiction in which you obtained the Software.
Licence agreement
Licence agreement
TERMS AND CONDITIONS FOR THE TOMTOM DATA
5 TERMINATION
This Agreement is effective until terminated.
You may terminate it at any time by destroying
the Software. The Agreement also will terminate if you do not comply with any terms or
conditions of this Agreement. Upon such termination, you agree to destroy the Software.
6 MISCELLANEOUS
This is the entire Agreement between Pioneer
and you regarding its subject matter. No
change in this Agreement shall be effective
unless agreed to in writing by Pioneer. If any
provision of this Agreement is declared invalid
or unenforceable, the remaining provisions of
this Agreement shall remain in full force and
effect.
Engb
Engb
Engb
Licence agreement
Other precautions
Other precautions
About the database
Gracenote® Database
About the data for the map
database
! Part of the data cannot be acquired. The
contents of the data in the Gracenote® Database included in the hard disk drive are
not 100 % guaranteed.
! The Gracenote® Database included in the
hard disk drive contains the titles for the
290 000 most frequently accessed albums
worldwide as of December 2011.
p Music and video recognition technology
and related data are provided by
Gracenote®. Gracenote is the industry standard in music recognition technology and
related content delivery. For more information, please visit www.gracenote.com.
p CD, DVD, Blu-ray Disc, and music and
video-related data from Gracenote, Inc.,
copyright ® 2000 to 2012 Gracenote.
Gracenote Software, copyright ® 2000 to
2012 Gracenote. One or more patents
owned by Gracenote apply to this product
and service. See the Gracenote website for
a non-exhaustive list of applicable
Gracenote patents. Gracenote, CDDB, MusicID, MediaVOCS, the Gracenote logo and
logotype, and the “Powered by Gracenote”
logo are either registered trademarks or trademarks of Gracenote in the United States
and/or other countries.
! Modifications related to roads, streets/highways, terrain, construction and other things
before/during the development period may
not be reflected in this database. Inevitably,
those modifications after that period are
not reflected in this database.
! Regardless of existing and newly-built
things, the data may be different from the
actual condition.
! For details about the map coverage of this
navigation system, refer to the information
on our website.
! It is strictly prohibited to reproduce and use
any part or the whole of this map in any
form without permission from the copyright
owner.
! If the local traffic regulations or conditions
deviate from this data, follow the local traffic regulations (such as signs, indications,
etc.) and conditions (such as construction,
weather, etc.).
! The traffic regulation data used in the map
database applies only to standard sized
passenger vehicles. Note that regulations
for larger vehicles, motorbikes, and other
non-standard vehicles are not included in
the database.
! TomTom Map Version, Rel. 06/2011.
Preparation for upgrade
Others
Learnt data used in [Learning Route]
! Do not lose the supplied Media Number
Card (MEDIA NUMBER CARD). If the
Media Number Card is lost, reissue of the
Media Number (MEDIA NUMBER) is not
possible. Also you must submit the Media
Number Card when repairs are needed.
The card is necessary as proof of authenticity if service is required (including recovery).
The user data stored in the hard disk drive of
the unit may be erased if unexpected error occurs during software installation. Pioneer is
not responsible for any data loss or unavailability of user data.
Checking the device number
Getting the password for
authentication
First, check your device number
(DEVICE NUMBER, displayed such as
Device# or Device Number) of your navigation
system for later procedures. To display the device number, do the following.
1
For upgrade, a unique password issued online
is necessary. Access the website with your PC
and get your password.
The following information is required.
! Media Number (MEDIA NUMBER) printed
on supplied Media Number Card
(MEDIA NUMBER CARD)
! Device Number (DEVICE NUMBER) of your
navigation system
Turn your navigation system on.
2 Press the MENU button to display the
navigation menu.
Navigation menu appears.
Setting items to be deleted
and initialised
Visit our website
Visit us at the following site:
http://www.pioneer.eu
The following settings and items are cleared
or returned to the default settings after upgrade. (The settings and items not listed below
will be retained.)
! Register your product. We will keep the details of your purchase on file to help you
refer to this information in the event of an
insurance claim such as loss or theft.
! We offer the latest information about
PIONEER CORPORATION on our
website.
Map function
View mode and scale setting on the map, direction of the map
Route setting
Current route and guidance status
3 Touch the key in the following order in
the navigation menu.
[Settings] d [Hardware] d [Service Info
Screen]
1 Access on the following website to
issue your password.
http://www.pioneer.eu/UnlockNavgate
For issuing the password, follow the instruction on the website.
4 Write down your device number
(Device Number) onto the supplied Media
Number Card (MEDIA NUMBER CARD) to
avoid mistakes.
2 Record the password that you received.
You need to input this password accurately.
Write down your password to avoid mistakes.
p Also write down “Version” information
which would be used to confirm completion
of the update.
[Destination] menu
! The history of “Auto fill-in function” for cities and streets
! Sorting order selected in [Address Book]
! The settings of [Options]([Route Overview])
[Info/Phone] menu
[Traffic Settings]
! © 2012 TomTom. All rights reserved. TomTom and the TomTom logo are registered
trademarks of TomTom N.V.
! © 2012 INCREMENT P CORP. ALL RIGHTS
RESERVED.
In case of trouble
! Should the navigation system fail to operate properly, contact your dealer or nearest
authorised Pioneer Service Station.
[Map] menu
All settings
[Settings] menu
[Volume], [Regional Settings] (except for
[Language])
[Vehicle Dynamics]
Right and left gauge type, [Adjust Style]
Engb
Engb
Engb
Engb
Instructions for
upgrading
Instructions for
upgrading
! NEVER stop the engine of your vehicle nor
turn off the power supply to the navigation
system until the installation is completed.
Turning the power off in this phase causes
a malfunction or failure of the navigation
system.
This section describes the upgrade procedures for your navigation system.
The update has two phases.
Phase 1: Update the database
Upgrade procedures
1 Park your vehicle in a safe place.
Leave the engine on, and make sure that the
handbrake is applied.
Instructions for
upgrading
3 Press the OPEN CLOSE button and insert the upgrade disc into the disc loading
slot.
5
CAUTION
For users who use AVIC-HD3 II or use the hardware
upgraded by CNDV-800HD, updating another software programme will begin first.
While this screen is visible, NEVER switch the
ignition key position or turn off the power of navigation system.
The message “Password obtained from
Pioneer should be entered to update. Have
you obtained the password? Please press
“Cancel” to stop update.” appears.
To start the update, touch [Yes].
Alternative options:
No:
Shows the device number (Device#) of your
navigation system.
Cancel:
Cancels the update.
2 Press the MAP button to display the
current location.
In this phase, take notice of the following:
! All functions other than the radio are disabled during update. You can perform simplified operations by using the TRK (c/d)
button and VOL (b/a) button. (We recommend changing the AV source to “AM” or
“FM” before you start the update.)
! The update takes approximately one hour
in total.
! If you turn the ignition switch off (the navigation system turns off) or eject the upgrade disc, the update resumes when the
navigation system turns on or the disc is reinserted.
Touch [Yes].
After the installation is complete, the navigation system restarts.
Check the details of the caution message and touch
[OK].
p The users who use other models can skip this
caution and proceed to the next step.
6 Enter the password for authentication
that you obtained, then touch [OK].
Renewed points through
this upgrade
9 Check the details of the caution message and touch [OK].
After you touch [Yes] in this screen, you cannot abort the update until the installation of
the system programme finishes.
The update takes approximately 3 hours in
total.
10 Touch [OK].
The map of your surroundings is displayed.
You can operate the navigation system by
touching keys displayed on the screen as
usual.
11 Press the OPEN CLOSE button and press
the EJECT button to eject the upgrade disc.
Checking whether the upgrade
was done properly
When the installation of “Disc 1” is finished,
the message that “Disc 2” is required appears.
After replacing the disc, the installation proceeds. When the update of map database is
completed, the finished message appears.
8
Display “Service Information” screen to compare the current version number with the previous one.
= For details of the operation, refer to Checking the device number.
Touch [OK] to restart the system.
The message confirming whether or not to
start the update will appear.
p If the message doesn’t appear, eject the
disc and display the map of your current position and then reinsert the disc.
4
Phase 2: Update the system
programme
After you touch [OK], the system starts the
authentication. When the authentication is finished properly, a message for confirmation
will appear.
Touch [Yes].
Be sure to display the map of your current position. Updating cannot start if others screens,
such as scroll mode, navigation menu or AV
screens are displayed.
7
Touch [Yes] to start the update.
p After touching [OK], the installation of system programme begins.
Input screen for “Address Book”, “Phone
Book”, “LIBRARY (Music Library)”
If you upgrade your navigation system by
these discs, the system will have the following
changes.
Renewal data
The following data are updated:
! Map database
! Gracenote® Database
Others, 0-9:
Touch to toggle the selection.
Small, Caps.:
This is a new feature. Either lowercase or
uppercase letters can be selected. Touch to
toggle the selection.
POI data coverage
Approximately 5.7 million POIs are included in
the database.
p For the modified categories that can be
used on “Overlay POI”, “Vicinity Search”
and used on the voice recognition, refer to
Category list for vicinity search (Renewal).
p Some POI information may not be accurate
or may become inaccurate through the
passage of time. Please directly contact the
POI to verify the accuracy of the information about the POI which appears in this
database. POI information is subject to
change without notice.
Time restrictions
This is a new feature. This setting controls
whether streets or bridges have traffic restrictions during a certain time should be taken
into account.
p If you want to set your route to avoid raised
draw bridges, select “On”.
p Settings marked with an asterisk (*) show
that these are default or factory settings.
1 Touch the key in the following order in
the navigation menu.
[Destination] d [Route Overview] d [Options]
Keyboard operation
Input screen of “Address Search” and
“POI Search”
CAUTION
While this screen is visible, NEVER switch the
ignition key position or turn off the power of navigation system.
p “Route Overview” is active only when the
route is set.
2 Touch [Time restrictions] to change the
route calculation conditions.
p To cancel the update, touch [No].
In this phase, take notice of the following:
! No functions are available.
! The update takes approximately 10 minutes.
The navigation system restarts and then the installation begins.
Engb
Engb
Others, Sym., 0-9:
Touch to toggle the selection.
After the installation is complete, the navigation system restarts.
Engb
Engb
Renewed points through
this upgrade
Renewed points through
this upgrade
Touching this option switches the setting “On”
or “Off”.
On*:
Calculates a route while avoiding streets or
bridges with traffic restrictions during a certain time.
Off:
Calculates a route while ignoring traffic restrictions.
1 Press the MAP button to display a map
of the area around your current position.
2
3 Touch [OK].
The route is recalculated, and the Route confirmation screen appears.
2D Twin Map View
CAUTION
If the time difference is not set correctly, the navigation system cannot consider traffic regulations correctly. Set the time difference correctly
(For details, refer to the Operation Manual of
your navigation system.)
shows for routes that contain streets or bridges
that are subject to traffic regulations during a certain
time when the setting “Time restrictions” is “On”.
1 Touch the key in the following order in
the navigation menu.
[Map] d [Displayed Info]
1 Touch the key in the following order in
the navigation menu.
[Map] d [Displayed Info]
2 Touch [Address Book Icon].
Each time you touch the key changes the setting.
2 Touch [3D Landmark].
Each time you touch the key changes the setting.
Press the MAP button again.
3 Touch the mode name to select the
mode you want to display.
p The system may calculate a route that includes streets or bridges that are subject to
traffic restrictions during a certain time
even if “On” is selected.
Renewed points through
this upgrade
The 2D map appears on the left screen.
! On*:
Displays the icon on the map.
! Off:
Hides the icon from the map.
p Even if “Address Book Icon” is set to
“Off”, the alarm sounds when you approach the registered location and the
set image pops up. To turn off the sound
output and image pop up, select
“No Sound” and “No Picture” for the
entry.
(dot), the registered name
p If you set
of that entry can be displayed on the
map. The registered name does not appear if “Address Book Icon” is set to
“Off”.
! On*:
Displays the 3D landmark on the map.
! Off:
Hides the 3D landmark on the map.
Traffic event icon and line
p Middle-sized icon is displayed on the map
scale between 2 km to 5 km (1 mile to
2.5 miles).
p The traffic-related items can be shown on
the detailed city map.
3D Twin Map View
Device name
The default device name displayed on the mobile phone changes “PIONEER NAVI” to
“PIONEER HDD NAVI”. (If you already connected the Bluetooth unit, the name already
set remains. If you restore the default setting,
the device name becomes “PIONEER HDD
NAVI”.)
You can select whether to display the 3D landmark on the map.
The 3D map appears on the left screen.
p Touching anywhere on the map changes
the map to the Scroll mode.
2D Twin Map View and 3D
Twin Map View
You can select whether to display the icons for
the entries of “Address Book” on the map.
p When you select “Address Book Icon Display” in “Short-Cut Selection”, you can
switch this setting with the shortcut menu.
p Settings marked with an asterisk (*) show
that these are default or factory settings.
Either “2D Twin Map View” or “3D Twin
Map View” can directly be selected in “View
Mode Selection” screen.
Engb
Editing the entry in “Phone Book”
The default device name displayed on the mobile phone changes “PIONEER NAVI” to
“PIONEER HDD NAVI”. (If you already connected the Bluetooth unit, the name already
set remains. If you restore the default setting,
the device name becomes “PIONEER HDD
NAVI”.)
Editing the entry in “Phone Book”
The display of an unknown user’s call
Depending on the caller ID service, the phone
number of the received call may not be displayed. [Unknown] appears instead in that
case.
p 3D landmark only appears when the view
mode is “3D Twin Map View” and the
map scale is set to 200 m (0.25 mile) or
lower.
p Settings marked with an asterisk (*) show
that these are default or factory settings.
Engb
Changing the background
picture
The customising of “Splash Screen” is added.
The operation is the same as “Navigation
Background” or “AV Background”. Please
refer to the Operation Manual of the navigation system to operate.
Splash Screen:
The screen that appears when the Navigation
system starts up.
Changing a pronunciation
You can edit [Pronunciation] to be used for
voice recognition along with [Name], [Phone
#], or [Picture].
Changing a name
1
1 Touch [Name], then touch [Yes].
The message confirming whether or not to
register the entered name as voice command
is displayed.
When not registering a name as a voice command, select [No].
1 Touch [Info/Phone] in the Navigation
menu, and touch [Phone Menu].
2
p If the pronunciation is not the desired one,
edit the characters so that the pronunciation matches your desired pronunciation.
is
p When you confirm the pronunciation,
shown on the left side of the location name
displayed in the entries of “Phone Book”.
This icon indicates that this name can be
used as a voice command during voice operation.
p Depending on which language is being
switched to, you may not be able to use
the registered pronunciation without
modification.
3 Phone #
These operations are the same as before
upgrade.
4 Picture
These operations are the same as before
upgrade.
Touch [Phone Book].
2
3 Touch
or [Add].
The edit screen appears.
Enter a new name, then touch [OK].
Hands-free phoning
3D Landmark
Address Book Icon
Renewed points through
this upgrade
The current name appears in the text box.
3 If the pronunciation is suitable, touch
[Yes].
The details you set are registered, and “Phone
Book Record Edit” screen appears.
Alternative options:
No:
Completes the registration without editing the
pronunciation.
Repeat:
You can reconfirm the pronunciation of the
name you entered.
1 Name
Enter the name to be displayed in the
phone book. If you enter the name for new
entry, you can select whether you use this
entry as voice commands.
2 Pronunciation
You can enter the desired pronunciation independently from the name. The registered
pronunciation is used for voice recognition.
p Up to 40 characters can be input for the
pronunciation.
p If “Pronunciation” is blank, you cannot
use the item as a voice command.
No sounds can be output during
Engb
Touch [Pronunciation].
Precautions when changing the splash
screen
The following is the default splash screen for
the navigation system.
PIONEER Original
2 Enter a new pronunciation, then touch
[OK].
The current pronunciation appears in the text
box (if already set).
3 If the pronunciation is suitable, touch
[Yes].
The details you set are registered, and “Phone
Book Record Edit” screen appears.
Alternative options:
No:
Cancels the editing.
Repeat:
You can reconfirm the pronunciation of the
name you entered.
If an image other than the one shown above is
previously set (such as an image from the dealer or other source) and you change the splash
screen once, you must use the CD-R (-RW)
where the image is recorded to restore the previous splash screen.
Setting the time difference
The time difference can be set from “–4” to
“+9” hours.
DVD playback
Touching o or p resumes normal playback at a desired point during continuous fast
or
is
reverse/fast forward (when
shown).
p You can also perform these operations by
using TRK (c/d) button.
.
Engb
Renewed points through
this upgrade
Renewed points through
this upgrade
Voice recognition
Renewed points through
this upgrade
Renewed points through
this upgrade
Operating the view mode
Preferential voice command
Other voice command
TV
Change To TV, Switch To TV
Terms written in italics are voice commands.
p You can skip the commands with the mark (*). For example, in case you want to recalculate the route, the system
can recognise the command even if you say “Rerouting” without saying “Route Options” and “Change Route”.
Map Operation* d Change View Mode* d Map Mode, 2D Twin Map View, 3D Twin Map View, Street List Mode, Mixed
Mode, Rear View, Vehicle Dynamics d Map screen will be changed to selected view mode.
Notes:
! Underlined commands are renewed.
! “Driver’s View” is not available.
AM
Change To AM, Switch To AM
FM
Change To FM, Radio
Music Library
Change To Music Library, Switch To Music Library
Dialled with the pronunciation of the entry in Phone Book
Recalculating the route
Music Search
Search My Music, Search Music
Call* d Telephone Book d <Registered phone book’s pronunciation> d If the registered entry in phone book has
telephone number data, touch VOICE icon to call the entry.
Notes:
! The voice operations related the telephone are available only using hands-free phoning feature of this system
and is unavailable during a call.
! For <Registered phone book’s pronunciation> shown above, say the registered pronunciation. For example, if
the registered pronunciation in the entry of phone book is “My friend” and you want to operate “Telephone Book”,
say “My friend”.
Route Options* d Change Route* d Rerouting, Use Main Road, Use Fast Route, Use Short Route, Use Motorway,
Avoid Motorway, Use Ferry, Avoid Ferry, Use Toll Road, Avoid Toll Road d If the route already set, touch VOICE icon to
recalculate.
Note:
! Underlined commands are renewed.
Album
Search By Album, Search Album
Artist
Search By Artist, Search Artist
Genre
Search By Genre, Search Genre
Track Search
Search By Track
iPod
Change To iPod, Switch To iPod
Additional voice operations (Only for AVIC-HD1BT)
Renewed other commands
Making phone call to your home
Added commands (Only for AVIC-HD1BT)
Call* d Call Home d Touch VOICE icon to call your home (Only when the phone number is registered in your
home.)
Search by city centre
Destination* d POI d <City Centre> d Location Screen (A)
Notes:
! Select the country manually before the voice operation.
! If the language and country are not selected in the correct combination, search cannot be performed. (The following table indicates the countries that can be selected for the search depending on which language is selected.)
! For <City Centre> shown above, say their city name directly. For example, if the city name is “London” and you
want to operate “Search by city centre”, say “London”.
Preferential voice command
Other voice command
Back
Return, Before
Set As Destination
Set, Go, Route To Destination, Begin Guidance, Start
POI
Point Of Interest, Points Of Interest, Business Listing
Address Book
Registered Points, My Addresses, Search By Address Book
Vicinity Search
Vicinity, Search Around, Search In Vicinity
2D Twin Map View
2D Twin, 2D Split
3D Twin Map View
3D Twin, 3D Split
Use Fast Route
Fast Route, Fastest Route
Use Short Route
Short Route, Shortest Route
Traffic Information
Traffic, View Traffic Info, Display Traffic Information, Current Traffic Information,
Display Traffic Condition
[Language] in [Regional Settings]
The country you can search
English, Swedish, Danish, Norwegian
UK (United Kingdom, Great Britain, England)
Dutch, Flemish
NL (Netherlands)
Spanish, Portuguese
E (Spain, Andorra)
Traffic On Route List
On Route List, Route List, Traffic On Route
German
A (Austria), D (Germany)
Call
Dial, Ring, Dial Out, Place A Call, Make A Call
French
L (Luxembourg), F (France, Monaco)
Call Phone Number
Call By Number, Call Number, Call By Phone Number, Call Using Phone Number
Italian
I (Italy, San Marino, Vatican City)
Navigation Screen
Navigation, Navi
AV Screen
AV, Audio
Change Source
Next Source, Source Change
CD
Change To CD, Switch To CD
DVD
Change To DVD, Switch To DVD
Engb
Engb
Unavailable command (Only for AVIC-HD1BT and AVIC-HD3)
Preferential voice command
Other voice command
Driver’s View
Driver, 3D
Engb
Category list for vicinity search (Renewal)
The following categories are modified or added as the sub-category.
p These changes are applicable for the voice operation.
p Only the difference between the data released last year and the data stored in CNDV-1100HD is described in this
list.
Category name
Old
New
Car Dealer
MAYBACH
(Not available.)
Car Dealer
MG
(Not available.)
Cash Dispenser/Bank
BANQUE POPULAIRE DE L’OUEST
BANQUE POPULAIRE
Cash Dispenser/Bank
CIN
CIC
Cash Dispenser/Bank
BRED BANQUE POPULAIRE
(Not available.)
Cash Dispenser/Bank
FORTIS
(Not available.)
Cash Dispenser/Bank
LYONNAISE DE BANQUE
(Not available.)
Cash Dispenser/Bank
SCALBERT-DUPONT
(Not available.)
Cash Dispenser/Bank
SOCIETE BORDELAISE
(Not available.)
Hotel
RADISSON SAS
RADISSON BLU
Hotel
CLIMAT DE FRANCE
(Not available.)
Hotel
TRAVEL INN
(Not available.)
Petrol Station
DIN-X
(Not available.)
Petrol Station
DK-BENZIN
(Not available.)
Petrol Station
HYDRO
(Not available.)
Shopping
Men’s Clothing
(Not available.)
Shopping
Women’s Clothing
(Not available.)
Engb
Troubleshooting
Messages in the procedures for updating
The following messages may be displayed in the updating.
p There are occasions when you may see error messages other than those shown here. In such a case, follow the instructions given on the display.
Message
When
What to do
Inserted disc is invalid. Please
confirm that the disc is correct.
If you insert a disc upside down.
Insert the disc with the label upward.
If the disc is dirty.
Clean the disc and retry.
If extreme vibration occurs continu- Retry in vibration-free condition.
ously.
If the disc is cracked or otherwise
damaged.
An error occurred and the up- If the disc is dirty.
date failed. Update is reUnexpected error occurred in the
started by pressing “Retry”.
update process.
Engb
Consult your dealer.
Clean the disc and retry.
Consult your local Pioneer dealer if this message persist.