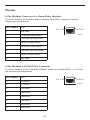
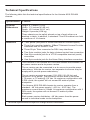
1
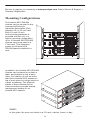
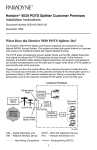
HOTWIRE 8610 DSLAM
INSTALLATION INSTRUCTIONS
Document No. 8610-A2-GN10-10
Copyright E 1999 Paradyne Corporation.
All rights reserved.
Printed in U.S.A.
Notice
This publication is protected by federal copyright law. No part of this publication may be
copied or distributed, transmitted, transcribed, stored in a retrieval system, or translated
into any human or computer language in any form or by any means, electronic,
mechanical, magnetic, manual or otherwise, or disclosed to third parties without the
express written permission of Paradyne Corporation, 8545 126th Ave. N., Largo,
FL 33773.
Paradyne Corporation makes no representation or warranties with respect to the
contents hereof and specifically disclaims any implied warranties of merchantability or
fitness for a particular purpose. Further, Paradyne Corporation reserves the right to
revise this publication and to make changes from time to time in the contents hereof
without obligation of Paradyne Corporation to notify any person of such revision or
changes.
Changes and enhancements to the product and to the information herein will be
documented and issued as a new release to this manual.
Warranty, Sales, Service, and Training Information
Contact your local sales representative, service representative, or distributor directly for
any help needed. For additional information concerning warranty, sales, service, repair,
installation, documentation, training, distributor locations, or Paradyne worldwide office
locations, use one of the following methods:
H
Internet: Visit the Paradyne World Wide Web site at www.paradyne.com. (Be
sure to register your warranty there. Select Service & Support → Warranty
Registration.)
H
Telephone: Call our automated system to receive current information by fax or to
speak with a company representative.
— Within the U.S.A., call 1-800-870-2221
— Outside the U.S.A, call 1-727-530-2340
Document Feedback
We welcome your comments and suggestions about this document. Please mail them
to Technical Publications, Paradyne Corporation, 8545 126th Ave. N., Largo, FL 33773,
or send e-mail to [email protected]. Include the number and title of this
document in your correspondence. Please include your name and phone number if you
are willing to provide additional clarification.
Trademarks
All products and services mentioned herein are the trademarks, service marks,
registered trademarks or registered service marks of their respective owners.
TM
Hotwirer 8610 DSLAM
Installation Instructions
Document Number 8610-A2-GN10-10
May 1999
Product Documentation on the World Wide Web
We provide complete product documentation online. This lets you search the
documentation for specific topics and print only what you need, reducing the waste of
surplus printing. It also helps us maintain competitive prices for our products.
Complete documentation for this product is available at www.paradyne.com.
Select Library → Technical Manuals → Hotwire DSL and MVL Systems.
Select one of the following documents:
8000-A2-GB22
Hotwire Management Communications Controller (MCC) Card, IP Conservative,
User’s Guide
8000-A2-GB29
Hotwire Management Communications Controller (MCC) Card User’s Guide
Refer to the MCC User’s Guide for a list of the appropriate DSL card documents.
To request a paper copy of a Paradyne document:
H Within the U.S.A., call 1-800-PARADYNE (1-800-727-2396)
H Outside the U.S.A., call 1-727-530-8623
Before installing the Hotwirer 8610 DSLAM, read the Important Safety Instructions
beginning on page 33.
1
About This Document
This guide is written for administrators and technicians who install devices at the
central office (CO) or at a Network Service Provider (NSP) location adjacent to the CO.
It should be used in conjunction with the appropriate Hotwire DSL card User’s Guide or
Network Configuration Guide, which describes how to plan the data networks
surrounding the DSLAM and specific DSL cards.
To install the customer premises (CP) portion of the Hotwire 8610 DSLAM, refer to the
appropriate Hotwire Remote Termination Unit (RTU) Customer Premises Installation
Instructions and Hotwire POTS Splitter Customer Premises Installation Instructions.
What is the Hotwire 8610 DSLAM?
The Hotwire 8610 Digital Subscriber Line Access Multiplexer (DSLAM), which can be
installed in the CO or at a customer location adjacent to the CO, is a low-startup-cost
alternative to the Hotwire 8810 DSLAM chassis. It provides high-speed Internet or
intranet access.
The following illustration shows a high-level view of an example Hotwire configuration.
Customer Premises (CP)
Central Office (CO)
Network
Service
Provider
Data
Interface
Hotwire
IPC
Ethernet
DSL
CARD
DSLAM
MDF
CO
POTS
Splitter
SN
POTS/DSL
POTS
CP
POTS
Splitter
Switched
Network
Voice
Interface
Optional
Optional
Legend: DSL – Digital Subscriber Line
MDF – Main Distribution Frame
SN – Service Node
IPC – Interworking Packet Concentrator
POTS – Plain Old Telephone Service
99-15674-03
2
The 8610 DSLAM accepts the following types of cards:
H
Management Control Processor (MCP). This is a processor card that administers
and provides diagnostic connectivity to the DSL cards. It acts as a mid-level
manager and works in conjunction with an SNMP network management system,
such as HP OpenView, via its LAN port. It gathers operational status for each of
the DSL cards and responds to the SNMP requests. It also has a serial port for
local terminal access.
H
MVL, RADSL and DSL cards. These cards provide a processor and an Ethernet
interface to the NSP. The processor controls the modems and forwards the packet
traffic to and from the Ethernet and DSL interfaces. Models include:
— 8310 4-port and 8312 12-port Multiple Virtual Lines (MVL) cards that
interoperate with the Hotwire 6310 modem.
— 8510 Rate Adaptive Digital Subscriber Line (RADSL) card that interoperates
with the 5620 Remote Termination Unit (RTU).
— 8540 Digital Subscriber Line (DSL) card that interoperates with either the 5216
or 5246 Remote Termination Unit (RTU).
— 8546 DSL card that interoperates with the 5446 RTU.
H
Multirate High-bit-rate Digital Subscriber Line (M/HDSL) card.
H
Multirate Symmetric Digital Subscriber Line (M/SDSL) card.
NOTE:
RADSL, MVL, M/HDSL and M/SDSL cards are generically referred to as DSL
cards in this document.
Hotwire 8610 DSLAM Features
The Hotwire 8610 DSLAM chassis has the following features:
H
Power Redundancy
Two versions of the Hotwire 8610 DSLAM chassis are available:
— ac power
— dc power
The ac version can also be connected to a dc source to provide power
redundancy. When using the dc version, two separate dc sources may be
employed to provide power redundancy. If one power source fails, the other source
provides all of the power needed by the system. This is done automatically without
system disruption.
The dc version requires a source of –48 Vdc, while the ac version will operate from
100 to 250 volts ac, 50 to 60 Hz.
3
H
Stackable Chassis for DSL Access Growth
Each chassis is an independent, standalone system. The 8610 and 8600 chassis
are interoperable in a stack. The stackable design provides for six systems to
share management access through a single MCP card (for 8610) or MCC card (for
8600) which, in turn, allows an additional slot for a DSL card in each of up to five
additional systems. In a stacked configuration, the first or base chassis is equipped
with an MCP/MCC card in Slot 1 leaving Slots 2 and 3 available for up to two DSL
cards.
Each additional system will accept up to three DSL cards.
A Hotwire 8610 or 8600 DSLAM chassis can be added or removed from the stack
without disrupting data service to the other items in the stack. However,
management service will be disrupted.
The base system is connected to additional systems by connecting the 8-pin
modular expansion cable provided from the OUT port of the base chassis to the IN
port of the next chassis in the stack.
H
Hot Swappable Cards
The MCP and DSL cards can be installed and removed from the Hotwire 8610
DSLAM chassis without service disruption. You can replace a card without
powering down the chassis and disrupting service to the other cards.
H
Primary Network Management Support via SNMP
SNMP management of the DSL cards is accomplished over a single Ethernet
connection to the MCP card from a Network Management System (NMS) (such as
Paradyne’s DCE Manager for HP OpenView). The MCP card gathers all
management information for each of the DSL cards and responds to the SNMP
requests on behalf of the cards.
For a list of specific management information bases (MIBs) supported, see the
appropriate Hotwire DSLAM Network Configuration Guide.
4
Hotwire 8610 DSLAM Components
TM
TM
3
RADSL
8546
8000
D
X
oll
C
ET
N
1
H
ER
MCP
4
3
2
SL
1
R
X
R
PO
RT
TX
TX
C
ol
t
ET
N
Te
s
H
ET
A B A B
48V RTN
2
ET
DC FUSES
T4A, MIN. 48V
48VDC CLASS 2
OR LIMITED
PWR SOURCE
AC
INPUT
ER
O
EM
MCP/
DSL
O
K
Alr
m
Te
st
ESD
SY
ST
EM
SY
ST
K
Alr
m
8610
A
B
10 BASE T
MANAGEMENT
PWR
FAN
ALM
A
4 5 6
3
2
1
B
STACK
POSITION
IN
OUT
SERIAL
ALM INTF
MCP/1
2
3
99-16311
The Hotwire 8610 DSLAM consists of the following components:
H
Hotwire 8610 DSLAM base chassis
Hotwire 8610 DSLAM is a 3-slot chassis designed to house one MCP card in the
first slot and up to two DSL cards in the remaining slots. Since the MCP card in the
8610 system can provide management connectivity for up to five other 8610
DSLAMs, these other systems can use the first slot for a DSL card, thus housing
up to three DSL cards.
H
One Management Control Processor (MCP) card
The Hotwire 8610 DSLAM requires one MCP card mounted in Slot 1 of the base,
or first, chassis in a stack. The MCP card is a processor card that administers and
provides diagnostic connectivity to DSL cards in from one to six 8610 DSLAMs. It
acts as a mid-level manager and works in conjunction with an SNMP network
management system, such as HP OpenView, via its LAN port. It gathers
operational status for each of the DSL cards and responds to the SNMP requests.
It also supports a serial port for local terminal access.
H
At least one Digital Subscriber Line (DSL) card
The 8610 DSLAM requires at least one DSL card. Each DSL card contains a
number of DSL ports (depending on model), Ethernet interface circuitry, and a
processor. The processor controls the modems and forwards the packet traffic to
and from the Ethernet and DSL interfaces.
NOTE:
You must order the MCP and DSL cards separately. They are not provided with the
chassis.
5
Preinstallation Considerations
Consider the following before performing installation of the 8610 chassis:
H
Installation Site
Your installation site should be well ventilated, clean, and free of environmental
extremes. If you are installing the Hotwire 8610 DSLAM chassis in a central office
rack, make sure there is 2 to 3 feet of clearance at the front of the rack in which the
8610 chassis is to be installed to allow access for the installation of the chassis,
circuit cards, and cables. Also allow for proper clearance at the rear of the chassis
for cabling, if using the rear cable connectors.
H
Power
The ac power version requires a power source of 100–250 Vac @ 50–60 Hz;
maximum current draw is 3 amps @ 110 Vac.
The dc power version requires a – 48 Vdc power source (– 40.0 to –60.0 Vdc;
maximum current draw is 2 amps). The size of power source wires must be
between 14 AWG and 18 AWG, and can be either solid or stranded. However,
16 AWG stranded wire is recommended.
H
Grounding
A ground lug is located at the lower right of the cover at the rear. It accepts
14 AWG wire.
A noninsulated banana jack is located at the left front side of the unit to provide a
ground for the ESD wrist strap plug.
H
Stacking
Up to three 8610 chassis may be physically stacked safely on top of each other.
However, for stacks of more than three, start a second stack or mount in a 19- or
23-inch rack. Contact your sales representative for ordering information.
H
Cabling
Use only CAT3 or better twisted-pair network connection cables for DSL
Termination Unit connections and interface patch cabling. Untwisted analog cables
of any length anywhere in the loop substantially contribute to crosstalk and
reduced loop reach.
The following customer-provided cables and cable adapters are required with this
product:
— Plug-ended Telco 50-pin cable for connection from the Hotwire 8610 DSLAM
Line ports to the CO POTS splitter shelf or MDF, one cable per DSL card.
— 8-pin UTP (Unshielded Twisted Pair) CAT5 modular cable for connection to
the DSL 10BaseT Ethernet ports. You will need this cable for accessing the
LAN/WAN circuits of each DSL card.
— 8-pin UTP CAT5 modular cable for connection from the Hotwire 8610 DSLAM
MANAGEMENT MCP port to a 10BaseT hub connector (connected to an
SNMP management system network) for Slot 1 in the base chassis. For other
chassis in a stack, use this cable for daisy chaining the chassis together. For
M/HDSL and M/SDSL cards, refer to the appropriate card Installation
Instructions for the correct cable needed.
6
— 14-foot serial cable and DB25 and DB9 adapters are shipped with the MCP
card. For connection to a modem, you will need a NULL modem adapter.
If there is adequate maintenance space at the rear of the rack, mount the chassis
on the rack before installing cables. If there is inadequate space to do this, install
the rear-mounted network connectors on the chassis before mounting the chassis
on the rack.
CAUTION:
Use of any nontwisted pair wiring arrangements, such as jumpers, can cause
reduction in overall DSL reach performance, even over short distances.
NOTE:
Each Hotwire 8610 DSLAM chassis weighs approximately nine pounds (with circuit
cards) and can be easily installed by one installer.
Unpacking the Hardware
When shipped, the Hotwire 8610 DSLAM chassis is packed in a cardboard shipping
container. Carefully remove the 8610 chassis from its shipping container and check for
physical damage. If the 8610 chassis shows signs of shipping damage, report this
immediately to your shipping and sales representatives.
Package Contents
The Hotwire 8610 DSLAM chassis, as shipped, consists of the following:
H
Three filler plates installed in Slots 1, 2, and 3.
H
ac power cord (if your chassis has the ac power option)
H
Two reversible mounting brackets (for 19- and 23-inch rack mounting)
H
Associated hardware bundled in a plastic bag:
— Four #10-32 mounting screws
— Four #12-24 mounting screws and four #12-24 Speed Nuts (for use with racks
without threaded mounting holes)
— Four #8-32 Phillips pan-head screws for center mounting
— Three #4-40 Phillips pan-head screws (to replace longer Telco captive screws
when using the rear-mounted connectors)
NOTE:
The Hotwire 8610 DSLAM chassis requires an MCP card and at least one DSL
card for proper functionality. These cards are not provided as part of the 8610
chassis and must be ordered separately.
7
Be sure to register your warranty at www.paradyne.com. Select Service & Support →
Warranty Registration.
Mounting Configurations
RADSL
8546
RADSL
8546
MCP
8000
RADSL
8546
RADSL
8546
MCP
8000
RADSL
8546
3
8546
4
1
RADSL
3
4
1
D
2
2
1
ol
C
X
l
ET
N
3
8000
2
3
1
2
D
RT
ol
SL
C
PO
R
R
X
ET
N
TX
ER
TX
st
1
MCP
ET
RT
ol
SL
C
PO
st
N
X
R
EM
TX
Te
O
ER
ST
H
SY
ET
st
EM
K
Alrm
Te
O
O
ET
H
SY
ST
K
Alrm
Te
EM
ST
A
A B A B
48V RTN
10 BASE T
MANAGEMENT
DC FUSES
T4A, MIN. 48V
48VDC CLASS 2
OR LIMITED
PWR SOURCE
AC
INPUT
2
H
SY
MCP/
DSL
3
ET
ESD
ER
TM
K
Alrm
TM
8610
PWR
FAN
ALM
B
A
4 5 6
3
2
1
B
STACK
POSITION
IN
OUT
SERIAL
ALM INTF
MCP/1
2
3
2
3
4
3
4
1
2
RT
ol
C
PO
SL
R
X
ET
TX
ER
D
1
RT
ol
SL
C
PO
R
R
X
ET
N
TX
ER
TX
D
C
ol
X
l
ET
ER
N
st
A
A B A B
48V RTN
10 BASE T
MANAGEMENT
DC FUSES
T4A, MIN. 48V
48VDC CLASS 2
OR LIMITED
PWR SOURCE
AC
INPUT
N
st
EM
ST
Te
st
EM
K
Alrm
Te
O
ET
O
EM
ST
H
SY
MCP/
DSL
ET
ESD
H
SY
ST
K
Alrm
Te
ET
H
SY
O
TM
K
Alrm
TM
8610
PWR
FAN
ALM
B
A
4 5 6
3
2
1
B
STACK
POSITION
IN
OUT
SERIAL
ALM INTF
MCP/1
2
3
A B A B
48V RTN
2
3
4
3
4
1
2
RT
ol
C
PO
SL
R
X
ET
ER
TX
N
st
D
RT
ol
SL
C
PO
R
R
X
ET
N
TX
ER
TX
1
EM
ST
Te
st
EM
K
Alrm
Te
O
l
X
ol
C
ER
N
st
ET
D
ET
O
EM
ST
DC FUSES
T4A, MIN. 48V
48VDC CLASS 2
OR LIMITED
PWR SOURCE
AC
INPUT
H
MCP/
DSL
SY
ESD
H
SY
ST
K
Alrm
Te
ET
H
SY
O
TM
K
Alrm
TM
8610
ET
The Hotwire 8610 DSLAM
chassis can be mounted in any
commercial Electronic
Industries Association (EIA)
standard 19- or 23-inch rack.
Both 19- and 23-inch
rack-mounting hardware is
provided with the unit. In a
typical mounting configuration,
up to 14 Hotwire 8610 DSLAM
chassis can be mounted in a
7-foot rack. This illustration
shows the Hotwire 8610
DSLAM chassis installed in a
rack.
A
B
10 BASE T
MANAGEMENT
PWR
FAN
ALM
A
4 5 6
3
2
1
B
STACK
POSITION
IN
OUT
SERIAL
ALM INTF
MCP/1
2
3
99-16309
In addition, the Hotwire 8610 DSLAM
chassis can be placed on a desk or
table, and stacked on top of each
other. For stability, do not set more
than three Hotwire 8610 chassis on
top of each other in a single stack on
a desk or tabletop. Two physical
stacks of three chassis can be
interconnected to provide shared
management access for six
Hotwire 8610 chassis.
3
2
1
10
SE
BA
T
3
2
NT
ME
GE
NA
MA
F
M
AL
P/1
MC
3
INT
L
RIA
SE
2
T
OU
4
3
2
1
5 6
IN
1
K
AC
ST ION
SIT
PO
R
PW
N
FA
TM
TM
DC
A,
T4
S
SE
FU . 48V
MIN
B
A
M
AL
10
SE
BA
T
B
3
D
ES
10
A
P/
MC L
DS
2
2
S
AS
CLITED
DCLIMURCE
48V
ORR SO
PW
86
B
A V
48
NT
ME
GE
NA
MA
B
A
N
RT
F
M
P/1
MC
3
INT
AL
L
RIA
SE
2
T
OU
AC T
PU
IN
4
3
2
1
5 6
IN
1
K
AC
ST ION
SIT
PO
R
PW
N
FA
TM
TM
DC
A,
T4
S
SE
FU . 48V
MIN
B
A
M
AL
10
SE
BA
B
D
ES
10
2
S
AS
CLITED
DCLIMURCE
48V
ORR SO
PW
3
A
P/
MC L
DS
86
B
A V
48
T
2
NT
ME
GE
NA
MA
B
A
N
RT
F
M
P/1
MC
INT
AL
L
RIA
SE
T
OU
AC T
PU
5 6
4
3
2
1
K
AC
ST ION
SIT
PO
IN
IN
R
PW
N
FA
TM
TM
DC
A,
T4
S
SE
FU . 48V
MIN
B
A
M
AL
B
10
D
ES
86
A
P/
MC L
DS
2
S
AS
CLITED
DCLIMURCE
48V
ORR SO
PW
B
A V
48
B
A
N
RT
AC T
PU
IN
99-16310
NOTE:
In this guide, the term rack refers to a CO rack, cabinet, frame, or bay.
8
Hotwire 8610 DSLAM Chassis Installation
The Hotwire 8610 DSLAM chassis is designed to be stacked one on top of the other on
a desktop or table, or mounted in a 19-or 23-inch rack (front or center mount). Up to
three 8610 chassis can be stacked on a table or desktop. Mounting brackets are
provided for mounting in 19- or 23-inch racks.
You will need a large, flat-blade screwdriver and a Phillips screwdriver to install the
8610 chassis in a commercial EIA-standard 19- or 23-inch rack. You will need a small
phillips screwdriver to change the STACK POSITION switch.
Stacking the 8610 Chassis
" Procedure
To stack the 8610 chassis on a desktop or table, select the stack position, and
interconnect the stack:
1. Place the first Hotwire 8610 DSLAM chassis on a desktop or table.
2. Place the second Hotwire 8610 DSLAM chassis directly on top of the first chassis.
3. Place the third Hotwire 8610 DSLAM chassis directly on top of the second chassis.
4. Change the setting of the rotary STACK POSITION switch to the appropriate
position of the chassis using a small Phillips screwdriver. Examine the switch
closely to be sure the switch is set so that the notch points to the position number.
— The base chassis
containing the MCP card
must be set to Stack
Position 1.
— The chassis directly on
top of the base chassis
must be set to Stack
Position 2.
Stack
Position 3
4 5 6
Stack
Position 2
3
2
..
4 5 6
3
2
..
.
.
1
STACK
POSITION
.
.
1
STACK
POSITION
3
2
1
E
10
T
BAS
3
— The chassis directly on
top of the second chassis
must be set to Stack
Position 3.
— Start a second stack for
chassis four through six
with the Stack Position
switch set appropriately.
2
EM
MA
ENT
NAG
F
MC
P/1
3
INT
ALM
IAL
SER
2
T
OU
4 5 6
3
2
..
4
5 6
IN
3
.
.
1
STACK
POSITION
1
2
1
CK N
STA
ITIO
POS
R
PW
FAN
TM
B
ES
FUS. 48V
DC, MIN
T4A
TM
A
E
ALM
10
T
BAS
B
3
A
P/
MC
DSL
ESD
2
2
SS
D
CLA
ITE
DCLIM RCE
48V
ORR SOU
PW
10
86
B
A
48V
EM
B
A
RTN
MA
ENT
NAG
F
MC
P/1
3
INT
ALM
IAL
2
SER
T
OU
AC T
PU
4
5 6
IN
3
IN
1
2
1
CK N
STA
ITIO
POS
R
PW
FAN
TM
B
ES
FUS. 48V
DC, MIN
T4A
TM
A
E
ALM
10
2
2
SS
D
CLA
ITE
DCLIM RCE
48V
ORR SOU
PW
86
3
A
P/
MC
DSL
ESD
10
T
BAS
B
EM
B
B
A
48V
A
RTN
MA
ENT
NAG
F
MC
P/1
INT
ALM
IAL
SER
T
OU
AC T
PU
4
5 6
3
IN
2
1
CK N
STA
ITIO
POS
IN
R
PW
FAN
TM
B
ES
FUS. 48V
DC, MIN
T4A
TM
A
ALM
B
Base Unit
Stack Position 1
9
ESD
10
86
A
P/
MC
DSL
2
SS
D
CLA
ITE
DCLIM RCE
48V
ORR SOU
PW
AC T
PU
IN
B
A
48V
B
A
RTN
99-16312
Interconnecting 8610 Systems
" Procedure
To interconnect multiple 8610 systems:
1. Connect the end of an 8-pin modular cable into the Management OUT port of the
base chassis.
2. Dress the 8-pin modular cable to the left and under the chassis, behind the foot,
and up the side of the unit.
3. Plug the other end of the 8-pin modular cable into the Management IN port of the
8610 chassis above, dressing the cable as in the previous step.
4. Repeat for the next 8610 chassis, connecting the Management OUT port of
Chassis 2 to the Management IN port of Chassis 3.
NOTE:
Bus cables must use Unshielded Twisted Pair (UTP) CAT5 cable. The total bus
cabling should not exceed 25 feet.
10
The following illustration shows the designated number for each DSL card slot in a
stack.
NOTE:
This illustration shows a stack of six Hotwire 8610 systems, which is valid for rack
mounting. However, the same relationship of software-assigned slot numbers
applies to two stacks of three each, mounted on a desk or tabletop and connected
by a bus cable. The base chassis must still have the MCP card in physical Slot 1
with the base chassis Stack Position switch set to 1. The software does not assign
a slot number to the MCP card.
Assigned DSL Slot Numbers
Physically Software
Assigned Assigned
3
2
ESD
1
MCP/
DSL
DC FUSES
T4A, MIN. 48V
48VDC CLASS 2
OR LIMITED
PWR SOURCE
AC
INPUT
A B A B
48V RTN
A
B
10 BASE T
MANAGEMENT
PWR
FAN
ALM
A
B
4 5 6
3
2
1
STACK
POSITION
IN
OUT
SERIAL
ALM INTF
MCP/1
2
3
2
1
MCP/
DSL
DC FUSES
T4A, MIN. 48V
48VDC CLASS 2
OR LIMITED
PWR SOURCE
A B A B
48V RTN
A
B
10 BASE T
MANAGEMENT
PWR
FAN
ALM
A
B
4 5 6
3
2
1
STACK
POSITION
IN
OUT
SERIAL
ALM INTF
MCP/1
2
3
2
1
MCP/
DSL
DC FUSES
T4A, MIN. 48V
48VDC CLASS 2
OR LIMITED
PWR SOURCE
A B A B
48V RTN
A
B
10 BASE T
MANAGEMENT
PWR
FAN
ALM
A
B
4 5 6
3
2
1
STACK
POSITION
IN
OUT
SERIAL
ALM INTF
MCP/1
2
2
ESD
1
MCP/
DSL
DC FUSES
T4A, MIN. 48V
48VDC CLASS 2
OR LIMITED
PWR SOURCE
AC
INPUT
A B A B
48V RTN
A
B
10 BASE T
MANAGEMENT
PWR
FAN
ALM
A
B
4 5 6
3
2
1
STACK
POSITION
IN
OUT
SERIAL
ALM INTF
MCP/1
2
11
10
9
3
2
1
8
7
6
3
2
1
5
4
3
3
2
1
2
1
Additional
Systems
3
3
MCP
Card
3
2
1
3
ESD
AC
INPUT
14
13
12
3
ESD
AC
INPUT
3
2
1
3
ESD
DSL
Cards
17
16
15
3
ESD
AC
INPUT
3
2
1
Base
Chassis
3
99-16313
11
Installing the 8610 Chassis in a Rack with Threaded Screw Holes
NOTE:
You may want to install the three supplied #4-40 Phillips pan-head screws for the
rear Telco connectors on the rear connectors before rack mounting the DSLAM.
This will make them readily available when needed. See Installing Network Tip and
Ring Connections on page 21 for more information.
" Procedure
To install the 8610 chassis in a rack that has threaded screw holes:
1. Install the mounting brackets on the 8610 chassis by removing the two front
screws on each side of the unit. You will reuse these screws to secure the
mounting brackets to the 8610 chassis.
— For a 19-inch rack installation,
the notched flange of the
mounting bracket is placed
against the side of the 8610
chassis.
19-Inch
Rack
23-Inch
Rack
— For a 23-inch rack installation,
the smaller flange of the
mounting bracket is placed
against the side of the 8610
chassis.
98-15451a
2. Secure the mounting brackets to the 8610 chassis by using the screws removed
from the sides of the unit.
3. Determine the preferred placement of the 8610 chassis in the rack. Then, mark the
appropriate locations for the mounting screws on the rack.
4. Place the 8610 chassis
against the front rails of the
rack and secure with the
appropriate mounting screws.
Front Rail
Repeat these steps for each
succeeding 8610 chassis.
D
ES
99-16314
12
Installing the 8610 Chassis in a Rack without Threaded Screw Holes
" Procedure
To install the 8610 chassis in a rack that does not have threaded screw holes:
1. Install the mounting brackets on the 8610 chassis.
— For a 19-inch rack installation, the notched flange of the mounting bracket is
placed against the side of the 8610 chassis.
— For a 23-inch rack installation, the smaller flange of the mounting bracket is
placed against the side of the 8610 chassis.
2. Determine the preferred placement of the 8610 chassis in the rack.
3. Slip a Speed Nut onto each
rail hole selected and align
the hole of the Speed Nut with
the hole in the rail.
Front Rail
4. Line up the chassis mounting
bracket with the Speed Nut
and start to rotate the screw
into the chassis mounting
bracket and the speed nut.
Start all four screws, then
tighten all four until each
screw head is flush with the
chassis and is securely
mounted in the rack.
Speed
Nut
D
ES
99-16315
Repeat these steps for each
succeeding 8610 chassis.
13
Center-Mounting the 8610 Chassis in a Rack
" Procedure
To center-mount the 8610 chassis in a rack:
1. Determine the preferred placement of the 8610 chassis in the rack. Then, mark the
appropriate locations for the mounting screws on the rack.
2. Reposition the mounting brackets to the center-mount position using the four #8-32
screws supplied with the chassis.
3. Fasten the chassis to the rack. Insert the screws through the rack and into the two
screw holes located in the center of each side of the chassis.
Repeat these steps for each succeeding 8610 chassis.
Complying with NEBS
The following must be taken into consideration for compliance with Network EquipmentBuilding System (NEBS) requirements.
Connection to the CO Ground Lug
" Procedure
1. Strip back the insulation approximately 1/4- to 3/8-inch on 14 AWG copper wire.
2. Loosen the screw on the GND lug located on the rear surface at the center of the
Hotwire 8610 DSLAM cover.
3. Insert the stripped end of the wire into the open end of the GND lug and tighten the
lug’s screw. Make sure it is making contact with the stripped portion of the wire.
ESD Wrist Strap Jack
A noninsulated banana jack is located at the left front side of the Hotwire 8610 DSLAM
to provide a ground for the ESD wrist strap’s plug.
! HANDLING PRECAUTIONS FOR STATIC-SENSITIVE DEVICES
This product is designed to protect sensitive components from
damage due to electrostatic discharge (ESD) during normal
operation. When performing installation procedures,
however, take proper static control precautions to
prevent damage to equipment. If you are not sure
of the proper static control precautions, contact
your nearest sales or service representative.
14
496-15149
Supplying Power
The Hotwire 8610 DSLAM chassis is available in two versions:
H
dc power (– 40.0 to – 60.0 Vdc; maximum current draw is 2 amps)
— The dc version has two separate dc inputs, A and B, to provide power
redundancy.
H
ac power (100–250V; 50–60 Hz; maximum current draw is 3 amps @ 110 Vac)
— The ac version can provide power redundancy if a separate – 48 Vdc source is
connected to the B input terminal.
CAUTION:
It is recommended that the following procedures be performed by a qualified
electrician.
Using a Single DC Power Source
" Procedure
To supply – 48 Vdc power to the 8610 chassis from a single – 48 Vdc power source:
Make sure that the dc power source wires are not powered (i.e., the circuit
breakers are open).
The ends of the power source wires (14–18 AWG solid or stranded wire) must
be stripped of insulation. If the wires are not stripped, strip the tip of each wire
(about 1/2-inch in length) before inserting the wire into the appropriate terminal
on the – 48V input terminal block. Ensure that each wire is fully inserted into
the terminal (until it can go no further).
1. Insert the following wires into Terminal A and securely fasten each wire by
tightening the screw above it. The insulation should be fully within the terminal
block and no bare wire should be exposed outside of the block.
NOTE:
You should clearly label these power source wires as – 48V and RTN
respectively.
Insert Power Source A’s . . .
Into the . . .
Negative side of the power source
– 48V A input terminal.
Positive side of the power source
RTN A (return) terminal.
15
2. Dress the wires under the 8610
chassis to the left behind the support
foot.
3. Power the Hotwire 8610 DSLAM
chassis.
A
B A B
3
2
–48V
4. Make sure the PWR A LED on the
front panel is ON (green).
RTN
1
E
10
T
BAS
3
2
EM
MA
ENT
NAG
F
MC
P/1
INT
ALM
IAL
SER
T
OU
4
5 6
3
IN
2
1
CK N
STA
ITIO
POS
R
PW
FAN
TM
B
ES
FUS. 48V
DC, MIN
T4A
TM
A
ALM
B
ESD
10
86
A
P/
MC
DSL
2
SS
D
CLA
ITE
DCLIM RCE
48V
ORR SOU
PW
B
A
48V
B
A
RTN
AC T
PU
IN
99-16316
Using Two DC Power Sources for Power Redundancy
" Procedure
To supply two dc power sources to the 8610 chassis for power redundancy:
Make sure that the dc power source wires are not powered (i.e., the circuit
breakers are open).
The ends of the power source wires (14–18 AWG solid or stranded wire) must
be stripped of insulation to about 1/2-inch in length before plugging the wires
into the appropriate terminal on the – 48V input terminal block. Ensure that
each wire is fully inserted into the terminal (until it can go no further).
1. Insert the following wires in the appropriate terminal and securely fasten each wire
by tightening the screw directly above it. The insulation should be fully within the
terminal block and no bare wire should be exposed outside of the block.
NOTE:
You should clearly label these power source wires as – 48V and RTN
respectively.
Insert Power Source . . .
Into the . . .
Negative side of the first power source
(Power Source A)
– 48V A input terminal.
(Optional) Negative side of the second
power source (Power Source B)
– 48V B input terminal.
Positive side of the first power source
(Power Source A)
RTN A (return) terminal.
(Optional) Positive side of the second
power source (Power Source B)
RTN B (return) terminal.
16
2. Dress the wires under the 8610
chassis to the left behind the support
foot.
3. Power the Hotwire 8610 DSLAM
chassis.
A
B A B
3
2
–48V
4. Make sure the PWR A and PWR B
LEDs on the front panel are both ON
(green).
RTN
1
E
10
T
BAS
3
2
EM
MA
ENT
NAG
F
MC
P/1
INT
ALM
IAL
SER
T
OU
4
5 6
3
IN
2
1
CK N
STA
ITIO
POS
R
PW
FAN
TM
B
ES
FUS. 48V
DC, MIN
T4A
TM
A
ALM
B
A
P/
MC
DSL
ESD
2
SS
D
CLA
ITE
DCLIM RCE
48V
ORR SOU
10
86
PW
B
A
48V
B
A
RTN
AC T
PU
IN
99-16317
Using Only AC Power Source
" Procedure
To supply power to the 8610 chassis using a single ac power source:
1. Plug the ac power cord into the IEC 320
receptacle labeled AC INPUT.
2. Plug the other end of the ac power
cord into your ac power outlet.
3
NOTE:
2
AC T
PU
IN
1
E
The ac power source should be
a nonswitched outlet to prevent
accidentally turning off power.
10
T
BAS
3
2
EM
MA
ENT
NAG
F
MC
P/1
INT
ALM
IAL
SER
T
OU
4
3
2
1
5 6
IN
CK N
STA
ITIO
POS
R
PW
FAN
TM
B
ES
FUS. 48V
DC, MIN
T4A
TM
A
ALM
B
ESD
10
86
A
P/
MC
DSL
2
SS
D
CLA
ITE
DCLIM RCE
48V
ORR SOU
PW
B
A
48V
B
A
RTN
AC T
PU
IN
3. Make sure the PWR A LED on the
front panel is ON (green).
99-16318
Using AC Power with DC Power Backup
" Procedure
To supply both ac and dc power to the 8610 chassis for power redundancy:
Make sure that the dc power source wires are not powered (i.e., the circuit
breakers are open).
The ends of the dc power source wires (14–18 AWG solid or stranded wire)
must be stripped of insulation. If they are not stripped of insulation, strip the tip
of each wire (about 1/2-inch in length) before plugging the wire into the
appropriate connector on the – 48V input terminal block. Ensure that each wire
is fully inserted into the terminal (until it can go no further).
1. Plug the ac power cord into the IEC 320 receptacle labeled AC INPUT.
17
2. Insert the wires for the dc power source into the appropriate terminal and securely
fasten each wire by tightening the screw above it. The insulation should be fully
within the terminal block and no bare wire should be exposed outside of the block.
NOTE:
You should clearly label these power source wires as – 48V and RTN
respectively.
Insert Power Source B’s . . .
Into the . . .
Negative side
– 48V B input terminal.
Positive side
RTN B (return) terminal.
3. Dress the wires under
the 8610 chassis to the
left and behind the front
left support foot.
4. Plug the other end of the
ac power cord into the ac
outlet.
48VDC CLASS 2
OR LIMITED
PWR SOURCE
AC
INPUT
5. Power the Hotwire 8610
DSLAM chassis.
3
2
1
E
10
A
T
BAS
B A B
3
2
EM
MA
ENT
NAG
F
INT
MC
P/1
–48V
RTN
ALM
IAL
6. Make sure the PWR A
and PWR B LEDs on the
front panel are both ON
(green).
SER
T
OU
4
5 6
3
IN
2
1
CK N
STA
ITIO
POS
R
PW
FAN
TM
B
ES
FUS. 48V
DC, MIN
T4A
TM
A
ALM
B
ESD
10
86
A
P/
MC
DSL
2
SS
D
CLA
ITE
DCLIM RCE
48V
ORR SOU
PW
B
A
48V
B
A
RTN
AC T
PU
IN
99-16319
Installing the Cards
Use a small- to medium-size flat-blade screwdriver to install the MCP and DSL cards.
The MCP card must be installed in Slot 1 of the base chassis.
CAUTION:
Do not insert the MCP card into Slots 2 or 3 as this will damage the DSLAM
chassis. The MCP card must be used in Slot 1 of the base 8610 chassis for
proper functionality. Only use the MCP card in an 8610 chassis. Do not try to
use an MCC or MCC Plus card.
A circuit card may be replaced without disruption to user data (i.e., you can remove and
reinstall a card without powering down the 8610 chassis and disrupting user data on
the other cards). To remove the card from the chassis, unfasten the screws on both
ends of the faceplate. Then, simply push the ejector handles outward and slide the card
out.
18
When swapping a new card for an old card, it is important to note that the 8610 DSLAM
retains the Media Access Control (MAC) address, also referred to as the physical
address. This means that the new card will have the same MAC address as the old
one.
NOTES:
— All standalone 8610 chassis (i.e., chassis that are not daisy-chained to other
Hotwire 8610 DSLAM chassis) require an MCP card in Slot 1, but only the
base chassis of a multisystem stack requires an MCP card.
— Do not discard filler plates. Each slot in the chassis must contain a circuit card
or a filler plate to maintain the required EMI shielding and to prevent air
leakage from the forced air cooling. Air leakage could result in overheating
which may cause the power to the circuit cards to be shut off. Store all unused
filler plates in a safe place. You may need to use the filler plates to cover open
slots in the chassis at a later time.
" Procedure
To install a circuit card in the Hotwire 8610 DSLAM chassis:
1. Remove the filler plate from the slot by unscrewing the mounting screws at each
end.
2. Hold the card horizontally with the components on top, and insert it into the left and
right card guides of the slot of the base chassis.
TM
TM
3
8610
2
8000
MCP
ET
X
C
oll
N
R
ER
1
A B A B
48V RTN
ALM
A
B
RADSL
4
3
1
SL
D
B
2
ol
C
PO
RT
X
R
N
ET
TX
ER
PWR
H
A
10 BASE T
MANAGEMENT
FAN
4 5 6
3
2
1
STACK
POSITION
IN
OUT
SERIAL
ALM INTF
MCP/1
2
8000
ET
H
TX
O
K
Alr
m
Te
st
t
Te
s
Alr
m
K
EM
O
DC FUSES
T4A, MIN. 48V
ET
AC
INPUT
ST
48VDC CLASS 2
OR LIMITED
PWR SOURCE
SY
MCP/
DSL
SY
ST
EM
ESD
3
99-16321
3. Carefully slide the card into the slot. Gently, but firmly, push the card until it
engages its mating connectors on the backplane.
4. Press on the card’s front panel with one hand and on the back of the 8610 chassis
with the other until the card’s connector seats in its mating connector.
5. Make sure the OK SYSTEM indicator on the card’s faceplate is ON (green). If not,
refer to Troubleshooting on page 25.
6. Secure the card by fastening the screws on each end of the faceplate. This is
required to maintain proper gasket pressure on the faceplate as well as proper air
flow.
19
NOTE:
For detailed information about the configuration and operation of the circuit card,
see the appropriate card User’s Guide.
Verifying the Installation
To verify the hardware installation, observe the following indicators:
H
The PWR A and/or PWR B LEDs on the front panel must be in the ON state
(green):
— If you are using a single – 48 Vdc power source, then only the green
PWR A LED will be ON.
— If you are using dual Vdc power sources, then both the green PWR A and
PWR B LEDs will be ON.
— If you are using a single ac power source, then the green PWR A LED must
be ON.
— If you are using both an ac power source and a – 48 Vdc power source, then
both the PWR A and PWR B LEDs must be ON.
H
The yellow FAN ALM LED on the front panel must be OFF.
H
Also check the SYSTEM LEDs on the MCP and DSL cards if you have not done so
already. The OK SYSTEM indicators on the cards must be in the ON state (winking
green).
If these status indicators fail to appear as described, see Troubleshooting on page 25
and LEDs on page 27 for more information.
Making Cable Connections
This section provides the instructions you need to make the necessary cable
connections to:
H
POTS splitter shelf or MDF
H
Ethernet hubs or switches for MVL and RADSL cards
H
SNMP management system
H
Terminal, laptop computer, or modem
H
Alarm Relay Interface
For any other type of connection, refer to the appropriate DSL card Installation
Instructions.
20
NOTE:
If you are connecting the Hotwire 8610 DSLAM to a CO POTS splitter, this
procedure assumes that the CO POTS splitter shelf is already installed. For
information on how to install the CO POTS splitter, refer to the Hotwire POTS
Splitter Central Office Installation Instructions, Document No. 5020-A2-GN10.
Installing Network Tip and Ring Connections
" Procedure
To connect a port card in the 8610 chassis to a POTS splitter shelf or MDF:
1. Make sure that the anchor mount is installed on the side of the connector where
the cable will lie.
2. Replace the longer #4-40 screw on the cable connector with the #4-40 Phillips
pan-head screw shipped in a plastic bag with the unit. Do not insert the screw past
the connector body until Step 5.
3. Plug the Telco 50-pin cable into the appropriate connector for the slot containing
the card (labeled 1, 2, or 3) on the rear of the 8610 chassis.
4. Thread the cable tie through the anchor mount provided. Tighten the cable tie
around the connector and cut off any excess.
5. Secure the Telco 50-pin cable by tightening the Phillips pan-head screw (that you
replaced in Step 2) on either the left or right side of the connector, depending on
the cable location.
6. Make sure the other end of the cable is connected to the appropriate POTS splitter
shelf, MDF, or demarcation point.
Anchor
Mount
Telco 50-Pin
Connector
Replaced with
Supplied #4-40
Phillips Pan-head
Screw
99-16329-01
NOTE:
For detailed information, refer to the Hotwire POTS Splitter Central Office
Installation Instructions.
21
Connecting Ethernet Connections to the IPC or Ethernet Hubs
Use this procedure for connecting RADSL and MVL cards to the IPC or Ethernet hubs.
For other types of cards, refer to the appropriate Installation Instructions.
" Procedure
To connect the DSL cards to the Ethernet hubs or switches:
1. Plug the end of an 8-pin modular cable into the appropriate 10 BASE T port of the
8610 chassis. For example, if you want to connect to a DSL card in Slot 2, insert
the 8-pin modular cable into the 10 BASE T Slot #2.
2. Run the 8-pin modular cable under the 8610 chassis and behind the left leg.
3. Plug the other end of the cable into your Ethernet hub or switch connector.
10 BASE T
MANAGEMENT
4 5 6
3
2
1
STACK
POSITION
IN
OUT
SERIAL
ALM INTF MCP/1
3
2
To Hub Connector
99-16323
Connecting to an SNMP Management System
" Procedure
To connect the Hotwire 8610 DSLAM base chassis (i.e., the chassis that contains the
MCP card) to an SNMP management system:
1. Plug the end of an 8-pin modular cable into the MCP/1 port of the Hotwire 8610
DSLAM base chassis.
2. Dress the 8-pin cable under the 8610 chassis to the left and behind the left support
foot.
3. Plug the other end of the cable into the 10BaseT hub connector to the SNMP
management system network.
10 BASE T
MANAGEMENT
4 5 6
3
2
1
STACK
POSITION
IN
OUT
SERIAL
ALM INTF MCP/1
To SNMP
Management System
2
3
99-16324
22
Connecting to a Terminal or Laptop Computer
" Procedure
To connect the Hotwire 8610 DSLAM chassis to a terminal or laptop computer:
1. Connect the serial cable with 8-pin modular plugs on each end (provided with the
MCP card) into the MANAGEMENT SERIAL port of the chassis.
2. Dress the serial cable under the 8610 chassis, to the left and behind the left
support foot.
3. Plug the other end of the cable into the terminal or laptop computer serial port,
using the appropriate DB25 or DB9 adapter that is supplied with the MCP card.
10 BASE T
MANAGEMENT
4 5 6
3
2
1
STACK
POSITION
IN
OUT
SERIAL
To Terminal
Serial Port
ALM INTF MCP/1
2
3
99-16325
4. Configure your terminal or terminal emulator with the following settings:
— Baud Rate = 9600
— Data Bits = 8
— Parity = No Parity
— Stop Bits = 1
— Flow Control = XON/XOFF
— Terminal Type = VT100
23
Connecting to a Modem for Remote Management
Before connecting the Hotwire 8610 DSLAM to a dial-up modem, configure the modem
with the following settings:
H
Set the modem for auto answer. For example, ATS0=1.
H
Turn off character echo. For example, ATE0.
H
Enable result codes in originate mode only. For example, ATQ2.
H
Set the modem to ignore Data Terminal Ready (DTR). For example, AT&D0.
" Procedure
To connect the Hotwire 8610 DSLAM chassis to a dial-up modem:
1. Connect an 8-pin modular plug-ended serial cable into the MANAGEMENT
SERIAL port of the Hotwire 8610.
2. Dress the serial cable under the 8610 chassis, to the left and behind the support
foot.
3. Plug the other end of the cable into your modem’s serial port using a DB25
(RS-232 male) adapter, supplied with the MCP card, and a Null Modem adapter.
Management Serial
10 BASE T
MANAGEMENT
4 5 6
3
2
1
STACK
POSITION
IN
OUT
SERIAL
ALM INTF MCP/1
2
3
Dial-up
Modem
DB25
Adapter
Null
Modem
99-16326
24
Connecting CO Alarm to the Alarm System
The following procedure is optional. Follow this procedure only if you want to connect to
a CO alarm system. See 8-Pin Modular Connector for Alarm Relay Interface on
page 28 for pin-out information.
" Procedure
To connect the 8610 DSLAM to a CO alarm system:
1. Plug the 8-pin modular cable into the ALM INTF connector on the front of the 8610
chassis.
2. Remove the modular plug connector at the end of the cable, strip the wires and
connect to the desired CO alarm system outputs.
Troubleshooting
Symptom
Possible Cause
Solutions
Either the PWR A
or PWR B LEDs,
or both, are OFF.
Failure in a single chassis
within a stack.
1. To clear the power alarm,
remove the power from the
chassis and disconnect the
powered-off chassis from the
management daisy chain
(bypassing the failed chassis).
No power.
2. Using a voltmeter, check for
power at the terminal
connections.
– If there is power, call your
sales representative for
service.
– If there is no power at the
terminal, call the appropriate
electrician.
Fan Alarm LED is
ON
Fan failure.
Go to the stack to see which
chassis is reporting the fan alarm.
To clear the fan alarm, contact your
service technician to replace the
Hotwire 8610 chassis.
25
Symptom
Possible Cause
Solutions
System Alarm
LED is ON (on a
DSL card)
SYSTEM ALM LED is ON
and DSL card is inoperative
in Slot n.
1. Choose Card Selection from the
Main Menu to display the status
of each DSL card.
2. If a major alarm is indicated,
reset the MCP card (A-A-F).
Then, reset the DSL card
(A-A-E).
3. Remove and reinstall the card.
4. If unable to clear by resetting
the card, replace the card.
DSL Card is not
working properly
Path to LAN/WAN hub or
switch is not OK.
Make sure the path to the
LAN/WAN hub or switch is OK.
Cable connection to hub is
not OK.
Check cables to the hub and make
sure connection is made properly.
Problem with connections
in this slot.
Remove the DSL card from the slot
and reinstall the card into another
slot.
Bad DSL card.
Replace the DSL card.
MCP has a slot
number assigned
on the Card
Selection screen
(rather than M)
Stack Position switch is not
set to 1.
Check that the Stack Position
switch on the base of the chassis
containing the MCP card is set
to 1.
Difficulty seating
MCP or DSL
Card when
installing
Other cards and filler plates
in the chassis are not
properly secured.
Check to see that the other cards
and filler plates in the chassis are
properly secured by the screws on
the faceplate. If you still experience
difficulty in seating the card, call
service.
Card may be slightly
warped.
Manipulate the card until it mates
with the connector.
26
LEDs
The following table describes the meaning and states of the LEDs on the front panel of
the DSLAM chassis. For individual card LEDs, see the appropriate card Installation
Instructions.
LED
LED is . . .
Indicating . . .
PWR A
Green
Normal operation for Power Source A.
Off
Low, high, or no voltage for Power Source A.
Green
Normal operation for Power Source B.
Off
Low, high, or no voltage for Power Source B.
Yellow
Fan failure or a single fan in the Fan Module is
working at less than 50% of its normal output.
Off
Normal operation or no power to mounting.
PWR B
FAN ALM
27
Pinouts
8-Pin Modular Connector for Alarm Relay Interface
The 8-pin interface for the Alarm Relay Interface (ALM INTF) connection has the
following pin assignments.
Pin Number
Use
1
Not used
2
Closed on major alarm
3
Common on major alarm
4
Open on major alarm
5
Closed on minor alarm
6
Common on minor alarm
7
Open on minor alarm
8
Not used
Pin 1
Pin 8
97-15449
8-Pin Modular LAN/WAN Slot Connector
The 8-pin interface for the LAN/WAN 10BaseT connections (Slots MCP/1, 2, or 3) has
the following pin assignments.
Pin Number
Use
1
TX Data +
2
TX Data –
3
RX Data +
4
Reserved
5
Reserved
6
RX Data –
7
Reserved
8
Reserved
Pin 1
Pin 8
97-15449
28
8-Pin Modular Management In and Out Connector
The 8-pin interface for the Management In and Out connections has the following pin
assignments.
Pin Number
Use
1
Mgt. Data +
2
Mgt. Data –
3
Fan Alarm
4
Ground
5
Power Alarm A
6
Power Alarm B
7
Mgt. Clk +
8
Mgt. Clk –
Pin 1
Pin 8
97-15449
8-Pin Modular Serial (Asynchronous Terminal) Connector
The 8-pin serial connector for asynchronous terminal interface (DCE type) has the
following pin assignments.
NOTE:
The serial port is active only on the base unit.
Pin Number
Function
1
Reserved
2
Reserved
3
Reserved
4
Signal Ground
5
Receive Data
6
Transmit Data
7
Reserved
8
Reserved
Pin 1
Pin 8
97-15449
29
DB25 Adapter Pinouts
The DB25 (RS-232 male) cable adapter is used to convert the 8-pin modular serial
interface to a standard RS-232 DB25 interface, which can then be connected to a
terminal, computer, or any Data Termination Equipment (DTE). Connection to a modem
requires a null modem adapter. The following table lists the pin assignments.
8-Pin Modular
Serial Interface
Use
Pin Number
DB25
Interface Pin
Number
1
2
Pins 1 and 2 are
shorted together
–
3
Data Terminal Ready
20
4
Signal Ground
7
5
Receive Data
3
6
Transmit Data
2
7
Clear to Send
5
8
Request to Send
4
99-15388a
DB9 Adapter Pinouts
The female DB9 cable adapter is used to convert the 8-pin modular serial interface to a
standard DB9 interface, which can then be connected to a laptop computer. The
following table lists the pin assignments.
8-Pin Modular
Serial Interface
Use
Pin Number
DB9
Interface Pin
Number
1
2
Pins 1 and 2 are
shorted together
–
3
Data Terminal Ready
4
4
Signal Ground
5
5
Receive Data
2
6
Transmit Data
3
7
Clear to Send
8
8
Request to Send
7
30
99-16049a
Telco 50-Pin Connector Pinouts for DSL Loops and POTS Splitters
The three Telco 50-pin receptacles on the rear of the
chassis (labeled for Slots 1, 2, 3) provide the 2-wire loop
interface from each DSL port to either the POTS splitter
card or, if the loop is not being shared with POTS, then to
the Main Distribution Frame (MDF). The following table
lists the pin assignments for each of these interfaces.
1
25
26
NOTE:
When the 8610 chassis is the base chassis, the
MCP is installed in Slot 1 and the Tips and Rings
for Slot 1 are not connected internally and are not
active.
50
97-15526
CONN #
for Slots 1–3
CONN PINS
(Tip, Ring)
CONN #
for Slots 1–3
CONN PINS
(Tip, Ring)
Port 1
1, 26
Port 14
14, 39
Port 2
2, 27
Port 15
15, 40
Port 3
3, 28
Port 16
16, 41
Port 4
4, 29
Port 17
17, 42
Port 5
5, 30
Port 18
18, 43
Port 6
6, 31
Port 19
19, 44
Port 7
7, 32
Port 20
20, 45
Port 8
8, 33
Port 21
21, 46
Port 8
9, 34
Port 22
22, 47
Port 10
10, 35
Port 23
23, 48
Port 11
11, 36
Port 24
24, 49
Port 12
12, 37
Port 25
25, 50
Port 13
13, 38
31
Technical Specifications
The following table lists the technical specifications for the Hotwire 8610 DSLAM
chassis:
Specifications
Criteria*
Physical
Dimensions
Height: 4.7 inches (11.94)
Width: 17.2 inches (43.69 cm)
Depth: 10.5 inches (26.67 cm)
Weight: 9 pounds (4.08 kg)
Three chassis can be safely placed on top of each other on a
desktop or table. In addition, a standard 7-foot EIA cabinet can hold
a maximum of 14 chassis.
Interfaces
H – 48V power (two pairs of screw terminals for A and B inputs)
H Three 8-pin modular jacks for 10BaseT Network Access Provider
interfaces and for the MCP card
H Three 50-pin Telco connector for DSL Loop interfaces
H Two 8-pin modular jacks for daisy-chained control bus connection
H One 8-pin modular jack for a VT100 compatible terminal (serial)
connection
H One 8-pin modular jack for the Alarm Relay Interface connection
Power
Two versions of the Hotwire 8610 DSLAM chassis are available: an
ac power version and a dc power version.
The ac version can be connected to a dc source to provide power
redundancy. With the dc version, two separate dc sources may be
employed to provide power redundancy.
The ac version accepts ac power (100–250V, 50–60 Hz) and
converts it to dc power. The maximum current draw is less than
1.75 amps, or 75 watts @ 110 Vac. At maximum configuration with
3 DSL cards, the system will not exceed 85 watts of power
dissipation.
The Hotwire 8610 DSLAM chassis dc version operates from a
standard – 48 Vdc power supply (– 40.0 to – 60.0 Vdc). The
maximum current draw is 2 amps. At maximum configuration with 3
DSL cards, the system will not exceed 75 watts of power
dissipation.
Each power version distributes – 48 Vdc power from the power
source to individual cards via the backplane.
* Technical Specifications subject to change without notification.
32
Specifications
Criteria*
Grounding
A ground lug is located on the right rear of the Hotwire 8610
DSLAM. It accepts 14 AWG wire.
A noninsulated banana jack is located at the left front of the 8610
DSLAM providing a ground for the ESD wrist strap plug.
Cooling and
Air Handling
The internal fan module is installed in the chassis to provide
cooling.
A built-in feature shuts off power to the circuit cards if a chassis
overheats because of fan failure. If the temperature in the chassis
reaches 70°C, power to the cards in the chassis is turned off
automatically. Power is turned on when the temperature drops
below 60°C.
Operating
Environment
Ambient Temperature: 32° to 122° F (0° to 50°C)
Relative Humidity: 15% to 90% noncondensing
Shock and vibration sufficient to withstand normal shipping
* Technical Specifications subject to change without notification.
!
Important Safety Instructions
1. Read and follow all warning notices and instructions marked on the product or
included in the manual.
2. The AC product version is intended to be used with a 3-wire grounding type plug –
a plug which has a grounding pin. This is a safety feature. Equipment grounding is
vital to ensure safe operation. Do not defeat the purpose of the grounding type
plug by modifying the plug or using an adapter.
Prior to installation, use an outlet tester or a voltmeter to check the ac receptacle
for the presence of earth ground. If the receptacle is not properly grounded, the
installation must not continue until a qualified electrician has corrected the
problem.
If a 3-wire grounding type power source is not available, consult a qualified
electrician to determine another method of grounding the equipment.
3. Slots and openings in the cabinet are provided for ventilation. To ensure reliable
operation of the product and to protect it from overheating, these slots and
openings must not be blocked or covered.
4. Do not allow anything to rest on the power cord and do not locate the product
where persons will walk on the power cord.
5. Do not attempt to service this product yourself, as opening or removing covers
may expose you to dangerous high voltage points or other risks. Refer all servicing
to qualified service personnel.
33
6. General purpose cables are provided with this product. Special cables, which may
be required by the regulatory inspection authority for the installation site, are the
responsibility of the customer.
7. When installed in the final configuration, the product must comply with the
applicable Safety Standards and regulatory requirements of the country in which it
is installed. If necessary, consult with the appropriate regulatory agencies and
inspection authorities to ensure compliance.
8. A rare phenomenon can create a voltage potential between the earth grounds of
two or more buildings. If products installed in separate buildings are
interconnected, the voltage potential may cause a hazardous condition. Consult a
qualified electrical consultant to determine whether or not this phenomenon exists
and, if necessary, implement corrective action prior to interconnecting the products.
9. Input power to the DC voltage configurations of this product must be provided by
one of the following: (1) a National Electrical Code (NEC)/Canadian Electrical
Code (CEC) Class 2 circuit for use in North America, or (2) a certified Safety Extra
Low Voltage (SELV) /Limited Power Source (LPS) input for use in the country of
installation.
10. In addition, if the equipment is to be used with telecommunications circuits, take
the following precautions:
— Never install telephone wiring during a lightning storm.
— Never install telephone jacks in wet locations unless the jack is specifically
designed for wet locations.
— Never touch uninsulated telephone wires or terminals unless the telephone
line has been disconnected at the network interface.
— Use caution when installing or modifying telephone lines.
— Avoid using a telephone (other than a cordless type) during an electrical
storm. There may be a remote risk of electric shock from lightning.
— Do not use the telephone to report a gas leak in the vicinity of the leak.
EMI Warnings
! WARNING:
This equipment has been tested and found to comply with the limits for a
Class A digital device, pursuant to Part 15 of the FCC rules. These limits are
designed to provide reasonable protection against harmful interference
when the equipment is operated in a commercial environment. This
equipment generates, uses, and can radiate radio frequency energy and, if
not installed and used in accordance with the instruction manual, may cause
harmful interference to radio communications. Operation of this equipment
in a residential area is likely to cause harmful interference in which case the
user will be required to correct the interference at his own expense.
The authority to operate this equipment is conditioned by the requirements
that no modifications will be made to the equipment unless the changes or
modifications are expressly approved by Paradyne Corporation.
34
! WARNING:
To Users of Digital Apparatus in Canada:
This Class A digital apparatus meets all requirements of the Canadian
interference-causing equipment regulations.
Cet appareil numérique de la classe A respecte toutes les exigences du
règlement sur le matérial brouilleur du Canada.
Notice to Users of the Canadian Telephone Network
The Industry Canada label identifies certified equipment. This certification means that
the equipment meets telecommunications network protective, operational and safety
requirements as prescribed in the appropriate Terminal Equipment Technical
Requirements document(s). The Department does not guarantee the equipment will
operate to the user’s satisfaction.
Before installing this equipment, users should ensure that it is permissible to be
connected to the facilities of the local telecommunications company. The equipment
must also be installed using an acceptable method of connection. The customer should
be aware that compliance with the above conditions may not prevent degradation of
service in some situations.
Repairs to certified equipment should be coordinated by a representative designated by
the supplier. Any repairs or alterations made by the user to this equipment, or
equipment malfunctions, may give the telecommunications company cause to request
to disconnect the equipment.
Users should ensure for their own protection that the electrical ground connections of
the power utility, telephone lines and internal metallic water pipe system, if present, are
connected together. This precaution may be particularly important in rural areas.
CAUTION:
Users should not attempt to make such connections themselves, but should
contact the appropriate electric inspection authority, or electrician, as
appropriate.
The Ringer Equivalence Number (REN) assigned to each terminal device provides an
indication of the maximum number of terminals allowed to be connected to a telephone
interface. The termination on an interface may consist of any combination of devices
subject only to the requirement that the sum of the Ringer Equivalence Numbers of all
the devices does not exceed 5.
35
CE Marking
When the product is marked with the CE mark, this demonstrates full compliance with
the following European Directives:
H
Directive 72/73/EEC – Council Directive of 19 February 1973 on the
harmonization of the laws of the member states relating to electrical equipment
designed for use within certain voltage limits, as amended by Directive 93/68EEC.
H
Directive 89/336/EEC – Council Directive of 3 May 1989 on the approximation of
the laws of the member states relating to Electro-Magnetic Compatibility (EMC), as
amended by Directive 93/68/EEC.
Japan
Class A ITE
This is a Class A product based on the standard of the Voluntary Control Council for
interference by Information Technology Equipment (VCCI). If this equipment is used in
a domestic environment, radio disturbance may arise. When such trouble occurs, the
user may be required to take corrective actions.
36