1
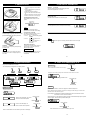
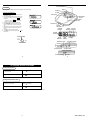
IMPORTANCE NOTICE
1
PDM-103
2
Compact Disc Player
This product does not contain a separate Power On/Off switch. After inserting a disc and
installing batteries/AC adaptor, simply press the Play button to switch on and ply disc.
In order to maximise battery life and provide optimum playing time this product incorporates
an Auto Power Off Function. The power to the player will automatically switch off approximately 30 seconds after a disc has finished playing or when the CD lid is opened.
Instruction Manual
TABLE OF CONTENTS
SAFETY PRECAUTIONS
Power Sources-Normal Batteries/AC adaptor ...... 1
Charging and Use of Rechargeable Batteries .... 2
Earphone and Hi-Fi Connection ......................... 3
Player Maintenance ............................................ 4
Disc Cleaning and Troubleshooting Guide ......... 5
Product Specifications ........................................ 6
1. As the laser beam used in this compact
disc player is harmful to the eyes, do not
attempt to disassemble the casing.
2. Stop operation immediately if any liquid
or solid object should fall into the cabinet.
Unplug the unit and have it checked by
qualified personnel.
3. Do not touch the lens or poke at it. If
you do, you may damage the lens and the
player may not operate properly.
4. Do not put anything in the safety slot. If
you do, the laser diode will be ON when
the lid is still opened.
5. If the unit is not to be used for a long
period of time, make sure that all power
sources are disconnected from the unit.
Remove all batteries from the battery
compartment, and unplug the AC adaptor
from the wall outlet. Make it a practice to
remove the AC adaptor by grasping the
main body and not by pulling the cord.
6. The unit employs a laser. The use of
controls or adjustments or performance
of procedures other than those specified
herein may result in exposure to
hazardous radiation.
Player Operation
Basic Disc Play ..............................................
LCD Display Information ................................
Repeat/Play Modes ........................................
Intro Scan and Random Play .........................
Programmed Track Play.................................
Location of Controls .......................................
Skip and Search Functions ............................
7
8
9
10
11
12
13
SPECIFICATIONS
Program Play: Up 20 memory
Line output: 0.6V +/- 0.2V
Earphone: 16mW
Dimensions: 136 mm (W) x 30 mm (H) x 150 mm (L)
Weight: 250g (without batteries)
Power requirements: DC 4.5V external and Battery, 3V "AA"
Cell x 2 (LR6, MN1500 or Ni-Cad rechargeable battery)
* For improvement purposes, specification and design are subject to change without notice
PALSONIC CORPORATION PTY LTD
1 JOYNTON AVENUE
WATERLOO NSW 2017 AUSTRALIA
TEL: (02) 9313 7111 FAX: (02) 9313 7555
www.palsonic.com.au
WARNING
To prevent a shock hazard, do not expose
the unit to rain a moisture.
To avoid electrical shock, do not open the cabinet.
Refer servicing to qualified personnel only.
PALSONIC CUSTOMER SERVICE
TELEPHONE
AUSTRALIA: 1300 657 888
2
1
1. POWER SOURCE NORMAL BATTERIES/AC ADAPTOR
2. CHARGING AND USE OF RECHARGEABLE BATTERIES
Battery Power Operation
AC Operation
1. Open the battery compartment cover and
insert two "AA" alkaline batteries inside the
battery compartment. Follow the polarity as
indicated in the battery compartment.
1. Insert the DC plug, at the end of the AC
adaptor cord into the DC input jack, on the
side of the unit.
This unit can fully recharge the specified rechargeable battery, in approximately 15 hours The
rechargeable batteries (NOT suppled) should be recharged before they are used for the first time
because they are low in power or if they have not been used for a long period (over 60 days).
2. Plug the AC adaptor into a 230V AC
power outlet socket.
1.
2. Close the battery compartment cover.
Note: Zinc/Carbon, or Zinc/Chloride type
batteries are not recommended for this unit
as their use will result in extremely short
playing times. Wherever possible and for
economy it is recommended that the mains
adaptor supplied with this unit is used.
Open the battery compartment cover and insert two of the recommended rechargeable
batteries, matching polarity (12V 650mA).
BOTH BATTERIES MUST BE OF RECHARGEABLE NICKEL-CADMIUM TYPE,
OTHERWISE THE BATTERIES MAY EXPLODE OR LEAK.
If the AC plug of this unit does not fit in your
AC outlet, a plug adaptor (not included) should
be used.
Consult your local dealer on the type of plug
adaptor required.
2.
Plug in the AC adaptor and set the Recharge switch to ON position to start charging and
Recharge indicator will light on.
Rechargeable Battery Operation
Note
RECHARGE SWITCH
USE ONLY THE AC ADAPTOR SUPPLIED WITH THE SET FOR CHARGING.
3.
After 15 hours. Please unplug the AC adaptor and switch the Recharge switch to the off position
DO NOT CHARGE CONTINUOUSLY FOR 24 HOURS OR MORE. DOING SO CAN CAUSE
THE PERFORMANCE OF THE RECHARGEABLE BATTERY TO DETERIORATE.
4.
If the operating time decreases drastically when when the rechargeable nickel-cadmium batteries
are properly recharged, purchase a new set of rechargeable nickel-cadmium batteries.
5.
When charging for the first time or after a long time, playing time may be reduced. In this
case, charge and discharge the batteries several times.
Note
3
You may play DISC'S whilst charging the batteries.
4
3. EARPHONE AND HI-FI CONNECTION
Connecting to component audio
system.
Connect the stereo connection cable
(not included) into the LINE OUT socket
of the unit and the CD/AUX inputs of
an audio system.
Listening with the Earphones
Connect the plug of the stereo earphones
(included) or headphone (not included)
into the PHONES socket.
Caution
Avoid excessive volume levels and listening to
sound for a long period of time when using
headphones, as this may impair your hearing.
Note
Always press the power off before making
any connection between the player and
another unit.
4. PLAYER MAINTENANCE
Cleaning the Cabinet
Wipe with a soft cloth. If the cabinet is very dirty, dampen the cloth with a weak solution of neutral
detergent and water and then wipe dean.
Cleaning the Lens
A dirty lens will cause sound skipping and, if the lens is very dirty, the CD may not work. Open the
disc cover and clean the lens as follow :
Dust or Dry Particles
Using a camera lens brush/blower, blow on the lens couple times, then wipe it lightly with the
brush to remove dust. Then, blow on the lens once more.
Fingerprints
If the lens cannot be cleaned by using a brush/blower, use a dry cotton swab starting in the middle
and working to the outside edge.
6
5
5. DISC CLEANING AND TROUBLESHOOTING GUIDE
6. PRODUCT SPECIFICATIONS
PICK- UP
Cleaning the Disc
When a disc becomes dirty, clean it with a cleaning cloth. Wipe the disc from the centre out
System
Compact disc digital audio system
Laser diode
Properties
Material: GaAIAs
Wave length: =780mm
Emission duration: continuous
Laser output: <44.6uW
Error correction
Cross-interleave Reed-solomon code
AUDIO
Note
Do not use solvents such as benzene petrol, thinner, commercially available cleaners or
anti-static spray intended for analogue discs.
Should you experience difficulties in the use of this player please refer to the following chart
before contacting your dealer or the place of purchase.
Troubleshooting Guide
Problem
Points to Check
Player fails to function
Disc may be inserted upside down
Disc not mounted correctly on chunk
Dirty or defective disc
Dirty pick up lens
Player lid not closed
Moisture/condensation, allow player to warm up to room
temperature for 60 minutes
AC Power to adaptor switched off
Weak batteries
Auto power off has occurred, press play button to restore power.
No sound from Earphones
Earphone plug is not firmly inserted into Green Phones socket.
Earphones have been inserted into the Black line output socket.
No sound when played
through an external amplifier
Connection is incorrect
Power to external amplifier not switched on
Intermitted Sound
Dirty or defective disc
Dirty pick up lens
Player is subject to excessive vibration or shock
Low battery power
Poor Earphone connection
7
D/A conversion
16 bit DAC eight times over sampling
Frequency response
20-20,000Hz (
Wow and flutter
Below measurable limits
No. of channels
2 channels (stereo)
Output level
Line output: 600Vrms (47K
Headphone: 16mW (32
Bass boost effect (100Hz)
+6db
Power requirements
- 2 x LR6 "AA" alkaline battery
- DC in 4.5V jack accepts AC power adaptor
(centre positive)
Power consumption
Dimension
0.8W (DC 3V) UNDER NORMAL CONDITION
Approx. 136(W) x 30(H) x 150(L) mm
Weight
Approx. 250g not battery
ACCESSORY
Battery
Not Included
8
7. BASIC DISC PLAY
8. LCD DISPLAY INFORMATION
1. Connect the earphone to the PHONES
socket.
2. Press the OPEN button to open the CD
compartment lid.
3. Adjust the VOLUME to minimum.
4. Insert the disc with the label side Facing
up.
5. Close the lid securely until a click is heard.
6. Press the PLAY button to start playing.
When the || is pressed
The total number of tracks and total playing time in the
disc will be displayed after 2 seconds.
During PLAY mode
The total number of tracks on the disc are played
To Emphasise the bass sound
Set the BASS BOOST switch to the ON
position.
BASS BOOST
OFF
ON
During PAUSE mode
The track playback is paused, the elapsed time is flashing.
Note
The bass boost performance will be
dependent on the VOLUME control setting.
Remove the Disc
Turning Power on and off
Hold the edge and gently press the centre
pivot as illustrated, the pick up the disc,
This unit has no ON/OFF switch. To turn on
and off, press the following buttons.
To turn on: Press || PLAY/PAUSE (playback
starts).
STOP button once to
To turn off: Press
standby mode.
Press
STOP button twice, it
will turn off the power
immediately.
Note
A flashing
indication appears on the display when the batteries need to be changed.
Auto Power-off function
CAUTION:
Wait for the disc to stop rotating before pressing
the OPEN button.
Then the unit is stopped (standby mode) for
approximately 30 seconds, the power is
automatically turned off.
Note
HOLD OPERATION
This unit can play 3" (8cm) single CD's without
an adaptor. Do not use a CD single adaptor for
these discs.
During the playback, turn HOLD switch "ON
to avoid any interruption whilst press CD
control button.
10
9
9. REPEAT/PLAY MODES
10. INTRO SCAN AND RANDOM PLAY
Every time the MODE button is pressed.
The corresponding mode appears in the display window.
During the play
INTRO SCAN
Press mode button to select intro scan play.
MODE
MODE
MODE
NORMAL
MODE
MODE
REPEAT 1
x3
CD player now is ready to play the first 10 seconds of each track on the disc
REPEAT ALL
1
ALL
Press
|| to start playing "INTRO" scan.
During the play
X1
INTRO
SHUFFLE
PLAY/PAUSE
SHUFFLE
NORMAL PLAYBACK
Enables all the tracks on a disc to be played in a Random sequence.
Play the whole disc.
During playback SHUFF indicator will show on the display and disc will play in random order
after the current track had been played.
For example : If "SHUFFLE" is selected whilst playing track 8, the random function.
1
Shown on the LCD display. The current
track on the disc will be repeated.
MODE
ALL
will commence once track 8 has ended.
When all tracks on a disc have been played, the player will automatically stop and power
down in approx. 30 seconds to preserve battery life.
During the play
Shown on the LCD display. All
tracks on the disc will be repeated.
X1
During the play
During the play
MODE
X2
MODE
X4
Press MODE button twice to return to NORMAL play mode
Note: In normal modes none of the above symbol show in the display.
11
12
12. LOCATION OF CONTROLS
11. PROGRAMMED TRACK PLAY
DISC COMPARTMENT LID
PROGRAMME
This allows selected tracks on the disc to be played in any desired order.
DISPLAY
PROGRAM
CD MODE
To set the programme play
STOP BUTTON
* programmes can be set in the STOP mode or
normal play mode.
1. Press the PROGRAM button when the unit is in the
stop mode a normal play mode until PRG shows on
the display.
* The track number and PRG indicator flashing
appear on the display.
2. Press |
or
| to select the desired track.
3. Press the REPEAT button to enter the track into
memory. Programme No. will be increment one
step.
4. Repeat step 2 and 3 to program the order of more
tracks up to 20 tracks can be programmed into
memory.
5. Press
|| to start the programme play.
6. To erase the programme, simply press the
STOP
button twice.
SKIP/SEARCH
BUTTON
PLAY/PAUSE
BUTTON
OPEN BUTTON
CHARGE
INDICATOR
PROGRAM
INDICATOR
REPEAT
BATTERY
INDICATOR INDICATOR
RANDOM
INDICATOR
INTRO
INDICATOR
EARPHONE SOCKET
VOLUME CONTROL
HOLD/OFF/CHARGE
PLAYTIME
TRACK
DISPLAY
BASS BOOST SWITCH
LINE OUT SOCKET
DC SOCKET
14
13
13. SKIP AND SEARCH FUNCTIONS
Locating a Particular track
To go back to the beginning of the current
or a previous track
Press |
lightly and repeatedly
To go to the beginning of following tracks
Press
| lightly and repeatedly
To search at a high speed
Keep |
depressed
To search forward at a high speed
Keep
| depressed
Locating a Particular Point in a track
Low level audio will be heard during the search process to assist in locating the correct point in the track
15
580-318N01-015