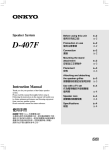
Download Onkyo D-407M User's Manual
Transcript
Speaker System
D-407M
Before using this unit
使用本系統之前
En-2
Precaution on use
使用注意事項
En-2
Connection
連接
En-2
Placement
安放
En-3
Ct-2
Ct-2
Ct-2
Ct-3
Installation using
commercially-available
stands and fixtures
En-3
用市場銷售的支架和夾具進行
安裝時
Ct-3
Instruction Manual
Thank you for your purchase of the Onkyo speaker
system.
Please read this manual thoroughly before using it.
Following the instructions in this manual will enable you
to obtain optimum performance and listening enjoyment
from your new speaker system.
Please retain this manual for future reference.
使用手冊
謝謝閣下購買 Onkyo 的揚聲器系統。
在連接各部件及接通電源之前,請先徹底閱讀本手冊。
遵從本手冊內的各項指示,使您的揚聲器系統能夠獲得
最優秀的性能和欣賞效果,您將能獲得最大樂趣。
請保存此手冊以備將來參考之用。
Attaching and detaching
the speaker grilles
揚聲器前格板的安裝和拆除
En-3
Ct-3
Use with a TV set
作為電視機的外接揚聲器
使用時
En-3
Speaker care
揚聲器的維護保養
En-3
Specifications
規格
En-4
Ct-3
Ct-3
Ct-4
En Ct
Before using this unit
Connection
• The speaker cabinet is made of wood and is therefore
sensitive to extreme temperatures and humidity. Avoid
placing the speaker systems in locations subjected to
direct sunlight, or in smoky or in humid places, such as
near an air conditioner, humidifier, bathroom, or kitchen.
Doing so may result in damage to the speaker.
• Turn the sound volume to the minimum and disconnect the
power cord from the amplifier before connecting the
speaker cables.
• Place the unit on a rigid, level surface. Placing it on a
slanted surface or weak base not only may cause the unit
to fall, but also results in decreased sound quality.
• Be sure to turn off your amplifier before connecting the
speaker system. Connecting them with the amplifier’s
power on may result in damage to the amplifier or the
speaker system.
• Keep water or other liquids away from the unit. If water is
spilled into the unit, not only the unit but also the speakers
themselves may be damaged.
Precaution on use
• This speaker system can handle the specified input power
when it is used for ordinary music reproduction. If the
following abnormal signals are fed to the speaker,
however, an overcurrent may flow in the internal circuits,
causing burning or breakage of the wires even if the input
power is below the specified rating.
• The nominal impedance of this speaker system is 6 Ω. Use
only amplifiers capable of handling this impedance.
• Use the supplied speaker cables to connect between
speaker’s input terminals and the amplifier’s speaker
terminals as illustrated below.
• Connect the speaker cables securely to the terminals, with
the core wires twisted properly. In this case, make sure that
the core wires do not touch each other. Note that a short
circuit in core wires may result in damage to the amplifier.
Connecting to AV amplifier
1. Strip off the end
of plastic skin,
and give a twist
to the core wire.
2. Slacken the
screw and thread
the core wire
deep enough into
the hole.
3. Hold the core wire
tight by fastening
the screw in the
direction of an
arrow.
15mm
1. Noise produced when FM station is not tuned in
2. Sound produced when fast-forwarding cassette tape
deck
3. High-frequency sound generated by an oscillator, an
electronic musical instruments, etc.
4. Oscillating amplifier signals
5. Special test signals produced by audio checking CD,
etc.
6. Sound produced when connecting or disconnecting
audio connection cables (Always turn off the amplifier’s
power before connecting or disconnecting cables.)
7. Howling when a microphone is used
• Do not place magnetic objects such as screwdrivers and
iron parts near the tweeter since they use speakers with
strong magnets. Otherwise, the objects may be attracted,
causing injury or damaging the diaphragm.
Right hand side
speaker (R Channel)
Red cord side
Left hand side speaker
(L Channel)
R
L
Red cord side
Speaker terminals of the amplifier
Before turning on the amplifier’s power switch:
• Make sure that the positive (+) and negative (–) speaker
cables do not contact each other. Otherwise, a short-circuit
may occur, causing damage to the amplifier.
• Be sure to connect the speaker cables with correct polarity
(connect the speaker’s positive (+) and negative (–)
binding posts with the amplifier’s corresponding speaker
terminals). Reversed polarity results in impaired bassrange reproduction, causing mislocalization of the sound
image. Also, be sure to connect the Right and Left
speakers with the amplifier’s corresponding speaker
terminals.
• Pull lightly on the speaker cables to ensure that they are
connected firmly.
En-2
Placement
Attaching and detaching the speaker grilles
Using as a surround speaker
Enhance the sensation of being at a live performance by
giving three-dimensional sound movement to the sound
effects. Place the surround speakers at the side of the listener
or at a position diagonally from the listener. Ideally, speakers
should be placed symmetrically.
Place these speakers so that their height is 1 meter higher
than that of the listener’s ears.
The speaker cabinet is made of wood and sensitive to extreme
temperatures and humidity. Avoid placing the speaker system
in locations subjected to direct sunlight or in humid places
such as near an air conditioner, bathroom, or kitchen.
This speaker system uses detachable grilles. Use the
following method to attach or detach the grilles.
1. While holding the bottom edge of the speaker grille with
your both hands, pull it gently toward you to remove the
bottom of the grille.
2. In the same way, gently pull the upper edge of the speaker
grille toward you to remove it from the main unit.
3. To replace the grill, push the projections at the corners into
the grille plug holes on the speaker cabinet.
Removal
Replacement
Installing on the wall
If the speakers are to be wall-mounted, make sure that the
walls are strong enough to support the speaker’s weight. The
weight that mounting screws can support varies greatly
depending on the wall material and the position of the
reinforcing ribs embedded in the wall. Use the thickest and
longest possible mounting screws with mounting screw head
diameters less than 10 mm and shank diameters less than 4
mm (consult with your interior designer or contractor).
Attach the supplied cushioning pads as shown to wall-mount
the speaker securely.
Cushioning pads
Key hole slot
Cushioning pads
D-407M
Use with a TV set
In general, Braun tubes used for color television sets, etc. are
extremely sensitive and can be affected even by the
magnetism of the earth. If a speaker system is used near
them, therefore, discoloration or distortion of pictures will
occur. To allow use with color television sets, etc., this speaker
system is provided with magnetic shielding.
Even so, discoloration may still result, depending on the
installation environment. If discoloration occurs, turn off the
power of the television set, wait for 15 to 30 minutes and then
turn it on again. This activates the self-demagnetizing function
of the television set, improving the display condition. If
discoloration persists even after performing this remedy, move
the speaker apart from the television set. Discoloration may
also be caused when a magnet or other magnetizing object
exists near the television because of the combined effect.
Installation using commercially-available stands
and fixtures
The surround speaker bottom and rear are equipped with
screw holes so that you can attach commercially-available
stands or mounting fixtures for a variety of mounting options.
(Two M5 screw holes, 60 mm pitch on the bottom and the
rear.)
Note:
When attaching an accessory item to a speaker, be careful of
the length of the screws used. Use only screws that provide
the required strength with a screw length between 3 and 11
mm.
Speaker care
Your Onkyo speakers are finished with a high quality covering
that serves to protect the wood speaker cabinet.
Wipe the cabinet periodically with a dry, silicon-embedded or
plain soft cloth.
The covering may be cleaned with a soft cloth moistened with
water and a mild soap. Avoid the use of furniture polishes or
harsh cleansers. Use a soft brush or hand vacuum cleaner to
remove dust and lint from the grille material.
Natural wood finished cabinets
5mm
3 - 11mm
M5 screw
The cabinets are finished with a natural wood surface. They
have a unique wood grain pattern. Your cabinets have their
own raw beauty and uniqueness which is unlocked from the
tree; this is depicted by the cross-grain patterns with dark and
light coloring. You can enjoy Onkyo’s craftsmanship not only
when designing for the best sound quality, but to assimilate
natural blessings for the visual senses. The paint and finishing
work of the cabinets are conducted under the strictest quality
control standards.
En-3
Specifications
Type:
2-way bass reflex
Impedance:
6Ω
Maximum input power:
150 W
Output sound pressure level: 85.5 dB/W/m
Frequency response:
63 Hz - 40 kHz
Crossover frequency:
8000 Hz
Cabinet capacity:
4.7 L
Speaker (woofer):
13 cm A-OMF cone
Speaker (tweeter):
2.5 cm soft dome
Dimensions:
172 (W) x 269 (H) x 169 (D) mm
(Overall dimensions)
Weight:
3.3 kg
Accessory:
8 m speaker cable
Cork spacer x 4
Cushioning pad x 4
Instruction manual
Others:
Magnetic shielding
Specifications and appearance are subject to change for
improvement without prior notice.
In catalogs and on packaging, the letter added to the end of
the product name indicates the color of the D-407M.
Specifications and operation are the same regardless of color.
En-4
使用本系統之前
連接
•本揚聲器的箱體是木質的,因此,對極高(或極低)的溫度
和溼度非常敏感。請不要將揚聲器系統放置在陽光直射之
處,或多煙塵和高濕氣的地方,如靠近空調機、加濕器或
浴室、廚房中。否則,將會損壞揚聲器。
•在連接揚聲器纜線之前,請先將AV接收器音量調至最小,
並關閉AV接收機電源開關(POWER)。
•請將系統放置在牢固的水平表面上。若將其放置在斜面上
或放置不穩,則不僅會有揚聲器系統跌落的危險,還會降
低其音質。
•如下圖所示,使用隨機附帶的揚聲器纜線,連接揚聲器的
接線柱和AV接收機的揚聲器端子。
•在連接揚聲器系統之前,請務必先關閉您的AV接收機。若
在AV接收機電源打開的狀況下進行連接,則可能會損壞AV
接收機或揚聲器系統。
•本揚聲器系統的額定阻抗是6Ω。請只使用對應於此阻抗的
AV接收機。
•連接揚聲器纜線時,請正確地纏繞芯線,將其牢固地連接
在端子上。這時,請確認芯線沒有相互接觸。請注意,芯
線間的短路會導致AV接收機的損壞。
•請注意不要讓水或其它液體濺入本系統。如果有水濺入本
系統,本系統和揚聲器都有可能受到損壞。
使用注意事項
連接到AV接收機
1.將末端的絕緣塑
膠層脫去,將線
心扭緊。
•當本揚聲器系統被用來進行普通的音樂再生時,可以承受
一定的輸入功率。但如果下述異常信號被輸入揚聲器,即
使其輸入功率低於最大輸入功率,也有可能在內部電路中
產生過大的電流,使線路燒毀或損壞。
1. 當收聽調頻廣播未調准電台時產生的噪音
2.放鬆螺釘並將線心 3.藉著將螺釘依照箭
穿過孔內達足夠的
頭的方向鎖緊,讓
深度。
線心緊緊地固定
住。
15mm
2. 當盒式錄音帶快進時產生的聲音
3. 由振蕩器、電聲樂器等產生的高頻音響
4. 振蕩的AV接收機信號
5. 由音頻測試CD等產生的特殊測試信號
6. 在連接或拆除音頻纜線時產生的聲音(請務必在連接或
拆除纜線前關閉AV接收機的電源)。
7. 使用麥克風時的反饋嘯聲
•請勿將螺絲刀等磁性物體和鐵制物品放置在揚聲器系統附
近,因為牠們會通過強磁場影響揚聲器系統,或者,牠們可
能會被磁性吸至揚聲器上,導致振動膜的損傷或徹底損壞。
右揚聲器(R聲道)
紅線側
左揚聲器(L聲道)
R
L
紅線側
接收機的揚聲器端子
在打開AV接收機的電源開關之前:
•確認揚聲器纜線的正極(+)和負極(-)沒有相互接觸。否則
可能會發生短路,導致AV接收機的損壞。
•在連接揚聲器纜線時,一定要保證極性的正確。(將揚聲器
的正(+)和負(-)接線柱連接至AV接收機上相應的揚聲器端
子。) 極性接反將會妨害低音的再生,併導致聲場不能正
確定位。同時,請務必使左側和右側的兩個揚聲器與AV接
收機上相應的揚聲器端子正確地連接。
•輕拉揚聲器纜線,以確認其已牢固地連接。
Ct-2
安放
揚聲器前格板的安裝和拆除
本揚聲器系統使用可拆式前格板。安裝和拆除的方法如下。
作為環繞聲揚聲器使用
可將立體聲移動帶入音效中,強化現場演奏音樂的感官體驗。
將環繞揚聲器放在和聆聽者的側面或呈對角的位置。理想的揚
聲器擺設位置應該是對稱地放置。
將揚聲器放在比聆聲者耳朵還要高1m的地方。
1. 用兩手抓住揚聲器前格板的底邊,輕輕向外拉,將前格板
的下部拆開。
揚聲器音箱是木製音箱,容易受到極高或極低的溫度和溼度變
化的影響。請勿將揚聲器系統放在受到陽光直接照射和潮溼的
地方,例如冷氣機旁、浴室或廚房等。
3. 安裝前格板時,將突起部推入揚聲器箱體的前格板安裝插
孔。
2. 用同樣的方法,輕輕向外拉前格板的上邊,將前格板從箱
體上拆下。
可拆式
安裝於牆上
復位
如果您要將揚聲器掛在牆壁上,請確認牆壁是否有足夠的強度
來承擔揚聲器的重量。牆壁的材料和牆內加強肋條的位置對壁
掛螺釘的承重強度有很大的影響。壁掛螺釘頭部的直徑應小於
10mm,螺杆的直徑應小於4mm,在此範圍內,請儘量選用最粗
最長的螺釘(請與您的室內裝修設計師或安裝人員洽談)。
請如圖所示安裝隨機附帶的緩衝墊,將揚聲器牢固地裝在牆壁
上。
D-407M
緩衝墊
鍵位孔狹縫
作為電視機的外接揚聲器使用時
通常,應用於彩色電視機等的陰極射線管是極為敏感的,牠們
甚至會受到地球磁場的影響。如果揚聲器系統靠近牠們,則會
產生色調混亂或圖像失真。為了能夠和彩色電視機等同時使
用,本揚聲器系統進行了磁場屏蔽,將磁場限制於箱體內。
緩衝墊
用市場銷售的支架和夾具進行安裝時
在環繞揚聲器底部和背面備有螺絲孔,因此您可以撰用市場上
可購買的支架或安裝配件。(2個M5螺絲孔,在底部和背面的間
距為60mm)
但是,即使進行了屏蔽,根據安裝的環境,也有可能發生色調
混亂。如果出現色調混亂,請關閉電視機的電源,等待15至30
分鐘,然後再次打開電視機電源。這將啟動電視機的自動消磁
功能,改善顯示狀況。如果在進行這種補救措施後仍有色調混
亂,請將揚聲器離開電視機遠一些。由於綜合影響,當一塊磁
鐵或其它磁性物體放置在電視機附近時,也有可能出現色調混
亂現象。
注意︰
將附件安裝在揚聲器上時,必須小心所用螺絲的長度。衹能使
用3和11mm長度的螺絲。
5mm
3 - 11mm
揚聲器的維護保養
您的Onkyo揚聲器表面覆蓋了高質量的膜,以保護木質的箱
體。
請定期用一塊硅夾層軟布或普通軟布擦拭機體。
M5螺絲
其表面可以用軟布蘸清水來擦拭,可以使用刺激性不強的肥
皂。請不要使用家具拋光劑或去污粉。請用軟刷或手持型吸塵
器去除沾在前格板上的灰塵和絨毛。
天然原木表面的櫃子
本櫃子的表面係使用天然原木作成的。這種表面有特殊的木質
晶格的花樣。讓您的櫃子富有樹木所具有的原始美麗的色澤和
特色;這些特點則藉著其深淺顏色的交叉晶格的花樣表現出
來。您不但可以享受 Onkyo 所設計出的最優良的音質,也帶
給您融入大自然造化的視覺享受。櫃子的油漆和表面處理是在
嚴格的品質控制之下進行的。
Ct-3
規格
型式﹕
阻抗﹕
最大輸入功率﹕
輸出聲壓電平﹕
頻率響應﹕
交叉頻率﹕
箱體容積﹕
低音揚聲器:
高音揚聲器:
尺寸﹕
重量﹕
附件﹕
其它﹕
雙路低音反射
6 Ω
150 W
85.5 dB/W/m
63 Hz-40 kHz
8000 Hz
4.7 L
13 cm A-0MF 錐型揚聲器
2.5 cm 軟質半球型體
172(寬)×269(高)×169(深) mm
(包括揚聲器前格板)
3.3 kg
8 m 揚聲器纜線×1
軟木間隔墊(cork spacer)×4
緩衝墊(cushioning pads)×4
使用手冊 (本書)
磁場屏蔽
規格和外觀如有變更,恕不另行通知。
在目錄和包裝上,產品標號最後的字母表示D-407M的顏色。雖然
顏色不同,但是操作和規格都是一樣的。
Sales & Product Planning Div. : 2-1, Nisshin-cho, Neyagawa-shi, OSAKA 572-8540, JAPAN
Tel: 072-831-8023 Fax: 072-831-8124
ONKYO U.S.A. CORPORATION
18 Park Way, Upper Saddle River, N.J. 07458, U.S.A.
Tel: 201-785-2600 Fax: 201-785-2650 http://www.onkyousa.com
ONKYO EUROPE ELECTRONICS GmbH
Liegnitzerstrasse 6, 82194 Groebenzell, GERMANY
Tel: +49-8142-4401-0 Fax: +49-8142-4401-555 http://www.onkyo.net
ONKYO EUROPE UK Office
Suite 1, Gregories Court, Gregories Road, Beaconsfield, Buckinghamshire, HP9 1HQ
UNITED KINGDOM Tel: +44-(0)1494-681515 Fax: +44(0)-1494-680452
ONKYO CHINA LIMITED
Units 2102-2107, Metroplaza Tower I, 223 Hing Fong Road, Kwai Chung,
N.T., HONG KONG Tel: 852-2429-3118 Fax: 852-2428-9039
HOMEPAGE
http://www.onkyo.com/
D0408-1
SN 29343898
(C) Copyright 2004 ONKYO CORPORATION Japan. All rights reserved.
* 2 9 3 4 3 8 9 8 *


