1
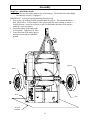
M268175D
ITEM NUMBER:
268175
SERIAL NUMBER: _____________
TM
Owner’s Manual
Instructions for Assembly, Testing, Operation, and Servicing
Trailer Kit: Outdoor agricultural product used to tow Item# 268170
WARNING
READ and UNDERSTAND the Owner’s Manual completely before using this trailer kit.
Assemble, test, and use only in accordance with the Owner’s Manual instructions.
EXERCISE CAUTION in vehicle handling when towing sprayer to avoid loss of control
or rollover.
Improper use of the trailer kit could result in serious injury to the operator or nearby
persons.
Any Questions, Comments, Problems, or Parts Orders
Call NorthStar Product Support 1-800-270-0810
1
Hazard Signal Word Definitions
2
Table of Contents
Summary of Important Safety Information ................................................................................4
During Assembly
During Operation
During Storage / Troubleshooting
Warning Label Location ...............................................................................................................5
Unpacking
Unpacking................................................................................................................................................ 6
Unpacking the Manual Bag ..................................................................................................................... 7
Assembly
Step One: Attach the A-frame tow bar to frame .............................................................................................. 8
Step Two: Attach the jack to the A-frame tow bar .......................................................................................... 9
Step Three: Build the axle assembly ................................................................................................................. 9
Step Four: Attach axle assembly to the frame ............................................................................................... 10
Step Five: Attach the wheels ............................................................................................................................ 11
Machine Components ..................................................................................................................12
Operation
Operation - Important Safety Information ................................................................................ 13
•
•
Before Towing
After Towing
• Transporting Safety
Operation – Using the Trailer Kit
Step One: Inspect/Repair................................................................................................................... 14
Step Two: Tow the trailer sprayer .............................................................................................................. 14
Specifications and Accessories ....................................................................................................15
Parts Breakdown..........................................................................................................................16
3
Summary of Important Safety Information
WARNING
Read and understand this owner’s manual completely before using the trailer kit.
Improper use of the trailer kit could result in serious injury for the operator or nearby persons.
LISTED BELOW is a summary of safety information of particular importance. See individual
sections of this owner’s manual for more details.
------------------------------------ DURING ASSEMBLY --------------------------------•
•
EXERCISE CAUTION when installing heavy parts. Follow the steps listed in the assembly section of this
manual to properly install the trailer kit.
DO NOT MODIFY trailer kit design.
----------------------------------- DURING OPERATION ------------------------------WARNING
Serious injury can occur if the vehicle to which the sprayer trailer is attached is driven in an
unsafe manner.
WARNING
The sprayer trailer is very heavy. It can cause serious injury if it rolls out of control or tips over.
Follow the safety instructions below for safely moving the sprayer trailer.
•
•
•
•
•
•
•
•
•
•
•
•
•
•
•
•
READ safety instructions in your vehicle manual with regard to towing heavy cargo loads.
DO NOT ALLOW drivers younger than 16 to drive the vehicle with the sprayer attached.
MAKE SURE the tires are fully inflated and in good repair before towing the sprayer trailer. When adding
air to the tires, do not over-inflate – serious injury could occur if tire explodes.
MAKE SURE SPRAYER IS SECURELY ATTACHED to vehicle.
EXERCISE CAUTION in vehicle handling when towing filled sprayer to avoid loss of control or sprayer
overturning.
Keep speed to a minimum so you can maintain control. Reduce speed prior to turns.
Allow for more distance to stop.
Avoid any sudden steering maneuvers, starts, or stops that could create liquid sloshing in the sprayer and
instability.
SLOW DOWN and EXERCISE EXTRA CAUTION on sloped or uneven terrain. Pick the most level
route possible across fields--drive up and down slopes when necessary, rather than across. Use a vehicle
equipped with a roll over protection system (ROPS) if you will be working on non-level terrain.
BE AWARE that visibility may be reduced when making turns or backing up.
BE AWARE of the added length of the sprayer trailer.
DO NOT RIDE or TRANSPORT cargo on the sprayer trailer.
NEVER TOW this sprayer trailer while under the influence of alcohol, drugs, or medication.
NEVER TOW this sprayer trailer over 12 mph. Faster speeds may result in loss of control. Order optional
Item# 268176 (high speed upgrade kit) if you want to tow at highway speeds.
If towing on a public road, make sure to comply with all local, state, and federal towing requirements. It is the
sole responsibility of the purchaser to obtain licensing, trailer lights, safety chains or signage, as needed to
comply. Order optional Item# 268176, which includes towing coupler, trailer lights and safety chains.
TURN OFF both sprayer and vehicle, and SET BRAKES before leaving unattended.
------------------- DURING STORAGE / TROUBLESHOOTING -----------------•
•
READ and FOLLOW the safety rules for troubleshooting / servicing the sprayer trailer.
If a part needs replacement, only use parts that meet the manufacturer’s specifications. Replacement parts
that do not meet specifications may result in a safety hazard or poor operation of the trailer sprayer.
4
Warning Label Location
Call 1-800-270-0810 to order a new label.
Part No. 779187
Towing Hazard
WARNING
Serious injury or death can happen if towing safety rules are not followed.
- When tank is full, tongue weight is 400 lbs. Make sure vehicle and
towing equipment are properly rated.
- When tank is empty, trailer is extremely light. Caution must be used
when towing at higher speeds.
- NEVER tow sprayer with jack in down position.
- Chock sprayer wheels before unhooking from tow vehicle.
5
Unpacking
Closely inspect all contents in the shipping carton.
•
•
If you have damaged components: Contact the freight company that delivered the unit and file a claim.
If you have missing components: Contact NorthStar Product Support at 1-800-270-0810.
Axle Support
Qty 2
Left Torsion Axle
Right Torsion Axle
13” Wheel Assembly
Qty 2
A-Frame Towbar
Jack
Axle Gusset
6
Manual Bag
Unpacking the Manual Bag
The following items are found in the manual bag.
Hitch Pin
3/8 x 1” Bolt
Qty. 8
3/8” Class G Nut
Qty. 20
3/8 x 1-1/4” Bolt
Qty. 12
7/16 x 1-1/4” Bolt
Qty. 4
5/8 x 1-1/2” Bolt
Qty. 10
7/16” Nyloc Nut
Qty. 4
5/8” Flat Washer
Qty. 10
5/8” Class G Nut
Qty. 10
Bridge Pin
Lug Bolt
Qty. 10
7
Assembly
Step One: Attach the A-frame tow bar to frame.
IMPORTANT: It is recommended that at least two people perform this step.
1. Raise the front of the sprayer frame until there is enough room for the A-frame tow bar to
fit underneath. Place blocks under the frame to hold it up.
2. Attach the A-frame tow bar to the frame using (6) 5/8 x 1-1/2” bolts, (6) 5/8” flat
washers, and (6) Class G 5/8” nuts. Tighten all bolts to 180 ft-lbs.
Block
5/8 x 1-1/2” bolts
& washers go
through sprayer
frame first
5/8” flat washer
Sprayer
frame
5/8” Class G nut
A-frame tow bar
8
Assembly
Step Two: Attach the jack to the A-frame tow bar.
1. Attach the jack to the A-frame
tow bar with (4) 7/16 x 1-1/4”
bolts and (4) 7/16” nyloc nuts.
2. Tighten the bolts to 60 ftlbs.
Jack
7/16” nyloc nut
7/16 x 1-1/4” bolt
A-frame tow bar
Step Three: Build the axle assembly.
Attach the torsion axles to the axle gusset and axle supports using (12) 3/8 x 1-1/4” bolts
and (12) 3/8” Class G nuts. Leave bolts loose until next step.
3/8 x 1-1/4”
bolts
Axle support
Axle gusset
Torsion axle
3/8” Class G nut
9
Assembly
Step Four: Attach axle assembly to the frame.
NOTE: For this step, the broadcast kit and taillight kit cannot be in place, if equipped.
1. Place the jack’s wheel on a 2x8 or other suitable block to gain 1-1/2” of additional height.
Completely extend the jack to raise the front of the sprayer frame.
2. Roll the axle assembly into place under the sprayer frame. Note that torsion axles point
to the rear of the sprayer frame.
a. Slide the axle supports in or out to match the width of the sprayer frame. Tighten
bolts from Step 3 to 37 ft-lbs.
b. Attach the axle supports to the side of the sprayer frame using (4) 3/8 x 1” bolts and
(4) 3/8” Class G nuts. Do not tighten completely.
c. Use (4) 3/8 x 1” bolts, (4) 3/8” Class G nuts, (4) 5/8 x 1-1/2” bolts, (4) 5/8” flat
washers, and (4) 5/8” Class G nuts to attach the axle assembly to the bottom of the
sprayer frame. Tighten the 3/8” bolts to 37 ft-lbs and the 5/8” bolts to 180 ft-lbs.
d. Tighten 3/8 x 1” bolts
on the side of the
sprayer frame to 37 ftlbs.
Sprayer frame
5/8 x 1 1/2” bolt
and flat washer
3/8 x 1” bolt
Axle support
First bolt through
the sides using
3/8 x 1” bolts
Note orientation
5/8” Class G nut
Jack
2x8 board
3/8” Class G nut
10
Assembly
Step Five: Attach the wheels.
NOTE: For this step, the engine must be free of oil and gas. The broadcast kit and taillight
kit cannot be in place, if equipped.
IMPORTANT: At least two people should perform this step.
1. Place a piece of cardboard on the ground behind the sprayer. The ground should be a
hard, level surface. Lift the tongue of the sprayer until the unit is resting on end in a
vertical position. It may be necessary to place a shim under the tubes so the sprayer
stands in a vertical position.
2. Fasten the wheels to the hubs with
(10) lug bolts. Tighten to 102 ft-lbs.
3. Lower the front of the trailer sprayer
until the wheels and jack touch the
ground.
Lug bolt
Wheel
Shim
Hub
Piece of
cardboard
11
Machine Components
1. Hitch Pin: Allows the trailer unit to be hooked up to an agricultural style coupler.
2. Jack: Supports the trailer when it is not in use. Eases moving and connecting the trailer
to a tow vehicle.
3. Tongue: The tongue connects the sprayer frame to the tow vehicle.
4. Wheels: Thirteen-inch high speed wheel assemblies.
5. Torsion Axles: Suspension reduces vibration and improves towing at high and low
speeds.
12
Operation – Important Safety Information
Now that you have completed and tested your assembly, there is some important safety information
you need to know with regard to vehicle handling with the sprayer attached.
WARNING
Carefully read and make sure you understand the following safety information before using the trailer kit.
•
•
•
•
Before Towing
Trailer prep. ALWAYS inspect and prepare the trailer kit before use according to the directions
provided in this manual.
Operator age. You must be 16 years of age or older to operate this trailer kit.
Mechanical parts. Check to be sure all nuts and bolts are tight to make sure the trailer kit is in safe
working condition.
After Towing
Unattended. ALWAYS turn off vehicle and set brake or block wheels.
Transporting Safety:
WARNING
The trailer sprayer is very heavy. It can cause serious injury if it rolls out of control or tips over.
Follow the safety instructions below for safely moving the trailer sprayer.
•
•
•
•
•
•
•
•
•
•
Read vehicle instructions. Review safety instructions in your vehicle manual with regard to towing heavy
cargo loads.
Driver age. You must be 16 years of age or older to drive the vehicle with the trailer sprayer attached.
Vehicle handling. Be aware that vehicle handling will be affected when driving with the filled sprayer.
Exercise caution to avoid loss of control or sprayer overturning:
o Keep speed to a minimum so you can maintain control at all times. Reduce speed prior to turns.
o Allow for more distance to stop.
o Avoid any sudden steering maneuvers, starts, or stops that could create liquid sloshing in the sprayer
and instability.
Rough or sloped terrain. Slow down and exercise extra caution on rough or sloped terrain in order to
reduce risk of rollover. Pick the most level route possible when transporting across fields. Drive up and
down slopes that cannot be avoided, rather than across. Use a vehicle equipped with a Roll Over
Protection System (ROPS) if you will be operating on non-level terrain.
Reduced visibility. Be aware that visibility may be reduced with trailer sprayer attached. Be extra
cautious when backing up or turning.
Ride / transport. Never ride or transport cargo on the trailer sprayer.
Under the influence. Never transport or operate this trailer sprayer while under the influence of alcohol,
drugs, or medication
Unattended. Before leaving the trailer sprayer unattended, turn off the vehicle and set vehicle brakes.
Tires. Be sure tires are fully inflated and in good repair before towing the trailer sprayer. When adding air
to tires, do not over-inflate -- serious injury could occur if tire explodes.
Replacement parts. If a part needs replacement, only use parts that meet the manufacturer’s
specifications. Replacement parts that do not meet specifications may result in a safety hazard or poor
operation of the trailer kit.
13
Operation – Using the Trailer Kit
Step One. Inspect/Repair
If the trailer has been used previously, it must be prepared BEFORE EACH SUBSEQUENT USE.
WARNING
Read instructions below carefully for inspecting and preparing the trailer kit.
Damaged or missing components could result in injury to the operator, bystanders, or property damage.
Important safety rules:
•
Replacement parts. If a part needs replacement, only use parts that meet the manufacturer’s
specifications. Replacement parts that do not meet specifications may result in a safety hazard or
poor operation of the trailer kit.
Inspect and repair
Inspect and test the trailer kit thoroughly
a. Check tires for proper pressure level.
b. Check to be sure that all nuts and bolts are tight.
Step Two: Tow the trailer sprayer.
1. Review safety
information
2. Attach to
vehicle
Review the “Operation – Important Safety Information” related to
Transportation Safety provided in this manual.
1. Attach trailer sprayer to agricultural style hitch. Secure with the hitch pin and
bridge pin.
2. Retract jack and rotate
into travel position.
Hitch pin
Bridge pin
Jack
Agricultural style hitch
3. Transport
Important: When filled, the trailer sprayer has a tongue weight of approximately
400lbs. Ensure that the tow vehicle is properly equipped to handle this load.
Tow the trailer sprayer at speeds less than 12mph. If greater speeds are
required, a high-speed coupler with safety chains must be used. Order optional
Item# 268176, which includes a 2” ball coupler, safety chains, and a trailer light kit
designed specifically for this trailer sprayer.
4. Leaving
unattended
If the trailer sprayer must be left unattended at any time:
• Turn off the vehicle. Set brake or block the wheels.
14
Specifications and Accessories
Trailer Kit Specifications
Maximum Towing Speed……………12 MPH
Tire Size…………………………….. ST175/80 D13
Maximum Tire Pressure……………..35 PSI
Overall Dimensions (boxed)…….….. 53”L x 45”W x 15”H
Weight (shipping)…………………... 250 lbs.
Available Accessories
High Speed Trailer Upgrade Kit…… Item #268176
The manufacturer reserves the right to make improvements in design and/or
changes in specifications at any time without incurring any obligation to install
them on units previously sold.
Any Questions, Comments, Problems or Parts Orders
Call NorthStar Product Support 1-800-270-0810
15
Exploded View – 268175 – Rev. D
Item
1
2
3
4
5
6
7
8
Part#
1178
779240
30312
779188
779094
779245
124223
124220
Description
Hitch Pin
A-Frame Towbar
Bridge Pin
Jack
Axle Support
Axle Gusset
Left Torsion Axle
Right Torsion Axle
Qty
1
1
1
1
2
1
1
1
Item
9
10
11
12
13
14
15
16
16
Part#
124293
124292
124112
777124
82140
780199
12412
124A
Description
Grease Seal
Bearing
5 Bolt Hub
Slotted Jam Nut
Cotter Pin
13” Wheel Assembly
Lug Bolt
Dust Cap
Qty
2
4
2
2
2
2
10
2