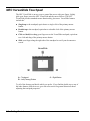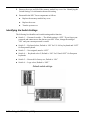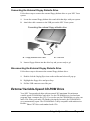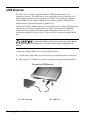
1
Proprietary Notice and Liability Disclaimer The information disclosed in this document, including all designs and related materials, is the valuable property of NEC Computers Inc. (hereinafter “NEC Computers”) and/or its licensors. NEC Computers and/or its licensors, as appropriate, reserve all patent, copyright and other proprietary rights to this document, including all design, manufacturing, reproduction, use, and sales rights thereto, except to the extent said rights are expressly granted to others. The NEC Computers product(s) discussed in this document are warranted in accordance with the terms of the Warranty Statement accompanying each product. However, actual performance of each such product is dependent upon factors such as system configuration, customer data, and operator control. Since implementation by customers of each product may vary, the suitability of specific product configurations and applications must be determined by the customer and is not warranted by NEC Computers. To allow for design and specification improvements, the information in this document is subject to change at any time, without notice. Reproduction of this document or portions thereof without prior written approval of NEC Computers is prohibited. As an ENERGY STAR partner, NEC Computers Inc. has determined that this product meets the ENERGY STAR guidelines for energy efficiency. ENERGY STAR is a U.S. registered mark. NEC is a registered trademark; Versa is a U.S. registered trademark; DayLite, VersaGlide and UltraLite are trademarks; and UltraCare is a U.S. registered service mark of NEC Corporation and/or one or more of its subsidiaries. All are used under license. Microsoft, Windows and Windows 2000 are registered trademarks of Microsoft Corporation. Transmeta, Crusoe, and LongRun are trademarks of Transmeta Corporation. All other trademarks and registered trademarks are the property of their respective trademark owners. First Printing - March 2001 Copyright 2001 NEC Computers Inc. 15 Business Park Way Sacramento, CA 95828 All Rights Reserved Contents Using This Guide Text Setup ........................................................................................................................... vii Related Documents ............................................................................................................ viii 1 Introducing Your NEC Versa Before You Begin .............................................................................................................. 1-2 About Your NEC Versa Notebook..................................................................................... 1-3 Around the Front of the System ......................................................................................... 1-3 LCD Panel................................................................................................................... 1-4 Base Unit..................................................................................................................... 1-4 Keyboard Panel........................................................................................................... 1-6 Front Features ............................................................................................................. 1-8 Around the Back of the System.......................................................................................... 1-9 Around the Left Side of the System ................................................................................... 1-9 Around the Right Side of the System............................................................................... 1-10 Power Button ............................................................................................................ 1-11 Around the Bottom of the System.................................................................................... 1-12 2 Getting Started NEC VersaGlide Touchpad................................................................................................ 2-2 Making VersaGlide Adjustments................................................................................ 2-3 VersaGlide Tips .......................................................................................................... 2-3 Power Sources for Your NEC Versa Notebook ................................................................. 2-3 AC Adapter ........................................................................................................................ 2-3 Connecting the AC Adapter........................................................................................ 2-4 Powering On Your System ......................................................................................... 2-6 Primary Battery Pack ......................................................................................................... 2-6 Secondary Battery Pack ..................................................................................................... 2-6 Determining Battery Status......................................................................................... 2-7 Low Battery Status...................................................................................................... 2-7 Returning the Battery to its Normal State ................................................................... 2-8 Extending Battery Life................................................................................................ 2-8 Battery Handling......................................................................................................... 2-8 Replacing the Battery.................................................................................................. 2-8 Charging the Battery ................................................................................................. 2-11 Battery Precautions ................................................................................................... 2-11 Precautions for Recharging the Battery .................................................................... 2-12 System Batteries............................................................................................................... 2-12 CMOS Battery .......................................................................................................... 2-12 Optional Battery........................................................................................................ 2-12 System Care ..................................................................................................................... 2-12 Precautions for System Use ...................................................................................... 2-13 Storage Requirements ............................................................................................... 2-13 Routine Cleaning ...................................................................................................... 2-14 Contents iii 3 Using the BIOS Setup Utility Introducing BIOS Setup .....................................................................................................3-2 Entering BIOS Setup ..........................................................................................................3-2 BIOS Setup Main Menu..............................................................................................3-3 How to Use Setup........................................................................................................3-3 Main Menu ..................................................................................................................3-5 Advanced Menu ..........................................................................................................3-8 Security Menu ...........................................................................................................3-10 Boot Menu.................................................................................................................3-11 Exit Menu..................................................................................................................3-11 Managing System Power..................................................................................................3-12 Windows 2000 Power Options Properties.................................................................3-12 Windows 2000 Power Schemes ................................................................................3-13 Windows 2000 Alarms..............................................................................................3-14 Windows 2000 Power Meter.....................................................................................3-14 Windows 2000 Advanced .........................................................................................3-15 Windows 2000 Hibernate..........................................................................................3-15 Windows 2000 Power Management States ...............................................................3-16 Recognizing the Windows 2000 Power Management States ....................................3-16 Updating the BIOS ...........................................................................................................3-17 Obtaining the BIOS Update ......................................................................................3-17 Preparing the BIOS Update Diskette.........................................................................3-17 Performing the BIOS Update ....................................................................................3-18 Configuring the Switch Settings.......................................................................................3-19 Accessing the DIP Switch .........................................................................................3-19 Identifying the Switch Settings .................................................................................3-20 4 Using the Operating System and Utilities Microsoft Windows Introduction .......................................................................................4-2 Windows 2000 ............................................................................................................4-2 Desktop Icons.......................................................................................................4-2 Taskbar Icons .......................................................................................................4-3 Transmeta LongRun Utility................................................................................................4-4 Setting LongRun Properties ........................................................................................4-4 Product Recovery CD.........................................................................................................4-5 Guidelines for Using the Product Recovery CD .........................................................4-5 Product Recovery CD Options ....................................................................................4-5 Full Disk Drive Restore...............................................................................................4-6 Partition Only Restore.................................................................................................4-7 5 Using the System Drives and Bays External Floppy Diskette Drive..........................................................................................5-2 Connecting the External Floppy Diskette Drive..........................................................5-3 Disconnecting the External Floppy Diskette Drive.....................................................5-3 External Variable-Speed CD-ROM Drive..........................................................................5-3 Using the CD-ROM Drive with your NEC Versa Notebook ......................................5-6 Disconnecting the CD-ROM Drive.............................................................................5-8 iv Contents CD Care ...................................................................................................................... 5-8 Hard Disk Drive ................................................................................................................. 5-9 Memory Modules............................................................................................................... 5-9 Installing a Memory Module..................................................................................... 5-10 6 Communicating with Your NEC Versa PC Cards ............................................................................................................................ 6-2 Type II Cards .............................................................................................................. 6-2 Type II Extended Cards .............................................................................................. 6-2 Communication Cards ................................................................................................ 6-2 Storage Cards.............................................................................................................. 6-3 Other Cards ................................................................................................................. 6-3 PC Card Slots.............................................................................................................. 6-3 Inserting a PC Card..................................................................................................... 6-4 Removing a PC Card .................................................................................................. 6-4 Mini PCI LAN ................................................................................................................... 6-5 Connecting the Mini PCI LAN ................................................................................... 6-5 Internal Modem.................................................................................................................. 6-6 Connecting the Internal Modem.................................................................................. 6-6 Internet Connections .......................................................................................................... 6-7 IR Port................................................................................................................................ 6-7 Enabling/Disabling the IR Port in Windows 2000...................................................... 6-8 Using the IR Port ........................................................................................................ 6-8 7 Traveling Tips Preparing for Travel ........................................................................................................... 7-2 Packing for Travel.............................................................................................................. 7-2 Using Power Connections .................................................................................................. 7-3 Getting Through Customs .................................................................................................. 7-3 Connecting to the Internet.................................................................................................. 7-4 Connecting Using a Modem ....................................................................................... 7-4 Connecting Using a LAN............................................................................................ 7-4 8 Using Peripheral Devices External Monitor ................................................................................................................ 8-2 External Audio Options...................................................................................................... 8-3 USB Devices ...................................................................................................................... 8-4 9 Using Multimedia Audio ................................................................................................................................. 9-2 Recording.................................................................................................................... 9-2 Microphone................................................................................................................. 9-3 Mixing......................................................................................................................... 9-3 Playing Back ............................................................................................................... 9-3 Using Headphones ...................................................................................................... 9-4 Using the Built-In Speaker.......................................................................................... 9-4 Using External Stereo Speakers.................................................................................. 9-4 MIDI Files................................................................................................................... 9-4 Contents v Video ..................................................................................................................................9-4 Using Digital Video Files............................................................................................9-4 Using Animation Files ................................................................................................9-5 Multimedia Applications....................................................................................................9-5 10 Solving System Problems Problem Checklist ............................................................................................................10-2 Start-Up Problems ............................................................................................................10-3 Post Error Messages ..................................................................................................10-4 Beep Codes ...............................................................................................................10-6 If You Need Assistance....................................................................................................10-7 11 Getting Service and Support Service and Support Contact Information ........................................................................11-2 Web Site ...........................................................................................................................11-3 FTP Site............................................................................................................................11-3 Support Services...............................................................................................................11-4 Email/Fax to Support Services .........................................................................................11-4 A Setting Up a Healthy Work Environment Making Your Computer Work for You............................................................................. A-2 Arrange Your Equipment .................................................................................................. A-3 Adjust Your Chair ............................................................................................................. A-3 Adjust Your Input Devices................................................................................................ A-3 Adjust Your Screen or Monitor......................................................................................... A-4 Vary Your Workday.......................................................................................................... A-5 Pre-Existing Conditions and Psychosocial Factors ........................................................... A-5 B Specifications System Components .......................................................................................................... B-2 Memory Map..................................................................................................................... B-7 Interrupt Controllers .......................................................................................................... B-8 C Frequently Asked Questions External Mouse ................................................................................................................. C-2 Display .............................................................................................................................. C-2 PC Cards............................................................................................................................ C-3 Diskette Drive ................................................................................................................... C-3 Booting.............................................................................................................................. C-5 Power Management........................................................................................................... C-5 Miscellaneous.................................................................................................................... C-7 Glossary Index Regulatory Statements vi Contents Using This Guide The NEC Versa® DayLite™/UltraLite™ User's Guide gives you the information you need to maximize the use of your NEC Versa notebook computer. Read this guide to familiarize yourself with the NEC Versa and its features. For specific information see ! Chapter 1, “Introducing Your NEC Versa,” to acquaint yourself with system hardware. ! Chapter 2, “Getting Started,” for instructions on how to connect, power on, and care for your system. ! Chapter 3, “Using the BIOS Setup Utility,” for details about modifying system parameters and managing system power. ! Chapter 4, “Using the Operating System and Utilities,” for an understanding of your Microsoft® Windows® operating system. ! Chapter 5, “Using the System Drives and Bays,” to master procedures for connecting the external floppy disk drive, connecting the external CD-ROM drive, and installing a memory module. ! Chapter 6, “Communicating with Your NEC Versa,” for essential information about using PC Cards and other communication features of the system. ! Chapter 7, “Traveling Tips,” for a variety of checklists to help you to prepare your notebook computer for getting through customs and accessing the internet when you are on the road. ! Chapter 8, “Using Peripheral Devices,” to master procedures for connecting external devices like an external monitor, headphones, a printer, or speakers. ! Chapter 9, “Using Multimedia,” for steps on integrating video and sound clips into impressive presentations. ! Chapter 10, “Solving System Problems,” for simple solutions to common problems that may arise while operating your notebook. ! Chapter 11, “Getting Service and Support,” for information about getting help when you need it from NEC Computers Inc. ! Appendix A, “Setting Up a Healthy Work Environment,” for guidelines that help promote a healthy work setting. ! Appendix B, “Specifications,” to review NEC Versa system specifications. Using This Guide vii ! Appendix C, “Frequently Asked Questions,” (FAQs) for a look at questions that users commonly ask and the answers to those questions. Text Setup To make this guide as easy to use as possible, text is set up as follows. ! Warnings, cautions, and notes have the following format: Warnings alert you to situations that could result in serious personal injury or loss of life. Cautions indicate situations that can damage the system hardware or software. Note Notes give particularly important information about whatever is being described. ! Names of keys are printed as they appear on the keyboard, for example, Ctrl, Alt, or Enter. ! Text that you must type or keys that you must press are presented in bold type. For example, type dir and press Enter. Related Documents See the NEC Versa DayLite/UltraLite Quick Setup sheet to help get your system up and running. viii Using This Guide 1 Introducing Your NEC Versa ! Before You Begin ! About Your NEC Versa Notebook ! Around the Front of the System ! Around the Back of the System ! Around the Left Side of the System ! Around the Right Side of the System ! Around the Bottom of the System Before You Begin This manual is the user’s guide for both the NEC Versa UltraLite and Versa DayLite notebook computers. All information applies to both units unless otherwise specified. The coloring of your NEC Versa may vary from the units shown in this guide. The colors of the systems used in this User’s Guide are for illustrative purposes only. Prolonged or improper use of a computer workstation may pose a risk of serious injury. To reduce your risk of injury, set up and use your computer in the manner described in Appendix A, “Setting Up a Healthy Work Environment.” After completing the steps in the Quick Setup sheet that comes with your computer, your NEC Versa DayLite/UltraLite notebook computer is ready to go! To get started, do the following: ! Read Appendix A, “Setting Up a Healthy Work Environment,” for guidelines that help you use your computer productively and safely. Information includes how to set up and use your computer to reduce your risk of developing nerve, muscle, or tendon disorders. ! Read through this guide to familiarize yourself with the NEC Versa. 1-2 Introducing Your NEC Versa About Your NEC Versa Notebook The NEC Versa notebook computer offers you a portable system filled with exciting resources for home, business, or travel. Standard features include a powerful Transmeta Crusoe TM5600 600MHz microprocessor that works together with the latest Peripheral Component Interconnect (PCI) architecture. In addition, your system provides a high-performance hard disk drive, external CD-ROM and diskette drives, and PC Card support. As a multimedia system, your NEC Versa also provides the tools needed to create and present impressive images using video clips and sound. NEC Versa notebook computer To get comfortable with your notebook, read the following sections and take a tour around your system! Around the Front of the System The NEC Versa is compact with features on every side. First, look at the front of the NEC Versa. The following sections describe front features, beginning with the liquid crystal display (LCD) panel. Introducing Your NEC Versa 1-3 LCD Panel Your NEC Versa comes with a 10.4-inch color Thin Film Transistor (TFT) display that you can adjust for a comfortable viewing position. To adjust the viewing angle, gently tilt the LCD panel into position. The primary battery is located behind the display. The Versa UltraLite has an Extended Graphics Array (XGA) backlit panel. The Versa DayLite has a TFT Super Video Graphics Array (SVGA) reflective panel. To adjust the LCD panel brightness press the Fn-F8 and Fn-F9 functions keys. For more details about using the system’s function keys, see the topic later in this chapter, “Keyboard Panel.” Base Unit The base unit of your NEC Versa offers the following features, described after the figure. After extended use, the surface of the base unit, below the keyboard, may become hot to the touch. LCD panel and base unit A – Operating Status LEDs B – LCD Panel C – Microphone 1-4 Introducing Your NEC Versa D – NEC VersaGlide touchpad E – Speaker F – Keyboard ! Keyboard — 86 keys with a country-specific QWERTY-key layout. ! LCD Panel — Provides a high-resolution display for sharp, effective visuals on your NEC Versa. ! Microphone — A strategically positioned built-in microphone allows you to record monophonic sound directly into your notebook computer. See Chapter 9, “Using Multimedia,” for details about recording. ! NEC VersaGlide touchpad — Works like a standard computer mouse. Simply move your fingertip over the VersaGlide to control the position of the mouse pointer. Use the selection buttons below the VersaGlide to select menu items. VersaGlide settings and features are described in detail in Chapter 2. ! Speaker — Provides mono sound for your system when speakers are not plugged into the speaker jack. ! Operating Status LEDs — Keep you informed of your NEC Versa notebook's current operating status. See the following figure and list for each icon's meaning. Operating status LEDs A – Hard Disk Drive B – Caps Lock C – Scroll Lock D – Num Lock — Hard Disk Drive — lights when the NEC Versa writes data to or retrieves data from the internal hard disk drive. — Caps Lock — lights when Caps Lock is on. — Scroll Lock — lights when Scroll Lock is on. — Num Lock — lights when Num Lock in on. Introducing Your NEC Versa 1-5 Keyboard Panel The NEC Versa notebook’s keyboard offers the following features, which are described after the figure. Keyboard A – Function Keys B – Numeric Keys C – Windows keys ! D – Cursor Control Keys E – Control Keys Function keys — Twelve function keys, F1 through F12, are available on the NEC Versa keyboard. These keys work together with the Fn key to activate special functions. Several keys are preprogrammed with dual functions and some are printed in blue on the key. Function keys are application-driven. See the specific application's user guide for information about how each function key works within the application you are using. The following function key combinations are preprogrammed for the NEC Versa computer. Fn-F3 — toggles between three video modes; LCD, CRT, or both (LCD and CRT). Fn-F6 — sets the beeper volume to low, medium, high, or mute. Fn-F8 — increases the LCD panel brightness. Fn-F9 — decreases the LCD panel brightness. Fn-F10 — increases the system speaker volume. 1-6 Introducing Your NEC Versa Fn-F11 — decreases the system speaker volume. Fn-F12 — toggles the scroll lock feature Fn-Ins —print screen Fn-Del — system request Fn-Pause — break Fn-↑ ↑ — page up Fn-↓ ↓ — page down Fn-← ← — end Fn-→ → — home ! Numeric keypad — Pressing NumLk on the keyboard activates the numeric keypad numbers and functions printed in blue on the keys. The keypad lets you type numbers and mathematical operands (+, -) as you would on a calculator. The keypad is ideal for entering long lists of numbers. When you press NumLk again, the keys revert to their normal functions as typewriter keys. ! Cursor Control keys — Cursor control keys let you position the cursor on the screen where you want. On the screen, the cursor is a blinking underline, block, or vertical line depending on the application. The cursor indicates where the next text typed is inserted. ! Windows keys — In Windows use the following two keys to facilitate your work. Quick access to shortcut menus Displays the Start menu ! Control keys — Ctrl, Alt, Fn, and Shift are controls used in conjunction with other keys to change their functions. To use control keys, press and hold the control key while pressing another key. For example, “press Ctrl c” means to hold down the Ctrl key and type the letter c. How the key combination works depends on the application you are running. Introducing Your NEC Versa 1-7 ! Typewriter keys — The typewriter keys (also called alphanumeric keys) are used to enter text and characters. Keys with blue printing on them behave differently when combined with control keys or the Fn key. Front Features The front features of your NEC Versa notebook are described after the figure. Features on the front of the system A – IR Port B – Battery Charging LED ! C – Power Status LED Power Status LED — This LED lights to indicate the following: — Lights green when the system power is on. — Blinks green when the system is in Standby mode. — Lights yellow (blinks when in Standby mode) to indicate that battery power is at 8% capacity or less. — Lights amber (blinks when in Standby mode) to indicate that battery power is at 3% capacity or less. ! Battery Charging LED — lights to indicate battery charging activity. — Lights amber when the primary battery is charging. Blinks amber to indicate an error. The primary battery is installed in the battery bay. — Lights green when the secondary battery is charging. Blinks green to indicate an error. The secondary battery is connected to the back of the system. 1-8 Introducing Your NEC Versa ! IR Port — Use this infrared (IR) port to transfer files between your NEC Versa and an IR-equipped desktop or notebook computer or to print to an IR-capable printer. Note Your NEC Versa ships with the IR port disabled. For detailed instructions on how to enable the IR port, see Chapter 6, “Communicating with Your NEC Versa.” Around the Back of the System The battery bay which contains the system's secondary lithium-ion (Li-Ion) battery is located at the back of your NEC Versa computer. For more detailed information on the battery bay, refer to the “Getting Started” chapter of this user’s guide. Around the Left Side of the System The left side of your NEC Versa notebook offers the following features, which are described after the figure. Left-side features A – AC Power Port B – Vent C – External Monitor (Video) Port D – RJ-11 Jack E – USB Port F – LAN Cable Jack ! AC Power Port — Attaches the NEC Versa to a power source, such as the AC adapter. ! Vent — Allows your system to cool properly and maintain a safe operating temperature. ! External Monitor (Video) Port — Use this port to attach an external monitor to your NEC Versa. You can run the LCD display and the external monitor simultaneously or run either alone. ! RJ-11 Jack — Connects the internal modem to an analog telephone line. Introducing Your NEC Versa 1-9 ! USB Port — The Universal Serial Bus (USB) port allows you to connect up to 127 USB-equipped peripheral devices (printers, monitors, scanners, etc.) to your NEC Versa. ! LAN Cable Jack (optional) — If your system has this feature, it will have shipped with a LAN adapter cable to connect the jack to a local area network (LAN). Always keep the vents unobstructed to allow proper system cooling. Around the Right Side of the System The right side of the NEC Versa notebook offers the features, which are described after the figure. Right-side features A – Headphone Jack/External Speakers B – External Microphone Jack C – Power Button ! D – PC Card Slot E – USB Port ® F – Kensington Lock Slot Power Button — Slide the Power button forward to power on, power off, and to resume from Standby mode. For more information about the Power button, see the following topic, “Power Button.” 1-10 ! Headphone Jack/External Speakers — Lets you connect external headphones or speakers to your NEC Versa. Plugging in headphones disables the built-in system speakers. ! External Microphone (MIC) — Allows you to connect an external microphone for monophonic recording or amplification through the unit. Plugging in an external microphone disables the built-in microphone. Introducing Your NEC Versa ! PC Card Slot — Accommodates one type II PC Card. These cards are often storage or communication devices such as Static Random Access Memory (SRAM), Read Only Memory (ROM), Flash Memory, LAN, and Small Computer System Interface (SCSI). ! USB Port — The Universal Serial Bus (USB) port allows you to connect up to 127 USB-equipped peripheral devices (printers, monitors, scanners, etc.) to your NEC Versa. ! Kensington Lock Slot — Provides a connection for an optional Kensington Lock. Power Button The Power button is a “smart” switch, meaning that it recognizes when the system is in Standby mode. If in Standby mode, you cannot power off until you slide the Power button to the right to resume operation. (The BIOS parameter “System Switch” must be set to “Sleep.”) Put the unit in Standby mode when you need to be away from your system for a short period of time and want to return to where you left off. Standby mode shuts down all devices in the system while retaining data and system status. Go to Start, Shut Down, Standby to put your system into Standby mode. Use the Power button in the following ways: — Slide the Power button forward to power on. — Slide the Power button forward to resume from Standby mode and proceed with normal operation. — Hold the Power button in place for four or more seconds to power off the system (power override). Only use this option if you cannot power off your system using Start, Shut Down. Introducing Your NEC Versa 1-11 Around the Bottom of the System The bottom of the NEC Versa notebook offers the following features, which are described after the figure. Bottom features A – Memory Module Bay B – System Feet C – Hard Drive Bay D – Secondary Li-Ion Battery E – Battery Release Latch F – Vents ! Memory Module Bay — Stores an optional memory module. ! System Feet — Heightens the system to allow proper ventilation. ! Hard Drive Bay — Stores the system’s hard drive. ! Secondary Li-Ion Battery — Removable secondary power supply. ! Battery Bay Release Latch — Releases and removes the system’s secondary battery. ! Vents — Allow your system to cool properly and maintain a safe operating temperature. Always keep the vents unobstructed to allow proper system cooling. 1-12 Introducing Your NEC Versa 2 Getting Started ! NEC VersaGlide Touchpad ! Power Sources for Your NEC Versa notebook ! AC Adapter ! Primary Battery Pack ! Secondary Battery Pack ! System Batteries ! System Care NEC VersaGlide Touchpad The NEC VersaGlide is an easy way to control the cursor with your finger. Lightly glide your finger across the NEC VersaGlide and the cursor follows. The NEC VersaGlide provides standard mouse functionality, plus more. VersaGlide features include the: ! Single tap to the touchpad, equivalent to a single click of the primary mouse button. ! Double tap to the touchpad, equivalent to a double click of the primary mouse button. ! Click and hold, then drag your finger across the VersaGlide touchpad, equivalent to a click and drag of the primary mouse button. ! Slide your finger along the right side of the touchpad to scroll your document or screen. VersaGlide A – Touchpad B – Left (Primary) Button C – Right Button Try all of the features and decide which you prefer. If you find the double tap or any of the other features difficult to use, go to the next section for general directions about adjusting the touchpad properties. 2-2 Getting Started Making VersaGlide Adjustments The NEC VersaGlide offers a number of options that let you customize how it functions. The options let you control the cursor speed, select button orientation, enable or disable tapping, define auto jumps, enable easy-scrolling, and configure gestures to initiate selected functions by tapping in a designated area of the touchpad. To access these options, locate the Control Panel and double click the mouse icon. Use the context-sensitive help to learn more about each option. Select the option, then press F1 to access the context sensitive help. VersaGlide Tips Follow these basic tips while working: ! Use a light touch on the VersaGlide surface. ! Set up the NEC Versa notebook with your keyboard and VersaGlide at a comfortable height. Keep your forearms parallel to the floor. Your wrists should be relaxed and straight. ! While using the keyboard and VersaGlide, keep your shoulders and arms as relaxed as possible. ! Take regular breaks from the computer to rest your eyes. Perform stretching exercises to relax your fingers, hands, wrists, forearms, and shoulders. See Appendix A, “Setting Up a Healthy Work Environment,” for more information. Power Sources for Your NEC Versa Notebook The NEC Versa notebook can be powered using three different sources, making it a truly portable system. Operate your NEC Versa notebook just about anywhere using one of the following power sources: ! the AC adapter connected to an electrical wall outlet (using AC power) ! the primary and secondary batteries Read the following sections for specific information about using the NEC power sources. AC Adapter Use the AC adapter and power cable that came with your NEC Versa notebook to run your computer on alternating current (AC) power, or to recharge the batteries. Use the AC adapter whenever a wall outlet is nearby. Getting Started 2-3 Keep the adapter connected whenever possible. It charges the battery when it is connected, whether the NEC Versa notebook is powered on or off. AC adapter A – AC Adapter B – Adapter Cable C – Power Cable Do not attempt to disassemble the AC adapter. The AC adapter has no user-replaceable or -serviceable parts inside. Dangerous voltage in the AC adapter can cause serious personal injury or death. The AC adapter is intended for use with a computer and must meet EN609050 standards. Connecting the AC Adapter Note The AC power cable type that your system uses depends on the country where you are using it. Contact the local dealer to purchase the correct power cable. Connect the AC adapter as follows: 1. Connect the AC adapter cable to the power port on the left side of your NEC Versa notebook. 2-4 Getting Started 2. Plug one end of the AC power cable into the AC adapter and the other end into a properly grounded 120- or 240-volt, 50- or 60-Hz wall outlet. Connecting the AC adapter A – Adapter Cable B – AC Power Port C – AC Adapter D – Power Cable Do not cover or place objects on the AC adapter. Keeping the adapter clear of objects lets the adapter cool properly during use. Only use the AC adapter that comes with your NEC Versa notebook. Although other adapters look similar, using them can damage your system. Getting Started 2-5 Powering On Your System Power on the system as follows: 1. Locate the latch on the front of the unit, slide it to the right, and raise the LCD panel. 2. Locate the Power button and slide it forward to turn on system power. For additional information about Power control buttons and power LEDs, refer to Chapter 1, “Introducing the NEC Versa.” Note When powering on your NEC Versa notebook running the Windows 2000 operating system, you may encounter a warning message suggesting that a problem exists with the hibernation file on your system. The warning message is inaccurate. To disable this message, simply enable hibernate support. See the section, “Windows 2000 Hibernate,” in Chapter 3, for details about enabling hibernate support. Primary Battery Pack The NEC Versa notebook comes with rechargeable Lithium Polymer (Li-Poly) battery behind the LCD panel. This battery is not user-replaceable. Secondary Battery Pack The NEC Versa notebook comes with a secondary rechargeable Lithium Ion (Li-Ion) battery pack that is easy to install and remove. Secondary Lithium-Ion battery A – Battery Connectors 2-6 Getting Started B – Alignment Grooves To prevent accidental battery ignition or explosion, adhere to the following: ! ! ! ! Keep the battery away from extreme heat. Keep metal objects away from the battery connectors to prevent a short circuit. Make sure the battery is properly installed in the battery bay. Read the precautions printed on the battery. Determining Battery Status Your NEC Versa notebook system provides tools to help you keep track of the power levels of the primary and secondary batteries. If your system is configured to display the power icon on the taskbar (default setting), an electrical plug appears when the system is connected to an AC power source or a battery icon appears when the system is not connected to an AC power source. Use the system’s power meter to determine battery status. Access the system’s power meter in the following ways: ! Move the cursor over the power icon on the taskbar to display the remaining battery power for the system’s main battery. ! Right click the power icon on the taskbar to open the power meter or to adjust power properties. ! Double click the power icon on the taskbar to display the remaining power for both the main and secondary batteries. ! Go to Start, Settings, Control Panel, and double click the Power Management icon and select the Power Meter tab. Low Battery Status When combined battery power is ! low (8% or less), the power LED lights yellow when in use, and flashes yellow in standby. ! very low (3% or less) the power LED lights amber when in use, and flashes yellow in standby. When your system is in a low battery status, do one of the following: ! Power off the system, remove the secondary battery pack and replace it with a fully charged battery. Getting Started 2-7 ! Leave the battery in the system and connect your NEC Versa notebook to the AC adapter and a wall outlet. If you connect the system to AC power and keep the system within standard operating temperatures, the batteries recharge in approximately 4.5 hours when off, and 8 hours when on. Returning the Battery to its Normal State To return the battery to its normal state, try the following: ! Remove and then reinstall the battery ! Reinstall the battery in your NEC Versa notebook and fully recharge the battery (to 100%). Extending Battery Life While on the road, it is important to be aware of the simple things you can do to extend the life of the system's main battery. One way is to keep the brightness setting low. Use the Fn-F8 and Fn-F9 function keys to control the brightness. Battery Handling Keep the following in mind when removing or replacing a battery. ! Use only the battery designed for your NEC Versa system. Mixing other manufacturers’ batteries, or using a combination of very old and new batteries can deteriorate battery and equipment performance. ! Turn off power to the system after use. Keeping system power on can degrade battery performance and shorten battery life. ! Clean the battery connectors with a dry cloth when they get dirty. ! Keep the battery out of the reach of children. Replacing the Battery The following symptoms indicate that battery life is nearing an end. Replace batteries that display these symptoms. ! Shorter work times. ! Discoloration, warping. ! Hot to the touch. ! Strange odor. 2-8 Getting Started Replace the secondary battery installed in your NEC Versa notebook system as follows. Note Use the batteries in the NEC Versa notebook computer for which they are designed. Installing another manufacturer’s battery, or using a combination of very old and new batteries can deteriorate battery and equipment performance. 1. Save your files, exit Windows and turn off system power. 2. Close the LCD panel and turn over the system. 3. Slide the battery release latch toward the right side of the system and hold firmly. Locating the battery bay release latch A – Battery Release Latch Getting Started 2-9 4. Continue to hold the battery release latch as you slide the battery out of the system. Removing the battery A – Battery Bay Connectors B – Battery Bay Release Latch 5. C – Secondary Li-Ion Battery Insert the new battery as follows: ! Locate the alignment grooves on the edge of the battery. ! Locate the alignment grooves inside the battery bay. ! Align the grooves on the battery with the grooves in the bay. ! Slide the battery into the bay until securely locked into place. Inserting the battery A – Battery Bay Connectors B – Battery Bay Release Latch 6. 2-10 Turn over the system. Getting Started C – Alignment Grooves D – Secondary Li-Ion Battery Charging the Battery Charge the primary and secondary batteries by simply connecting your NEC Versa system to an AC power source. It takes 8 hours to fully charge the battery while the system is on, and 4.5 hours while the system is off. To monitor the charging activity, observe the battery charging LED on the front of the system. The battery charging LED lights as follows: ! Lights amber when the primary battery is charging. ! Blinks amber if the primary battery encounters an error while charging. ! Lights green when the secondary battery is charging. ! Blinks green if the secondary battery encounters an error while charging. Battery Precautions To prevent accidental battery ignition, rupture, or explosion, adhere to the following precautions. There is a danger of explosion if the battery is incorrectly replaced. Replace only with the same or equivalent type recommended by the manufacturer. Discard used batteries according to the manufacturer’s instructions. To avoid personal injury and property damage, read these battery precautions on handling, charging, and disposing of Li-Ion batteries. ! ! ! ! ! ! ! ! Keep the battery away from heat sources including direct sunlight, open fires, microwave ovens, and high-voltage containers. Temperatures over 140º F (60º C) may cause damage. Do not drop or impact the battery. Do not disassemble the battery. Do not solder the battery. Do not puncture the battery. Do not use a battery that appears damaged or deformed, has any rust on its casing, is discolored, overheats, or emits a foul odor. Keep the battery dry and away from water. Keep metal objects away from battery connectors. Metal objects in contact with the connectors can cause a short circuit and damage. If the battery leaks: ! ! If the battery leaks onto skin or clothing, wash the area immediately with clean water. Battery fluid can cause a skin rash and damage fabric. If battery fluid gets into eyes, DO NOT rub; rinse with clear water immediately and consult a doctor. Getting Started 2-11 ! Take extra precautions to keep a leaking battery away from fire. There is a danger of ignition or explosion. Precautions for Recharging the Battery Adhere to the following precautions when recharging the primary or secondary battery. ! Charge the battery for the specified charge time only (8 hours when on, 4.5 hours when off). ! During charging, keep the environmental temperature between 32° F and 104° F (0° C to 40° C). System Batteries Your NEC Versa notebook is equipped with a primary Lithium Polymer battery and a secondary Lithium Ion battery to help prevent data loss. Only the secondary battery is removable. In addition, the CMOS battery also provides system power. See Appendix B for a list of battery specifications. CMOS Battery This lithium battery provides battery backup and prevents data loss in the system's complementary metal oxide semiconductor (CMOS) RAM. This memory area contains information on the system's configuration, for example date, time, drives, and memory. The CMOS battery charges when your NEC Versa notebook is connected to AC power. The CMOS battery may discharge completely if the NEC Versa notebook remains unused for approximately two months. Optional Battery Your NEC Versa system allows you to remove and replace the secondary Li-Ion battery with an optional Extra Life Lithium-Ion battery. 2-12 Getting Started System Care The NEC Versa notebook is designed to be a durable, dependable system built for extensive use and travel. Follow these guidelines to maintain the condition and performance of your computer. Immediately turn off and unplug the NEC Versa notebook under the following conditions: ! ! ! The power cord is damaged or frayed. Liquid spills on or into the NEC Versa notebook. The system is dropped or the casing is damaged. Precautions for System Use Follow these precautions when using your NEC Versa computer and AC adapter. ! Avoid dropping or bumping the computer or the AC adapter. ! Do not stack heavy objects on the computer, the AC adapter, or the batteries. ! Avoid moving the NEC Versa notebook during system operation, especially while the hard disk is being accessed. ! When using the AC adapter, make sure the power source falls within the system's compatible range of 100-240 volts and 50 or 60-Hz, AC. Never use the AC adapter if the voltage falls outside of this range. (Watch for this when traveling to other countries.) ! Turn computer power off before attaching or removing non-plug and play devices. ! Do not push any foreign objects into the connectors, and slots. ! Do not set the computer on top of a magnetized area. Doing so can destroy the data on your hard disk drive. (Some airline tray tables are magnetic.) ! Avoid using the computer or AC adapter for extended periods in direct sunlight. ! Do not use the system in humid or dusty environments. ! Turn computer power off before cleaning it. ! Avoid exposing the NEC Versa notebook or AC adapter to extreme changes in temperature or humidity. If it is unavoidable, allow your NEC Versa notebook to adjust to room temperature before use. ! When cleaning the system, use a soft, clean, dry cloth. Avoid wiping the display surface with abrasive material, including rough fabric. Do not use a cleaning solution; this may damage the notebook's plastic. ! If the AC adapter becomes extremely hot, unplug the adapter and let it cool. ! Keep the AC adapter away from the IR ports. Getting Started 2-13 Storage Requirements Store the computer and AC adapter in an environment that meets the following conditions: If the temperature of the NEC Versa notebook suddenly rises or falls (for example, when you move the system from a cold place to a warm place), vapor condenses inside the system. Turning on the system under this condition can damage the internal system components. Before turning on the system, wait until the system's internal temperature equalizes with the new environment and any internal moisture evaporates. ! Maintain storage temperatures between -4° F and 104° F (-20° C and 40° C). ! Keep the storage area free from vibration and magnetic fields. ! Keep the system and its components away from organic solvents or corrosive gases. ! Avoid leaving the system and its components in direct sunlight or near heat sources. Routine Cleaning Clean or dust your system as follows: Never use harsh solutions, household cleaners, or spray cleaners that contain caustic materials on the NEC Versa computer. These cleaners are usually high in alkalinity which is measured in pH. Using these cleaners can cause the plastic surface to crack or discolor. 2-14 ! LCD screen — Carefully wipe the LCD screen with a soft cloth or a screen wipe designed for that purpose. Special screen wipes are available through your local computer dealer. ! System case — NEC recommends that you carefully wipe the case with a slightly damp, almost dry cloth. Getting Started 3 Using the BIOS Setup Utility ! Introducing BIOS Setup ! Entering BIOS Setup ! Managing System Power ! Updating the BIOS ! Configuring the Switch Settings Introducing BIOS Setup Your NEC Versa DayLite/UltraLite computer comes with a hardware program called BIOS Setup that allows you to view and set system parameters. BIOS Setup also allows you to set password features that protect your system from unauthorized use. Use BIOS Setup to: ! set the current time and date ! customize your operating system to reflect your computer hardware ! secure your system with a password Entering BIOS Setup Access the BIOS utility at power-on. Just press F2 when the following prompt appears. Press <F2> to Enter Setup. When you press F2 to enter BIOS Setup, the system interrupts the Power-On Self-Test (POST) and displays the current CMOS RAM settings. If the system detects an error during POST, it prompts you with a double beep and a message: “Press <F1> to resume.” If you press F1, the system enters BIOS Setup automatically. If you want to fix the error, carefully read the error message that appears above the prompt (taking notes if you want), and press F2. You will see this message if your CMOS battery becomes fully discharged. 3-2 Using the BIOS Setup Utility BIOS Setup Main Menu After you press F2, the system displays the BIOS Setup Main Menu screen, similar to the following. Main Setup Menu How to Use Setup The Setup utility has a Main Menu window and five top-level menus with submenus. The menu bar at the top of the Main Menu window lists the following top-level menus. ! ! ! Main Use the Main menu for basic system configuration. For example, select Main to set the system time and date, set diskette and hard disk parameters, or check memory parameters. Advanced Use the Advanced menu to set IR serial port, I/O device configuration, LCD panel view, and more. Security Use this menu to set User and Supervisor passwords, password on boot, fixed disk boot sector. ! Boot — Use this menu to set boot sequence. ! Exit Exits the Setup utility with various save or discard options. Using the BIOS Setup Utility 3-3 Use the keys listed in the legend bar on the bottom of the Setup menu to make the selections or exit the current menu. The following table describes the legend keys. Setup Key Functions Key Function F1 Provides help for the parameter field being displayed. Esc Exits the menu. Up or down arrow keys Moves cursor up and down for item selection. Left or right arrow keys Selects next menu. F5/F6 Changes values. Enter Executes a command or selects submenu. F9 Loads the default configuration values for the current menu. F10 Saves the current values and exits Setup. To select one of the five menus from the menu bar, use the left and right arrow keys. Use the up or down arrow keys to select an item under the menu. Menu items preceded by a > contain a submenu of selectable fields for setting system parameters. Display a submenu by using the up or down arrow keys to move the cursor to the desired submenu, then press Enter. An Item Specific Help window on the right side of each menu displays the help text for the currently selected Setup option. It updates as the cursor moves to each new field. Pressing F1 on any menu brings up the General Help window that describes the legend keys and their functions. Press Esc to exit the current window. The following subsections describe the five top-level menus and their submenus. 3-4 Using the BIOS Setup Utility Main Menu Choose the Main menu by selecting Main in the legend bar on the Main menu screen. Other Main menu options are available by selecting submenus. Use the arrow keys to select one of the Main menu options and press Enter to select a submenu. Items with grayed-out text are not available. Explanations of each Main menu item are in the following table. Setting items on this menu to incorrect values can cause your system to malfunction. Main Menu Items Menu Item Settings (default is bold) System Time Set system time in this field. Press Tab or Enter to move between hour, minute, and second fields. Example: 09:30:00 System Date Set system date in this field. Press Tab or Enter to move between month, date, and year fields. Example: 07/09/2001 Language English, Japanese Selects the display language for the BIOS. Bring up the Language submenus by pressing Enter. Diskette A Disabled, 1.44 Selects the diskette drive type. Bring up the Diskette A submenu by pressing Enter. Internal HDD Displays the HDD capacity. Example: 10056 MB Bring up the Internal HDD submenu by pressing Enter. The submenus include Type and LBA Format. See the table, “Internal HDD Menu Items” for descriptions of each submenu and its fields. Using the BIOS Setup Utility 3-5 Main Menu Items Menu Item Settings (default is bold) Boot Display Device Both, LCD, CRT Allows you to choose either display devices, or both. System Memory Displays amount of conventional memory detected during boot. This field is read-only and cannot be changed from BIOS Setup. Example: 640 KB Extended Memory Displays amount of extended memory detected during boot. This field is read-only and cannot be changed from BIOS Setup. Example: 63488 KB CPU Type Displays the processor type. This field is read-only and cannot be changed from BIOS Setup. CPU Speed Displays the processor speed. This field is read-only and cannot be changed from BIOS Setup. Example: 600 MHz BIOS Revision Displays the BIOS revision number. This field is read-only and cannot be changed from the BIOS Setup. Example: 1.0F-3707-6211/149A-0100 QuickBoot Mode 3-6 Using the BIOS Setup Utility Enabled, Disabled Internal HDD Submenu Items Menu Item Settings (default is bold) Type Auto, None, User When set to Auto, the values for Cylinders, Heads, Sectors, and Maximum Capacity as read only. When set to Auto, the BIOS detects what the drive is capable of, not the translation mechanism that was used to format the drive. If a drive is run in a mode other than the mode in which it was partitioned and formatted, unpredictable results may occur, including data loss. When set to None, informs the system to ignore this drive. When set to User, allows the manual entry of all fields described next. Cylinders When Type is Auto, value in the Cylinders field is auto-detected and field is read only. Heads When Type is Auto, value in Heads field is auto-detected and field is read only. Sectors When Type is Auto, value in Sectors field is auto-detected and field is read only. Maximum Capacity This field is read-only and cannot be changed from BIOS Setup. Example: 10056 MB Multi-Sector Transfers Disabled, 2, 4, 8, 16 sectors Determines the number of sectors per block for multi-sector transfers. When Type is Auto, value in Multi-Sector Transfers field is auto-detected and field is read only. Using the BIOS Setup Utility 3-7 Internal HDD Submenu Items Menu Item Settings (default is bold) LBA Mode Control Enabled, Disabled When Enabled is selected, it causes logical block addressing to be used in place of cylinders, heads, and sectors. When Type is set to Auto, the value in the LBA Mode field is auto-detected and the field is read only. 32-Bit I/O Disabled, Enabled When Enabled, allows 32 bit data transfers. Transfer Mode Standard, Fast PIO1, Fast PIO2, Fast PIO3, Fast PIO4, Fast PIO3/DMA1, Fast PIO4/DMA2 Selects the method for moving data to and from the drive. When Type is set to Auto, the value in the field is auto-detected and the field is read only. Ultra DMA Mode Disabled, Mode 0, Mode 1, Mode 2, Mode 3, Mode 4 Selects the Ultra DMA Mode for moving data to and from the drive. Autotype the drive to select the optimum transfer mode. When Type is set to Auto, the value in the field is auto-detected and the field is read only. Advanced Menu Choose the Advanced menu by selecting Advanced in the legend bar on the Main menu screen. Other Advanced menu options are available by selecting submenus. Use the arrow keys to select one of the Advanced menu options and press Enter to select a submenu. Items with grayed-out text are not available. Explanations of each Advanced menu item are in the following table. 3-8 Using the BIOS Setup Utility Setting items on this menu to incorrect values can cause your system to malfunction. Advanced Menu Menu Item Settings (default is bold) BootUp Num-Lock LockOn, LockOff Selects the state for Num Lock at power on. PS/2 Mouse Enabled, Disabled Enabled forces the PS/2 mouse port to be enabled regardless of whether a mouse is present. Disabled prevents any installed PS/2 mouse from functioning, but frees up IRQ 12. LCD Panel View Expansion Enabled, Disabled Disabled reduces the panel view in some video modes. Enabled expands the panel view. The enabled setting sometimes affects graphic quality. BootUp Message Enabled, Disabled Disabled suppresses the logo screen during boot. Summary Screen Disabled, Enabled. When set to Enabled, information about the system’s configuration is displayed onscreen during boot. Silent Boot Disabled, Enabled, Black. When set to Enabled, the logo screen appears during boot. Disabled causes the POST messages to appear during boot. Black causes the screen to remain black during boot. I/O Device Configuration Press Enter to bring up the I/O Device Configuration submenu to configure the IR serial port. On Board Device Configuration Press Enter to view submenu. USB Device Enable, Disable Using the BIOS Setup Utility 3-9 Security Menu Choose the Security menu by selecting Security from the Main menu screen. Other Security menu options are available by selecting submenus. Use the arrow keys to select one of the Security menu options and press Enter to select a submenu. Items with grayed-out text are not available. Explanations of each Security menu item are in the following table. Security Menu Items Menu Item Settings (default is bold) Set Supervisor Password Press Enter to access. Use this field to set or change the supervisor password. Press Enter to bring up a dialog box where the password can be entered and confirmed. Set User Password Press Enter to access. Use this field to set or change the user password. Press Enter to bring up a dialog box where the password can be entered and confirmed. Password on Boot Disabled, Enabled When Enabled, requires password entry before boot. System remains in secure mode until the password is entered. Fixed Disk Boot Sector Normal, Write Protect Write Protect protects the boot sector on the hard disk from viruses. 3-10 Using the BIOS Setup Utility Boot Menu Choose the Boot menu by selecting Boot in the legend bar on the Main menu screen. Other Boot menu options are available by selecting submenus. Use the arrow keys to select one of the Boot menu options and press Enter to select a submenu. Items with grayed-out text are not available. Explanations of each Boot menu item are in the following table. Boot Menu Settings Menu Item Settings (default is bold) USB Drive Hard Drive The Boot Menu displays the bootable devices in the current boot order. Use the up or down arrows to select a device. Press Enter to expand or collapse device information. Press Ctrl Enter to expand or collapse all device information. Use the plus (+) or minus (-) key to move a selected device up or down in the boot order. Exit Menu Choose the Exit menu by selecting Exit in the legend bar on the Main menu screen. Other Exit menu options are available by selecting submenus. Use the arrow keys to select one of the Exit menu options and press Enter to select a submenu. Explanations of each Exit menu item are in the following table. Exit Menu Items Menu Item Settings (default is bold) Exit Saving Changes Implements the changes just made, and exits BIOS. Exit Discarding Changes Exits, leaving BIOS unchanged. Load Setup Defaults Loads default values for all BIOS setup fields. Using the BIOS Setup Utility 3-11 Exit Menu Items Menu Item Settings (default is bold) Discard Changes Loads previous values from BIOS for all setup fields. Save Changes Saves all setup value changes to BIOS. Battery Refresh Reactivates the battery (applies to the Lithium-Ion battery). Managing System Power In the Windows 2000 operating system environment, your NEC Versa manages its power resources using the Advanced Configuration and Power Interface (ACPI) while the system is powered on using AC or battery (DC) power. ACPI enables the operating system to manage the power given to each attached device and to turn off a device when not in use. Take advantage of the opportunity to manage power on your system to: ! Minimize battery drain. ! Preserve the life of your NEC Versa. ! Save time. When you return from that urgent call or meeting, you don’t have to reboot, just slide the Power button to resume system operation. Windows 2000 Power Options Properties In Windows 2000, most ACPI power management settings are controlled through Windows Power Options Properties, not through the BIOS Setup utility. To access Windows 2000 Power Options Properties, go to Start, Settings, Control Panel, and double click Power Options. The Power Options Properties features are broken down as follows: 3-12 ! Power Schemes ! Alarms ! Power Meter ! Advanced ! Hibernate Using the BIOS Setup Utility Windows 2000 Power Schemes Use the Power Schemes options to define the appropriate Power scheme for your system, and to set timeouts for standby, LCD panel, and hard disk. Define parameters for your system when running under AC (plugged in) or DC (running on batteries) power. Power Schemes Parameter Default Setting Alternate Setting(s) Power Schemes Portable/Laptop Home/Office Desk, Presentation, Always On, Minimal Power Management, Max. Battery Turn off monitor (Plugged in) After 15 Minutes 1, 2, 3, 5, 10, 15, 20, 25, 30, 45 minutes; 1, 2, 3, 4, 5 hours; Never Turn off monitor (Running on batteries) After 5 Minutes 1, 2, 3, 5, 10, 15, 20, 25, 30, 45 minutes; 1, 2, 3, 4, 5 hours; Never Turn off hard disks (Plugged in) After 30 Minutes 3, 5, 10, 15, 20, 25, 30, 45 minutes; 1, 2, 3, 4, 5 hours; Never Turn off hard disks (Running on batteries) After 5 Minutes 3, 5, 10, 15, 20, 25, 30, 45 minutes; 1, 2, 3, 4, 5 hours; Never System standby (Plugged in) After 20 Minutes 1, 2, 3, 5, 10, 15, 20, 25, 30, 45 minutes; 1, 2, 3, 4, 5 hours; Never System standby (Running on batteries) After 5 Minutes 1, 2, 3, 5, 10, 15, 20, 25, 30, 45 minutes; 1, 2, 3, 4, 5 hours; Never System hibernates (Plugged in and running on batteries) After 1 Hour 10, 15, 20, 25, 30, 45 minutes; 1, 2, 3, 4, 5, 6 hours; Never ! Power Schemes — Defines the most appropriate power scheme for your computer. ! Turn off monitor — Selects the time delay before your LCD panel turns off. ! Turn off hard disks — Selects the time delay before your hard disk(s) power down. Using the BIOS Setup Utility 3-13 ! System standby — Selects the system standby timeout period for your system when running under AC or DC power. ! System hibernates — Selects the system hibernate timeout period for your system when running on AC or DC power. Windows 2000 Alarms Use the Alarms screen to define the point at which the battery alarm activates. Define the alarm to either sound, display a warning message, or invoke Standby, Hibernate or Shutdown. Alarms Parameter Default Setting Alternate Setting(s) Low battery alarm 10% 0-100% Display message Sound alarm Alarm Action Power Level None Standby, Power Off Critical battery alarm 3% 0-100% Display message Sound alarm Alarm Action Power Level Standby Power Off, Hibernate Run a program None When the alarm occurs, run this program. Alarm Action Notification Alarm Action Notification ! Low battery alarm — Allows you to define a low battery alarm percentage, notification, and system action. ! Critical battery alarm — Allows you to define a critical battery alarm percentage, notification, and system action. ! Run a program — Allows you to run a specific program when an alarm occurs. Windows 2000 Power Meter The Power Meter screen displays the remaining battery power and charging status for the primary and secondary batteries. Choose to display either a percentage progress bar or a battery icon with percentage indicator for your battery status information. 3-14 Using the BIOS Setup Utility Windows 2000 Advanced The Advanced window allows you to select behaviors for the taskbar icon, standby password, LCD panel, when closed, and the Power button. Advanced Parameter Default Setting Alternate Setting(s) Always show icon on taskbar unchecked checked Prompt for password when computer goes off standby checked unchecked When I close the lid on my computer None When I press the Power button on my computer Power Off 1 1 Standby, Power Off, Hibernate Standby, Hibernate When None is selected, LCD panel turns off when closed. ! Always show icon on the taskbar — Determines whether or not the Power Meter icon displays on the taskbar. ! Prompt for password when computer goes off standby — Determines whether or not the system prompts for your Windows password when resuming from Standby. ! When I close the lid of my computer — Defines the system action when the LCD panel is closed. ! When I press the Power button on my computer — Defines the system action when the Power button is used. Windows 2000 Hibernate Use the Hibernate window to enable hibernate support, see the amount of free disk space, and the amount of disk space required to hibernate. When your system hibernates it performs a save-to-disk or save-to-file (STF). Your current working environment is saved to the hard disk. Use the Power button to resume from hibernation and your system returns to its previous state. Using the BIOS Setup Utility 3-15 Windows 2000 Power Management States ACPI uses different levels or states of power management. The power management states occur automatically, based on the system’s default settings, or manually, when invoked. Settings are configurable to occur while on battery power or AC power. The Windows 2000 ACPI power management states include: ! LCD timeout — manages power at the lowest level by shutting down the LCD. ! Standby — also known as Save-to-RAM (STR), Standby manages power by saving your current working environment to memory and shutting down most system devices. Conserves more power than an LCD timeout. ! Hibernate — also known as save-to-disk, or save-to-file (STF) manages power by saving the current working environment to an area on your hard disk, then powering off your system. Conserves the most battery power. Recognizing the Windows 2000 Power Management States It is important to recognize your system’s behavior when in each of these power management states. The following table describes the system behavior for each power management state. Windows 2000 Power Management Behavior LCD Timeout Standby (STR) Hibernate (STF) 2 Minutes, DC power 5 Minutes, DC power 30 minutes after Standby. 15 Minutes, AC power 20 minutes, AC power Manually Invoke Close LCD panel. Go to Start, Shutdown, Standby. Close LCD panel. System behavior LCD panel is blank. LCD panel is blank. LCD panel is blank. Status LED lights green. Status LED blinks green. Status LED turns off. Press any key. Press Power button. Default Setting Resume 2 Press Power button. 2 Progress bar indicates that current working environment is saved to hard disk. Press Power button. Progress bar appears during process. 1 2 When 3% battery power remains. Only when set in Advanced Windows Power Management Properties. 3-16 1 Using the BIOS Setup Utility Updating the BIOS The BIOS is code transmitted onto your system’s Flash ROM. As indicated in this chapter, you use the BIOS Setup utility to configure your system’s software and hardware features. Use the BIOS Update Diskette for your specific model to update your NEC Versa system BIOS. Note You only need to update the BIOS if NEC Computers makes significant improvements or fixes to the current system BIOS. Your authorized NEC dealer or NEC support representative can help you determine this. To update the system BIOS you must: ! Obtain the BIOS Update ! Prepare the BIOS Update Diskette ! Perform the BIOS Update Obtaining the BIOS Update If you are informed that the default BIOS needs an update contact the NEC Computers Support Services at (800) 632-4525, Fax (801) 579-1552, or access the web site, www.neccomp.com to obtain a copy of the BIOS update. Note If you purchased and are using this computer outside the U.S. or Canada, please contact a local NEC or dealer in your country. Preparing the BIOS Update Diskette Before using the BIOS update diskette you must make the diskette BIOS flash ready. Refer to the readme.txt file on the diskette before using the diskette. Follow these instructions to prepare the BIOS Update Diskette. 1. Scan your hard drive for any computer viruses. 2. Enable the diskette for write access. 3. Insert the diskette into the diskette drive. Using the BIOS Setup Utility 3-17 4. Type a:\install at the DOS prompt and follow the on-screen instructions. Install.bat copies the DOS system files from your hard drive onto the BIOS Update Diskette to make it BIOS flash ready. The system prompts you when the process is complete. 5. Scan the BIOS Update Diskette for computer viruses. The diskette is ready for use. Performing the BIOS Update Follow these steps to perform the BIOS update. Before you begin, be sure to: ! Connect the computer to AC power and power off the computer. ! Configure the Boot Device Setup to boot from a floppy diskette. ! Remove any bootable CDs from the CD-ROM drive, if connected. ! Document all customized BIOS settings 1. Power on the computer with the diskette in the drive. The computer boots and automatically loads the utility. A message similar to the following appears: The NEC BIOS Update Utility should not be used to modify the BIOS in a Versa system which is docked. If your Versa is docked, please exit the BIOS Update Utility, power down, and undock your Versa before running the utility. Plug in your AC cable before restarting the flash utility. 2. Press Enter to continue. The utility checks the currently installed BIOS version and the diskette’s BIOS version. The Main menu appears. 3. Use the arrow keys to highlight the “Display BIOS Version” option on the Main Menu. Use this option to check the currently installed BIOS version and the version of the new replacement BIOS. Press any key to return to the Main menu. 3-18 4. Highlight the “Install New BIOS” option and press Enter. 5. Press Y and then press Enter. After a brief pause, a message appears telling you to remove the diskette from the drive. 6. Remove the diskette and press any key to continue. The utility updates the BIOS. 7. Power off your computer. The next time you power on your computer, you will have the latest NEC Versa computer BIOS revision level. Using the BIOS Setup Utility 8. Power on your computer. A CMOS Checksum message appears and prompts you to press F1 to enter Setup. 9. Press F1 to enter Setup and restore the default parameter settings. 10. Be sure to modify any custom settings that you may have configured. 11. Disable the BIOS flash switch. Change switch 5 back to “OFF” after completing the BIOS update. For details about enabling and disabling the BIOS flash switch, see the section earlier in this chapter, “Enabling the BIOS Flash Switch.” Configuring the Switch Settings Some system settings are set through DIP switches. The six-position dip switch is located on the bottom of the system. The switch is accessed by removing the memory module bay cover. See the following sections for information on accessing the DIP switches and identifying DIP switch settings. Accessing the DIP Switch Follow these steps to access the DIP switch in the memory bay. 1. Power off the system and disconnect any peripheral devices. 2. Turn the system over and locate the screw on the memory bay. Memory module bay cover and screw A – Screw B –Memory Module Bay Cover Using the BIOS Setup Utility 3-19 3. Remove the screw and lift off the memory module bay cover. See “Identifying the Switch Settings” for information about each setting. 4. Reassemble the NEC Versa components as follows. ! Replace the memory module bay cover. ! Replace the screw. ! Turn the system over. Identifying the Switch Settings The following list identifies each switch setting and its function. ! Switch 1 — Password override — The default setting is “OFF.” If you forget your password and cannot access the data on your NEC Versa, change the setting to “ON” and your current password is erased. ! Switch 2 — Keyboard select; Default is “ON” for U.S. 86 key keyboard and “OFF” for European keyboard. ! Switch 3 — Not assigned; must be “OFF.” ! Switch 4 — Keyboard select 2; Default is “ON” for US and “OFF” for European keyboards. ! Switch 5 — Reserved for factory use; Default is “ON.” ! Switch 6 — Logo select; Default is “OFF.” Default switch settings 3-20 Using the BIOS Setup Utility Note The system memory expansion slot is also located here. Therefore, if you need to install/replace SO-DIMM modules, you might want to do so when the system is already disassembled. 1. Replace the memory module bay cover and screw. 2. Turn over the system. 3. Follow the instructions earlier in this chapter, “Performing the BIOS Update.” Using the BIOS Setup Utility 3-21 4 Using the Operating System and Utilities ! Microsoft Windows Introduction ! Transmeta LongRun Utility ! Product Recovery CD Microsoft Windows Introduction Your NEC Versa comes pre-installed with the Microsoft Windows 2000 operating system, which provides a means of running applications, navigating through your file structure, and using your notebook computer. It offers its own look and tools and employs its own easy-to-use graphical interface. Windows 2000 Windows 2000 gives you the newest features offered by Microsoft, including a Desktop with room to maneuver, taskbar icons for quick access to installed applications, a system performance and monitoring manager, enhanced entertainment features, and a fully integrated Internet experience. Desktop Icons With Windows 2000, the following icons are installed on your desktop: ! My Computer — Provides access to drives, the control panel, network features, and scheduled tasks. ! Recycle Bin — Gives you a trash container in which to put and discard unwanted files or allows you to restore those same files back to their original location. ! My Network Places — When on a network, provides access to network printers and other computers on your network. Use my network places to browse through the computers in your workgroup and the computers in the entire network. ! My Documents — Provides you with a convenient place to store documents, graphics, and other files for quick access. ! Connect to the Internet — Runs the Internet Connection wizard that helps you to set up your computer to access the Internet. Note Before connecting to the Internet, you must either connect an optional modem and a working phone line to your system or install a LAN card for network access. Your NEC Versa comes with all the software you need to get started on the most popular services available today. For a fee, online services give you access to the Internet, email, the world wide web, travel information, news reports, and more. 4-2 Using the Operating System and Utilities Note Before choosing and registering for an online service, you must connect an optional modem to your system and to a working phone line. The phone line must be analog. If you are unsure what type of line you have, call your local phone company. If you are using this product outside of the United States or Canada, some online services may require a long-distance or international call. ! Microsoft Internet Explorer — Provides your default internet program. Also access Internet Explorer under Start, Programs, Internet Explorer. Taskbar Icons With Windows 2000, three icons appear on the taskbar. Use the cursor to hover over the icon and display its function, right click the icon to display its menu options, or double click the icon to launch it. The following icons normally appear on the left side of the Windows 2000 taskbar. ! Internet Explorer — Allows you to browse the internet or view local HTML files. Also access Internet Explorer under Start, Programs, Internet Explorer. ! Microsoft Outlook Express — Provides your default email program with secure and personalized features for email and newsgroup communication. Also access Outlook Express under Start, Programs, Outlook Express. ! Show Desktop — Minimizes all active screens to display your desktop. Using the Operating System and Utilities 4-3 Transmeta LongRun Utility The Crusoe processor that powers your NEC Versa notebook is equipped with the LongRun power management utility. This utility automatically adjusts the clock speed and voltage of the processor based on the needs of the application. If the system is in an idle state, or doing processing that doesn’t require faster clock speeds, it automatically lowers to 300MHz. If the system is completing more demanding tasks, it adjusts up to full 600MHz. The ability to lower the processor speed results in longer battery life for your NEC Versa system. The LongRun utility is a tool that allows you to override these automatic adjustments by the processor. You can ! Force the processor to stay at the lower 300MHz speed to preserve the battery when you need the system to run for a long time without an AC source. Forcing the battery to run at lower speeds slows some applications but extends the battery life by hours. ! Force the processor to stay at the higher 600MHz speed when system speed is necessary, or when the system is running on an AC power source. LongRun utility status bar A – Current Speed B – Range of Speeds C – Minimum Speed Slider D – Current Speed Indicator E – Maximum Speed Slider Setting LongRun Properties To adjust the default GUI properties of the LongRun utility, right click on the top of the dialog title bar and select Properties from the pull-down menu. 4-4 Using the Operating System and Utilities Product Recovery CD The Product Recovery CD contains the NEC Product Recovery Utility that allows you to restore your system to its initial installation state. If you determine that you need to restore your system to its initial installation state follow the instructions provided here. Note Only use the Product Recovery utility to restore your system to its initial installation state as a last resort. Check the problem checklist in Chapter 10 for information about solving problems before using the CD. The Product Recovery utility provides options that either remove or replace existing files, a process that may result in data loss. Before using the Product Recovery CD, enter the BIOS Setup utility and restore the BIOS default settings. Save the default settings before exiting the BIOS Setup utility. Guidelines for Using the Product Recovery CD Follow these guidelines when using the Product Recovery CD. ! Use AC power. ! Remove all optional hardware such as PC Cards, USB devices, printers, and monitors. Product Recovery CD Options The Product Recovery CD and Utility provides you with a number of choices. Move the cursor over each selection on the NEC Product Recovery Utility screen to display a description of the selection in the window at the right side of the screen. ! Restore System — Select this option if you wish to restore your hard disk drive to its initial installation state. Restore System allows you to restore your system in one of the following ways. — Full Disk Drive — Completely rebuilds your hard disk drive, destroying all existing data in the process. Note Use the Full Disk Drive restore option if your hard disk consists of one partition (drive). Using the Operating System and Utilities 4-5 — Partition Only — Lets you preserve your existing hard disk drive partition structure and format only the primary partition without affecting the extended partition(s). Partition Only formats drive C: (of a multiple partitioned drive) and restores drive C: to its initial installation state. To use the Partition Only option, drive C: must be equal to or greater than 1 GB. Additional partitions, e.g., drives D:, E:, etc., remain intact. Note Use the Partition Only restore option if your hard disk is partitioned into two or more partitions (drives). ! Exit — Exits the NEC Product Recovery utility. Full Disk Drive Restore If your preinstalled software becomes unusable and you cannot boot from the hard disk, use the Product Recovery utility to restore your system to its initial shipping configuration. The Full Disk Drive restore option erases the hard disk completely before reinstalling the files. The Full Disk Drive restore option deletes all files on the hard drive and replaces them with the original factory installed files. Only use the Full Disk Drive restore option if the preinstalled software is unusable. Use the Product Recovery utility to perform a Full Disk Drive restore as follows: 1. Check the Product Recovery CD title and make sure that it is the correct CD for your NEC Versa computer and operating system. 2. Power off your system before connecting the external CD-ROM drive to your NEC Versa. 3. Put the CD into the CD-ROM drive tray, close the drive door, and power on your system. 4. Read the License Agreement screen that appears. Use the VersaGlide touchpad to position the cursor on the Accept button. Left click to accept the agreement. You have the option of accepting or declining the agreement. If you decline the agreement, the recovery utility exits. 5. In the NEC Product Recovery utility screen, use the VersaGlide touchpad to choose Full Disk Drive to restore your hard disk drive to its original factory installed state. 4-6 Using the Operating System and Utilities Choose your restore option carefully to prevent losing data and applications installed on your system. 6. Read the Warning screen. A warning displays indicating that your hard disk is about to be erased. 7. Select Continue to proceed to perform a Full Disk Drive restore. If you select Back, the recovery utility returns to the prior screen which has an exit option. If you select Continue, a screen with progress bars displays and lets you know the progress of the recovery. Do not turn off or disturb the system during the recovery process. 8. When the recovery process is complete, you are prompted to remove the CD from the CD-ROM drive and reboot your system. 9. Press Enter, click Reboot, or press Alt-R to reboot your system. A series of hardware detection screens display, the system reboots and the Windows Setup screen appears. Follow the on-screen instructions to set up Windows. You are required to reenter your Microsoft license number. Partition Only Restore If your preinstalled software on drive C: of your multiple partitioned drive becomes unusable and you cannot boot from the hard disk, use the Product Recovery Utility to restore your primary partition to its initial shipping configuration. Use the Partition Only restore option only if your hard disk drive consists of multiple partitions and if drive C: contains the operating system and related drivers. Move all other data and applications to other partitions (drives) or the Partition Only restore process will erase them completely. The Partition Only restore option deletes all files on drive C: and replaces them with the original factory installed files. Only use the Partition Only restore option if the preinstalled software on drive C: is unusable. Using the Operating System and Utilities 4-7 Use the Product Recovery Utility to perform a Partition Only restore as follows: 1. Check the Product Recovery CD title and make sure that it is the correct CD for your NEC Versa computer and operating system. 2. Power off your system before connecting the external CD-ROM drive to your NEC Versa. 3. Put the CD into the CD-ROM drive tray, close the drive door, and reboot your computer. 4. Read the License Agreement screen that appears. Use the VersaGlide touchpad to position the cursor on the Accept button. Left click to accept the agreement. You have the option of accepting or declining the agreement. If you decline the agreement, the recovery utility exits. 5. In the NEC Product Recovery Utility screen, use the VersaGlide touchpad to choose Partition Only to restore drive C: of a multiple partitioned drive to its original factory installed state. Choose your restore option carefully to prevent losing data and applications installed on your system. If the hard disk is configured with multiple or extended partitions you may have to reinstall some software to restore configuration settings and shared files. 6. Read the Warning screen. A warning displays indicating that drive C: (the primary drive/partition) is about to be erased and formatted. It may be necessary to reinstall software to the other drives (partitions) to reestablish Start Menu links and other configuration requirements stored on drive C:. 7. Select Continue to proceed, to perform a Partition Only restore. If you select Back, the recovery utility returns to the prior screen which has an exit option. If you select Continue, a screen with progress bars displays and lets you know the progress of the recovery. Do not turn off or disturb the system during the recovery process. 4-8 Using the Operating System and Utilities 8. When the recovery process is complete, you are prompted to remove the CD from the CD-ROM drive and reboot your system. 9. Press Enter, click Reboot, or press Alt-R to reboot your system. A series of hardware detection screens display, the system reboots, and the Windows Setup screen appears. Follow the on-screen instructions to set up Windows. You are required to reenter your Microsoft license number. Using the Operating System and Utilities 4-9 5 Using the System Drives and Bays ! External Floppy Diskette Drive ! External Variable-Speed CD-ROM Drive ! Hard Disk Drive ! Memory Modules External Floppy Diskette Drive The NEC Versa notebook ships with a standard 3.5-inch, 1.44-MB external floppy diskette drive and cable. Use the floppy diskette drive to install applications, create a BIOS update diskette, or simply copy files to and from your NEC Versa notebook computer. Connect the drive to one of the USB ports. When connected, the floppy diskette drive is assigned the letter a:. The external floppy diskette drive offers the following features, which are described after the figure. External floppy diskette drive and cable A – Status LED B – Floppy Diskette Drive Bay C – Eject Button D – Floppy Diskette Drive E – Floppy Diskette Drive Cable F – USB Port Connector ! Status LED — Lights to indicate drive activity. ! Floppy Diskette Drive — Use the cable provided to attach this drive to your system. ! Eject Button — Press this button to eject/remove a diskette from the floppy diskette drive. ! Floppy Diskette Drive Bay — Insert your floppy diskettes in this bay. ! Floppy Diskette Drive Cable — Use this cable to connect the floppy diskette drive to your NEC Versa notebook system. ! USB Port Connector — Attach the large end of the connector to the USB port on the left side of your system. 5-2 Using the System Drives and Bays Connecting the External Floppy Diskette Drive Follow these steps to connect the external floppy diskette drive to your NEC Versa system. 1. Locate the external floppy diskette drive and cable that ships with your system. 2. Attach the cable connector to the USB port on the NEC Versa system. Connecting the external floppy diskette drive A – Floppy Diskette Drive Cable 3. B – USB Port Insert a floppy diskette into the drive bay and you are ready to go! Disconnecting the External Floppy Diskette Drive Follow these steps to disconnect the external floppy diskette drive: 1. Double click the Unplug/Eject icon on the toolbar and a box will pop up. 2. Highlight the floppy drive and press Stop. 3. Pull the USB connector out of the port. External Variable-Speed CD-ROM Drive Your NEC Versa notebook ships with an external 24X maximum/10x minimum variable-speed CD-ROM drive and cable. Use the CD-ROM drive to load and start programs from a compact disc (CD). You can also use the CD-ROM drive to play your audio CDs. When your audio CD finishes playing the last track, the CD-ROM drive cover automatically opens. The CD-ROM drive is fully compatible with multisession Kodak™ Photo CD™ discs and standard audio CDs. Using the System Drives and Bays 5-3 Use the external CD-ROM drive in the following ways: ! Connect the drive to one of the USB ports to load and start programs. When connected, the CD-ROM drive is assigned an available drive letter. Note The first time that you connect the CD-ROM drive, do so before powering on the system. Once you install and use the External Drive Connect Utility, you can connect the CD-ROM drive while the system is powered on. For details, see the section, “External Drive Connect Utility,” later in this chapter. The CD-ROM drive operates at different speeds depending on whether the CD you are using contains data or music. This allows you to get your data faster and to see smoother animation and video. In addition, data is read at a variable transfer rate depending on its location. The maximum rated speed is generally achieved only when reading the outermost track on a completely filled CD. The external CD-ROM drive and cable offer the following features, which are described after each figure. External CD-ROM drive, left and front A – Headphone Jack B – Volume Control C – Release Latch D – Status LED E – Play/Stop Button F – Forward Button ! Headphone Jack — Attach external headphones to listen to your audio CDs. (For stand-alone use, only. Do not use this headphone jack when the CD-ROM drive is connected to your NEC Versa notebook.) ! Volume Control — Increase or decrease the volume of your audio CDs. ! Release Latch — Use this latch to open the cover of the CD-ROM drive and insert or remove a compact disc. 5-4 Using the System Drives and Bays ! Status LED — Lights green when powered on or connected to the NEC Versa notebook. Lights amber during data read operations. Do not eject the CD or turn off the NEC Versa notebook when the indicator lights amber. ! Play/Stop Button — Use this button to start or stop your compact discs. ! Forward Button — Use this button to advance the playback of your compact disc, one track at a time. External CD-ROM drive, right and rear A – CD-ROM Drive Connector ! CD-ROM Drive Connector — Attach the CD-ROM drive cable to this connector to use the drive with your NEC Versa system. CD-ROM drive cable A – USB Connector B – CD-ROM Cable Connectors ! USB Cable Connectors — Use the connector to attach the cable to either USB port on the NEC Versa system. ! CD-ROM Drive Cable — Attach to the CD-ROM drive. Using the System Drives and Bays 5-5 Using the CD-ROM Drive with your NEC Versa Notebook Follow these steps to connect to and use the external CD-ROM drive with your NEC Versa notebook computer. 1. Power off your NEC Versa notebook. 2. Locate the external CD-ROM drive and cable that ship with your system. 3. Attach the USB connector to either USB port on the system. Connecting the CD-ROM drive A – CD-ROM Connector B – USB Cable 5-6 Using the System Drives and Bays C – USB port 4. Slide the release latch toward the front of the CD-ROM drive to open the cover. Opening the CD-ROM drive cover A – Release Latch 5. Put your CD, printed side up, into the circular impression in the drive. Inserting a CD 6. Close the drive cover. Using the System Drives and Bays 5-7 7. Run the setup, installation program or other instructions provided with the software application to start or load the CD contents. Note Before recording from the external CD-ROM drive to the internal hard disk drive, disable the internal microphone. To disable the internal microphone, go to Start, Programs, Accessories, Entertainment, Volume Control. Choose Options, Properties and remove the check from the Microphone box in the 'Show the following controls' window. Disconnecting the CD-ROM Drive Follow these steps to disconnect the external CD-ROM drive: 1. Double click the Unplug/Eject icon on the toolbar and a box will pop up. 2. Highlight the floppy drive and press Stop. 3. Pull the USB connector out of the port. CD Care When handling CDs, keep the following guidelines in mind. ! Always pick up the disc by its edges. ! Avoid scratching or soiling either side of the disc. ! Do not write on or apply labels to the data side of the disc. ! Keep the disc away from direct sunlight or high temperatures. ! Clean fingerprints or dust from the disc by wiping it with a soft cloth. Gently brush the cloth from the center of the disc toward the edge. Avoid using benzene, paint thinner, record cleaner, static repellent, or any other chemical on the disc. Chemicals and cleaners can damage the disc. 5-8 Using the System Drives and Bays Hard Disk Drive Your NEC Versa notebook comes equipped with an internal fixed 2.5-inch, 9.5mm hard disk drive with a capacity of either 10 or 20 GB, depending on your system configuration. When you power on your system for the first time, the hard disk drive contains the Windows operating system and some resident drivers and utilities. If for some reason, your hard disk drive becomes unreadable, use the Product Recovery CD to restore your system to its initial installation state. For details about using the Product Recovery CD, see Chapter 4, “Using the Operating System and Utilities.” Memory Modules Your NEC Versa computer comes standard with 64 megabytes (MB) of random access memory (RAM) on the motherboard. You can increase system memory to a maximum of 192 MB with a 128-MB memory module in the memory module bay. Only install NEC Computers supplied/approved memory module options to ensure proper functionality of your NEC Versa notebook computer. Contact your NEC Computers dealer for information about available NEC-supplied/ approved memory modules. Before handling any internal components, discharge static electricity from yourself and your clothing by touching a nearby metal surface. Using the System Drives and Bays 5-9 Installing a Memory Module Follow these steps to install a memory module. 1. Make sure that the system is powered off and that no peripheral devices are attached. 2. Turn over the system and locate the memory module bay. Locating the memory module bay A – Memory Module Bay Cover 3. B – Screw Remove the screw and bay cover. Removing the screw and bay cover 5-10 Using the System Drives and Bays 4. Locate the connectors and alignment notch on the SO-DIMM. Memory module features A – Connectors 5. B – Alignment Notch Locate the memory module expansion port and proceed as follows: ! Hold the module at a 45 degree angle and align the module contacts with the socket in the system. Push the connector into the socket. ! Press down on the edge of the module opposite the contacts until the lock tabs on the sides snap into place, securing the module. Installing a memory module If you are replacing a memory module and need to remove one that is already installed, do so as follows: ! Press the locking tabs away from the sides of the module and hold while gently lifting on the edge of the module. Using the System Drives and Bays 5-11 ! When the edge of the module pops up and is at approximately a 60 degree angle, pull it from the socket. Removing an installed memory module Note The system switches are also located in the memory module bay. Therefore, if you need to set any system switches, you might want to do so while the system is already disassembled. The system switches are defined in Chapter 3. 5-12 6. Replace the memory module bay cover and screw. 7. Turn over the system and power on. Using the System Drives and Bays 6 Communicating with Your NEC Versa ! PC Cards ! Mini PCI LAN ! Internal Modem ! Internet Connections ! IR Port PC Cards Your NEC Versa DayLite/UltraLite system is equipped with a PC Card slot that supports Type II PC Cards. PC Cards are all approximately the same size and vary only in thickness. All have a standard 68-pin connector. Your NEC Versa notebook supports the installation of the PC Cards described next. Type II Cards Type II cards have a thickness of 5.0 millimeters (mm). Type II cards are often storage or communication devices such as Static Random Access Memory (SRAM), Read Only Memory (ROM), Flash Memory, LAN, and Small Computer System Interface (SCSI). Typically Type II cards include input/output (I/O) features such as modems. Type II Extended Cards Many PC Cards are Type II extended cards. The extended card has an additional physical component that protrudes beyond the traditional card size. The extension can be as large as 40 mm deep by 9.65 mm high. This extension provides room for additional electronics as well as a location for external connectors. Communication Cards You can use both fax/modem and network PC Cards with your NEC Versa notebook. Here are some suggestions to help you get the best system performance. Note If you are using this unit outside of the United States or Canada, contact a local NEC Computers dealer for availability information. ! Network Cards — You can use a network card with your system to gain access to a local area network (LAN). ! Fax/Modem Cards — You can use a PC Card modem with your system to communicate with others via fax, email, or connect to an online service or bulletin board. You can insert either card in the slot. Always insert the fax/modem card before using your fax/modem software application. If you start the application before inserting the fax/modem card, the application typically does not find the card. 6-2 Communicating with Your NEC Versa Storage Cards When you insert a memory or storage card in an NEC notebook computer, it appears as a unique drive as long as the system has an available interrupt for the card. Other Cards Many other kinds of PC Cards are available for notebook computers. They include the following cards: ! Global Positioning System (GPS) — enables the tracking of remote units (for example, delivery trucks) ! Serial — adds a serial communications port ! Multimedia — combines animation and sound PC Card Slots Your NEC Versa notebook integrates a CardBus slot for inserting a Type II PC Card. The 32-bit CardBus also has Zoomed Video support. Note The 32-bit CardBus structure not only accepts new CardBus cards but is also backward compatible. Using the system’s PC Card slot, you can add optional PC Cards and connect external devices to your NEC Versa notebook. These devices include peripheral devices, such as modems, LAN cards, and storage cards. Communicating with Your NEC Versa 6-3 Inserting a PC Card To insert a PC Card, follow these steps. 1. Align the card so that the 68-pin connector points towards the slot and the arrow shows on the top face of the card. 2. Slide the card into the slot. A low tone followed by a high tone lets you know that the card is fully inserted and recognized. (If you turn off the sound through the function keys or volume control, no sound is emitted.) Other tone sequences such as high, then low tones, indicate that the card is inserted, but the card type is unknown. Inserting a PC Card 3. Use the software preinstalled on your system to check PC Card slot availability. Look for the PC Card icon in the Control Panel or on the right side of the taskbar. It shows which slot contains a PC Card and which is empty. Removing a PC Card Follow these steps to remove a PC Card. 1. Double click the PC Card icon on the taskbar. 2. Select the PC Card to remove, and select Stop. The Windows operating system alerts you if any applications are still using the card. If all applications using the card are closed, services for that card are shut down. You receive a message saying that it is safe to remove the card. 3. Press the button on the side of the PC Card in the slot. 6-4 Communicating with Your NEC Versa Mini PCI LAN Your NEC Versa system may ship with an internal Mini PCI LAN that allows you to connect your system to a local area network. The internal LAN is a 10/100Base-TX interface that supports both Wake on LAN and Network Boot functions. Connecting the Mini PCI LAN The mini PCI LAN ships with a LAN adapter cable that is designed with a LAN port connector and an RJ-45 connector. Follow these steps to take advantage of the internal mini PCI LAN. 1. Locate the LAN port jack on the left side of the system and open the port cover. 2. Connect the LAN port connector to the LAN port jack. 3. Connect the RJ-45 connector at the other end of the LAN adapter cable to an RJ-45 cable. Connecting the Mini PCI LAN A – LAN Cable Jack B – LAN Adapter Cable Connector 4. C – RJ-45 Connector D – LAN (RJ-45) Cable Connect the RJ-45 cable to a local area network. Communicating with Your NEC Versa 6-5 Internal Modem Your NEC Versa system ships with a V.90 internal modem that allows you to connect to the Internet, send a fax, or access your email. Note When using a modem outside the U.S. and Canada, you might need an international telephone adapter, available at most electronics supply stores. Use only an industry standard phone line cord when connecting the internal modem. Connecting the Internal Modem Follow these steps to connect an RJ-11 telephone cable to the internal modem. 1. Locate the RJ-11 telephone cable that ships with your NEC Versa notebook. Each end of the cable has an RJ-11 connector that plugs into a standard telephone outlet. 2. Locate the RJ-11 port on the left side of your system and open the cover. 3. Carefully plug the RJ-11 telephone cable into the RJ-11 port. Connecting the RJ-11 telephone cable 4. Connect the other end of the RJ-11 telephone cable into an (analog) phone jack. Now you are ready to configure your modem for Internet or email access! 6-6 Communicating with Your NEC Versa Internet Connections Your NEC Versa system is equipped with the Microsoft Windows operating system to provide a fully-integrated Internet experience. Use the Internet Connection Wizard on your desktop to configure your system for email and Internet access. Sign up for a new account or configure your system to use an existing account. The Internet Connection Wizard offers the following choices: ! Sign-up for a new Internet account. Take advantage of the Microsoft Internet Referral Service. ! Transfer an existing Internet account. ! Manually configure an Internet account or connect through a local area network (LAN). Before using the Internet Connection Wizard to transfer an existing account for email and Internet access, you need an Internet service provider (ISP) account and some or all of the following configuration information: ! the dial-up telephone number ! TCP/IP settings ! port settings ! a user name/logon and password ! your email address ! the name of a POP3, IMAP, or HTTP server (for incoming mail) ! the name of an SMTP server (for outgoing mail) IR Port The IR (infrared communication) port on the front of your system lets your NEC Versa DayLite/UltraLite computer communicate with other devices that also use infrared technology. The IR port is Infrared Data Association (IrDA) compatible. You can easily transfer files between your NEC Versa notebook and an IR-equipped desktop, or print to an IR-equipped printer without using cables. IR transfer speed ranges from 9.6 Kbit/sec to 4.0 Mbit/sec. Follow these steps to choose the IR transfer speed: 1. Go to Start, Settings, Control Panel and double click the Wireless Link icon and select the Hardware tab. 2. Select the Infrared controller from the Device list and click the Properties tab. Communicating with Your NEC Versa 6-7 3. Select the Advanced tab and choose a value for the MaxConnectRate property. Choose a transfer speed compatible with the receiving device. 4. Click the OK button to save the changes. Your NEC Versa notebook ships with the IR port disabled. Before using the IR port for the first time, you must enable the device. See detailed instructions in the section that follows. Enabling/Disabling the IR Port in Windows 2000 The IR port on your NEC Versa notebook ships set to Auto. An icon appears on the taskbar and provides access to the system’s infrared utility. If for any reason you want to enable (or disable) the IR port to reassign system resources, refer to the following procedure. Follows these steps to enable/disable the IR port in Windows 2000. 1. Go to Start, Setting, Control Panel, and double click the Wireless Link icon. 2. Select the Hardware tab and click the Properties button. 3. Select (or deselect) ‘Use the device (enable)’ in the device usage section of the window. 4. Click OK, then click OK again to close the Wireless Link window. Using the IR Port Follow these guidelines when using the IR port to communicate with another infrared device. ! Position the NEC Versa notebook no more than three feet away from the IR peripheral device you are using. ! Make sure that there is no greater than a 30º angle between the computer and the device. 6-8 Communicating with Your NEC Versa 7 Traveling Tips ! Preparing for Travel ! Packing for Travel ! Using Power Connections ! Getting Through Customs ! Connecting to the Internet Preparing for Travel The NEC Versa DayLite/UltraLite computer makes a natural traveling companion. With a little preparation you can use the computer practically anywhere you go, to prepare your business documents, confirm your travel plans, surf the Internet, or simply stay in touch with those back home! Here is what you should do before you leave home: Note Speed the trip through airport security by carrying a charged system. Inspectors want to see the screen display a message. The boot message is usually sufficient. If your system is fully charged, the inspection only takes a minute or so. Otherwise, be prepared to attach the AC adapter and power cable. And if you don't have these, the inspection might include a disassembly of the system. ! Back up your NEC Versa’s hard disk. ! Insert a fully charged battery to make sure your system is ready to quickly boot up at the airport security check. ! Fully charge all your batteries. ! Tape your business card to your NEC Versa, AC adapter, and batteries. ! If you run your system with battery power, maximize battery life by using powersaving features whenever possible. ! Take along any application or data files that you might need on diskette. ! Check that you have everything you need before you leave on a trip. ! AT&T’s Worldwide Calling Guide. (For more information, see the section later in this chapter, “Using Your Modem.”) Packing for Travel The following are what you should take with you when you travel with your NEC Versa. ! Extra fully charged batteries ! Single-outlet surge protector ! Appropriate AC plug adapter for international voltage requirements ! Extra phone cord to access hard to reach wall jacks 7-2 Traveling Tips ! USB diskette drive if you plan to use diskettes ! Copy of proof of purchase for your computer and other equipment or customs registration form for customs check ! Customer support phone numbers for your software ! AC extension cord. Using Power Connections With the right accessories, you can run your NEC Versa almost anywhere! Your system self-adjusts to various power sources. The United States, Canada, and most of Central and South America use 120-volt alternating current (AC). Most other countries of the world use 240-volt AC. The NEC Versa adapts to voltages ranging from 100 to 240 volts. There are a few countries with areas that use direct current (DC) as their main power source. You need a DC-to-AC converter in particular areas of Argentina, Brazil, India, Madeira, and South Africa. To use your system overseas, you need an adapter plug. There are several different plugs available worldwide. You can buy these at an electronics supply store. Getting Through Customs With so many countries in the world, you can be sure that there are a variety of customs regulations. Plan wisely to get your NEC Versa notebook computer through customs by carrying the appropriate documentation to assure the customs agent that your system is not a recent purchase. Travelers are often asked, when returning to their home country, whether or not they purchased the computer while outside of the country. Sometimes, the proof of purchase such as a bill of sale, insurance policy, or purchase receipt is sufficient. Taking along the purchase receipt for your laptop may sound practical, but may not always suffice, particularly when the purchaser of the computer is your company and the original receipt is not available to you. Another alternative to a proof of purchase document is a Certificate of Registration, a document that is issued when you register your laptop with the Customs Service prior to departure. The certificate of registration contains a brief description of your computer and lists appropriate serial numbers for identification. The document is available from the customs web site at http://www.customs.ustreas.gov/. To avoid hassle when moving your system through customs, you may want to obtain a certificate of registration and carry it whenever you travel out of the country with your NEC Versa notebook computer. Traveling Tips 7-3 Connecting to the Internet Whether you are on a business trip or vacation, connecting to the Internet while you travel can be expensive and frustrating unless you are prepared. Here are some tips on how to avoid frustration and expense while on the road. Connecting Using a Modem If you have access to a standard telephone jack while you are traveling, you can probably use your modem for dial-up access to your favorite sites. Follow these guidelines for connecting and configuring your system. 1. 2. Before leaving home, check with your Internet Service Provider to see if it has: ! A local access number at your point of destination. ! A toll-free number that can also save you money. ! In the absence of a local ISP access number or toll-free number, charging the call to your home phone can be less expensive than charging the call to your hotel room. Prepare your system for phone line access in another country. ! Line access outside of a hotel may require the addition of a “9” preceding the phone number string. ! To circumvent unusual dial tone sounds sometimes encountered in hotels, you may have to modify a system configuration setting to “ignore the dial tone.” 3. Always check with the hotel that the modem phone line is analog. NEVER use your modem with a digital phone line. Doing so can destroy your modem! 4. Use AT&T’s Worldwide Calling Guide, a resource that provides instructions for dealing with unfamiliar phone systems. For more information about the calling guide, access the web site at http:/www.att.com/traveler/ or call 800-435-0812. Connecting Using a LAN Many hotels and convention centers now offer direct Internet access for a nominal fee. If your hotel provides this service, follow these guidelines for connecting and configuring your system. ! Many hotels can provide a LAN cable by prearrangement, so you can travel with a minimum of accessories. 7-4 Traveling Tips ! Plug the LAN cable into your system and the LAN connector in the room or hall where you want to access the Internet. ! After connecting the LAN cable, connect your system to an AC power outlet (if desired) and power on your system. ! Try launching your browser (Microsoft Internet Explorer, or Netscape Communicator, for example): — If your TCP/IP network settings are already configured to “Use DHCP for WINS Resolution” you should be able to access the Internet. — If your TCP/IP network settings are not set to use DHCP, a help screen may appear, or you may be directed to call the LAN provider for assistance configuring your system. Follow the instructions that are provided to you completely, so your settings work effectively with the provider’s system. ! If you have problems, the hotel or center may be able to direct you to a support technician. Traveling Tips 7-5 8 Using Peripheral Devices ! External Monitor ! External Audio Options ! USB Devices External Monitor You can add a standard external monitor to your NEC Versa DayLite/UltraLite system using a display signal cable (usually provided with the monitor) and a monitor transfer cable. Follow these steps to connect an external monitor to your NEC Versa notebook. 1. Check that power to both the NEC Versa notebook and the monitor is off. 2. Open the monitor port cover on the left side of the system. 3. Attach the monitor transfer cable connector to the monitor port on the system. Connecting a monitor 4. Connect the monitor cable to the transfer cable. 5. Connect the monitor power cable and plug it into a properly grounded wall outlet. 6. Follow any setup instructions in the monitor's user's guide. 7. Turn on power to the system and the monitor. 8. Press Fn-F3 to toggle through the video modes: LCD, CRT, or both. 8-2 Using External Devices External Audio Options The NEC Versa notebook comes equipped with built-in audio ports that let you record and play sound. Connect audio jacks, like a microphone, headphones, or external speakers to the audio ports as follows. 1. Locate the audio port that you want to use. 2. Plug the jack into the appropriate port on the right side of the NEC Versa notebook. Audio ports A – Headphone Jack B – External Microphone Jack Note If you are using external speakers or an external microphone and experience sound distortion or feedback, use the Fn-F11 key to lower the volume. Some feedback is caused by having the microphone and speakers too close to each other, so moving the external audio option away from the unit may also help. Using External Devices 8-3 USB Devices Your NEC Versa system is equipped with two USB ports that increase your connectivity choices. The USB ports on your system allow you to connect up to 127 USB-equipped peripheral devices per port to your NEC Versa notebook computer. These peripherals may include a digital camera, scanner, printer, CD-ROM drive, modem, mouse, keyboard, telephone, or game device. USB devices called USB hubs can serve as connection ports for other USB peripherals. Only one device needs to be plugged into your NEC Versa notebook. Additional peripherals can be connected in a daisy chain configuration where one device is connected to another in a series. Up to 127 devices can be connected together in this way. Connecting USB devices to your system may reduce battery life. Always connect your system to an AC power source before connecting USB devices. Connect an external USB device to your system as follows. 1. Locate either of the USB port covers on your system and open the cover door(s). 2. Plug in up to 127 USB devices per port to optimize your notebook possibilities. Connecting USB devices A – USB Connector 8-4 Using External Devices B – USB Port 9 Using Multimedia ! Audio ! Video ! Multimedia Applications Audio The NEC Versa notebook provides entertainment-level sound quality with its internal mono speaker or by plugging stereo speakers or headphones into the external speaker/headphone jack. It handles MIDI files and digital audio files recognizing .WAV, .MID, and .AVI formats. The system is 3D-stereo, Sound Blaster® PRO compatible. Recording All information on a computer must be stored in digital form. Analog audio signals from sources such as tape cassettes or music CDs must be digitized before being recorded and stored on disk. You can make microphone level recordings on your NEC Versa computer using the internal microphone or an external microphone plugged into the microphone jack on the front of the system. Note When using the built-in microphone, make sure the speaker volume is turned down before using the microphone or feedback may occur. The following procedure describes how to record using the Microsoft Sound Recorder and an external microphone plugged into the NEC Versa notebook. 1. To record using an external microphone, attach an external microphone to the microphone port. 2. Go to Start, Programs, Accessories, Entertainment, and select Sound Recorder. 3. Specify the default sound quality before you record. ! Select Audio Properties from the Sound recorder edit menu. ! Use the Effects menu to adjust recording volume, device, and quality settings. 4. Select File, New from the Sound Recorder menu bar. 5. Click the Record button (solid round dot) to begin recording. 6. Click the Stop button (solid rectangle) to stop recording. 7. Select File, Save As from the Sound Recorder menu bar. 8. Name and save your file. You can play your recording in Sound Recorder or in Windows Media Player. See the section, “Playing Back,” later in this chapter. 9-2 Using Multimedia Note Before recording from the external CD-ROM drive to the internal hard disk drive, disable the internal microphone. To disable the internal microphone, go to Start, Programs, Accessories, Entertainment, Volume Control. Choose Options, Properties and remove the check from the Microphone box in the 'Show the following controls' window. Microphone You can capture and record sounds through the internal microphone on the NEC Versa or through an external microphone that connects to the system through the microphone port. You can record voice-overs for narration, reminders, or special instructions. See “Recording,” explained earlier in this chapter, for details about recording sound with the microphone. Mixing With the Microsoft Sound Recorder on your NEC Versa notebook, you can mix data from two separate .WAV files to create a new sound file. You can also mix the microphone volume to create soft background sounds to accompany a voice-over or another more prominent sound. Mixing lets you blend digital and MIDI audio files to get the final, high-quality soundtrack you want. See the online help that is available with the Sound Recorder for more information. Playing Back You can play back your recorded soundtrack through stereo headphones, the internal NEC Versa notebook mono speaker, or external stereo speakers. You can play .WAV and .MID files as well as CD audio. Adjust the volume through the software or with the Fn-F10/Fn-F11 function keys. Play audio from files or audio devices as follows. (This example shows how to use the Windows Media player option in Accessories. You can also play audio through the Microsoft Sound Recorder. See the Sound Recorder help files for details on its use.) 1. Go to Start, Programs, Accessories, Entertainment, and select the Windows Media Player option. 2. Click File and specify the file name of your audio source. 3. Once your file is open or your source specified, click the Play button. 4. Click the square Stop button to stop playing the audio. Using Multimedia 9-3 Using Headphones The NEC Versa notebook headphone port delivers sound at half a watt. Stereo headphones (available at an electronics supply store) plug in through the headphone jack located on the front of the NEC Versa notebook. Adjust the volume using the FnF10/Fn-F11 function keys or through the software using the sound horn on the taskbar. Using the Built-In Speaker The NEC Versa notebook has a built-in mono speaker that is always available. Adjust the volume using the Fn-F10/Fn-F11 function keys or through the software using the sound horn on the taskbar. Using External Stereo Speakers For full stereo sound impact, you can plug a pair of stereo speakers into the headphone jack located on the front of the system. Adjust the volume using the Fn-F10/Fn-F11 function keys or through the software using the sound horn on the taskbar. MIDI Files The musical instrument digital interface (MIDI) lets you enhance a presentation by adding computer-generated music and sound effects. Using MIDI, you can purchase a wide range of public domain and commercial recordings in MIDI format. MIDI files require only a fraction of the storage space of digital audio files. Video The NEC Versa UltraLite XGA display panels have a high-resolution capability of 1024 x 768 pixels, and the Versa DayLite SVGA has a high-resolution capability of 800 x 600 pixels. Use the Windows Media Player on your NEC Versa notebook to run full motion, fullscreen MPEG video. For details about using the Windows Media Player, refer to the section earlier in this chapter, “Playing Back.” Using Digital Video Files With commercial video capture hardware and application software, you can plug any video device, including VCRs, camcorders, and laser disc players into your NEC Versa notebook and record motion graphics to your hard drive. Use the system’s USB port or PC Card slot (depending on the video capture hardware and software that you purchase separately) to plug in the external video device. You can even use a video frame grabber and store a stream of grabbed stills on your hard disk! 9-4 Using Multimedia Using Animation Files You can create a dynamic presentation using an animation application. Animation can illustrate a concept, drive home an important point, or command attention. Graphics animation can add punch to a presentation with an animated illustration, a flashing arrow, or a flying logo. Multimedia Applications A growing number of multimedia applications are available for PC users. These multimedia software packages include graphics packages, animation software, and presentation authoring systems as follows: ! Animation software allows you to create 3D effects and 3D titles and add interest to an otherwise static presentation. ! Authoring packages let you pull all the elements of your design into an exciting, interactive multimedia presentation. Using Multimedia 9-5 10 Solving System Problems ! Problem Checklist ! Start-Up Problems ! If You Need Assistance Problem Checklist First check the items in the following list. If these items don't help, see the table that follows the list. ! Power is on to the computer. ! The electrical outlet to which your AC adapter is connected is working. Test the outlet by plugging in a lamp or other electrical device. ! All cables are tightly connected. ! The display setting is configured correctly. ! The display brightness control is adjusted properly. ! If using battery power, check that the battery pack is properly inserted and fully charged. Troubleshooting Problem Resolution The system does not power on. If you are operating the system with battery power, check that the battery pack is correctly inserted. Attach the AC adapter to recharge the battery. If you have the AC adapter attached, check that you are using a working electrical outlet. LCD screen is dark and blank. Power-saving mode has shut off the backlight. Press a keyboard key or move the mouse. The built-in LCD may not be selected. Press Fn-F3 once or twice to select the LCD video mode. Screen brightness needs adjustment. Use the Fn-F8 and Fn-F9 functions keys. The system entered Standby mode due to low battery power. Use the power meter to check battery status. Plug in the AC adapter or replace the battery pack, and then press the Power button to resume operation. Battery power does not last long. Use power-saving modes. Fully charge and discharge the battery several times to recondition it. Replace the battery. Information on the LCD is difficult to see. 10-2 Solving System Problems Use the Fn-F8 and Fn-F9 functions keys to adjust the brightness control. Troubleshooting Problem Resolution An optional component does not work. Make sure the component is securely installed or connected. Verify that the system parameter for the I/O port configuration is set correctly in Setup. The Power button does not resume the system from Standby mode. If system does not resume, it may have auto suspended (Standby) on a low battery. Attach the AC adapter and try again. The system does not auto-suspend (Standby). A disk drive might be busy. Wait until the disk drive stops and try again. Upon resuming from a manual STF the system displays the message, ”Following system component(s) changed since last suspend – System Memory. Do you want to (B)oot or (P)ower down?" Power down the system and reseat the memory. If new memory was installed prior to manual STF, remove new memory before resuming. Start-Up Problems The system displays an invalid configuration error message at power on when there are the following conditions: ! the current configuration information does not match configuration information stored in Auto Setup, such as when an internal option is added. ! the system loses configuration information. If either condition is true, the system displays an “invalid configuration information” message. To continue start-up procedures, press F2 (or F1 when prompted) and run the Setup utility to set current system parameters. Note When the NEC Versa detects an error related to display devices, it cannot display on either the LCD or a CRT. The system warns you by beeping. Solving System Problems 10-3 Post Error Messages The NEC Versa computer has a built-in checking program that automatically tests its components when you turn the system power on. This diagnostic test is called the Power-On Self-Test (POST). If the system finds a problem during the POST, the system displays an error message or emits a series of beep signals. If this happens, follow the instructions in the POST Error Messages table or the Beep Code table, as appropriate. If an error message appears before the operating system starts, look up the error message in the following table. Follow the instructions. If you see other error messages, the hardware might need repair. Post Error Messages 10-4 Message Resolution Address line is short Error in the address decoding circuitry on the system board. Contact your NEC Computers service representative for service. C: Drive Error Hard disk drive C: does not respond. Confirm that C: hard disk type in Setup is correct. C:Drive Failure Hard disk drive C: does not respond. You may need to replace the hard disk drive. Contact your NEC Computers service representative for service. Cache Memory Bad, Do Not Enable Cache Cache memory is defective. It must be replaced. Contact your NEC Computers service representative for service. CH-2 Timer Error Most ISA computers include two timers. There is an error in timer 2. Contact your NEC Computers service representative for service. CMOS Battery State Low CMOS RAM is powered by a battery. The battery power is low. Connect the system to AC power to charge the CMOS battery. If the battery does not charge, contact your NEC Computers service representative to replace the CMOS battery. CMOS Checksum Failure After CMOS RAM values are saved, a checksum value is generated for error checking. The previous value is different from the current value. Run Setup to reset the value. CMOS System Options Not Set The values stored in CMOS RAM are either corrupt or nonexistent. Run Setup to reset the value. Solving System Problems Post Error Messages Message Resolution CMOS Display Type Mismatch The amount of memory on the system board is different than the amount in CMOS RAM. Run Setup to reset the value. CMOS Time and Date Not Set Run Setup to set the time and date. Diskette Boot Failure The boot diskette is corrupt. It cannot be used to boot the computer. Use another boot disk and follow the onscreen instructions. DMA Error Error in the DMA controller. Contact your NEC Computers service representative to replace the CMOS battery. DMA#1 Error Error in the first DMA channel. Contact your NEC Computers service representative for service. DMA#2 Error Error in the second DMA channel. Contact your NEC Computers service representative for service. FDD Controller Failure The BIOS cannot communicate with the floppy disk controller. Contact your NEC Computers service representative to check all appropriate connections. HDD Controller Failure The BIOS cannot communicate with the hard disk drive controller. Contact your NEC Computers service representative to check all appropriate connections. INTR #1 Error Interrupt channel 1 failed POST. Contact your NEC Computers service representative for service. INTR #2 Error Interrupt channel 2 failed POST. Contact your NEC Computers service representative for service. Invalid Boot Diskette The BIOS can read the diskette in the disk drive, but cannot boot the computer. Use another boot diskette. Keyboard is Locked Unlock It The keyboard lock on the computer is engaged. The computer must be unlocked to continue. Keyboard Error There is a timing problem with the keyboard. Set the Keyboard option in Setup to Not Installed to skip the keyboard POST routines. KB/interface Error There is an error in the keyboard connector. Contact your NEC Computers representative for service. Solving System Problems 10-5 Post Error Messages Message Resolution Off Board Parity Error Parity error in an expansion slot. Contact your NEC Computers service representative to be sure that the memory module is installed correctly. The error format is: OFF BOARD PARITY ERROR ADDR(HEX) = (XXXX) XXXX is the hex address where the error occurred. On Board Parity Error Parity error in system board memory. Contact your NEC Computers service representative for service. Parity Error ???? Parity error in system memory at an unknown address. Contact your NEC Computers service representative for service. Beep Codes Fatal errors that occur during POST are communicated through a series of beeps. All beep code errors, except beep code 8, are fatal errors and do not allow the system to continue to boot. If beep codes occur during POST, check the items in the Problem Checklist (at the start of this chapter), verify that all the hardware is set up properly and securely connected, and try rebooting. If you still get a beep code, go to the section “If You Need Assistance” at the end of this chapter. Beep Codes are listed in the table that follows. Beep Codes 10-6 Number of Beeps Error Description 1 Refresh Failure The memory refresh circuitry on the motherboard is faulty. 2 Parity Error Parity error in the first 64 KB of memory. 3 Base 64 KB Memory Failure Memory failure in the first 64 KB. 4 Timer Not Operational Memory failure in the first 64 KB of memory or Timer 1 on the motherboard is not functioning. Solving System Problems Beep Codes Number of Beeps Error Description 5 Processor Failure The CPU on the motherboard generated an error. 6 Gate A20 Failure The keyboard controller may be bad. The BIOS cannot switch to protected mode. 7 Processor Exception Interrupt Error The CPU generated an exception interrupt. 8 Display Memory Read/Write Error The system video adapter is either missing or its memory is faulty. (This is not a fatal error.) 9 ROM Checksum Error The ROM checksum value does not match the value encoded in the BIOS. 10 CMOS Shutdown Register Read/Write Error The shutdown register for CMOS RAM failed. 11 Cache Error/External Cache Bad The external cache is faulty. If You Need Assistance If you have a problem with your computer, first review the checklist and troubleshooting table at the beginning of this chapter. If you still have a problem, see Chapter 11, “Getting Service and Support,” for details about contacting NEC Computers. Note If you purchased and are using this product outside the U.S. or Canada, please contact the local NEC Computers office or their dealers for the support and service available in your country. Solving System Problems 10-7 11 Getting Service and Support ! Service and Support Contact Information ! Web Site ! FTP Site ! Support Services ! Email/Fax to Support Services Service and Support Contact Information Service Contact Information NEC Computers Inc. Web Site www.neccomp.com Support Services Web Site support.neccomp.com FTP Site ftp.neccsdeast.com/pub Support Services (U.S. and Canada customers only). 800-632-4525 Fax: 801-579-1552 Email to Support Services through a commercial online service or the Internet. Internet email address: [email protected] Note If you purchased your computer outside the U.S. or Canada, please contact the local NEC office or their dealers for support and service. If you have access to a telephone, modem, and/or fax machine, you can use these services to obtain information about your system at any time, day or night, seven days a week. Not only do these services provide information about your NEC system, they can also be used to answer your questions and help solve any problems you may have with your system, should that ever be necessary. 11-2 Getting Service and Support Web Site If you have a modem or are connected to a network, you can access the NEC Computers web site. You can do this through a commercial online service or through your Internet account. The web site contains general information about NEC Computers and its products, press releases, reviews, a reseller locator, and service and support information. Look in the Service and Support area for the following: ! technical documentation, including Frequently Asked Questions, reference manuals, and warranty information ! BIOS updates, drivers, and Setup Disk files to download ! contact information, including telephone numbers for Technical Support and links to vendor web sites ! an automated email form for your technical support questions ! a password-accessible area for resellers To access The NEC Computers Home Page, enter the following Internet Uniform Resource Locator (URL) in your browser: http://www.neccomp.com/ To access The NEC Computers Support Page, enter the following Internet Uniform Resource Locator (URL) in your browser: http://support.neccomp.com/ FTP Site Use the Internet to access the NEC Computers FTP (file transfer protocol) site to download various files (video drivers, printer drivers, BIOS updates, and Setup Disk files). The files are essentially the same files as on the NEC Computers web site. To access The NEC Computers FTP site, enter the following Internet ftp address through your service: ftp.neccsdeast.com/pub Once in the FTP site, select the pubs directory link and follow the links to choose and download the file(s) you want. Getting Service and Support 11-3 Support Services NEC Computers also offers direct technical support through Support Services. (NEC Computers Support Services is for U.S. and Canadian customers only; international customers should contact the local NEC office or dealer for the support and service available in their country.) Direct assistance is available 24 hours a day, 7 days a week. Call the NEC Computers Support Services, toll free, at 800-632-4525 (U.S. and Canada only) for the following support and to find out about the extended service programs available for purchase. ! System hardware — toll-free phone support is limited to the length of the three-year limited warranty. ! Preinstalled software — toll-free phone support for 90 days from the time of your first call to the Support Services. Please have available your system’s name, model number, serial number, and as much information as possible about your system’s problem before calling. For outside the U.S. or Canada, please contact your local NEC office or dealer for the support and service available in your country. Email/Fax to Support Services The NEC Computers Support Services offers technical support by email if you have Internet access. The email address is: [email protected] You can also fax technical questions to Support Services if you have access to a fax machine or fax/modem. The fax number is: 801-579-1552 When using the email or fax support service, you should include the word “notebook” in the subject field for prompt response from the appropriate technical person. You should provide as much specific information about your questions as possible. Also, if you are sending a fax, please include your voice telephone number, fax number, model number and system serial number with the question. You will receive a response to your questions within one business day. 11-4 Getting Service and Support A Setting Up a Healthy Work Environment ! Making Your Computer Work for You ! Arrange Your Equipment ! Adjust Your Chair ! Adjust Your Input Devices ! Adjust Your Screen or Monitor ! Vary Your Workday ! Pre-Existing Conditions and Psychosocial Factors Making Your Computer Work for You Computers are everywhere. More and more people sit at computers for longer periods of time. This appendix explains how to set up your computer to fit your physical needs. This information is based on ergonomics - the science of making the workplace fit the needs of the worker. Some nerve, tendon, and muscle disorders (musculoskeletal disorders) may be associated with repetitive activities, improper work environments, and incorrect work habits. Examples of musculoskeletal disorders that may be associated with certain forms of repetitive activities include: carpal tunnel syndrome, tendinitis, tenosynovitis, de Quervain's tenosynovitis, and trigger finger, as well as other nerve, tendon, and muscle disorders. Prolonged or improper use of a computer workstation may pose a risk of serious injury. To reduce your risk of injury, set up and use your computer in the manner described in this appendix. Although some studies have shown an association between increasing hours of keyboard use and the development of some musculoskeletal disorders, it is still unclear whether working at a computer causes such disorders. Some doctors believe that using the keyboard and mouse may aggravate existing musculoskeletal disorders. Note Contact a doctor if you experience pain, tenderness, swelling, burning, cramping, stiffness, throbbing, weakness, soreness, tingling and/or numbness in the hands, wrists, arms, shoulders, neck, back, and/or legs. Some people are more susceptible to developing these disorders due to pre-existing conditions or psychosocial factors (see “Pre-existing Conditions and Psychosocial Factors” later in the appendix). To reduce your risk of developing these disorders, follow the instructions in this appendix. If you experience discomfort while working at your computer or afterwards, even at night, contact a doctor as soon as possible. Signs of discomfort might include pain, tenderness, swelling, burning, cramping, stiffness, throbbing, weakness, soreness, tingling and/or numbness in the hands, wrists, arms, shoulders, neck, back, and/or legs. Note To increase your comfort and safety when using your notebook computer as your primary computer system at your home or office, note the following recommendations: ! ! use a separate, external keyboard attached to your notebook computer use a separate, external monitor attached to your notebook computer. A-2 Setting Up a Healthy Work Environment Arrange Your Equipment Arrange your equipment so that you can work in a natural and relaxed position. Place items that you use frequently within easy reach. Adjust your workstation setup to the proper height (as described in this appendix) by lowering the table or stand that holds your computer equipment or raising the seat height of your chair. Position your notebook computer directly in front of you for increased safety and comfort. Adjust Your Chair Your chair should be adjustable and stable. Vary your posture throughout the day. Check the following: ! Keep your body in a relaxed yet upright position. The backrest of your chair should support the inward curve of your back. ! Use the entire seat and backrest to support your body. Tilt the backrest slightly (90° to 105°). The angle formed by your thighs and back should be 90° or more. ! Your seat depth should allow your lower back to comfortably contact the backrest. Make sure that the backs of your lower legs do not press against the front of the chair. ! Extend your lower legs slightly so that the angle between your thighs and lower legs is 90° or more. ! Place your feet flat on the floor. Only use a footrest when attempts to adjust your chair and workstation fail to keep your feet flat. ! Be sure that you have adequate clearance between the top of your thighs and the underside of your workstation. ! Use armrests or forearm supports to support your forearms. If adjustable, the armrests or forearm supports should initially be lowered while all the other adjustments discussed in this appendix are made. Once all these adjustments are completed, raise the armrests or adjust the forearm supports until they touch the forearms and allow the shoulder muscles to relax. Adjust Your Input Devices Note the following points when positioning your notebook computer or any external input devices. ! Position your keyboard directly in front of you. Avoid reaching when using your keyboard or mouse. Setting Up a Healthy Work Environment A-3 ! If you use a mouse, position it at the same height as the keyboard and next to the keyboard. Keep your wrists straight and use your entire arm when moving a mouse. Do not grasp the mouse tightly. Grasp the mouse lightly and loosely. ! Adjust the keyboard height so that your elbows are near your body and your forearms are parallel to the floor, with your forearms resting on either armrests or forearm supports, in the manner described previously. If you do not have armrests or forearm supports, your upper arms should hang comfortably at your sides. ! Adjust the keyboard slope so that your wrists are straight while you are typing. ! Type with your hands and wrists floating above the keyboard. Use a wrist pad only to rest your wrists between typing. Avoid resting your wrists on sharp edges. ! Type with your wrists straight. Instead of twisting your wrists sideways to press hard-to-reach keys, move your whole arm. Keep from bending your wrists, hands, or fingers sideways. ! Press the keys gently; do not bang them. Keep your shoulders, arms, hands, and fingers relaxed. Adjust Your Screen or Monitor Correct placement and adjustment of the screen or external monitor can reduce eye, shoulder, and neck fatigue. Check the following when you position the screen or external monitor. ! Adjust the height of your screen or external monitor so that the top of the screen is at or slightly below eye level. Your eyes should look slightly downward when viewing the middle of the screen or external monitor. ! Position your screen or external monitor no closer than 12 inches and no further away than 28 inches from your eyes. The optimal distance is between 14 and 18 inches. ! Rest your eyes periodically by focusing on an object at least 20 feet away. Blink often. ! Position the screen or external monitor at a 90° angle to windows and other light sources to minimize glare and reflections. Adjust the monitor tilt so that ceiling lights do not reflect on your screen or external monitor. ! If reflected light makes it hard for you to see your screen or external monitor, use an anti-glare filter. ! Clean your screen or external monitor regularly. Use a lint-free, non-abrasive cloth and a non-alcohol, neutral, non-abrasive cleaning solution or glass cleaner to minimize dust. A-4 Setting Up a Healthy Work Environment ! Adjust the screen or external monitor's brightness and contrast controls to enhance readability. ! Use a document holder placed close to the screen or external monitor. ! Position whatever you are looking at most of the time (the screen or reference material) directly in front of you to minimize turning your head while you are typing. ! Get regular eye check-ups. Vary Your Workday If you use your computer for prolonged periods, follow these instructions. ! Vary your tasks throughout the day. ! Take frequent short breaks that involve walking, standing, and stretching. During these breaks, stretch muscles and joints that were in one position for an extended period of time. Relax muscles and joints that were active. ! Use a timer or reminder software to remind you to take breaks. ! To enhance blood circulation, alter your sitting posture periodically and keep your hands and wrists warm. Note For more information on workstation setup, see the American National Standard for Human Factors Engineering of Visual Display Terminal Workstations. ANSI/HFS Standard No. 100-1988. The Human Factors Society, Inc., P.O. Box 1369, Santa Monica, California 90406. Pre-Existing Conditions and Psychosocial Factors Pre-existing conditions that may cause or make some people more susceptible to musculoskeletal disorders include the following: hereditary factors, vascular disorders, obesity, nutritional deficiencies (e.g., Vitamin B deficiency), endocrine disorders (e.g., diabetes), hormonal imbalances, connective tissue disorders (e.g., arthritis), prior trauma (to the hands, wrists, arms, shoulders, neck, back, or legs), prior musculoskeletal disorders, aging, fluid retention due to pregnancy, poor physical conditioning and dietary habits, and other conditions. Psychosocial factors associated with these disorders include: workplace stress, poor job satisfaction, lack of support by management, and/or lack of control over one's work. Setting Up a Healthy Work Environment A-5 Contact a doctor if you experience pain, tenderness, swelling, burning, cramping, stiffness, throbbing, weakness, soreness, tingling and/or numbness in the hands, wrists, arms, shoulders, neck, back, and/or legs. This appendix was prepared in consultation with Dr. David Rempel of the University of California/San Francisco Ergonomics Program and Mr. M.F. Schneider of HUMANTECH, Inc., Ann Arbor, Michigan. A-6 Setting Up a Healthy Work Environment B Specifications ! System Components ! Memory Map ! Interrupt Controllers System Components The following system component specifications are standard except where noted. Note The components that ship with the system are subject to change without notice. System Processor 600-MHz Transmeta Crusoe TM5600 microprocessor Architecture 64-bit Peripheral Component Interconnect (PCI) Random Access Memory ! Standard Main Memory — 64-MB SDRAM SO-DIMM on motherboard, 125-MHz SDRAM ! One memory slot — supports 128-MB SO-DIMM — Maximum 192-MB ! Video Ram — 4 MB-SGRAM ! Cache Memory — L1: 64-KB code and 64-KB data 8/16 way set associate, write back (data) — L2: 512-KB built-in (4-way) — operates at full core speed — 4 GB cacheable range Read-Only Memory 2-MB x 8-bit, Flash ROM Calendar Clock Year/month/day/hour/minute/second maintained by internal back-up battery B-2 Specifications Input/Output (I/O) Facilities Integrated industry-standard interfaces ! Infrared — 1 FIR ! VGA — 1 port, 20-pin (via CRT cable) ! Mono microphone — 1 port, 3-pin, Mini Pin Jack ! Stereo Headphones — 1 port, stereo 3-pin, Mini Pin Jack ! DC In — 1 port, for AC adapter cable ! USB ports — 2 ports, 4-pin ! Modem — 1 port, RJ-11 modular jack ! LAN I/F — 1 port, 26-pin Speakers One built-in, 1 watt (W) ! Mono speaker ! Sound Blaster PRO compatible ! ESSR Solo-1 PCI AudioDrive + ESS 1946S ! Software-controlled sound and beep volume PC Card Slots ! One 32-bit card slot for a Type II card, 5 V or 3.3 V interface ! 32-bit CardBus support ! 10.4-inch high-resolution active-matrix Thin Film Transistor (TFT) LCD Panel — Colors — 24 bit — ATI® RAGE™ MOBILITY™-M graphics accelerator with 8-MB VRAM and 2X AGP graphics capability — Versa UltraLite — Backlit, XGA (1024 x 768) resolution — Versa DayLite — Reflective, SVGA (800 x 600) resolution Specifications B-3 Keyboard Membrane 86 keys with country-specific QWERTY-key layout ! Function keys — 12 keys ! Cursor Control keys — 8 keys; arrow keys arranged in inverted T layout ! Numeric keypad — embedded ! Fn key — function key for ROM-based key functions ! Stroke — 2.5 mm ! Height — 6 mm ! Pitch — 17.5 mm External Floppy Diskette Drive ! Size — 3.5-inch ! Capacity — 1.44 MB1 (formatted), 2 MB1 (unformatted) ! Transfer Rate — 250 to 500 K/bps ! Number of tracks — 160 Hard Disk Drive Specifications vary depending upon model: ! Busmaster IDE, Ultra DMA/33 support ! Capacity — Internal 10- or 20-GB1 ! Drive height — 9.75 mm ! Read/write track-to-track seek rate — 3 ms ! Average seek time — 12 ms – 14 ms ! Revolutions per minute — 4200 ! Data transfer rate — 16.6 MB/sec (PIO mode4/DMA mode2) — 66.6 MB/sec (ultra DMA mode 4) 1 When referring to storage capacity, GB stands for one billion bytes and MB stands for one million bytes. Some utilities may indicate varying storage capabilities. Total user-accessible capacity may vary depending on operating environments. B-4 Specifications 24X-Maximum/10x Minimum Variable Speed CD-ROM Drive ! Type — 5-inch CD-ROM Pack ! Average Data Transfer Rates — 1545 KB/second to 3600 KB/second ! Burst Transfer Rate — 16.7 MB/second, PIO mode4/DMA mode ! Average Access Time — 190 ms (Random) — 350 ms (Fullstroke) ! Interface — IDE (ATAPI) ! Photo CD Compatibility — Single Session/Multisession Photo CD, Video CD (CD-1, CD-I Ready, CD-G, CD-Plus, CD-DA, CD-EXTRN, and CD-ROM XA mode 2) ® Mini PCI LAN/Xircom Modem Combo ! 10BASE-T and 100BASE-TX compatible ! IEEE 802.3 and IEEE 802.3u compliant ! 10/100 Mbps transmission rate ! 10/100M, LINK, and ACT diagnostic LEDs ! V.90 data/V.17 fax soft, MMX optimized ! K56flex™ compatible ! SmartDAA™ technology ! V.80 synchronous access mode Power AC Adapter ! Input Voltage — 100 to 240 volts (V) AC, 50 or 60 Hz, Maximum 2.8A ! Output Voltage — 16.0 V DC, 45 Watt ! Australia, Europe, and Asia use an AC power cable specific to each country's standards. Specifications B-5 Battery Pack ! Main Battery — 9 Cell Lithium Polymer; 10.8 volts, 1800mAH ! Secondary Battery — 3 cell Lithium-Ion; 11.1volts, 2500 mAH ! Recharging Time — Approximately 8 hours when the system is on, 4.5 hours when off. Dimensions ! Width — 10.4 in. (264 mm) ! Depth — 8.3 in. (211 mm) ! Height — 1.06 in. (27 mm) Weight 3.01 lb. (1.37 kg) — without external drives Recommended Environment Operation ! Temperature — 41°F to 95°F (5°C to 35°C) ! Relative Humidity — 20% to 80% (Noncondensing) Storage ! Temperature — -4°F to 104°F (-20°C to 40°C) ! Relative Humidity — 20% to 80% (Noncondensing) B-6 Specifications Memory Map The system supports system and video shadowing, both controlled through complementary metal oxide semiconductor (CMOS). The system supports BIOS as a cacheable area with write protection. The following table shows the system's memory map. System Memory Map Memory Space Size Function FFFE 0000H-FFFF FFFFH 128K Upper ROM, System and Video BIOS FFFC 0000H-FFFD FFFFH 128K Lower ROM, Power Management BIOS FFFA 0000H-FFFB FFFFH FFF8 0000H-FFF9 FFFFH 128K 128K New Extended Area FFF0 0000H-FFF7 FFFFH 512K 1MB Extended, BIOS 512KB 0A00 0000H-0BFF FFFFH Up to 176MB Extended Memory 000F 0000H-000F FFFFH 000E 0000H-000E FFFFH 64K 64K System BIOS, 128K 000A 0000H-000B FFFFH 128K Video Buffer Ram 000C 0000H-000D FFFFH 128K Available for Applications 0000 0000H-0009 FFFFH 640K System/Application Memory Specifications B-7 Interrupt Controllers Using interrupts, hardware can request software services. If non-Plug and Play software is being used, the interrupt may need to be moved for software application or driver compatibility. Some interrupts cannot be moved. Fifteen interrupts can be used with a cascade connection of 8259INTC x 2. The table shows default interrupt level assignments 0 through 15, in order of decreasing priority. Priority Name Device 0 IRQ00 Internal Timer 1 1 IRQ01 Keyboard 2 IRQ02 PIC 3 IRQ08 Real-time Clock 4 IRQ09 SCI, CardBus, Modem, LAN 5 IRQ10 Video 6 IRQ11 Sound 7 IRQ12 Mouse 8 IRQ13 Coprocessor 9 IRQ14 IDE Controller 10 IRQ15 (Free) 11 IRQ03 or IRQ04 (Free) Infrared Port 12 IRQ04 or IRQ03 (Free) 13 IRQ05 or IRQ09 USB 14 IRQ06 (Free) 15 IRQ07 (Free) 1 When enabled. B-8 Specifications 1 C Frequently Asked Questions ! External Mouse ! Display ! PC Cards ! Diskette Drive ! Booting ! Power Management ! Miscellaneous External Mouse How can a mouse and an external keyboard be connected to the notebook at the same time? The NEC Versa DayLite/UltraLite is equipped with two USB ports that allow you to connect any combination of two USB devices, at the same time. If you purchase a USB mouse and a USB keyboard, simply plug each device into any of the USB ports on your system. The USB ports allow you to connect up to 127 USBequipped peripheral devices per port to your NEC Versa notebook computer. Display What is the maximum resolution I can run in simultaneous mode? The maximum resolution in simultaneous mode is 1024 x 768 for XGA TFT or 800 x 600 for SVGA TFT panels, depending on the capabilities of the external monitor. You can obtain higher resolutions if you connect a higher-resolution external monitor and switch to CRT-only mode. How can I change my video drivers? Go to Start, Settings, and Control Panel. In the control Panel, double click the Display icon. Click the Settings tab. Next, click the Advanced button, select the Adapter tab, click on Properties, select the Driver tab and click on Update Driver. Proceed as prompted to find the video driver you need, and if applicable, insert a diskette or CD into the appropriate drive and click on Have Disk. Follow the on-screen instructions to install the new video driver. C-2 Frequently Asked Questions PC Cards Why do certain PC Cards cause my battery life to drop noticeably? Certain hard disk cards and wireless radio cards consume more power than others and can impact battery life. When not using any PC Card, close all applications using the card and pop it part of the way out of the slot to save power. In Setup, I disabled or reconfigured peripheral devices (like the ports or sound), yet I am unable to use the freed IRQs or I/O address resources with my PC Cards. Why? To provide a stable platform free of conflicts, NEC computers excluded some resources from PC Card use. Diskette Drive Why can't I boot from the external USB diskette drive? To boot from the diskette drive, be sure that you have a diskette in the drive containing operating system files. Be sure to check the Boot Device Setup parameters in the BIOS Setup Utility to determine the designated sequence of boot devices. See Chapter 3, “Using the BIOS Setup Utility.” See your operating system documentation for information about creating system diskettes. Frequently Asked Questions C-3 What happens if I leave a diskette in my diskette drive? Shutting down your system with a diskette in the diskette drive can damage the data on your diskette and your diskette drive. You should remove the diskette before powering off. How do I format a diskette? Double click on the My Computer icon and then right click (click the right-hand mouse button) on the floppy diskette drive icon. Select Format and choose the format process that best suits your needs. To format high density 1.44-MB diskettes – In DOS, type format a: and press Enter. If you want a bootable diskette, type format a:/s and press Enter. What type of diskette do I use in my diskette drive? Your NEC Versa DayLite/UltraLite ships with an external 1.44-MB USB diskette drive that uses 3.5-inch high density (HD) diskettes. These diskettes are also called double-sided, high-density (DSHD) diskettes. You can store 1.44 MB of information on these diskettes. Your diskette drive can also use 3.5-inch double-sided, double-density (DSDD) diskettes. These diskettes only hold 720 kilobytes of data – about half the amount of data that 1.44-MB diskettes hold. C-4 Frequently Asked Questions Booting What is the difference between a warm boot and a cold boot? A warm boot restarts the system while system power is on. A warm boot is also a software reset. A warm boot clears volatile system memory and reloads the operating system. In Windows 2000, press Ctrl, Alt, and Del twice to restart the system or go to Start, Shut Down, Restart the computer. In DOS mode, press Ctrl, Alt, and Del to warm boot the system. A cold boot is a system start with power off. A cold boot also resets the hardware. It checks the hardware and reloads the operating system. Slide the system unit Power button to perform a cold boot or go to Start, Shut Down, to shut down the computer. If power is on, turn the power off using the system unit Power button, wait at least five seconds, and then turn the power on. Power Management Does my system come with power management features enabled? Your system’s default settings are configured with power management features enabled when on DC (battery) power and disabled when on AC power. Use the BIOS Setup Utility to modify the default settings, if desired. If you do not use the keyboard, mouse, or drives for the preset length of inactive time, your screen goes blank and your system goes into a power saving mode of operation. This is known as an LCD time-out. When your screen goes blank, before the system goes into Standby mode (power status LED blinks), just press the Space Bar or move your mouse to reactivate your system. Frequently Asked Questions C-5 What is the purpose of Suspend to RAM (Standby)? You can initiate full Suspend-to-RAM by accessing Start, Shut Down, Standby. This places the system in a deeper state of “sleep” and requires that you slide the Power button forward to resume operation. Putting your system into Standby initiates the Standby power-saving mode and is a convenient way of conserving energy when you are going to be away from your system for a short period of time. What is the function of Suspend-to-File (Hibernation)? Suspend-to-File (Hibernation) provides the greatest power savings by putting the system into a maximum power shutdown. When the system goes into STF mode, it saves data and system status and then shuts off power to all components. STF mode lets you save power without first saving your work. Resuming from STF mode requires less time than performing a cold boot. Your system must be configured for STF/Hibernation. In Windows Power Management Properties, check the box labeled “enable hibernate support,” under the Hibernate tab. How do I bring my system out of Standby mode? Sliding the Power button forward brings the system out of Standby mode. C-6 Frequently Asked Questions What is a time-out? A time-out is the amount of time your system or a particular component is inactive. Miscellaneous How do I set the time and date? You can change the time and date in Windows 2000 as follows. ! Double click the time in the lower right corner of the screen. ! Change the date and time as needed. How do I speed up my application? If the application you are using runs really slow, close any other applications you are not using - this should speed things up. If your application still runs slow, you might consider installing additional memory. (See “Memory Modules” in Chapter 5.) If upgrading after initial purchase, one or more of the memory modules provided with the system may have to be replaced with Also, refer to your operating system's documentation for tips on optimizing system performance. Frequently Asked Questions C-7 Why do I get a message “Insufficient memory” when I run some games? I have 64 MB of memory. The “Insufficient memory” refers to the 640 kilobytes of (DOS) base memory. Since there are drivers being loaded at power on, the amount of memory can be lower than the game requires. Contact the game manufacturer and request advice to create a boot disk. This loads only the drivers necessary to run the game. How do I find help in a Windows application? If you need help in a Windows application, click on a Help button or Help menu item. Most applications provide online help. If the application doesn't provide these, try pressing F1. How do I save a file? You save a file by selecting File, then Save, from the drop down menu. If the file was not previously named, you will be prompted for a file name. In Windows 2000 you can use up to 255 characters to name a file. C-8 Frequently Asked Questions I'm having a problem using the IR port. What can I do? Use the taskbar icon to enable the IR port. Next, enter the BIOS Setup utility to verify that the IR serial port setting contains an available COM port and IRQ setting. Check that both the sending and receiving system and device are using the same transmission software. If you are transmitting underneath a fluorescent light, try repositioning the system and device so that they are not directly under the fluorescent light. Reference the IR setup online help for further information. Frequently Asked Questions C-9 Glossary A AC adapter A device that connects an NEC Versa notebook computer and an AC wall outlet to provide AC power for running the system and recharging the battery. A/D conversion The process of converting an analog signal into a digital signal. AGP Advanced Graphics Port is an interface specification designed for the throughput demands of 3D graphics. AGP introduces a point-to-point channel allowing the graphics controller direct access to main memory, increases bandwidth to 266-MBps, and supports throughputs of 533-MBps and 1.07-GBps. animation The art of making things appear to move in two-dimensional (2D) or three-dimensional (3D) space and making events happen over time. applications programs Software designed to perform specific functions, like solving business or mathematical problems. audio The range of acoustic, mechanical, or electrical frequencies that humans hear. B base RAM Area of system memory between 0 and 640 kilobytes available to the user for the operating system and application programs. BIOS Basic Input Output System. A collection of computer routines, usually burnt into ROM, that controls the real-time clock, keyboard, disk drives, video display, and other peripheral devices. bit Binary digit. The smallest unit of computer data. Glossary 1 bits per second (bps) A unit of transmission. Also called baud rate. board Printed circuit board (PCB). Board on which computer components are soldered and thin wires are printed to connect the components. boot To start up a computer. See cold boot and warm boot. bus An electronic circuit within a computer used for transmitting data or electrical power from one device to another. byte Group of eight contiguous bits. C CardBus A 32-bit high-performance bus defined by the PC Card Standard and released by the PCMCIA standards body and trade associations. CardBus offers wider and faster 32-bit bus and bus mastering operation for improved adapter performance and can operate at speeds up to 32-MHz. CD Compact disc. A polished metal platter capable of storing digital information. The most prevalent types of compact discs or those used by the music industry to store digital recordings and CDs used to store computer data. Both types are read-only, which means that once the data is recorded onto them, they can only be read or played. CD audio Also called digital audio, uses the same format as conventional music CDs. CD audio sounds have been digitized at a high sampling rate. CD-ROM drive Compact Disc Read-Only Memory. A computer-controlled device that reads highcapacity optical discs and sends the output to the computer. CD-RW drive Compact Disc Read/Write. A computer controlled device that reads from and writes to high capacity optical discs. clock Electronic timer used to synchronize computer operations. 2 Glossary CMOS Complementary Metal Oxide Semiconductor. A chip that contains nonvolatile memory in the NEC Versa notebook. CMOS is backed up by an internal battery that preserves clock/calendar data and system configuration parameters stored in CMOS. cold boot Process of starting up the computer by turning on the power. If power is already on, the process means to turn off the computer and turn it on again. A cold boot reinitializes all devices. CRT Cathode-Ray Tube. A type of display screen used in desktop monitors. It forms the screen image using tiny dots called, pixels. See also LCD. cursor A movable image on the display screen that indicates where the next entered data appears. D default A value, option, or setting that the computer automatically selects until you direct it otherwise. digital audio Recorded sounds such as speech and sound effects. These are played back by the audio circuit’s Digital-to-Analog Converter (DAC). digital sound A description of a sound wave that consists of binary numbers. digitizing The process of converting an analog signal into a digital representation. diskette A thin flexible platter coated with a magnetic material for storing information. diskette drive A magnetic drive that writes on and retrieves data from a diskette. E enhanced VGA A video interface that offers more colors or higher resolution than VGA. Glossary 3 extended RAM The area of RAM above the first megabyte of memory in the system available for enhancing system performance. F FIR Fast Infrared, an infrared technology that sends data at 4.0 Mbit/second (4 million bits per second). FM synthesis A technique for synthesizing sound that uses a combination of modulated sine waves to produce different waveforms. function key The set of keys on the keyboard (usually F1 through F12) that let you get help and error message information or quickly select frequently used commands. H hard disk A rigid magnetic storage device that provides fast access to stored data. hardware The electrical and mechanical parts from which a computer is made. hertz (Hz) A unit of frequency equal to one cycle per second. hot key Combination of two or three keys that you press simultaneously for a particular function. I input/output (I/O) The process of transferring data between the computer and external devices. IDE Intelligent Drive Electronics. A hard disk drive type that has controller electronics built into the drive and delivers high throughput. 4 Glossary infrared Technology that uses infrared waves to communicate data between the IR-equipped devices without the use of cables. The IR port on the NEC Versa is Infrared Data Association (IrDA) compatible. interface A connection that enables two devices to communicate. interrupt A special control signal from an I/O device that diverts the attention of the microprocessor from the program to a special address. K kilobyte (KB) 1024 bytes. L LAN Local Area Network. LCD Liquid Crystal Display. An LCD consists of a thin sandwich of two glass plates with sealed edges, containing nematic liquid-crystal material that forms the screen image. Versa displays are LCD type. load To copy a program into the computer's memory from a storage device. M megabyte (MB) 1,048,576 bytes. memory Electronic storage area in a computer that retains information and programs. A computer has two types of memory — read-only memory (ROM) and random access memory (RAM). menu A video display of programs or options. Glossary 5 microprocessor A semiconductor central processing unit that is the principal component of a microcomputer. Usually contained on a single chip that includes an arithmetic logic unit, control logic, and control-memory unit. MIDI Musical Instrument Digital Interface. A standard serial bus, digital interface designed to connect electronic musical devices. MIDI has no innate sound of its own. MIR Medium Infrared, an infrared technology that sends data at 1.152 Mbit/second (1,152,000 bits per second). mode A method of operation; for example, the NEC Versa operates in either normal or power-saving modes. modem MOdulator-DEModulator. A device that links computers over a telephone line. MPEG The MPEG (Moving Pictures Experts Group) standard is used to encode motion images. The MPEG player program in Windows lets you play back MPEG files. multimedia Integrated forms of media such as sound, text, graphics, and video. N nonvolatile memory Storage media that retains its data when system power is turned off. Nonvolatile memory in the Versa is a complementary metal oxide semiconductor (CMOS) chip which is backed up by an internal battery. The backup battery preserves the clock/calendar data and system configuration parameters stored in CMOS. See volatile memory. O operating system Set of programs that manage the overall operation of the computer. overwrite Storing information at a location where information is already stored, thus destroying the original information. 6 Glossary P page A type of message transmission in which a message is sent or received via modem to a paging device from a computer (with paging communications software) or telephone. parallel interface Interface that communicates multiple data bits at a time. parallel printer A printer with a parallel interface. parameter A characteristic of a device or system. partition Process of dividing mass storage (hard disk drive) into isolated or separate sections. Partitioning a hard drive creates additional logical drives, e.g., a 20-GB hard drive partitioned into three logical drives creates drives C, D, and E. Partitioning facilitates file management by allowing you to isolate the computer’s operating system to drive C while storing applications and data files on separate drives D and E (also referred to as partitions). password A string of characters that the user must enter before the system allows access or system privileges. PC Cards A credit-card-sized peripheral interface standard for portable devices. Types of PC Cards (also known as PCMCIA cards) currently offered by major vendors include fax/modems, LAN, storage cards, and wireless communications devices. peripheral Input or output device not under direct computer control. A printer is a peripheral device. pixels Picture elements. Tiny dots that make up a screen image. port Provides the means for an interface between the microprocessor and external devices. A cable connector is usually plugged into the port to attach the device to the computer. processor In a computer, a functional unit that interprets and executes instructions. Glossary 7 prompt A special symbol indicating the beginning of an input line. Also a message that appears on the screen indicating that the user must take a certain action. Q QWERTY The QWERTY keyboard, designed in the 1800s for mechanical typewriters, refers to the first six keys (QWERTY) on the top row of letters on the standard keyboard. R RAM Random Access Memory. A storage device into which data is entered and from which data is retrieved in a nonsequential manner. read To extract data from a storage device such as a diskette. ROM Read-Only Memory. Memory in which stored data cannot be modified by the user except under special conditions. reset The process of returning a device to zero or to an initial or arbitrarily selected condition. resolution The degree of screen image clarity. Video display resolution is determined by the number of pixels on the screen. Resolution is usually specified in pixels by scan lines, for example, 640 by 480. See pixels. RS-232C Standard interface for serial devices. This port is sometimes referred to as the serial port. S scanner An optical device that reads printed material and converts it to a computer screen image. serial interface An interface that communicates information one bit at a time. 8 Glossary serial printer A printer with a serial interface. SIR Serial Infrared, an infrared technology that sends data at 2.4 Mbit/second (2,400,000 bits per second). SO-DIMM Small outline dual-inline Memory Module. A small circuit board that holds memory chips. A dual in-line memory module (DIMM) has a 64-bit path. software Programs that run on a computer such as operating systems, word processors, and spreadsheets. SP/DIF Sony and Philips Digital Interconnect Format. SP/DIF enables a computer system to produce digital audio output through the use of an optical output cable to an optical disk device. Standby mode A state of power management that puts the system to “sleep.” Standby mode shuts down all devices in the system while retaining data and system status. SVGA Super Video Graphics Array. Graphics technology that supports up to 256 or more colors and a graphics resolution of 800 x 600 pixels. system board The main printed circuit board inside the system unit into which other boards and major chip components, such as the system microprocessor, are connected. s-video Short for super-video, a technology for transmitting video signals over a cable by dividing the video information into two separate signals: one for color, and the other for brightness. When sent to a television, s-video produces sharper images and superior color definition. T TFT Thin Film Transistor. A type of LCD color screen that supports up to 16.8 million colors. Glossary 9 U USB Universal Serial Bus. This external bus standard supports the connection of up to 127 peripheral devices, such as mice, modems, and keyboards. USB supports plug-and-play installation on some systems. V VersaGlide A small, touch-sensitive pad used as a pointing device on your NEC Versa notebook computer. With the VersaGlide, you can move your finger along the pad to move the cursor or simulate a mouse click by tapping the pad. VGA Video Graphics Array. Graphics technology that supports up to 256 colors and a graphics resolution of 640 by 480 pixels. volatile memory Storage media that loses its data when system power is turned off. Standard memory and memory that you add to the Versa are volatile memory. See nonvolatile memory. W warm boot Process of resetting the computer without turning off the power through keyboard input (pressing Ctrl, Alt, and Del keys simultaneously). The system returns to an initial or arbitrarily selected condition. warm swap Process of swapping devices in and out of a computer system without turning off the power. The system must be in a sleep state before removing or inserting a device. waveform A graphic representation of a sound wave as displayed on an oscilloscope, which converts sound waves into electronic signals. write To record or store information to a storage device. 10 Glossary X XGA Extended Graphics Array. This high-resolution graphics standard supports 800 x 600 – 1024 x 768 pixels and up to 16 million simultaneous colors. XGA also supports noninterlaced monitors. Z Zoomed Video A direct high-speed connection between the video, audio, and graphics subsystems within the computer that provides the high-quality path required for smooth video playback or TV tuner transmission. Zoomed Video technology allows data transfer directly between a PC Card and VGA controller allowing notebook computers to connect via PC Card to real-time multimedia devices such as video cameras. Glossary 11 Index A AC adapter, 7-3 connecting, 2-4 using, 2-3 AC Power port, 1-9 ACPI, 3-12 advanced power settings, 3-15 alarms, 3-14 hibernation, 2-6, 3-15 power meter, 3-14 power schemes, 3-13 Advanced graphics Port, 1-3 Advanced Configuration and Power Interface, 3-12 Advanced power settings, 3-15 Alarm, 3-14 critical battery, 3-14 low battery, 3-14 Audio AVI files, 9-2 MIDI files, 9-2 WAV files, 9-2 B Battery bay, 1-9 charging, 2-11 charging LED, 1-8 CMOS, 2-12 extending life, 2-8 handling, 2-8 inserting, 2-10 main, 2-12 optional, 2-12 precautions, 2-11 recharging precautions, 2-12 removing, 2-10 replacing, 2-9 using, 2-6 when to change, 2-8 Beep codes, 10-6 BIOS Advanced menu, 3-8 Boot menu, 3-11 Exit menu, 3-11 Main menu, 3-5 Security menu, 3-10 BIOS setup, 3-2 C Cache memory, B-2 Caps lock, 1-5 CD care, 5-8 CD-ROM drive, 5-3 cable, 5-5 connecting, 5-6 disconnecting, 5-8 using, 5-3, 5-6 Charging the battery, 2-11 Cleaning your NEC Versa, 2-14 Closing LCD panel, 3-15 CMOS battery, 2-12 Connecting AC adapter, 2-4 audio options, 8-3 external monitor, 8-2 USB devices, 8-4 Control keys, 1-7 Critical battery alarm, 3-14 Cursor control keys, 1-7 D Determining battery status, 2-7 Digital video files, 9-4 Dip switch settings, 3-20 Diskette drive, 5-2 cable, 5-2 connecting, 5-3 disconnecting, 5-3 E Entering BIOS setup, 3-2 Index-1 Extending battery life, 2-8 External devices audio options, 8-3 CD-ROM drive, 5-3 floppy diskette drive, 5-2 microphone, 1-10 speakers, 9-4 F FAQs booting the system, C-5 diskette drive, C-3 display panel, C-2 external mouse, C-2 miscellaneous, C-7 power management, C-5 Full restore, 4-6 Function keys, 1-6 H Hard disk turning off, 3-13 Hard disk drive, 5-8 Headphones, 1-10, 9-4 Hibernate mode, 2-6, 3-15 Hibernation, 2-6, 3-15 I Increasing system memory, 5-9 Installing SO-DIMMs, 5-9, 5-11 Internal hard disk drive, 5-8 LAN, 6-5 LAN, connecting, 6-5 modem, 6-6 modem, connecting, 6-6 speakers, 9-4 Internet Connection Wizard, 6-7 connections, 6-7 using Connection Wizard, 6-7 Interrupt controllers, B-8 IR port, 1-9 using, 6-8 Index-2 K Keyboard, 1-5, 1-6 L LCD panel closing, 3-15 display, 1-5 features, 1-4 Locating memory module bay, 5-9 Low battery power, 2-7 Low battery alarm, 3-14 M Main battery, 1-12, 2-12 returning to normal state, 2-8 Main power source DC power, 7-3 Managing system power, 3-12 Memory expansion, 5-9 map, B-7 module bay, 1-12, 5-9 modules, 5-9 Menus Advanced, 3-8 Boot, 3-11 Exit, 3-11 Main, 3-5 Security, 3-10 Microphone, 1-5, 9-3 MIDI files, 9-4 Mini-PCI LAN, 6-5 Mixing, 9-3 Monitor port, 1-9, 1-10 turning off, 3-13 Multimedia applications, 9-5 digital files, 9-4 microphone, 9-3 MIDI files, 9-4 mixing, 9-3 playing back, 9-3 recording, 9-2 using animation files, 9-5 using external speakers, 9-4 using headphones, 9-4 using internal speakers, 9-4 N NEC VersaGlide, 1-5 NEC Computers email/fax, 11-4 FTP site, 11-3 support services, 11-4 web site, 11-3 Num lock, 1-5 Numeric keypad, 1-7 O Operating status LEDs, 1-5 Operating systems Windows 2000, 4-2 Optional battery, 2-12 P Partition Only restore, 4-7 Password Standby, 3-15 PC Card Slot, 1-11 PC cards, 6-2 communication cards, 6-2 inserting a card, 6-4 removing a card, 6-4 slots, 1-10, 6-3 storage, 6-3 Type II, 6-2 Type II extended, 6-2 Peripheral Component Interconnect (PCI), 1-3 Peripheral devices, using audio, 8-3 external monitor, 8-2 USB port, 8-4 Playing back, 9-3 Ports DC power, B-3 headphones, B-3 infrared, B-3 microphone, B-3 monitor, B-3 USB, B-3 POST error messages, 10-4 Power button, 1-10, 1-11 meter, 3-14 schemes, 3-13 sources, 2-3 status LED, 1-8 Power button pressing, 3-15 Power connections, 7-3 Power management, 3-12 Power options Windows 2000, 3-12 Power schemes, 3-13 Powering on, 2-6 Power-on self test (POST), 3-2 Pressing Power button, 3-15 Problem checklist, 10-2 Product Recovery CD, 4-5 Full Disk restore, 4-6 guidelines, 4-5 options, 4-5 Partition Only restore, 4-7 Product Recovery Utility, 4-5 Protecting your system, 2-12 R Recharging the battery, 2-8 Recommended operating environment, B-6 Recording, 9-2 Release latch battery, 1-12, 2-9 Removing SO-DIMMs, 5-11 Replacing the battery pack, 2-9 S Scroll lock, 1-5 Setting up a healthy work environment, A-2 Setup utility legend bar, 3-4 using, 3-3 Show icon on taskbar, 3-15 SO-DIMMs features, 5-10 Index-3 installing, 5-11 removing, 5-11 Speaker, 1-5 Specifications battery pack, B-6 calendar clock, B-2 CD-ROM drive, B-5 diskette drive, B-4 hard disk drive, B-4 input/output facilities, B-3 keyboard, B-4 PC card slots, B-3 power, B-5 random access memory, B-2 read-only memory, B-2 speakers, B-3 system processor, B-2 Standby password, 3-15 Start-up problems, 10-3 Storage requirements, 2-13 Switch settings, 3-20 System care, 2-12 dimensions, B-6 feet, 1-12 precautions for use, 2-13 Standby, 3-14 weight, B-6 System features back, 1-9 bottom, 1-12 front, 1-3, 1-8 left, 1-9 right, 1-10 T Taskbar icon, 3-15 Technical support, 10-7 U USB port, 1-10, 1-11, 8-4 Using AC adapter, 2-3 animation files, 9-5 main battery, 2-6 Index-4 NEC VersaGlide, 2-2 V Vents, 1-12 VersaGlide adjustments, 2-3 features, 2-2 tips, 2-3 W Windows 2000, 4-2 introduction, 4-2 power options, 3-12 taskbar icons, 4-3 Regulatory Statements The following regulatory statements include the Federal Communications Commission (FCC) Radio Frequency Interference Statement, compliance statements for Canada and Europe, battery disposal and replacement information, and the Declaration of Conformity. FCC Statement for United States Only Changes or modifications to this unit not expressly approved by the party responsible for compliance could void the user’s authority to operate the equipment. Note This equipment has been tested and found to comply with the limits for a Class B digital device, pursuant to Part 15 of the FCC Rules. These limits are designed to provide reasonable protection against harmful interference in a residential installation. This equipment generates, uses and can radiate radio frequency energy and, if not installed and used in accordance with the instructions, may cause harmful interference to radio communications. However, there is no guarantee that interference will not occur in a particular installation. If this equipment does cause harmful interference to radio or television reception, which can be determined by turning the equipment off and on, the user is encouraged to try to correct the interference by one or more of the following measures. ! Reorient or relocate the receiving antenna. ! Increase the separation between the equipment and receiver. ! Connect the equipment to an outlet on a circuit different from the one to which the receiver is connected. ! Consult the dealer or an experienced radio/TV technician for help. Canadian Department of Communications Compliance Statement This Class B digital apparatus meets all requirements of the Canadian Interference-Causing Equipment Regulations (pursuant to ICES-003 Issue 2, Revision 1). Avis de conformité aux normes du ministere des communications du Canada Cet equipment ne depasse pas les limites de Classe B d'émission de bruits radioelectriques pour les appareill numerique, lelles que prescribes per le Reglement sur le brouillage radioélectrique elebil por le minisieredes Communications du Canada. Regulatory Statements 1 European Community Directive Conformance Statement This product is in conformity with the protection requirements of EC Council Directive 89/336/EEC on the approximation of laws of the Member States relating to electromagnetic compatibility. This product satisfied the Class B limits of EN 55022. Battery Replacement A lithium battery in some computers maintains system configuration information. In the event that the battery fails to maintain system configuration information, NEC Computers recommends that you replace the battery. For battery replacement information, call your NEC Computers dealer or NEC Support Services. There is a danger of explosion if the battery is incorrectly replaced. Replace only with the same or equivalent type recommended by the manufacturer. Discard used batteries according to the manufacturer’s instructions. Il y a danger d’explosion s’il y a replacement incorrect de la batterie. Remplacer uniquement avec une batterie du même type ou d’un type recommandé par le constructeur. Mettre au rébut les batteries usagées conformément aux instructions du fabricant. Battery and LCD Panel Disposal The primary battery is made of Lithium Polymer (Li-Poly), the secondary battery of Lithium Ion (Li-Ion) and the CMOS clock battery is made of Lithium. The LCD panel contains mercury. Do not place used batteries or LCD panels in your regular trash. They must be collected, recycled or disposed of in an environmentally approved manner. Contact your local waste management officials for other information regarding the environmentally sound collection, recycling, and disposal of the LCD panel, which contains the primary battery, or other batteries. Mini-PCI FCC Registration Numbers If your system has a built-in mini-PCI modem, the FCC registration number of your system is FJE USA-40066-ME-E REN 0.0A. 2 Regulatory Statements NEC Computers Inc. DECLARATION OF CONFORMITY We, the Responsible Party NEC Computers Inc. 15 Business Park Way Sacramento, CA 95828 declare that the product NEC Versa® DayLite™/UltraLite™ is in conformity with part 15 of the FCC Rules. Operation of this product is subject to the following two conditions: (1) this device may not cause harmful interference, and (2) this device must accept any interference received, including interference that may cause undesired operation.