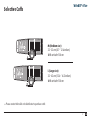
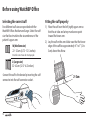
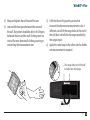
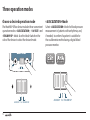
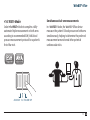
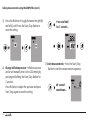
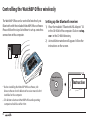
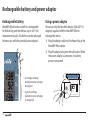
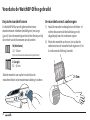
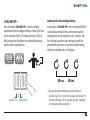
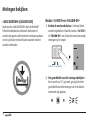
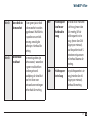
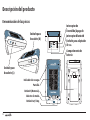
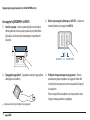
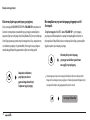
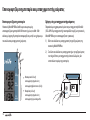
1
Simultaneous dual-arm
measurement and auscultatory
function for accurate office
blood pressure measurement.
Instruction Manual
EN
3
WatchBP Office combines the advantages of an automatic blood pressure device and hybrid
sphygmomanometer and is designed to provide convenient, accurate and reliable in-office
blood pressure measurement following recommended guidelines of the European Society
of Hypertension (ESH), American Heart Association (AHA), and World Health Organization
(ESH)1.
1
O’Brien E, Asmar R, Beilin L, Imai Y, et al. European Society of Hypertension recommendations for conventional, ambulatory and home blood pressure
measurement. European Society of Hypertension Working Group on Blood Pressure Deviceing. J Hypertens 2003;21:821-848.
Table of Contents
Product description
Name of parts and display...................................6-7
Components and accessories.............................. 8-9
Before using WatchBP Office
Selecting and fitting the correct cuff................10-11
Three operation modes
«AUSCULTATION» Mode......................................... 12
«1st VISIT» Mode..............................................13-14
«FOLLOW-UP» Mode.............................................. 15
Taking measurements using WatchBP Office
«AUSCULTATION» Mode....................................16-17
«1st VISIT» Mode..............................................18-20
«FOLLOW-UP» Mode......................................... 21-23
Special Functions
Hiding measurement values................................. 24
Mean arterial pressure and pulse pressure .......... 25
Taking fewer than three measurements ............. 26
Skipping the 60-second countdown..................... 26
Setting inflation pressure...................................... 27
Setting measurement intervals............................ 27
Viewing Measurements
«AUSCULTATION» Mode ........................................ 28
«1st VISIT» and «FOLLOW-UP» Mode...............28-29
Controlling the WatchBP Office Wirelessly
Setting up the Bluetooth receiver....................30-31
Installation of the software program.................... 32
Controlling the device wirelessly ....................32-33
Appendix
Rechargeable battery and power adaptor . ......... 34
Troubleshooting.................................................... 35
Error messages.................................................36-37
Safety, care, accuracy test and disposal...........38-39
Technical specifications........................................ 40
EN
Product description
Name of parts
I/O switch
Bluetooth Switch
Main Adaptor Socket
Battery Compartment
L
Cuff Socket (R)
DC 6V 600mA
DC 6V 600mA
R
Cuff Socket (L)
SYS
mmHg
DIA
mmHg
Recharge Indicator
Display
M Button (Memory)
SYS
mmHg
DIA
mmHg
PUL
/min
Mode Switch
INTERVAL
L/R
Start/Stop Button
6
3 sec.
3 sec.
HIDE
7 sec.
PRESSURE
AUSCULT 1st FOLLOW UP
7 sec.
Display
Mean Arterial Pressure (MAP)
Pulse Pressure (PP)
Mode Indication
External Power
Value for Left Arm
Systolic Value
Diastolic Value
Bluetooth
Rest and Arm Position Reminder
Battery Symbol
Hide Display
Memory Mode
Pulse Rate
Value for Right Arm
Systolic Value
Diastolic Value
Heart Beat
L/R Cuff
7
EN
WatchBP Office and components
Bluetooth Receiver
Driver
SYS g
mmH
DIA
mmHg
Install CD
SYS g
mmH
DIA
mmHg
PUL
/min
INTER VAL
3 sec.
PRESS
URE
7 sec.
L/R
3 sec.
AUSC ULT
HIDE
W
1st FOLLO
UP
7 sec.
WatchBP Office blood
pressure device (1 pcs.)
AC Adaptor X1 (Input:
100-240V~50/60Hz 0.7A
Output: +7.5V 2A)
Bluetooth receiver X1
Install CD X1
Quick start guide
How to take blood presssure measurement in three different modes
1 Plug cuff connector
«1st VISIT» Mode (Double arm)
ght
i
All R
«AUSCULTATION» Mode
(Single arm)
Flip over the quick start guide to see ‘Product description’.
68
y, 1024x7
Memor
port, 40MB
z CPU. 256MB
free USB
s: 550MH
drive, 1
ement
Vista.
Requir
/ XP /
color, CD-ROM
System
s 2000
ion, 256
ft Window
pixel resolut space, Microso
disk
free hard
WatchBP Office Software
CD X1
Simultaneous
dual-arm
Press Start/Stop
button to begin a
measurement
and
measurement
Note bloodfor
auscultatory function
presure using
accurate in-officeauscultatory
blood
method
pressure measurement.
Place the stethoscope on
the hollow of the elbow,
over the brachial artery
3 Switch the mode
Install CD
8
An averaged result will
be displayed after three
consecutive measurments
Press Start/Stop
button to begin a
measurement
«FOLLOW-UP» Mode (Single arm)
2 Turn on the device
.
ration
1.0.2
Version
©2008 Microlife Corpo
Office
d.
rve
ese
sR
in the cuff socket
Analyzer
WatchBP
.4
Instruction Manual
EN
M size (22cm~32cm) X2
L size (32cm~42cm) X2
1
Manual Instruction X1
Quick Start Guide X1
Selective Cuffs
M (Medium size)
22 - 32 cm (8.7 - 12.6 inches)
With air tube 130 cm
L (Large size)
32 - 42 cm (12.6 - 16.5 inches)
With air tube 130 cm
* Please contact Microlife or its distributor to purchase cuffs.
9
EN
Before using WatchBP Office
Selecting the correct cuff
Fitting the cuff properly
Two different cuff sizes are provided with the
WatchBP Office: Medium and Large. Select the cuff
size that best matches the circumference of the
patient’s upper arm.
1) Place the cuff over the left (right) upper arm so
that the air tube and artery mark arrow point
toward the lower arm.
M (Medium size)
22 - 32 cm (8.75 - 12.5 inches)
2) Lay the cuff on the arm. Make sure that the lower
edge of the cuff lies approximately ¾” to 1”(2 to
3cm) above the elbow.
M is the correct size for most people.
L (Large size)
32-42 cm (12.5-16.5 inches)
Connect the cuff to the device by inserting the cuff
connector into the cuff connector socket.
R
R
10
2–3cm
3) Wrap and tighten the cuff around the arm.
4) Leave a little free space between the arm and
the cuff. The patient should be able to fit 2 fingers
between the arm and the cuff. Clothing must not
restrict the arm. Remove all clothing covering or
constricting the measurement arm.
5) Cuffs that do not fit properly can result in
incorrect blood pressure measurements. Use a
different size cuff if the range Index at the end of
the cuff does not fall into the range specified by
the range stripes.
6) Apply the same steps to the other arm if a double
arm measurement is required.
* The range index of cuff should
be fallen into this range.
11
EN
Three operation modes
SY S
Choose a desired operationmmHg
mode
«AUSCULTATION» Mode
DIA
The WatchBP Office device includesmmHg
three convenient
operation modes: «AUSCULTATION», «1st VISIT» and
«FOLLOW-UP» Mode. Use the ModeSY SSwitch on the
mmHg
side of the device to select the desired mode.
Select «AUSCULTATION» Mode for blood pressure
measurement of patients with arrhythmia, and,
if needed, to confirm if a patient is suitable for
the oscillometric method using a digital blood
pressure monitor.
DIA
mmHg
PUL
/min
INTERVAL
L/R
3 sec.
3 sec.
HIDE
7 sec.
1st FOLLOW UP
12
PRESSURE
AUSCULT 1st FOLLOW UP
7 sec.
AUSCULT 1st FOLLOW UP
AUSCULT 1st FOLLOW UP
AUSCULT 1st FOLLOW UP
AUSCULT 1st FOL
«1st VISIT» Mode
Simultaneous dual-arm measurements
Select «1st VISIT» Mode to complete a fullyautomated triple measurement on both arms
according to recommended ESH/AHA blood
pressure measurement protocols for a patient’s
first office visit.
In «1st VISIT» Mode, the WatchBP Office device
measures the patient’s blood pressure on both arms
simultaneously, helping to determine the preferred
measurement arm and reveal other potential
cardiovascular risks.
FOLLOW UP
AUSCULT 1st FOLLOW UP
AUSCULT 1st FOLLOW UP
13
EN
Three operation modes (cont.)
Automated triple measurement
Determine proper measurement arm
In «1st VISIT» Mode, the WatchBP Office device
automatically takes three consecutive measurements
at one minute* intervals by default. The result of
these three measurements are averaged to produce
the first visit blood pressure measurement.
If the measurement result between the two arms
differs more than 20mmHg for Systolic or 10mmHg
for Diastolic for all three measurements, the device
will indicate the higher measurement arm by a
flashing L or R.
1
60 sec.
2
3
60 sec.
* The user can manually set up the measurement
interval of 15, 30, 45 or 60 seconds in 1st Visit and
Follow-up Mode. (Please refer to special functions
section page.24 “Set up measurement interval”).
14
The higher arm should be used as the preferred
measurement arm for future measurements.
W UP
«FOLLOW-UP» Mode
Automated triple measurement
Select «FOLLOW-UP» Mode to complete a fullyautomated triple measurement on the preferred
measurement arm. According to recommended
ESH/AHA blood pressure measurement protocols for
follow-up blood pressure measurement.
In «FOLLOW-UP» Mode, the WatchBP Office
device automatically takes three consecutive
measurements at one minute intervals by default.
The result of these three measurements are
averaged to produce the follow-up visit blood
pressure measurement.
1
60 sec.
2
3
60 sec.
* The user can manually set up the measurement
AUSCULT 1st FOLLOW UP
interval of 15, 30, 45 or 60 seconds in 1st Visit and
Follow-up Mode. (Please refer to special functions
section page 24 “Set up measurement interval”).
15
EN
Taking measurements using WatchBP Office
«AUSCULTATION» Mode
1) Turn on the power – Turn on the device by
switching the I/O switch at the back of the
device into the ON position and make sure
Bluetooth switch is in off position.
600mA
3) Switch to «AUSCULTATION» Mode – Slide the
Mode Switch to «AUSCULTATION» Mode.
DC 6V 600mA
AUSCULT 1st FOLLOW UP
2) Apply the cuff* – Properly fit one cuff to the
preferred measurement arm.
AUSCULT 1st FO
4) Adjust inflation pressure if necessary –
Inflation pressure can be set manually from 140
to 280 mmHg by pressing and holding the Start/
Stop Button for 7 seconds.
Press the M Button to adjust the pressure and
press Start/Stop to save the setting.
* Additional visual instruction can be found on the cuff
16
5) Start inflation – Press the Start/Stop Button to
start inflation of the cuff.
Press and hold
for 7 seconds...
6) Take note – Take note of the systolic and
diastolic values in the same manner used for
sphygmomanometer measurements.
* The default inflation pressure is 180 mmHg.
* When the device is in standby mode, it will remind you
the current preset pressure setting by displaying the
current pressure setting on the screen.
7) Set device to Stand by Mode – The device can
be set to Stand by Mode by pressing the Start/
Stop Button. The device will automatically switch
to Idle Mode if left for five minutes.
Stand by mode
17
EN
Taking measurements using WatchBP Office (cont.)
«1st VISIT» Mode
1) Turn on the power – Turn on the device by
switching the I/O switch at the back of the device
to the ON position. and make sure Bluetooth
switch is in off position.
600mA
DC 6V 600mA
3) Switch to «1st VISIT» Mode – Slide the Mode
Switch to «1st VISIT» Mode.
AUSCULT 1st FOLLOW UP
2) Apply the cuff – Properly fit one cuff to each of
the patient’s arms.
AUSCULT 1st FOLLOW UP
AUSCULT 1st
4) Adjust inflation pressure if necessary –
Inflation pressure can be set manually from 140
to 280 mmHg by pressing and holding the Start/
Stop Button for 7 seconds.
Press the M Button to adjust the pressure and
press Start/Stop to save the setting.
* Additional visual instruction can be found on the cuff
18
Press and hold
for 7 seconds...
5) Start measurements – Press the Start/Stop
Button to start the measurement sequence.
* A 60-second countdown will proceed the first
measurement .
60-second
countdown...
* The default inflation pressure is 180 mmHg.
* The device will deflate and re-pump more air into the
cuff if the blood pressure of the patient is higher than
that of the inflation setting of the device.
* When the device is in standby mode, it will remind you
the current preset pressure setting by displaying the
current pressure setting on the screen.
6) Three consecutive measurements – The device
will take three consecutive measurements with
one minute intervals in between measurements.
1
60
seconds
2
3
60
seconds
19
EN
Taking measurements using WatchBP Office (cont.)
7) View the average measurement – Only the
average measurement will be displayed once the
triplicate measurement is completed.
8) View all measurements – Results of the three
individual measurements can be accessed by
pressing the M Button. Press the M Button once to
review the first measurement. Continue to press
the M Button to review the other measurements.
1
2
* When the measurements are completed, the blood
pressure measurement corresponding with the
consistently higher arm will blink continuously for
5 seconds. If no significant difference (20mmHg for
systolic blood pressure or 10 mmHg for diastolic blood
pressure or both) exists between the two arms, neither
measurement will blink.
20
3
* WatchBP Office only stores the last three measurements
completed in «1st VISIT» and «FOLLOW-UP» Modes. To
store patient blood pressure for later retrieval, please use
the included WatchBP Office software.
«FOLLOW-UP» Mode
1) Turn on the power – Turn on the device by
switching the I/O switch at the back of the device
to the ON position and make sure Bluetooth
switch is in off position.
DC 6V 600mA
DC 6V 600mA
AUSCULT 1st FOLLOW UP
3) Switch to «FOLLOW-UP» Mode – Slide the Mode
Switch to «FOLLOW-UP» Mode.
AUSCULT 1st FOLLOW UP
2) Apply the cuff – Properly fit one cuff to the
preferred measurement arm.
AUSCULT 1st FOLLOW UP
4) Select the inflation cuff – Set the device to
inflate only the designated (right or left) cuff.
Press and hold the M Button for 3 seconds.
Press and hold
for 3 seconds...
* Additional visual instruction can be found on the cuff
21
EN
Taking measurements using WatchBP Office (cont.)
5) Press the M Button to toggle between the right(R)
and left(L) cuff. Press the Start/Stop Button to
save the setting.
6) Change inflation pressure – Inflation pressure
can be set manually from 140 to 280 mmHg by
pressing and holding the Start/Stop Button for
7 seconds.
Press M Button to adjust the pressure and press
Start/Stop again to save the setting.
22
Press and hold
for 7 seconds...
7) Start measurements – Press the Start/Stop
Button to start the measurement sequence.
60-second
countdown...
8) Three consecutive measurements – The device
will take three consecutive measurements with
one minute intervals in between measurements.
1
60
seconds
2
60
seconds
3
9) View the average measurement – Only the
average measurement will be displayed once the
triplicate measurement is completed.
10) View all measurements – Results of the three
individual measurements can be accessed by
pressing the M Button. Press the M Button once to
review the first measurement. Continue to press
the M Button to review the other measurements.
1
2
3
* WatchBP Office only stores the last three measurements
completed in «1st VISIT» and «FOLLOW-UP» Modes. To
store patient blood pressure for later retrieval, please
use the included WatchBP Office software.
23
EN
Special Functions
Hiding measurement values
The WatchBP Office device features a “Hide” function
in order to prevent unnecessary elevated blood
pressure in patients due to nervousness triggered by
visible blood pressure measurements.
* This feature is only available in follow up mode
1) Activate the «Hide» Function – pressing and
holding the M Button for 7 seconds.
Press and hold
for 7 seconds...
2) Select ON or OFF – Press the M Button again to
turn the “Hide” function ON or OFF.
* When the «Hide»
function is ON, the
countdown between
each measurement and
the Hide icon will be
displayed.
3) Confirm – Press Start/Stop to confirm the setting.
* Please make sure the
Bluetooth switch is in OFF
position, otherwise the
«Hide» function can not
be set.
24
* The «1st VISIT» Mode “Hide” default setting is set to ON
and cannot be set to OFF.
MAP (Mean Arterial Pressure)
PP (Pulse Pressure)
The WatchBP Office device measures the mean
arterial pressured (MAP) of the patient. Each
measurement includes the calculation of a single
MAP value. The average measurement will display
the average MAP value. When viewing in Memory
mode, the MAP value will be displayed with the
systolic/diastolic pressure once every 5 seconds.
The WatchBP Office device measures the pulse
pressure (PP) of the patient: pulse pressure = systolic
- diastolic pressure. Each measurement includes
the calculation of a single PP value. The average
measurement will display the average PP value.
When viewing in Memory mode, the PP value will be
displayed with the systolic/diastolic pressure once
every 5 seconds.
25
EN
Special Function (cont.)
Taking fewer than three measurements
Skipping the 60-second countdown
In «FOLLOW-UP» Mode, the measurement
sequence can be stopped at any time. By
pushing the Start/Stop button the remaining
measurements in the sequence will be cancelled.
Data from the measurements completed can be
viewed by pushing the M Button.
In «1st VISIT» and «FOLLOW-UP» Mode, the
60-second pre-measurement countdown can be
skipped by pushing the Start/Stop Button. Once
the Start/Stop Button is pushed, the device will
immediately begin the next measurement.
Skips the 60-second
countdown and begins
measurement.
Cancels remaining
measurements at
anytime during
the measurement
sequence.
* The device can put into Stand by Mode by pressing
the Start/Stop Button after the completion of
measurements. The device will automatically switch to
Stand by Mode if left unattended for five minutes.
Stand by mode
26
Setting inflation pressure
Setting measurement intervals
Inflation pressure can be set manually from 140 to
280 mmHg by pressing and holding the Start/Stop
Button for 7 seconds.
In 1st Visit and Follow-up Mode, the measurement
intervals of 15, 30, 45 or 60 seconds can be set
manually.
Press and hold
for 7 seconds...
Press the M Button to adjust the pressure and press
Start/Stop again to save the setting.
1) Pressing and holding the Start/Stop Button for 3
seconds.
Press and hold
for 3 seconds...
2) Press the M Button to adjust the measurement
interval, then press the Start/Stop Button to
confirm, the meter will go back to stand by Mode.
15 30
45 60
27
EN
Viewing Measurements
«AUSCULTATION» Mode
«1st VISIT» and «FOLLOW-UP» Mode
The WatchBP Office blood pressure measurement
device in «AUSCULTATION» mode serves only as a
pressure gauge. No oscillometric measurements will
be taken and a mental note must be made of the
systolic and diastolic values.
1) Switch the mode switch –The M Button can be
pressed in either «1st VISIT» or the «FOLLOWUP» mode to retrieve the last set of the triplicate
measurements.
AUSCULT 1st FOLLOW UP
Memory
28
AUSCULT 1st FOLLOW UP
AUSCULT 1st FOLLOW UP
2) Viewing the average of all measurements –
At first an “A” will be displayed, followed by an
average of all measurements taken in the last
sequence of measurements.
3) Viewing MAP and PP values – Ten seconds after
the display of the average blood pressure, the
device will display values for Pulse Pressure (PP)
and Mean Arterial Pressure (MAP).
5) Values for the third measurement (including PP
and MAP values) will be shown on the display
in the order listed in step 3.
3
10
seconds...
4) Viewing individual measurements – Press
the M Button once again to view individual
measurements. The display will flash a number
“3” indicating the third measurement.
10
seconds...
6) Press the M Button to retrieve values for second
and first measurements from the last completed
set of measurements.
2
1
29
EN
Controlling the WatchBP Office wirelessly
The WatchBP Office can be controlled wirelessly via
Bluetooth with the included WatchBP Office software.
Please follow the steps listed here to set up a wireless
connection with a computer.
Setting up the Bluetooth receiver
1) Place the included “Bluetooth USB Adaptor” CD
in the CD-ROM of the computer. Click on «setup.
exe» in the CD-ROM directory.
2) An installation window will appear. Follow the
instructions on the screen.
AU SC
ULT
LLO
1st FO
W UP
IN
R VA
7
L
SU
ES
P R c.
se
TE
RE
*
Before installing the WatchBP Office software, the
driver software for the Bluetooth receiver must be first
installed on the computer.
* The distance between WatchBP office and operating
computer should be within 10m.
30
Bluetooth Receiver
Driver
Install CD
Instruction
3) Insert the Bluetooth receiver into a USB port
of the computer after the installation program
requests to do so.
4) Restart the computer after installation is
completed.
5) Turn on the Bluetooth function of the WatchBP
Office device by switching the Bluetooth switch
at the back of the device to the “ON” position.
The Bluetooth icon will illuminate and flash
continuously to show a connection.
* Select a single USB port and make sure to always use
*
the same port in the future.
* Do not use other Bluetooth receiver.
Restart
your
computer
It is noted that WatchBP office device will not
respond to any button pressing or switching when
the Bluetooth is on. This is to prevent accidental
interruptions during the measurement.
DC 6V 600mA
DC
31
EN
Controlling the WatchBP Office wirelessly (cont.)
Installation of the software program
Controlling the device wirelessly
1) Put the CD in the CD-ROM drive of your computer.
Then click on «setup.exe» in the CD’s directory.
1) Turn on the Bluetooth switch located on the back
of the device.
2) Follow the instructions provided in the
installation window on the computer screen.
2) Make sure the Bluetooth receiver is at right
position and the light is on (if applicable).
3) When the installation is complete, be sure to
restart the computer before using the program for
the first time.
3) Launch WatchBP Office Software from the
computer. Follow these steps to control the
WatchBP Office from the computer.
WatchBP Analyzer Office
Version 1.0.2.4
Install CD
System Requirements: 550MHz CPU. 256MB Memory, 1024x768
pixel resolution, 256 color, CD-ROM drive, 1 free USB port, 40MB
free hard disk space, Microsoft Windows 2000 / XP / Vista.
32
ed.
serv
©200
s Re
Right
8 Microlif
e Corporation. All
* System Requirements:
550MHz CPU. 256MB
Memory, 1024x768 pixel
resolution, 256 color,
CD-ROM drive, 1 free USB
port, 40MB free hard disk
space, Microsoft Windows
2000 / XP / Vista.
DC 6V 600mA
Software commands
Choose measure blood pressure
Click «1st VISIT», «FOLLOW-UP»
Enter Patient ID
Input Patient ID
Start to perform
Press the «Measure» button
Store blood pressure measurements Click «Save». The data is stored in an Excel data table. The file
name is generated automatically from the following format
«Patient ID+ WatchBP Office +measurement mode +
yyyymmdd.xls».
View the data
Go to the folder where the file is saved and open the
corresponding Excel file.
Print the data sheet
While the corresponding Excel file is open, click print in Excel.
Disconnect the device
Click «Disconnect» before existing the program
Close the program
Click «Close»
* The software automatically searches for the nearest WatchBP device when the program is launched. If the device is
not located, confirm that the Bluetooth switch on the WatchBP Office is set to the ON position.
33
EN
Rechargeable battery and power adaptor
Rechargeable Battery
Using a power adaptor
WatchBP Office features a built-in, rechargeable
Ni-MH battery pack that delivers up to 400~500
measurement cycles. The battery can be recharged
between use with the provided power adaptor.
Please use only the Microlife adaptor (DSA-20P-05
Adaptor) supplied with the WatchBP Office to
recharge the device.
1) Plug the adapter cable into the Power Plug in the
WatchBP Office device.
2) Plug the adaptor plug into the wall socket. When
the power adaptor is connected, no battery
power is consumed.
S YS
mmHg
DIA
mmHg
* An orange recharge
indicator means recharge
in progress.
DC 6V 600mA
SYS
mmHg
DIA
mmHg
34
* A green recharge
indicator means recharge
is completed.
DC 6V 600mA
Troubleshooting
Problem
Possible cause
How to make correction
No power(No LCD display) Power supply is not
Plug power supply into wall socket.
properly plugged
Battery is fully discharged Recharge the rechargeable battery by plugging in
the power supply.
Cuff does not inflate
Loose connection of the
Make sure the tube of the cuff is securely
properly
tube
connected to the device.
Leakage of the tube /
Check for cracks on the tube or the bladder. Please
bladder
contact Microlife customer service for this issue.
Hide, pressure, or pause Wireless option is ON
The device can not be operated by the Start/Stop
interval can not be set
and M Button when the Bluetooth switch is in the
ON position. Please switch off the Bluetooth or use
Unable to take
the included software to control the device.
measurement
No result displayed
between measurements
Cannot access device via
computer
Device is in
«AUSCULTATION» mode
or the Hide function is
activated
Bluetooth software not
installed
Disable “Hide” function, or use «1st VISIT» /
«FOLLOW-UP» mode to measure the blood
pressure.
Make sure the Bluetooth software provided with
the device is installed on the computer.
35
EN
Error messages
If an error occurs during measurement, the
measurement is interrupted and an error
message «Err» is displayed.
• Please contact your local
Microlife service center if
the error persists.
• If you think the results
are unusual, please read
through the information
in this instruction manual
carefully.
36
Error
Description
Potential cause and
remedy
«Err 1»
Signal too
weak
The pulse signals
on the cuff are too
weak. Re-position the
cuff and repeat the
measurement.
«Err 2»
Error signal
During the
measurement,
error signals were
detected by the cuff,
caused for instance by
movement or muscle
tension. Repeat the
measurement, keeping
your arm still.
«Err 3»
No pressure
in the cuff
An adequate pressure
cannot be generated
in the cuff. A leak
may have occurred.
Replace the batteries if
necessary. Repeat the
measurement.
«Err 5»
Abnormal
result
The measuring signals
are inaccurate and no
result can therefore
be displayed. Read
through the checklist
for performing reliable
measurements and
then repeat the
measurement.
«HI»
Pulse or cuff
pressure too
high
The pressure in the
cuff is too high (over
300 mmHg) OR the
pulse is too high
(over 200 beats per
minute). Relax for 5
minutes and repeat the
measurement.
«LO»
Pulse too
low
The pulse is too low
(less than 40 beats per
minute). Repeat the
measurement.
37
EN
Safety, care, accuracy test and disposal
Safety and protection
This device may be used only for the purpose
described in this booklet. The device comprises of
sensitive components and must be treated with
caution. The manufacturer cannot be held liable for
damage caused by incorrect application.
• Ensure that children do not use the device
unsupervised; some parts are small enough to be
swallowed.
Observe the storage and operating conditions
described in the “Technical specifications” section
of this manual.
Protect the device from water and moisture
Protect the device from direct sunlight
Protect the device from extreme heat and cold
•
• Do not use the device if you think it is damaged or
Avoid proximity to electromagnetic fields, such
as those produced by mobile phones
• Read the further safety instructions in the
Never open device
• Do not connect the device to a computer until
Protect device from impact and drops
Only activate the pump when cuff is installed.
if anything appears unusual.
individual sections of the instruction manual.
prompted to do so by the computer software.
38
Device care
Cleaning the cuff
Clean the device with a soft, dry cloth.
DO NOT wash the cuff. DO NOT iron the cuff cover.
Do not wash the cuff!
AU SC
ULT
LLO
1st FO
W UP
IN
Do not iron the cuff!
R VA
7
L
SU
ES
P R c.
se
TE
RE
Accuracy test
We recommend the WatchBP Office device to
be tested for accuracy every 2 years or after
mechanical impact (e.g. being dropped). Please
contact Microlife to arrange for an accuracy test.
Disposal
Batteries and electronic instruments must
be disposed of in accordance with the locally
applicable regulations, and not as domestic
waste.
39
EN
Technical specifications
Operation
temperature/humidity: 10 - 40 °C / 50 - 104 °F
Storage temperature/
humidity:
Weight:
•
• -20 - +50 °C / -4 - +122 °F
• 15 - 90 % relative maximum humidity
• 1080 g (including rechargeable
battery pack)
Dimensions:
Measuring method:
• 200 x 125 x 90 mm
• Oscillometric, corresponding to
•
• IEC60601-1 General requirement for
Reference to Standards: EN 1060-1 /-3, NIBP-requirements
safety
• IEC60601-1-2 Requirements for EMC
• EN1060-4, NIBP clinical investigation
• ANSI/AAMI SP10, NIBP requirements
• Bluetooth system to V2.0
• FCC part15C
Korotkoff
Measurement range:
Cuff pressure display:
• 30 - 280 mmHg – blood pressure
• 40 - 200 beats per minute – pulse
• Range: 0 - 299 mmHg
• Resolution: 1 mmHg
• Static accuracy: pressure within ±3
mmHg
• Pulse accuracy: ±5 % of the readout
value
Voltage source:
• Rechargeable battery pack;
4.8V C3500 mAh
• Mains adapter DC 7.5V, 2 A
40
Microlife reserves the right to alter technical
specfications without prior written notice.
Guarantee card
This device is covered by a two-year
guarantee and accessories are cover by
a one-year guarantee from the date of
Name:
Address:
purchase. This guarantee is valid only
on presentation of the guarantee card
Date:
completed by the owner confirming date of
Telephone:
purchase or purchase receipt.
Product: WatchBP Office
Product Number: Twin200
Serial Number:
Date:
Email:
Gelijktijdige metingen aan
beide armen en auscultatieve
functie voor nauwkeurige
meting van de bloeddruk.
Gebruiksaanwijzing
NL
43
WatchBP Office combineert de voordelen van een automatische bloeddrukmeter en
een hybride sfygmomanometer en is ontworpen voor het eenvoudig, nauwkeurig
en betrouwbaar meten van de bloeddruk volgens aanbevolen richtlijnen van de
European Society of Hypertension (ESH), de American Heart Association (AHA) en de
Wereldgezondheidsorganisatie (WHO)1.
1
O’Brien E, Asmar R, Beilin L, Imai Y, et al. European Society of Hypertension recommendations for conventional, ambulatory and home blood pressure
measurement. European Society of Hypertension Working Group on Blood Pressure Deviceing. J Hypertens 2003;21:821-848.
Inhoudsopgave
Productomschrijving
Namen van onderdelen en display................. 46-47
Componenten en accessoires......................... 48-49
Voordat u de WatchBP Office gebruikt
De juiste manchet kiezen en aanbrengen...... 50-51
Drie bedieningsmodi
Modus «AUSCULTATION» (AUSCULTATIE)............... 52
Modus «1st VISIT» (1e BEZOEK)....................... 53-54
Modus «FOLLOW-UP» (FOLLOW-UP)...................... 55
Metingen doen met WatchBP Office
Modus «AUSCULTATION» (AUSCULTATIE)......... 56-57
Modus «1st VISIT» (1e BEZOEK)....................... 58-60
Modus «FOLLOW-UP» (FOLLOW-UP).................61-63
Speciale functies
Meetwaarden verbergen...................................... 64
Gemiddelde arteriële druk en polsdruk . ............. 65
Minder dan drie metingen doen .......................... 66
De aftelroutine van 60 seconden overslaan......... 66
De opblaasdruk instellen...................................... 67
Meetintervallen instellen..................................... 67
Metingen bekijken
Modus «AUSCULTATION» (AUSCULTATIE) .............. 68
Modus «1st VISIT» (1e BEZOEK) en
«FOLLOW-UP» (FOLLOW-UP)........................... 68-69
De WatchBP Office draadloos gebruiken
De Bluetooth-ontvanger instellen...................70-71
Het softwareprogramma installeren.................... 72
Het apparaat draadloos gebruiken .................72-73
Aanhangsel
Oplaadbare batterij en voedingsadapter ............ 74
Problemen oplossen............................................. 75
Foutmeldingen................................................76-77
Veiligheid, verzorging, nauwkeurigheidstest
en verwijderen.................................................78-79
Technische gegevens............................................ 80
NL
Productomschrijving
Namen van onderdelen
Aansluiting voor
manchet (R)
L
I/O-schakelaar
Bluetooth-schakelaar
Aansluiting voor adapter
Batterijvak
DC 6V 600mA
DC 6V 600mA
R
Aansluiting voor
manchet (L)
SYS
mmHg
DIA
mmHg
Laadindicator
Display
M-knop (geheugen)
SYS
mmHg
DIA
mmHg
PUL
/min
Modusschakelaar
INTERVAL
L/R
Start/Stop-knop
46
3 sec.
3 sec.
HIDE
7 sec.
PRESSURE
AUSCULT 1st FOLLOW UP
7 sec.
Display
Gemiddelde arteriële druk (MAP)
Polsdruk (PP)
Aanduiding modus
Externe voeding
Waarde voor linkerarm
Systolische waarde
Diastolische waarde
Bluetooth
Steun en herinnering armpositie
Batterijsymbool
Display verbergen
Geheugenmodus
Polsfrequentie
Waarde voor rechterarm
Systolische waarde
Diastolische waarde
Hartslag
L/R-manchet
47
NL
WatchBP Office en onderdelen
Bluetooth Receiver
Driver
SYS g
mmH
DIA
mmHg
Install CD
SYS g
mmH
DIA
mmHg
PUL
/min
INTER VAL
3 sec.
PRESS
URE
7 sec.
L/R
3 sec.
AUSC ULT
HIDE
W
1st FOLLO
UP
7 sec.
WatchBP Office
bloeddrukmeter (1 stk.)
AC-adapter X1 (ingang:
100-240V~50/60Hz 0,7A
uitgang: +7,5V 2A)
Bluetooth-ontvanger X1
Installatie-cd X1
Quick start guide
How to take blood presssure measurement in three different modes
1 Plug cuff connector
«1st VISIT» Mode (Double arm)
ght
i
All R
«AUSCULTATION» Mode
(Single arm)
Flip over the quick start guide to see ‘Product description’.
68
y, 1024x7
Memor
port, 40MB
z CPU. 256MB
free USB
s: 550MH
drive, 1
ement
Vista.
Requir
/ XP /
color, CD-ROM
System
s 2000
ion, 256
ft Window
pixel resolut space, Microso
disk
free hard
WatchBP Office softwarecd X1
Simultaneous
dual-arm
Press Start/Stop
button to begin a
measurement
and
measurement
Note bloodfor
auscultatory function
presure using
accurate in-officeauscultatory
blood
method
pressure measurement.
Place the stethoscope on
the hollow of the elbow,
over the brachial artery
3 Switch the mode
Install CD
48
An averaged result will
be displayed after three
consecutive measurments
Press Start/Stop
button to begin a
measurement
«FOLLOW-UP» Mode (Single arm)
2 Turn on the device
.
ration
1.0.2
Version
©2008 Microlife Corpo
Office
d.
rve
ese
sR
in the cuff socket
Analyzer
WatchBP
.4
Instruction Manual
EN
M-formaat (22cm~32cm) X2
L-formaat (32cm~42cm) X2
Handleiding X1
Snelstartgids X1
1
Manchetten
M (Medium)
22 - 32 cm
Met luchtslang 130 cm
L (Large)
32 - 42 cm
Met luchtslang 130 cm
* Neem voor het aanschaffen van de manchetten contact op met Microlife of diens distributeur.
49
NL
Voordat u de WatchBP Office gebruikt
De juiste manchet kiezen
De manchet correct aanbrengen
De WatchBP Office wordt geleverd met twee
manchetmaten: Medium (middelgroot) en Large
(groot). Kies de manchetgrootte die het beste past bij
de omtrek van de bovenarm van de patiënt.
1) Houd de manchet zodanig boven de linker- of
rechter bovenarm dat de luchtslang en de
slagaderpijl naar de onderarm wijzen.
M (Medium)
22 - 32 cm
2) Plaats de manchet op de arm. Let op dat de
onderrand van de manchet zich ongeveer 2 tot
3 cm boven de elleboog bevindt.
M is voor de meeste mensen de juiste maat.
L (Large)
32 - 42 cm
Sluit de manchet aan op het toestel door de
manchetstekker in de manchetaansluiting te steken.
R
R
50
2–3cm
3) Leg de manchet om de arm en maak deze vast.
4) Laat een beetje speling tussen de arm en de
manchet. De patiënt moet twee vingers tussen
de arm en de manchet kunnen steken. De
beweging van de arm mag niet door kleding
worden belemmerd. Verwijder alle kleding die
de arm waarbij de meting wordt uitgevoerd,
bedekt of in zijn bewegingsvrijheid beperkt.
5) Als een manchet niet goed past, kan dit tot
onjuiste bloeddrukmetingen leiden. Gebruik
een andere manchetgrootte indien de
bereikaanduiding aan het einde van de manchet
niet binnen het bereik valt dat door de strepen
wordt aangegeven.
6) Volg dezelfde stappen bij de andere arm indien
er bij twee armen moet worden gemeten.
* De bereikaanduiding van de
manchet moet binnen dit bereik
vallen.
51
NL
Drie bedieningsmodi
SY S
mmHg
Kies de gewenste bedieningsmodus
«AUSCULTATION» (AUSCULTATIE)
DIA
De WatchBP Office kent drie handige
mmHg
bedieningsmodi: «AUSCULTATION» (AUSCULTATIE),
«1st VISIT» (1e BEZOEK) en «FOLLOW-UP»
(FOLLOWSY S
mmHg
UP). Gebruik de modusschakelaar aan de zijkant van
DIA
het apparaat
PULom de gewenste modus
mmHg te kiezen.
Kies de modus «AUSCULTATION» voor het meten
van de bloeddruk bij patiënten met aritmie en om
zonodig te controleren of een patiënt geschikt is
voor de oscillometrische methode zoals wordt
gebruikt door de digitale bloeddrukmonitor.
/min
INTERVAL
L/R
3 sec.
3 sec.
HIDE
7 sec.
1st FOLLOW UP
52
PRESSURE
AUSCULT 1st FOLLOW UP
7 sec.
AUSCULT 1st FOLLOW UP
AUSCULT 1st FOLLOW UP
AUSCULT 1st FOLLOW UP
AUSCULT 1st FOL
«1st VISIT» (1e BEZOEK)
Gelijktijdige metingen bij beide armen
Kies de modus «1st VISIT» om een volledig
automatische drievoudige bloeddrukmeting aan
beide armen uit te voeren volgens door de ESH/
AHA aanbevolen richtlijnen wanneer een patiënt
de praktijk voor het eerst bezoekt.
In de modus «1st VISIT» meet de WatchBP Office
de bloeddruk aan beide armen tegelijk, zodat de
meest geschikte arm voor het doen van metingen
kan worden bepaald en mogelijke cardiovasculaire
risico's in kaart kunnen worden gebracht.
FOLLOW UP
AUSCULT 1st FOLLOW UP
AUSCULT 1st FOLLOW UP
53
NL
Drie bedieningsmodi (vervolgd)
Automatische drievoudige meting
De juiste arm voor de meting bepalen
In de modus «1st VISIT» voert de WatchBP Office
standaard automatisch drie achtereenvolgende
metingen uit met tussenpozen van 1 minuut*. Van
deze drie metingen wordt het gemiddelde genomen
en geeft zo de bloeddrukmeting van het eerste
bezoek.
Indien het meetresultaat bij alle drie de metingen
aan twee armen meer dan 20mmHg systolisch
of 10mmHg diastolische verschilt, dan geeft het
apparaat de arm waarbij de hoogste waarde werd
gemeten, aan met een knipperende L of R.
1
60 sec.
2
3
60 sec.
* De gebruiker kan handmatig een meetinterval
instellen van 15, 30, 45 of 60 seconden in de modi 1st
Visit en Follow-up. (Zie de speciale functies, bladzijde
24 “Meetintervallen instellen”).
54
De arm met de hogere waarde kan het beste worden
gebruikt voor toekomstige metingen.
W UP
«FOLLOW-UP»
Automatische drievoudige meting
Kies de modus «FOLLOW-UP» om een volledig
automatische drievoudige meting te doen bij de arm
die de voorkeur heeft. Dit volgens de door de ESH/
AHA aanbevolen richtlijnen voor bloeddrukmeting
tijdens follow-upbezoeken.
In de modus «FOLLOW-UP» voert de WatchBP Office
standaard automatisch drie achtereenvolgende
metingen uit met tussenpozen van 1 minuut. Van
het resultaat van deze drie metingen wordt het
gemiddelde genomen om een bloeddrukmeting
van het vervolgbezoek te verkrijgen.
1
60 sec.
2
3
60 sec.
* De gebruiker kan handmatig een meetinterval
AUSCULT 1st FOLLOW UP
instellen van 15, 30, 45 of 60 seconden in de modi 1st
Visit en Follow-up. (Zie de speciale functies, bladzijde
24 “Meetintervallen instellen”).
55
NL
Meten met de WatchBP Office
«AUSCULTATION» (AUSCULTATIE)
1) Inschakelen – Schakel het apparaat in door
de I/O-schakelaar aan de achterzijde van het
apparaat in de stand ON te zetten. Controleer
of de Bluetooth-schakelaar zich in de uitstand
bevindt.
600mA
DC 6V 600mA
2) Breng de manchet aan* – Breng een manchet
correct aan rondom de arm die de voorkeur heeft.
* Meer visuele aanwijzingen zijn te vinden op de manchet.
56
3) Schakel de modus «AUSCULTATION» in. – Schuif
de modusschakelaar in de stand «AUSCULT».
AUSCULT 1st FOLLOW UP
AUSCULT 1st FO
4) Stel de opblaasdruk indien nodig bij – De
opblaasdruk kan handmatig tussen 140 en
280 mmHg worden ingesteld door de Start/
Stop-knop gedurende 7 seconden ingedrukt te
houden.
Druk op de knop M om de druk aan te passen en
druk op Start/Stop om de instelling op te slaan.
Houd de knop gedurende
7 seconden ingedrukt...
6) Noteren – Noteer de systolische en diastolische
waarden op dezelfde manier als bij metingen
met een sfygmomanometer.
* De standaard opblaasdruk bedraagt 180 mmHg.
* Wanneer het apparaat in de stand-by-modus staat,
wordt de huidige vooraf ingestelde druk aangegeven op
het scherm.
5) Het opblazen starten – Druk op de Start/Stopknop om te beginnen met het opblazen van de
manchet.
7) Apparaat instellen op de stand-by-modus –
Het apparaat kan stand-by worden gezet door
op de Start/Stop-knop te drukken. Het apparaat
schakelt automatisch naar de wachtmodus
indien er gedurende vijf minuten geen knop
wordt ingedrukt.
Stand-by-modus
57
NL
Meten met de WatchBP Office (vervolg)
«1st VISIT»
1) Inschakelen – Schakel het apparaat in door
de I/O-schakelaar aan de achterzijde van het
apparaat in de stand ON te zetten. Controleer
of de Bluetooth-schakelaar zich in de uitstand
bevindt.
3) Ga naar de modus «1st VISIT» – Schuif de
modusschakelaar in de stand «1st VISIT».
AUSCULT 1st FOLLOW UP
600mA
AUSCULT 1st FOLLOW UP
AUSCULT 1st
DC 6V 600mA
2) Breng de manchet aan – Breng rondom beide
armen van de patiënt een manchet aan.
*
58
Meer visuele aanwijzingen zijn te vinden op de manchet.
4) Stel de opblaasdruk indien nodig bij – De
opblaasdruk kan handmatig tussen 140 en
280 mmHg worden ingesteld door de Start/
Stop-knop gedurende 7 seconden ingedrukt te
houden.
Druk op de knop M om de druk aan te passen en
druk op Start/Stop om de instelling op te slaan.
Houd de knop gedurende
7 seconden ingedrukt...
5) Start de meting – Druk op de Start/Stop-knop
om de meetcyclus te starten.
* De eerste meting wordt voorafgegaan door een
aftelroutine die 60 seconden duurt.
60 seconden
aftellen...
* De standaard opblaasdruk bedraagt 180 mmHg.
* Het apparaat laat de manchet leeglopen en pompt
weer meer lucht in de manchet indien de bloeddruk van
de patiënt hoger is dan de opblaasinstelling van het
apparaat.
* Wanneer het apparaat in de stand-by-modus staat,
wordt de huidige vooraf ingestelde druk aangegeven op
het scherm.
6) Drie opeenvolgende metingen – Het apparaat
voert drie opeenvolgende metingen uit met
pauzes van 1 minuut tussen de metingen.
1
60
seconden
2
3
60
seconden
59
NL
Meten met de WatchBP Office (vervolg)
7) De gemiddelde meetwaarde bekijken – Alleen
de gemiddelde meetwaarde wordt getoond
nadat de drie metingen zijn voltooid.
8) Alle metingen bekijken – De resultaten
van de drie afzonderlijke metingen kunnen
worden bekeken door op de knop M te drukken.
Druk eenmaal op de knop M om de eerste
meetwaarde te zien. Druk nogmaals op de knop
M om de andere meetwaarde(n) te zien.
1
2
* Als de metingen voltooid zijn, knippert de
bloeddrukwaarde die hoort bij de arm met de hoogste
waarde ononderbroken gedurende 5 seconden. Indien
er geen groot verschil is (20mmHg bij systolische
bloeddruk of 10 mmHg bij diastolische bloeddruk, of
allebei) tussen de beide armen, knippert geen van de
meetwaarden.
60
3
* WatchBP Office slaat alleen de laatste drie metingen op
die zijn voltooid in de modi «1st VISIT» en «FOLLOW-UP».
Om de bloeddrukwaarde voor latere raadpleging op te
slaan, dient u de bijgevoegde WatchBP Office-software
te gebruiken.
«FOLLOW-UP»
1) Inschakelen – Schakel het apparaat in door
de I/O-schakelaar aan de achterzijde van het
apparaat in de stand ON te zetten, en controleer
of de Bluetooth-schakelaar in de uitstand staat.
DC 6V 600mA
DC 6V 600mA
AUSCULT 1st FOLLOW UP
3) Kies de modus «FOLLOW-UP» – Zet de
modusschakelaar in de stand «FOLLOW-UP».
AUSCULT 1st FOLLOW UP
2) Breng de manchet aan – Breng een manchet
aan rondom de arm die de voorkeur heeft.
AUSCULT 1st FOLLOW UP
4) Kies de manchet die opgeblazen moet
worden – Stel het apparaat zodanig in, dat alleen
de gewenste manchet (rechts of links) wordt
opgeblazen. Druk gedurende 3 seconden op de
knop M.
Houd de knop gedurende
3 seconden ingedrukt...
* Meer visuele aanwijzingen zijn te vinden op de manchet.
61
NL
Meten met de WatchBP Office (vervolg)
5) Druk op de knop M om te wisselen tussen de
rechter (R) en de linker (L) manchet. Druk op de
Start/Stop-knop om de instelling op te slaan.
6) Verander de opblaasdruk – De opblaasdruk
kan handmatig tussen 140 en 280 mmHg
worden ingesteld door de knop Start/Stop
gedurende 7 seconden in te drukken.
Druk op de knop M om de druk aan te passen en
druk nogmaals op Start/Stop om de instelling
op te slaan.
62
Druk gedurende 7
seconden op de knop...
7) Start de metingen – Druk op de Start/Stop-knop
om de meetcyclus te starten.
60 seconden
aftellen...
8) Drie opeenvolgende metingen – Het apparaat
voert drie opeenvolgende metingen uit met
pauzes van 1 minuut tussen de metingen.
1
60
seconden
2
60
seconden
3
9) De gemiddelde meetwaarde bekijken – Alleen
de gemiddelde meetwaarde wordt getoond
nadat de drie metingen zijn voltooid.
10) Alle metingen bekijken – De resultaten
van de drie afzonderlijke metingen kunnen
worden bekeken door op de knop M te drukken.
Druk eenmaal op de knop M om de eerste
metingwaarde te zien. Druk nogmaals op de
knop M om de andere meetwaarde(n) te zien.
1
2
3
* WatchBP Office slaat alleen de laatste drie metingen op
die zijn voltooid in de modi «1st VISIT» en «FOLLOW-UP».
Om de bloeddrukwaarde voor latere raadpleging op te
slaan, dient u de bijgevoegde WatchBP Office-software
te gebruiken.
63
NL
Speciale functies
Meetwaarden verbergen
De WatchBP Office kent een verbergfunctie
ter vermijding van onnodig verhoogde
bloeddrukwaarden bij patiënten vanwege
nervositeit bij zichtbare bloeddrukmetingen.
* Deze functie is alleen beschikbaar in de modus
FOLLOW-UP.
1) Schakel de functie «Hide» (Verbergen) in –
Druk de knop M gedurende 7 seconden in.
Druk gedurende 7
seconden op de knop...
2) Kies ON of OFF – Druk nogmaals op de knop M
om de verbergfunctie aan (ON) of uit (OFF) te
zetten.
* Wanneer de functie
«Hide» ingeschakeld is,
wordt het aftellen tussen
elke twee metingen
en het Hide-pictogram
weergegeven.
* Vergewis u ervan dat de
Bluetooth-schakelaar UIT
staat (OFF), want anders
kan de functie «Hide» niet
worden ingesteld.
64
3) Bevestigen – Druk op Start/Stop om de
instelling te bevestigen.
* De instelling "Hide" in de modus «1st VISIT» staat
standaard op ON en kan niet op OFF worden gezet.
MAP (gemiddelde arteriële druk)
PP (polsdruk)
De WatchBP Office meet de echte gemiddelde
arteriële druk (mean arterial pressure, MAP) van de
patiënt. Elke meting bevat de berekening van een
enkele MAP-waarde. De gemiddelde meting toont
de gemiddelde MAP-waarde. In de geheugenmodus
wordt de MAP-waarde elke 5 seconden samen met
de systolische/diastolische druk getoond.
De WatchBP Office meet de polsdruk (pulse pressure,
PP) van de patiënt: polsdruk = systolische druk diastolische druk. Elke meting bevat de berekening
van een enkele PP-waarde. De gemiddelde
meting toont de gemiddelde PP-waarde. In de
geheugenmodus wordt de PP-waarde elke 5
seconden samen met de systolische/diastolische
druk getoond.
65
NL
Speciale functies (vervolg)
Minder dan drie metingen doen
De aftelroutine van 60 seconden overslaan
Alleen in de modus «FOLLOW-UP» kan de
meetcyclus elk gewenst moment worden gestopt
door op de Start/Stop-knop te drukken. Door op
de Start/Stop-knop te drukken, gaat het apparaat
naar de stand-by-modus, en worden de resterende
metingen in de cyclus geannuleerd. Gegevens van
de voltooide metingen kunnen worden bekeken
door op de knop M te drukken.
In de modus «1st VISIT» en «FOLLOW-UP» kan
de aftelroutine van 60 seconden die elke meting
voorafgaat, worden overgeslagen door op de Start/
Stop-knop te drukken. Als er op de Start/Stop-knop
wordt gedrukt, begint het apparaat onmiddellijk met
de volgende meting.
De aftelroutine van 60
seconden wordt overgeslagen
en de meting begint.
De resterende
metingen kunnen
elk gewenst moment
tijdens de meetcyclus
worden geannuleerd.
* Het apparaat kan in de stand-by-modus worden gezet
door na voltooiing van de metingen op de Start/Stopknop te drukken. Het apparaat gaat automatisch naar
de stand-by-modus als er gedurende 5 minuten geen
knop wordt ingedrukt.
Stand-by-modus
66
De opblaasdruk instellen
Meetintervallen instellen
De opblaasdruk kan met de hand tussen 140 en 280
mmHg worden ingesteld door de Start/Stop-knop
gedurende 7 seconden in te drukken.
In de modi 1st Visit en Follow-up kunnen de
meetintervallen van 15, 30, 45 of 60 seconden
handmatig worden ingesteld.
Druk gedurende 7
seconden op de knop...
Druk op de knop M om de druk aan te passen en druk
nogmaals op Start/Stop om de instelling op te slaan.
1) Druk gedurende 3 seconden op de Start/Stopknop.
Druk gedurende 3
seconden op de knop...
2) Druk op de knop M om de meetinterval aan te
passen, en druk vervolgens ter bevestiging op de
Start/Stop-knop; de meter keert terug naar de
stand-by-modus.
15 30
45 60
67
NL
Metingen bekijken
«AUSCULTATION» (AUSCULTATIE)
Modus «1st VISIT» en «FOLLOW-UP»
In de modus «AUSCULTATION» dient de WatchBP
Office bloeddrukmeter alleen als drukmeter. Er
worden dan geen oscillometrische metingen gedaan
en de systolische en diastolische waarden moeten
worden onthouden.
1) Bedien de modusschakelaar – De knop M kan
worden ingedrukt in ofwel de modus «1st VISIT»
of «FOLLOW-UP» om de laatste serie drievoudige
metingen op te roepen.
AUSCULT 1st FOLLOW UP
Memory
68
AUSCULT 1st FOLLOW UP
AUSCULT 1st FOLLOW UP
2) Het gemiddelde van alle metingen bekijken –
Eerst wordt een “A” getoond, gevolgd door het
gemiddelde van alle metingen die in de laatste
meetreeks zijn gedaan.
3) MAP- en PP-waarden bekijken – Tien seconden
na het tonen van de gemiddelde bloeddruk,
toont het apparaat de waarden van de polsdruk
(PP) en de gemiddelde arteriële druk (MAP).
5) Waarden van de derde meting (inclusief
PP- en MAP-waarden) worden op het display
weergegeven in de volgorde die in stap 3 is
vermeld.
3
10
seconden...
4) Afzonderlijke meetwaarden bekijken – Druk
nogmaals op de knop M om afzonderlijke
meetwaarden te bekijken. Op het display
knippert een “3”, waarmee de derde meting
wordt aangeduid.
10
seconden...
6) Druk op de knop M om de waarden van de
tweede en eerste meting uit de laatste voltooide
serie metingen op te halen.
2
1
69
NL
De WatchBP Office draadloos gebruiken
De WatchBP Office kan draadloos via Bluetooth
worden bediend met behulp van de bijgesloten
WatchBP Office-software. Volg de onderstaande
stappen om een draadloze verbinding met een
computer op te zetten.
De Bluetooth-ontvanger instellen
1) Plaats de bijgesloten 'Bluetooth USB Adaptor'cd in de cd-romspeler van de computer. Klik op
«setup.exe» in de cd-rom-directory.
2) Er wordt een installatievenster getoond. Volg de
aanwijzingen op het scherm.
AU SC
ULT
LLO
1st FO
W UP
IN
R VA
7
L
SU
ES
P R c.
se
TE
RE
Bluetooth Receiver
Driver
* Voordat u de WatchBP Office-software installeert, moet
eerst de driversoftware voor de Bluetooth-ontvanger
op de computer worden geïnstalleerd.
* De maximale afstand tussen de WatchBP Office en de
computer bedraagt 10 meter.
70
Install CD
Instruction
op de achterzijde van het apparaat in de stand
“ON” te zetten. Het Bluetooth-pictogram
knippert op het display om aan te geven dat er
een verbinding is.
3) Steek de Bluetooth-ontvanger in de usbpoort van de computer wanneer het
installatieprogramma hierom vraagt.
4) Start de computer opnieuw op nadat de
installatieprocedure is voltooid.
* Kies een usb-poort en let erop dat u deze zelfde poort
ook in de toekomst steeds gebruikt.
* Gebruik geen andere Bluetooth-ontvanger.
5) Schakel de Bluetooth-functie van het WatchBP
Office-apparaat in door de Bluetooth-schakelaar
Start uw
computer
opnieuw op
* Let op: de WatchBP Office reageert op geen enkele
bediening van een knop of schakelaar zolang de
Bluetooth-functie ingeschakeld is. Dit is gedaan om
onbedoelde onderbrekingen tijdens een meting te
voorkomen.
DC 6V 600mA
DC
71
NL
De WatchBP Office draadloos gebruiken (vervolg)
Het softwareprogramma installeren
Het apparaat draadloos bedienen
1) Plaats de cd in de cd-romspeler van uw computer.
Klik vervolgens op «setup.exe» in de cddirectory.
1) Schakel de Bluetooth-schakelaar in aan de
achterkant van het apparaat.
2) Volg de aanwijzingen die in het installatievenster
op het computerscherm worden getoond.
2) Vergewis u ervan dat de Bluetooth-ontvanger
zich in de juiste positie bevindt en dat het lampje
aan is (indien van toepassing).
3) Als de installatieprocedure voltooid is, dient u de
computer opnieuw op te starten voordat u het
programma voor de eerste keer gebruikt.
3) Start de WatchBP Office-software op uw
computer. Volg deze stappen om de WatchBP
Office vanaf uw computer te bedienen.
WatchBP Analyzer Office
Version 1.0.2.4
Install CD
System Requirements: 550MHz CPU. 256MB Memory, 1024x768
pixel resolution, 256 color, CD-ROM drive, 1 free USB port, 40MB
free hard disk space, Microsoft Windows 2000 / XP / Vista.
72
ed.
serv
©200
s Re
Right
8 Microlif
e Corporation. All
* Systeemeisen: 550MHz
CPU. 256MB geheugen,
resolutie: 1024x768 pixels,
256 kleuren, cd-romspeler,
1 vrije usb-poort, 40MB
vrije schijfruimte, Microsoft
Windows 2000 / XP / Vista.
DC 6V 600mA
Softwarecommando's
Gemiddelde bloeddruk kiezen
Patiënt-ID invoeren
Starten met meting
Bloeddrukmetingen opslaan
De gegevens bekijken
Het spreadsheet afdrukken
De verbinding met het apparaat
verbreken
Het programma sluiten
Klik op «1st VISIT», «FOLLOW-UP»
Invoer Patient ID
Druk op de knop «Measure» (Meten)
Klik op «Save» (Opslaan). De gegevens worden opgeslagen in een
Excel-tabel. De bestandsnaam wordt automatisch aangemaakt in
de volgende indeling: «Patient ID+ WatchBP Office +meetmodus
+ jjjjmmdd.xls».
Ga naar de map waar het bestand is opgeslagen en open het
bijbehorende Excel-bestand.
Klik op de afdrukfunctie in Excel terwijl het betreffende Excelbestand geopend is.
Klik op «Disconnect» (Verbreken) voordat u het programma afsluit
Klik op «Close» (Afsluiten)
* De software zoekt automatisch naar het dichtstbijzijnde WatchBP Office-apparaat wanneer het programma wordt
gestart. Indien het apparaat niet wordt gevonden, dient u te controleren of de Bluetooth-schakelaar op de WatchBP
Office in de stand ON staat.
73
NL
Oplaadbare batterij en voedingsadapter
Oplaadbare batterij
Een voedingsadapter gebruiken
WatchBP Office heeft een ingebouwde, oplaadbare
Ni-MH-batterijset die zo'n 400~500 meetcycli
meegaat. De batterij kan worden opgeladen als de
meegeleverde voedingsadapter wordt gebruikt.
Gebruik alleen de adapter van Microlife (DSA-20P-05
Adapter) die bij de WatchBP Office is geleverd om
het apparaat op te laden.
1) Steek de adapterkabel in de voedingsstekker van
de WatchBP Office.
2) Steek de andere adapterstekker in een
wandcontactdoos. Als de voedingsadapter is
aangesloten, wordt de batterij niet gebruikt.
S YS
mmHg
DIA
mmHg
* Een oranje laadlampje
geeft aan dat het
apparaat wordt
opgeladen.
DC 6V 600mA
SYS
mmHg
DIA
mmHg
74
* Een groen laadlampje
geeft aan dat het
opladen is voltooid.
DC 6V 600mA
Problemen oplossen
Probleem
Geen stroom (LCD-display
blanco)
Manchet wordt niet goed
opgeblazen
De interval voor verbergen,
druk of pauze kan niet
worden ingesteld
Er kan geen meting worden
uitgevoerd
Tussen metingen wordt er
geen resultaat getoond
Mogelijke oorzaak
Oplossing
Voedingsstekker niet correct Voedingsstekker in de wandcontactdoos steken.
ingestoken
Batterij is helemaal leeg
Laad de oplaadbare batterij op door de voedingsstekker
in te steken.
De slang is niet goed
Zorg dat de slang van de manchet stevig op het apparaat
bevestigd
is aangesloten.
Lekken van de slang of van
Kijk of er scheurtjes in de slang of in de blaas
de blaas
zitten. Neem hierover contact op met de afdeling
klantenservice van Microlife.
De draadloze functie is
Het apparaat kan niet met de Start/Stop-knop en de
ingeschakeld
M-knop worden bediend als de Bluetooth-schakelaar in
de stand ON staat. Schakel Bluetooth uit of gebruik de
meegeleverde software om het apparaat te bedienen.
Het apparaat is in de
modus AUSCULTATION,
of de verbergfunctie is
ingeschakeld
Het apparaat kan niet via de Bluetooth-software niet
computer worden benaderd geïnstalleerd
Schakel de verbergfunctie (Hide) uit, of gebruik de
modus «1st VISIT» of «FOLLOW-UP» om de bloeddruk te
meten.
Vergewis u ervan dat de Bluetooth-software die bij het
apparaat is geleverd, op de computer is geïnstalleerd.
75
NL
Foutmeldingen
Indien er tijdens het meten een fout optreedt,
wordt de meting onderbroken en wordt de
foutmelding «Err» getoond.
• Neem contact op met het
plaatselijke servicecentrum
van Microlife als het
probleem aanhoudt.
• Bent u van mening dat de
resultaten ongewoon zijn,
lees deze handleiding dan
aandachtig door.
76
Fout
Omschrijving
Mogelijke oorzaak en
oplossing
«Err 1»
Signaal te
zwak
De trilsignalen van de
manchet zijn te zwak.
Verander de positie van
de manchet en herhaal
de meting.
«Err 2»
Foutsignaal
Tijdens de meting
zijn foutsignalen
gedetecteerd door de
manchet, bijvoorbeeld
als gevolg van een
beweging of het
aanspannen van een
spier. Herhaal de
beweging, en zorg dat de
arm stil wordt gehouden.
«Err 3»
Geen druk in
de manchet
Er kan geen juiste druk
in de manchet worden
opgebouwd. Wellicht is
er sprake van een lek.
Vervang zonodig de
batterijen. Herhaal de
meting.
«Err 5»
Abnormaal
resultaat
De meetsignalen zijn
niet accuraat, waardoor
er geen resultaat kan
worden getoond.
Raadpleeg de checklist
voor het doen van
betrouwbare metingen
en herhaal de meting.
«HI»
Polsfrequentie of manchetdruk te
hoog
De druk in de manchet
is te hoog (meer dan
300 mmHg) OF de
polsfrequentie is te
hoog (meer dan 200
slagen per minuut).
Laat de patiënt zich 5
minuten ontspannen
en herhaal daarna de
meting.
«LO»
Polsfrequentie te laag
De polsfrequentie is te
laag (minder dan 40
slagen per minuut).
Herhaal de meting.
77
NL
Veiligheid, verzorging, nauwkeurigheidstest en
verwijderen
Veiligheid en bescherming
Dit apparaat mag alleen voor de doeleinden worden
gebruikt die in dit boekje worden genoemd. Het
apparaat bevat gevoelige onderdelen en moet
voorzichtig worden behandeld. De fabrikant kan
niet aansprakelijk worden gesteld voor schade,
veroorzaakt door onjuist gebruik.
• Pas op dat kinderen het apparaat niet zonder
toezicht gebruiken; sommige onderdelen zijn zo
klein dat ze kunnen worden ingeslikt.
• Gebruik de pomp alleen als de manchet is
bevestigd.
• Gebruik het apparaat niet als u denkt dat het
beschadigd is of als u iets ongewoons bespeurt.
Neem de voorschriften voor opslag en gebruik
in acht zoals beschreven onder “Technische
gegevens” in deze handleiding.
Stel het apparaat niet bloot aan water of vocht
Stel het apparaat niet bloot aan rechtstreekse
zonnestraling
Stel het apparaat niet bloot aan extreme hitte
of kou
Houd het apparaat uit de buurt van
elektromagnetische velden, zoals die welke
worden veroorzaakt door mobiele telefoons
• Lees de verdere veiligheidsinstructies in de
Maak het apparaat nooit open
• Sluit het apparaat pas aan op een computer
Stel het apparaat niet bloot aan schokken en
laat het niet vallen
afzonderlijke gedeelten van de handleiding.
wanneer de software hierom vraagt.
78
Verzorging
Reiniging van de manchet
Maak het apparaat schoon met een
zachte, droge doek.
De manchet NIET WASSEN. De hoes van de manchet
NIET strijken.
De manchet niet wassen!
AU SC
ULT
LLO
1st FO
W UP
IN
De manchet niet strijken!
R VA
7
L
SU
ES
P R c.
se
TE
RE
Nauwkeurigheidstest
Wij bevelen aan, de WatchBP Office elke twee jaar
of na een mechanische schok (bijvoorbeeld bij een
val) op nauwkeurigheid te testen. Neem contact
op met Microlife om een nauwkeurigheidstest af te
spreken.
Verwijderen
Batterijen en elektronische instrumenten
moeten worden verwijderd met inachtneming
van de plaatselijk geldende voorschriften, en
mogen niet als huisvuil worden behandeld.
79
NL
Technische gegevens
Bedrijfstemperatuur/
-vochtigheid:
Bewaartemperatuur/
-vochtigheid:
• 10 - 40 °C / 50 - 104 °F
• -20 - +50 °C / -4 - +122 °F
• 15 - 90 % relatieve maximale
vochtigheid
Gewicht:
• 1080 g (inclusief oplaadbare
batterijset)
Afmetingen:
Meetmethode:
Meetbereik:
Weergave
manchetdruk:
• 200 x 125 x 90 mm
• Oscillometrisch, volgens Korotkoff
• 30 - 280 mmHg – bloeddruk
• 40 - 200 slagen per minuut – pols
• Bereik: 0 - 299 mmHg
• Resolutie: 1 mmHg
• Statische nauwkeurigheid: druk
Relevante normen:
• EN 1060-1 /-3, NIBP-vereisten
• IEC60601-1 Algemene vereiste voor
veiligheid
• IEC60601-1-2 Vereisten voor EMC
• EN1060-4, NIBP klinisch onderzoek
• ANSI/AAMI SP10, NIBP-vereisten
• Bluetooth-systeem V2.0
• FCC part15C
binnen ±3 mmHg
• Polsslagnauwkeurigheid: ± 5% van de
uitleeswaarde
Spanningsbron:
• Oplaadbare batterijset;
4,8V C3500 mAh
• Voedingsadapter DC 7,5 V, 2 A
80
Microlife behoudt zich het recht voor, technische
gegevens zonder voorafgaande schriftelijke
mededeling te wijzigen.
Garantiekaart
Voor dit apparaat geldt een garantietermijn
van twee jaar; voor de accessoires
geldt een garantietermijn van een jaar,
Naam:
Adres:
gerekend vanaf de aankoopdatum. Deze
garantie wordt alleen verleend indien de
Datum:
eigenaar de garantiekaart met daarop de
Telefoon:
aankoopdatum, of de garantiekaart samen
met de aankoopbon kan overleggen.
Product: WatchBP Office
Productnummer: Twin200
Serienummer:
Datum:
E-mail:
Medición dual simultánea en
ambos brazos y función de
auscultación para la medición
exacta de la presión arterial
en consulta.
Manual de Instrucciones
ES
83
WatchBP Office combina las ventajas de un tensiómetro automático y un
esfigmomanómetro híbrido y ha sido diseñado para realizar mediciones cómodas, exactas
y fiables de la presión arterial en consulta, siguiendo las directrices recomendadas por la
Sociedad Europea de Hipertensión (SEH), la Asociación Americana del Corazón (AHA), y la
Organización Mundial de la Salud (OMS)1.
1
O’Brien E, Asmar R, Beilin L, Imai Y, y col. Recomendaciones de la Sociedad Europea de Hipertensión para la medición convencional, ambulatoria y casera de
la presión arterial. Sociedad Europea de Hipertensión Grupo de Trabajo en Tensiómetros. J Hypertens 2003;21:821-848.
Índice
Descripción del producto
Denominación de piezas y pantalla................ 86-87
Componentes y accesorios.............................. 88-89
Antes de usar WatchBP Office
Seleccionar y ajustar el brazalete correcto..... 90-91
Tres modos de operación
Modo «AUSCULTATION» (Auscultación) ............... 92
Modo «1st VISIT» (1ª Visita)............................ 93-94
Modo «FOLLOW-UP» (Seguimiento)..................... 95
Tomar mediciones usando WatchBP Office
Modo «AUSCULTATION» (Auscultación) ......... 96-97
Modo «1st VISIT» (1ª Visita) ..........................98-100
Modo «FOLLOW-UP» (Seguimiento) ...........101-103
Funciones especiales
Ocultar valores de medición............................... 104
Presión arterial media y presión del pulso . ....... 105
Tomar menos de tres mediciones ...................... 106
Saltar la cuenta atrás de 60 segundos................ 106
Ajustar la presión de inflado............................... 107
Ajustar los intervalos de medición...................... 107
Ver mediciones
Modo «AUSCULTATION» (Auscultación) ............. 108
Modos «1st VISIT» (1ª Visita) y «FOLLOW-UP»
(Seguimiento) .............................................108-109
Control inalámbrico de WatchBP Office
Configurar el receptor Bluetooth . .............. 110-111
Instalación del programa de software................ 112
Control inalámbrico del aparato . ................112-113
Apéndice
Batería recargable y adaptador de corriente...... 114
Solución de problemas....................................... 115
Mensajes de error....................................... 116-117
Seguridad, cuidado, prueba de precisión y
eliminación..................................................118-119
Especificaciones técnicas.................................... 120
ES
Descripción del producto
Denominación de las piezas
Interruptor de
Encendido/Apagado
Interruptor Bluetooth
Enchufe para adaptador
de c.a.
Compartimento de
batería
L
Enchufe para
brazalete (R)
DC 6V 600mA
DC 6V 600mA
R
Enchufe para
brazalete (L)
SYS
mmHg
DIA
mmHg
Indicador de recarga
Pantalla
Botón M (Memoria)
SYS
mmHg
DIA
mmHg
PUL
/min
Selector de modo
INTERVAL
L/R
Botón Start/Stop
86
3 sec.
3 sec.
HIDE
7 sec.
PRESSURE
AUSCULT 1st FOLLOW UP
7 sec.
Pantalla
Presión arterial media (MAP)
Presión del pulso (PP)
Indicación de modo
Alimentación externa
Bluetooth
Recordatorio de relajación y
posición del brazo
Símbolo de batería
Ocultar pantalla
Modo Memoria
Valor para el brazo
izquierdo
Valor sistólico
Valor diastólico
Valor para el brazo
derecho
Valor sistólico
Valor diastólico
Frecuencia del pulso
Latido cardíaco
Brazalete izquierdo/derecho
(left/right)
87
ES
WatchBP Office y componentes
Bluetooth Receiver
Driver
SYS g
mmH
DIA
mmHg
Install CD
SYS g
mmH
DIA
mmHg
PUL
/min
INTER VAL
3 sec.
PRESS
URE
7 sec.
L/R
3 sec.
AUSC ULT
HIDE
W
1st FOLLO
UP
7 sec.
Adaptador de c.a. X1
(Entrada: 100-240V~50/60Hz
0.7A Salida: +7.5V 2A)
Quick start guide
How to take blood presssure measurement in three different modes
1 Plug cuff connector
«1st VISIT» Mode (Double arm)
ght
i
All R
«AUSCULTATION» Mode
(Single arm)
Flip over the quick start guide to see ‘Product description’.
68
y, 1024x7
Memor
port, 40MB
z CPU. 256MB
free USB
s: 550MH
drive, 1
ement
Vista.
Requir
/ XP /
color, CD-ROM
System
s 2000
ion, 256
ft Window
pixel resolut space, Microso
disk
free hard
CD Software WatchBP
Office X1
Simultaneous
dual-arm
Press Start/Stop
button to begin a
measurement
and
measurement
Note bloodfor
auscultatory function
presure using
accurate in-officeauscultatory
blood
method
pressure measurement.
Place the stethoscope on
the hollow of the elbow,
over the brachial artery
3 Switch the mode
Install CD
88
An averaged result will
be displayed after three
consecutive measurments
Press Start/Stop
button to begin a
measurement
«FOLLOW-UP» Mode (Single arm)
2 Turn on the device
.
ration
1.0.2
Version
©2008 Microlife Corpo
Office
d.
rve
ese
sR
in the cuff socket
Analyzer
WatchBP
.4
Instruction Manual
EN
Tamaño (22cm~32cm) X2
1
Manual de Instrucciones X1
Guía de Inicio Rápido X1
Brazaletes disponibles
M (tamaño medio)
22 - 32 cm (8.7 - 12.6 pulgadas)
Con tubo de aire de 130 cm
L (tamaño grande)
32 - 42 cm (12.6 - 16.5 pulgadas)
Con tubo de aire de 130 cm
* Por favor, contacte con Microlife o su distribuidor si desea adquirir brazaletes.
89
ES
Antes de usar WatchBP Office
Seleccionar el brazalete correcto
Ajuste adecuado del brazalete
WatchBP Office se suministra con dos tamaños de
brazalete distintos: Medio y grande. Seleccione
el tamaño de brazalete que mejor se ajuste a la
circunferencia del brazo del paciente.
M (tamaño medio)
22 - 32 cm (8.75 - 12.5 pulgadas)
M es el tamaño correcto para la mayoría de la gente.
L (tamaño grande)
32-42 cm (12.5-16.5 pulgadas)
Conecte el brazalete al aparato insertando el conector
del brazalete en el enchufe para la conexión del
brazalete.
R
R
90
2–3cm
5) Un ajuste inapropiado del brazalete puede dar
lugar a mediciones incorrectas de la presión
arterial. Use un brazalete de otro tamaño si la
marca de ajuste al final del brazalete no coincide
con el área especificada por las tiras de intervalo
de ajuste.
6) Aplique los mismos pasos en el otro brazo si se
requiere una medición en los dos brazos.
* La marca de ajuste del brazalete
debe quedar situada dentro de
este área.
91
ES
Tres modos de operación
SY S
mmHg
Elija el modo de operación deseado
Modo «AUSCULTATION» (Auscultación)
DIA
El tensiómetro WatchBP Office incluye
tres modos
mmHg
de operación: Los modos «AUSCULTATION»
(Auscultación), «1st VISIT» (1ª Visita)
SY S y «FOLLOWmmHg
UP» (Seguimiento). Use el Selector de Modo en
DIA
el lateral delPULaparato para seleccionar
mmHg el modo
/min
deseado.
Seleccione el modo «AUSCULTACTION»
(Auscultación) para medir la presión arterial de
pacientes con arritmia y, en caso de necesidad,
para confirmar si un paciente es apto para el
método oscilométrico usando un tensiómetro
digital.
INTERVAL
L/R
3 sec.
3 sec.
HIDE
7 sec.
1st FOLLOW UP
92
PRESSURE
AUSCULT 1st FOLLOW UP
7 sec.
AUSCULT 1st FOLLOW UP
AUSCULT 1st FOLLOW UP
AUSCULT 1st FOLLOW UP
AUSCULT 1st FOL
Modo «1st VISIT» (1ª Visita)
Mediciones simultáneas en ambos brazos
Seleccione el modo «1st VISIT» (1ª Visita) para
llevar a cabo una medición triple totalmente
automática en ambos brazos de acuerdo con
los protocolos de medición de la presión arterial
recomendados por la SEH/AHA para la primera
consulta de un paciente.
En el modo «1st VISIT» (1ª Visita), el aparato
WatchBP Office mide la presión arterial del paciente
simultáneamente en ambos brazos, ayudando a
determinar el brazo preferente para la medición y
revelar otros potenciales riesgos cardiovasculares.
FOLLOW UP
AUSCULT 1st FOLLOW UP
AUSCULT 1st FOLLOW UP
93
ES
Tres modos de operación (cont.)
Medición triple automática
Determinar el brazo apropiado para la medición
En el modo «1st VISIT» (1ª Visita), el WatchBP
Office toma automáticamente tres mediciones
consecutivas, por defecto, en intervalos de un
minuto*. A partir de los resultados de estas tres
mediciones es calculado un promedio que constituye
la lectura de la presión arterial en la primera visita.
Si la lectura entre los dos brazos difiere en más
de 20mmHg para el valor sistólico o 10mmHg
para el valor diastólico en las tres mediciones,
el aparato indicará el brazo con el resultado más
elevado mediante una L (izquierda) o R (derecha)
parpadeando.
1
60 sec.
2
3
60 sec.
* El usuario puede ajustar manualmente el intervalo de
medición en 15, 30, 45 ó 60 segundos en los modos
1st VISIT (1ª Visita) y FOLLOW-UP (Seguimiento). (Por
favor, consulte la sección de funciones especiales en
la pág.24 “Ajustar el intervalo de medición”).
94
El brazo con el resultado más elevado debe usarse
como el brazo de medición preferente para futuras
mediciones.
W UP
Modo «FOLLOW-UP» (Seguimiento)
Medición triple automática
Seleccione el modo «FOLLOW-UP» (Seguimiento)
para llevar a cabo una medición triple totalmente
automática en el brazo de medición preferente.
De acuerdo con los protocolos de medición de la
presión arterial recomendada por la SEH/AHA para
mediciones de seguimiento de la presión arterial.
En el modo «FOLLOW-UP» (Seguimiento), el
aparato WatchBP Office toma automáticamente tres
mediciones consecutivas, por defecto, en intervalos
de un minuto. A partir de los resultados de estas
tres mediciones es calculado un promedio que
constituye la lectura de la presión arterial en la visita
de seguimiento.
1
60 sec.
2
3
60 sec.
* El usuario puede ajustar manualmente el intervalo de
AUSCULT 1st FOLLOW UP
medición de 15, 30, 45 ó 60 segundos en los modos
de 1st VISIT (1ª Visita) y FOLLOW-UP (Seguimiento).
(Por favor, consulte la sección de funciones especiales
en la pág.24 “Ajustar el intervalo de medición”).
95
ES
Tomar mediciones usando WatchBP Office
Modo «AUSCULTATION» (Auscultación)
1) Conectar la corriente – Encienda el dispositivo
pulsando el interruptor de Encendido/Apagado
en la parte posterior del aparato colocándolo
en la posición de encendido (ON) y compruebe
que el interruptor Bluetooth se encuentre en la
posición de apagado (OFF).
3) Cambiar al modo «AUSCULTATION»
(Auscultación) – Sitúe el selector de modo en el
modo «AUSCULTATION» (Auscultación) .
AUSCULT 1st FOLLOW UP
600mA
AUSCULT 1st FO
DC 6V 600mA
2) Poner el brazalete* – Fije un brazalete
correctamente al brazo de medición preferente.
*
96
Instrucciones visuales adicionales se encuentran en el
brazalete
4) Ajustar la presión de inflado si es necesario –
La presión de inflado puede ajustarse
manualmente entre 140 y 280 mmHg
manteniendo presionado el botón Start/Stop
durante 7 segundos.
Presione el botón M para ajustar la presión y
presione Start/Stop para guardar el ajuste.
5) Iniciar el inflado – Presione el botón Start/Stop
para iniciar el inflado del brazalete.
Mantener presionado
durante 7 segundos...
6) Tomar nota – Tome nota de los valores sistólicos
y diastólicos del mismo modo que para las
mediciones con el esfigmomanómetro.
* La presión de inflado por defecto es de 180 mmHg.
* Cuando el tensiómetro se encuentra en el modo
stand-by, le recordará la presión ajustada actualmente
visualizando en pantalla el valor ajustado actualmente.
7) Ponga el aparato en el modo Stand by
(espera) – El aparato puede ponerse en el modo
Stand by presionando el botón Start/Stop. El
aparato cambiará automáticamente al modo de
espera al cabo de cinco minutos de inactividad.
Modo Stand by
(espera)
97
ES
Tomar mediciones usando WatchBP Office (cont.)
Modo «1st VISIT» (1ª VISITA)
1) Conectar la corriente – Encienda el dispositivo
pulsando el interruptor de Encendido/Apagado
en la parte posterior del aparato colocándolo en la
posición de encendido (ON) y compruebe que el
interruptor Bluetooth se encuentre en la posición
de apagado (OFF).
3) Cambiar al modo «1st VISIT» (1ª Visita) – Sitúe
el selector en el modo «1st VISIT» (1ª Visita).
AUSCULT 1st FOLLOW UP
600mA
AUSCULT 1st FOLLOW UP
AUSCULT 1st
DC 6V 600mA
2) Poner el brazalete – Ajuste correctamente un
brazalete a cada brazo del paciente.
*
98
Instrucciones visuales adicionales se encuentran en el
brazalete
4) Ajustar la presión de inflado si es necesario –
La presión de inflado puede ajustarse
manualmente entre 140 y 280 mmHg
manteniendo presionado el botón Start/Stop
durante 7 segundos.
Presione el botón M para ajustar la presión y
presione Start/Stop para guardar el ajuste.
Mantener presionado
durante 7 segundos...
5) Iniciar las mediciones – Presione el botón Start/
Stop para iniciar la secuencia de mediciones.
* Antes de la primera medición se produce una cuenta
atrás de 60 segundos.
Cuenta
atrás de 60
segundos...
* La presión de inflado por defecto es de 180 mmHg.
* El tensiómetro inflará más aire al brazalete, si la presión
arterial del paciente es superior a la presión de inflado
ajustada en el aparato.
* Cuando el tensiómetro se encuentra en el modo
stand-by (espera), le recordará la presión ajustada
actualmente visualizando en pantalla el valor ajustado
actualmente.
6) Tres mediciones consecutivas – El tensiómetro
tomará tres mediciones consecutivas con
intervalos de un minuto entre cada medición.
1
60
segundos
2
3
60
segundos
99
ES
Tomar mediciones usando WatchBP Office (cont.)
7) Ver el promedio de medición – Una vez
finalizada la medición triple se visualizará
únicamente el promedio de las lecturas.
8) Ver todas las mediciones – Se puede acceder a
los resultados de las tres mediciones individuales
presionando el botón M. Presione el botón M
una vez para consultar la primera medición.
Vuelva a presionar el botón M para ver las otras
mediciones.
1
2
* Una vez finalizadas las mediciones, la lectura de
presión arterial que corresponda al brazo con los
resultados constantemente más elevados parpadeará
durante 5 segundos. Si no existe ninguna diferencia
significativa (20mmHg para el valor sistólico y 10
mmHg para el valor diastólico o ambos) entre los dos
brazos, no parpadeará ninguna lectura.
100
3
* WatchBP Office memoriza solamente las últimas tres
mediciones realizadas en los modos «1st VISIT» (1ª
Visita) y «FOLLOW-UP» (Seguimiento). Para guardar
la presión arterial del paciente para futuras consultas,
utilice el software WatchBP Office incluido, por favor.
Modo «FOLLOW-UP» (Seguimiento)
1) Conectar la corriente – Encienda el dispositivo
pulsando el interruptor de Encendido/Apagado
en la parte posterior del aparato colocándolo
en la posición de encendido (ON) y compruebe
que el interruptor Bluetooth se encuentre en la
posición de apagado (OFF).
AUSCULT 1st FOLLOW UP
DC 6V 600mA
3) Cambiar al modo «FOLLOW-UP» (Seguimiento)
– Sitúe el selector en el modo «FOLLOW-UP»
(Seguimiento).
AUSCULT 1st FOLLOW UP
AUSCULT 1st FOLLOW UP
DC 6V 600mA
2) Poner el brazalete – Ajuste un brazalete
correctamente al brazo de medición preferente.
* Instrucciones visuales adicionales se encuentran en el
4) Seleccionar el brazalete para el inflado –
Prepare el tensiómetro para inflar sólo el
brazalete indicado (derecho o izquierdo).
Mantenga presionado el botón M durante 3
segundos.
Mantener presionado
durante 3 segundos...
brazalete
101 ES
Tomar mediciones usando WatchBP Office (cont.)
5) Presione el botón M para cambiar entre el
brazalete derecho (R) y el izquierdo(L). Presione
el botón Start/Stop para guardar el ajuste.
6) Cambiar la presión de inflado – La presión de
inflado puede ajustarse manualmente entre
140 y 280 mmHg manteniendo presionado el
botón Start/Stop durante 7 segundos.
Presione el botón M para ajustar la presión y
vuelva a presionar Start/Stop para guardar el
ajuste.
102
Mantener presionado
durante 7 segundos...
7) Iniciar las mediciones – Presione el botón Start/
Stop para iniciar la secuencia de mediciones.
Cuenta
atrás de 60
segundos...
8) Tres mediciones consecutivas – El tensiómetro
tomará tres mediciones consecutivas con
intervalos de un minuto entre cada medición.
1
60
segundos
2
60
segundos
9) Ver el promedio de medición – Una vez
finalizada la medición triple se visualizará
únicamente el promedio de las lecturas.
3
10) Ver todas las mediciones – Se puede acceder a
los resultados de las tres mediciones individuales
presionando el botón M. Presione el botón M
una vez para consultar la primera medición.
Vuelva a presionar el botón M para ver las otras
mediciones.
1
2
3
* WatchBP Office memoriza solamente las últimas tres
mediciones realizadas en los modos «1st VISIT» (1ª
Visita) y «FOLLOW-UP» (Seguimiento). Para memorizar
la presión arterial del paciente para futuras consultas,
por favor, utilice el software WatchBP Office incluido.
103 ES
Funciones especiales
Ocultar valores de medición
El aparato WatchBP Office incluye una función Ocultar
(Hide) para evitar que los pacientes se pongan
nerviosos por la medición visible de la presión arterial
dando resultados innecesariamente elevados.
* Esta característica está disponible únicamente en el
modo Follow-Up (Seguimiento)
1) Activar la función «Hide» (Ocultar) –
manteniendo pulsado el botón M durante 7
segundos.
Mantener presionado
durante 7 segundos...
2) Seleccionar ON u OFF – Vuelva a presionar el
botón M para encender o apagar la función
Ocultar.
* Cuando la función «Hide»
(Ocultar) está activada (ON),
se visualizarán la cuenta
atrás entre cada medición y
el ícono Hide.
*
Compruebe, por favor, que
el interruptor Bluetooth se
encuentra en la posición
de apagado (OFF), en caso
contrario, no se puede activar
la función «Hide» (Ocultar).
104
3) Confirmar – Presione Start/Stop para confirmar
el ajuste.
* En el modo «1st VISIT (1ª Visita), la función “Hide”
(Ocultar) está activada por defecto y no puede
desconectarse.
Presión arterial media (MAP)
Presión del pulso (PP)
El tensiómetro WatchBP Office mide la presión arterial
media (MAP) real del paciente. Cada medición
incluye el cálculo de un solo valor MAP. La medición
promedio visualiza el valor MAP promedio. En el
modo Memoria, el valor MAP se visualiza junto con la
presión sistólica/diastólica una vez cada 5 segundos.
El tensiómetro WatchBP Office mide la presión
del pulso (PP) del paciente: presión del pulso =
presión sistólica - presión diastólica. Cada medición
incluye el cálculo de un solo valor PP. La medición de
promedio visualiza el valor PP promedio. En el modo
Memoria, el valor PP se visualiza junto con la presión
sistólica/diastólica una vez cada 5 segundos.
105 ES
Funciones especiales (cont.)
Tomar menos de tres mediciones
Saltar la cuenta atrás de 60 segundos
En el modo «FOLLOW-UP» (Seguimiento)
solamente, la secuencia de medición puede
pararse en cualquier momento pulsando el botón
Start/Stop. Pulsando el botón Start/Stop de
forma continuada, el tensiómetro entra en standby cancelando las mediciones pendientes de la
secuencia. Los datos de las mediciones realizadas
pueden verse pulsando el botón M.
En los modos de «1st VISIT» (1ª Visita) y «FOLLOWUP» (Seguimiento), la cuenta atrás de 60 segundos,
previa a la medición, puede saltarse pulsando el
botón Start/Stop. Una vez pulsado el botón Start/
Stop, el tensiómetro comenzará inmediatamente con
la siguiente medición.
Cancela las mediciones
pendientes en cualquier
momento durante la
secuencia de medición.
Se salta la cuenta atrás de
60 segundos y comienza la
medición.
* El tensiómetro puede ponerse en el modo Stand by
(espera) presionando el botón Start/Stop una vez
finalizadas las mediciones. El aparato cambiará
automáticamente al modo Stand by después de un
tiempo de inactividad de cinco minutos.
Modo Stand by
(espera)
106
Ajustar la presión de inflado
Ajustar los intervalos de medición
La presión de inflado puede ajustarse manualmente
entre 140 y 280 mmHg manteniendo presionado el
botón Start/Stop durante 7 segundos.
En el modo "1st Visit" (1ª Visita) y "Follow-up"
(Segumiento), los intervalos de medición de 15, 30,
45 o 60 segundos pueden configurarse manualmente.
Mantener presionado
durante 7 segundos...
Presione el botón M para ajustar la presión y vuelva a
presionar Start/Stop para guardar el ajuste.
1) Manteniendo presionado el botón Start/Stop
durante 3 segundos.
Mantener presionado
durante 3 segundos...
2) Presione el botón M para ajustar el intervalo de
medición y, a continuación, presione el botón
Start/Stop para confirmar. El tensiómetro volverá
al modo Stand by (espera).
15 30
45 60
107 ES
Ver mediciones
Modo «AUSCULTATION» (Auscultación)
En el modo «AUSCULTATION» (Auscultación), el
tensiómetro WatchBP Office sirve únicamente
de manómetro.No se tomarán mediciones
oscilométricas y hay que recordar los valores
sistólicos y diastólicos.
AUSCULT 1st FOLLOW UP
Memory
108
AUSCULT 1st FOLLOW UP
Modos «1st VISIT» (1ª Visita) y «FOLLOWUP» (Seguimiento)
1) Conmutar el selector de modo –El botón M
puede pulsarse en el modo de «1st VISIT» (1ª
Visita) o en el de «FOLLOW-UP» (Seguimiento)
para recuperar el último registro de mediciones
triples.
AUSCULT 1st FOLLOW UP
2) Ver el promedio de todas las mediciones – En
primer lugar, se visualiza una “A”, seguida por un
promedio de todas las mediciones tomadas en la
ultima secuencia de mediciones.
3) Ver los valores MAP y PP – Diez segundos
después de la visualización del promedio de la
presión arterial, el tensiómetro visualizará los
valores de la presión del pulso (PP) y la presión
arterial media (MAP).
5) Los valores de la tercera medición (incluyendo
los valores PP y MAP) se mostrarán en la
pantalla en el orden citado en el paso 3.
3
10
segundos
4) Ver mediciones individuales – Presione el
botón M una vez más para visualizar mediciones
individuales. En la pantalla parpadeará un
número “3” indicando la tercera medición.
10
segundos
6) Presione el botón M para recuperar los valores
de la segunda y la primera medición del último
juego de mediciones realizadas.
2
1
109 ES
Control inalámbrico de WatchBP Office
WatchBP Office puede ser controlado de forma
inalámbrica vía Bluetooth con el software WatchBP
Office incluido. Por favor, siga los pasos que se indican
aquí para establecer una conexión inalámbrica a un
ordenador.
Configuración del receptor Bluetooth
1) Inserte el CD incluido “Bluetooth USB Adaptor”
en el CD-ROM del ordenador. Pinche en «setup.
exe» en el directorio del CD-ROM.
2) Aparecerá una ventana de instalación. Siga las
instrucciones en la pantalla.
AU SC
ULT
LLO
1st FO
W UP
IN
R VA
7
L
SU
ES
P R c.
se
TE
RE
Bluetooth Receiver
Driver
* Antes de instalar el software WatchBP Office, debe
instalarse en el ordenador el driver software para el
receptor Bluetooth.
* La distancia entre WatchBP Office y el ordenador
conectado no debe exceder de 10m.
110
Install CD
Instruction
en la parte posterior del aparato en la posición
“ON”. El icono de Bluetooth se iluminará y
parpadeará continuamente indicando la
conexión.
3) Inserte el receptor Bluetooth en el puerto USB
del ordenador cuando se lo pida el programa de
instalación.
4) Reinicie el ordenador una vez terminada la
instalación.
* Tenga en cuenta que el aparato WatchBP office
no responderá al accionamiento de ningún
botón o interruptor mientras esté encendido el
Bluetooth. Esto es para prevenir interrupciones
accidentales durante la medición.
* Seleccione un único puerto USB y acuérdese de usar
siempre el mismo puerto en el futuro.
* No use otros receptores Bluetooth.
5) Encienda la función Bluetooth del tensiómetro
WatchBP Office situando el interruptor Bluetooth
Reinicie su
ordenador
DC 6V 600mA
DC
111 ES
Control inalámbrico de WatchBP Office (cont.)
Instalación del programa de software
Control inalámbrico del tensiómetro
1) Introduzca el CD en la unidad de CD-ROM de su
ordenador. A continuación, pinche en «setup.
exe» en el directorio del CD.
1) Encienda el interruptor Bluetooth situado en la
parte posterior del aparato.
2) Siga las instrucciones facilitadas en la ventana de
instalación en la pantalla del ordenador.
2) Compruebe que el receptor Bluetooth se
encuentre en la posición derecha y que esté
encendida la luz (si procede).
3) Una vez finalizada la instalación, reinicie el
ordenador antes de usar el programa por primera
vez.
3) Arranque el software WatchBP Office desde el
ordenador. Siga estos pasos para controlar el
WatchBP Office desde el ordenador.
WatchBP Analyzer Office
Version 1.0.2.4
Install CD
System Requirements: 550MHz CPU. 256MB Memory, 1024x768
pixel resolution, 256 color, CD-ROM drive, 1 free USB port, 40MB
free hard disk space, Microsoft Windows 2000 / XP / Vista.
112
ed.
serv
©200
s Re
Right
8 Microlif
e Corporation. All
* Requisitos del sistema:
CPU 550MHz. Memoria
de 256MB, resolución de
1024x768, 256 colores,
unidad CD-ROM, 1
puerto USB libre, 40MB
de espacio libre en disco
duro, Microsoft Windows
2000 / XP / Vista.
DC 6V 600mA
Comandos de software
Elegir medir presión arterial
Pinche en «1st VISIT» (1ª Visita), «FOLLOW-UP» (Seguimiento)
Introducir ID del paciente
Entrada de ID del paciente
Iniciar la medición
Presione el botón «Medir»
Guardar las lecturas de la presión
arterial
Pinche en «Guardar». Los datos se guardan en una tabla de datos
Excel. El nombre del archivo es generado automáticamente con
el siguiente formato «ID de paciente+ WatchBP Office +modo
de medición + aaammdd.xls».
Ver los datos
Vaya a la carpeta donde está guardado el archivo y abra el
archivo excel correspondiente.
Imprimir la hoja de datos
Estando abierto el archivo Excel correspondiente, pinche en
Imprimir en Excel.
Desconectar el aparato
Pinche en <<Desconectar>> antes de salir del programa
Cerrar el programa
Pinche en «Cerrar»
* El software busca automáticamente el aparato WatchBP más cercano al arrancar el programa. Si el aparato no puede ser
localizado, compruebe que el interruptor Bluetooth del WatchBP Office se encuentre en la posición de encendido (ON).
113 ES
Batería recargable y adaptador de corriente
Batería recargable
Uso de un adaptador de corriente
WatchBP Office incluye un pack de batería Ni-MH
recargable, incorporado, que proporciona hasta
400~500 ciclos de medición. La batería puede
recargarse entre los usos, con el adaptador de
corriente suministrado.
Por favor, para recargar el aparato, use únicamente
el adaptador Microlife (adaptador DSA-20P-05)
suministrado junto el WatchBP Office.
1) Enchufe el cable del adaptador en la toma de
corriente del tensiómetro WatchBP Office.
2) Inserte la clavija del adaptador en una caja de
enchufe. Mientras esté conectado el adaptador
de corriente, no se consume corriente de las
pilas.
S YS
mmHg
DIA
mmHg
SYS
mmHg
DIA
mmHg
114
* Un indicador de recarga
de color naranja significa
que la recarga está en
curso.
* Un indicador de recarga
de color verde significa
que la recarga ha
finalizado.
DC 6V 600mA
DC 6V 600mA
Solución de problemas
Problema
No hay corriente (No se
enciende la pantalla LCD)
El brazalete no se infla
correctamente
Posible causa
La alimentación eléctrica
no está enchufada
correctamente
La batería está
completamente descargada
Se ha soltado la conexión del
tubo
Fuga del tubo / de la cámara
de aire
No es posible ajustar la
función Ocultar (Hide), la
presión o el intervalo de
pausa
No se puede tomar ninguna
medición
La opción inalámbrica está
encendida
No se visualiza ningún
resultado entre las
mediciones
El aparato se encuentra
en el modo AUSCULTATION
(Auscultación) o la función
Ocultar (Hide) está activada
No está instalado el software
Bluetooth
No se puede acceder
al aparato a través del
ordenador
Cómo corregirlo
Enchufe el cable de alimentación en una caja de
enchufe.
Recargue la batería recargable enchufando el cable de
alimentación.
Compruebe que el tubo del brazalete esté conectado de
forma segura al aparato.
Compruebe si hay grietas en el tubo o la cámara de aire.
En este caso, contacte con el servicio de atención al
cliente de Microlife, por favor.
El aparato no puede ser manejado mediante los botones
Start/Stop y M mientras el interruptor Bluetooth se
encuentre en la posición de encendido (ON). Apague
el Bluetooth o use el software incluido para controlar el
aparato.
Inhabilite la función Ocultar (Hide) o use el modo«1st
VISIT» (1ª Visita) / «FOLLOW-UP» (Seguimiento) para
medir la presión arterial.
Asegúrese que el software Bluetooth suministrado con
el tensiómetro esté instalado en el ordenador.
115 ES
Mensajes de error
Si se produce un error durante la medición,
se interrumpe la medición y se visualiza un
mensaje de error «Err».
• Por favor, contacte con su
centro de servicio local de
Microlife si el error persiste.
• Si cree que los resultados
son inusuales, por favor,
lea detenidamente la
información en este manual
de instrucciones.
116
Error
Descripción
Posible causa y
remedio
«Err 1»
Señal
demasiado
débil
Las señales del pulso
en el brazalete son
demasiado débiles.
Vuelva a colocar el
brazalete y repita la
medición.
«Err 2»
Señal de
error
Durante la medición se
han detectado señales
de error por el brazalete,
causadas, por ejemplo,
por un movimiento o
por la contracción de
un músculo. Repita la
medición manteniendo
el brazo quieto.
«Err 3»
No hay
presión en el
brazalete
No se puede generar
una presión adecuada
en el brazalete. Se
puede haber producido
una fuga. Cambie
la batería si fuese
necesario. Repita la
medición.
«Err 5»
Resultado
anormal
Las señales de medición
son imprecisas y, por
ello, no se puede
visualizar ningún
resultado. Lea la lista de
chequeo para realizar
mediciones fiables y
repita la medición.
«HI»
Pulso o
presión de
brazalete
demasiado
alto
La presión en el
brazalete es demasiado
alta (superior a 300
mmHg) O BIEN el pulso
es demasiado alto
(más de 200 latidos
por minuto). Relájese
durante 5 minutos y
repita la medición.
«LO»
Pulso
demasiado
bajo
El pulso es demasiado
bajo (menos de 40
latidos por minuto).
Repita la medición.
117 ES
Seguridad, cuidado, prueba de precisión y eliminación
Seguridad y protección
Este aparato debe usarse únicamente para el fin
descrito en este manual. El aparato comprende
componentes sensibles y se debe tratar con cuidado.
No se puede responsabilizar al fabricante de daños
causados por una aplicación incorrecta.
• Evite que el aparato sea usado por niños sin
supervisión; algunas piezas son tan pequeñas que
podrían ser tragadas.
Tenga en cuenta las condiciones de conservación
y de funcionamiento descritas en las
“Especificaciones Técnicas” de este manual.
Proteja el aparato del agua y la humedad
Proteja el aparato de la luz solar directa
• Accione la bomba sólo cuando esté colocado el
Proteja el aparato del calor y el frío extremos
• No use el aparato si cree que está dañado o si hay
Evite la proximidad a campos electromagnéticos,
como los producidos por teléfonos móviles
• Lea las instrucciones de seguridad adicionales
No abra nunca el aparato
brazalete.
algo que le parezca inusual.
en los apartados individuales de este manual de
instrucciones.
• No conecte el aparato a un ordenador antes de que
se lo pida el software de ordenador.
118
Proteja el aparato contra impactos y caídas
Cuidado del aparato
Limpieza del brazalete
Limpie el aparato con un paño suave y
seco.
NO lave el brazalete. NO planche la funda del
brazalete.
No lave el brazalete.
AU SC
ULT
LLO
1st FO
W UP
IN
R VA
7
L
SU
ES
P R c.
se
TE
No planche el brazalete.
RE
Prueba de precisión
Recomendamos someter el tensiómetro WatchBP
Office a una prueba de precisión cada 2 años o
después de un impacto mecánico (p.ej., si se
ha caído). Por favor, contacte con Microlife para
concertar la prueba.
Eliminación de residuos
Las baterías y los instrumentos electrónicos
han de eliminarse de acuerdo con las
reglamentaciones locales aplicables y no como
basura doméstica.
119 ES
Especificaciones técnicas
Temperatura
operativa/humedad:
Temperatura de
conservación/
humedad:
• 10 - 40 °C / 50 - 104 °F
• -20 - +50 °C / -4 - +122 °F
• 15 - 90 % de humedad relativa
Peso:
• 1080 g (incluyendo el pack de batería
máxima
recargable)
• 200 x 125 x 90 mm
Método de medición: • Oscilométrico, según Korotkoff
Rango de medición:
• 30 - 280 mmHg – presión arterial
• 40 - 200 latidos por minuto – pulso
Indicación de presión de• Rango: 0 - 299 mmHg
brazalete:
• Resolución: 1 mmHg
• Precisión estática: Presión dentro de
Dimensiones:
Referencia a normas:
• EN 1060-1 /-3, Requisitos NIBP
• IEC60601-1 Requisito general de
seguridad
• IEC60601-1-2 Requisitos para EMC
• EN1060-4, Investigación clínica NIBP
• ANSI/AAMI SP10, Requisitos NIBP
• Sistema Bluetooth a V2.0
• FCC part15C
±3 mmHg
• Precisión del pulso: ±5 % del valor
medido
Fuente de corriente:
• Pack de batería recargable;
4.8V C3500 mAh
• Adaptador de corriente c.a. 7.5V, 2 A
120
Microlife se reserva el derecho de modificar las
especificaciones técnicas sin notificación previa
por escrito.
Tarjeta de garantía
Este aparato está cubierto por una garantía
de dos años y los accesorios están cubiertos
por una garantía de un año a partir de
Nombre:
Dirección:
la fecha de compra. Esta garantía sólo
tiene validez si se presenta la tarjeta de
Fecha:
garantía cumplimentada por el propietario
Teléfono:
confirmando la fecha de compra o el recibo
de compra.
Email:
Producto: WatchBP Office
Número de producto: Twin200
Número de serie:
Fecha:
Παράλληλη διπλή λειτουργία
μέτρησης βραχίονα και ακροαστική
λειτουργία για μετρήσεις ακριβείας της
αρτηριακής πίεσης στο ιατρείο.
Οδηγίες χρήσης
EL
123
Η συσκευή WatchBP Office συνδυάζει τα πλεονεκτήματα μιας αυτόματης συσκευής μέτρησης της αρτηριακής πίεσης και ενός
υβριδικού σφυγμομανόμετρου και σχεδιάσθηκε για να παρέχει ευκολόχρηστη, ακριβή και αξιόπιστη μέτρηση της αρτηριακής
πίεσης εντός του ιατρείου σύμφωνα με τις προταθείσες οδηγίες της Ευρωπαϊκής Εταιρείας για την Υπέρταση (European Society
of Hypertension) (ESH), της Αμερικάνικης Καρδιολογικής Ένωσης (American Heart Association) (AHA), και του Παγκόσμιου
Οργανισμού Υγείας (World Health Organization) (WHO)1.
1
O’Brien E, Asmar R, Beilin L, Imai Y, et al. European Society of Hypertension recommendations for conventional, ambulatory and home blood pressure measurement. European Society of Hypertension Working Group
on Blood Pressure Deviceing. J Hypertens 2003;21:821-848.
Πίνακας περιεχομένων
Περιγραφή προϊόντος
Ονομασία μερών και οθόνη ενδείξεων....................................126-127
Κατασκευαστικά στοιχεία και εξαρτήματα............................. 128-129
Πριν χρησιμοποιήσετε το WatchBP Office
Επιλογή και εφαρμογή της σωστής περιχειρίδας.....................130-131
Τρεις τρόποι λειτουργίας
Λειτουργία ακρόασης «AUSCULTATION» ....................................... 132
Λειτουργία 1η επίσκεψη «1st VISIT».......................................133-134
Λειτουργία επόμενη επίσκεψη«FOLLOW-UP»................................ 135
Λήψη μετρήσεων χρησιμοποιώντας το WatchBP Office
Λειτουργία ακρόασης «AUSCULTATION» ................................136-137
Λειτουργία 1η επίσκεψη «1st VISIT».......................................138-140
Λειτουργία ακόλουθη επίσκεψη «FOLLOW-UP»......................141-143
Ειδικές λειτουργίες
Απόκρυψη τιμών μέτρησης........................................................... 144
Μέση αρτηριακή πίεση και πίεση παλμών ..................................... 145
Κάνοντας λιγότερες από τρεις μετρήσεις ....................................... 146
Μεταπηδώντας την αντίστροφη μέτρηση των 60 δευτερολ........... 146
Ρύθμιση της πίεσης φουσκώματος................................................ 147
Ρύθμιση των διαστημάτων μέτρησης............................................ 147
Ένδειξη Μετρήσεων
Λειτουργία ακρόασης «AUSCULTATION» ....................................... 148
Λειτουργία 1η επίσκεψη «1st VISIT» και Λειτουργία ακόλουθη
επίσκεψη«FOLLOW-UP»........................................................148-149
Ασύρματος έλεγχος του WatchBP Office
Ρύθμιση του δέκτη Bluetooth................................................150-151
Εγκατάσταση του λογισμικού προγράμματος................................. 152
Ασύρματος έλεγχος της συσκευής . ........................................152-153
Παράρτημα
Επαναφορτιζόμενη μπαταρία και μετασχηματιστής ρεύματος . ..... 154
Αναζήτηση προβλημάτων............................................................. 155
Μηνύματα σφάλματος...........................................................156-157
Ασφάλεια, φροντίδα, τεστ ακριβείας και αποκομιδή...............158-159
Τεχνικά χαρακτηριστικά............................................................... 160
EL
Περιγραφή προϊόντος
Ονομασία μερών
Υποδοχή
περιχειρίδας (R)
L
Διακόπτης I/O
Διακόπτης Bluetooth
Πρίζα κύριου
μετασχηματιστή
Θήκη Μπαταριών
DC 6V 600mA
DC 6V 600mA
R
Υποδοχή
περιχειρίδας (L)
SYS
mmHg
DIA
mmHg
Ένδειξη επαναφόρτισης
Οθόνη
Πλήκτρο M (Μνήμη)
SYS
mmHg
DIA
mmHg
PUL
/min
Διακόπτης Λειτουργιών
Κουμπί Start/Stop
126
INTERVAL
L/R
3 sec.
3 sec.
HIDE
7 sec.
PRESSURE
AUSCULT 1st FOLLOW UP
7 sec.
Οθόνη
Μέση Αρτηριακή Πίεση (MAP)
Πίεση παλμών (PP)
Τιμή για αριστερό βραχίονα
Ένδειξη τρόπου λειτουργίας
Συστολική τιμή
Εξωτερική πηγή ενέργειας
Διαστολική τιμή
Bluetooth
Υπενθύμιση θέση ανάπαυσης και βραχίονα
Σύμβολο μπαταρίας
Απόκρυψη ένδειξης
Λειτουργία Μνήμης
Ταχύτητα παλμών
Τιμή για δεξιό βραχίονα
Συστολική τιμή
Διαστολική τιμή
Καρδιακοί χτύποι
Περιχειρίδα L/R
127
EL
WatchBP Office και εξαρτήματα
Bluetooth Receiver
Driver
SYS g
mmH
DIA
mmHg
Install CD
SYS g
mmH
DIA
mmHg
PUL
/min
INTER VAL
3 sec.
PRESS
URE
7 sec.
L/R
3 sec.
AUSC ULT
HIDE
W
1st FOLLO
UP
7 sec.
WatchBP Office συσκευή μέτρησης
αρτηριακής πίεσης (1 τεμ.)
Μετασχηματιστής ρεύματος AC X1
(είσοδος: 100-240V~ 50/60Hz 0.7A
έξοδος: +7.5V 2A)
Δέκτης Bluetooth X1
CD εγκατάστασης X1
Quick start guide
How to take blood presssure measurement in three different modes
1 Plug cuff connector
«1st VISIT» Mode (Double arm)
ght
i
All R
«AUSCULTATION» Mode
(Single arm)
Flip over the quick start guide to see ‘Product description’.
68
y, 1024x7
Memor
port, 40MB
z CPU. 256MB
free USB
s: 550MH
drive, 1
ement
Vista.
Requir
/ XP /
color, CD-ROM
System
s 2000
ion, 256
ft Window
pixel resolut space, Microso
disk
free hard
WatchBP Office Λογισμικό για
CD X1
Simultaneous
dual-arm
Press Start/Stop
button to begin a
measurement
and
measurement
Note bloodfor
auscultatory function
presure using
accurate in-officeauscultatory
blood
method
pressure measurement.
Place the stethoscope on
the hollow of the elbow,
over the brachial artery
3 Switch the mode
Install CD
128
An averaged result will
be displayed after three
consecutive measurments
Press Start/Stop
button to begin a
measurement
«FOLLOW-UP» Mode (Single arm)
2 Turn on the device
.
ration
1.0.2
Version
©2008 Microlife Corpo
Office
d.
rve
ese
sR
in the cuff socket
Analyzer
WatchBP
.4
Instruction Manual
EN
M μέγεθος (22cm~32cm) X2
L μέγεθος (32cm~42cm) X2
1
Εγχειρίδιο Οδηγιών X1
Οδηγός γρήγορης έναρξης X1
Επιλογές περιχειρίδας
M (μεσαίο μέγεθος)
22 - 32 cm (8.7 - 12.6 ίντσες)
Με ελαστικό σωλήνα αέρα 130 cm
L (μεγάλο μέγεθος)
32 - 42 cm (12.6 - 16.5 ίντσες)
Με ελαστικό σωλήνα αέρα 130 cm
*
Παρακαλούμε επικοινωνήστε με την Microlife ή τον αντιπρόσωπό της για την αγορά περιχειρίδων.
129
EL
Πριν χρησιμοποιήσετε το WatchBP Office
Επιλογή της σωστής περιχειρίδας
Εφαρμόστε την περιχειρίδα σωστά
Δύο διαφορετικά μεγέθη περιχειρίδας παραδίδονται μαζί με το WatchBP
Office: Μεσαίο και Μεγάλο. Επιλέξτε το μεγέθος περιχειρίδας που
εφαρμόζει καλύτερα στην περιφέρεια του άνω βραχίονα (μπράτσο) του
ασθενή.
1) Τοποθετήστε την περιχειρίδα επάνω από το αριστερό (δεξί)
μπράτσο έτσι ώστε ο ελαστικός σωλήνας του αέρα και το σημάδι για
την αρτηρία να δείχνουν προς τον κάτω βραχίονα.
M (μεσαίο μέγεθος)
22 - 32 cm (8.75 - 12.5 ίντσες)
2) Βάλτε την περιχειρίδα επάνω στον βραχίονα. Βεβαιωθείτε ότι το
κάτω άκρο της περιχειρίδας βρίσκεται περίπου 2 έως εκ. ( ¾ έως 1
ίντσα) επάνω από τον αγκώνα.
M είναι το σωστό μέγεθος για τα περισσότερα άτομα.
L (μεγάλο μέγεθος)
32-42 cm (12.5-16.5 ίντσες)
Συνδέστε την περιχειρίδα με την συσκευή εισάγοντας το συνδετήρα
περιχειρίδας με την πρίζα σύνδεσης περιχειρίδας.
R
R
130
2–3cm
3) Τυλίξτε και σφίξτε την περιχειρίδα γύρω από τον βραχίονα.
4) Αφήστε λίγη απόσταση ελεύθερη ανάμεσα στον βραχίονα και την
περιχειρίδα. Ο ασθενής θα πρέπει να μπορεί να τοποθετήσει 2
δάχτυλα ανάμεσα στον βραχίον και την περιχειρίδα. Η ενδυμασία
δεν θα πρέπει να εμποδίζει τον βραχίονα. Αφαιρέστε τυχόν
ενδυμασία που καλύπτει ή περικλείει τον βραχίονα θα γίνει η
μέτρηση.
5) Οι περιχειρίδες που δεν έχουν καλή εφαρμογή μπορεί να
προκαλέσουν λανθασμένες μετρήσεις αρτηριακής πίεσης.
Χρησιμοποιήστε ένα διαφορετικό μέγεθος περιχειρίδας αν ο
δείκτης περιοχής στο τέλος της περιχειρίδας δεν εμπίπτει στην
περιοχή που ορίζεται από τις λωρίδες.
6) Εφαρμόστε τις ίδιες ενέργειες και στον άλλο βραχίονα αν απαιτείται
διπλή μέτρηση βραχίονα.
*
Ο δείκτης της περιοχής της περιχειρίδας
θα πρέπει να συμπίπτει εντός αυτής της
περιοχής.
131
EL
Τρεις τρόποι λειτουργίας
SY S
Επιλέξτε τον τρόπο λειτουργίας πουmmHgεπιθυμείτε
Λειτουργία ΑΚΡΟΑΣΗ «AUSCULTATION»
DIA τρόπους
Η συσκευή WatchBP Office προσφέρει τρεις άνετους
mmHg
λειτουργίας: Την λειτουργία ΑΚΡΟΑΣΗ «AUSCULTATION», 1η ΕΠΙΣΚΕΨΗ
«1st VISIT» και ΑΚΟΛΟΥΘΗ ΕΠΙΣΚΕΨΗ «FOLLOW-UP».Χρησιμοποιήστε
SY S
mmHg
το κουμπί Mode στην πλευρά της συσκευής για να επιλέξετε τον τρόπο
DIA
λειτουργίας πουPUL
επιθυμείτε.
mmHg
Επιλέξτε την λειτουργία ΑΚΡΟΑΣΗ «AUSCULTATION» για την
μέτρηση της πίεσης του αίματος σε ασθενείς με αρρυθμιες και, αν
χρειαστεί, για να επιβεβαιωθείτε ότι ο ασθενής είναι κατάλληλος
για την μέθοδο ταλαντομέτρησης χρησιμοποιώντας μια ψηφειακή
οθόνη μέτρησης πίεσης αίματος.
/min
INTERVAL
L/R
3 sec.
3 sec.
HIDE
7 sec.
1st FOLLOW UP
132
PRESSURE
AUSCULT 1st FOLLOW UP
7 sec.
AUSCULT 1st FOLLOW UP
AUSCULT 1st FOLLOW UP
AUSCULT 1st FOLLOW UP
AUSCULT 1st FOL
Λειτουργία 1η ΕΠΙΣΚΕΨΗ «1st VISIT»
Παράλληλες μετρήσεις δύο βραχιόνων
Επιλέξτε την λειτουργία 1η επίσκεψη «1st VISIT» για να διεξάγετε μια
πλήρως αυτόματη τριπλή μέτρηση και στα δύο μπράτσα σύμφωνα με
τα προτεινόμενα πρωτόκολλα μέτρησης πίεσης των οργανισμών ESH/
AHA κατά την πρώτη επίσκεψη του ασθενή στο ιατρείο.
Στην λειτουργία «1st VISIT», η συσκευή WatchBP Office μετρά την
πίεση του αίματος του ασθενή και στους δύο βραχίονες ταυτόχρονα,
βοηθώντας να προσδιοριστεί ο κατά προτίμηση βραχίονας μέτρησης και
να αποκαλυφθούν ίσως και άλλοι πιθανοί καρδιοαγγειακοί κίνδυνοι.
FOLLOW UP
AUSCULT 1st FOLLOW UP
AUSCULT 1st FOLLOW UP
133
EL
Τρεις τρόποι λειτουργίας (συν.)
Αυτόματη τριπλή μέτρηση
Καθορισμός κατάλληλου βραχίονα μέτρησης
Στην λειτουργία «1st VISIT», η συσκευή WatchBP Office αυτόματα κάνει
τρεις αλλεπάλληλες μετρήσεις σε διαστήματα ενός λεπτού εξ ορισμού. Το
αποτέλεσμα αυτών των τριών μετρήσεων δίνει ως μέσος όρος την πρώτη
μέτρηση πίεσης αίματος.
Αν το αποτέλεσμα μέτρησης μεταξύ των δύο βραχιόνων διαφέρει
περισσότερο από 20mmHg για την συστολική ή 10mmHg για την
διαστολική τιμή σε όλες τις τρεις μετρήσεις, η συσκευή θα υποδείξει τον
βραχίονα με την υψηλότερη μέτρηση αναβοσβήνοντας την ένδειξη L ή R.
1
60 sec.
*
134
2
3
60 sec.
Ο χρήστης μπορεί να ρυθμίσει το διάστημα μέτρησης σε 15, 30, 45 ή 60
δευτερόλεπτα στην λειτουργία 1η επίσκεψη 1st Visit και Ακόλουθη Επίσκεψη.
(Παρακαλούμε ανατρέξτε στο κεφάλαιο Ειδικές λειτουργίες, σελ. 24 “Ρύθμιση
διαστήματος μέτρησης”).
Ο βραχίονας με την υψηλότερη μέτρηση θα πρέπει να προτιμάται ως ο
βραχίονας μέτρησης για μελλοντικές μετρήσεις.
W UP
Λειτουργία ΑΚΟΛΟΥΘΗ ΜΕΤΡΗΣΗ «FOLLOW-UP»
Αυτόματη τριπλή μέτρηση
Επιλέξτε την λειτουργία «FOLLOW-UP» για να διεξάγετε μια πλήρως
αυτόματη τριπλή μέτρηση στον προτιμηθέντα βραχίονα μέτρησης.
Σύμφωνα με τα προτεινόμενα πρωτόκολλα μέτρησης πίεσης των
οργανισμών ESH/AHA για μέτρηση πίεσης αίματος στην ακόλουθη
μέτρηση.
Στην λειτουργία «FOLLOW-UP» η συσκευή WatchBP Office αυτόματα
θα κάνει τρεις αλλεπάλληλες μετρήσεις σε διαστήματα ενός λεπτού εξ
ορισμού. Το αποτέλεσμα αυτών των τριών μετρήσεων δίνει ως μέσος
όρος την ακόλουθη μέτρηση πίεσης αίματος.
1
60 sec.
*
AUSCULT 1st FOLLOW UP
2
3
60 sec.
Ο χρήστης μπορεί να ρυθμίσει το διάστημα μέτρησης σε 15, 30, 45 ή 60
δευτερόλεπτα στην λειτουργία 1η επίσκεψη 1st Visit και Ακόλουθη Επίσκεψη.
(Παρακαλούμε ανατρέξτε στο κεφάλαιο Ειδικές λειτουργίες, σελ. 24 “Ρύθμιση
διαστήματος μέτρησης”).
135
EL
Λήψη μετρήσεων χρησιμοποιώντας το WatchBP Office
Λειτουργία ΑΚΡΟΑΣΗ «AUSCULTATION»
1) Ανοίξτε το ρεύμα – Ανοίξτε τη συσκευή βάζοντας το διακόπτη
I/O που βρίσκεται στο πίσω μέρος της συσκευής στην θέση ON και
βεβαιωθείτε ότι ο διακόπτης Bluetooth βρίσκεται στην θέση off
(κλειστός).
600mA
3) Βάλτε τον διακόπτη στη λειτουργία Ακρόαση
«AUSCULTATION» – Γυρίστε τον διακόπτη Mode στη λειτουργία
«AUSCULTATION» .
DC 6V 600mA
AUSCULT 1st FOLLOW UP
2) Εφαρμογή περιχειρίδας* – Εφαρμόστε σωστά μια περιχειρίδα
στον προτιμηθέντα βραχίονα μέτρησης.
AUSCULT 1st FO
4) Ρυθμίστε πίεση φουσκώματος αν χρειαστεί – Η πίεση
φουσκώματος μπορεί να ρυθμιστεί με το χέρι από 140 σε 280
mmHg πιέζοντας και κρατώντας κάτω το κουμπί Start/Stop για 7
δευτερόλεπτα.
Πιέστε το κουμπί M για να ρυθμίσετε την πίεση και πιέστε Start/
Stop για να απομνημονεύσετε την ρύθμιση.
*
136
Περαιτέρω οπτικές οδηγίες θα βρείτε στην περιχειρίδα
5) Αρχίστε το φούσκωμα – Πιέστε το κουμπί Start/Stop για να
αρχίσετε το φούσκωμα της περιχειρίδας.
Πιέστε και κρατήστε
για 7 δευτερόλεπτα...
6) Σημειώστε – Σημειώστε τη συστολική και διαστολική τιμή με τον
ίδιο τρόπο όπως για τις σφυγμομανομετρικές μετρήσεις.
*
*
Η εξ ορισμού πίεση φουσκώματος είναι 180 mmHg.
Όταν η συσκευή είναι στην λειτουργία standby, θα υπενθυμίσει την τρέχουσα
προρύθμιση πίεσης με μια ανάλογη ένδειξη της τρέχουσας ρύθμισης πίεσης στην
οθόνη.
7) Ρυθμίστε τη συσκευή στη λειτουργία Stand by – Η συσκευή
ρυθμίζεται στη λειτουργία Stand by πιέζοντας το κουμπί Start/Stop.
Η συσκευή αυτόματα θα γυρίσει στην αδρανή λειτουργία αν δεν
χρησιμοποιηθεί για πέντε λεπτά.
Λειτουργία mode
137
EL
Λήψη μετρήσεων χρησιμοποιώντας το WatchBP Office (συν.)
Λειτουργία 1η ΕΠΙΣΚΕΨΗ «1st VISIT»
1) Ανοίξτε το ρεύμα – Ανοίξτε τη συσκευή βάζοντας το διακόπτη
I/O που βρίσκεται στο πίσω μέρος της συσκευής στην θέση ON και
βεβαιωθείτε ότι ο διακόπτης Bluetooth βρίσκεται στην θέση off
(κλειστός).
600mA
DC 6V 600mA
3) Βάλτε τη λειτουργία 1η Επίσκεψη «1st VISIT» – Γυρίστε τον
διακόπτη Mode στην λειτουργία «1st VISIT» .
AUSCULT 1st FOLLOW UP
2) Εφαρμογή περιχειρίδας* – Εφαρμόστε σωστά μια περιχειρίδα σε
κάθε βραχίονα του ασθενή.
AUSCULT 1st FOLLOW UP
AUSCULT 1st
4) Ρυθμίστε πίεση φουσκώματος αν χρειαστεί – Η πίεση
φουσκώματος μπορεί να ρυθμιστεί με το χέρι από 140 σε 280
mmHg πιέζοντας και κρατώντας κάτω το κουμπί Start/Stop για 7
δευτερόλεπτα.
Πιέστε το κουμπί M για να ρυθμίσετε την πίεση και πιέστε Start/
Stop για να απομνημονεύσετε την ρύθμιση.
*
138
Περαιτέρω οπτικές οδηγίες θα βρείτε στην περιχειρίδα
Πιέστε και κρατήστε
για 7 δευτερόλεπτα...
5) Αρχίστε τις μετρήσεις – Πιέστε το κουμπί Start/Stop για να
αρχίσετε την ακολουθία των μετρήσεων.
*
Μια αντίστροφη μέτρηση των 60 δευτερολέπτων θα προηγηθεί της πρώτης
μέτρησης.
Αντίστροφη
μέτρηση 60
δευτερολέπτων ...
*
*
Η εξ ορισμού πίεση φουσκώματος είναι 180 mmHg.
*
Όταν η συσκευή είναι στην λειτουργία standby, θα υπενθυμίσει την τρέχουσα
προρύθμιση πίεσης με μια ανάλογη ένδειξη της τρέχουσας ρύθμισης πίεσης στην
οθόνη.
Η συσκευή θα καθυστερήσει και θα ξαναφουσκώσει περισσότερο αέρα στην
περιχειρίδα αν η πίεση αίματος του ασθενή είναι μεγαλύτερη από τη ρύθμιση
φουσκώματος της συσκευής.
6) Τρεις αλλεπάλληλες μετρήσεις – Η συσκευή θα κάνει τρεις
αλλεπάλληλες μετρήσεις με διαστήματα ενός λεπτού
μεταξύ των μετρήσεων.
1
60
δευτερόλεπτα
2
3
60
δευτερόλεπτα
139
EL
Λήψη μετρήσεων χρησιμοποιώντας το WatchBP Office (συν.)
7) Ένδειξη του μέσου όρου της μέτρησης – Μόνο ο μέσος όρος
της μέτρησης θα εμφανιστεί την οθόνη μόλις ολοκληρωθεί η τριπλή
μέτρηση.
8) Ένδειξη όλων των μετρήσεων – Τα αποτελέσματα των τριών
μεμονωμένων μετρήσεων εμφανίζονται πιέζοντας το πλήκτρο M.
Πιέστε το πλήκτρο Μ μια φορά για να δείτε την πρώτη μέτρηση.
Συνεχίστε πιέζοντας το πλήκτρο Μ για να δείτε τις άλλες μετρήσεις.
1
2
3
*
140
Όταν τελειώσουν οι μετρήσεις, η μέτρηση πίεσης αίματος που αντιστοιχεί
στο βραχίονα με την σταθερή υψηλότερη μέτρηση θα αναβοσβήσει συνεχώς
για 5 δευτερόλεπτα. Αν δεν υπάρξει σημαντική διαφορά (20mmHg για την
συστολική πίεση αίματος ή 10 mmHg για την διαστολική πίεση αίματος ή και τα
δύο) ανάμεσα στους δύο βραχίονες, δεν θα αναβοσβήσει καμία μέτρηση.
*
Η συσκευή WatchBP Office θα αποθηκεύσει μόνο τις τρεις τελευταίες μετρήσεις
που έγιναν στη λειτουργία 1η ΕΠΙΣΚΕΨΗ«1st VISIT» και «ΑΚΟΛΟΥΘΗ ΕΠΙΣΚΕΨΗ»
Modes. Για να αποθηκεύσετε την πίεση του ασθενή για μεταγενέστερη πρόσβαση,
παρακαλούμε να χρησιμοποιήσετε το συνημμένο λογισμικό WatchBP Office.
Λειτουργία ΑΚΟΛΟΥΘΗ ΕΠΙΣΚΕΨΗ «FOLLOW-UP»
1) Ανοίξτε το ρεύμα – Ανοίξτε τη συσκευή βάζοντας το διακόπτη
I/O που βρίσκεται στο πίσω μέρος της συσκευής στην θέση ON και
βεβαιωθείτε ότι ο διακόπτης Bluetooth βρίσκεται στην θέση off
(κλειστός).
DC 6V 600mA
3) Βάλτε τον διακόπτη στη λειτουργία ΑΚΟΛΟΥΘΗ ΕΠΙΣΚΕΨΗ
«FOLLOW-UP» – Γυρίστε τον διακόπτη Mode στη λειτουργία
«FOLLOW-UP» .
DC 6V 600mA
AUSCULT 1st FOLLOW UP
AUSCULT 1st FOLLOW UP
2) Εφαρμογή περιχειρίδας* – Εφαρμόστε σωστά μια περιχειρίδα
στον προτιμηθέντα βραχίονα μέτρησης.
AUSCULT 1st FOLLOW UP
4) Επιλέξτε την περιχειρίδα φουσκώματος – Ρυθμίστε την
συσκευή να φουσκώσει μόνο την καθορισμένη περιχειρίδα
(δεξιά ή αριστερή). Πιέστε και κρατήστε κάτω το κουμπί Μ για 3
δευτερόλεπτα.
Πιέστε και κρατήστε
για 3 δευτερόλεπτα...
*
Περαιτέρω οπτικές οδηγίες θα βρείτε στην περιχειρίδα
141
EL
Λήψη μετρήσεων χρησιμοποιώντας το WatchBP Office (συν.)
5) Πιέστε το κουμπί Μ για να μεταπηδήσετε μεταξύ της δεξιάς (R)
και αριστερής(L) περιχειρίδας. Πιέστε το κουμπί Start/Stop για να
απομνημονεύσετε τη ρύθμιση.
6) Αλλαγή πίεσης φουσκώματος – Η πίεση φουσκώματος
μπορεί να ρυθμιστεί με το χέρι από 140 σε 280 mmHg πιέζοντας
και κρατώντας κάτω το κουμπί Start/Stop για 7 δευτερόλεπτα.
Πιέστε το κουμπί M για να ρυθμίσετε την πίεση και πιέστε Start/
Stop πάλι για να απομνημονεύσετε την ρύθμιση.
142
Πιέστε και κρατήστε
για 7 δευτερόλεπτα...
7) Αρχίστε τις μετρήσεις – Πιέστε το κουμπί Start/Stop για να
αρχίσετε την ακολουθία των μετρήσεων.
Αντίστροφη
μέτρηση 60
δευτερολέπτων ...
8) Τρεις αλλεπάλληλες μετρήσεις – Η συσκευή θα κάνει τρεις
αλλεπάλληλες μετρήσεις με διαστήματα ενός λεπτού μεταξύ των
μετρήσεων.
1
60
δευτερόλεπτα
2
60
δευτερόλεπτα
10) Ένδειξη όλων των μετρήσεων – Τα αποτελέσματα των τριών
μεμονωμένων μετρήσεων εμφανίζονται πιέζοντας το πλήκτρο M.
Πιέστε το πλήκτρο Μ μια φορά για να δείτε την πρώτη μέτρηση.
Συνεχίστε πιέζοντας το πλήκτρο Μ για να δείτε τις άλλες μετρήσεις.
3
1
9) Ένδειξη του μέσου όρου της μέτρησης – Μόνο ο μέσος όρος
της μέτρησης θα εμφανιστεί την οθόνη μόλις ολοκληρωθεί η τριπλή
μέτρηση.
2
3
*
Η συσκευή WatchBP Office αποθηκεύει μόνο τις τρείς τελευταίες μετρήσεις
που έγιναν στη λειτουργία «1st VISIT» και «FOLLOW-UP» . Για να αποθηκεύσετε
την πίεση του ασθενή για μεταγενέστερη πρόσβαση, παρακαλούμε να
χρησιμοποιήσετε το συνημμένο λογισμικό WatchBP Office.
143
EL
Ειδικές λειτουργίες
Απόκρυψη τιμών μέτρησης
Η συσκευή WatchBP Office διαθέτει την λειτουργία Απόκρυψη για να
αποφύγει την αδικαιολόγητη αύξηση της πίεσης του αίματος στον ασθενή
που θα προκληθεί από ανησυχία όταν θα βλέπει τις μετρήσεις της πίεσης
του αίματος.
*
Αυτό το χαρακτηριστικό είναι διαθέσιμο μόνο στην λειτουργία ακόλουθη μέτρηση
*
Όταν η λειτουργία Απόκρυψη
«Hide» είναι ενεργή ON, θα
εμφανιστεί η αντίστροφη μέτρηση
μεταξύ κάθε μέτρησης και το
σύμβολο της απόκρυψης.
*
Παρακαλούμε βεβαιωθείτε ότι
ο διακόπτης Bluetooth είναι στη
θέση OFF, διαφορετικά η λειτουργία
απόκρυψης «Hide» είναι αδύνατον
να ρυθμιστεί.
144
1) Ενεργοποιήστε τη λειτουργία Απόκρυψη «Hide» – πιέζοντας
και κρατώντας κάτω το κουμπί Μ για 7 δευτερόλεπτα.
Πιέστε και κρατήστε
για 7 δευτερόλεπτα...
2) Επιλέξτε ON ή OFF – Πιέστε το κουμπί Μ ξανά για ανοίξετε ή να
κλείσετε την λειτουργία Απόκρυψη “Hide”(ON ή OFF).
3) Επιβεβαίωση – Πιέστε Start/Stop για να επιβεβαιώσετε τη
ρύθμιση.
*
Η εξ ορισμού ρύθμιση της απόκρυψης για την λειτουργία 1η μέτρηση «1st
VISIT» είναι στη θέση ON και δεν μπορεί να ρυθμιστεί στο OFF.
MAP (Μέση Αρτηριακή Πίεση)
PP (Πίεση Παλμών)
Η συσκευή WatchBP Office μετρά την αληθινή μέση αρτηριακή πίεση
(MAP) του ασθενή. Κάθε μέτρηση συμπεριλαμβάνει τον υπολογισμό
μιας μεμονωμένης τιμής MAP. Ο μέσος όρος της μέτρησης θα δείξει τον
μέσο όρο της τιμής MAP. Στην ένδειξη στη λειτουργία Μνήμης η τιμή
MAP θα εμφανιστεί με την συστολική/διαστολική πίεση μια φορά κάθε 5
δευτερόλεπτα.
Η συσκευή WatchBP Office μετρά την πίεση παλμών (PP) του ασθενή:
πίεση παλμών = συστολική - διαστολική πίεση. Κάθε μέτρηση
συμπεριλαμβάνει τον υπολογισμό μιας μεμονωμένης τιμής PP. Ο μέσος
όρος της μέτρησης θα δείξει τον μέσο όρο της τιμής PP. Στην ένδειξη
στη λειτουργία Μνήμης η τιμή PP θα εμφανιστεί με την συστολική/
διαστολική πίεση μια φορά κάθε 5 δευτερόλεπτα.
145
EL
Ειδική λειτουργία (συν.)
Κάνοντας λιγότερες από τρεις μετρήσεις
Στην λειτουργία ΑΚΟΛΟΥΘΗ ΕΠΙΣΚΕΨΗ «FOLLOW-UP» και μόνο είναι
δυνατόν να σταματήσει η ακολουθία της μέτρησης σε οποιοδήποτε
σημείο πιέζοντας το πλήκτρο Start/Stop Button. Πιέζοντας το πλήκτρο
Start/Stop η συσκευή μπαίνει στην λειτουργία stand-by, ακυρώνοντας
τις υπόλοιπες μετρήσεις της ακολουθίας.Τα στοιχεία των μετρήσεων
που ολοκληρώθηκαν θα εμφανιστούν πιέζοντας το πλήκτρο Μ.
Μεταπηδώντας την αντίστροφη μέτρηση των 60
δευτερολ.
Στην λειτουργία «1st VISIT» και «FOLLOW-UP», η αντίστροφη
μέτρηση των 60 δευτερολέπτων μπορεί να παραληφθεί πιέζοντας το
πλήκτρο Start/Stop. Μόλις πιέσετε το πλήκτρο Start/Stop, η συσκευή θα
αρχίσει αμέσως την επόμενη μέτρηση.
Μεταπηδά την αντίστροφη
μέτρηση των 60 δευτερολέπτων
και αρχίζει την μέτρηση.
Ακυρώνει υπόλοιπες
μετρήσεις σε όποιο
χρονικό σημείο κατά την
διάρκεια της μέτρησης.
*
Η συσκευή μπορεί να μπει σε λειτουργία Stand by πιέζοντας το πλήκτρο Start/
Stop μετά την ολοκλήρωση των μετρήσεων. Η συσκευή αυτόματα θα γυρίσει στην
λειτουργία Stand by αν δεν χρησιμοποιηθεί για πέντε λεπτά.
Λειτουργία Stand by
146
Ρύθμιση πίεσης φουσκώματος
Ρύθμιση των διαστημάτων μέτρησης
Ρύθμιση πίεσης φουσκώματος - Η πίεση φουσκώματος μπορεί να
ρυθμιστεί με το χέρι από 140 σε 280 mmHg πιέζοντας και κρατώντας
κάτω το κουμπί Start/Stop για 7 δευτερόλεπτα.
Ένα χρονικό διάστημα 15 δευτερολέπτων μεταξύ των ενδείξεων
πίεσης αίματος και αυτών των μετρήσεων ξεκινά μετά από μια περίοδο
ανάπαυσης των 5 λεπτών.
1) Πιέζοντας και κρατώντας το πλήκτρο Start/Stop για 3 δευτερόλεπτα.
Πιέστε και κρατήστε
για 7 δευτερόλεπτα...
Πιέστε το κουμπί M για να ρυθμίσετε την πίεση και πιέστε Start/Stop πάλι
για να απομνημονεύσετε την ρύθμιση.
Πιέστε και κρατήστε
για 3 δευτερόλεπτα...
2) Πιέστε το πλήκτρο Μ γα να ρυθμίσετε το διάστημα μέτρησης,
κατόπιν πιέστε το πλήκτρο Start/Stop για να επιβεβαιώσετε, η
μέτρηση θα πάει πάλι πίσω στην λειτουργία stand by.
15 30
45 60
147
EL
Ένδειξη Μετρήσεων
Λειτουργία ΑΚΡΟΑΣΗ «AUSCULTATION»
«1st VISIT» και «FOLLOW-UP» Mode
Η συσκευή μέτρησης πίεσης αίματος The WatchBP Office λειτουργεί
μόνο ως συσκευή πίεσης στην λειτουργία ΑΚΟΡΟΑΣΗ «AUSCULTATION».
Δεν λαμβάνονται ταλαντομετρικές μετρήσεις και πρέπει ο χρήστης να
αποστηθίσει ή να σημειώσει κάπου την συστολική και διαστολική τιμή.
1) Γυρίστε το πλήκτρο mode –Το πλήκτρο M πιέζεται είτε στην
λειτουργία «1st VISIT» ή στην λειτουργία «FOLLOW-UP» για να
ανακληθεί η τελευταία ομάδα των τριπλών μετρήσεων.
AUSCULT 1st FOLLOW UP
Memory
148
AUSCULT 1st FOLLOW UP
AUSCULT 1st FOLLOW UP
2) Ένδειξη του μέσου όρου όλων των μετρήσεων – Αρχικά θα
εμφανιστεί ένα “A”, που ακολουθείται από έναν μέσο όρο όλων
των μετρήσεων που ελήφθησαν στην τελευταία ακολουθία των
μετρήσεων.
3) Ένδειξη τιμών MAP και PP – Δέκα δευτερόλεπτα μετά την
ένδειξη του μέσου όρου της πίεσης αίματος, η συσκευή θα δείξει
τις τιμές για την Πίεση Παλμών (PP) και την Μέση Αρτηριακή Πίεση
(MAP).
5) Οι τιμές για την τρίτη μέτρηση (μαζί με τις τιμές PP και MAP) θα
εμφανιστούν στην οθόνη με την σειρά που αναγράφεται στον αρ.
3.
3
10
δευτερόλεπτα
4) Ένδειξη των μεμονωμένων μετρήσεων – Πιέστε το πλήκτρο Μ
ακόμη μια φορά για να δείτε τις μεμονωμένες μετρήσεις. Η οθόνη θα
αναβοσβήσει δείχνοντας έναν αριθμό “3”που υποδεικνύει την τρίτη
μέτρηση.
10
δευτερόλεπτα
6) Πιέστε το πλήκτρο Μ για να ανακαλέσετε τις τιμές για την δεύτερη
και την τρίτη μέτρηση από την τελευταία ολοκληρωμένη ομάδα των
μετρήσεων.
2
1
149
EL
Ασύρματος έλεγχος του WatchBP Office
Η συσκευή WatchBP Office μπορεί να ελεγχθεί ασύρματα μέσω Bluetooth
με το συνημμένο λογισμικό WatchBP Office. Παρακαλούμε ακολουθήστε
τις οδηγίες που αναφέρονται εδώ για να εγκαταστήσετε μια ασύρματη
σύνδεση με έναν υπολογιστή.
Εγκατάσταση του δέκτη Bluetooth
1) Τοποθετήστε το συνημμένο CD “Bluetooth USB Adaptor”στη θύρα
για το CD-ROM του υπολογιστή. Κάντε κλικ στο «setup.exe» στον
κατάλογο CD-ROM.
2) Θα εμφανιστεί ένα παράθυρο εγκατάστασης. Ακολουθήστε τις
οδηγίες στην οθόνη.
AU SC
ULT
LLO
1st FO
W UP
IN
R VA
7
L
SU
ES
P R c.
se
TE
RE
*
Πριν εγκαταστήσετε το λογισμικό του WatchBP Office, πρέπει να εγκατασταθεί
στον υπολογιστή πρώτα το λογισμικό οδηγού για τον δέκτη του Bluetooth.
*
Η απόσταση μεταξύ της συσκευής WatchBP office και του Η/Υ που θα
λειτουργήσει δεν θα πρέπει να υπερβαίνει τα 10 μ.
150
Bluetooth Receiver
Driver
Install CD
Instruction
3) Βάλτε τον δέκτη Bluetooth σε μια θύρα USB του Η/Υ αφού σας
ζητήσει το πρόγραμμα εγκατάστασης να το κάνετε αυτό.
4) Εκκινήστε ξανά τον Η/Υ αφού ολοκληρωθεί η εγκατάσταση.
*
Επιλέξτε μια θύρα USB μόνο και βεβαιωθείτε ότι χρησιμοποιείτε πάντα την ίδια
θύρα και στο μέλλον.
*
Μην χρησιμοποιήσετε άλλον δέκτη Bluetooth.
5) Ανοίξτε την λειτουργία Bluetooth στην συσκευή WatchBP Office
γυρίζοντας τον διακόπτη Bluetooth στην πίσω πλευρά της
συσκευής στη θέση “ON”. Το σύμβολο Bluetooth θα φωτιστεί και θα
αναβοσβήνει συνεχώς για να δείξει την σύνδεση.
* Σημειώστε ότι η συσκευή WatchBP office δεν θα αντιδράσει όταν
πιέζονται πλήκτρα ή διακόπτες όταν είναι ενεργή η λειτουργία
Bluetooth. Αυτό συμβαίνει για την αποφυγή κατά λάθος διακοπών
όταν διεξάγεται η μέτρηση.
Θέστε ξανά
σε λειτουργία
τον Η/Υ σας
DC 6V 600mA
DC
151
EL
Ασύρματος έλεγχος του WatchBP Office (συν.)
Εγκατάσταση του λογισμικού προγράμματος
Ασύρματος έλεγχος της συσκευής
1) Βάλτε το CD στον οδηγό CD-ROM του Η/Υ σας. Κάντε κλικ στο
«setup.exe» στον κατάλογο CD.
1) Ανοίξτε τον διακόπτη Bluetooth που βρίσκεται στην πίσω πλευρά
της συσκευής.
2) Ακολουθήστε τις οδηγίες που εμφανίζονται στο παράθυρο
εγκατάστασης στη οθόνη του Η/Υ.
2) Βεβαιωθείτε ότι ό δέκτης Bluetooth είναι σε σωστή θέση και ότι το
φως είναι αναμμένο (αν υπάρχει).
3) Όταν ολοκληρωθεί η εγκατάσταση, βεβαιωθείτε ότι θα
ξαναεκκινήσετε τον Η/Υ πριν χρησιμοποιήσετε το πρόγραμμα για
πρώτη φορά.
3) Ξεκινήστε το λογισμικό WatchBP Office από τον Η/Υ. Ακολουθήστε
τις οδηγίες που είναι απαραίτητες για τον έλεγχο του WatchBP
Office από τον υπολογιστή.
WatchBP Analyzer Office
Version 1.0.2.4
Install CD
System Requirements: 550MHz CPU. 256MB Memory, 1024x768
pixel resolution, 256 color, CD-ROM drive, 1 free USB port, 40MB
free hard disk space, Microsoft Windows 2000 / XP / Vista.
152
ed.
serv
©200
s Re
Right
8 Microlif
e Corporation. All
*
Απαιτήσεις συστήματος: 550MHz
CPU. 256MB μνήμη, 1024x768 pixel
ανάλυση, 256 χρώματα, CD-ROM
οδηγός, 1 ελεύθερη θύρα USBt,
40MB ελεύθερα στον σκληρό δίσκο,
Microsoft Windows 2000 / XP / Vista.
DC 6V 600mA
Εντολές λογισμικού
*
Επιλέξτε μέτρηση πίεση αίματος
Κάντε κλικ«1st VISIT», «FOLLOW-UP»
Εισάγετε κωδικό ασθενή
Εισάγετε κωδικό ασθενή
Εκκίνηση λειτουργίας
Πιέστε το πλήκτρο «Measure»
Αποθήκευση μετρήσεων πίεσης αίματος
Πατήστε «Save». Τα δεδομένα αποθηκεύονται σε έναν πίνακα Excel. Το όνομα του αρχείου
δημιουργείται αυτόματα από την εξής φόρμαt «Κωδικός ασθενή+ WatchBP Office
+είδος μέτρησης + yyyymmdd.xls».
Ένδειξη των δεδομένων
Πηγαίνετε στον κατάλογο όπου είναι σωσμένο το αρχείο και ανοίξτε το αντίστοιχο αρχείο
Excel.
Εκτύπωση του φύλλου δεδομένων
Όσο είναι ανοιγμένο το αντίστοιχο αρχείο Excel, κάντε κλικ στην εκτύπωση από το Excel.
Αποσύνδεση της συσκευής
Κάντε κλικ «Disconnect» πριν βγείτε από το πρόγραμμα
Κλείστε το πρόγραμμα
Κάντε κλικ στο «Close»
Το λογισμικό ψάχνει αυτόματα για την κοντινότερη συσκευή WatchBP όταν ξεκινά το πρόγραμμα. Αν η συσκευή δεν εντοπιστεί, βεβαιωθείτε αν ο διακόπτης Βluetooth της
συσκευής WatchBP Office βρίσκεται στην θέση ON.
153
EL
Επαναφορτιζόμενη μπαταρία και μετασχηματιστής ρεύματος
Επαναφορτιζόμενη μπαταρία
Χρήση ενός μετασχηματιστή ρεύματος
Η συσκευή WatchBP Office διαθέτει μια ενσωματωμένη,
επαναφορτιζόμενη μπαταρία Ni-MH που αντέχει έως και 400~500
κύκλους μέτρησης. Η μπαταρία επαναφορτίζεται μεταξύ των χρήσεων με
τον εσώκλειστο μετασχηματιστή ρεύματος.
Παρακαλούμε να χρησιμοποιείτε μόνο τον μετασχηματιστή Microlife
(DSA-20P-05 μετασχηματιστής) που παραδίδεται μαζί με την συσκευή
WatchBP Office για να επαναφορτίζεται τη συσκευή.
1) Βάλτε το καλώδιο του μετασχηματιστή στη πρίζα ρεύματος της
συσκευής WatchBP Office.
2) Συνδέστε το καλώδιο του μετασχηματιστή με την πρίζα ρεύματος
του τοίχου. Όταν ο μετασχηματιστής είναι συνδεδεμένος, δεν
καταναλώνεται ρεύμα της μπαταρίας.
S YS
mmHg
*
Μια πορτοκαλί ένδειξη
επαναφόρτισης σημαίνει ότι η
επαναφόρτιση βρίσκεται σε εξέλιξη.
*
Μια πράσινη ένδειξη
επαναφόρτισης σημαίνει ότι η
επαναφόρτιση έχει ολοκληρωθεί.
DIA
mmHg
DC 6V 600mA
SYS
mmHg
DIA
mmHg
154
DC 6V 600mA
Αναζήτηση προβλημάτων
Πρόβλημα
Δεν υπάρχει ρεύμα (λείπει
ένδειξη LCD)
Πιθανή αιτία
Δεν έχει συνδεθεί κατάλληλα η
παροχή ρεύματος
Πλήρως αποφορτισμένη μπαταρία
Η περιχειρίδα δεν φουσκώνει
κατάλληλα
Χαλαρή σύνδεση του ελαστικού
σωλήνα
Διαρροή του σωλήνα / σάκου
Αδύνατη η ρύθμιση της
απόκρυψης, πίεσης ή του
διαστήματος για διακοπή
Αδύνατη η λήψη μέτρησης
Η επιλογή ασύρματης λειτουργίας
είναι ON
Δεν εμφανίζονται αποτελέσματα Η συσκευή είναι στην λειτουργία
μεταξύ των μετρήσεων
ΑΚΡΟΑΣΗ AUSCULTATION ή η
λειτουργία Απόκρυψη είναι ενεργή
Αδύνατη η πρόσβαση της
Δεν υπάρχει εγκατάσταση
συσκευής μέσω Η/Υ
λογισμικού Bluetooth
Αποκατάσταση
Συνδέστε την παροχή ρεύματος στην πρίζα του τοίχου.
Επαναφορτίστε την επαναφορτιζόμενη μπαταρία συνδέοντας της με
την παροχή ρεύματος.
Βεβαιωθείτε ότι ο ελαστικός σωλήνας της περιχειρίδας είναι
συνδεδεμένος καλά με την συσκευή.
Ελέγξτε αν υπάρχουν ρωγμές στο σωλήνα ή στο σάκο. Επικοινωνήστε
με το τμήμα εξυπηρέτησης πελατών της Microlife γι΄αυτό το
πρόβλημα.
Η συσκευή δεν λειτουργεί με το πλήκτρο Start/Stop και M όταν ο
διακόπτης Bluetooth είναι στη θέση ON. Παρακαλούμε κλείστε τη
λειτουργία Bluetooth ή χρησιμοποιήστε το συνημμένο λογισμικό για
τον έλεγχο της συσκευής.
Απενεργοποιήστε την λειτουργία “απόκρυψη”, ή χρησιμοποιήστε τη
λειτουργία «1st VISIT» / «FOLLOW-UP» για να μετρήσετε την πίεση του
αίματος.
Βεβαιωθείτε ότι το λογισμικό Bluetooth που παραδόθηκε με την
συσκευή είναι εγκατεστημένο στον Η/Υ.
155
EL
Μηνύματα σφάλματος
Αν συμβεί ένα σφάλμα κατά την μέτρηση, η μέτρηση διακόπτεται
και εμφανίζεται ένα μήνυμα σφάλματος «Err».
•
Παρακαλούμε επικοινωνήστε με τον
τοπικό σέρβις της Microlife αν το
σφάλμα δεν επιδιορθώνεται.
•
Αν νομίζετε ότι τα αποτελέσματα είναι
ασυνήθιστα, παρακαλούμε διαβάστε
προσεκτικά τις πληροφορίες στο παρόν
εγχειρίδιο.
156
Σφάλμα
Περιγραφή
Πιθανή αιτία και
αποκατάσταση
«Err 1»
Σήμα πολύ
αδύνατο
Τα σήματα σφυγμού στην
περιχειρίδα είναι πολύ αδύνατα.
Διορθώστε την θέση της
περιχειρίδας και επαναλάβετε
την μέτρηση.
«Err 2»
Σήμα σφάλματος Κατά την διάρκεια της μέτρησης,
η περιχειρίδα διάγνωσε σήματα
σφάλματος, που προκλήθηκαν
π.χ. από κάποια κίνηση ή
τάση μυών. Επαναλάβετε
την μέτρηση, κρατώντας τον
βραχίονα ακίνητο.
«Err 3»
Έλλειψη
πίεσης στην
περιχειρίδα
Δεν δημιουργείται κατάλληλη
πίεση στην περιχειρίδα.
Υπάρχει περίπτωση διαρροής.
Αντικαταστήστε τις μπαταρίες
αν χρειαστεί. Επαναλάβετε την
μέτρηση.
«Err 5»
Μη κανονικό
αποτέλεσμα
Τα σήματα μέτρησης
είναι ανακριβή και είναι
αδύνατο να γίνει ένδειξη του
αποτελέσματος. Διαβάστε
τον κατάλογο ελέγχου για
την διεξαγωγή ξιόπιστων
μετρήσεων και κατόπιν
επαναλάβετε την μέτρηση.
«HI»
Πίεση σφυγμού
ή περιχειρίδας
πολύ υψηλή
Η πίεση στην περιχειρίδα είναι
πολύ υψηλή (πάνω από 300
mmHg) Ή ο σφυγμός είναι
πολύ υψηλός (πάνω από 200
χτύποι το λεπτό). Χαλαρώστε
για 5 λεπτά και επαναλάβετε την
μέτρηση.
«LO»
Σφυγμός πολύ
χαμηλός
Ο σφυγμός είναι πολύ χαμηλός
(κάτω από 40 χτύπους το λεπτό).
Επαναλάβετε την μέτρηση.
157
EL
Ασφάλεια, φροντίδα, τεστ ακριβείας και αποκομιδή
Ασφάλεια και προστασία
Η συσκευή αυτή χρησιμοποιείται μόνο για τον σκοπό που περιγράφεται
στο παρόν εγχειρίδιο. Η συσκευή αποτελείται από ευαίσθητα μέρη
και πρέπει εκ τούτου ο χειρισμός της να γίνεται με προσοχή. Ο
κατασκευαστής δεν θα καταστεί υπεύθυνος για ζημιές που οφείλονται
στη μη αρμόζουσα χρήση της συσκευής.
• Βεβαιωθείτε ότι δεν χρησιμοποιείται η συσκευή από παιδιά χωρίς
επιτήρηση, μερικά τμήματα της συσκευής είναι πολύ μικρά και
υπάρχει κίνδυνος κατάποσης.
• Ενεργοποιήστε την αντλία μόνο όταν είναι τοποθετημένη η
περιχειρίδα.
• Μην χρησιμοποιείτε την συσκευή αν νομίζετε ότι έχει ζημιές ή κάτι
φαίνεται να είναι ασυνήθιστο.
Τηρήστε τις προϋποθέσεις αποθήκευσης και λειτουργίας που
περιγράφονται στο κεφάλαιο "Τεχνικά χαρακτηριστικά" του παρόντος
εγχειριδίου.
Προστατέψτε τη συσκευή από νερό και υγρασία
Προστατέψτε τη συσκευή από την άμεση ηλιακή ακτινοβολία
Προστατέψτε τη συσκευή από υπερβολική ζέστα και κρύο
Αποφύγετε την εγγύτητα ηλεκτρομαγνητικών πεδίων, όπως
αυτά που δημιουργούνται από κινητά τηλέφωνα
• Διαβάστε τις περαιτέρω οδηγίες ασφαλείας σε κάθε μεμονωμένο
Μην ανοίξετε ποτέ την συσκευή
• Μην συνδέετε την συσκευή σ΄ έναν υπολογιστή εκτός και αν σας
Προστατέψτε τη συσκευή από κρούσεις και πτώσεις
κεφάλαιο του παρόντος εγχειριδίου.
ζητείται να το κάνετε αυτό από το λογισμικό του υπολογιστή.
158
Φροντίδα της συσκευής
Καθαρισμός περιχειρίδας
Καθαρίστε την συσκευή μ΄ ένα μαλακό, στεγνό πανί.
ΜΗΝ ΠΛΥΝΕΤΕ την περιχειρίδα. ΜΗΝ σιδερώσετε το περίβλημα της
περιχειρίδας.
ΜΗΝ ΠΛΥΝΕΤΕ την περιχειρίδα!
AU SC
ULT
LLO
1st FO
W UP
IN
ΜΗΝ σιδερώσετε την περιχειρίδα!
R VA
7
L
SU
ES
P R c.
se
TE
RE
Τεστ ακριβείας
Συνιστούμε να διεξάγεται δοκιμή ακριβείας της συσκευής WatchBP
Office κάθε 2 χρόνια ή μετά από μεταλλική κρούση (π.χ. αν πέσει κάτω
η συσκευή). Παρακαλούμε επικοινωνήστε με την Microlife για την
διεξαγωγή ενός τεστ ακριβείας.
Αποκομιδή
Οι μπαταρίες και τα ηλεκτρονικά όργανα πρέπει να
περισυλλέγονται για την αποκομιδή τους σύμφωνα με τους τοπικά
ισχύοντες κανονισμούς και όχι ως οικιακά απορρίματα.
159
EL
Τεχνικά χαρακτηριστικά
Θερμοκρασία λειτουργίας/
υγρασία:
Θερμοκρασία αποθήκευσης/
υγρασία:
Βάρος:
• 10 - 40 °C / 50 - 104 °F
• -20 - +50 °C / -4 - +122 °F
• 15 - 90 % μέγιστη σχετική υγρασία
• 1080 g (συμπεριλ. της επαναφορτιζόμενης
μπαταρίας)
Διαστάσεις:
Μέθοδος μέτρησης:
Εύρος μέτρησης:
Ένδειξη πίεσης περιχειρίδας:
Πηγή τάσης:
• 200 x 125 x 90 mm
• ταλαντομετρική σύμφωνα με Κοροτκώφ
• 30 - 280 mmHg – πίεση αίματος
• 40 - 200 χτύποι το λεπτό – σφυγμός
• Εύρος: 0 - 299 mmHg
• Ανάλυση: 1 mmHg
• Στατική ακρίβεια: πίεσηη εντός ±3 mmHg
• Ακρίβεια σφυγμού: ±5 % της αναγνωσθείσας τιμής
• Επαναφορτιζόμενη μπαταρία,
Αναφορά στα πρότυπα:
• EN 1060-1 /-3, απαιτήσεις NIBP
• IEC60601-1 Γενικές απαιτήσεις ασφαλείας
• IEC60601-1-2 Απαιτήσεις για ΗΜΣ
• EN1060-4, κλινική έρευνα NIBP
• ANSI/AAMI SP10, απαιτήσεις NIBP
• Σύστημα Bluetooth προς V2.0
• FCC μέρος15C
4.8V C3500 mAh
• Μετασχηματιστής ρεύματος DC 7.5V, 2 A
Η εταιρία Microlife επιφυλάσσεται του δικαιώματος τεχνικών
αλλαγών χωρίς προηγούμενη γραπτή ειδοποίηση.
160
Κάρτα εγγύησης
Η παρούσα συσκευή καλύπτεται από μια διετή εγγύηση και
τα εξαρτήματα καλύπτονται από μια μονοετή εγγύηση από
την ημέρα της αγοράς. Αυτή η εγγύηση ισχύει μόνο με την
Όνομα:
Διεύθυνση:
υποβολή της κάρτας, η οποία πρέπει να έχει συμπληρωθεί
από τον ιδιοκτήτη που θα επιβεβαιώνει την ημερομηνία της
Ημερομηνία:
αγοράς ή θα υποβάλει την ταμειακή απόδειξη.
Τηλέφωνο:
Email:
Προϊόν: WatchBP Office
Αρ. προϊόντος: Twin200
Σειριακός αρ.:
Ημερομηνία: