1
KREISEN
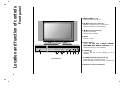
Colour Television
Owner’s Manual
KR-370T
KREISEN
Please read this manual carefully before operating your set.
Retain it for future reference.
See the label attached on the back cover and quote this information to your dealer when you require service.
P/NO : MAN04HY0034
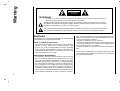
Warning
CAUTION
RISK OF ELECTRIC SHOCK
DO NOT OPEN
WARNING:
TO REDUCE THE RISK OF ELECTRIC SHOCK DO NOT REMOVE COVER (OR BACK). NO USER SERVICEABLE PARTS INSIDE. REFER TO QUALIFIED SERVICE PERSONNEL.
The lightning flash with arrowhead symbol, within an equilateral triangle, is intended to alert the user to
the presence of uninsulated “dangerous voltage” within the product’s enclosure that may be of sufficient
magnitude to constitute a risk of electric shock to persons.
The exclamation point within an equilateral triangle is intended to alert the user to the presence of important operating and maintenance (servicing) instructions in the literature accompanying the appliance.
WARNING:
TO PREVENT FIRE OR SHOCK HAZARDS, DO NOT EXPOSE
THIS PRODUCT TO RAIN OR MOISTURE.
NOTE TO CABLE/TV INSTALLER:
This reminder is provided to call the CATV system installer’s
attention to Article 820-40 of the National Electric Code
(U.S.A.). The code provides guidelines for proper grounding
and, in particular, specifies that the cable ground shall be connected to the grounding system of the building, as close to the
point of the cable entry as practical.
REGULATORY INFORMATION
This equipment has been tested and found to comply with the
limits for a Class B digital device, pursuant to Part 15 of the
FCC Rules. These limits are designed to provide reasonable
protection against harmful interference in a residential installation. This equipment generates, uses and can radiate radio frequency energy and, if not installed and used in accordance with
the instructions, may cause harmful interference to radio communications. However, there is no guarantee that interference
will not occur in a particular installation. If this equipment does
cause harmful interference to radio or television reception,
2
which can be determined by turning the equipment off and on,
the user is encouraged to try to correct the interference by one
or more of the following measures:
- Reorient or relocate the receiving antenna.
- Increase the separation between the equipment and receiver.
- Connect the equipment into an outlet on a circuit different from
that to which the receiver is connected.
- Consult the dealer or an experienced radio/TV technician for
help.
Any changes or modifications not expressly approved by the
party responsible for compliance could void the user’s authority to operate the equipment.
1. Read Instructions
All the safety and operating instructions should be read before the product is operated.
2. Follow Instructions
All operating and use instructions should be followed.
3. Retain Instructions
The safety and operating instructions should be retained for future reference.
4. Heed Warnings
All warnings on the product and in the operating instructions should be
adhered to.
5. Cleaning
Unplug this product from the wall outlet before cleaning. Do not use liquid
cleaners or aerosol cleaners. Use a damp cloth for cleaning.
6. Water and Moisture
Do not use this product near water, for example, near a bath tub, wash
bowl, kitchen sink, or laundry tub, in a wet basement, or near a swimming
pool.
7. Accessories Carts and Stands
Do not place this product on a slippery or tilted surface, or on an unstable
cart, stand, tripod, bracket, or table. The product may slide or fall, causing serious injury to a child or adult, and serious damage to the product.
Use only with a cart, stand, tripod, bracket, or table recommended by the
manufacturer, or sold with the product. Any mounting of the product
should follow the manufacturer’s instructions, and should use a mounting
accessory recommended by the manufacturer.
8. Transporting Product
A product and cart combination should be moved with care. Quick stops,
excessive force, and uneven surfaces may cause the product and cart
combination to overturn.
PORTABLE CART WARNING
9. Attachments
Do not use attachments not recommended by the product manufacturer
as they may cause hazards.
10. Ventilation
Slots and openings in the cabinet are provided for ventilation and to
ensure reliable operation of the product and to protect it from overheating,
and these openings must not be blocked or covered. The openings
should never be blocked by placing the product on a bed, sofa, rug, or
other similar surface. This product should not be placed in a built-in installation such as a bookcase or rack unless proper ventilation is provided or
the manufacturer’s instructions have been adhered to.
Safety Instructions
Important safeguards for you and your new product
Your product has been manufactured and tested with your safety in mind. However, improper use can result in potential electrical shock or fire hazards. To avoid defeating the safeguards that have been built into your new product, please read and observe the following safety points when installing
and using your new product, and save them for future reference.
Observing the simple precautions discussed in this booklet can help you get many years of enjoyment and safe operation that are built into your new
product.
This product complies with all applicable U.S. Federal safety requirements, and those of the Canadian Standards Association.
11. Power Sources
This product should be operated only from the type of power source indicated on the marking label. If you are not sure of the type of power supply to your home, consult your product dealer or local power company.
For products intended to operate from battery power, or other sources,
refer to the operating instructions.
12. Power-Cord Polarization
This product is equipped with a three-wire grounding type plug, a plug
having a third (grounding) pin. This plug will only fit into the groundingtype power outlet. This is a safety feature. If you are unable to insert the
plug into the outlet, contact your electrician to replace your obsolete outlet. Do not defeat the safety purpose of the grounding-type plug.
13. Power-Cord Protection
Power-supply cords should be routed so that they are not likely to be
walked on or pinched by items placed upon or against them, paying particular attention to cords at plugs, convenience receptacles, and the point
where they exit from the product.
3
EN
Safety Instructions
14. Outdoor Antenna Grounding
If an outside antenna or cable system is connected to the product, be
sure the antenna or cable system is grounded so as to provide some protection against voltage surges and built-up static charges. Article 810 of
the National Electrical Code (U.S.A.), ANSI/ NFPA 70 provides information with regard to proper grounding of the mast and supporting structure,
grounding of the lead-in wire to an antenna discharge unit, size of grounding conductors, location of antenna-discharge unit, connection to grounding electrodes, and requirements for the grounding electrode.
Example of Grounding According to National
Electrical Code Instructions
Ground Clamp
Antenna Lead in Wire
Antenna Discharge Unit
(NEC Section 810-20)
Electric Service
Equipment
Grounding Conductor
(NEC Section 810-21)
Ground Clamps
Power Service Grounding
Electrode System (NEC
Art 250, Part H)
NEC - National Electrical Code
15. Lightning
For added protection for this product (receiver) during a lightning storm,
or when it is left unattended and unused for long periods of time, unplug
it from the wall outlet and disconnect the antenna or cable system. This
will prevent damage to the product due to lightning and power-line
surges.
16. Power Lines
An outside antenna system should not be located in the vicinity of overhead power lines or other electric light or power circuits, or where it can
fall into such power lines or circuits. When installing an outside antenna
system, extreme care should be taken to keep from touching such power
lines or circuits as contact with them might be fatal.
17. Overloading
Do not overload wall outlets and extension cords as this can result in a
risk of fire or electric shock.
18. Object and Liquid Entry
Never push objects of any kind into this product through openings as they
may touch dangerous voltage points or short-out parts that could result in
4
a fire or electric shock. Never spill liquid of any kind on the product.
19. Servicing
Do not attempt to service this product yourself as opening or removing
covers may expose you to dangerous voltage or other hazards. Refer all
servicing to qualified service personnel.
20. Damage Requiring Service
Unplug this product from the wall outlet and refer servicing to qualified
service personnel under the following conditions:
a. If the power-supply cord or plug is damaged.
b. If liquid has been spilled, or objects have fallen into the product.
c. If the product has been exposed to rain or water.
d. If the product does not operate normally by following the operating
instructions. Adjust only those controls that are covered by the operating instructions as an improper adjustment of other controls may
result in damage and will often require extensive work by a qualified
technician to restore the product to its normal operation.
e. If the product has been dropped or the cabinet has been damaged.
f. If the product exhibits a distinct change in performance.
21. Replacement Parts
When replacement parts are required, be sure the service technician has
used replacement parts specified by the manufacturer or have the same
characteristics as the original part. Unauthorized substitutions may result
in fire, electric shock, or other hazards.
22. Safety Check
Upon completion of any service or repairs to this product, ask the service
technician to perform safety checks to determine that the product is in
proper operating condition.
23. Wall or Ceiling Mounting
The product should be mounted to a wall or ceiling only as recommended by the manufacturer. The product may slide or fall, causing serious
injury to a child or adult, and serious damage to the product.
24. Heat
The product should be situated away from heat sources such as radiators, heat registers, stoves, or other products (including amplifiers) that
produce heat.
Safety Instructions
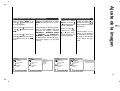
Contents
Location and function of controls
Remote control handset
Battery installation
Front panel
Back panel
Installation
Connection to External equipment
Connecting to an Inside Antenna Setup
Connecting to an Outdoor Antenna Setup
VCR Setup
Cable TV Setup
External A/V Source Setup
DVD Setup
DTV Setup
PC/DTV Setup
2
3-4
5
6-9
10
11-14
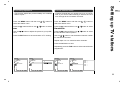
Setting up TV stations
Memorizing the Channels with Auto
Add/Delete Channels with Manual
Fine Tuning Adjustment
Favorite Channels Setup
22-23
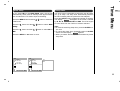
Time Menu
Clock
On/Off Time
Auto sleep / Sleep timer
24-25
Special Menu
CSM (Colour Status Memory)
Caption
Caption/Text
Lock Menu
Lock Menu options
Lock Menu Setup
RGB-PC Menu
PC Setup
Basic operation
On and Off / Programme selection
Volume adjustment
On screen language selection (option)
15
On screen menus
Menu selection
16
Picture adjustment
PSM (Picture Status Memory)
Manual Picture Control
Picture Format
17-18
Sound adjustment
SSM (Sound Status Memory)
Balance
AVL (Auto Volume Leveler)
Stereo/SAP Broadcasts Setup
19-21
26
27-28
29
PIP (Picture-In-Picture) Feature
Watching PIP
Moving the PIP
Swapping the PIP
Selecting a Input Signal Source for the PIP
Programme selection for sub picture
Programme scan
30-31
External Control Device Setup
32-39
Displayable Monitor Specification
KREISEN Product Warranty and Customer
Support Information
Troubleshooting Check list
Contents
Warnings
40
41-42
43
5
EN
Remote control handset
Location and function of controls
6
- All the functions can be controlled with the remote control handset.
- Some functions can also be adjusted with the buttons on the front panel of the set.
- Before you use the remote control handset, please install the batteries.
POWER
switches the set on from standby or off to
standby.
MUTE
switches the sound on or off.
ARC
select your desired picture format.
POWER
NUMBER BUTTONS
PSM (Picture Status Memory)
recalls your preferred picture setting.
1
2
3
FCR (Favorite Channels Setup)
4
5
6
MENU
selects a menu.
7
8
9
SSM (Sound Status Memory)
recalls your preferred sound setting.
I/II
selects the language during dual language
broadcast.
selects the sound output (option).
SSM
PSM
0
EXIT
exits from each mode.
FCR
CC
MENU
ARC
I / II
INPUT SELECT
Select a closed caption: Off, EZ Mute, and On.
PR
PIP
Switches the sub picture on or off.
PIP PR +/Selects a program for the sub picture.
SWAP
Alternates between main and sub picture.
PIP INPUT
Selects the input mode for the sub picture.
PIP POSITION
D / E (Programme Up/Down)
VOL
OK
EXIT
VOL
PC/DVI
PR
CC
PIP PR+
PIP
Q.VIEW
PIP PR-
SWAP
PIP POSITION STILL
SLEEP
PIP INPUT
SCAN
relocates the sub picture in clockwise
direction.
freezes motion of the sub picture.
switches on the programme scan mode
through 4/12 sub pictures.
selects a programme or a menu item.
switches the set on from standby.
F / G (Volume Down/Up)
adjusts the volume.
adjusts menu settings.
OK
accepts your selection or displays the
current mode.
PC/DVI
selects COMPONENT, RGB-DTV, RGB-PC,
RGB-DVI mode.
SLEEP
sets the sleep timer.
STILL
SCAN
INPUT SELECT
select TV, AV1, AV2, S-VIDEO, COMPONENT, RGB-DTV, RGB-PC, RGB-DVI mode.
switches the set on from standby.
KREISEN
Q.VIEW
returns to the previously viewed programme.
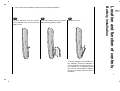
To insert batteries, turn the remote
control handset over and remove the
battery cover.
2
Put the two batteries into the compartment observing battery polarity.
3
Replace the cover.
To avoid damage from possible battery leakage, remove the batteries if
you do not plan to use the remote control handset for an extended period
time. Do not use batteries of differing
age or type. Always discard of batteries safely.
Location and function of controls
1
Battery installation
- Your remote control handset is powered by two AAA type batteries.
7
EN
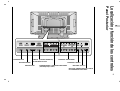
Front panel
Location and function of controls
8
1. MAIN POWER (I / y)
switches the set on or off.
2. D / E (Programme Up/Down)
selects a programme or a menu item.
switches the set on from standby.
3. F / G (Volume Down/Up)
adjusts the volume.
adjusts menu settings.
4. MENU
selects a menu.
5. INPUT SELECT
selects TV, AV1, AV2, S-VIDEO, COMPONENT RGB-DTV, RGB-PC, RGB-DVI mode.
switches the set on from standby.
1
2
(Front panel)
3
4
5
6 7
8
6. POWER (r
r)
switches the set on from standby or off to
standby.
7. POWER/STANDBY INDICATOR (r
r)
illuminates red in standby mode.
illuminates green when the set is switched on.
8. REMOTE CONTROL SENSOR
AUDIO INPUT
DVI INPUT
RGB INPUT
RS-232C INPUT
(CONTROL/SER
(CONTROL/SERVICE)
VICE)
R AUDIO L
Y
AUDIO INPUT
COMPONENT INPUT
(480i/480p/720p/1080i)
Pb
Pr
RS-232C INPUT
(CONTROL/SERVICE) PORT
L AUDIO R
AV1
VIDEO
L AUDIO R
AV2
S-VIDEO
ANT.. IN
ANT
AC INPUT
AUDIO/VIDEO INPUT
S-VIDEO INPUT
AUDIO INPUT
DVI INPUT
VIDEO
AUDIO INPUT / COMPONENT
INPUT (480i/480p/720p/ 1080i)
Antenna INPUT
POWER CORD
Location and function of controls
Back panel
RGB INPUT
9
EN
Installation
Power
Location
This set operates on an AC mains supply, the voltage is as
indicated on the label on the back cover. Never apply DC
power to the set. In the event of thunderstorms or powercuts, please pull out the aerial and mains plugs.
Position your set so that no bright light or sunlight falls
directly onto the screen. Care should be taken not to
expose the set to any unnecessary vibration, moisture,
dust or heat. Also ensure that the set is placed in a position to allow a free flow of air. Do not cover the ventilation
openings on the back cover.
Warning
To prevent fire or shock hazard, do not expose the set to
rain or moisture. Do not rub or strike the Active Matrix LCD
with anything hard as this may scratch, mar, or damage
the Active Matrix LCD permanently.
Service
Never remove the back cover of the set as this can expose
you to very high voltage and other hazards. If the set does
not operate properly, unplug it and call your dealer.
Aerial
Connect the aerial cable to the socket marked +75 Ω on
the back cover. For the best reception an outdoor aerial
should be used.
10
Cleaning
Unplug the set before cleaning the face of the LCD
Screen. Dust the set by wiping the screen and the cabinet
with a soft, clean cloth. If the screen requires additional
cleaning, use a clean, damp cloth. Do not use liquid cleaners or aerosol cleaners.
- Typical wall antenna jack used in apartment buildings, connect the antenna cable as shown below.
(Use the correct type of antenna cable for the type of wall antenna jack.)
Turn clockwise to tighten.
ANT.. IN
ANT
AC INPUT
Bronze Wire
75Ω Round Cable
Antenna
Converter
300Ω Flat Wire
Apartment Buildings
Antenna Jack
Wall Connection Jack
- If you have a 75Ω round cable, insert the bronze wire and then tighten the connection nut. If you have a 300Ω flat wire, connect the twisted wire to the antenna converter and then connect the converter to the antenna jack on the TV.
- If using 75Ω round cable, do not bend the bronze wire. It may cause poor picture quality.
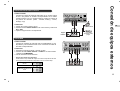
Connecting to an Outdoor Antenna Setup
- This type of antenna is commonly used in single family dwellings.
VHF Antenna
Turn clockwise to tighten.
ANT.. IN
ANT
UHF
Antenna
75Ω Round Cable
Bronze Wire
Antenna Jack
300Ω Flat Wire
Antenna Converter
Single Family Home
- In poor signal areas, to get better picture quality,
install a signal amplifier to the antenna as shown to
the right.
- If signal needs to be split for two TVs, use an
antenna signal splitter for connection.
AC INPUT
VHF
UHF
ANT.. IN
ANT
Signal
Amplifier
AC INPUT
Connection to External equipment
Connecting to an Inside Antenna Setup
11
EN
Connection to External equipment
12
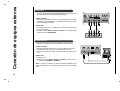
VCR Setup
- In Video mode, TV automatically reverts to TV mode if the CH F / G
button or number buttons are pressed.
L AUDIO R
AV1
VIDEO
Connection 1
S-VIDEO
L AUDIO R
AV2
VIDEO
ANT. IN
Set VCR switch to 3 or 4 and then tune TV to the same channel number.
Connection 2
1. Connect the audio/video output jacks on VCR to the corresponding
input jacks on the TV. When connecting the TV to a VCR, match the
jack colors (Video = yellow, Audio Left = white, and Audio Right =
red).
2. Insert a video tape into the VCR and press PLAY on the VCR. (Refer
to the VCR owner’s manual.)
3. Use the INPUT SELECT button on the remote control to select AV1
or AV2. (If connected to S-VIDEO on side panel, select the S-Video
external input source.)
Typical
Antennas
ANT IN
ANT OUT
S-VIDEO
IN
CH4
CH3
Direct
Connection
OUT
VCR
(R) AUDIO (L)
VIDEO
Cable TV Setup
- After subscribing to a local cable TV service and installing a converter,
you can watch cable TV programming.
- For further cable TV information, contact a local cable service provider.
Connection 1
1. Select 3 or 4 with channel switch on cable box.
2. Tune the TV channel to the same selected output channel of cable box.
3. Select channels at the cable box or with the cable box remote control.
Connection 2
1. Connect the audio/video output jacks on Cable Box to the corresponding input jacks on the TV. When connecting the TV to Cable
Box, match the jack colors
(Video = yellow, Audio Left = white, and Audio Right = red).
2. Use the INPUT SELECT button on the remote control to select AV1
or AV2.
3. Select channels with the cable box remote control.
VIDEO
L AUDIO R
AV1
VIDEO
L AUDIO R
AV2
(R) AUDIO (L)
S-VIDEO
ANT.. IN
ANT
AC INPUT
VIDEO
TV
VCR
RF
Cable Box
Cable
AC INPUT
Connections
Connect the audio/video output jacks on the external A/V equipment to
the corresponding input jacks on the TV. When connecting the TV to
external A/V equipment, match the jack colors (Video = yellow, Audio
Left = white, and Audio Right = red).
VIDEO
L AUDIO R
AV1
VIDEO
S-VIDEO
L AUDIO R
AV2
ANT.. IN
ANT
AC INPUT
Viewing Setup
1. Turn on the external A/V equipment.
2. Use the INPUT SELECT button on the remote control to select AV1
or AV2.
3. Operate the corresponding external equipment. Refer to external
equipment operating guide.
Camcorder
External
Equipment
Video Game set
AUDIO
R
VIDEO
L
DVD Setup
Connections
Connect the DVD video outputs to the COMPONENT (Y, PB, PR)
jacks and connect the DVD audio outputs to the AUDIO jacks.
RS-232C INPUT
(CONTROL/SER
(CONTROL/SERVICE)
VICE)
R AUDIO L
Y
AUDIO INPUT
COMPONENT INPUT
(480i/480p/720p/1080i)
(R) AUDIO (L)
Y
Pb
Pr
Viewing Setup
1. Turn on the DVD player, insert a DVD.
2. Use the INPUT SELECT or PC/DVI button on the remote control
to select COMPONENT.
3. Refer to the DVD player's manual for operating instructions.
• Component Input ports
To get better picture quality, connect a DVD player to
the component input ports as shown below.
Component ports
of the TV
Y
PB
Video output ports
of DVD player
Y
Y
Y
Y
Pr
Pb
B-Y R-Y
Cb Cr
PB PR
PR
DVD
PB
PR
VIDEO
L AUDIO R
AV1
Connection to External equipment
External A/V Source Setup
13
EN
Connection to External equipment
14
DTV Setup
- To watch digitally broadcast programs, purchase and connect a digital set-top box.
Connections
RS-232C INPUT
(CONTROL/SER
(CONTROL/SERVICE)
VICE)
R AUDIO L
Y
AUDIO INPUT
COMPONENT INPUT
(480i/480p/720p/1080i)
(R) AUDIO (L)
Y
Pb
Pr
Connect the digital set-top box video outputs to the COMPONENT
(Y, PB, PR) jacks and connect the digital set-top box audio outputs to
the AUDIO jacks.
Viewing Setup
1. Turn on the digital set-top box. (Refer to the owner’s manual for the
digital set-top box.)
2. Use the INPUT SELECT or PC/DVI button on the remote control to
select COMPONENT.
PB
PR
DTV Receiver (Set-top Box)
PC/ DTV Setup
- After setup, be sure to select RGB-PC source on TV.
Connections
1. Set the monitor output resolution on the PC before connecting to
the TV.
2. Connect the TV to the PC with the PC cable.
3. Connect the PC audio output to the TV's PC SOUND input.
Viewing Setup
1. Turn on the PC.
2. Use the INPUT SELECT or PC/DVI button on the remote control
to select RGB-PC or RGB-DTV.
Note: When the set is inputted RGB-DTV signal in RGB-PC mode,
automatically it is set to RGB-DTV mode.
RGB INPUT
AUDIO INPUT
DVI INPUT
RS-232C INPUT
(CONTROL/SERVICE)
(CONTROL/SER VICE)
VIDEO
L AUDIO R
AV1
2
Programme selection
4
On screen language selection
(option)
Press the main power button to switch
the set on.
You can select a programme
number with the D / E or NUMBER buttons.
Press the MENU button and then use
D / E button to select the SPECIAL
menu.
If the set is in standby mode, press the
POWER, D / E, INPUT SELECT,
PC/DVI or NUMBER buttons on the
remote control handset to switch it on
fully.
Press the POWER button on the remote
control handset.
The set reverts to standby mode.
Press the main power button again to
switch the set off.
3
Volume adjustment
Press the F / G button to adjust
the volume.
If you want to switch the sound
off, press the MUTE button.
You can cancel it by pressing
the MUTE, F / G, SSM or I/II
button.
Press the G button and then use
button to select Language.
D
/
E
Press the G button and then use D / E
button to select your desired language.
All the on screen displays will appear in
the selected language.
Basic operation
1
On and Off
Repeatedly press the MENU button to
return to normal TV viewing.
15
EN
Menu selection
On screen menus
- The dialogue between you and your set takes place on screen with an operator menu. The buttons required for the
operating steps are also displayed.
1
2
Press the MENU button and then use D / E
button to display each
menu.
Press the G button and
then use D / E button to
select a menu item.
4
Press the G button to display the sub menu or the
pull-down menu.
Change the setting of an item in the
sub or pull-down menu with F / G
or D / E.
You can move to the higher level
menu with F button and to move to
the lower level menu press the G
button.
PICTURE
PSM
Contrast
Brightness
Colour
Sharpness
Tint
()OO}{OOOKOOMENU
LOCK
SOUND
STATION
SSM
Balance
AVL
()OO}{OOOKOOMENU
Auto
Manual
Fine
Favorite Ch
()OO}{OOOKOOMENU
()OO}{OOOKOOMENU
SPECIAL
Lock On/Off
Set Password
MPAA
Age Block
Content Block
Aux. Block
Canadian
16
3
Language
CSM
PC Control
WXGA
VGA
Set ID
Caption
Caption/Text
()OO}{OOOKOOMENU
TIME
Clock
Off Time
On Time
Auto Sleep
()OO}{OOOKOOMENU
Press the MENU button and
then use D / E button to
select the PICTURE menu.
Press the G button and then
use D / E button to select
PSM.
Press the G button and then
use D / E button to select a
picture setting on the PSM
pull-down menu.
PICTURE
PSM
Contrast
Brightness
Colour
Sharpness
Tint
()OO}{OOOKOOMENU
Manual Picture Control
Repeatedly press the MENU button to return to normal TV viewing.
You can also recall a desired picture (Dynamic, Standard, Mild
or User) with PSM button on the
remote control. The picture
Dynamic, Standard and Mild
are programmed for good picture
reproduction at the factory and
cannot be changed.
PICTURE
PSM
Contrast
Brightness
Colour
Sharpness
Tint
()OO}{OOOKOOMENU
Press the MENU
button and then use
D / E button to
select the PICTURE
menu.
Press the G button
and then use D / E
button to select the
desired picture option.
PICTURE
Dynamic
Standard
Mild
User
PSM
Contrast
Brightness
Colour
Sharpness
Tint
()OO}{OOOKOOMENU
Press the G button and
then use F / G button
to make appropriate
adjustments.
You can adjust picture
contrast, brightness,
colour, sharpness and
tint to the levels you
prefer.
Picture adjustment
PSM (Picture Status Memory)
PICTURE
PSM
Contrast
Brightness
Colour
Sharpness
Tint
100
()OO}{OOOKOOMENU
17
EN
Picture Format
Picture adjustment
Picture format
You can watch TV in various picture formats; 16:9, 4:3, Zoom, Panorama.
Repeatedly press the ARC button to select your desired picture format.
1. Press the ARC button to select a desired picture format.
• Each press of ARC button changes the screen display as shown below.
• You can also select 16:9, 4:3, Zoom, Panorama in the SCREEN menu.
16 : 9
Panorama
18
4:3
Zoom
Press the MENU button and then
use D / E button to select the
SOUND menu.
Press the G button and then use
D / E button to select SSM.
Press the G button and then use D /
E button to select a sound setting on
the SSM pull-down menu.
Repeatedly press the MENU button to return to normal TV viewing.
SOUND
Sound Frequency Adjustment
a. Press the
G
button in User.
b. Select a sound band by pressing the
F / G button.
c. Make appropriate sound level with
the D / E button.
You can also recall a desired sound
(Flat, Speech, Movie, Music or
User) with SSM button on the remote
control. The sound Flat, Speech,
Movie and Music are programmed for
good sound reproduction at the factory
and cannot be changed.
d. Press the OK button to store it for the
sound User.
The display Stored will appear.
Sound adjustment
SSM (Sound Status Memory)
SOUND
SSM
Balance
AVL
SSM
Balance
AVL
Flat
Speech
Movie
Music
User
0.1 0.5 1.0 5.0 10kHz
()OO}{OOOKOOMENU
()OO}{OOOKOOMENU
()OO}{OOOKOOMENU
19
EN
Sound adjustment
Balance
Press the MENU button and then use
select the SOUND menu.
D
/
E
button to
Press the MENU button and then use
select the SOUND menu.
G
D
/
E
button to
Press the G button and then use D / E button to select the
desired sound item.
Press the
AVL.
button and then use
D
/
E
button to select
Press the G button and then use F / G button to make appropriate adjustments.
Press the G button and then use
On or Off.
D
/
E
button to select
Repeatedly press the MENU button to return to normal TV
viewing.
Repeatedly press the MENU button to return to normal TV
viewing.
This feature maintains an equal volume level; even if you
change channels.
SOUND
SOUND
SSM
Balance
AVL
()OO}{OOOKOOMENU
20
AVL (Auto Volume Leveler)
SOUND
SSM
Balance
AVL
()OO}{OOOKOOMENU
0
SOUND
SSM
Balance
AVL
()OO}{OOOKOOMENU
SSM
Balance
AVL
()OO}{OOOKOOMENU
Off
On
- The TV can receive MTS stereo programs and any SAP (Secondary Audio Program) that accompanies the stereo program, if the broadcaster transmits an additional sound signal as well as the original one.
- Mono: The primary language is heard from left and right speakers. Signal mode is mono.
- Stereo: The primary language is heard from left and right speakers. Signal mode is stereo.
- SAP: The secondary language is heard from left and right speakers.
Mono
Stereo
SAP
Sound adjustment
Stereo/SAP Broadcasts Setup
1. Press the I/II button repeatedly.
• Select mono sound mode if the signal is not clear or in poor signal reception areas.
• Stereo, SAP mode are available only if included on the broadcast signal.
21
EN
Setting up TV stations
Memorizing the Channels with Auto
- For Auto to work, the programming source must be connected to the TV and the TV must be receiving programming signals either over-the-air or from a cable-type service provider.
- You can manually include or erase individual channels.
Press the MENU button and then use
select the Station menu.
Press the MENU button and then use
select the Station menu.
Press the
G
button and then use
D / E
D /E
button to
button to select
Press the
G
button and then use
D / E
D /E
button to
button to select
Auto.
Manual.
Press the G button to begin the channel search.
• Wait for auto program to complete the channel search
cycle before choosing a channel. The TV scans for
over-the-air channels and then channels provided by a
cable service.
Press the G button and then use D / E button to select a
channel you want to add to memory or erase.
NOTES
• When the channel search is complete, use the D / E buttons
to review the memorized channels.
• If you press the OK button in Auto, the function will stop and only
channels programming up to that time will remain.
• Auto function can memorize only the channels which are being
received at that time.
STATION
Auto
Manual
Fine
Favorite Ch
()OO}{OOOKOOMENU
22
Add/Delete Channels with Manual
STATION
Auto
Manual
Fine
Favorite Ch
()OO}{OOOKOOMENU
Press the
E
button and then use
12
GGG
6%
button to select
Press the EXIT button to save and return to TV viewing.
The current channel is added to Memory or Erased from
the channel list.
The display Stored will appear.
STATION
Start
F /G
Memory (add) or Erase (delete).
Auto
Manual
Fine
Favorite Ch
()OO}{OOOKOOMENU
STATION
Auto
Manual
Fine
Favorite Ch
()OO}{OOOKOOMENU
Memory
54
Favorite Channels Setup
- This function adjusts the pictures stability and condition
when it is poor.
- Favorite Channel lets you quickly tune in up to 5 channels of your choice without having to wait for the TV to
scan through all the in-between channels.
Press the MENU button and then use
select the Station menu.
Press the MENU button and then use
select the Station menu.
Press the
G
D / E
button to
F /G
button to
button to select
Press the G button and then use
Favorite ch..
D /E
button to select
button to adjust the picture to your prefer-
Press the G button and then use
the first favorite channel position.
D /E
button to select
button and then use
D /E
Fine.
Use the
ence.
D / E
Press the EXIT button to save and return to TV viewing.
Use the F / G button to set the desired channel number
for first favorite channel.
Repeat steps 3 to 4 to memorize other channels.
Press the OK button to save.
Repeatedly press the FCR button to select stored favorite
programmes.
STATION
Auto
Manual
Fine
Favorite Ch
()OO}{OOOKOOMENU
STATION
Auto
Manual
Fine
Favorite Ch
()OO}{OOOKOOMENU
STATION
0
Auto
Manual
Fine
Favorite Ch
()OO}{OOOKOOMENU
Setting up TV stations
Fine Tuning Adjustment
STATION
Auto
Manual
Fine
Favorite Ch
CATV
CATV
CATV
CATV
CATV
-----------
()OO}{OOOKOOMENU
23
EN
Time Menu
Clock
On/Off Time
You must set the time correctly
before using on/off time function.
The off timer automatically switches the set to standby at the preset time.
Press the MENU button and then
D / E button to select the TIME
menu.
Press the
G
button and then
D /E
button to select Off Time or On Time.
Press the
G
button and then
D /E
button to select On.
D /E
button to select the TIME menu.
To cancel Off/On Time function, press the
Press the G button and then D
button to select Clock.
/E
Press the G button and then D
button to adjust the hour.
/E
Press the G button and then D
button to adjust the minute.
/E
Press the MENU or OK button to
save.
TIME
()OO}{OOOKOOMENU
D /E
button to select Off.
Press the
G
button and then
D /E
button to adjust the hour.
Press the
G
button and then
D /E
button to adjust the minute.
Only On time function; Press the G button and then D
ume level and programe number.
/E
button to adjust vol-
Press the MENU or OK to save.
Note :
a.In the event of power interruption (disconnection or power failure), the clock
must be reset.
b.Two hours after the set is switched on by the on time function it will automatically switch back to standby mode unless a button has been pressed.
c.Once the on or off time is set, these functions operate daily at the preset time.
d.Off Timer function overrides On Timer function if they are set to the same time.
e.The set must be in standby mode for the On Timer to work.
TIME
Clock
Off Time
On Time
Auto Sleep
24
Press the MENU button and then
TIME
Clock
Off Time
On Time
Auto Sleep
()OO}{OOOKOOMENU
--:--
AM
TIME
Clock
Off Time
On Time
Auto Sleep
()OO}{OOOKOOMENU
Clock
Off Time
On Time
Auto Sleep
()OO}{OOOKOOMENU
06:59 AM
CATV.
7
VOL.
46
On
Sleep timer
If you select On on the Auto Sleep menu, the set will
automatically switch itself to standby mode approximately
ten minutes after a TV station stops broadcasting.
Press the MENU button and then D
TIME menu.
Press the
G
button and then
/E
D /E
button to select the
button to select Auto
Sleep.
Press the
Off.
G
button and then
D /E
button to select On or
Press the MENU or OK button to save.
TIME
You don’t have to remember to switch the set off before
you go to sleep. The sleep timer automatically switches
the set to standby after the preset time has elapsed.
Press the SLEEP button to select the number of minutes.
The display ‘ r - - - ’ will appear on the screen, followed
by 10, 20, 30, 60, 90, 120, 180 and 240. The timer begins
to count down from the number of minutes selected.
Note :
a.To view the remaining sleep time, press the SLEEP button once.
b.To cancel the sleep time, repeatedly press the SLEEP
button until the display ‘ r - - - ’ appears.
c.When you switch the set off, the set releases the preset
sleep time.
Time Menu
Auto sleep
TIME
Clock
Off Time
On Time
Auto Sleep
()OO}{OOOKOOMENU
Clock
Off Time
On Time
Auto Sleep
On
Off
()OO}{OOOKOOMENU
25
EN
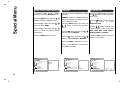
Special Menu
CSM (Colour Status Memory)
Caption
Caption/Text
To initialize values (reset to default
settings), select the Normal option.
Use the cc button repeatedly to select
Captions.
Press the MENU button and then D / E
button to select the SPECIAL menu.
EZ Mute shows the selected captions
Press the G button and then
button to select CSM.
D / E
Press the G button and then D / E
button to select the desired colour
temperature.
Press the MENU button to save.
option (if available on program) when
the TV sound is muted.
Press the MENU button and then use
D / E button to select the SPECIAL
menu.
Press the G button and then use D / E
button to select Caption.
Press the G button and then use D / E
button to select Off, On or Ez Mute.
Press the menu button and then
use D / E button to select the SPECIAL menu.
G
E
Press the
button and then use
button to select
Caption/Text.
D
/
Use the F / G button to select your
caption selection. Your choices are:
CC1, CC2, CC3, CC4, Text 1,
Text 2, Text3 and Text4.
Press the EXIT button to save and
return to TV viewing.
Press the MENU or OK button to save.
Note : It’s not available in Component
and RGB-PC modes.
SPECIAL
Language
CSM
PC Control
WXGA
VGA
Set ID
Caption
Caption/Text
()OO}{OOOKOOMENU
26
SPECIAL
Cool
Normal
Warm
Language
CSM
PC Control
WXGA
VGA
Set ID
Caption
Caption/Text
()OO}{OOOKOOMENU
SPECIAL
Off
On
Ez Mute
Language
CSM
PC Control
WXGA
VGA
Set ID
Caption
Caption/Text
()OO}{OOOKOOMENU
F
CC1
G
Parental Control can be used to block specific channels, ratings and other viewing sources.
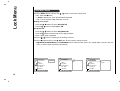
The Parental Control Function (V-Chip) is used to block program viewing based on the ratings sent by the broadcast station. The
default setting is to allow all programs to be viewed. Viewing can be blocked by the type of program and by the categories chosen to
be blocked. It is also possible to block all program viewing for a time period. To use this function, the following must be set :
1. Ratings and categories to be blocked.
2. Set a password
3. Enable the lock
V-Chip rating and categories
Rating guidelines are provided by broadcast stations. Most television programs and television movies can be blocked by TV Rating
and/or Individual Categories. Movies that have been shown at the theaters or direct-to-video movies use the Movie Rating System
(MPAA) only.
For Movies previously shown in theaters :
Movie Ratings :
• Unblocked
• G and Above
(general audience)
• PG and Above
(parental guidance suggested)
• PG-13 and Above
(13 years and older))
• NC-17 and Above
(18 years and older)
•X
(adult)
If you set PG-13 and Above : G and PG movies will be available
, PG-13, NC-17 and X will be blocked.
For Television programs including made-for-TV movies:
General TV Ratings:
• Unblocked
• TV-G and Above
• TV-PG and Above
• TV-14 and Above
• TV-MA
Children TV Ratings:
• Unblocked
• TV-Y and Above
• TV-Y7
(general audience) (individual categories
do not apply)
(parental guidance suggested)
(14 years and older)
(mature audience)
(youth) (individual content categories
do not apply)
(youth, 7 years and older)
Content Categories:
• Dialog - sexual dialogue
• Language - adult language
(applies to TV-PG and Above,
TV-14, Unblocked)
(applies to TV-PG and Above,
Lock Menu
Lock Menu Options
TV-14 and Above, TV-MA,
Unblocked)
• Sex scenes - sexual situations (applies to TV-PG and Above,
TV-14 and Above, TV-MA,
Unblocked)
• Violence
(applies to TV-PG and Above,
TV-14 and Above, TV-MA,
Unblocked)
• F Violence - fantasy violence
(applies to TV-PG and Above,
TV-14 and Above, TV-MA,
Unblocked)
For Canadian English/French language rating system:
Canadian English language rating system:
• C and Above
(Children)
• C8+ and Above
(8 years and up)
• G and Above
(General programming. Suitable for all
audiences.)
• PG and Above
(Parental guidance suggested)
• 14+and Above
(Viewers 14 years and older)
• 18+
(Adult programming)
• Unblocked
Canadian French language rating system:
•G
(General)
• 8 ans+
(8 years and older)
• 13 ans+
(13 years and older)
• 16 ans+
(16 years and older)
• 18 ans+
(Adults only)
• Unblocked
27
EN
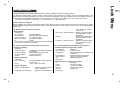
Lock Menu
Lock Menu Setup
Press the MENU button and then use
Then, press the G button.
D /E
button to select the LOCK menu.
• If Lock is already set, enter the password requested.
• The TV is set with the initial password “0-0-0-0”.
Setting Lock on/off:
Press the
Use the
D /E
F /G
button to select Lock on/off.
button to select on or off.
Set password:
Press the
D /E
button to select Set password.
Press the G button and then enter a four digit password.
Enter it again when requested.
Press the
D /E
Press the
G
button to select type of blocking to be set .
button and then use
D /E
button to select type of ratings to block .
• Age block, Content block, and Canadian menus, also have sub menus. So, repeat steps 4 and 5 in the sub
menu, to set the types of blocking and ratings.
LOCK
LOCK
Lock On/Off
Set Password
MPAA
Age Block
Content Block
Aux. Block
Canadian
()OO}{OOOKOOMENU
28
Enter Code
----
LOCK
Lock On/Off
Set Password
MPAA
Age Block
Content Block
Aux. Block
Canadian
()OO}{OOOKOOMENU
On
Off
Lock On/Off
Set Password
MPAA
Age Block
Content Block
Aux. Block
Canadian
()OO}{OOOKOOMENU
New
Confirm
-------
You can adjust horizontal/vertical position, clock, phase, and auto-configure,
reset as you prefer.
Press the MENU button and then D / E
button to select the SPECIAL menu.
Press the G button and then D / E button to select the desired picture item.
Press the F / G button to make appropriate adjustments.
H-Position / V-Position
This function is to adjust picture to
left/right and up/down as you prefer.
Clock
This function is to minimize any vertical
bars or stripes visible on the screen
background. And the horizontal screen
size will also change.
Phase
This function allows you to remove any
horizontal noise and clear or sharpen
the image of characters.
SPECIAL
Language
CSM
PC Control
WXGA
VGA
Set ID
Caption
Caption/Text
()OO}{OOOKOOMENU
Auto-configure
This function is for the automatic
adjustment of the screen position,
clock and phase. The displayed image
will disappear for a few seconds while the
Auto-configuration is in progress.
WXGA or VGA (Only RGB
[DVI] mode)
Reset
This function allows you to return to the
good picture reproduction programmed at the factory and cannot be
changed.
Press the MENU button and then
D / E button to select the SPECIAL menu.
Note : Some signal from some graphics boards may not function properly. If
the results are unsatisfactory, adjust
your monitor’s position, clock and
phase manually.
Press the OK button to store it for the
PC monitor picture.
When the set is inputted DVI-480p
signal in VGA mode, select 480p on
the special menu.
Press the G button and then
button to select WXGA.
D /E
Press the G button and then D / E
button to select the desired WXGA
resolution.
RGB-PC Menu
PC Setup
Repeatedly press the MENU button
to return to normal TV viewing.
Press the EXIT button to return to PC
mode.
SPECIAL
Language
CSM
PC Control
WXGA
VGA
Set ID
Caption
Caption/Text
()OO}{OOOKOOMENU
SPECIAL
H-Pos. 0
V-Pos. 0
Clock 10
Phase 15
Auto
Reset
Language
CSM
PC Control
WXGA
VGA
Set ID
Caption
Caption/Text
1024X768
1280X768
1360X768
1366X768
()OO}{OOOKOOMENU
29
EN
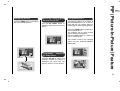
PIP (Picture-In-Picture) Feature
30
- PIP lets you view 2 different inputs (sources) on your monitor screen at the same time. One source will be large, and
the other source will show a smaller inset image.
- PIP is not available in Lock On mode only.
Watching PIP
Press the PIP button to show the sub picture.
• Each press of PIP button changes the screen display as shown below.
Moving the PIP
Press the PIP POSITION button.
Press the PIP POSITION button
repeatedly until desired position is
achieved. The sub pictures move
clockwise.
Press the SWAP button to exchange
the main and sub pictures.
Selecting a Input Signal
Source for the PIP
Use the PIP INPUT button to
select the input source for the sub
picture.
Programme scan
This function enables you to search all
the stored stations on 4 or 12 sub pictures and see your favorite station by
exchanging the main and sub pictures.
Press the SCAN button repeatedly to
select POP4/POP12.
The selected sub or main pictures
search all the stored stations.
Press the EXIT button to switch off
sub or main pictures.
This function works in the following
mode : AV1, AV2, S-VIDEO, COMPONENT(480i).
Programme selection
for sub picture
Main Picture
Sub Picture
Press the PIP PR +/- button. The
selected programme number is
displayed just below the programme number of main picture.
PIP (Picture-In-Picture) Feature
Swapping the PIP
31
EN
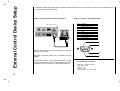
External Control Device Setup
32
- Connect the RS-232C input jack to an external control device (such as a computer or an A/V control system) and control the set’s functions externally.
How to connect external control equipment
Type of connector; D-Sub 9-pin male
No.
1
2
3
4
5
6
7
8
9
< Side panel of the set >
RGB INPUT
AUDIO INPUT
DVI INPUT
RS-232C INPUT
(CONTROL/SER VICE)
(CONTROL/SERVICE)
Pin name
No connection
RXD (Receive data)
TXD (Transmit data)
DTR (DTE side ready)
GND
DSR (DCE side ready)
RTS (Ready to send)
CTS (Clear to send)
No Connection
1
5
Connect the serial port of the control device to the RS232C jack on the set.
9
RS-232C connection cables are not supplied with the
Monitor.
The Monitor remote control and front panel controls
(except main power) will not be functional if the set is
controlled by a PC computer or other external device.
6
Communication Parameters
•
•
•
•
•
Baud rate : 115200 bps (UART)
Data length : 8 bits
Parity : None
Stop bit : 1 bit
Communication code : ASCII code
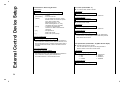
Command Reference List
Press the MENU button and then use
select the SPECIAL menu.
Press the G button and then use
select Set ID.
D
D
/
/
E
E
button to
button to
Press the G button and then use F / G button to
adjust Set ID to choose the desired monitor ID number.
The adjustment range of Set ID is 1 ~ 99.
Use this function to specify a monitor ID number.
SPECIAL
Language
CSM
PC Control
WXGA
VGA
Set ID
Caption
Caption/Text
COMMAND COMMAND
2
1
01. Power
02. Input Select
03. Aspect Ratio
04. Screen Mute
05. Volume Mute
06. Volume Control
07. Contrast
08. Brightness
09. Colour
10. Tint
11. Sharpness
12. Remote control lock mode
13. PIP/Twin
14. PIP position
15. Balance
16. Colour temperature
17. PIP input source
18. SSM
19. AVL
20. Auto Sleep
21. Horizontal Shift
22. Vertical Shift
23. Auto Configure
24. Reset
25. On screen language selection
26. Programme Selection
27. Programme Number input
28. PSM
k
k
k
k
k
k
k
k
k
k
k
k
k
k
k
k
k
k
k
k
k
k
k
k
k
k
k
k
a
m
q
b
c
i
d
e
f
l
g
p
r
s
j
u
y
h
k
n
v
w
~
!
^
%
$
t
DATA
(Hexadecimal)
0~1
0~7
0~5
0~1
0~1
0 ~ 64
0 ~ 64
0 ~ 64
0 ~ 64
0 ~ 64
0 ~ 64
0~1
0~2
0~3
0 ~ 64
0~2
0~4
1~5
0~1
0~1
0 ~ C6
0 ~ 27
1
1
0~2
0~1
0 ~ 125
0~3
External Control Device Setup
Set ID
()OO}{OOOKOOMENU
33
EN
External Control Device Setup
34
Transmission / Receiving Protocol
G To control Power On/Off of the set.
Transmission
[Command1][Command2][ ][Set ID][ ][Data][Cr]
* [Command 1]
: First command to control set.
* [Command 2]
* [Set ID]
: To control LCD set.
: You can adjust the set ID to choose
desired monitor ID number in special
menu. See previous page.
Adjustment range is 1 ~ 99.
When selecting Set ID ‘0’, every
connected LCD set is controlled.
: To transmit command data.
Transmit ‘FF’ data to read status of
command.
: Carriage Return
ASCII code ‘0x0D’
: ASCII code ‘space (0x20)’
* [DATA]
* [Cr]
* [ ]
01. Power (Command2 : a)
(j or k)
OK Acknowledgement
Transmission
[k][a][ ][Set ID][ ][Data][Cr]
Data 0 : Power Off
1 : Power On
Acknowledgement
[a][ ][Set ID][ ][OK][Data][x]
G To show Power On/Off.
Transmission
[k][a][ ][Set ID][ ][FF][Cr]
Data 0 : Power Off
1 : Power On
Acknowledgement
[a][ ][Set ID][ ][OK][Data][x]
* In like manner, if other functions transmit ‘FF’ data based
on this format, Acknowledgement data feed back presents
status about each function.
[Command2][ ][Set ID][ ][OK][Data][x]
* The Monitor transmits ACK (acknowledgement) based on
this format when receiving normal data. At this time, if the
data is data read mode, it indicates present status data. If
the data is data write mode, it returns the data of the PC
computer.
02. Input Select (Command2 : m) (Main Picture Input)
Error Acknowledgement
G To select input source for the set.
You can also select an input source using the INPUT
SELECT button on the set's remote control.
[Command2][ ][Set ID][ ][NG][x]
Transmission
[k][m][ ][Set ID][ ][Data][Cr]
* The Monitor transmits ACK (acknowledgement) based on
this format when receiving abnormal data from
non-viable functions or communication errors.
Data 0
1
2
3
: TV
: AV1
: AV2
: S-Video
Acknowledgement
[m][ ][Set ID][ ][OK][Data][x]
4
5
6
7
:
:
:
:
Component
RGB-PC
RGB-DTV
RGB-DVI
06. Volume Control (Command2 : i)
G To adjust the screen format.
You can also adjust the screen format using the ARC
(Aspect Ratio Control) button on remote control handset.
Transmission
G To adjust volume.
You can also adjust volume with the volume buttons
on remote control handset.
[k][q][ ][Set ID][ ][Data][Cr]
Data 0 : 16:9
1 : 14:9
2 : 4:3
Transmission
[k][i][ ][Set ID][ ][Data][Cr]
3 : Zoom
4 : Panorama
Acknowledgement
Data Min : 0 ~ Max : 64
• Refer to ‘Real data mapping 1’. See page 37.
Acknowledgement
[i][ ][Set ID][ ][OK][Data][x]
[q][ ][Set ID][ ][OK][Data][x]
* Using the PC input, you select either 16:9 or 4:3 screen aspect
ratio.
07. Contrast (Command2 : d)
04. Screen Mute (Command2 : b)
G To adjust screen contrast.
You can also adjust contrast in the PICTURE menu.
G To select screen mute on/off.
Transmission
Transmission
[k][d][ ][Set ID][ ][Data][Cr]
[k][b][ ][Set ID][ ][Data][Cr]
Data Min : 0 ~ Max : 64
• Refer to ‘Real data mapping 1’. See page 37.
Data 0 : Screen mute off (Picture on)
1 : Screen mute on (Picture off)
Acknowledgement
Acknowledgement
[b][ ][Set ID][ ][OK][Data][x]
[d][ ][Set ID][ ][OK][Data][x]
05. Volume Mute (Command2 : c)
08. Brightness (Command2 : e)
G To control volume mute on/off.
You can also adjust mute using the MUTE button on
remote control handset.
Transmission
G To adjust screen brightness.
You can also adjust brightness in the PICTURE menu.
[k][c][ ][Set ID][ ][Data][Cr]
Data Min : 0 ~ Max : 64
• Refer to ‘Real data mapping 1’. See page 37.
Data 1 : Volume mute on (Volume off)
0 : Volume mute off (Volume on)
Acknowledgement
[c][ ][Set ID][ ][OK][Data][x]
Transmission
[k][e][ ][Set ID][ ][Data][Cr]
Acknowledgement
[e][ ][Set ID][ ][OK][Data][x]
External Control Device Setup
03. Aspect Ratio (Command2 : q) (Main picture format)
35
EN
External Control Device Setup
09. Colour (Command2 : f)
12. Remote Control Lock Mode (Command2 : p)
G To adjust the screen color.
You can also adjust color in the PICTURE menu.
G To lock the remote control and front panel controls on the
set
Transmission
Transmission
[k][f][ ][Set ID][ ][Data][Cr]
[k][p][ ][Set ID][ ][Data][Cr]
Data Min : 0 ~ Max : 64
• Refer to ‘Real data mapping 1’. See page 37.
Acknowledgement
Data 0: off
[f][ ][Set ID][ ][OK][Data][x]
[p][ ][Set ID][ ][OK][Data][x]
• If you’re not using the remote control, use this mode.
When main power is on/off, remote control lock is released.
10. Tint (Command2 : l)
G To adjust the screen tint.
You can also adjust tint in the PICTURE menu.
Transmission
[k][l][ ][Set ID][ ][Data][Cr]
Data Red : 0 ~ Green : 64
* Refer to ‘Real data mapping 1’. See page 37.
Acknowledgement
[l][ ][Set ID][ ][OK][Data][x]
13. PIP / Twin (Command2 : r)
G To control the PIP (Picture In picture) or TWIN picture.
You can also control the PIP/TWIN picture using the PIP or
TWIN button on the remote control handset or in the
PIP/DW menu.
Transmission
[k][r][ ][Set ID][ ][Data][Cr]
Data 0: off
1: PIP
2: DW
Acknowledgement
[r][ ][Set ID][ ][OK][Data][x]
11. Sharpness (Command2 : g)
G To adjust the screen sharpness.
You can also adjust sharpness in the PICTURE menu.
Transmission
[k][g][ ][Set ID][ ][Data][Cr]
Data Min: 0 ~ Max: 64
• Refer to ‘Real data mapping 1’. See page 37.
Acknowledgement
[g][ ][Set ID][ ][OK][Data][x]
14. PIP Position (Command2 : s)
G To select sub picture position for PIP.
You can also adjust the sub picture position using POSITION
on the remote control handset or in the PIP/DW menu.
Transmission
[k][s][ ][Set ID][ ][Data][Cr]
Data 0:
1:
2:
3:
Right down on screen
Left down on screen
Left up on screen
Right up on screen
Acknowledgement
[s][ ][Set ID][ ][OK][Data][x]
36
1: on
Acknowledgement
* Real data mapping 1
G To adjust balance.
You can also adjust balance in the SOUND menu.
0 : Step 0
Transmission
A : Step 10 (SET ID 10)
[k][j][ ][Set ID][ ][Data][Cr]
Data Min: 0 ~ Max: 64
• Refer to ‘Real data mapping 1’. See page 37.
Acknowledgement
F : Step 15 (SET ID 15)
10 : Step 16 (SET ID 16)
G To adjust colour temperature.
You can also adjust CSM in the PICTURE menu.
0 : -10
5 : -9
A : -8
2D: -1
32 : 0
37 : +1
64 : Step 100
5F : +9
64 : +10
[j][ ][Set ID][ ][OK][Data][x]
16. Colour Temperature (Command2 : u)
* Real data mapping 2
18. SSM (Command2 : h)
G To select sound mode.
Transmission
Transmission
[k][u][ ][Set ID][ ][Data][Cr]
[k][h][ ][Set ID][ ][Data][Cr]
Data 0: Cool
Data 1 : Flat
2 : Speech
3 : Movie
1: Normal
2: Warm
Acknowledgement
4 : Music
5 : User
[u][ ][Set ID][ ][OK][Data][x]
Acknowledgement
[h][ ][Set ID][ ][OK][Data][x]
17. PIP Input Select (Command2 : y)
G To select input source for sub picture in PIP/Twin picture
mode.
[k][y][ ][Set ID][ ][Data][Cr]
Data 0 : TV
1 : AV1
2 : AV2
19. AVL (Command2 : k)
G To keeps on an equal volume level even if you change
programmes.
Transmission
3 : S-Video
4 : Component(480i)
Transmission
[k][k][ ][Set ID][ ][Data][Cr]
Data 0: Off
Acknowledgement
Acknowledgement
[y][ ][Set ID][ ][OK][Data][x]
[k][ ][Set ID][ ][OK][Data][x]
* In Component 480i for main picture, you can select RGB and DVi
for sub picture.
1: On
External Control Device Setup
15. Balance (Command2 : j)
37
EN
External Control Device Setup
38
20. Auto Sleep (Command2 : n)
23. Auto Configure (Command2 : ~)
G If there is no input signal, the set turn off automatically
after 10 minutes.
G To adjust picture position and minimize image shaking
automatically. It works only in RGB (PC) mode.
Transmission
Transmission
[k][n][ ][Set ID][ ][Data][Cr]
[k][~][ ][Set ID][ ][Data][Cr]
Data 0: Off
1: On
Data 1: Auto Configure start
Acknowledgement
Acknowledgement
[n][ ][Set ID][ ][OK][Data][x]
[~][ ][Set ID][ ][OK][Data][x]
21. Horizontal Shift (Command2 : v)
24. Reset (Command2 : !)
G To adjust picture to left/right as you prefer.
G To return to the good picture reproduction programmed at the
factory and cannot be changed.
Transmission
[k][v][ ][Set ID][ ][Data][Cr]
Data 0 : 0~c6
Transmission
[k][!][ ][Set ID][ ][Data][Cr]
Data 1 : Reset start
Acknowledgement
Acknowledgement
[v][ ][Set ID][ ][OK][Data][x]
[!][ ][Set ID][ ][OK][Data][x]
22. Vertical Shift (Command2 : w)
25. On screen language selection (Command2 : ^)
G To adjust picture to up/down as you prefer.
G To select your desired language.
Transmission
Transmission
[k][w][ ][Set ID][ ][Data][Cr]
[k][^][ ][Set ID][ ][Data][Cr]
Data 0 : 0 ~ 27
Data 0 : English
1 : French
2 : Spain
Acknowledgement
[w][ ][Set ID][ ][OK][Data][x]
Acknowledgement
[^][ ][Set ID][ ][OK][Data][x]
G To select a programme for the main picture.
Transmission
[k][%][ ][Set ID][ ][Data][Cr]
Data 0 : Ch Up
1 : Ch Down
Acknowledgement
[%][ ][Set ID][ ][OK][Data][x]
27. Programme Number input (Command2 : $)
G To select a programme.
Transmission
[k][$][ ][Set ID][ ][Data][Cr]
Data 0 : 0~125
Acknowledgement
[$][ ][Set ID][ ][OK][Data][x]
28. PSM (Command2 : t)
G To select picture mode.
Transmission
[k][t][ ][Set ID][ ][Data][Cr]
Data 0 : Dynamic
1 : Standard
Acknowledgement
[t][ ][Set ID][ ][OK][Data][x]
2 : Mild
3 : User
External Control Device Setup
26. Programme selection (Command2 : %)
39
EN
Displayable Monitor
Specification
RGB Mode / DVI Mode
Horizontal
Frequency (KHz)
Vertical
Frequency (Hz)
31.469
70.08
37.927
85.03
31.500
60.00
37.500
67.00
37.861
72.80
37.500
75.00
43.269
85.00
35.156
56.25
37.879
60.31
48.077
72.18
46.875
75.00
53.674
85.06
48.363
60.00
56.476
70.06
60.023
75.02
68.677
84.99
54.348
60.05
47.700
60.00
60.150
75.00
1360X768
49.020
60.00
MODE
Resolution
DOS
720X400
VGA
SVGA
640X480
800X600
XGA
1024X768
SXGA
1152X864
1280X768
WXGA
1366X768
49.020
60.00
SXGA
1280X1024
63.981
60.02
MAC
832X624
49.725
74.55
(Synchronization input form : separate)
40
Note:
a. If the set is cold, there may be a small “flicker” when the set is
switched on. This is normal, there is nothing wrong with the
set.
b. If possible, use the VESA 1,024x768@60Hz video mode
to obtain the best image quality for your LCD monitor. If
used to PC vertical frequency 85Hz, some noise can be
seen when PIP is on. In this case, set the PC vertical frequency to 60Hz. The set has been pre-adjusted to the
mode VESA 1,024x768@60Hz.
c. Some dot defects may appear on the screen, like Red,
Green or Blue spots. However, this will have no impact
or effect on the monitor performance.
d. Do not press the LCD screen with your finger for a long
time as this may produce some temporary distortion
effects on the screen.
e. When the PC screen appears on the set, a message may
appear on the screen, and the message will differ according to the Window system version (Win98, 2000). If a message appears click “Next” until the message finishes.
f. If the message “Out Of Range” appears on the screen,
adjust the PC as in the ‘Displayable Monitor Specification’
section.
KREISEN Product Warranty and Customer Support Information
EN
End-User Warranty Terms and Conditions
Encross Enterprise, Inc. ("Encross") warrants that your new KREISEN product(s) are against defects in material and workmanship during
the warranty period from the date of the original purchase of the new product within our service the territory. If a product proves to be defective in material or workmanship during the warranty period, Encross will, at its sole option, repair or replace the product with a similar product, provided the purchaser adheres to certain return authorization procedures and guidelines. For better service, Encross strongly encourages you to register your product by filling out the warranty registration card provided with your product or register online.
Warranty Period for All Encross (KREISEN) Products
Parts :
Labor :
Advanced Cross-Ship :
1 year
1 year
1 year
Warranty Exclusion
G
The limited warranty does not cover the repair of damages occurring after you purchase the monitor in shipping or in storage or that
caused by disaster, accident, misuse, abuse, negligence, mishandling, improper packaging or shipping, unauthorized repair or modification, or acts of God.
G
This limited warranty does not cover repair of monitor display quality degradation resulting from failure of following the manufacturer's instruction with respect to proper handling, operation, installation, usage, service and maintenance of the monitor.
G
Encross shall not be liable for any incidental or consequential damages resulting from the use of this product.
Date of Original Purchase
A copy of the original proof of purchase will be required to establish the original date of purchase for all warranty service.
Product Replacement
Replacement of a product or parts may include remanufactured, refurbished parts or components. The product replacement is warranted
for 60 days or for the period remaining on the original warranty, whichever is greater.
Replaced/repaired product will be shipped via UPS delivery, to any point within the territory. Extra freight charges will apply for expedited
shipping, if such service is available.
41
Return Authorization Procedures
1. CONTACT US
Encross Technical Support staff will help you identify if the unit needs to be repaired (866-573-4736)
Please also check our website for any updates on warranty and support issues at either of these addresses: www.encrossenterprise.com or www.kreisen.com.
2. ACQUIRE AN RMA NUMBER
After we receive your RMA request, Encross staff will contact you within 48 hours and assign you an RMA number. For Advanced CrossShip service, a replacement unit will be sent to you before returning the defective unit.
3. RETURN UNIR FOR REPAIR/ REPLACEMENT
Please send your original back to us in the original box. Damage due to improper or inadequate packing will be charged to you as an
out-of-warranty cost. Please remember to mark the RMA number outside of the box. The original unit must be properly packaged in the
same manner as the replacement unit. Please contact Encross Technical Support for monitor shipping instructions at 866-573-4736 or
[email protected]
4. RETURN AND REPLACE
Once the unit is repaired, we will ship it back to you free of charge. If the unit is not repairable, we will send you a replacement instead.
Before Contacting Us
In many cases, your product may not need repair. Before you contact us, please consult the troubleshooting section in your user's guide
or Encross's FAQ web page at
www.encrossenterprise.com to see if you can easily remedy the problem yourself.
If neither of the approaches resolves your problem, please locate your proof of purchase date, indicated on your receipt or invoice. Get your
product model and serial number on the back of your products and have the product in front of you when you call us.
Encross Technical Support Service
During all three years of product warranty, we support your basic configuration, setup and troubleshooting questions, and when required,
we provide you with all instructions on how to return your product for repair.
For support inquiries in the United States, please call 866-573-4736 or e-mail us at [email protected]
NOTE: RMA program is subject to changes at anytime without notice.
42
Check these items and try to adjust these
The mains plug-(plugged in and switched on)
Is the TV switched on
Troubleshooting
No picture, no sound
Sound OK, poor picture
Picture OK, poor sound
Picture blurred
Lines or streaks in picture
Poor reception on some channels
No colour
Poor colour
Remote control does not work
Incorrect position
Vertical bars or stripes on background
Horizontal noise
Signal Cable message appears
Check list
Symptoms
Try another channel (weak signal)
Check aerial (plugged into TV?)
Check aerial (broken lead?)
Check aerial
Check for local interference
Adjust contrast
Adjust brightness
Adjust colour
Adjust volume
Check the batteries in remote control
Check Audio/Video sockets (VCR only)
Auto-configure or adjust the H/V position
Auto-configure or adjust Clock
Auto-configure or adjust Clock Phase
Is the Signal Cable connected or loose
43
EN
KREISEN
Televisor en color
MANUAL DEL USUARIO
KREISEN
Por favor, lea atentamente este manual antes de utilizar el
aparato.
Consérvelo para futuras consultas.
Consulte la etiqueta adherida en la cubierta posterior y proporcione dicha información a su proveedor cuando necesite
asistencia técnica.
Advertencia
ADVERTENCIA
RIESGO DE CHOQUE
ELÉCTRICO
NO LO ABRA
ADVERTENCIA:
PARA REDUCIR EL RIESGO DE CHOQUE ELÉCTRICO NO QUITE LA CUBIERTA (O PARTE POSTERIOR). NO
HAY PARTES DE SERVICIO PARA EL USUARIO EN EL INTERIOR DEL APARATO. CONSULTE AL PERSONAL
DE SERVICIO CALIFICADO.
El símbolo del rayo con punta en forma de flecha dentro de un triángulo equilátero, está destinado para
alertar al usuario de la presencia de "voltaje peligroso" sin aislar dentro de la cubierta del producto que
podría ser de magnitud suficiente para constituir un riesgo de choque eléctrico a las personas.
El signo de exclamación dentro del triángulo equilátero tiene la intención de alertar al usuario de la presencia de importantes instrucciones de operación y mantenimiento (servicio) en la literatura que acompaña este producto.
ADVERTENCIA:
PARA PREVENIR EL RIESGO DE INCENDIO O CHOQUE
ELÉCTRICO, NO EXPONGA ESTE PRODUCTO A LA LLUVIA O
HUMEDAD.
NOTA PARA EL INSTALADOR DE CABLE/TV.
Este recordatorio intenta atraer la atención del instalador del sistema CATV de acuerdo al artículo 820-40 del Código Eléctrico
Nacional (U.S.A.). El código provee instrucciones para la correcta conexión y, en particular, especifica que la conexión a tierra
debe ser conectada al sistema de cableado a tierra del edificio,
tan cercano al punto de entrada del cable como sea factible.
INFORMACIÓN DE REGLAMENTACIÓN:
Este equipo ha sido probado y cumple con los límites establecidos para un dispositivo digital de Clase B, según la parte 15 de
las Normas de la FCC. Estos límites han sido diseñados para
ofrecer una protección razonable contra interferencias perjudiciales cuando el equipo es operado en una instalación residencial. Este equipo genera, usa y puede emitir energía de radiofrecuencia y, si no se instala y utiliza de acuerdo con el manual de
instrucciones, puede ocasionar interferencia perjudiciales a las
comunica-ciones de radio. Sin embargo, no existe garantía que
2
no se presenten interferencias en una instalación en particular. Si
este equipo causa interferencias perjudiciales en la recepción de
radio o televisión, lo que se puede comprobar apagando y encendiendo el equipo, se aconseja al usuario que trate de corregir la
interferencia con una o más de las siguientes medidas :
• Cambie la orientación o reubique la antena receptora.
• Aumente la separación entre el equipo y el receptor.
• Conecte el equipo a un tomacorriente en un circuito diferente al
que se encuentra conectado el receptor.
• Consulte a su distribuidor o un técnico experto en radio/TV para
obtener ayuda.
Todo cambio o modificaciones que no estén expresamente aprobados por la parte responsable del cumplimiento puede anular la
autorización del usuario para operar el equipo.
1. Lea las Instrucciones
Todas las instrucciones de seguridad y operación deben leerse antes de
usar el aparato.
9. Aditamentos
No utilice aditamentos que no estén recomendados por el fabricante de
este aparato ya que pueden causar peligros.
2. Siga las Instrucciones
Deben seguirse todas las instrucciones de operación y uso.
10. Ventilación
Las ranuras y aperturas en el gabinete son provistas para ventilación y
para asegurar una operación confiable del aparato y protegerlo para que
no se caliente excesivamente. Estas aperturas no deben ser cubiertas o
bloqueadas. Las aperturas nunca deben ser bloqueadas colocando el
aparato sobre la cama, sofá, alfombra u otra superficie similar. Este
aparato no debe ser colocado en instalaciones cerradas como libreros o
estantes a menos que disponga de una ventilación adecuada y se cumplan las instrucciones del fabricante.
3. Conserve las Instrucciones
Las instrucciones de seguridad y operación deben guardarse para
futuras referencias.
4. Tome en Cuenta las Advertencias
Todas las advertencias en el aparato y en las instrucciones de operación
deben ser cumplidas.
5. Limpieza
Desconecte este aparato del tomacorriente antes de limpiarlo. No utilice
limpiadores líquidos ni en aerosol. Para limpiar el aparato utilice un paño
húmedo.
6. Agua y Humedad
No use este aparato cerca del agua, por ejemplo, cerca de la tina de
baño, lavabo, fregador o tina de lavar, en un sótano húmedo o cerca de
una piscina.
7. Accesorios, Carritos y Soportes
No coloque este aparato sobre una superficie resbaladiza o inclinada o
sobre un carrito, soporte, trípode, repisa o mesa inestable.El aparato
puede deslizarse o caerse, causando heridas graves a niños o adultos,
además de estropearse seriamente. Utilícelo solamente con un carrito,
soporte, trípode, repisa, o mesa recomendados por el fabricante, o vendidos con el aparato. Cualquier montaje del aparato debe seguir las
instrucciones del fabricante, y debe utilizar accesorios de montaje
recomendados por el fabricante.
8. Transporte del Producto
El conjunto del aparato y el carrito debe moverlo con cuidado. Las
paradas rápidas, la fuerza excesiva y las superficies disparejas pueden
causar que el conjunto del aparato y el carrito se vuelquen.
11. Fuentes de Energía
Este aparato sólo debe operarse con el tipo de fuente de energía indicada en la etiqueta de fábrica. Si no está seguro del tipo energía que se
suministra a su casa, consulte a su distribuidor del aparato o a la compañía eléctrica local. Para los productos diseñados para operar con
baterías u otras fuentes, refiérase a las instrucciones de operación.
12. Polarización del Cordón de Alimentación
Este producto está equipado con un enchufe polarizado de línea de corriente alterna (un enchufe que tiene una clavija más ancha que la otra).
Este enchufe sólo encajará en el tomacorriente en una sola dirección.
Esto constituye una característica de seguridad. Si no puede insertar el
enchufe completamente en el tomacorriente, trate invirtiendo el enchufe.
Si aún no puede encajar, contacte a un electricista para que le cambie el
tomacorriente. No anule el propósito de seguridad del enchufe polarizado.
13. Protección del Cordón de Alimentación
Los cables de alimentación deben colocarse de manera que nadie pueda
caminar sobre ellos o ser presionados por artículos colocados sobre o
contra ellos, poniendo mucha atención a las partes donde los cables se
conectan a los enchufes, tomacorrientes y los puntos por donde salen del
aparato.
Precauciones de Seguridad
Precauciones importantes sobre seguridad para usted y su nuevo producto.
Su aparato ha sido fabricado y probado teniendo en cuenta su seguridad. Sin embargo, el uso indebido del mismo puede resultar en riesgos de
choque eléctrico o incendio. Para evitar que fallen las precauciones de seguridad que se han incorporado a su nuevo aparato, por favor lea y cumpla
los siguientes puntos sobre seguridad cuando instale y use su nuevo aparato, y guárdelos para futuras referencias.Observando las simples precauciones que se mencionan en este manual puede ayudarlo a tener muchos años de disfrute y operación segura que se incorporan en su nuevo producto.
Este producto cumple con todos los requisitos de seguridad Federales aplicables de los USA , y los de la Asociación de Estándares Canadiense.
PORTABLE CART WARNING
3
ES
Safety Instructions
14. Conexión a Tierra de una Antena Externa
Si una antena exterior o sistema de cable es conectado al aparato,
asegúrese que la antena o el sistema por cable estén conectados a tierra, para proporcionar protección contra descargas eléctricas y cargas
estáticas acumuladas. El artículo 810 del Código Eléctrico Nacional
(U.S.A.), ANSI/ NFPA 70 proporciona información sobre la conexión a
tierra adecuada del mástil y la estructura de soporte, la conexión a tierra
del cable de entrada a una unidad de descarga de antena, tamaño de los
conductores con conexión a tierra, ubicación de la unidad de descarga
de antena, conexión a los electrodos con conexión a tierra, y requisitos
para el electrodo con conexión a tierra.
Ejemplo de cómo Conectar a Tierra de Acuerdo con
las Instrucciones del Código Eléctrico Nacional
Ground Clamp
Antenna Lead in Wire
Antenna Discharge Unit
(NEC Section 810-20)
Electric Service
Equipment
Grounding Conductor
(NEC Section 810-21)
20. Daño que Requiere de Servicio
Desenchufe este aparato del tomacorriente y solicite las reparaciones al
personal de servicio calificado cuando se produzcan las siguientes condiciones:
a. Si se ha dañado el cordón de alimentación o el enchufe.
b. Si se ha derramado líquido o se han caído objetos en el interior del
aparato.
c. Si el aparato ha estado expuesto a la lluvia o agua.
d. Si el aparato no opera normalmente al seguir las instrucciones de
operación. Ajuste solamente los controles indicados en las instrucciones de operación ya que un ajuste inapropiado de otros controles
puede resultar en averías y a menudo requerirá el trabajo intenso de
un técnico calificado para hacer que el aparato vuelva a funcionar
normalmente.
e. Si se ha caído el aparato o si el gabinete ha sido dañado de cualquier
forma.
f. Si el aparato muestra un cambio notable en el
Ground Clamps
Power Service Grounding
Electrode System (NEC
Art 250, Part H)
NEC - Código Eléctrico Nacional
15. Relámpagos
Para mayor protección a este aparato (receptor) durante una tormenta
eléctrica, o cuando se deja sin atender y sin usar por mucho tiempo, desenchúfelo del tomacorriente y desconecte la antena o el sistema por
cable. Esto evitará que se estropee el aparato debido a los relámpagos
y a los aumentos de tensión en la línea de alimentación.
16. Líneas Eléctricas
Un sistema de antena externa no debe estar ubicado cerca de las líneas
aéreas de alimentación ni otros circuitos de iluminación y alimentación, o
donde pueda caer sobre dichas líneas o circuitos. Cuando instale un sistema de antena externa, debe tomarse sumo cuidado para evitar que
toque a dichas líneas o circuitos de alimentación ya que el contacto con
ellos puede ser fatal.
17. Sobrecarga
No sobrecargue los tomacorrientes y extensiones eléctricas ya que esto
puede resultar en riesgo de incendio o choques eléctricos.
18. Introducción de objetos Sólidos y Líquidos
Nunca introduzca objetos de ninguna clase dentro de este aparato a
través de las ranuras del gabinete ya que pueden tocar puntos de voltaje peligrosos u ocasionar corto circuito en las partes que podría resultar
en incendio o choque eléctrico. Nunca derrame líquidos de ninguna clase
sobre el aparato.
4
19. Servicio
No intente reparar este aparato usted mismo ya que si abriese o quitase
las cubiertas puede exponerlo a voltaje peligroso u otros peligros. Solicite
cualquier reparación a personal de servicio calificado.
21. Piezas de Repuesto
Cuando sea necesario reemplazar piezas, asegúrese que el técnico de
servicio haya empleado piezas de repuestos especificadas por el fabricante o que tengan las mismas características que la original.
Sustituciones no autorizadas puede resultar en incendio, choque eléctrico u otros peligros.
22. Comprobación de Seguridad
Luego de completarse algún trabajo de mantenimiento o reparación de
este aparato, solicite al técnico de servicio que realice las comprobaciones de seguridad para determinar que el aparato está en las condiciones apropiadas de funcionamiento.
23. Montaje de Pared o Techo
El aparato debe ser montado a una pared o techo solamente como lo
recomienda el fabricante. El aparato puede resbalar o caer, causándole
serias lesiones a un niño o adulto, así como serios daños al aparato.
24. Calor
El aparato debe ser colocado lejos de fuentes de calor tales como radiadores, calentadores, estufas u otros aparatos (incluidos amplificadores)
que produzcan calor.
Precauciones de Seguridad
Contenido
Localización y función de los controles
Mando a distancia
Instalación de las pilas
Panel frontal
Panel Posterior
Instalación
Conexión de equipos externos
Conectando a una terminal de antena de pared
Conectando una antena exterior
Viendo VCR
Viendo Cable TV
Viendo una fuente externa de A/V
Viendo DVD
Viendo DTV
Viendo PC/DTV
2
3-4
5
Sintonizar los canales de TV
22-23
Memorizando los canales por medio de la automática
Memorización de los Canales por medio de la manual
Fine Tuning Adjustment
Memorización de los canales favoritos
6-9
Menú HORA
24-25
Reloj
Hora de encendido/apagado
Apagado automático / Temporizador de desconexión
10
11-14
Menú ESPECIAL
CSM (Memoria de Estado de Color)
Subtítulos
Subtít/Text
Menú Bloqueado
Menú de BLOQUEO
Bloqueo Paterno
Operaciones básicas
Encendido y apagado / Selección de programas
Ajuste del volumen
Selección del idioma en pantalla (opción)
15
Menús en pantalla
Selección del menú
16
Ajuste de la imagen
PSM (Memoria del estado de imagen)
Control Manual de temperaturas
Formato de imagen
17-18
Ajuste del sonido
SSM (Memorización niveles de sonido)
Balance
AVL (Auto Nivelador de Volumen)
Disfrute de la transmisión Estéreo/SAP
19-21
Menú RGB-PC
Configuración del PC
26
Contenido
Advertencia
27-28
29
Función PIP (Imagen dentro de Imagen)
Viendo la PIP (Imagen dentro de Imagen)
Moviendo la sub-imagen
Alternancia entre la imagen principal y las imágenes
secundarias
Selección del modo de entrada para la imagen secundaria
Selección de programas para la imagen secundaria
Exploración del programa
Ajuste Externo
32-39
Especificación del monitor
40
Guía para la solución de problemas
43
5
ES
Mando a distancia
Localización y función de los controles
6
- Todas las funciones pueden ser controladas mediante el mando a distancia. Asimismo, algunas funciones pueden
ajustarse mediante los botones en el panel lateral del televisor.
- Inserte las pilas antes de utilizar el mando a distancia.
POWER
Enciende el televisor o lo pone en modo en
espera.
MUTE
Conecta y desconecta el sonido.
ARC (Control de la Relación del Ancho a la
Altura de la Imagen)
Seleccione el formato de pantalla que desea.
POWER
NUMBER BUTTONS
PSM (Memoria de Estado de Imagen)
Eproduce el ajuste de imagen que usted
haya seleccionado.
FCR (Memorización de los canales
favoritos)
MENU
Selecciona un menú.
1
2
3
4
5
6
7
8
9
0
ARC
FCR
CC
Selecciona el modo Subtítulos :
Descon, Ez. Silenc. Conex.
PR
PIP
activa o desactiva la imagen secundaria.
VOL
OK
EXIT
VOL
PR
PIP PR+
PIP
Q.VIEW
PIP PR-
SWAP
PIP POSITION STILL
SLEEP
PIP INPUT
SCAN
SCAN
activa las imagen secundaria 4/12 del modo
de búsqueda de programa.
Selecciona un programa o elemento de menú.
Permite conectar el televisor desde el modo en
espera.
F / G (Volumen Arriba / Abajo)
Ajusta el volumen.
Ajusta los elementos del menú.
OK
Acepta su selección o permite visualizar el
modo actual.
PC/DVI
Selecciona el modo COMPONENT, RGB-DTV,
RGB-PC, RGB-DVI.
PIP POSITION
reubica la imagen secundaria en el sentido
de las agujas del reloj.
STILL
congela el movimiento de la imagen secundaria.
INPUT SELECT
Selecciona el modo TV, AV1, AV2, S-VIDEO,
COMPONENT, RGB-DTV, RGB-PC, RGB-DVI.
Permite conectar el televisor desde el modo en
espera.
D / E (Programa Arriba / Abajo)
PC/DVI
CC
PIP INPUT
selecciona el modo de entrada para la imagen secundaria.
I / II
INPUT SELECT
MENU
SWAP
selecciona alternadamente imagen principal
e imagen secundaria.
I/II
Selecciona el idioma durante emisiones en
dual.
Selecciona de salida de sonido (opción).
SSM
PSM
EXIT
Abandona el modo.
PIP PR +/selecciona un programa para la imagen
secundaria.
SSM (Memoria de ajuste de sonido)
Para seleccionar el ajuste de sonido preferido.
KREISEN
SLEEP
Ajusta el temporizador para la desconexión
automática.
Q.VIEW
Vuelve al programa visualizado anteriormente.
Abra la tapa del compartimiento de las
pilas situada en la parte posterior e
introduzca las pilas con la polaridad
correcta.
2
Inserte dos pilas según se indica mediante los símbolos de polaridad + y - ,
marcados en el alojamiento.
3
Vuelva a colocar la tapa.
Al objeto de no dañar el mando a distancia en el caso de fugas, extraiga
las pilas si no va a utilizar el mando a
distancia durante un período de tiempo prolongado. No mezcle diferentes
tipos de pilas, nuevas y antiguas.
Localización y función de los controles
1
Instalación de las pilas
- El mando a distancia funciona mediante dos pilas tipo AAA.
7
ES
Panel frontal
Localización y función de los controles
8
1. ALIMENTACIÓN PRINCIPAL (I / y )
2. D / E (Programa Arriba / Abajo)
para seleccionar un canal o una opción de
menú.
para encender el televisor, si está en espera.
3. F / G (Volumen Arriba / Abajo)
para ajustar el volumen.
para ajustar valores de menú.
4. MENU
para seleccionar un menú.
5. INPUT SELECT
Selecciona el modo TV, AV1, AV2, S-VIDEO,
COMPONENT RGB-DTV, RGB-PC, RGBDVI.
Permiten conectar el televisor desde el modo
en espera.
1
2
3
(Panel frontal)
4
5
6 7
8
6. POWER (r
r)
para encender el televisor, si está en espera,
o para ponerlo en espera, si está apagado.
7. INDICADOR DE MODO DE ENCENDIDO /
ESPERA (r
r)
Se ilumina en rojo en el modo de espera.
Se ilumina en verde cuando el aparato está
encendido.
8. SENSOR DE CONTROL REMOTO
AUDIO INPUT
DVI INPUT
RS-232C INPUT
(CONTROL/SER
(CONTROL/SERVICE)
VICE)
R AUDIO L
Y
AUDIO INPUT
COMPONENT INPUT
(480i/480p/720p/1080i)
PUERTO (CONTROL/SERVICIO)
DE ENTRADA RS-232C
ENTRADA RGB
Pb
Pr
VIDEO
L AUDIO R
AV1
L AUDIO R
AV2
S-VIDEO
ANT.. IN
ANT
AC INPUT
ENTRADA AUDIO/VIDEO
ENTRADA S-VIDEO
ENTRADA AUDIO
ENTRADA DVI
VIDEO
ENTRADA AUDIO / ENTRADA COMPONENT
(480i/480p/720p/ 1080i)
ENTRADA Antenna
ENCHUFE HEMBRA PARA EL CABLE
DE CORRIENTE ELÉCTRICA
Localización y función de los controles
Panel Posterior
RGB INPUT
9
ES
Instalación
Alimentación
Situación
El equipo funciona con el suministro eléctrico de la red
que se especifica en la etiqueta situada en la parte posterior. No utilice nunca corriente continua con el aparato.
Para proteger su aparato contra daños durante tormentas
eléctricas, desenchúfelo de la red y quite el enchufe de la
antena.
Coloque su aparato de forma que ningún rayo del sol o luz
briliante incida directamente en la pantalla. Se debe tener
cuidado en no exponer el aparato a vibraciones innecesarias, humedad, polvo o calor. Asegúrese también que el
aparato está colocado en una posición que permita el
paso libre de aire. No cubra o tape las aberturas de ventilación en la parte posterior.
Cuando instale el aparato para utilizar el soporte de instalación en pared (piezas opcionales), fíjelo con cuidado
para que no se caiga.
Advertencia
No exponga el aparato a la Iluvia o la humedad pues
puede incendiarse o dar sacudidas peligrosas. No permita ningún tipo de roce o fricción que pueda dañar permanentemente el Active Matrix LCD.
Limpiar
Servicio
Desenchufar el aparato antes de limpiar la pantalla del
LCD. Frote la pantalla con una tela suave y limpia. Si la
pantalla requiere una limpieza adicional use una tela
limpia y húmeda. No utilice detergentes limpiadores o
aerosoles.
No retire nunca la tapa posterior del aparato ya que esto
le puede exponer a corrientes de muy alta tensión y a
otros peligros. Si el aparato no funciona correctamente,
desenchúfelo y Ilame a su suministrador.
Antena
Conecte el cable de la antena en la toma marcada + 75
Ω situada en la parte posterior. Para una mejor recepción
se deberá usar una antena externa.
10
- En el caso de una terminal de antena de pared en apartamentos, conecte el cable de la antena como se muestra abajo.
(Utilice el tipo correcto de cable que concuerde con el tipo de terminal de antena de pared).
Gire en dirección al reloj para ajustar.
ANT. IN
AC INPUT
cable de bronce
Cable redondo 75 ohms
convertidor
de antena
puerto de entrada
de antena
Cable redondo 300 ohms
puerto conector a la pared
Apartamentos
- En el caso de un cable redondo de 75 ohms, inserte el cable de bronce y ajústelo con una tuerca.
Y en el caso de un cable plano de 300 ohms conecte el cable enrroscado al convertidor de antena y luego conecte el convertidor al puerto de
entrada de la antena.
- Cuando use un cable redondo de 75 ohms no doble el alambre (disminuye la calidad de la imágen).
Conectando una antena exterior
- Este tipo de antena es usualmente utilizada en casas privadas.
Antena VHF
Gire en dirección al reloj para ajustar.
ANT. IN
Antena
UHF
Cable redondo 75 ohms
cable de bronce
Cable redondo 300 ohms
convertidor de antena
Casa Unifamiliar
- En áreas de señal deficiente, puede obtener mejor calidad
en la imágen si instala la antena como en la figura de la
derecha.
- Si una antena está siendo utilizada para 2 unidades, utilice
un divisor de señal de RF(splitter) para conectarse.
AC INPUT
VHF
puerto de entrada
de antena
UHF
ANT. IN
AC INPUT
Conexión de equipos externos
Conectando a una terminal de antena de pared
Signal
Amplifier
11
ES
Conexión de equipos externos
12
Viendo VCR
Conexión 1
El equipo VCR alterna entre 3 ó 4 y después sintoniza la TV al mismo
canal.
L AUDIO R
AV1
VIDEO
S-VIDEO
L AUDIO R
AV2
VIDEO
ANT. IN
Conexión 2
1. Conecte las salidas de audio/video del VCR con los puertos de
entrada correspondientes en la unidad. Cuando conecte el TV con
VCR, iguale los colores de los puertos de conexión. (Video - amarillo, Audio(L) - blanco, Audio(R) -rojo).
2. Inserte una cinta de video en el VCR y presione el botón PLAY
(REPRODUCIR) del VCR. Vea el manual de usuario del VCR.
3. Presione el botón INPUT SELECT en el control remoto y seleccione
AV1 o AV2. (Cuando conecte con un S-Video, selecione S-Vídeo)
Forma de cables
para la antena
ANT IN
ANT OUT
S-VIDEO
IN
CH4
CH3
Conexión
Directa
OUT
VCR
(R) AUDIO (L)
VIDEO
Viendo Cable TV
- Después de subscribirse a un servicio de cable TV de un proveedor
local y de instalar un convertidor, usted puede ver la programación
de cable TV.
- Para mayor información acerca del servicio de cable TV, contacte a
su proveedor local de cable TV.
VIDEO
L AUDIO R
AV1
VIDEO
L AUDIO R
AV2
S-VIDEO
ANT.. IN
ANT
AC INPUT
Conexión 1
1. Seleccione el 3 ó 4 en el interruptor de canal de la caja de Cable.
2. Iguale el canal de la Pantalla de TV con el canal seleccionado de la
caja de Cable.
3. Seleccione el canal deseado con el control remoto de la caja de
cable.
Conexión 2
1. Conecte las salidas de audio/video del caja de Cable con los puertos de entrada correspondientes en la unidad. Cuando conecte el
TV con caja de Cable, iguale los colores de los puertos
Cuando conecte el TV con caja de Cable, iguale los colores de los
puertos de conexión. (Video - amarillo, Audio(L) - blanco, Audio(R)
-rojo).
2. Presione el botón INPUT SELECT en el control remoto y seleccione
AV1 o AV2.
3. Sintonice los canales provistos por su servicio de cable utilizando la
caja de cable.
(R) AUDIO (L)
VIDEO
TV
VCR
RF
caja de Cable
Cable
AC INPUT
Cómo conectar
Conecte los puertos de salida de audio/video de un equipo externo
de AV a los puertos de entrada correspondientes en la unidad.
Cuando conecte el TV con equipos externos, iguale los colores de
los puertos de conexión. (Video - amarillo, Audio(L) - blanco,
Audio(R) -rojo).
VIDEO
L AUDIO R
AV1
VIDEO
S-VIDEO
L AUDIO R
AV2
ANT.. IN
ANT
AC INPUT
Cómo usar
1. Apagar la un equipo externo de AV.
2. Presione el botón INPUT SELECT en el control remoto y seleccione
AV1 o AV2.
3. Opere el equipo externo correspondiente.
Cámara filmadora
Equipo
Externo
AUDIO
R
Unidad de video
juegos
VIDEO
L
Viendo DVD
Cómo conectar
Conecte las entradas de video del DVD a COMPONENT (Y, PB,
PR) INPUT y las entradas de audio a los conectores de Audio de
la AUDIO correspondientes.
RS-232C INPUT
(CONTROL/SER
(CONTROL/SERVICE)
VICE)
R AUDIO L
Y
AUDIO INPUT
COMPONENT INPUT
(480i/480p/720p/1080i)
(R) AUDIO (L)
Y
Pb
Pr
Cómo usar
1. Encienda el reproductor DVD, e inserte un DVD.
2. Presione el botón INPUT SELECT o PC/DVI en el control remoto
y seleccione COMPONENT.
3. Vea el manual de usuario del DVD.
• Puertos de Entrada de Componente
Puede obtener mejor calidad de imagen si conecta el reproductor de DVD
con los puertos de entrada del componente como se muestra abajo.
Puertos del componente
del TV
Y
PB
Puertos de salida de
vídeo del reproductor de
DVD
Y
Y
Y
Y
Pr
Pb
B-Y R-Y
Cb Cr
PB PR
PR
DVD
PB
PR
VIDEO
L AUDIO R
AV1
Conexión de equipos externos
Viendo una fuente externa de A/V
13
ES
Conexión de equipos externos
14
Viendo DTV
- Si quiere ver programas de televisión digitales debe comprar una
SET-TOP BOX (CAJA SINTONIZADORA) digital.
RS-232C INPUT
(CONTROL/SER
(CONTROL/SERVICE)
VICE)
R AUDIO L
Y
AUDIO INPUT
COMPONENT INPUT
(480i/480p/720p/1080i)
(R) AUDIO (L)
Y
Pb
Pr
Cómo conectar
Conecte las entradas de video de la caja sintonizadora a COMPONENT (Y, PB, PR) INPUT y las entradas de audio a los conectores de Audio de la AUDIO.
Cómo usar
1. Encienda el set-top box. (Refiérase al manual de usuario de la
set-top box digital.)
2. Presione el botón INPUT SELECT o PC/DVI en el control remoto
para seleccionar COMPONENT.
PB
PR
Caja Sintonizadora
Viendo PC/DTV
- Asegúrese de seleccionar el modo RGB-PC antes de operar.
Cómo conectar
1. Asegúrese de fijar la resolución de la PC antes de conectarse.
2. Conecte la unidad a la PC con el cable de señal de PC.
3. Conecte los puertos de audio a la PC para obtener sonido de la
PC.
Cómo usar
1. Apague la PC.
2. Presione el botóne INPUT SELECT o PC/DVI n el control remoto y seleccione RGB-PC o RGB-DTV.
Nota : Cuando el sistema es señal entrada de RGB-DTV en
modo de RGB-PC, se fija automáticamente al modo de RGBDTV.
RGB INPUT
AUDIO INPUT
DVI INPUT
RS-232C INPUT
(CONTROL/SERVICE)
(CONTROL/SER VICE)
VIDEO
L AUDIO R
AV1
2
Selección de programas
4
Selección del idioma en pantalla (opción)
Pulse el botón alimentacion principal
para conectar el televisor.
Los programas se pueden seleccionar, bien sea mediante D / E
o las teclas de NÚMEROS.
Pulse el botón MENU y entonces el
botón D / E para seleccionar el menú
de Especial.
Si el televisor está en modo de espera,
pulse los botones POWER, D / E,
INPUT SELECT, PC/DVI o las teclas de
NÚMEROS en el mando a distancia,
para conectarlo completamente.
Pulse el botón POWER en el mando a
distancia.
El aparato vuelve al modo de espera.
Pulse de nuevo el botón de encendido
para apagar el aparato.
Pulse el botón G y entonces el botón
D / E para seleccionar Idioma.
3
Ajuste del volumen
Pulse el botón F /
tar el volumen.
G
para ajus-
Función Mudo; Pulse el botón
MUTE. Podrá cancelar esta función, pulsando nuevamente el
botón MUTE, F / G, I/II o SSM.
Pulse el botón G y entonces el botón
D / E para seleccionar el idioma
deseado.
Todas las indicaciones en pantalla
aparecerán el idioma seleccionado.
Presione repetidamente el botón
MENU para volver a ver la TV normal.
Operaciones básicas
1
Encendido y apagado
15
ES
Selección del menú
Menús en pantalla
- El diálogo entre usted y su televisor se produce en la pantalla, a través del menú del usuario.
1
2
Pulse el botón de
MENU y entonces el
botón D / E para visualizar cada menú.
Pulse el botón G y
entonces el botón D / E
para seleccionar un elemento del menú.
IMAGEN
PSM
Contraste
Luminosidad
Color
Definición
Matiz
()OO}{OOOKOOMENU
BLOQUEADO
Activar
Fijar Clave
MPAA
Edad
Contenido
Bloq. Aux
Canadian
()OO}{OOOKOOMENU
16
3
Presione el botón de G
para visualizar el menú
secundario o el tirar
abajo de menú.
SONIDO
SSM
Balance
AVL
()OO}{OOOKOOMENU
ESPECIAL
Idioma
CSM
PC Control
WXGA
VGA
Set ID
Subtitulos
Subtit/Texto
()OO}{OOOKOOMENU
4
Cambie la configuración de un item
en el submarino o de tirar abajo de
menú con F / G o D / E.
Usted puede trasladarse al menú
de un nivel más alto con el botón F
y al movimiento a la prensa de nivel
inferior del menú el botón de G.
EMISORA
Auto
Manual
Fino
Ca. Favorito
()OO}{OOOKOOMENU
HORA ACTUAL
Reloj
Off Tiempo
A Tiempo
Auto Dessonex
()OO}{OOOKOOMENU
Control Manual de temperaturas
Pulse el botón MENU y el
botón D / E para seleccionar
el menú IMAGEN.
Presione repetidamente el botón
MENU para volver a ver la TV normal.
Pulse el botón G y entonces el
botón D / E para seleccionar
PSM.
Para recuperar su ajuste preferido,
pulse el botón PSM hasta que
aparezca la imagen deseada
(Dinámico , Estándar, Suave
o Usuario). La Dinámico,
Estándar y Suave se programa
en fábrica para una buena reproducción de imagen y no se puede
cambiar.
Pulse el botón G y entonces el
botón D / E para seleccionar
un cuadro que fija en el PSM
menú.
IMAGEN
PSM
Contraste
Luminosidad
Color
Definición
Matiz
()OO}{OOOKOOMENU
IMAGEN
PSM
Contraste
Luminosidad
Color
Definición
Matiz
()OO}{OOOKOOMENU
Pulse
el
botón
MENU y el botón D
/ E para seleccionar
el menú IMAGEN.
Pulse el botón G y
entonces el botón
D / E para seleccionar elemento de
imagen deseado.
IMAGEN
Dinámico
Estándar
Suave
Usuario
PSM
Contraste
Luminosidad
Color
Definición
Matiz
()OO}{OOOKOOMENU
Pulse el botón G y
entonces el botón F / G
para realizar los ajustes
adecuados.
Puede ajustar el contraste, la luminosidad,
la intensidad del color,
la nitidez y de la imagen
a los niveles que prefiera.
Ajuste de la imagen
PSM (Memoria del estado de imagen)
IMAGEN
PSM
Contraste
Luminosidad
Color
Definición
Matiz
100
()OO}{OOOKOOMENU
17
ES
Formato de imagen
Ajuste de la imagen
Formato de imagen
Puede ver Ud. la televisión en varios formatos de imagen ; 16:9, 4:3, Zoom, Panorama.
Pulse el botón ARC, para cambiar al formato de imagen.
1. Pulse el botón ARC para seleccionar el formato de imagen deseado.
• Cada pulsación del botón ARC cambia el mensaje de la pantalla tal y como se muestra al pie.
• También puede seleccionar 16:9, 4:3, Zoom, Panorama en el menú de SCREEN.
16 : 9
Panorama
18
4:3
Zoom
Pulse el botón MENU y el botón
D / E para seleccionar el menú
SONIDO.
Ajuste del sonido
Pulse el botón G y entonces el
botón D / E para seleccionar
SSM.
b. Seleccione una banda de sonido
oprimiendo el botón F / G.
Pulse el botón G y entonces el
botón D / E para seleccionar el
artículo de sonido deseado en el
SSM menú.
a. Pulse el botón de OK en Usuario.
c. Ajuste el nivel de sonido apropiado
con el botón D / E.
d. Oprima el botón OK para almacenarlo para el sonido Usuario.
También puede recuperar el ajuste de
sonido que desee (Flat, Voz,
Película, Música o Usuario) usando
el botón SSM del mando de control a
distancia.
Los ajustes Flat, Voz, Película y
Música se programan en fábrica para
proporcionar una buena calidad de
reproducción del sonido y no pueden
ser modificados.
Aparecen la visualización Memorízar.
Ajuste del sonido
SSM (Memorización niveles de sonido)
Presione repetidamente el botón
MENU para volver a ver la TV
normal.
SONIDO
SSM
Balance
AVL
SONIDO
SSM
Balance
AVL
Flat
Voz
Película
Música
Usuario
0.1 0.5 1.0 5.0 10kHz
()OO}{OOOKOOMENU
()OO}{OOOKOOMENU
()OO}{OOOKOOMENU
19
ES
Ajuste del sonido
Balance
Pulse el botón MENU y el botón D / E para seleccionar el
menú SONIDO.
Pulse el botón MENU y el botón
el menú SONIDO.
Pulse el botón G y entonces el botón
cionar el artículo de sonido deseado.
Pulse el botón
cionar AVL.
Pulse el botón G y luego el botón
ajustes adecuados.
D
F /G
/
E
para selec-
para hacer los
Presione repetidamente el botón MENU para volver a ver
la TV normal.
G
D
/
E
para seleccionar
y entonces el botón
D
/
E
para selec-
Pulse el botón G y entonces el botón
cionar Conex o Descon.
D
/
E
para selec-
Presione repetidamente el botón MENU para volver a ver
la TV normal.
Si usted selecciona AVL Conex, el conjunto mantiene de
forma automática un mismo nivel de volumen aunque se
cambie de canal.
SONIDO
SSM
Balance
AVL
()OO}{OOOKOOMENU
20
AVL (Auto Nivelador de Volumen)
SONIDO
SSM
Balance
AVL
()OO}{OOOKOOMENU
SONIDO
0
SSM
Balance
AVL
()OO}{OOOKOOMENU
SONIDO
SSM
Balance
AVL
()OO}{OOOKOOMENU
Descon
Conex
- La Pantalla de TV puede recibir programas MTS Estéreo y SAP que acompañan la programación y transmiten una
señal de sonido adicional de alta fidelidad.
- Mono : El lenguaje primario es resultado de los altavoces izquierdo y derecho. El modo de señal es mono.
- Estéreo : El lenguaje primario es resultado de los altavoces izquierdo y derecho. El modo de señal es estéreo.
- SAP : El lenguaje secundario es resultado de los altavoces izquierdo y derecho.
Mono
Estéreo
SAP
Ajuste del sonido
Disfrute de la transmisión Estéreo/SAP
1. Presione el botón I/II repetidamente
• Si un ruido raro es escuchado cuando se estén viendo programas de TV en modo estéreo en áreas de señal deficiente, o en áreas que no tienen señal SAP, asegúrese de seleccionar el modo mono.
• El modo Estéreo o SAP estará disponible sólo cuando los transmisores contengan la información.
21
ES
Sintonizar los canales de TV
Memorizando los canales por medio de la automática
- Para que Auto Programa funcione, la fuente programada
debe estar conectada al TV y el TV debe recibir las
señales programadas ya sea por aire o del proveedor de
servicio de cable.
- Usted puede memorizar o borrar un canal manualmente.
Pulse el botón MENU y entonces el botón D / E para
seleccionar el menú de Emisora.
Pulse el botón G y entonces el botón D / E para seleccionar Auto.
Presione el botón G ara empezar la búsqueda de canal.
• Espere a que Autoprograma complete el ciclo de
busqueda de canal antes de escoger alguno. La TV
buscará por los canales de aire y después por los
canales proporcionados por el servicio de cable.
Pulse el botón MENU y entonces el botón
seleccionar el menú de Emisora.
NOTA
• Presione los botones de canales D / E para verificar que la
memorización de canales esté terminada.
• Si presiona el botón OK durante la auto programación, la función se detendrá y sólo los canales programados hasta ese
momento permanecerán.
• La función Auto programming puede memorizar sólo los
canales que son recibidos en ese momento.
EMISORA
Auto
Manual
Fino
Ca. Favorito
()OO}{OOOKOOMENU
22
Memorización de los Canales por medio de la manual
EMISORA
Auto
Manual
Fino
Ca. Favorito
()OO}{OOOKOOMENU
Pulse el botón G y entonces el botón
cionar Manual.
12
G
GG
GG
G
6%
/
E
/
E
para
para selec-
Presione el botón G y luego presione el botón D / E para
seleccionar los canales que desee.
Presione el botón E y luego presione el botón F / G para
seleccionar Almacenar o Borrar.
Presione EXIT para guardar y regresar a ver TV. El canal
actual será memorizado (Memoria) o borrado (Borrar).
Aparecen la visualización Memorízar.
EMISORA
Inicio
D
D
Auto
Manual
Fino
Ca. Favorito
()OO}{OOOKOOMENU
EMISORA
Auto
Manual
Fino
Ca. Favorito
()OO}{OOOKOOMENU
Almacenar
54
Memorización de los canales favoritos
- Esa functión ajusta la condición de la esta bilidad be los
cuadros cuando es pobre.
Pulse el botón MENU y entonces el botón
seleccionar el menú de Emisora.
D
/
E
para
- Esta función es un elemento conveniente que le permite
examinar rápidamente hasta cinco canales de su preferencia sin tener que esperar que la Pantalla de Plasma
examine todos los canales.
Pulse el botón MENU y entonces el botón
seleccionar el menú de Emisora.
D
/
E
para
Presione el botón G y luego presione el botón D / E para
seleccionar Sint.fina.
Presione el botón G y luego presione el botón D / E para
seleccionar Favorito.
Presione el botón F
condición deseada.
Presione el botón G y luego presione el botón D / E para
memorizar los canales favoritos.
/ G
para sintonizar la imagen a la
Presione EXIT para guardar y regresar a ver TV.
Presione el botón
canal deseado.
F /G
para seleccionar el número del
Repita los pasos del 3 al 4 para memorizar otros canales.
Presione el botón OK para guardar.
Presione en varias ocasiones el botón de FCR para
seleccionar programas preferidos salvados.
EMISORA
Auto
Manual
Fino
Ca. Favorito
()OO}{OOOKOOMENU
EMISORA
Auto
Manual
Fino
Ca. Favorito
()OO}{OOOKOOMENU
EMISORA
0
Auto
Manual
Fino
Ca. Favorito
()OO}{OOOKOOMENU
EMISORA
Auto
Manual
Fino
Ca. Favorito
CATV
CATV
CATV
CATV
CATV
-----------
Sintonizar los canales de TV
Fino Tuning Adjustment
()OO}{OOOKOOMENU
23
ES
Menú HORA
Reloj
Hora de encendido/apagado
Usted tendrá que ajustar el tiempo
correctamente antes de utilizar la
función de conexión/desconexión
de tiempo.
Pulse el botón MENU y el botón
D / E para seleccionar el menú
HORA ACTUAL.
Pulse el botón G y entonces el
botón D / E para seleccionar
Reloj.
Pulse el botón G y después el
botón D / E para ajustar la hora.
Pulse el botón G y después el
botón D / E para ajustar el minuto.
Pulse el botón MENU o OK para
guardar.
HORA ACTUAL
Reloj
Off Tiempo
A Tiempo
Auto Dessonex
()OO}{OOOKOOMENU
24
El temporizador de apagado automáticamente cambia el equipo al estado de
standby después de que transcurra el tiempo programado.
Pulse el botón MENU y el botón D / E para seleccionar el menú HORA ACTUAL.
Pulse el botón G y entonces el botón D / E para seleccionar Off Tiempo o A
Tiempo.
Pulse el botón G y entonces el botón D / E para seleccionar Conex.
Para cancelar la función Off/A Tiempo, pulse el botón D / E para seleccionar
Descon.
Pulse el botón G y después el botón D / E para ajustar la hora.
Pulse el botón G y después el botón D / E para ajustar el minuto.
Sólo para la función Conex timer (temporizador de conexión) ; Pulse el botón
G y, a continuación, el botón D / E para ajustar el nivel de volumen y el número
de programa.
Pulse el botón MENU o OK para guardar.
Nota :
a. En caso de interrupción de la corriente (desconexión o corte en el suministro
eléctrico), se debe ajustar de nuevo el reloj.
b. Dos horas después de que el aparato se haya encendido mediante la función
de hora de encendido, volverá automáticamente al modo de espera a menos
que se haya pulsado un botón.
c. Una vez que se ha ajustado la hora de encendido y apagado, estas funciones
se activan diariamente a la hora preajustada.
d. La función de desconexión de tiempo anula la función de conexión de tiempo
si ambas funciones se activan al mismo tiempo.
e. El aparato deberá estar en el modo de espera para que se active el temporizador.
HORA ACTUAL
Reloj
Off Tiempo
A Tiempo
Auto Dessonex
()OO}{OOOKOOMENU
HORA ACTUAL
--:--
AM
Reloj
Off Tiempo
A Tiempo
Auto Dessonex
()OO}{OOOKOOMENU
HORA ACTUAL
Reloj
Off Tiempo
A Tiempo
Auto Dessonex
()OO}{OOOKOOMENU
06:59 AM
CATV.
7
VOL.
46
Conex
Temporizador de desconexión
Si usted selecciona Conex en el Auto Dessonex que tira
abajo de menú, el conjunto se cambiará automáticamente
al modo espera aproximadamente diez minutos después
de que una estación de la TV para el difundir.
Pulse el botón MENU y el botón D / E para seleccionar el
menú HORA ACTUAL.
Pulse el botón G y entonces el botón
cionar Auto Dessonex.
D
Pulse el botón G y entonces el botón
cionar Conex o Descon.
D
/
/
E
E
para selec-
para selec-
Pulse el botón MENU o OK para guardar.
HORA ACTUAL
Reloj
Off Tiempo
A Tiempo
Auto Dessonex
()OO}{OOOKOOMENU
No es necesario que desconecte el aparato antes de
acostarse. El sleep timer conmuta automáticamente el
aparato al modo de espera una vez transcurrido el tiempo
preajustado. Para seleccionar el número de minutos,
pulse repetidamente el botón ‘ r - - - ’ aparecerá en la
pantalla, seguido de 10, 20, 30, 60, 90, 120, 180 y 240. El
temporizador comienza la cuenta atrás desde el número
de minutos seleccionado.
Nota :
a. Para ver el tiempo que falta hasta la desconexión,
pulse el botón SLEEP una vez.
b. Para cancelar el tiempo, pulse repetidamente el botón
SLEEP hasta que aparezca el mensaje ‘ r - - - ’.
c. Cuando desconecta el aparato, éste anula el tiempo
preseleccionado.
Menú HORA
Apagado automático
HORA ACTUAL
Reloj
Off Tiempo
A Tiempo
Auto Dessonex
Conex
Descon
()OO}{OOOKOOMENU
25
ES
Menú ESPECIAL
CSM (Memoria de Estado de Color)
Subtít/Text
Subtítulos
Para inicializar valores (restablecer
opciones por defecto), seleccionar la
opción Normal.
Use el botón cc para seleccionar subtítulos.
Presione el botón de MENU y los
botones D / E para selec-cionar
un menú ESPECIAL.
Presione el botón de MENU y los
botones D / E para selec-cionar un
menú ESPECIAL.
Presione el botón de MENU y los
botones D / E para selec-cionar un
menú ESPECIAL.
Pulse el botón G y entonces el
botón D / E para seleccionar
Subtit/Texto.
Pulse el botón G y entonces el botón
/ E para seleccionar Subtitulos.
Use el botón de la flecha F / G
para efectuar su selección de subtítulo. Sus opciones son : CC1,
Pulse el botón G y entonces el botón
D / E para seleccionar CSM.
Pulse el botón G y entonces el botón
D / E para seleccionar el color temperatura deseado.
Pulse el botón MENU para guardar.
D
Pulse el botón G y entonces el botón
D / E para seleccionar Descon,
Conex o Ez. Silenc..
CC2, CC3, CC4, Text 1, Text 2,
Text3, Text4.
Pulse el botón MENU o OK para
guardar.
Presione EXIT para guardar y
regresar a ver TV.
Nota : No está disponible en modos
Componente y RGB-PC.
ESPECIAL
Idioma
CSM
PC Control
WXGA
VGA
Set ID
Subtitulos
Subtit/Texto
()OO}{OOOKOOMENU
26
ESPECIAL
Frio
Norma
Templado
Idioma
CSM
PC Control
WXGA
VGA
Set ID
Subtitulos
Subtit/Texto
()OO}{OOOKOOMENU
ESPECIAL
Descon
Conex
Ez. Silenc.
Idioma
CSM
PC Control
WXGA
VGA
Set ID
Subtitulos
Subtit/Texto
()OO}{OOOKOOMENU
F
CC1
G
Parental Control puede ser utilizado para bloquear canales específicos, clasificación de programas y otras fuentes.
La función de control de lo que ven los niños (V-chip) se utiliza para bloquear la visión de programas basándose en las clasificaciones enviadas por la emisora de televisión. El ajuste por defecto permite ver todos los programas. La visión se puede bloquear por
el tipo de programa y por las clasificaciones escogidas para bloquear. También es posible bloquear la visión de todos los programas
por un periodo de tiempo Para utilizar la función de control de lo que ven los niños, se deberá ajustar lo siguiente :
1. Clasificaciones y categorías a bloquear.
2. Fijación de una contraseña
3. Activación del bloqueo
Clasificación y categorías de V-Chip
Las emisoras de televisión ofrecen guías sobre la clasificación. La mayoría de los programas de televisión y películas para televisión
pueden ser bloqueados por clasificación y/o categorías individuales de televisión. Las películas que han sido mostradas en las salas
de cine o en vídeo utilizan el sistema de clasificación de películas (MPAA) solamente.
Clasificación de películas:
• Sin bloqueo
• G y superior
(audiencia general)
(se sugiere control de lo que los niños ven)
• PG y superior
• PG-13 y superior
(13 años o más))
• NC-17 y superior
(18 años o más)
•X
(adultos)
Si ajusta PG-13 y superior; estarán disponibles películas G y
PG; PG-13, R, NC-17 y X estarán bloqueadas.
TV-14 y superior, TV-MA,
Sin bloqueo)
• Escenas de sexo - situaciones sexuales (aplicable a TV-PG y superior,
TV-14 y superior, TV-MA,
Sin bloqueo)
• Violencia
(aplicable a TV-PG y superior,
TV-14 y superior, TV-MA,
Sin bloqueo)
• Violencia F - violencia de fantasía (aplicable a TV-PG y superior,
TV-14 y superior, TV-MA,
Sin bloqueo)
Para programas de televisión incluidas las películas hechas
para televisión:
Para el systema canadiense del grado de la lengua de english/frecnch:
Para películas mostradas previamente en salas de cine: :
Clasificaciones para televisión general:
• Sin bloqueo
• TV-G y superior
(audiencia general) (las categorías
individuales no cuentan)
• TV-PG y superior
(se sugiere control de lo que los niños ven)
• TV-14 y superior
(14 años o más)
• TV-MA
(audiencia adulta)
Clasificaciones para televisión para niños:
• Sin bloqueo
• TV-Y y superior
(jóvenes) (las categorías por contenido
individuales no cuentan)
• TV-Y7
(jóvenes, 7 años o más)
Categorías por contenido:
• Diálogo - dialogo sexual
• Lenguaje - lenguaje adulto
(aplicable a TV-PG y superior,
TV-14 y superior)
(aplicable a TV-PG y superior,
Menú Bloqueado
Opciones del Menú Bloqueado
Sistema canadiense del grado de la leugua inglesa:
• C y superior
(Niños)
• C8+ y superior
(8 años o más)
• G y superior
(General programming. Suitable for all
audiences.)
• PG y superior
(Supervisión sugerida)
• 14+y superior
(Mayores de 14 años)
• 18+
(Solo adultos)
• Sin bloqueo
Sistema del grado de la leugua del francés canadience:
•G
(General)
• 8 ans+
(8 años o más)
• 13 ans+
(13 años o más)
• 16 ans+
(16 años o más)
• 18 ans+
(Adults only)
• Sin bloqueo
27
ES
Menú Bloqueado
Configuración del Menú Bloqueado
Presione el botón de MENU y los botones
Después presione el botón G.
D
/
E
para selec-cionar un menú BLOQUEADO.
• Si Bloqueado ya está determinado, ingrese la contraseña requerida.
• El TV esta configurado con la clave inicial “0-0-0-0”.
Configurando Activar:
Presione los botones
D /E
F /G
Utilice los botones
para seleccionar Activar.
para seleccionar Conex u descon.
Estableciendo el password o contraseña:
Presione los botones
D /E
para seleccionar Fijar Clave.
Presione el botón G y después accese su clave de 4 dígitos.
Accese otra vez su clave cuando sea requerida.
Presione los botones
Presione el botón
G
D /E
para seleccionar el tipo de bloqueo que desee.
y después los botones
D /E
para seleccionar el tipo de clasificación a bloquear.
• Los menús Edad, Contenido, y Canadian también contienen sub-menús, asi que será necesario repetir los
pasos 4 y 5 dentro de estos sub-menús, para establecer el tipo de clasificación y bloqueo.
BLOQUEADO
Activar
Fijar Clave
MPAA
Edad
Contenido
Bloq. Aux
Canadian
()OO}{OOOKOOMENU
28
BLOQUEADO
Dar Clave
----
Activar
Fijar Clave
MPAA
Edad
Contenido
Bloq. Aux
Canadian
()OO}{OOOKOOMENU
BLOQUEADO
Conex
Descon
Activar
Fijar Clave
MPAA
Edad
Contenido
Bloq. Aux
Canadian
()OO}{OOOKOOMENU
Nueva
Confirm
-------
Puede ajustar la posición horizontal y
vertical, el reloj, la fase de reloj, la reajuste y la configuración automática de
la configuración original del modo que
usted prefiera.
Pulse el botón MENU y entonces el
botón D / E para seleccionar el menú
de Especial.
Pulse el botón G y entonces el botón
D / E para seleccionar la opción de
imagen que desees.
Pulse el botón F /
ajustes oportunos.
G
para realizar los
Posición H / Posición V
Esta función se usa para ajustar la
imagen horizontalmente y verticalmente de modo que usted prefiera.
Reloj (Clock)
Esta función sirve para minimizar las
barras o franjas verticales que puedan
aparecer en el fondo de la pantalla.
También modifica el tamaño horizontal
de la pantalla.
Fase de reloj (Clock phase)
Esta función permite eliminar toda
ESPECIAL
Idioma
CSM
PC Control
WXGA
VGA
Set ID
Subtitulos
Subtit/Texto
()OO}{OOOKOOMENU
posible perturbación horizontal y
aclarar o hacer más nítida la imagen
de los caracteres.
WXGA (o VGA (Sólo modo
RGB[DVI] ))
Config automático (Auto-configure)
Esta función se usa para ajustar
automáticamente la posición, el reloj,
y la fase del reloj de la pantalla. La
imagen desaparecerá de la pantalla
durante unos segundos mientras se
realiza el proceso de configuración
automática.
Cuando el sistema es señal entrada
de DVI-480p en modo de VGA,
seleccione 480p en el menú especial.
Reajuste (Reset)
Esta función le permite restablecer la
configuración de repro-ducción de la
imagen establecida en fábrica. Dicha
configu-ración no puede modificarse.
Nota : Es posible que no funcionen
correctamente algunas señales de
algunas tarjetas gráficas. Si los resultados no son satisfactorios, ajuste
manualmente la posición, el reloj, y la
fase del reloj del monitor.
Pulse el botón OK para guardar los
ajustes de imagen de monitor del PC.
Pulse el botón EXIT para volver al
modo PC.
ESPECIAL
Idioma
CSM
PC Control
WXGA
VGA
Set ID
Subtitulos
Subtit/Texto
()OO}{OOOKOOMENU
Pulse el botón MENU y entonces el
botón D / E para seleccionar el
menú de Especial.
Pulse el botón G y entonces el
botón D / E para seleccionar
WXGA.
Menú RGB-PC
Configuración del PC
Pulse el botón G y luego el botón
D / E para seleccionar la definición XGA deseada
Presione repetidamente el botón
MENU para volver a ver la TV normal.
ESPECIAL
H-Pos. 0
V-Pos. 0
Clock 10
Phase 15
Auto
Reset
Idioma
CSM
PC Control
WXGA
VGA
Set ID
Subtitulos
Subtit/Texto
1024X768
1280X768
1360X768
1366X768
()OO}{OOOKOOMENU
29
ES
Función PIP (Imagen dentro de Imagen)
30
- PIP (Imagen in Imagen) visualiza una imagen dentro de otra imagen.
- PIP solamente no está disponible en modo Bloqueado On.
Viendo la PIP (Imagen dentro de Imagen)
Pulse el botón PIP para activar la imagen secundaria.
• Cada pulsación del botón PIP cambia el mensaje de la pantalla tal y como
se muestra al pie.
Moviendo la sub-imagen
Pulse el botón POSITION en modo
PIP.
Pulse repetidamente el botón POSITION hasta conseguir la posición
deseada. La imagen secundaria se
mueve en el sentido de las agujas
del reloj.
Selección del modo
de entrada para la
imagen secundaria
Pulse repetidamente el botón SWAP
para cambiar de la imagen principal
a las secundarias y viceversa.
Presione el botón PIP INPUT
para seleccionar el modo de
entrada para la subimagen.
Selección de programas
para la imagen secundaria
Imagen principal
Imagen secundaria
Presione los botones PR +/- para
seleccionar el programa de subimagen. El número seleccionado del
programa se visualiza apenas
debajo del número del programa
del cuadro principal.
Exploración del programa
Esta función le permite buscar todas
las estaciones salvadas en modo
secundario/principale de 4/12 cuadros
y considerar su estación preferida intercambiando los cuadros principales y
secundarios.
Pulse el botón de SCAN en varias ocasiones para seleccionar POP4/POP12
cuadros secundarios y principales.
Los cuadros secundarios y principales
seleccionados buscan todas las estaciones salvadas.
Pulse el botón de EXIT otra vez al
interruptor de estos cuadros secundarios y principales.
Esta función solo función en el siguiente modo : AV1, AV2, S-VIDEO,
COMPONENT(480i).
Función PIP (Imagen dentro de Imagen)
Alternancia entre la imagen
principal y la s imágenes
secundarias
31
ES
Ajuste Externo
- Conecte al conector de entrada RS-232C un dispositivo de control externo (como, por ejemplo, un ordenador, o un
sistema de control de audio/vídeo) para controlar las funciones del monitor externamente.
Macho D-Sub de 9 pines
RGB INPUT
AUDIO INPUT
DVI INPUT
RS-232C INPUT
(CONTROL/SER VICE)
(CONTROL/SERVICE)
Núm.
1
2
3
4
5
6
7
8
9
Nombre del pin
Sin conexión
RXD (Recibir datos)
TXD (Transmitir datos)
DTR (Lado del DTE preparado)
GND
DSR (Lado del DCE preparado)
RTS (Preparado para enviar)
CTS (Preparado para enviar)
Sin conexión
1
5
Conecte el puerto en serie del mecanismo de control al
enchufe para clavijas (jack) RS-232C del aparato.
9
Los cables de conexión RS-232C no se suministran con
el aparato.
El mando a distancia del aparato y los mandos del
auricular y del panel frontal (excepto la fuente de
energía principal) no funcionarán si el aparato está controlado por un ordenador personal u otro dispositivo
externo.
32
6
Parámetros de comunicación
• Ancho de banda : 115200 bps (UART)
• Longitud de los datos : 8 bits
• Paridad : Ninguna
• Bit de parada : 1 bit
• Communication code : ASCII code
Pulse el botón MENU y entonces el botón
D / E para seleccionar el menú de
Especial.
Pulse el botón G y entonces el botón D / E
para seleccionar Set ID.
Pulse el botón G y entonces el botón F / G
para ajustar el valor de Set ID hasta elegir
el número de identificación del monitor
deseado.
Para ajustar el valor de Set ID puede elegir cualquier valor comprendido entre 1 y
99.
Use esta función para especificar el
número de identificación (ID) del monitor.
ESPECIAL
Idioma
CSM
PC Control
WXGA
VGA
Set ID
Subtitulos
Subtit/Texto
Lista de consulta de comandos
COMANDO COMANDO
2
1
01. Encendido
02. Selección de entrada
03. Relación de aspecto
04. Desactivar pantalla
05. Desactivar sonido
06. Control de volumen
07. Contraste
08. Brillo
09. Color
10. Tono de color
11. Definición
12. Modo de control externo
13. PIP / Imagen
14. Posición PIP
15. Balance
16. Color temperatura
17. Fuente de entrada PIP
18. SSM
19. AVL
20. Auto Desconex
21. Cambio horizontal
22. Cambio vertical
23. Autoajuste
24. Reajuste
25. Selección del idioma en pantalla (opción)
26. Selección de programa
27. Entrada del número del programa
28. PSM
k
k
k
k
k
k
k
k
k
k
k
k
k
k
k
k
k
k
k
k
k
k
k
k
k
k
k
k
a
m
q
b
c
i
d
e
f
l
g
p
r
s
j
u
y
h
k
n
v
w
~
!
^
%
$
t
DATOS
(Hexadecimal)
0~1
0~7
0~5
0~1
0~1
0 ~ 64
0 ~ 64
0 ~ 64
0 ~ 64
0 ~ 64
0 ~ 64
0~1
0~2
0~3
0 ~ 64
0~2
0~4
1~5
0~1
0~1
0 ~ C6
0 ~ 27
1
1
0~2
0~1
0 ~ 125
0~3
Ajuste Externo
ID del equipo
()OO}{OOOKOOMENU
33
ES
Ajuste Externo
Protocolo de transmisión / recepción
Transmisión
[Comando1][Comando2][ ][ID del equipo][ ][Datos][Cr]
* [Comando 1]
*
*
*
*
*
: Primer mandato para controlar el apara
to. (j o k)
[Comando 2]
: Second command to control LCD set.
[ID del equipo] : Identificación del equipo. El número de
identificación del monitor puede estable
cerse en el menú Special [Especial].
Véase la página. Puede elegirse cualquier
valor com pren dido entre 1 y 99. Si se
selecciona "0" como valor de "ID del
equipo", se controla cualquier equipo
conectado.
[DATOS]
: Transmite los datos del comando.
Transmita "FF" para leer el estado de
comando.
[Cr]
: Retorno de carro (Tecla "Intro") Código
ASCII "0x0D"
[ ]
: Código ASCII ‘espacio (0x20)’
01. Encendido (Comando2 : a)
G Para controlar el encendido/apagado del set.
Transmisión
[k][a][ ][ID del equipo][ ][Datos][Cr]
Datos 0 : Apagarf
1 : Encender
Reconocimiento
[a][ ][ID del equipo][ ][OK][Datos][x]
G Para mostrar el estado de encendido / apagado.
Transmisión
[k][a][ ][ID del equipo][ ][FF][Cr]
Datos 0 : Apagarf
1 : Encender
Reconocimiento
[a][ ][ID del equipo][ ][OK][Datos][x]
* Si otras funciones transmiten ‘FF’ con este formato, la
respuesta de reconocimiento presenta el estado de la
respectiva función.
Reconocimiento afirmativo
[Comando2][ ][ID del equipo][ ][OK][Datos][x]
* El monitor transmite un acuse de recibo (ACK) con este
formato al recibir datos anormales desde funciones no
viables o errores de comunicación.
Reconocimiento de error
[Comando2][ ][ID del equipo][ ][NG][x]
* El monitor transmite un acuse de recibo (ACK) con este
formato al recibir datos anormales desde funciones no
viables o errores de comunicación.
02. Selección de entrada (Comando2 : m)
(Entrada de Imagen principal.)
G Para seleccionar la fuente de entrada del set.
También se puede seleccionar una fuente de entrada
usando el botón INPUT SELECT del mando de control a
distancia del set.
Transmisión
[k][m][ ][ID del equipo][ ][Datos][Cr]
Datos 0
1
2
3
: TV
: AV1
: AV2
: S-Video
Reconocimiento
[m][ ][ID del equipo][ ][OK][Datos][x]
34
4
5
6
7
:
:
:
:
Component
RGB-PC
RGB-DTV
RGB-DVI
G Para ajustar el formato de la pantalla.
También se puede ajustar el formato de la pantalla usando
el botón ARC (Aspect Ratio Control) del mando de control
a distancia.
Transmisión
G Para ajustar el volumen.
También puede ajustarse el volumen con los botones
de control de volumen del mando a distancia.
Transmisión
[k][i][ ][ID del equipo][ ][Datos][Cr]
Datos Mín. : 0 ~ Máx. : 64
* Véase la ‘Correspondencia de datos reales1’ (Consulte p.37)
[k][q][ ][ID del equipo][ ][Datos][Cr]
Datos 0 : 16:9
1 : 14:9
2 : 4:3
06. Control de volumen (Comando2 : i)
3 : Zoom
4 : Panorama
Reconocimiento
[i][ ][ID del equipo][ ][OK][Datos][x]
Reconocimiento
[q][ ][ID del equipo][ ][OK][Datos][x]
* Usando la entrada de PC, se puede seleccionar una relación
de aspecto de 16:9 o de 4:3.
07. Contraste (Comando2 : d)
G Para ajustar el contraste de la pantalla.
También puede ajustarse el contraste en el menú Picture
[Imagen].
04. Desactivar pantalla (Comando2 : b)
Transmisión
G Para desactivar o activar la pantalla.
[k][d][ ][ID del equipo][ ][Datos][Cr]
Transmisión
[k][b][ ][ID del equipo][ ][Datos][Cr]
Datos 0 : Desactivar pantalla (Desaparece la imagen)
1 : Anular desactivar pantalla (Aparece la imagen)
Ajuste Externo
03. Relación de aspecto (Comando2 : q)
(Formato de la imagen principal)
Datos Mín. : 0 ~ Máx. : 64
* Véase la ‘Correspondencia de datos reales1’ (Consulte p.37)
Reconocimiento
[d][ ][ID del equipo][ ][OK][Datos][x]
Reconocimiento
[b][ ][ID del equipo][ ][OK][Datos][x]
08. Brillo (Comando2 : e)
05. Desactivar sonido (Comando2 : c)
G Para desactivar o activar el sonido.
También se puede desactivar el sonido usando el
botón MUTE del mando a distancia.
Transmisión
[k][c][ ][ID del equipo][ ][Datos][Cr]
Datos 1 : Desactivar sonido (Desaparece el sonido)
0 : Anular desactivar sonido (Se escucha el sonido)
Reconocimiento
G Para ajustar el brillo de la pantalla.
También puede ajustarse el brillo en el menú Picture
[Imagen].
Transmisión
[k][e][ ][ID del equipo][ ][Datos][Cr]
Datos Mín. : 0 ~ Máx. : 64
* Véase la ‘Correspondencia de datos reales1’ (Consulte p.37)
Reconocimiento
[e][ ][ID del equipo][ ][OK][Datos][x]
[c][ ][ID del equipo][ ][OK][Datos][x]
35
ES
Ajuste Externo
09. Color (Comando2 : f)
12. Modo de control externo (Comando2 : p)
G Para ajustar el color de la pantalla.
También puede ajustarse el color en el menú Picture
[Imagen].
G Para bloquear los controles del panel delantero del monitor
y del mando.
Transmisión
[k][f][ ][ID del equipo][ ][Datos][Cr]
Datos Mín. : 0 ~ Máx. : 64
* Véase la ‘Correspondencia de datos reales1’ (Consulte p.37)
Reconocimiento
[f][ ][ID del equipo][ ][OK][Datos][x]
Transmisión
[k][p][ ][ID del equipo][ ][Datos][Cr]
Datos 0: Descon
1: Conex
Reconocimiento
[p][ ][ID del equipo][ ][OK][Datos][x]
• Si usted no utiliza el mando a distancia, opte por este modo.
Cuando la alimentación principal de energÌa está en on/off, se
desactiva el bloqueo de control externo.
10. Tono de color (Comando2 : l)
G Para ajustar el tono de color de la pantalla.
También puede ajustarse el tono de color en el menú Picture
[Imagen].
13. PIP / Twin (Comando2 : r)
Transmisión
G Para controlar la imagen PIP (Picture In picture: Imagen en imagen) / Twin.
Usted podrá también controlar la imagen PIP/DW mediante el
botón PIP/DW del mando a distancia o con el menú PIP/DW.
[k][l][ ][ID del equipo][ ][Datos][Cr]
Transmisión
Datos Red : 0 ~ Green : 64
* Véase la ‘Correspondencia de datos reales1’ (Consulte p.37)
[k][r][ ][ID del equipo][ ][Datos][Cr]
Reconocimiento
Datos 0: apagado
1: PIP
[l][ ][ID del equipo][ ][OK][Datos][x]
Reconocimiento
2: DW
[r][ ][ID del equipo][ ][OK][Datos][x]
11. Definición (Comando2 : g)
G Para ajustar la definición de la pantalla.
También puede ajustarse la definición de la pantalla en el
menú Picture [Imagen]
Transmisión
[k][g][ ][ID del equipo][ ][Datos][Cr]
Datos Mín. : 0 ~ Máx. : 64
* Véase la ‘Correspondencia de datos reales1’ (Consulte p.37)
Reconocimiento
[g][ ][ID del equipo][ ][OK][Datos][x]
14. Posición PIP (Comando2 : s)
G Para seleccionar la posición de la subimagen en el modo PIP.
También puede ajustarse la posición de la subimagen usando el
botón POSITION del mando de control a distancia o en el menú
PIP/DW.
Transmisión
[k][s][ ][ID del equipo][ ][Datos][Cr]
Datos
0
1
2
3
:
:
:
:
Ángulo
Ángulo
Ángulo
Ángulo
inferior derecho de la pantalla
inferior izquierdo de la pantalla
superior izquierdo de la pantalla
superior derecho de la pantalla
Reconocimiento
[s][ ][ID del equipo][ ][OK][Datos][x]
36
G Para ajustar el balance.
También puede ajustarse el balance en el menú SONIDO.
* Representación real de
datos 1
* Representación real de
datos 2
0 : -10
5 : -9
A : -8
0 : Step 0
Transmisión
A : Step 10 (ID del equipo 10)
[k][j][ ][ID del equipo][ ][Datos][Cr]
Datos Mín. : 0 ~ Máx. : 64
* Véase la ‘Correspondencia de datos reales1’ (Consulte p.37)
2D: -1
32 : 0
37 : +1
F : Step 15 (ID del equipo 15)
10 : Step 16 (ID del equipo 16)
Reconocimiento
64 : Step 100
[j][ ][ID del equipo][ ][OK][Datos][x]
16. Temperatura de color (Comando2 : u)
18. SSM (Comando2 : h)
G Para ajustar la temperatura de color. También puede
ajustar CSM en el menú Picture [Imagen].
G Para elegir el modo de sonido.
Transmisión
Transmisión
5F : +9
64 : +10
[k][u][ ][ID del equipo][ ][Datos][Cr]
[k][h][ ][ID del equipo][ ][Datos][Cr]
Datos 0: Frío
Datos
1: Normal
2: Caliente
Reconocimiento
[u][ ][ID del equipo][ ][OK][Datos][x]
0
1
2
: Flat
: Voz
: Película
3
4
Ajuste Externo
15. Balance (Comando2 : j)
: Música
: Usuario
Reconocimiento
[h][ ][ID del equipo][ ][OK][Datos][x]
17. Selección de entrada de PIP (Comando2 : y)
G Para seleccionar la fuente de entrada de la subimagen en
el modo PIP/DW.
[k][y][ ][ID del equipo][ ][Datos][Cr]
Datos 0 : TV
1 : AV1
2 : AV2
19. AVL (Comando2 : k)
G Para mantener un nivel de volumen igual aún cuando
cambie de programa.
Transmisión
3 : S-Video
4 : Component(480i)
Transmisión
[k][k][ ][ID del equipo][ ][Datos][Cr]
Datos 0: Descon
1: Conex
Reconocimiento
Reconocimiento
[y][ ][ID del equipo][ ][OK][Datos][x]
[k][ ][ID del equipo][ ][OK][Datos][x]
* En Componente 480i para Imagen principal, usted puede
seleccionar RGB y DVI para sub-imagen.
37
ES
Ajuste Externo
20. Auto Desconex (Comando2 : n)
23. Autoajuste (Comando2 : ~)
G Si no hay señal de entrada, el monitor se apagará
automáticamente después de 10 minutos.
G Ajusta automáticamente la posición de la imagen y elimina cualquier temblor de la imagen.
Transmisión
Transmisión
[k][n][ ][ID del equipo][ ][Datos][Cr]
[k][~][ ][ID del equipo][ ][Datos][Cr]
Datos 0: Descon
Datos 1: Autoajuste inicio
1: Conex
Reconocimiento
Reconocimiento
[n][ ][ID del equipo][ ][OK][Datos][x]
[~][ ][ID del equipo][ ][OK][Datos][x]
21. Cambio horizontal (Comando2 : v)
24. Reajuste (Comando2 : !)
G Para ajustar la imagen a la derecha/izquierda según prefiera.
G Para regresar a una buena reproducción de imagen programada por la fábrica y que no pueda ser cambiada.
Transmisión
Transmisión
[k][v][ ][ID del equipo][ ][Datos][Cr]
Datos 0 : 0~c6
[k][!][ ][ID del equipo][ ][Datos][Cr]
Datos 1 : Reinicializar
Reconocimiento
Reconocimiento
[v][ ][ID del equipo][ ][OK][Datos][x]
[!][ ][ID del equipo][ ][OK][Datos][x]
22. Cambio vertical (Comando2 : w)
25. Selección del idioma en pantalla (Comando2 : ^)
G Para ajustar la imagen hacia arriba/abajo de acuerdo a
sus preferencias.
G Para seleccionar el lenguaje deseado.
Transmisión
Transmisión
[k][w][ ][ID del equipo][ ][Datos][Cr]
[k][^][ ][ID del equipo][ ][Datos][Cr]
Datos 0 : 0 ~ 27
Datos 0 : English
1 : French
2 : Spain
Reconocimiento
[w][ ][ID del equipo][ ][OK][Datos][x]
Reconocimiento
[^][ ][ID del equipo][ ][OK][Datos][x]
38
G Ajusta automáticamente la posición de la imagen y elimina cualquier temblor de la imagen.
Transmisión
[k][%][ ][ID del equipo][ ][Datos][Cr]
Datos 0 : Ch Up
1 : Ch Down
Reconocimiento
[%][ ][ID del equipo][ ][OK][Datos][x]
27. Entrada del número del programa (Comando2 : $)
G Para seleccionar un programa.
Transmisión
[k][$][ ][ID del equipo][ ][Datos][Cr]
Datos 0 : 0~125
Ajuste Externo
26. Selección de programa (Comando2 : %)
Reconocimiento
[$][ ][ID del equipo][ ][OK][Datos][x]
28. PSM (Comando2 : t)
G Para seleccionar un modo de imagen.
Transmisión
[k][t][ ][ID del equipo][ ][Datos][Cr]
Datos 0 : Dinámico
1 : Estándar
2 : Suave
3 : Usuario
Reconocimiento
[t][ ][ID del equipo][ ][OK][Datos][x]
39
ES
Especificación del monitor
RGB Modo / DVI Modo
Frecuencia
horizontal (KHz)
Frecuencia
vertical (Hz)
31.469
70.08
37.927
85.03
31.500
60.00
37.500
67.00
37.861
72.80
37.500
75.00
43.269
85.00
35.156
56.25
37.879
60.31
48.077
72.18
46.875
75.00
53.674
85.06
48.363
60.00
56.476
70.06
60.023
75.02
68.677
84.99
54.348
60.05
47.700
60.00
60.150
75.00
1360X768
49.020
60.00
1366X768
49.020
60.00
SXGA
1280X1024
63.981
60.02
MAC
832X624
49.725
74.55
MODO
Resolución
DOS
720X400
VGA
SVGA
640X480
800X600
XGA
1024X768
SXGA
1152X864
1280X768
WXGA
(Forma de entrada de sincronización : Independiente)
40
Nota :
a. Si el televisor está frío, puede haber un ligero
"parpadeo" al encenderlo. Es algo normal, no supone
ninguna anomalía en el televisor.
b. Si es posible, use el modo de vídeo 1,280x768@60Hz
para obtener la mejor calidad de la imagen en su monitor LCD. Si se usa con las demás resoluciones, pueden
aparecer en la pantalla algunas imágenes a una escala
errónea, o con signos de procesamiento. Si se usa con
una frecuencia vertical de PC de 85 Hz, pueden aparecer algunas interferencias si la PIP está activada. En tal
caso, ajuste la frecuencia vertical del PC a 60 Hz.
c. Pueden aparecer algunos defectos de puntos en la pantalla, tales como puntos rojos, verdes, o azules. Sin
embargo, esos defectos no tendrán efecto alguno en el
rendimiento del monitor.
d. No presione la pantalla LCD con el dedo durante mucho
tiempo, ya que podría originar efectos de persistencia
de la imagen.
e. Cuando aparecezca la pantalla del PC en el televisor,
puede aparecer algún mensaje en la pantalla. El mensaje variará según cuál sea la versión del sistema operativo Windows (Win98, 2000). Si aparece algún mensaje, haga clic en "Siguiente" para continuar hasta que
apareza el mensaje "Finalizar".
f. Si aparece el mensaje “Out Of Range” en la pantalla,
ajuste el PC según se indica en la sección
"Especificación del monitor".
NOTA
ES
41
42
NOTA
No hay imagen ni sonido
Sonido satisfactorio ; imagen deficiente
Imagen satisfactoria ; sonido deficiente
Imagen borrosa
Líneas o rayas en la imagen
Recepción deficiente en algunos canales
Sin color
Color deficienter
No funciona el mando a distancia
Posición Incorrecta
Barras o tiras verticales en la parte de atrás
Señal horizontal
Aparece señal de mensaje del cable
Compruebe estos elementos y trate de ajustar estos
La toma de corriente (enchufado y encendido)
¿Está encendido el televisor?
Pruebe otro canal (señal débil)
Compruebe la antena (¿conectada al televisor?)
Compruebe la antena (¿cable roto?)
Compruebe la antena
Compruebe posibles interferencias locales
Ajuste el contraste
Ajuste el brillo
Ajuste el color
Ajuste el volumen
Compruebe las pilas del mando a distancia
Compruebe las tomas de Audio/Vídeo (sólo en el vídeo)
Automóvil-configure o ajuste la posición de H/V
Automóvil-configure o ajuste el reloj
Automóvil-configure o ajuste la fase del reloj
Guía para la solución de problemas
Síntomas
¿Cómo está la señal del cable, conectada o perdida?
43
ES
P/NO : 3828VA0538H