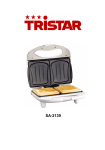
1
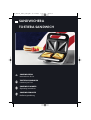
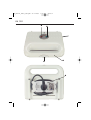
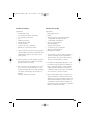
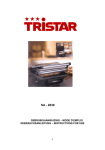
CV_KH1121_E2237_LB5.qxd
23.11.2007
9:20 Uhr
Seite 1
5
KOMPERNASS GMBH · BURGSTRASSE 21 · D-44867 BOCHUM
www.kompernass.com
ID-Nr.: KH1121-11/07-V1
CV_KH1121_E2237_LB5.qxd
23.11.2007
9:20 Uhr
Seite 2
SANDWICHERA
TOSTIERA SANDWICH
KH 1121
SANDWICHERA
Instrucciones de uso
TOSTIERA SANDWICH
Istruzioni per l'uso
SANDWICH MAKER
Operating instructions
SANDWICHMAKER
Bedienungsanleitung
CV_KH1121_E2237_LB5.qxd
23.11.2007
9:20 Uhr
Seite 3
CV_KH1121_E2237_LB5.qxd
23.11.2007
9:20 Uhr
Seite 4
KH 1121
q
w
r
e
t
CV_KH1121_E2237_LB5.qxd
23.11.2007
9:20 Uhr
Seite 5
CV_KH1121_E2237_LB5.qxd
23.11.2007
9:20 Uhr
Seite 6
IB_KH1121_E2237_LB5
23.11.2007
9:25 Uhr
Seite 1
ÍNDICE
PÁGINA
Uso previsto
2
Datos técnicos
2
Elementos de mando
2
Volumen de suministro
2
Indicaciones de seguridad
2
Antes del primer uso
3
Manejo
4
Limpieza y cuidado
5
Almacenamiento
5
Evacuación
5
Garantía y servicio
6
Importador
6
Recetas recomendadas
6
¡Guardar estas instrucciones para preguntas posteriores – e, igualmente entregar éstas, en caso de dar el
aparato a terceras personas!
-1-
IB_KH1121_E2237_LB5
23.11.2007
9:25 Uhr
Seite 2
SANDWICHERA
¡Peligro por descarga eléctrica!
• La sandwichera debe colocarse únicamente en
habitaciones secas y siempre en interiores. Mantenga el aparato – también cuando esté desconectado – alejado de salpicaduras de agua.
• Utilice la sandwichera sólo cuando la tensión de
red local coincida con la tensión nominal del
aparato (220-240V ~ 50 Hz).
• No conecte el aparato a una base de enchufe
múltiple, a través de la cual se pongan en funcionamiento otros aparatos eléctricos, ya que esto
puede provocar una sobrecarga en el circuito
eléctrico.
• Desconecte el aparato después de cada uso.
Para ello extraiga la clavija de red.
• Tenga cuidado de que no entre agua en el interior del aparato al limpiarlo. Nunca limpie el
aparato bajo agua corriente. Nunca sumerja el
aparato en agua.
• Proteja el cable de red contra posibles daños.
Tenga cuidado de que no se quede aprisionado
y manténgalo alejado de objetos calientes. No
dejes que el cable de red cuelgue suelto de la
mesa o del lugar de trabajo.
• Desenrolle siempre el cable de red por completo
del enrollador de cable.
• Nunca abra la carcasa del aparato.
• En caso de averiarse la clavija o el cable de red,
encargue su reparación de forma inmediata a un
técnico autorizado o al servicio de asistencia técnica para evitar riesgos innecesarios.
• Las reparaciones sólo pueden ser llevadas a
cabo en comercios especializados autorizados
por el fabricante, o por personal autorizado
(véase “Garantía y servicio posventa“).
Uso previsto
La sandwichera sirve para la preparación de sándwiches rellenos y está diseñada para uso privado.
Datos técnicos
Tensión nominal:
220-240V ~ 50Hz
Consumo de potencia: 700 W
Elementos de mando
q Luz de funcionamiento POWER
w Luz de funcionamiento READY
e Asa de sujeción
r Cierre
t Enrollamiento del cable
Volumen de suministro
Sandwichera
Instrucciones de uso
Indicaciones de seguridad
• Antes de utilizar su sandwichera por primera vez,
lea atentamente estas instrucciones de uso.
• Conserve las instrucciones de uso en un lugar
adecuado cerca del aparato. Entregue estas instrucciones junto con el aparato en caso de
traspasarlo a terceros.
• Utilice la sandwichera únicamente para su uso
previsto y de acuerdo con estas instrucciones de
uso.
-2-
IB_KH1121_E2237_LB5
23.11.2007
9:25 Uhr
Seite 3
Riesgo de incendio / peligro de
lesiones
De esta forma evitará daños en el
aparato
• Coloque la sandwichera sobre una base plana,
antideslizante y resistente al calor y nunca sobre
o al lado de otros aparatos que puedan irradiar
calor (p.ej. una tostadora, los hornillos de
la cocina).
• No ponga el aparato en funcionamiento cerca
de objetos fácilmente inflamables, p.ej. bajo
cortinas o junto a rollos de papel de cocina.
• Saque los sándwiches solamente con una espátula de plástico o de madera, o con otro objeto
adecuado, no metálico, para no dañar el revestimiento adherente de la sandwichera.
• Por los mismos motivos, no utilice ningún producto de limpieza agresivo ni ningún objeto puntiagudo.
Antes del primer uso
También haciendo un uso conforme a lo prescrito hay partes del aparato que alcanzan altas temperaturas (p.ej. la placas superior e inferior de la carcasa). Tenga cuidado de no
tocar estas superficies hasta que se hayan enfriado completamente después de desconectar
el aparato.
1. Extraiga su nueva sandwichera del embalaje.
Retire todos los elementos de seguridad adicionales para el transporte, p.ej. plásticos o fijaciones para el cable.
2. Compruebe antes de la puesta en funcionamiento que el volumen de suministro está completo y
no presenta daños visibles.
3. Lea cuidadosamente estas instrucciones de uso.
4. Posiciones el aparato según las indicaciones de
seguridad.
• Durante el funcionamiento la sandwichera puede
abrirse y cerrarse sin peligro sujetando el asa.
• No permita utilizar el aparato a personas (incluidos los niños) cuyas facultades físicas, sensoriales o mentales, así como su falta de conocimientos o de experiencia, les impida hacer un uso
seguro del mismo si no están bajo vigilancia o
han sido instruidos correctamente.
• Explique el aparato y los peligros derivados del
mismo a los niños para que no jueguen con él.•
Tenga cuidado al retirar los sandwiches preparados. Tanto el aparato como los sandwiches están
muy calientes.
• Después de desconectar el aparato deje que se
enfríe completamente antes de limpiarlo y
guardarlo.
En el primer calentamiento de la sandwichera
puede surgir vapores. Estos vapores no son
perjudiciales para la salud pero podrían estropear el sabor de sus sándwiches. Por ello le recomendamos que antes de preparar sándwiches por primera vez, conecte la sandwichera y
la
caliente sin introducir alimentos.
-3-
IB_KH1121_E2237_LB5
23.11.2007
9:25 Uhr
Seite 4
Manejo
• Deposite el pan sobre la superficie de tostar
inferior.
• Coloque ahora sobre el pan los otros
ingredientes.
• Cubra su sandwich con otra tostada.
Recomendamos tener preparados todos los ingredientes del sandwich antes de encender la
sandwichera. Le recomendamos para sus sándwiches pan para tostar. Pruebe también además de con pan de trigo, con pan de grano entero y de cereales.
Procure que el relleno del sandwich esté
distribuido uniformemente.
1. Abra la Tapa de la sandwichera. Tire hacia delante del cierre r en el asa de sujeción e y
levante la tapa hasta el tope hacia arriba. Si es
necesario elimine las partículas de polvo de las
superficies con un trapo seco.
2. Engrase las superficies con un poco de aceite
vegetal o mantequilla.
3. Cierre la tapa de la sandwichera. El aparato
está cerrado cuando el cierre r en el asa de
sujeción e se encaja de forma audible.
4. Introduzca la clavija de red en una base de enchufe, para conectar el aparato. La sandwichera comienza a calentarse inmediatamente. La
luz roja de funcionamiento „POWER“ q sobre
la tapa está iluminada.
5. Espere aprox. 3 minutos, hasta que la luz de funcionamiento verde „READY“ w se ilumine. Esto
indica el final de precalentado: el aparato ha alcanzado ahora la temperatura de
funcionamiento.
6. Abra la tapa hasta el tope e introduzca los
ingredientes para su sándwich, previamente
preparados, en el orden oportuno:
7. Cierre la tapa con cuidado, hasta que el cierre
r en el asa de sujeción e encaje de forma audible. Ahora su sándwich se está tostandoDurante la preparación, puede que la luz de funcionamiento verde „READY“ w se apague
temporalmente, ya que el termostato interno
regula constantemente la temperatura.
8. Abra la sandwichera después de unos 2–3 minutos. Compruebe si su sándwich está
suficientemente tostado.
El tiempo de preparación del sandwich dependerá de la cantidad y clase de los ingredientes
y de su gusto personal. Pruebe diferentes tiempos de cocinado.
9. Retire su sandwich con ayuda de una espátula
de madera o cualquier otro instrumento
adecuado que no sea de metal.
10. Para hacer más sándwiches, cierre la tapa y
repita los pasos 5 al 9.
11. Apague la sandwichera desenchufándola de la
red eléctrica. Ambas luces de funcionamiento se
apagan.
12. Abra la tapa hasta el tope. ¡Tenga cuidado con
las partes calientes del aparato! Deje que el
aparato se enfríe completamente y limpie las
superficies de tostado, p.ej. con un paño
húmedo.
-4-
IB_KH1121_E2237_LB5
23.11.2007
9:25 Uhr
Seite 5
Limpieza y cuidado
Evacuación
Antes de la limpieza extraiga la clavija de red y
espere a que el aparato se enfríe completamente.
Nunca limpie el aparato bajo agua corriente y nunca lo sumerja en agua.
No utilice productos de limpieza agresivos ni
objetos puntiagudos.
En ningún caso deberá tirar el aparato a la
basura doméstica.
Elimine el aparato a través de una empresa de
evacuación de basuras autorizada o por medio del
centro de evacuación de basuras municipal.
Tenga en cuenta las normativas actuales en vigor.
En caso de duda póngase en contacto con el
centro de evacuación de basuras.
Para no dañar el revestimiento antiadherente de la
sandwichera utilice un paño
humedecido en agua caliente, para la
limpieza básica. Séquelo después con un paño
seco. También para la limpieza de las superficies
exteriores del aparato es suficiente un paño húmedo. Antes de utilizar de nuevo la sandwichera asegúrese de que todas las partes está completamente
secas.
El material de embalaje debe desecharse
de forma respetuosa con el medio
ambiente.
Almacenamiento
Puede guardar la sandwichera en posición
horizontal o incorporada.
La sandwichera tiene un sistema integrado de enrrollamiento de cable t en la parte inferior del
aparato, aquí podrá enrollar el cable cuando la
sandwichera no esté en uso. De esta forma evitará
que el cable se quede pillado o se ensucie e incluso
evitará los posibles peligros de dejar el cable
suelto.
-5-
IB_KH1121_E2237_LB5
23.11.2007
9:25 Uhr
Seite 6
Garantía y servicio
Recetas recomendadas
Con este aparato recibe usted 3 años de garantía
desde la fecha de compra. El aparato ha sido fabricado cuidadosamente y ha sido probado antes de
su entrega. Guarde el comprobante de caja como
justificante de compra. Si necesitara hacer uso de
la garantía, póngase en contacto por teléfono con
su punto de servicio habitual. Éste es el único
modo de garantizar un envío gratuito.
Sándwich de tomate holandés
Ingredientes:
• 4 rebanadas de pan
• agua
• Cebollinas
• 1 tomate mediano
• mantequilla de hierbas
• 2 lonchas de jamón cocido
• Sal
• pimienta fresca molida
• 2 lonchas de queso Gouda joven
La garantía cubre los defectos de fabricación o del
material, pero no las piezas sujetas a desgaste y
los daños sufridos por las piezas frágiles. Este producto ha sido diseñado exclusivamente para el uso
particular y no para el uso industrial.
En caso de manipulación indebida e incorrecta, uso
de la fuerza y en caso de abrir el aparato personas
extrañas a nuestros centros de asistencia técnica
autorizados, la garantía pierde su validez. Esta garantía no reduce en forma alguna sus derechos
legales.
1. Lave las cebollinas y a continuación déjelas
escurrir. Corte las cebollinas a lo largo, por la
mitad y en trozos grandes. Poner el agua con la
sal a hervir en una cacerola. Añadir las cebollinas y escaldarlas durante aproximadamente 1
minuto. A continua-ción verterlas en un escurridor, bañarlas en agua fría y dejarlas escurrir.
Kompernass Service España
C/Invención 7
Polígono Industrial Los Olivos
28906 Getafe – Madrid
Tel.: 902/430758
Fax: 91/6652551
e-mail: [email protected]
2. Lavar los tomates y secarlos, partirlos por la mitad y eliminar las partessobrantes de los tallos.
Cortar los tomates en rodajas.
3. Untar una rebanada de pan con mantequilla de
hierbas. Colocar una rodaja de jamón doblada
sobre la rebanada untada. Distribuir por encima
los trozos de cebollina y las rodajas de tomate.
Condimentar con sal y pimienta.
Importador
Partir a la mitad las lonchas de queso y cubrir
con ellas la rebanada de pan preparada. Unte
otra rodaja de pan con un poco de mantequilla
de especias y cubra su sandwich con la parte
untada hacia abajo.
KOMPERNASS GMBH
BURGSTRASSE 21
D-44867 BOCHUM
www.kompernass.com
-6-
IB_KH1121_E2237_LB5
23.11.2007
9:25 Uhr
Seite 7
Sándwich italiano
Sándwich Scandia
Ingredientes:
• 4 rebanadas de pan
• 4 cucharadas de tomate concentrado
• 2 cucharadas de mayonesa
• Sal
• Hierbas de Provenza
• pimienta fresca molida
• 1 tomate mediano
• 1 paquete de queso mozzarella
• pimienta de colores fresca molida
Ingredientes:
• 4 rebanadas de pan
• Eneldo
• 125 g de salsa de yogur para ensalada
• 1 cucharadita de mostaza de Dijon
• 1 cucharadita de miel líquida
• 20 g de crema de salmón
(tubo del frigorífico)
• 1 Pepino para ensalada
• 1 paquete de queso mozzarella
• 100 g de salmón ahumado
• pimienta fresca molida
1. Mezcle el tomate concentrado, la mayonesa, la
sal, las hierbas de Provenza y la pimienta. Unte
la rebanada de pan que vaya a poner en la
parte superior.
1. Lave el eneldo y séquelo. Corte las puntas, de
los tallos del eneldo. Picar las puntas finas.
Mezcle la salsa de yogur con la mostaza, la
miel, la crema de salmón y el eneldo.
2. Lavar los tomates y secarlos, partirlos por la mitad y eliminar las partes sobrantes de los tallos.
Cortar los tomates en rodajas.
2. A continuación quite la piel del pepino y corte
los extremos. Corte el pepino por la mitad, a lo
largo y quítele las pepitas con una cucharilla.
Cortar en pedazos las mitades del pepino. A
continuación deje escurrir el queso mozzarella
en un escurridor y córtelo en rodajas.
3 Deje escurrir el queso mozzarella en un escurridor y córtelo en rodajas. Partir estas a su vez
por la mitad. Cubrir ahora la tostada ya untada,
con tomate y mozzarella y espolvorearla con
pimienta.
Cubra su sandwich una tostada.
3. Unte una rebanada de pan con la salsa de yogur para ensalada y colóquela sobre la sandwichera. Poner un trozo de pepino sobre la rebanada untada. Distribuir homogéneamente por
en-cima las lonchas de salmón y cubrirlas con
las lonchas de queso. Espolvorear con pimienta.
Cubra su sandwich una tostada.
-7-
IB_KH1121_E2237_LB5
23.11.2007
9:25 Uhr
Seite 8
Sándwich Hawaii
Sándwich de pechuga de pavo con
curry
Ingredientes:
• 4 rebanadas de pan
• 1 rodaja de piña (de lata)
• Mantequilla
• 2 lonchas de jamón cocido
• 2 lonchas de queso
Ingredientes:
• 4 rebanadas de pan
• 25 g de mantequilla
• Embutido de pechuga de pavo
• Ciruelas
• Salsa curry de cocktail
• Curry en polvo
Al gusto:
• 2 cerezas en almíbar (de bote)
1. Mezcle la mantequilla, la salsa de curry y el
curry en polvo. Lave las ciruelas, séquelas y quíteles el hueso. Corte las ciruelas por la mitad y
las mitades en rodajas finas.
1. Deje escurrir la piña en un escurridor. Unte la
rebanada de pan con mantequilla. Coloque la
rebanada de pan en la sandwichera y rellénela
con jamón y piña. El queso se coloca en último
lugar, sobre la piña. Según el gusto puede colocar las cerezas en el centro de la rebanada.
Cubra su sandwich una tostada.
2. A continuación unte la rebanada con la mantequilla de curry. Coloque la rebanada en la
sandwichera. Rellene la rebanada untada con
la loncha de pavo y las rodajas de ciruelas.
Cubra su sandwich con otra tostada.
-8-
IB_KH1121_E2237_LB5
23.11.2007
9:25 Uhr
Seite 9
INDICE
PAGINA
Destinazione d'uso
10
Dati tecnici
10
Elementi di comando
10
Fornitura
10
Avvertenze di sicurezza
10
Prima del primo impiego
11
Funzionamento
11
Pulizia & Cura
12
Conservazione
12
Smaltimento
13
Garanzia & assistenza
13
Importatore
13
Proposte di ricette
14
Conservare le presenti istruzioni per consultarle in futuro; in caso di cessione dell'apparecchio a terzi,
consegnare anche le istruzioni!
-9-
IB_KH1121_E2237_LB5
23.11.2007
9:25 Uhr
Seite 10
TOSTIERA SANDWICH
Pericolo di scossa elettrica!
Destinazione d'uso
Il Sandwich Maker serve per preparare sandwich
ripieni in ambiente domestico.
Dati tecnici
Tensione nominale: 220-240V ~ 50Hz
Potenza assorbita: 700 W
Elementi di comando
q Spia di controllo POWER
w Spia di controllo READY
e Maniglia
r Chiusura
t Avvolgimento cavo
Fornitura
Sandwich Maker
Istruzioni per l'uso
Avvertenze di sicurezza
• Leggere attentamente le istruzioni per l'uso prima
del primo impiego del Sandwich Maker.
• Conservare le istruzioni per l'uso in un luogo
appropriato nelle vicinanze dell'apparecchio.
In caso di cessione dell'apparecchio a terzi,
consegnare anche le istruzioni per l'uso.
• Utilizzare il Sandwich Maker solo per lo scopo
previsto e in conformità alle presenti istruzioni per
l'uso.
• Il Sandwich Maker dev'essere utilizzato solo in
ambienti interni. Tenere lontano l'apparecchio
dagli spruzzi d'acqua anche quando è spento.
• Utilizzare l'apparecchio solo se la tensione di
rete locale corrisponde alla tensione di rete dell'apparecchio (220-240V ~ 50 Hz).
• Non collegare l'apparecchio a una presa multipla contemporaneamente ad altri elettrodomestici, perché ciò potrebbe provocare un
sovraccarico di tensione.
• Spegnere l'apparecchio dopo l'uso e staccare la
spina dalla presa di corrente.
• Durante la pulizia, impedire la penetrazione di
acqua all'interno dell'apparecchio. Non pulire
mai l'apparecchio sotto acqua corrente. Non
immergere mai l'apparecchio in acqua.
• Proteggere il cavo di rete dai danneggiamenti.
Fare attenzione a non schiacciarlo e tenerlo lontano da oggetti surriscaldati. Non lasciar pendere
il cavo di rete dal tavolo o dal piano di lavoro.
• Svolgere sempre completamente il cavo di rete
dall’avvolgimento.
• Non aprire mai l'alloggiamento dell'
apparecchio.
• Fate sostituire la spina o il cavo danneggiata/o
immediatamente da personale specializzato
autorizzato o dal servizio di assistenza clienti ai
fini di evitare pericoli.
• Le riparazioni devono essere effettuate solo in negozi autorizzati dal produttore o da personale
specializzato ed esperto (v. „Garanzia &
Assistenza“).
- 10 -
IB_KH1121_E2237_LB5
23.11.2007
9:25 Uhr
Seite 11
Prima del primo impiego
Pericolo d'incendio / Pericolo di
lesioni
• Posizionare il Sandwich Maker su una superficie
piana, antisdrucciolo e resistente al calore e non
sopra o accanto ad altri apparecchi che irradiano molto calore (ad es. tostapane, fornelli).
• Non azionare l'apparecchio in vicinanza di oggetti facilmente infiammabili, ad es. tendine o
rotoli di carta da cucina.
1. Prelevare il nuovo Sandwich Maker dalla confezione. Rimuovere tutte le ulteriori protezioni per
il trasporto, ad es. pellicole o fascette fermacavi.
2. Prima della messa in funzione, controllare la
completezza e l'integrità della fornitura.
3. Leggere attentamente le presenti istruzioni per
l'uso.
4. Installare l'apparecchio in conformità alle
avvertenze di sicurezza.
Anche in caso di utilizzo conforme, i singoli
componenti dell'apparecchio si surriscaldano
(ad es. il piano superiore e inferiore dell'alloggiamento). Fare quindi attenzione a non toccare queste superfici finché non si saranno completamente raffreddate dopo lo spegnimento
dell'apparecchio.
• Durante il funzionamento, il Sandwich Maker
può essere aperto e chiuso senza rischi utilizzando l'apposita maniglia termoisolata.
• Impedire l'uso dell'apparecchio a persone (inclusi
bambini) che per motivi di natura fisica, sensoriale o mentale, o a causa della scarsa esperienza
e conoscenza non possono utilizzare l'apparecchio in sicurezza senza controllo o
senza essere stati prima istruiti in merito.
• Spiegare ai bambini il funzionamento dell'apparecchio e i suoi pericoli per impedire che lo
usino come un giocattolo.
• Usare cautela nel prelevare i sandwich pronti.
L'apparecchio e i sandwich sono bollenti.
• Fare raffreddare completamente l'apparecchio
dopo lo spegnimento, prima di pulirlo e di
riporlo.
Per evitare danni all'apparecchio
• Prelevare i sandwich solo con una spatola in
plastica, in legno o di altro materiale non
metallico appropriato, per non distruggere il
rivestimento antiaderente del Sandwich Maker.
• Per lo stesso motivo, non utilizzare detergenti aggressivi e oggetti acuminati durante la pulizia
dell'apparecchio.
Il primo riscaldamento del Sandwich Maker
potrebbe dare luogo a vapori, non pericolosi
per la salute, ma comunque in grado di compromettere il gusto dei sandwich. Consigliamo
pertanto, prima della prima preparazione dei
sandwich, di accendere una volta il Sandwich
Maker e farlo riscaldare per vari minuti senza
inserirvi alcuni alimento.
Funzionamento
Consigliamo di preparare tutti gli ingredienti
per i sandwich già prima dell'accensione del
Sandwich Makers. Per la preparazione dei
sandwich, consigliamo di utilizzare il pancarrè.
È possibile utilizzare, oltre al comune pancarrè,
anche pancarrè integrale o ai cereali.
1. Aprire il coperchio del Sandwich Maker. Per farlo, tirare la chiusura r sulla maniglia e verso
l'alto e rovesciare il coperchio verso l'alto fino
all'arresto. Se necessario, rimuovere le particelle
di polvere dalla superficie di cottura con un
panno asciutto.
2. Ungere le superfici di cottura con un po' di olio
vegetale o burro.
3. Chiudere il coperchio del Sandwich Maker. L'apparecchio è chiuso quando la chiusura r
della maniglia e si inserisce in modo udibile.
- 11 -
IB_KH1121_E2237_LB5
23.11.2007
9:25 Uhr
Seite 12
4. Per accendere l'apparecchio, inserire la spina in
una presa di corrente. Il Sandwich Maker comincia immediatamente a riscaldarsi. La spia di
controllo rossa „POWER“ q sul coperchio si
accende.
5. Attendere ca. 3 minuti fino a quando si accende
la spia di controllo verde „READY“ w. Essa segnala la fine del periodo di preriscaldamento:
l'apparecchio ha così raggiunto la temperatura
di funzionamento.
6. Aprire il coperchio fino all'arresto e posizionare
gli ingredienti per i sandwich già preparati nella
sequenza corretta:
• Collocare il pane sulla superficie inferiore.
• Posizionare quindi gli altri ingredienti sul pane.
• Coprire il sandwich con un'altra fetta di pane.
12. Aprire il coperchio fino all'arresto. Fare attenzione alle parti surriscaldate! Fare raffreddare
completamente l'apparecchio e quindi ripulire
le superfici di cottura ad es. con un panno
umido.
Pulizia & Cura
Prima della pulizia, estrarre la spina dalla presa e
attendere fino al completo raf-freddamento dell'apparecchio.
Non pulire mai l'apparecchio sotto l'acqua corrente
e non immergerlo mai in acqua.
Non utilizzare detergenti aggressivi e oggetti
acuminati.
Per non distruggere il rivestimento antiaderente del
Sandwich Maker, utilizzare esclusivamente un panno inumidito con
acqua bollente per una prima
pulizia. Detergere quindi con un panno asciutto. Anche per la pulizia delle superfici esterne dell'apparecchio è sufficiente utilizzare un panno umido. Accertarsi che tutte le parti del Sandwich Maker siano
perfettamente asciutte prima di riutilizzarlo.
Fare attenzione a distribuire uniformemente il
ripieno.
7. Chiudere con cautela il coperchio fino allo
scatto udibile della chiusura r al manico e.
Il sandwich viene quindi tostato. Durante la preparazione, la spia di controllo verde „READY“
w può temporaneamente spegnersi, perché il
termostato incorporato regola continuamente la
temperatura.
8. Aprire il Sandwich Maker dopo circa 2–3
minuti. Controllare la doratura del sandwich.
Conservazione
I tempi di cottura del sandwich varia-no a seconda dalla quantità e dal tipo di ingredienti e
dal gusto personale. Provare anche tempi di
cottura diversi.
9. Prelevare il sandwich con una spatola in legno o
con un altro utensile idoneo non in metallo.
10. Per preparare altri sandwich, chiudere il coperchio e ripetere le fasi da 5 a 9.
11.Spegnere il Sandwich Maker staccando la spina
dalla presa. Entrambe le spie di controllo si
spegneranno.
Il Sandwich Maker può essere riposto in orizzontale o in verticale.
Il Sandwich Maker presenta un dispositivo integrato
per l'avvolgimento del cavo t sul lato inferiore dell'apparecchio, al quale si può avvolgere il cavo di
rete quando l'apparecchio non viene utilizzato. In
tal modo si evita che il cavo di rete si impigli o si
imbratti, oppure penda e rappresenti un pericolo di
incendio.
- 12 -
IB_KH1121_E2237_LB5
23.11.2007
9:25 Uhr
Seite 13
Smaltimento
Importatore
Non gettare per alcun motivo l’apparecchio insieme ai normali rifiuti
domestici.
KOMPERNASS GMBH
BURGSTRASSE 21
D-44867 BOCHUM
Smaltire l’apparecchio presso un’azienda autorizzata o presso l’ente comunale di smaltimento.
Rispettare le norme attualmente in vigore. In caso di
dubbi, contattare l’azienda di smaltimento
competente.
www.kompernass.com
Smaltire tutti i materiali d’imballo in conformità alle norme per il rispetto dell’ambiente.
Garanzia & assistenza
Questo apparecchio è garantito per tre anni a partire dalla data di acquisto. L'apparecchio è stato
prodotto con cura e debitamente collaudato prima
della consegna. Conservare lo scontrino come prova d'acquisto. Nei casi contemplati dalla garanzia,
mettersi in comunicazione telefonicamente con il
centro di assis-tenza più vicino. Solo in questo
modo è possibile garantire una spedizione gratuita
della merce.
La prestazione della garanzia vale solo per difetti
del materiale o di fabbricazione. Il prodotto è destinato esclusivamente all'uso domestico e non a quello commerciale.
La garanzia decade in caso di impiego improprio o
manomissione, uso della forza e interventi non eseguiti dalla nostra filiale di assistenza autorizzata.
Kompernass Service Italia
Corso Lino Zanussi 11
33080 Porcia (PN)
Tel.: 0434/550833
Fax: 0434/550833
e-mail: [email protected]
- 13 -
IB_KH1121_E2237_LB5
23.11.2007
9:25 Uhr
Seite 14
Proposte di ricette
Toast olandese ai pomodori
Toast italiano
Ingredienti:
• 4 fette di pane per toast
• acqua
• cipolline
• 1 pomodoro di media grandezza
• burro alle erbe
• 2 fette di prosciutto cotto
• sale
• pepe macinato di fresco
• 2 fette di formaggio Gouda non stagionato
Ingredienti:
• 4 fette di pane per toast
• 4 cucchiai di concentrato di pomodoro
• 2 cucchiai di maionese per insalata
• sale
• erbe di Provenza
• pepe macinato di fresco
• 1 pomodoro di media grandezza
• 1 pacchetto di mozzarella
• pepe di vari colori macinato di fresco
1. Lavare le cipolline e farle sgocciolare. Dividerle
nel senso della lunghezza e quindi tagliarle a
pezzi grossi. Portare l'acqua a ebollizione con il
sale in un tegame. Versare le cipolline e sbollentarle per circa un minuto. Infine, versarle in
uno scolapasta, sciacquarle con acqua fredda
e farle sgocciolare.
1. Mescolare il concentrato di pomodoro, la maionese, il sale, le erbe di Provenza e il pepe. Cospargervi la superficie delle fette di pane rivolta
verso l'alto.
2. Lavare e asciugare il pomodoro, divi-derlo ed
eliminare la parte dura vicino al picciolo.
Affettare il pomodoro.
3. Spalmare il burro alle erbe sulle fette di pane
per toast. Collocare una fetta di prosciutto piegata sulla superficie di pane imburrata. Distribuirvi i pezzi di cipolle e le fette di pomodoro.
Insaporire con sale e pepe.
2. Lavare e asciugare il pomodoro, divi-derlo ed
eliminare la parte dura vicino al picciolo.
Affettare il pomodoro.
3. Fare sgocciolare la mozzarella in un colino e tagliarla a fette. Dividere ancora una volta le fette.
La fetta di pane per toast già spalmata viene
quindi ricoperta con fette di pomodoro e
mozzarella e cosparsa di pepe.
Coprire il sandwich con un'altra fetta di pane.
Dividere le fette di formaggio e posarle sulla fetta di pane così preparata. Imburrare un'altra fetta di pane con un po' di burro alle erbe e coprire il sandwich con la parte imburrata rivolta
verso il basso.
- 14 -
IB_KH1121_E2237_LB5
23.11.2007
9:25 Uhr
Seite 15
Toast Scandia
Toast Hawaii
Ingredienti:
• 4 fette di pane per toast
• aneto
• 125 g di salsa allo yogurt per insalata
• 1 cucchiaino di senape di Dijon
• 1 cucchiaino di miele liquido
• 20 g di pasta di salmone
(tubo prelevato dal reparto frigorifero)
• 1 cetriolo per insalata
• 1 pacchetto di mozzarella
• 100 g di salmone affumicato a fette
• pepe macinato di fresco
Ingredienti:
• 4 fette di pane per toast
• 1 fetta di ananas (in scatola)
• burro
• 2 fette di prosciutto cotto
• 2 sottilette di formaggio
1. Lavare l'aneto e asciugarlo. Staccare le punte
dai gambi e sminuzzarle finemente. Mescolare
la salsa allo yogurt con la senape, il miele, la
crema di salmone e l'aneto.
2. Sbucciare infine il cetriolo e tagliarne via le
estremità. Dividere il cetriolo in lunghezza ed
estrarne via il centro con un cucchiaino. Tagliare
a fette le metà del cetriolo. Fare quindi sgocciolare la mozzarella in un colino e ta-gliarla a
fette.
A piacere:
• 2 ciliegie sgocciolate
(dal barattolo)
1. Fare sgocciolare l'ananas in un colino. Ricoprire
la fetta di pane con burro. Collocare la fetta di
pane nel Sandwich Maker e ricoprirla col prosciutto e con l'ananas. Il formaggio viene messo
per ultimo sull'ananas. A piacere, si può collocare la ciliegia nel centro del toast. Coprire il
sandwich con un'altra fetta di pane.
3. Ricoprire una fetta di pane con la salsa allo
yogurt e collocarla sul Sandwich Maker. Mettere una fetta di cetriolo sulla fetta di pane spalmata. Distribuire uniformemente le fette di salmone e ricoprirle con le fette di formaggio.
Cospargere di pepe. Coprire il sandwich con
un'altra fetta di pane.
- 15 -
IB_KH1121_E2237_LB5
23.11.2007
9:25 Uhr
Seite 16
Toast con petto di tacchino e curry
Ingredienti:
• 4 fette di pane per toast
• 25 g di burro
• affettato di petto di tacchino
• prugne
• salsa da cocktail al curry
• curry in polvere
1. Mescolare il burro con la salsa al curry e il
curry in polvere. Lavare le prugne, asciugarle e
snocciolarle. Dividere a metà le prugne e
tagliarle a fette sottili.
2. Ricoprire infine una fetta di pane con il burro al
curry. Collocare la fetta di pane sul Sandwich
Maker. Coprire la fetta di pane imburrata con il
tacchino e le fette di prugne. Coprire il sandwich con un'altra fetta di pane.
- 16 -
IB_KH1121_E2237_LB5
23.11.2007
9:25 Uhr
Seite 17
CONTENT
PAGE
Intended use
18
Technical data
18
Operating elements
18
Delivery Contents
18
Safety instructions
18
Before the first use
19
Operation
19
Cleaning & care
20
Storage
20
Disposal
20
Warranty & Service
21
Importer
21
Recipe suggestions
22
Read the operating instructions carefully before using the appliance for the first time and preserve this
booklet for later reference. Pass the manual on to whomsoever might acquire the scale at a later date.
- 17 -
IB_KH1121_E2237_LB5
23.11.2007
9:25 Uhr
Seite 18
SANDWICHMAKER
Danger of electrical shock!
• The Sandwich Maker may only be used in dry
rooms indoors. Keep the appliance away from
splashing water – even while turned off.
• You must only use this appliance when the local
mains voltage corresponds to the appliances
rated voltage (220-240V ~ 50 Hz)
• Do not connect the appliance to a multiple connection power socket on which other electrical
devices are operating at the same time; this could
lead to overloading of the power circuit.
• Turn off the appliance after every use. Also pull
the power plug.
• When cleaning, make certain that no water penetrates inside the appliance. Never clean the appliance under running water. Never submerse the
appliance in water.
• Protect the power cord from damage. Be careful
not to pinch it, and keep it away from hot objects.
Do not allow the power cord to hang loosely off
a table or counter.
• Always wrap the power cable up completely
from the cable rewinder.
• Never open the casing of the appliance.
• Arrange for defective power plugs and/or cables
to be replaced as soon as possible by a qualified
technician or by our Customer Service Department to avoid the risk of injury.
• Repairs may only be performed by specialised
dealers authorised by the manufacturer or by experienced experts (see "Warranty & service").
Intended use
The Sandwich Maker is intended for preparing
filled sandwiches in private house-holds.
Technical data
Rated voltage:
220-240V ~ 50Hz
Power consumption: 700 W
Operating elements
q Operation light POWER
w Operation light READY
e Handle
r Fastener
t Winding the cable
Delivery Contents
Sandwich Maker
Operating instructions
Safety instructions
• Read these instructions carefully before using
your Sandwich Maker for the first time.
• Keep the instructions in an appropriate place
near the appliance. Also include the instructions if
you pass the appliance on to anyone else.
• Only use the Sandwich Maker for its intended
purpose and only according to these operating
instructions.
- 18 -
IB_KH1121_E2237_LB5
23.11.2007
9:25 Uhr
Fire danger / Danger of injury
• Place your Sandwich Maker on a flat, slip-proof
and heat-resistant surface and not next to other
appliances that could radiate significant heat
(e.g. toasters, kitchen ovens).
• Do not operate the appliance in the area of easily flammable objects, such as under curtains or
next to rolls of paper towels.
Even when used properly, some parts of the
appliance become very hot (such as the top
and bottom casing panels). Be careful not to
touch these surfaces until they have cooled
down completely after the appliance is turned
off.
• During operation, the Sandwich Maker can be
opened and closed without danger using the
heat-insulated grip.
• Do not allow individuals (including children) to
use the appliance whose physical, sensorial or
mental abilities or lack of experience and knowledge hinder their safe usage of it if they have
not previously been supervised or instructed in
its correct usage.
• Tell children about the appliance and its potential dangers so that they do not play with it.
• Be careful when taking out the pre-pared sandwich. The appliance as well as the sandwiches
are very hot.
• Allow the appliance to cool completely after
switching it off before cleaning and storing it.
In order to avoid damaging the
appliance
• Remove your sandwiches only with a plastic or
wooden spatula or with another suitable, nonmetallic object to avoid damaging the non-stick
coating of the Sandwich Maker.
• For the same reason, do not use abrasive cleansers and sharp objects to clean the appliance.
Seite 19
Before the first use
1. Take your new Sandwich Maker out of the pakkaging. Remove all additional transport packing,
e.g. plastic wrap or cable holders.
2. Check before initial operation that the package
contents are complete and for possible visible
damages.
3. Read these operating instructions carefully.
4. Set up the appliance according to the safety
instructions.
Vapours can develop when the Sandwich
Maker is heated up for the first time. These vapours are not hazardous to your health, but
may affect the taste of your sandwich. For this
reason, we recommend turning on the Sandwich Maker once before preparing the first
sandwich and allowing it to heat up for several
minutes without food.
Operation
We recommend that you have all the sandwiches ingredients already accordingly prepared
before you switch on the sandwich maker. We
recommend using toast bread for your sandwiches. In addition to wheat bread, also try full
grain or multi-grain bread.
1. Open the lid of the Sandwich Maker. To do this
pull the fastener r on the handle e forward
and lift the lid up to its fullest extent. If necessary,
remove any dust from the toasting surfaces with
a dry cloth.
2. Grease the toasting surfaces with some
vegetable oil or butter.
3. Close the lid of the Sandwich Maker. The
appliance is closed when the fastener r on
the handle e audibly locks into place.
4. Insert the power plug into a socket to turn on the
appliance. The Sandwich Maker immediately
begins to heat up. The red operation light
"POWER" q on the lid lights up.
- 19 -
IB_KH1121_E2237_LB5
23.11.2007
9:25 Uhr
Seite 20
5. Wait approximately 3 minutes until the green
operation light "READY" w lights up. This indicates the end of the preheating: The appliance has
now reached the operating temperature.
6. Open the lid until it reaches the stop and lay in
your prepared sandwich ingredients in the
correct order:
Cleaning & care
• Place the bread on the lower toast surface.
• Now place the other ingredients on the bread.
• Cover your sandwich with another slice of toast
bread.
To avoid damaging the non-stick coating of the
Sandwich Maker, use only a cloth dampened with
hot water for thorough cleaning. Then wipe off with
a dry cloth. A damp cloth is also sufficient for cleaning the outer surfaces of the appliance. Be sure to
allow all parts to dry completely before using the
Sandwich Maker again.
Before cleaning, pull the power plug and wait until
the appliance has cooled completely.
Never clean the appliance under running water,
and never submerge it into water.
Do not use abrasive cleansers or sharp objects.
Make sure that the filling is distributed evenly.
7. Close the lid carefully until the fastener r on the
handle e audibly locks into place. Your sandwich will now be toasted. During preparation the
green operation light "READY" w can, at times,
go out because the built in thermostat constantly
readjusts the temperature.
8. Open the Sandwich Maker after about 2–3
minutes. Check whether your sandwich is
sufficiently brown.
Vary the cooking time for your sandwich depending on the amount and type of ingredients
and your personal taste. Try various cooking
times.
Storage
You can store the Sandwich Maker lying flat or
standing upright.
The Sandwich Maker has an intergrated cable reel
t on the bottom of the casing where you can wind
the mains cable when the appliance is not in use. In
this way you avoid clamping or soiling the mains
cable or creating a source of danger from a loose
hanging cable.
Disposal
9. Remove your sandwiches with a wooden spatula or any other suitable non-metallic object.
10. To create more sandwiches, close the lid and
repeat steps 5 to 9.
11. Turn the Sandwich Maker off by pulling the
mains plug out of the socket. Both operation
lights will go out.
12. Open the lid until it reaches the stop. Be careful
of hot parts of the appliance! Allow the
appliance to cool completely, then clean the
toasting surfaces, for instance with a damp
cloth.
Do not dispose of the appliance in your
normal domestic waste.
Dispose of the appliance through an approved disposal centre or at your community waste facility.
Observe the currently applicable regulations.
In case of doubt, please contact your waste disposal
centre.
Dispose of all packaging materials in an
environmentally friendly manner.
- 20 -
IB_KH1121_E2237_LB5
23.11.2007
9:26 Uhr
Seite 21
Warranty & Service
Importer
The warranty for this appliance is for 3 years from
the date of purchase. The appliance has been
manu-factured with care and meticulously examined
before delivery. Please retain your receipt as proof
of purchase. In the case of a warranty claim, please
make contact by telephone with our service department. Only in this way can a post-free despatch for
your goods be assured.
The warranty covers only claims for material and
maufacturing defects, not for wearing parts or for
damage to fragile components. This product is for
private use only and is not intended for commercial
use.
The warranty is void in the case of abusive and improper handling, use of force and internal tampering not carried out by our authorized service
branch. Your statutory rights are not restricted in
any way by this warranty.
KOMPERNASS GMBH
BURGSTRASSE 21
D-44867 BOCHUM
www.kompernass.com
DES Ltd
Units 14-15
Bilston Industrial Estate
Oxford Street
Bilston
WV14 7EG
Tel.: 0870/787-6177
Fax: 0870/787-6168
e-mail: [email protected]
Irish Connection
Harbour view
Howth
Co. Dublin
Tel: 00353 (0) 87 99 62 077
Fax: 00353 18398056
e-mail: [email protected]
- 21 -
IB_KH1121_E2237_LB5
23.11.2007
9:26 Uhr
Seite 22
Recipe suggestions
Dutch Tomato Toast
Italian Toast
Ingredients:
• 4 slices of toast bread
• Water
• Spring onions
• 1 medium tomato
• Herb butter
• 2 slices of cooked ham
• Salt
• Freshly ground pepper
• 2 slices of young Gouda cheese
Ingredients:
• 4 slices of toast bread
• 4 tbsp. tomato paste
• 2 tbsp. salad mayonnaise
• Salt
• Herbs de Provence
• Freshly ground pepper
• 1 medium tomato
• 1 package Mozzarella cheese
• Freshly ground coloured pepper
1. Wash the spring onions and let them drip dry.
Halve the spring onions lengthwise and cut
them into large pieces. Bring the water with salt
to boil in a pot. Add the spring onions and
blanch for about 1 minute. Then place in a colander, run cold water over them and let drip
dry.
1. Stir the tomato paste, mayonnaise, salt, herb de
Provence and pepper together. Coat the toast
slices on the subsequently upper facing side
with this mixture.
2. Wash the tomato and towel dry, slice in half and
remove the stem. Cut the tomato into slices.
3 Let the Mozzarella cheese drain in a colander
and cut it into slices. Cut these in half. Now lay
the tomato and Mozzarella slices on the coated
slice and season with pepper.
3. Coat a slice of bread with herb butter. Place a
folded slice of ham on the buttered toast slice.
Lay spring onion pieces and tomato slices over
the ham. Season with salt and pepper.
2. Wash the tomato and towel dry, slice in half and
remove the stem. Cut the tomato into slices.
• Cover your sandwich with a slice of toast bread.
Cut cheese slices in half and place them on the
prepared bread slice. Coat another slice of toast
with some garlic butter and place it on your
sandwich with the buttered side down.
- 22 -
IB_KH1121_E2237_LB5
23.11.2007
9:26 Uhr
Seite 23
Scandia Toast
Hawaiian Toast
Ingredients:
• 4 slices of toast bread
• Dill
• 125 g yoghurt salad cream
• 1 tsp. Dijon mustard
• 1 tsp. liquid honey
• 20 g real salmon cream
(tube from the refrigerated aisle)
• 1 cucumber
• 1 package Mozzarella cheese
• 100 g smoked salmon, sliced
• Freshly ground pepper
Ingredients:
• 4 slices of toast bread
• 1 pineapple slice (from the can)
• Butter
• 2 slices of cooked ham
• 2 cheese slices
1. Rinse off the dill and towel it dry. Pluck the tips
from the dill stalks. Chop the tips finely. Mix the
yoghurt salad cream with the mustard, honey,
salmon cream and dill.
As desired:
• 2 drained emperor cherrys (out of the glass)
1. Let the pineapples drain in a colander. Now
coat the toast slice with butter. Place the toast slice in the Sandwich Maker and overlay it with
the ham and pineapple. Lay the cheese on the
pineapple as the last ingredient. If you wish you
can place the cherrys in the middle of the toast.
Cover your sandwich with a slice of toast
bread.
2. Then peel the cucumber and cut off the ends. Slice the cucumber in half lengthwise and scoop
out the seeds with a teaspoon. Cut the cucumber
halves into slices. Then let the Mozzarella drain
in a colander and cut it into slices.
3. Now coat a toast slice with yoghurt salad cream
and place it on the Sandwich Maker. Lay a
piece of cucumber on the coated bread slice.
Evenly lay salmon slices on top, followed by the
cheese slices. Season with pepper. Cover your
sandwich with a slice of toast bread.
- 23 -
IB_KH1121_E2237_LB5
23.11.2007
9:26 Uhr
Seite 24
Curry Turkey Breast Toast
Ingredients:
• 4 slices of toast bread
• 25 g butter
• Sliced turkey breast
• Plums
• Cocktail curry sauce
• Curry powder
1. Stir the butter with the curry sauce and the curry
powder. Wash the plums, dry them and remove
the pits. Cut the plums in half and slice the halves into thin slices.
2. Subsequently coat a toast slice with the curry
butter. Place the toast slice on the Sandwich
Maker. Now overlay the coated toast slice with
the sliced turkey breast and plum slices. Cover
your sandwich with another toast slice.
- 24 -
IB_KH1121_E2237_LB5
23.11.2007
9:26 Uhr
Seite 25
INHALTSVERZEICHNIS
SEITE
Verwendungszweck
26
Technische Daten
26
Bedienelemente
26
Lieferumfang
26
Sicherheitshinweise
26
Vor dem ersten Gebrauch
27
Bedienen
27
Reinigen & Pflegen
28
Aufbewahren
28
Entsorgen
29
Garantie und Service
29
Importeur
29
Rezeptvorschläge
30
Lesen Sie die Bedienungsanleitung vor der ersten Verwendung aufmerksam durch und heben Sie diese für
den späteren Gebrauch auf. Händigen Sie bei Weitergabe des Gerätes an Dritte auch die Anleitung aus.
- 25 -
IB_KH1121_E2237_LB5
23.11.2007
9:26 Uhr
Seite 26
SANDWICH MAKER
Gefahr durch elektrischen Schlag!
Verwendungszweck
Der Sandwich Maker dient der Zubereitung von
gefüllten Sandwiches im privaten Haushalt.
Technische Daten
Nennspannung:
220-240V ~ 50Hz
Leistungsaufnahme: 700 W
Bedienelemente
q Betriebsleuchte POWER
w Betriebsleuchte READY
e Haltegriff
r Verschluss
t Kabelaufwicklung
Lieferumfang
Sandwich Maker
Bedienungsanleitung
Sicherheitshinweise
• Lesen Sie vor dem ersten Gebrauch Ihres
Sandwich Makers diese Gebrauchsanleitung
aufmerksam durch.
• Bewahren Sie die Gebrauchsanleitung an einem
geeigneten Ort in der Nähe des Gerätes auf.
Händigen Sie die Gebrauchsanleitung bei
Weitergabe des Gerätes an Dritte ebenfalls mit
aus.
• Benutzen Sie den Sandwich Maker nur für seinen
vorgesehenen Zweck und in Übereinstimmung mit
dieser Gebrauchsanleitung.
• Der Sandwich Maker darf nur in trockenen
Räumen im Innenbereich eingesetzt werden.
Halten Sie das Gerät – auch im ausgeschalteten
Zustand – von Spritzwasser fern.
• Benutzen Sie das Gerät nur dann, wenn die örtliche Netzspannung mit der Nennspannung des
Gerätes (220-240V ~ 50 Hz) übereinstimmt.
• Schließen Sie das Gerät nicht über eine
Mehrfachsteckdose an, über die gleichzeitig
andere elektrische Geräte arbeiten, denn das
kann zu einer Überlastung des Stromkreises
führen.
• Schalten Sie das Gerät nach jedem Gebrauch
aus. Ziehen Sie dazu den Netzstecker.
• Achten Sie beim Reinigen darauf, dass kein Wasser in das Innere des Gerätes gelangt. Reinigen
Sie das Gerät nie unter fließendem Wasser.
Tauchen Sie das Gerät nie in Wasser ein.
• Schützen Sie das Netzkabel vor Beschädigung.
Achten Sie darauf, es nicht einzuklemmen und
von heißen Gegenständen fernzuhalten. Lassen
Sie das Netzkabel nicht lose von Tisch oder
Arbeitsplatte hängen.
• Wickeln Sie das Netzkabel immer vollständig von
der Kabelaufwicklung ab.
• Öffnen Sie nie das Gehäuse des Gerätes.
• Lassen Sie beschädigte Netzstecker oder Netzkabel sofort von autorisiertem Fachpersonal oder
dem Kundenservice austauschen, um
Gefährdungen zu vermeiden.
• Reparaturen dürfen nur im vom Hersteller autorisierten Fachhandel oder durch erfahrenes Fachpersonal ausgeführt werden (siehe „Garantie &
Service“).
Brandgefahr / Verletzungsgefahr
• Stellen Sie Ihren Sandwich Maker auf eine ebene, rutschfeste und hitzebeständige Unterlage
und nicht auf oder neben andere Geräte, die
viel Wärme ausstrahlen können (z.B. Toaster,
Küchenherde).
- 26 -
IB_KH1121_E2237_LB5
23.11.2007
9:26 Uhr
Seite 27
Vor dem ersten Gebrauch
• Betreiben Sie das Gerät nicht in der Nähe leicht
brennbarer Gegenstände, z.B. unter Gardinen
oder neben Küchenkrepp-Rollen.
Auch bei vorschriftsmäßiger Benutzung werden
einzelne Geräteteile sehr heiß (z.B. die obere
und untere Gehäuseplatte). Achten Sie darauf,
diese Oberflächen nicht zu berühren, bis sie
nach dem Ausschalten vollständig abgekühlt
sind.
• Während des Betriebs kann der Sandwich Maker
gefahrlos am wärmeisolierten Griff geöffnet und
geschlossen werden.
• Dieses Gerät ist nicht dafür bestimmt, durch
Personen (einschließlich Kinder) mit eingeschränkten, physischen, sensorischen oder geistigen
Fähigkeiten oder mangels Erfahrung und/oder
mangels Wissen benutzt zu werden, es sei denn,
sie werden durch eine für ihre Sicherheit zuständige Person beaufsichtigt oder erhielten von ihr
Anweisungen, wie das Gerät zu benutzen ist.
• Kinder sollten beaufsichtigt werden, um sicherzustellen, dass sie nicht mit dem Gerät spielen.
• Seien Sie vorsichtig beim Herausnehmen der fertigen Sandwiches. Das Gerät, sowie die
Sandwiches sind sehr heiß.
• Lassen Sie das Gerät nach dem Ausschalten
vollständig abkühlen, bevor Sie es reinigen und
verstauen.
So vermeiden Sie Schäden am
Gerät
• Entnehmen Sie Ihre Sandwiches nur mit einem
Kunststoff- oder Holzspatel oder einem anderen
geeigneten, nichtmetallischen Gegenstand, um
die Antihaftbeschichtung des Sandwich Makers
nicht zu zerstören.
• Benutzen Sie – aus dem selben Grund – zur
Reinigung keine scharfen Putzmittel und spitze
Gegenstände.
1. Entnehmen Sie Ihren neuen Sandwich Maker
aus der Verpackung. Entfernen Sie alle zusätzlichen Transportsicherungen, z.B. Folien oder
Kabelhalter.
2. Überprüfen Sie vor der Inbetriebnahme den
Lieferumfang auf Vollständigkeit und eventuell
sichtbare Beschädigungen.
3. Lesen Sie diese Gebrauchsanleitung aufmerksam
durch.
4. Stellen Sie das Gerät gemäß den Sicherheitshinweisen auf.
Durch das erstmalige Beheizen des Sandwich
Makers können Dämpfe entstehen. Diese
Dämpfe sind nicht gesundheitsgefährdend,
könnten aber den Geschmack Ihrer Sandwiches
beeinträchtigen. Wir empfehlen Ihnen daher
vor der ersten Zubereitung von Sandwiches,
den Sandwich Maker einmal einzuschalten und
ohne Lebensmittel mehrere Minuten aufzuheizen.
Bedienen
Wir empfehlen, alle Zutaten für die Sandwiches
bereits vor dem Einschalten des Sandwich
Makers entsprechend vorzubereiten. Für Ihre
Sandwiches empfehlen wir Toastbrot. Probieren
Sie doch außer Weizen-Toastbrot auch einmal
Vollkorn- oder Mehrkorn-Toastbrot.
1. Öffnen Sie den Deckel des Sandwich Makers.
Ziehen Sie dazu den Verschluss r am Haltegriff
e nach vorn und klappen Sie den Deckel bis
zum Anschlag nach oben. Entfernen Sie ggf.
Staubpartikel mit einem trockenen Tuch von den
Toastflächen.
2. Fetten Sie die Toastflächen mit etwas Pflanzenöl
oder Butter ein.
- 27 -
IB_KH1121_E2237_LB5
23.11.2007
9:26 Uhr
3. Schließen Sie den Deckel des Sandwich Makers. Das Gerät ist geschlossen, wenn der Verschluss r am Haltegriff e hörbar eingerastet
ist.
4. Stecken Sie den Netzstecker in eine Steckdose,
um das Gerät einzuschalten. Der Sandwich Maker fängt sofort an zu heizen. Die rote Betriebsleuchte „POWER“ q auf dem Deckel leuchtet.
5. Warten Sie ca. 3 Minuten, bis die grüne Betriebsleuchte „READY“ w leuchtet. Sie zeigt das
Ende des Vorheizens an: Das Gerät hat nun die
Betriebstemperatur erreicht.
6. Öffnen Sie den Deckel bis zum Anschlag und
legen Sie Ihre vorbereiteten Sandwich-Zutaten
in der richtigen Reihenfolge ein:
• Legen Sie das Brot auf die untere Toastfläche.
• Geben Sie nun die anderen Zutaten auf das Brot.
• Decken Sie Ihr Sandwich mit einer weiteren
Toastscheibe zu.
Achten Sie auf eine gleichmäßige Verteilung
der Füllung.
7. Schließen Sie den Deckel behutsam, bis der
Verschluss r am Haltegriff e hörbar einrastet.
Ihr Sandwich wird nun getoastet.
Während der Zubereitung kann die grüne
Betriebsleuchte „READY“ w zeitweise ausgehen, weil der eingebaute Thermostat ständig die
Temperatur nachregelt.
8. Öffnen Sie den Sandwich Maker nach ca. 2–3
Minuten. Prüfen Sie, ob Ihr Sandwich
ausreichend braun ist.
Abhängig von Menge und Art der Zutaten und
Ihrem persönlichem Geschmack variieren die
Garzeiten für Ihr Sandwich. Probieren Sie
verschiedene Garzeiten aus.
9. Entnehmen Sie Ihre Sandwiches mit einem
Holzspatel oder einem anderen geeigneten,
nichtmetallischem Gegenstand.
Seite 28
10. Um weitere Sandwiches herzustellen, schließen
Sie den Deckel und wiederholen die Schritte 5
bis 9.
11. Schalten Sie den Sandwich Maker aus, indem
Sie den Netzstecker ziehen. Beide Betriebsleuchten erlöschen.
12. Öffnen Sie den Deckel bis zum Anschlag. Geben Sie auf heiße Geräteteile acht! Lassen Sie
das Gerät vollständig auskühlen und reinigen
Sie dann die Toastflächen, z.B. mit einem
feuchten Tuch.
Reinigen & Pflegen
Ziehen Sie vor der Reinigung den Netzstecker und
warten Sie, bis das Gerät vollständig abgekühlt ist.
Reinigen Sie das Gerät nie unter fließendem
Wasser und tauchen Sie es nie in Wasser ein.
Benutzen Sie keine scharfen Putzmittel und spitze
Gegenstände.
Um die Antihaftbeschichtung des Sandwich Makers
nicht zu zerstören, benutzen Sie bitte ausschließlich
ein mit heißem Wasser angefeuchtetes Tuch zur
Grundreinigung. Wischen Sie mit einem trockenen
Tuch nach. Auch für die Reinigung der Außenflächen des Gerätes genügt ein feuchtes Tuch. Achten
Sie darauf, dass vor der erneuten Verwendung des
Sandwich Makers alle Teile vollständig trocken
sind.
Aufbewahren
Den Sandwich Maker können Sie liegend oder
aufrecht stehend verstauen.
Der Sandwich Maker hat eine integrierte Kabelaufwicklung t an der Gehäuseunterseite, auf die Sie
das Netzkabel bei Nichtgebrauch aufwickeln können. Sie vermeiden dadurch, dass das Netzkabel
eingeklemmt oder verschmutzt wird oder durch loses Herabhängen zur Gefahrenquelle wird.
- 28 -
IB_KH1121_E2237_LB5
23.11.2007
9:26 Uhr
Seite 29
Entsorgen
Werfen Sie das Gerät keinesfalls in den
normalen Hausmüll.
Schraven
Service- und Dienstleistungs GmbH
Gewerbering 14
D-47623 Kevelaer
Tel.: +49 (0) 180 5 008107
(14 Ct/Min. aus dem dt. Festnetz)
Entsorgen Sie das Gerät über einen zugelassenen
Entsorgungsbetrieb oder über Ihre kommunale
Entsorgungseinrichtung.
Beachten Sie die aktuell geltenden Vorschriften.
Setzen Sie sich im Zweifelsfall mit Ihrer Entsorgungseinrichtung in Verbindung.
Führen Sie alle Verpackungsmaterialien
einer umweltgerechten Entsorgung zu.
Garantie und Service
Sie erhalten auf dieses Gerät 3 Jahre Garantie ab
Kaufdatum. Das Gerät wurde sorgfältig produziert
und vor Anlieferung gewissenhaft geprüft. Bitte bewahren Sie den Kassenbon als Nachweis für den
Kauf auf. Bitte setzen Sie sich im Garantiefall mit
Ihrer Servicestelle telefonisch in Verbindung. Nur so
kann eine kostenlose Einsendung Ihrer Ware
gewährleistet werden.
Die Garantieleistung gilt nur für Material- oder Fabrikationsfehler, nicht aber für Verschleißteile oder
für Beschädigungen an zerbrechlichen Teilen, z. B.
Schalter oder Akkus. Das Produkt ist lediglich für
den privaten und nicht für den gewerblichen
Gebrauch bestimmt.
Bei missbräuchlicher und unsachgemäßer Behandlung, Gewaltanwendung und bei Eingriffen, die
nicht von unserer autorisierten Service-Niederlassung vorgenommen wurden, erlischt die Garantie.
Ihre gesetzlichen Rechte werden durch diese Garantie nicht eingeschränkt.
Fax: +49 (0) 2832 3532
e-mail: [email protected]
Kompernaß Service Österreich
Rittenschober KG
Gmundner Strasse 10
A-4816 Gschwandt
Tel.: +43 (0) 7612 6260516
Fax: +43 (0) 7612 626056
e-mail: [email protected]
Importeur
KOMPERNASS GMBH
BURGSTRASSE 21
D-44867 BOCHUM
www.kompernass.com
- 29 -
IB_KH1121_E2237_LB5
23.11.2007
9:26 Uhr
Seite 30
Rezeptvorschläge
Italienischer Toast
Holländischer Tomatentoast
Zutaten:
• 4 Scheiben Toastbrot
• Wasser
• Frühlingszwiebeln
• 1 mittelgroße Tomate
• Kräuterbutter
• 2 Scheiben gekochten Schinken
• Salz
• frisch gemahlener Pfeffer
• 2 Scheiben junger Gouda-Käse
1. Waschen Sie die Frühlingszwiebeln und lassen
diese anschließend abtropfen. Frühlingszwiebeln werden längs halbiert und in große Stücke
geschnitten. Wasser mit Salz in einem Topf zum
Kochen bringen. Frühlingszwiebeln hinzugeben
und etwa 1 Minute blanchieren. Anschließend
in ein Sieb geben, mit kaltem Wasser übergießen und abtropfen lassen.
2. Die Tomaten waschen und trockentupfen, halbieren und Stängelansätze entfernen. Tomaten in
Scheiben schneiden.
3. Toastscheibe mit Kräuterbutter bestreichen. Eine
zusammengeklappte Scheibe Schinken auf die
bestrichene Toastscheibe legen. Frühlingszwiebelstücke und Tomatenscheiben darauf verteilen.
Mit Salz und Pfeffer würzen.
Zutaten:
• 4 Scheiben Toastbrot
• 4 EL Tomatenmark
• 2 EL Salatmayonnaise
• Salz
• Kräuter der Provence
• frisch gemahlener Pfeffer
• 1 mittelgroße Tomate
• 1 Pck. Mozzarella-Käse
• frisch gemahlener bunter Pfeffer
1. Verrühren Sie das Tomatenmark, die Mayonnaise, das Salz, die Kräuter der Provence und den
Pfeffer miteinander. Bestreichen Sie die Toastscheiben auf der später obenliegenden Seite
damit.
2. Die Tomaten waschen und trockentupfen,
halbieren und Stängelansätze entfernen.
Tomaten in Scheiben schneiden.
3. Lassen Sie den Mozzarella-Käse in einem Sieb
abtropfen und schneiden Sie ihn in Scheiben.
Diese nochmals halbieren. Die bereits bestrichene Toastscheibe wird nun mit Tomaten-und Mozzarellascheiben belegt und mit Pfeffer bestreut.
Decken Sie Ihr Sandwich mit einer Toastscheibe
zu.
Käsescheiben halbieren und die vorbereitete
Toastscheibe damit belegen. Bestreichen Sie
eine weitere Toastscheibe mit etwas Kräuterbutter und decken Sie Ihr Sandwich mit der
bestrichenen Seite nach unten damit zu.
- 30 -
IB_KH1121_E2237_LB5
23.11.2007
9:26 Uhr
Seite 31
Toast Scandia
Toast Hawaii
Zutaten:
• 4 Scheiben Toastbrot
• Dill
• 125 g Joghurt-Salat-Creme
• 1 TL Dijon-Senf
• 1 TL flüssiger Honig
• 20 g Echtlachscreme (Tube aus dem Kühlregal)
• 1 Salatgurke
• 1 Pck. Mozzarella-Käse
• 100 g Räucherlachs, in Scheiben
• frisch gemahlener Pfeffer
Zutaten:
• 4 Scheiben Toastbrot
• 1 Scheibe Ananas (aus der Dose)
• Butter
• 2 Scheiben gekochter Schinken
• 2 Käsescheibletten
Nach Belieben:
• 2 abgetropfte Kaiserkirschen (aus dem Glas)
1. Spülen Sie den Dill ab und tupfen Sie ihn
trocken. Zupfen Sie die Spitzen von den
Stängeln des Dills. Spitzen fein hacken. Verrühren Sie die Joghurt-Salat-Creme mit dem Senf,
dem Honig, der Lachscreme und dem Dill.
2. Anschließend schälen Sie die Gurke und schneiden die Enden ab. Halbieren Sie die Gurke der
Länge nach und schaben Sie die Kerne mit
einem Teelöffel heraus. Gurkenhälfte in Stücke
schneiden. Als nächstes lassen Sie den Mozzarella in einem Sieb abtropfen und schneiden Sie
ihn in Scheiben.
3. Bestreichen Sie nun eine Toastscheibe mit
Joghurt-Salat-Creme und legen Sie sie auf den
Sandwich Maker. Ein Gurken-Stück auf die
bestrichene Toastscheibe legen. Lachsscheiben
gleichmäßig darauf verteilen und mit den Käsescheiben belegen. Mit Pfeffer bestreuen. Decken
Sie Ihr Sandwich mit einer Toastscheibe zu.
1. Lassen Sie die Ananas in einem Sieb abtropfen.
Bestreichen Sie nun die Toastscheibe mit Butter.
Legen Sie die Toastscheibe in den Sandwich
Maker und belegen Sie sie mit dem Schinken
und der Ananas. Der Käse wird als letztes über
die Ananas gelegt. Nach Belieben können Sie
die Kirsche in die Mitte des Toastes legen.
Decken Sie Ihr Sandwich mit einer Toastscheibe
zu.
Curry-Putenbrust-Toast
Zutaten:
• 4 Scheiben Toastbrot
• 25 g Butter
• Putenbrustaufschnitt
• Pflaumen
• Cocktail-Currysauce
• Currypulver
1. Verrühren Sie die Butter mit der Currysauce und
dem Currypulver. Waschen Sie die Pflaumen,
trocknen und entkernen Sie sie. Halbieren Sie
die Pflaumen und schneiden Sie die Hälften in
dünne Scheiben.
2. Anschließend bestreichen Sie eine Toastscheibe
mit der Curry-Butter. Legen Sie die Toastscheibe
auf den Sandwich Maker . Belegen Sie nun die
bestrichene Toastscheibe mit dem Putenbrustaufschnitt und den Pflaumenscheiben. Decken
Sie Ihr Sandwich mit einer weiteren
Toastscheibe zu.
- 31 -