1
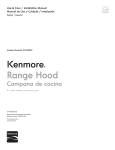
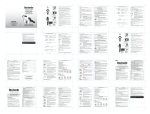
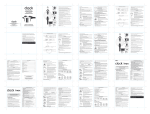
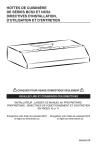
Use & Care / Installation Manual
Manual de Uso y Cuidado / Instalación
English / Español
Models/Modelos 233.5580*
Kenmore
Range Hood
®
Campana de cocina
* = color number, número de color
P/N 99044817B
Sears Brands Management Corporation,
Hoffman Estates, IL 60179 USA
www.kenmore.com
www.sears.com
READ AND SAVE THESE INSTRUCTIONS
TABLE OF CONTENTS
SECTION........................................................................ PAGE
SafetyInstructions................................................................2
Warranty...............................................................................3
Operation..............................................................................3
Cleaning.................................................................................3
PartsIncludedWithHood.................................................. 4
PartsNotIncludedWithHood.......................................... 4
ToolsNeeded....................................................................... 4
SECTION ........................................................................ PAGE
EquivalentDuctLengthChart.............................................5
PrepareTheHoodLocation................................................6
PrepareTheHood.............................................................7,8
ConnectTheWiring.............................................................9
InstallTheHood.................................................................. 10
ServiceParts......................................................................... 11
SAFETY INSTRUCTIONS
!
INTENDED FOR DOMESTIC COOKING ONLY
WARNING
TO REDUCE THE RISK OF FIRE, ELECTRIC SHOCK, OR
INJURY TO PERSONS, OBSERVE THE FOLLOWING:
1. Usethisunitonlyinthemannerintendedbythe
manufacturer.Ifyouhavequestions,contactthe
manufacturerattheaddresslistedinthewarranty.
2. Beforeservicingorcleaningunit,switchpoweroff
atservicepanelandlocktheservicedisconnectingmeanstopreventpowerfrombeingswitched
onaccidentally.Whentheservicedisconnecting
meanscannotbelocked,securelyfastenaprominentwarningdevice,suchasatag,totheservice
panel.
3. Installation work and electrical wiring must be
donebyaqualifiedperson(s)inaccordancewith
all applicable codes and standards, including
fire-ratedcodesandstandards.
4. Sufficientairisneededforpropercombustionand
exhaustingofgasesthroughtheflue(chimney)of
fuelburningequipmenttopreventbackdrafting.
Follow the heating equipment manufacturer’s
guidelineandsafetystandardssuchasthosepublishedbytheNationalFireProtectionAssociation
(NFPA), and the American Society for Heating,
Refrigeration and Air Conditioning Engineers
(ASHRAE),andthelocalcodeauthorities.
5. Whencuttingordrillingintowallorceiling,do
not damage electrical wiring and other hidden
utilities.
6. Toreducetheriskoffireorelectricshock,donot
use this range hood with an additional speed
controldevice.
7. Ductedfansmustalwaysbeventedtotheoutdoors.
8. Toreducetheriskoffire,useonlymetalductwork.
9. Usewithapprovedcord-connectionkitonly.
10.Thisunitmustbegrounded.
TO REDUCE THE RISK OF A RANGE TOP GREASE FIRE:
1. Neverleavesurfaceunitsunattendedathighsettings.Boiloverscausesmokingandgreasyspilloversthatmayignite.Heatoilsslowlyonlowor
mediumsettings.
2. AlwaysturnhoodONwhencookingathighheat
orwhencookingflamingfoods.
3. Cleanventilatingfansfrequently.Greaseshould
notbeallowedtoaccumulateonfanorfilter.
4. Use properpansize.Alwaysusecookwareappropriateforthesizeofthesurfaceelement.
2
!
WARNING
TO REDUCE THE RISK OF INJURY TO PERSONS IN
THE EVENT OF A RANGE TOP GREASE FIRE, OBSERVE
THE FOLLOWING:*
1. SMOTHERFLAMESwithaclose-fittinglid,cookie
sheet,ormetaltray,thenturnofftheburner.BE
CAREFULTOPREVENTBURNS.Iftheflamesdo
not go out immediately, EVACUATE AND CALL
THEFIREDEPARTMENT.
2. NEVERPICKUPAFLAMINGPAN-Youmaybe
burned.
3. DONOTUSEWATER,includingwetdishclothsor
towels-aviolentsteamexplosionwillresult.
4. UseanextinguisherONLYif:
A. YouknowyouhaveaClassABCextinguisher
andyoualreadyknowhowtooperateit.
B. The fire is small and contained in the area
whereitstarted.
C. Thefiredepartmentisbeingcalled.
D. Youcanfightthefirewithyourbacktoanexit.
* Basedon“KitchenFiresafetyTips”publishedbyNFPA.
CAUTION !
1. Forindooruseonly.
2. For general ventilating use only. Do not use to
exhaust hazardous or explosive materials and
vapors.
3. Toavoidmotorbearingdamageandnoisyand/
or unbalanced impellers, keep drywall spray,
constructiondust,etc.offpowerunit.
4. Forbestcaptureofcookingimpurities,yourrange
hoodshouldbemountedsothatthetopofthe
hoodis24-30”abovethecookingsurface.
5. Useonlywithrangehoodcord-connectionkitsthat
havebeeninvestigatedandfoundacceptablefor
usewiththismodelrangehood.
6. Please read specification label on product for
furtherinformationandrequirements.
NOTE
If hood is to be installed Non-Ducted:
• Purchase a set of (2) non-ducted filters from your
local distributor or retailer and attach them to the
aluminum mesh filters.
OPERATION
KENMORE LIMITED WARRANTY
Safety
LOW
OFF
HIGH
NITE
OFF
HIGH
FAN
The3-positionrockerswitch(ontheleft)controlsthe
fan.Theleftpositionislowspeed,centerpositionis
off,andrightpositionishighspeed.
LIGHT
The3-positionrockerswitch(ontheright)controlsthe
lights.Theleftpositionislowlightintensity,center
positionisoff,andrightpositionishighlightintensity.
Warranty
Operation
Cleaning
Installation
Service Parts
When this appliance is installed, operated and
maintainedaccordingtoallsuppliedinstructions,
the following warranty coverage applies. To
arrange for warranty service, call 1-800-4-MYHOME®(1-800-469-4663).
• For one year from the date of purchase,any
partofthisproductthatfailsduetoadefectin
materialorworkmanshipwillreceivefreerepair
or replacement if repair proves impossible. The
lengthofthiscoveragedoesnotapplytothefinish
ofanypaintedorbrightmetalpart.
• For thirty days date of purchase,anypaintedor
brightmetalpartofthisproductwillbereplaced
freeofchargeifitsfinishisdefectiveinmaterial
orworkmanship.
Allwarrantycoverageisvoidifthisproductisever
usedforotherthanprivatehouseholdpurposes.
This warranty covers only defects in material and
workmanship, and will NOT pay for:
1. Consumable parts that can wear out from
normaluse,includingbutnotlimitedtofilters,
belts,lightbulbs,andbags.
2. Aservicetechniciantoinstructtheuserincorrectproductinstallation,operationormaintenance.
3. Aservicetechniciantocleanormaintainthis
product.
4. Damagetoorfailureofthisproductifitisnot
installed,operatedormaintainedaccordingto
theallinstructionssuppliedwiththeproduct.
5. Damagetoorfailureofthisproductresulting
fromaccident,abuse,misuseoruseforother
thanitsintendedpurpose.
6. Damagetoorfailureofthisproductcaused
bytheuseofdetergents,cleaners,chemicals
orutensilsotherthanthoserecommendedin
allinstructionssuppliedwiththeproduct.
7. Damagetoorfailureofpartsorsystemsresultingfromunauthorizedmodificationsmadeto
thisproduct.
Disclaimer of implied warranties; limitation of
remedies
Customer’ssoleandexclusiveremedyunderthis
limitedwarrantyshallbeproductrepairasprovidedherein.Impliedwarranties,includingwarrantiesofmerchantabilityorfitnessforaparticular
purpose,arelimitedtooneyearortheshortest
periodallowedbylaw.Searsshallnotbeliable
for incidental or consequential damages. Some
statesandprovincesdonotallowtheexclusionor
limitationofincidentalorconsequentialdamages,
orlimitationonthedurationofimpliedwarranties
ofmerchantabilityorfitness,sotheseexclusions
orlimitationsmaynotapplytoyou.
Thiswarrantygivesyouspecificlegalrights,and
youmayalsohaveotherrightswhichvaryfrom
statetostate.
Sears Brands Management Corporation,
Hoffman Estates, IL 60179
3
PARTS INCLUDED WITH HOOD
CLEANING
WARNING: To reduce the risk of electric
shock,disconnectfrompowersupplybefore
cleaning.
7-inchRound
DuctAdapter
ALUMINUMMESHFILTERS
Cleanfrequentlyusinghotwaterandamilddetergent
orinyourdishwasher.Thealuminummeshfiltersshould
bewashedapproximatelyeverymonthdependingon
theamountofusage.Washmoreoftenifyourcooking
stylegeneratesgreatergrease-likefryingfoodsorwok
cooking.
3¼”x10”
Damper/DuctConnector
AluminumGreaseFilter
(2perhood)
PAINTEDHOODSURFACES
Wipingregularlywithmildsoap/detergentandwarm
water should protect painted hood surfaces. Be cautiousaboutusing“NewandImproved”cleaningagents.
Yourhoodisinstalledoverhotcookingequipment.Most
chemicalsfoundincleaningagentsreactwithheatto
loosenpaint.
PartsBag
(4hoodmountingscrewsinside)
FluorescentLightBulb
(1perhood)
STAINLESSSTEELHOODSURFACES
Stainlesssteelhoodsshouldbewashedregularlywitha
cleancloth,warmwaterandmildsoapordishdetergent.
Cleaninthedirectionofthepolishlines.Rinsewellwith
clearwaterandwipedryimmediately.Youmaywishto
applylightoilusedforfurniturepolishingtoemphasize
it’sbrightfinish.
NightLightBulb
(1perhood)
PARTS NOT INCLUDED WITH HOOD*
FANASSEMBLY
Fanbladecanbecleanedwithadampclothandmild
detergent.Usecarewhencleaningfanblade-itmustnot
becomebentormisaligned.DONOTALLOWWATER
TO ENTER MOTOR. Make sure all surfaces are completelydrybeforere-installingfiltersandrestoringpower.
Motor is permanently lubricated. Do not oil or disassemblemotor.
OPTIONAL PARTS (purchase separately)
7-inchRoundDamper
(Forusewith7-inchRoundDuct)
SearsPartNo.59183
Splashplate
SearsPartNos.
58120 30”Black/Biscuit
58128 30”White/Almond
CordKit
(Allowshoodtobe
pluggedintoastandard
120VACwalloutlet)
SearsPartNo.50300
TOOLS NEEDED FOR HOOD INSTALLATION
Screwdriver
(Flat&Phillips)
Pencil
1/4”
Nutdriver
DuctTape
Wire
Stripper
Tape
Measure
Sabre -or- Keyhole
Saw
Saw
4
Drill
DuctingAccessories
(See “Equivalent Duct
Length Chart” on page
5forDuctingAccessory
ModelNos.
“PartsNotIncluded
WithHood”available
bycallingSearsat
1-800-4-MY-HOME®
EQUIVALENT DUCT LENGTH CHART
BroanModel407
StraightDuct
7-in.roundx2-ft.long
Equivalentlength
2ft.
SearsModel59581
3¼-in.x10-in.to
6-in.RoundTransition
Equivalentlength
5.5ft.
BroanModel
431
3¼-in.x10-in.
Right-angle
Long
EaveElbow
Equivalent
length
15ft.
Sears
Model59091
RoofCap
(accepts7-in.round
or3¼-in.x10-in.duct)
Equivalentlength
30ft.(7-ft.w/odamper)
Sears Model “Ducting Accessories” available
by calling:
Sears at 1-800-4-MY-HOME®
Broan Model “Ducting Accessories” available by calling:
1-800-558-1711.
Service Parts
BroanModel412H
3¼-in.x10-in.to
7-in.Round
Transition
Equivalentlength
5.5ft.
BroanModel430
3¼-in.x10-in.
Right-angle
Short
EaveElbow
Equivalentlength
15ft.
SearsModel
59391
3¼-in.x
10-in.
WallCap
Equivalent
length
45ft.
(7-ft.w/o
damper)
Installation
BroanModel415
7-in.RoundElbow
Equivalentlength
8ft.
BroanModel647
7-in.Round
WallCap
Equivalentlength
34ft.
(6-ft.w/odamper)
Cleaning
BroanModel419
6-in.RoundElbow
Equivalentlength
8ft.
BroanModel429
3¼-in.x10-in.
Right-angleFlat
Elbow
Equivalentlength
24ft.
Operation
BroanModel406
StraightDuct
6-in.roundx2-ft.long
Equivalentlength
2ft.
SearsModel59691
6-in.Round
WallCap
Equivalentlength
34ft.
(6-ft.w/odamper)
Warranty
BroanModel401
StraightDuct
3¼-in.x10-in.x2-ft.long
Equivalentlength
2ft.
BroanModel428
3¼-in.x10-in.
Right-angleElbow
Equivalentlength
8.5ft.
Safety
Kenmorerangehoodsaredesignedtoperformefficientlywhenattachedtolongrunsofduct.Asapointof
reference,thishoodwillfunctionatapproximately80%ofitsratedairflowwhen200equivalentfeetof7”
roundductworkisattached.Usethischarttocalculatetheequivalentductlengthofyoursystem.
5
PREPARE THE HOOD LOCATION
1. Determinewhetherhoodwilldischargevertically
(3¼”x10”or7”Round),horizontally(3¼”x10”
only).
Forverticalorhorizontaldischarge,runductwork
betweenthehoodlocationandaroofcaporwall
cap.
Forbestresults,useaminimum numberoftransitionsandelbows.
2. Usethesediagramsforproperplacementofductworkandelectricalcutoutincabinetorwall.
Foranon-ductedinstallation,DONOTcutaduct
accesshole.
3¼”X10”
VERTICALDUCTING
3. Runhousewiringbetweenservicepanelandhood
location.
7”ROUND
VERTICALDUCTING
6
3¼”X10”
HORIZONTALDUCTING
PREPARE THE HOOD
Safety
7”ROUND
DUCTPLATE
1. Remove7”RoundDuctPlatefromtopofhood.
Setductplateaside-withmountingscrews.
Warranty
2. RemovetapeholdingFiltersinplace.Pulldown
onfiltertabsandliftfiltersout.Setfiltersaside.
FILTERS
Operation
Cleaning
3. RemoveDamper/DuctConnectorfrominsidethe
hood.Setconnectoraside-withmountingscrews
andpartsbag.
Installation
DAMPER/DUCT
CONNECTOR
4. RemoveWiringCoverfrominsidethehood.Set
coverandmountingscrewaside.
7
Service Parts
WIRING
COVER
5. Removeeithertoporbackwiringknockoutand
installapprovedElectricalCableClamp.
ELECTRICAL
CABLE
CLAMP
TOPRECTANGULAR
DUCTKNOCKOUT
6. RemoveappropriateDuctKnockout(s)fromtop (REMOVEFOR3¼”X10”
VERTICAL&FOR7”
orbackofhood.
ROUNDDISCHARGE)
7. 3¼”x10”DuctedDischargeOnly:
Attach Damper/Duct Connector over knockout
opening. Make sure damper Pivot is nearest to
Top/Back Edge of hood. Remove Tape from
damperflap.
8. 7”RoundDuctedDischargeOnly:
Re-install7”RoundDuctPlateremovedinStep
#1under“PREPARETHEHOOD”section.Installa
7”rounddamper(purchaseseparately).Damper
flapmustopenfreelyindirectionofairflow(away
fromrangehood).
SEMI-CIRCULAR
DUCTKNOCKOUT
(REMOVEFOR7”
ROUNDDISCHARGE)
REAR
RECTANGULAR
DUCTKNOCKOUT
(REMOVEFOR3¼”X10”
HORIZONTALDISCHARGE)
TOP/BACK
EDGE
UPTO1”
SIDE-TO-SIDE
ADJUSTMENT
TAPE
NOTE
To accomodate off-center ductwork, the Damper/ PIVOT
Duct Connector can be installed up to 1-inch on
either side of hood center or the 7” Round Duct
Plate can be installed up to ½” on either side of
hood center. In extreme off-center installations,
one end of the duct connector may need to be
trimmed to clear the electrical cable clamp.
8
DAMPER/DUCT
CONNECTOR
(VERTICAL
DISCHARGE
POSITIONSHOWN)
CONNECT THE WIRING
Warranty
WARNING: To reduce the risk of electric
shock, make sure power is switched off at
the service panel. Lock or tag service panel
to prevent power from being switched on
accidentally.
1. Connect House Wiring (120 VAC) to hood. Use
apieceofCardboardtoprotectthecooktop,if
necessary.
OPTION
A Cord Kit is available - which enables the hood
to plug into a standard 120 VAC wall outlet.
Safety
GREEN
GROUND
SCREW
See page 4 for Cord Kit information.
Cord Kit available by calling Sears
at 1-800-4-MY-HOME®
Operation
!
Use only with range hood cord-connection
kits that have been investigated and found
acceptable for use with this model range
hood.
2. Connecthouseblacktohoodblackwire,housewhite
tohoodwhitewire,andhousegroundunderGreen
Ground Screw. Securely tighten cable clamp onto
housewiring.
Cleaning
3. Replacewiringcover.
Installation
Service Parts
9
INSTALL THE HOOD
1. Hanghoodfrom(4)MountingScrews(fromparts
bag).Slidehoodtowardswalluntilmountingscrews
areengagedinnarrowendof(4)Keyholes.Tighten
mountingscrewssecurely.
!
CAUTION: Do not push on fan blade! Pushing
on the blade may cause it to interfere with
other hood parts.
KEYHOLE
(4)
MOUNTING
SCREW
(4)
2. Connectductworktohood.UseDuctTapetomake
jointssecureandairtight.
DUCT
TAPE
LAMP REPLACEMENT
1. PullTabonLightLensforwardandpulldownto
removelens.
See page 4 for Bulb information.
Bulbs available by calling Sears at
1-800-4-MY-HOME®
!
LIGHT
LENS
CAUTION: Bulbs may be hot! Refer to bulb
packaging for further information.
2. GraspLampatbase,tiltdownandpulloutto
remove. Replace with 42W Fluorescent Lamp
GX24Q-4.NightLightuses4W,C-7bulb.
3. Replacelightlens.
4W
NIGHTLIGHT
C-7BULB
42W
FLUORESCENT
LAMPGX24Q-4
10
SERVICE PARTS
Damper/DuctConnector
(includeshardware)
Screw,#8-18x¼Hex*
(2inpackage,6req.)
RockerSwitch,White
(2inpackage)
RockerSwitch,Black
(2inpackage)
Nameplate,White
Nameplate,Stainless
Nameplate,Black
Lens
GroundScrew(2req.)
WiringCover(includeshardware)
Rivet,Pop.125dia.(3req.)
FilterSpringKit
MotorMountingScrew
(3eachpart)
Motor
(includesMotorMountingKit)
FanBlade(Includeshairpinclip)
HairpinClip
FilterKit(2perbag)
IndicatorLight
(includes2wirenutsandlens)
LightLens
Lamp,42WFluorescent
BallastAssembly
WireHarness
ReflectorAssembly
LightPanel,White
LightPanel,Black
LightPanel,Stainless
Screw,8-18x3/8”*
(2inpackage,5req.)
7”RoundDuctPlate
(includeshardware)
Lamp,4W,C-7
2
3
1
2
4
5
22
14
2
8
9
2
2
7
11
17
10
6
12
19
18
2
21
16
20
23
Cleaning
R740013
R602017
R561116
R561117
R627497
R627499
R627575
R607657
R602533
R680504
*
R169016
R169002
R99080535
R531075
R99420635
99010299
R169004
99111515
99271358
99770154
99770150
97018489
98010817
98010818
98010814
R602534
R680508
99271426
Operation
1
2
3
4
5
6
7
8
9
10
11
12
**
13
14
15
16
17
18
19
20
21
22
23
DESCRIPTION
Warranty
PARTNO.
Safety
KEYNO.
15
13
OrderreplacementpartsbyPARTNO.-notbyKEYNO.
*Standardhardware-maybepurchasedlocally.
**Notillustrated.
Installation
Service Parts
11
LEA Y CONSERVE ESTAS INSTRUCCIONES
SECCIÓN ................................................................. PÁGINA
Instruccionesdeseguridad...............................................12
Garantía.............................................................................13
Operación...........................................................................13
Limpieza..............................................................................13
Piezasincluidasconlacampana................................... 14
Piezasnoincluidasconlacampana............................. 14
Herramientasnecesarias................................................. 14
SECCIÓN ................................................................. PÁGINA
Cuadrodelargoequivalentedeconducto....................15
Preparelalocalizaciónparalacampana.....................16
Preparelacampana................................................... 17,18
Conecteelcableado.........................................................19
Instalelacampana...........................................................20
Piezasdeservicio..............................................................21
Seguridad
TABLA DE CONTENIDO
INSTRUCCIONES DE SEGURIDAD
PREVISTO PARA COCINAR DOMÉSTICO SOLAMENTE.
!
* Basadoenlasrecomendacionespara“SeguridadenlaCocina”pub
licadasporNFPAdelosEE.UU.
PRECAUCIÓN !
1. Sólodebeusarsebajotecho.
2. Solamenteparausogeneraldeventilación.Noutilice
paradescargarmaterialespeligrososomaterialesy
vaporesexplosivos.
3. Paraevitardañosalcojinetedelmotoryevitarque
laspaletasdelventiladoremitanmuchoruidooestén
fueradeequilibrio,mantengaelmotorlibredepelusa,
polvo,etc.
4. Paraobtenermejoresresultadosenlacapturadeimpurezas,lapartesuperiordelacampanadebeestar
montadadeformatalquelacampanaquedede61
a76cmdedistanciadelasuperficiedelaestufa.
5. Utilicesolamenteconloskitsdelacuerda-conexiónde
lacampanasehaninvestigadoqueyencontróaceptableparaelusoconestamodelodelacampana.
6. Porfavor,lealaetiquetadeespecificacionesdelproductoparamayoresinformacionesyrequerimientos.
Si se instalará la campana en un sistema sin conductos:
• Compre un conjunto de (2) filtros sin conducto de su
distribuidor o minorista local y sujételos a los filtros
de malla de aluminio.
12
Service Parts
NOTA
Instalación
PARA REDUCIR EL RIESGO DE LESIONES A PERSONAS EN
CASO DE INCENDIO DE GRASA EN LA ESTUFA, OBSERVE
LO SIGUIENTE:*
1. APAGUELASLLAMASconunatapaajustada,plancha
paragalletitasocharoladecorativa,yluegoapague
la hornilla. TENGA CUIDADO DE EVITAR QUEMADURAS.Silasllamasnoseapagandeinmediato,
EVACÚEELLUGARYLLAMEALDEPARTAMENTODE
BOMBEROS.
2. NUNCALEVANTEUNASARTENQUEESTÉENLLAMAS-Ustedsepodráquemar.
3. NOUTILICEAGUA,incluyendotoallasdecocinamojadas-puederesultarunaexplosióndevaporviolenta.
4. UtiliceunextintorSOLAMENTEsi:
A. UstedsabequetieneunextintordeclaseABCy
yasabeutilizarlo.
B. Elincendioespequeñoycontenidodentrodelárea
dondeseinició.
C. Losbomberoshansidoavisados.
D. Ustedpuedecombatirelincendioconunasalidaasu
espalda.
Limpieza
ADVERTENCIA
PARA REDUCIR EL RIESGO DE INCENDIO, CHOQUE ELÉCTRICO, O LESIÓN A PERSONAS, OBSERVE LO SIGUIENTE:
1. Utilice esta unidad sólo en la manera prescrita por
elfabricante.Sitieneustedalgunapregunta,comuniqúeseconelfabricantealadirecciónoaltélefono
indicadosenlagarantía.
2. Antesdeefectuaralgúnservicioolimpieza,sedebe
desconectar la corriente eléctrica en el armario de
circuitos y asegurarlo con llave para evitar que la
corriente sea conectada accidentalmente. Cuando
el medio de desconexión del servicio no puede ser
trabado,sujeteundispositivodeadvertenciaevidente,
talcomounaetiqueta,alpaneldeservicio.
3. Todotrabajodoinstalaciónycableadoeléctricodebe
serrealizadoporpersonalcalificadoydeacuerdocon
todos los códigos y normas pertinentes, incluyendo
loscódigosynormasrelacionadosconconstrucción
clasificadaparaincendio.
4. Airesuficienteesnecesarioparafacilitarlacombustión
adecuada y la salida apropiada de gases por la
chimenea de la unidad y para evitar corrientes de
aire invertidas. Siga las instrucciones y medidas de
seguridaddelfabricantedelequipoydelassociedadesprofesionalesdeequiposdocalentadoresylos
reglamentosdeseguridadlocales.
5. Alcortaroperforarlaparedoeltecho,nodañeel
cableadoeléctricoyotrosserviciospúblicosocultos.
6. Para reducir el riesgo de incendio o de descarga
eléctrica,noutiliceestacampanaconundispositivo
decontroldevelocidadadicional.
7. Losventiladoresconconductodeberánsiempretener
unasalidahaciaelexterior.
8. Parareducirelriesgodeincendio,usesóloconductos
demetal.
9. Usoconelkitaprobadodellaconexióndelacuerda
solamente.
9. Estaunidadsedebeinstalarconconexiónatierra.
PARA REDUCIR EL RIESGO DE UN INCENDIO POR GRASA
EN LA ESTUFA:
1. Nuncadejelasunidadesdesuperficiesinsupervisión
cuando tengan ajustes altos. Los reboses pueden
provocarhumoyderramesgrasososquesepueden
incendiar.Calientelentamenteelaceiteenunajuste
bajoomedio.
2. SiempreENCIENDAlacampanacuandococinecon
altatemperaturaocuandococinealimentosquese
puedanincendiar.
3. Limpieconfrecuencialosventiladores.Nodebepermitirquelagrasaseacumuleenelventiladornienel
filtro.
4. Utiliceunsarténdetamañoadecuado.Siempreutiliceelutensilioadecuadoaltamañodelelementodo
superficie.
Operación
ADVERTENCIA
Garantía
!
OPERACIÓN
GARANTÍA LIMITADA DE KENMORE
Siseinstala,operaymantieneesteelectrodoméstico
conformeatodaslasinstruccionessuministradas, se
aplicalasiguientecoberturadegarantía.Paradisponer
serviciobajogarantía,llameal1-800-4-MY-HOME®
(1-800-469-4663).
• Durante un año desde la fecha de compra,cualquier
partedeesteproductoquefalledebidoaundefecto
en material o mano de obra recibirá reparación o
sustitucióngratuitasisehaceimposiblerepararlo.La
duracióndeestacoberturanoesaplicablealacabado
deningunapiezademetalbrillanteopintada.
• Durante treinta días desde la fecha de compra,
se reemplazará sin cargo toda parte de metal brillanteopintadadeesteproductosiestádefectuososu
acabadoencuantoamaterialomanodeobra.
Todacobertura degarantíaquedanula si se utiliza
esteproductoparaotrofinquenoseasuusoenuna
casaparticular.
Esta garantía cubre solamente defectos en material
y mano de obra, y NO abarca:
1. Piezas consumibles que pueden desgastarse por
el uso normal, como filtros, correas, bombillas y
bolsas,entreotras.
2.Untécnicodeservicioparaindicaralusuariola
instalación,operaciónoelmantenimientocorrecto
delproducto.
3. Un técnico de servicio para estar a cargo de la
limpiezayelmantenimientodeesteproducto.
4. Dañosofallasdeesteproductosinoseinstala,operaomantieneconformeatodaslasinstrucciones
entregadasconelproducto.
5. Dañosofallasdeesteproductoresultantesdeaccidente,maltrato,usoindebidooutilizacióndistinta
delpropósitodelproducto.
6. Dañooaveríadeesteproductocausadaporeluso
de detergentes, limpiadores, agentes químicos o
utensiliosquenoseanlosrecomendadosentodas
lasinstruccionesentregadasconelproducto.
7. Daño o falla de piezas o sistemas resultante de
modificaciones no autorizadas realizadas a este
producto.
Limitación de garantías implícitas; limitación de
remedios
Elúnicoyexclusivoremediodelclienteconformea
estagarantíalimitadaserálareparacióndelproducto
comoseindicaaquí.Lasgarantíasimplícitas,como
garantíasdecomerciabilidadoidoneidadparaunfin
particular,selimitanaunañooelmenorperiodoque
permita la ley. Sears no será responsable de daños
fortuitosoconsecuentes.Algunosestadosyprovincias
nopermitenexcluirolimitardañosfortuitosoconsecuentes,nilimitarladuracióndegarantáisimplícitas
decomerciabilidadoidoneidad,detalmodoquees
posible que estas exclusiones o limitaciones no correspondanasucaso.
Estagarantíaleconcedederechoslegalesespecíficos,
y ustedpuedetenertambiénotrosderechosquevarían
deunestadoaotro.
Sears Brands Management Corporation,
Hoffman Estates, Illinois 60179
13
LOW
OFF
HIGH
NITE
OFF
HIGH
VENTILADOR
Elinterruptoroscilantede3posiciones(delaizquierda)
controlaelventilador.Laposiciónhacialaizquierdaes
lavelocidadbaja(LOW),laposicióncentralesapagado
(OFF)ylaposiciónhacialaderechaeslavelocidadalta
(HIGH).Unaluzindicadoraseiluminacuandoelventiladorestáencendido.
LUZ
Elinterruptoroscilantede3posiciones(deladerecha)
controlalasluces.Laposicióndelaizquierdaesluzde
bajaintensidad(NITE),laposicióncentralesapagado
(OFF)ylaposiciónaladerechaesluzdealtaintensidad
(HIGH).
LIMPIEZA
PIEZAS INCLUIDAS CON LA CAMPANA
Adaptadordeconductoredondo
de17.8cm(7pulgadas)
FILTROSDEMALLADEALUMINIO
Limpiefrecuentementelosfiltrosconaguacalienteyundetergentesuave.Losfiltrossepuedenlavarenlavaplatos.Sedebe
lavarlosfiltrosdemalladealuminioaproximadamentecada
mes,dependiendodesuuso.Lávelosconmayorfrecuenciasi
suformadecocinargeneramásgrasa-como,porejemplo,
frituraso‘wok’.
8.3cmx25.4cm(3¼”x10”)
Conector de regulador de
tiro/conducto
Filtrodegrasadealuminio
(2porcampana)
Bolsadepiezas
(4 tornillos de montaje
delacampana,adentro)
Bombilladeluzfluorescente
(1porcampana)
Bombilladenoche
(1porcampana)
PIEZAS NO INCLUIDAS CON LA CAMPANA*
PIEZAS OPTATIVAS (compraseparada)
Reguladordetiroredondode17.8cm
(7pulgadas)
(Parausoconconducto
redondode17.8cm[7pulgadas])
PiezaSearsNo.59183
HERRAMIENTAS NECESARIAS PARA LA INSTALACIÓN DE LA CAMPANA
CINTAADHESIVA
PARACONDUCTOS
SIERRA
SERRUCHO
DE -O- DEPUNTA
PUNTA
Las“Piezasnoincluidasconla
campana”están
disponiblesllamandoaSearsal
1-800-4-MY-HOME®
CINTAMÉTRICA
14
PERFORADORA
Piezas de servicio
LÁPIZ
PELADOR
DE
CABLE
Accesoriosparaconductos
(Vea el “Cuadro de largo
equivalente de conducto”
delapágina16paraobtenerlosNos.deModelosde
AccesoriosparaConductos.
Instalación
Kitdecable
(Permitequeseenchufe
lacampanaenuna
tomadeparedestándar
de120VCA)
PiezaSearsNo.50300
Limpieza
Placaposteiror
PiezasSearsNos.
58120 30”Negro/Beige
58128 30”Blanco/Almendra
1/4”
AJUSTADORDE
TUERCAS
Operación
SUPERFICIESDEACEROINOXIDABLEDELACAMPANA
Sedebelavarlascampanasdeaceroinoxidableperiódicamenteconunpañolimpio,aguatibiayunjabónodetergente
paraplatossuave.Límpielasenladireccióndelaslíneasde
pulido.Enjuáguelasbienconagualimpiayséqueladeinmediatoconunpaño.Podráaplicarlesunaceiteleveutilizadopara
lustrarmueblespararealzarsuacabadolustroso.
DESTORNILLADOR
(CHATOYPHILLIPS)
Garantía
SUPERFICIESPINTADASDELACAMPANA
Limpiarlasperiódicamenteconaguatibiayunjabón/detergentesuaveprotegerálassuperficiespintadasdelacampana.
Tenga cuidado si usa agentes de limpieza “Nuevos y Mejorados”.Sucampanaestáinstaladasobreequiposdecocina
calientes.Lamayoríadelosproductosquímicosquecontienen
losagentesdelimpiezacalentarányaflojaránlapintura.
MONTAJEDELVENTILADOR
Sepuedelimpiarlaspaletasdelventiladoconunpañohúmedo
yundetergentesuave.Tengacuidadocuandolimpielapaleta
delventilador.Nosedebedoblarnidesalinear.NOPERMITA
LAENTRADADEAGUAENELMOTOR.Asegúresedequetodas
lassuperficiesesténcompletamentesecasantesdevolvera
colocarlosfiltrosyconectarlaenergiaeléctrica.
El motor está permanentemente lubricado. No lubrique ni
desmonteelmotor.
Seguridad
ADVERTENCIA: Para reducir el riesgo de una
descarga eléctrica, desconecte el suministro
eléctrico antes de limpiar la unidad.
CUADRO DE LARGO EQUIVALENTE DE CONDUCTO
LascampanasdecocinaKenmorefuerondiseñadasparasudesempeñoeficientecuandoselassujetaalargosrecorridosdeconducto.Comopuntodereferencia,estacampanafuncionaráaaproximadamenteel80%desuflujode
airenominalcuandoselesujeta61m(200pies)equivalentesdeconductoredondode17.8cm(7”).Utiliceestacuadro
paracalcularellargoequivalentedeconductodesusistema.
BroanModelo401
Conductorecto
3¼-pulg.x10-pulg.x2-piesde
largo
Largoequivalente
0.61m(2pies)
BroanModelo406
Conductorecto
6-pulg.alrededorx2piesdelargo
Largoequivalente
0.61m(2pies)
BroanModelo428
3¼-pulg.x10-pulg.
Acodadoconángulo
aladerecha
Largoequivalente
2.6m(8.5pies)
BroanModelo429
3¼-pulg.x10-pulg.
Acodadoplanocon
ánguloaladerecha
Largoequivalente
7.3m(24pies)
BroanModelo
430
3¼-pulg.x10pulg.
Acodado
conalerocorto
yánguloala
derecha
Largoequivalente
4.6m(15pies)
BroanModelo407
Conductorecto
7-pulg.alrededorx2piesdelargo
Largoequivalente
0.61m(2pies)
BroanModelo431
3¼-pulg.x10pulg.
Acodado
conalerolargo
yánguloala
derecha
Largoequivalente
4.6m(15pies)
BroanModelo419
Acodadoredondo
de6pulg.
Largoequivalente
2.4m(8pies)
BroanModelo415
Acodadoredondo
de7pulg.
Largoequivalente
2.4m(8pies)
ModeloSears59581
3¼-pulg.x10-pulg.
a6-pulg.
Transiciónredondo
Largoequivalente
1.7m(5.5pies)
BroanModelo412H
3¼-pulg.x10-pulg.
a7-pulg.
Transiciónredondo
Largoequivalente
1.7m(5.5pies)
ModeloSears59691
6-pulg.Tapónde
paredredondo
Largoequivalente
10m(34pies)
(1.8m[6-pies]sin
reguladordetiro)
BroanModelo647
7-pulg.Tapóndepared
redondo
Largoequivalente
10m(34pies)
(1.8m[6-pies]sin
reguladordetiro)
ModeloSears
59391
3¼-pulg.x
10-pulg.
Tapóndepared
Largoequivalente
14m(45pies)
(2.1m[7-pies]sin
reguladordetiro)
Modelo
Sears59091
Tapóndetecho
(aceptaductode
7-pulg.redondoo
de3¼-pulg.x10-pulg.)
Largoequivalente
9.1m(30pies)
(2.1m[7-pies]sin
reguladordetiro)
Los “Accesorios para conductos” de modelos de Sears
están disponibles llamando a Sears al 1-800-4-MY-HOME®
Los “Accesorios para conductos” de modelos de Broan
están disponibles llamando a 1-800-558-1711.
15
PREPARE LA LOCALIZACIÓN PARA LA CAMPANA
Seguridad
1. Determinesiladescargadelacampanaserávertical
(8.3cmx25.4cmo17.8cmredondo[3¼”x10”o7”
redondo]),horizontal(8.3cmx25.4cm[3¼”x10”]
solamente).
Enelcasodedescargaverticaluhorizontal,tiendalos
conductosentreellugardondeseinstalarálacampana
yeltapóndetechooeltapóndepared.
Paraobtenerlosmejoresresultados,utiliceunacantidadmínimadetransicionesycodos.
Garantía
SISTEMA VERTICAL DE CONDUCTOS
DE 8.3 cm x 25.4 cm (3 ¼” x 10”)
Operación
2. Utiliceestosdiagramasparacolocaradecuadamente
losconductosyhacerelcorteexactoparalaconexión
eléctricaenelgabineteoenlapared.
Enelcasodeaquellasinstalacionesensistemassin
conductos,NOhaganingúnorificiodeaccesopara
elconducto.
Limpieza
3. Guíelasconexionesdelcableadodelacasaentreel
paneldeservicioyellugardondeinstalarálacampana.
SISTEMA HORIZONTAL DE CONDUCTOS
DE 8.3 cm x 25.4 cm (3 ¼” x 10”)
SISTEMA VERTICAL DE CONDUCTOS
REDONDOS DE 17.8 CM (7”)
Instalación
Piezas de servicio
16
PREPARE LA CAMPANA
1. Quitelaplacadelconductoredondode17.8cm(7”)
delasuperiordelacampana.Colóquelaaparte,con
lostornillosdemontaje.
2. Quitelacintaquesujetalosfiltrosensulugar.Tire
hacia abajo de las lengüetas del filtro y sáquelos
levantándolos.Coloquelosfiltrosaunlado.
PLACADELCONDUCTO
REDONDODE
17.8CM(7”)
FILTROS
3. Quiteelconectordelreguladordetiro/coductodel
interiordelacampana.Pongaaparteelconector,con
lostornillosdemontajeylabolsadepiezas.
CONECTORDEL
REGULADORDE
TIRO/CONDUCTO
4. Quitelatapadelcableadodelinteriordelacampana.
Coloquelatapayeltornillodemontajeaunlado.
TAPADEL
CABLEADO
17
Seguridad
5. Quiteelagujerociegoparaloscableseléctricos,ya
seaelsuperioroelposterior,einstaleunagrapapara
cableeléctricoaprobada.
ropiadosdelapartesuperiorodelaparteposterior
delacampana.
HASTA2.5CM(1”)
DEAJUSTE
DELADOALADO
BORDEDELA
PARTESUPERIOR/
POSTERIOR
CINTA
Instalación
8. Sóloparadescargaconconductoredondode17.8cm(7”):
Vuelvaainstalarlaplacadelconductoredondode
17.8cm(7”)quequitóenelpaso1delasección“PREPAREDELACAMPANA”.Instaleunreguladordetiro
redondode7”(secompraporseparado).Laaletadel
reguladorsedebeabrirlibrementeendireccióndel
flujodeaire(ensentidocontrarioalacampanadela
estufa).
AGUJEROCIEGO
POSTERIOR
PARACONDUCTO
RECTANGULAR
(QUITEPARADESCARGA
HORIZONTAL
DE8.3CMX25.4CM
[3¼”X10”])
Limpieza
7. Sóloparadescargaconconductode8.3cmx25.4cm
(3¼”x10”):
Coloqueelconectadordelreguladordetiro/conducto
sobrelaaberturadelagujerociego.Asegúresedeque
el pivote del regulador de tiro quede lo más cerca
posibledelbordesuperior/posteriordelacampana.
Quitelacintadelaaletadelreguladordetiro.
Operación
AGUJEROCIEGOSUPERIORDEL
CONDUCTORECTANGULAR
AGUJEROCIEGODE
(QUITEPARADESCARGA
CONDUCTO
VERTICALDE8.3CMX25.4CM
SEMICIRCULAR
[3¼”X10”YPARADESCARGA (QUITEPARADESCARGA
REDONDADE17.8CM[7”])
REDONDA
6. QuiteelagujerooagujerosciegosparaconductoapDE17.8CM[7”])
Garantía
GRAPADEL
CABLE
ELÉCTRICO
NOTA
PIVOTE
18
CONECTOR
DEL
REGULADOR
DETIRO/
CONDUCTO
(SEILUSTRALA
POSICIÓNDE
DESCARGA
VERTICAL)
Piezas de servicio
Para acomodar los conductos descentrados,
el conector del regulador de tiro/conducto se
pueden instalar a una distancia hasta de 2.5 cm
(1”) desde el centro de la campana hacia cu
alquier lado o la placa del conducto redondo
de 17.8 cm (7”) se pueden in stalar a una distancia hasta de 1.3 cm (½”) desde el centro de la
campana hacia cualquier lado. En instalaciones
ex céntricas extremas, un extremo del conector
de regula dor de conducto puede necesitar ser
cortado al claro la grapa para cable eléctrico.
CONECTE EL CABLEADO
Seguridad
ADVERTENCIA: Para reducir el riesgo de descargas eléctricas, asegúrese de apagar el interruptor
de alimentación eléctrica en el panel de servicio.
Bloquee o rotule el panel de servicio para evitar
que alguien conecte accidentalmente la energía
eléctrica.
1. Conecteelcableadodelacasa(120VCA)alacampana. Si fuera necesario, use un pedazo de cartón
paraprotegerlasuperficiedelaestufa.
OPCIÓN
Hay un Kit de Cable disponible, que permite
que se enchufe la campana en una toma de pared
estándar de 120 VCA.
Operación
Vea la página 15 para información sobre el Kit de Cable.
El Kit de Cable está disponible llamando a Sears
al 1-800-4-MY-HOME®
Utilice solamente con los kits de la cuerda-conexión de la campana se han investigado que y
encontró aceptable para el uso con esta modelo
de la campana.
Garantía
TORNILLO
VERDEDE
CONEXIÓN
ATIERRA
!
Limpieza
2. Conecte el cable negro del suministro de la casa
alcablenegrodelacampana,elcableblancodel
suministrodelacasaalcableblancodelacampana
ylaconexiónatierradelsuministrodomésticodebajo
deltornilloverdedeconexiónatierra.Ajustebienla
grapaparacableeléctricoalcableadodelacasa.
3. Vuelvaainstalarlatapadelaconexióneléctrica.
Instalación
Piezas de servicio
19
INSTALE LA CAMPANA
1. Cuelguelacampanadelos(4)tornillosdemontaje
(queseencuentranenlabolsadepiezas).Deslicela
campanahacialaparedhastaquelostornillosde
montajequedenconectadosenelextremoangosto
delos(4)orificiostipobocallave.Aprietefijamente
lostornillosdemontaje.
!
PRECAUCIÓN: ¡No presione sobre la paleta del
ventilador! El empujar la paleta puede hacerla
interferir con otras piezas de la campana.
ORIFICIO
TIPO
BOCALLAVE
(4)
TORNILLO
DE
MONTAJE
(4)
2. Conecteelsistemadeconductosalacampana.Use
cintaparaconductosparafijarysellarlasuniones
herméticamente.
CINTA
PARA
CONDUCTOS
REEMPLAZO DE LA LÁMPARA
1. Estirelalengüetadelalentedelaluzhaciaadelante
yluegohaciaabajoparaquitarlalente.
Vealainformaciónsobrelabombillaenlapágina4.
LasbombillasestándisponiblesllamandoaSearsal
1-800-4-MY-HOME®
!
LENTEDELA
LÁMPARA
PRECAUCIÓN: ¡Las bombillas podrían estar
calientes!Consultelainformaciónadicionalen
lospaquetesdelasbombillas.
2. Sujetelalámparaenlabase,inclínelahaciaabajoy
estirehaciaafueraparaquitarla.Reemplaceconla
lámparafluorescenteGX24Q-4de42W.Lalámpara
denocheusaunabombillaC-7de4W.
3. Vuelvaacolocarlalentedelalámpara.
BOMBILLAC-7
PARALA
LÁMPARADE
NOCHEDE
4W
LÁMPARA
FLUORESCENTE
GX24Q-4DE
42W
20
PIEZAS DE SERVICIO
R740013
R602017
R561116
R561117
R627497
R627499
R627575
R607657
R602533
R680504
*
R169016
R169002
R99080535
R531075
R99420635
99010299
R169004
99111515
99271358
99770154
99770150
97018489
98010817
98010818
98010814
R602534
R680508
99271426
2
3
1
2
4
5
22
14
2
8
9
2
2
7
11
17
10
6
12
19
18
2
21
16
20
23
Limpieza
Conector del regulador de tiro
conducto(incluyelosherrajes)
Tornillo,#8-18x¼hexagonal*
(2enelpaquete,sereq.6)
Interruptoroscilante,blanco
(2enelpaquete)
Interruptoroscilante,negro
(2enelpaquete)
Placadeidentificación,blanca
Placadeidentificación,
aceroinoxidable
Placadeidentificación,negra
Lente
Tornillodepuestaatierra(2req.)
Cubiertaparacableado
(incluyeherrajes)
Remachepop..125dediám.(3req.)
Juegoderesorteparafiltro
Tornillodemontajedelmotor
(3encadapieza)
Motor(incluyejuegode
montajedelmotor)
Aspadelventilador
(incluyepasadordehorquilla)
Pasadordehorquilla
Juegodefiltros(2porbolsa)
Luzindicadora(incluye2tuercas
paraalambreylente)
Lentedelámpara
Lámparafluorescente,42watts
Conjuntodereactancia
Arnésdecables
Conjuntodelreflector
Paneldeluz,blanco
Paneldeluz,negro
Paneldeluz,aceroinoxidable
Tornillo,8-18x3/8*
(2enelpaquete,sereq.5)
Placaparaconductoredondode7
pulg.(17.8cm)(incluyeherrajes)
LámparaC-7,4W
1
2
3
4
5
6
7
8
9
10
11
12
**
13
14
15
16
17
18
19
20
21
22
23
Operación
Garantía
DESCRIPCIÓN
Seguridad
CLAVENo. PIEZANo.
15
13
Alpedirpiezasderepuesto,indiqueelNo.DEPIEZA,noelNo.
DECLAVE
Instalación
Piezas de servicio
21
22
23