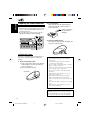
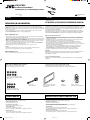
1
ENGLISH
KW-XC939
SOUND
ATT
U
R SOURCE F
D
VOL
VOL
For installation and
connections, refer to
the separate manual.
Указания по
установке и
выполнению
соединений
приводятся в
отдельной
инструкции.
В соответствии с Законом Российской Федерации “О защите прав
потребителей” срок службы (годности) данного товара “по истечении которого
он может представлять опасность для жизни, здоровья потребителя,
причинять вред его имуществу или окружающей среде” составляет семь (7) лет
со дня производства. Этот срок является временем, в течение которого
потребитель данного товара может безопасно им пользоваться при условии
соблюдения инструкции по эксплуатации данного товара, проводя
необходимое обслуживание, включающее замену расходных материалов и/или
соответствующее ремонтное обеспечение в специализированном сервисном
центре.
Дополнительные косметические материалы к данному товару, поставляемые
вместе с ним, могут храниться в течение двух (2) лет со дня его производства.
Срок службы (годности), кроме срока хранения дополнительных
косметических материалов, упомянутых в предыдущих двух пунктах, не
затрагивает никаких других прав потребителя, в частности, гарантийного
свидетельства JVC, которое он может получить в соответствии с законом о
правах потребителя или других законов, связанных с ним.
INSTRUCTIONS
ИНСТРУКЦИИ ПО ЭКСПЛУАТАЦИИ
LVT1099-001A
[EE]
Cover001AKW-XC939[EE]f.pm6
3
6/23/03, 3:47 PM
РУCCKИЙ
CD/CASSETTE RECEIVER
ПРИЕМНИК С ПРОИГРЫВАТЕЛЕМ КОМПАКТ-ДИСКОВ
И КАССЕТ
ENGLISH
IMPORTANT FOR LASER PRODUCTS
1. CLASS 1 LASER PRODUCT
2. CAUTION: Do not open the top cover. There are no user serviceable parts inside unit; leave all
servicing to qualified service personnel.
3. CAUTION: Visible and invisible laser radiation when open and interlock failed or defeated. Avoid
direct exposure to beam.
4. REPRODUCTION OF LABEL: CAUTION LABEL, PLACED OUTSIDE THE UNIT.
CAUTION on Volume Setting
CDs produce very little noise compared with other sources. If the volume level is adjusted for the tuner, for
example, the speakers may be damaged by the sudden increase in the output level. Therefore, lower the
volume before playing a CD and adjust it as required during playback.
How to reset your unit
Press the reset button on the front panel using
a ball-point pen or similar tool.
Note:
Your preset adjustments—such as preset channels or
sound adjustments—will be erased.
2
EN02-07KW-XC939[EE]f.pm6
2
6/23/03, 3:47 PM
ENGLISH
Thank you for purchasing a JVC product. Please read all instructions carefully before operation, to
ensure your complete understanding and to obtain the best possible performance from the unit.
CONTENTS
How to reset your unit ....................................
2
LOCATION OF THE BUTTONS ............ 4
Control panel .............................................
Remote controller ......................................
Preparing the remote controller ................
4
5
6
BASIC OPERATIONS ....................... 7
RADIO OPERATIONS ...................... 8
Listening to the radio ................................. 8
Storing stations in memory ....................... 9
Tuning in to a preset station ...................... 10
Other convenient tuner functions .............. 11
CD OPERATIONS ........................... 12
Playing a CD .............................................
Locating a track or a particular portion
on a CD .................................................
Selecting CD playback modes ..................
Playing a CD Text ......................................
Other convenient CD functions .................
SOUND ADJUSTMENTS ................... 25
Adjusting the sound ..................................
Reinforcing the bass sound ......................
Selecting preset sound modes ..................
Storing your own sound adjustments ........
25
25
26
27
LEVEL METER SETTING ................... 28
Selecting level meter patterns ................... 28
OTHER MAIN FUNCTIONS ................ 29
About the demonstration mode
(DEMO MODE) ......................................
Setting the clock ........................................
Changing general settings (PSM) .............
Assigning names to the sources ...............
29
29
30
33
12
EXTERNAL COMPONENT OPERATIONS ... 34
13
14
15
15
CD CHANGER OPERATIONS .............. 35
MP3 INTRODUCTION ...................... 16
Handling cassettes .................................... 38
Handling discs ........................................... 39
Playing CDs .............................................. 35
Selecting CD playback modes .................. 37
ADDITIONAL INFORMATION ............. 38
What is MP3? ............................................ 16
How are MP3 files recorded and
played back? ......................................... 16
TROUBLESHOOTING ...................... 40
MP3 OPERATIONS ......................... 18
SPECIFICATIONS ........................... 43
Playing an MP3 disc ................................. 18
Locating a file or particular portion
on an MP3 disc ....................................... 19
Selecting MP3 playback modes ................ 21
TAPE OPERATIONS ........................ 22
Listening to a tape ..................................... 22
Finding the beginning of a tune ................. 23
Other convenient tape functions ............... 24
BEFORE USE
*For safety....
• Do not raise the volume level too much, as this will
block outside sounds, making driving dangerous.
• Stop the car before performing any complicated
operations.
*Temperature inside the car....
If you have parked the car for a long time in hot or
cold weather, wait until the temperature in the car
becomes normal before operating the unit.
3
EN02-07KW-XC939[EE]f.pm6
3
6/23/03, 3:47 PM
LOCATION OF THE BUTTONS
ENGLISH
Control panel
1
q
2
w
3
e
4
5
6
r
t
7
y
u
8
9
p
i
Display window
o
;
a
f g
h
j
s
k
d
l
Control panel
Display window
1
2
3
4
5
6
7
8
9
p
q
w
e
o Dolby NR indicator
; S.BASS EQ (Super Bass/Equalizer) level /
level meter
a Main display
s Level meter
d Play mode indicators
RND (random), RPT (repeat),
B.SKIP (blank skip)
f CD indicator
g TAPE indicator
h Text name indicators
DISC, TRACK, STATION
j Source indicators
MP3, CD, CD-CH (CD-changer), TAPE, AUX,
F1, F2, F3, A
k Tuner reception indicators
MO (monaural), ST (stereo)
l Clock display
r
t
y
u
i
Display window
CD loading slot
/ ATT (standby/on/attenuator) button
DISP (display) button
Auxiliary input jack
SEL (select) button
EQ LV (Equalizer/Level) button
+ / – buttons
Reset button
MODE button
Cassette compartment
CD 0 (eject) button
Source buttons
• CD/CH button
• FM/AM button
• TAPE/AUX button
• 2 PROG 3 button
• +10 / –10 button
TAPE 0 (eject) button
4
/¢
buttons
EX (extra) button
Number buttons
4
EN02-07KW-XC939[EE]f.pm6
4
6/23/03, 3:47 PM
Remote controller
ENGLISH
4 Functions the same as the +/– buttons on the
main unit.
Note:
These buttons do not function for the preferred
setting mode (PSM) adjustment.
SOUND
ATT
1
5
2
U
6
R SOURCE F
3
7
D
4
VOL
5 Selects the sound mode.
Each time you press the button, the EQ
(equalizer) mode changes.
VOL
1 Functions the same as the
on the main unit.
/ ATT button
6 Selects the source.
Each time you press the button, the source
changes.
7 • Searches for stations while listening to the
radio.
• Fast-forwards or reverses the track/file if
pressed and held while listening to any disc.
• Skips to the beginning of the next track/file
or goes back to the beginning of the current
(or previous) track/file if pressed briefly
while listening to any disc.
• Fast-forwards or rewinds a tape and finds
the beginning of a tune (MMS) while
listening to a tape. To release this operation,
press button 2 which then starts playback.
2 • Changes the band while listening to the
radio.
• Skips to the first file of the next directory if
pressed while listening to an MP3 disc.
• Changes the tape direction while listening to
a tape.
• Selects disc numbers in increasing order,
and starts playing while listening to the CD
changer.
3 • Selects preset numbers in increasing order
while listening to the radio.
• Skips to the first file of the previous directory
if pressed while listening to an MP3 disc.
• Selects disc numbers in decreasing order,
and starts playing while listening to the CD
changer.
5
EN02-07KW-XC939[EE]f.pm6
5
6/23/03, 3:47 PM
ENGLISH
Preparing the remote controller
2.
Before using the remote controller:
• Aim the remote controller directly at the remote
sensor on the main unit. Make sure there is no
obstacle in between.
• Do not expose the remote sensor to strong
light (direct sunlight or artificial lighting).
Lithium coin battery
(product number:
CR2025)
3.
Remote sensor
Place the battery.
Slide the battery into the holder with the +
side facing upwards so that the battery is
fixed in the holder.
Return the battery holder.
Insert again the battery holder pushing it until
you hear a clicking sound.
(back side)
Installing the battery
When the controllable range or effectiveness of
the remote controller decreases, replace the
battery.
1.
Remove the battery holder.
1) Push out the battery holder in the direction
indicated by the arrow using a ball-point
pen or a similar tool.
2) Remove the battery holder.
(back side)
1)
2)
WARNING:
• Store the battery in a place where children
cannot reach.
If a child accidentally swallows the battery,
consult a doctor immediately.
• Do not recharge, short, disassemble or heat the
battery or dispose it in a fire.
Doing any of these things may cause the battery
to give off heat, crack or start a fire.
• Do not leave the battery with other metallic
materials.
Doing this may cause the battery to give off
heat, crack or start a fire.
• When throwing away or saving the battery,
wrap it in tape and insulate; otherwise, the
battery may start to give off heat, crack or start
a fire.
• Do not poke the battery with tweezers or similar
tools.
Doing this may cause the battery to give off
heat, crack or start a fire.
CAUTION:
DO NOT leave the remote controller in a place
(such as dashboards) exposed to direct sunlight
for a long time. Otherwise, it may be damaged.
6
EN02-07KW-XC939[EE]f.pm6
6
6/23/03, 3:47 PM
1
2
Note:
When you use this unit for the first
time, set the built-in clock correctly, see
page 29.
3
1
ENGLISH
BASIC OPERATIONS
3
Turn on the power.
Adjust the volume.
To increase the volume
“HELLO!” appears on the
display.
To decrease the volume
Note on One-Touch Operation:
When you select a source in step 2 below, the
power automatically comes on. You do not have
to press this button to turn on the power.
2
Volume level
Select the source.
• Each time you press CD/CH,
the source alternates between
CD* and CD-changer (or
external component)**.
• Each time you press FM/AM, the
band changes to FM (FM1,
FM2, FM3) and AM.
• Each time you press TAPE/AUX,
the source alternates between
TAPE*** and external
component (AUX INPUT).
*
If a disc is not in the loading slot, you cannot
select CD as the source to play. (“NO DISC” will
appear on the display.)
** Without connecting the CD changer or the
external component, you cannot select it as the
source to play.
*** If a cassette is not in the cassette compartment,
you cannot select TAPE as the source to play.
(“NO TAPE” will appear on the display.)
To operate the tuner, see pages 8 – 11.
To play the CD, see pages 12 – 15.
To play an MP3 disc, see pages 18 – 21.
To operate the tape deck, see pages 22 – 24.
To operate the external components, see page 34.
To operate the CD changer, see pages 35 – 37.
Clock time
4
Adjust the sound as you want
(see pages 25 – 27).
• If you need to change the level meter
pattern, see page 28.
To drop the volume immediately
Press
/ ATT briefly while listening to any
source. “ATT” starts flashing on the display, and
the volume level will drop immediately.
To resume the previous volume level, press the
button briefly again.
To turn off the power
Press
/ ATT for more than 1 second.
“SEE YOU” appears, then the unit turns off.
• If you turn off the power while listening to a
disc, the disc play will start from where
playback has been stopped previously, next
time you turn on the power.
• If you turn off the ignition key without
turning off this unit, the unit will automatically
turn on when you turn on the ignition key next
time. If the last selected source is ready for
playback (ex. a disc or a tape is in the unit),
playback starts automatically.
7
EN02-07KW-XC939[EE]f.pm6
7
6/23/03, 3:47 PM
ENGLISH
RADIO OPERATIONS
Listening to the radio
Searching for a station manually:
Manual search
You can use either automatic searching or manual
searching to tune in to a particular station.
1
FM1
Searching for a station automatically:
Auto search
1
Select the band (FM1, FM2, FM3 or
AM).
FM1
FM2
FM3
Select the band (FM1, FM2, FM3, or
AM).
2
AM
FM2
FM3
AM
Press and hold ¢
or 4
until “M” (manual) starts flashing on
the display.
Note:
This receiver has three FM bands (FM1, FM2,
and FM3). You can use any one of them to listen
to an FM broadcast.
Selected band appears.
2
Start searching for a station.
To search stations of
higher frequencies
To search stations of
lower frequencies
When a station is received, searching stops.
3
Tune in to a station you want while
“M” is flashing.
To tune in to stations of
higher frequencies
To tune in to stations of
lower frequencies
• If you release your finger from the button, the
manual mode will automatically turn off after
5 seconds.
• If you hold down the button, the frequency
keeps changing (in 50 kHz intervals for FM and
9 kHz for AM) until you release the button.
To stop searching before a station is
received, press the same button you have
pressed for searching.
8
EN08-11KW-XC939[EE]f.pm6
8
6/23/03, 3:48 PM
You can use one of the following methods to
store broadcasting stations in memory.
• Automatic preset: SSM (Strong-station
Sequential Memory)
• Manual preset
• Storing your favorite station into the EX button
Manual preset
ENGLISH
Storing stations in memory
You can preset up to 6 stations in each band
(FM1, FM2, FM3, and AM) manually.
Ex.: Storing an FM station of 88.3 MHz into the
preset channel number 1 of the FM1 band
1
Select the FM1 band.
Automatic preset: SSM
You can preset up to 6 local stations in each FM
band (FM1, FM2, and FM3).
1
Select the band (FM1, FM2, or FM3).
FM1
2
2
FM2
FM3
To tune in to stations of
higher frequencies
AM
Press MODE repeatedly until “SSM”
appears.
To tune in to stations of
lower frequencies
3
3
Tune in to a station (in this example,
of 88.3 MHz).
Press and hold the number button
(in this example, 1) for more than
2 seconds.
Press SEL (select).
“P1” flashes for a few seconds.
“--SSM--” appears, then disappears
when automatic preset is over.
4
Repeat the above procedure to store
other stations into other preset
numbers.
Local stations with the strongest signals are
searched for and stored automatically in the
band you have selected (FM1, FM2, and FM3).
These stations are preset in the number
buttons—No. 1 (lowest frequency) to No. 6
(highest frequency).
When automatic preset is over, the station stored
in the number 1 button will be automatically tuned
in.
9
EN08-11KW-XC939[EE]f.pm6
9
6/23/03, 3:48 PM
ENGLISH
Storing your favorite station into the
EX (extra) button
Tuning in to a preset station
You can preset an FM or AM station (such as
your favorite station or traffic announcement
station); and recall it by one touch operation even
if the unit is turned off.
You can easily tune in to a preset station.
Remember that you must store stations first. If
you have not stored them yet, see page 9.
1
Ex.: Storing an FM station of 88.3 MHz into the
EX button
1
FM1
FM2
FM3
AM
Select the FM1 band.
2
2
Select the band (FM1, FM2, FM3, or
AM) you want.
Select the number (1 – 6) for the
preset station you want.
Tune in to a station (in this example,
of 88.3 MHz).
To tune in to stations of
higher frequencies
To tune in to stations of
lower frequencies
To tune in the favorite station (EX)
Press EX (extra) so that the unit
automatically turns on (if it has
been off).
Your favorite station is tuned in.
EX
3
Press and hold the EX (extra) button
until “EX” flashes.
EX
• If you press the button again, the previous
source will be played back again.
“EX” flashes on the display.
Notes:
• The previously preset station is erased when a new
station is stored.
• Preset stations are erased when the power supply to
the memory circuit is interrupted (for example,
during battery replacement). If this occurs, preset
the stations again.
10
EN08-11KW-XC939[EE]f.pm6
10
6/23/03, 3:48 PM
Selecting FM reception mode
Scanning broadcast stations
When an FM stereo broadcast is hard to
receive, follow the procedure below:
1
1
Select “SCAN.”
*SSM
SCAN
Canceled
*MONO
(frequency indication)
Select “MONO.”
SSM
SCAN
Canceled
MONO
ENGLISH
Other convenient tuner functions
(frequency indication)
* When receiving an FM stereo broadcast.
2
2
Start scanning.
Each time a broadcast is tuned
in, scanning stops for about
5 seconds (tuned frequency
number flashes on the display),
and you can check what
program is now being
broadcasted.
Select FM reception mode.
FM reception mode turns on
(“MONO ON”) and off (“MONO
OFF”) alternately.
When the monaural mode is turned on, the
sound you hear becomes monaural but reception
will be improved.
If you want to listen to that program, press
MODE button again to stop scanning.
If you have assigned a name to a station
frequency, the display shows its assigned name
after the station frequency is displayed.
When the station name is displayed, the
STATION indicator lights up on the display (see
page 33).
Lights up when receiving an FM
broadcast in stereo.
J
Showing an assigned name
Lights up
To confirm the station frequency while the
assigned name is shown, press DISP (display).
Each time you press the button, the assigned
name and the station frequency alternate on the
display.
Note:
If no name is assigned, “NO NAME” will appear
when you press DISP (display).
11
EN08-11KW-XC939[EE]f.pm6
11
6/23/03, 3:48 PM
ENGLISH
CD OPERATIONS
Playing a CD
1
Insert a disc into the loading slot.
The unit turns on, draws
in the CD and starts
playback automatically.
CD indicator lights up.
\
Total track number of
the inserted disc
Total playing time of
the inserted disc
\
Current track
Elapsed playing time
Note on One-Touch Operation:
When a CD is already in the loading slot, pressing
CD/CH turns on the unit and starts playback
automatically.
Notes:
• When a CD is inserted upside down, the CD
automatically ejects.
• When you play a CD Text, the disc title and
performer appear on the display. Then the current
track title appears on the display, followed by the
track number and elapsed playing time. See also
“Playing a CD Text” (page 15) and “Selecting the
scroll mode—SCROLL” (page 32).
If a CD Text includes much text information, some
may not appear on the display.
• If you play a CD with assigned name (see page 33),
the assigned name appears on the display, followed
by the track number and elapsed playing time. See
also “Showing an assigned name” on page 15.
To stop play and eject the CD
Press CD 0.
CD play stops and the CD automatically ejects
from the loading slot (“EJECT” appears on the
display). The source changes to the last selected
source.
Notes:
• If the ejected disc is not removed for about
15 seconds, the disc is automatically inserted again
into the loading slot to protect it from dust. (CD
play will not start this time.)
• You can eject the CD even when the unit is turned
off.
• If you change the source, CD play also stops
(without ejecting the disc).
Next time you select “CD” as the source, CD play
starts from where playback had been stopped
previously.
12
EN12-15KW-XC939[EE]f.pm6
12
6/23/03, 3:48 PM
To skip 10 tracks
1 Press MODE repeatedly until
“2 –10 +10 3” appears.
To fast-forward or reverse the track
2 –10 +10 3
Press and hold ¢
while
playing a CD, to fast-forward
the track.
Canceled
INTRO
REPEAT
ENGLISH
Locating a track or a
particular portion on a CD
RANDOM
Press and hold 4
while
playing a CD, to reverse the
track.
2 Press +10 or –10 button.
To go to the next tracks or the previous
track
Press ¢
briefly while
playing a CD, to go ahead to
the beginning of the next track.
Each time you press the
button consecutively, the
beginning of the next track is
located and played back.
Press 4
briefly while
playing a CD, to go back to the
beginning of the current track.
Each time you press the
button consecutively, the
beginning of the previous track
is located and played back.
To go to a particular track directly
To skip 10 tracks* forwards to
the last track
To skip 10 tracks* backwards
to the first track
* The first time you press +10 or –10 button, the
track skips to the nearest higher or lower track
with a track number of multiple ten (ex. 10th,
20th, 30th).
Then each time you press the button, you can
skip 10 tracks (see “How to use the +10 and –10
buttons” below).
• After the last track, the first track will be
selected, and vice versa.
How to use the +10 and –10 buttons
• Ex. 1: To select track number 32 while
playing track number 6
Press the number button corresponding to the
track number to start its playback.
Track 6
• To select a track number from 1 – 6:
Press 1 (7) – 6 (12) briefly.
• To select a track number from 7 – 12:
Press and hold 1 (7) – 6 (12) for more than
1 second.
(Three times)
\10 \ 20 \ 30
(Twice)
\ 31 \ 32
• Ex. 2: To select track number 8 while playing
track number 32
Track 32
(Three times)
\30 \ 20 \ 10
(Twice)
\9\8
13
EN12-15KW-XC939[EE]f.pm6
13
6/23/03, 3:48 PM
ENGLISH
Selecting CD playback modes
To play back tracks repeatedly
(Repeat Play)
You can play back the current track repeatedly.
2 Press SEL (select).
Each time you press the
button, CD random play mode
turns on (“RANDOM ON”)
and off (“RANDOM OFF”)
alternately.
1 Press MODE repeatedly until
“REPEAT” appears.
2 –10 +10 3
Canceled
INTRO
REPEAT
RANDOM
When the random mode is turned on, the RND
indicator lights up on the display and a randomly
selected track starts playing.
To play back only intro (Intro scan)
2 Press SEL (select).
Each time you press the
button, CD repeat play mode
turns on (“REPEAT ON”) and
off (“REPEAT OFF”)
alternately.
You can play back the first 15 seconds of each
track sequentially.
1 Press MODE repeatedly until
“INTRO” appears.
2 –10 +10 3
Canceled
When the repeat mode is turned on, the RPT
indicator lights up on the display.
To play back tracks at random
(Random Play)
INTRO
REPEAT
RANDOM
2 Press SEL (select).
Each time you press the
button, CD Intro scan mode
turns on (“INTRO ON”) and
off (“INTRO OFF”) alternately.
You can play back all tracks on the CD at
random.
2 –10 +10 3
Canceled
INTRO
REPEAT
\
1 Press MODE repeatedly until
“RANDOM” appears.
RANDOM
When the Intro scan mode is turned on, the
current track number flashes.
14
EN12-15KW-XC939[EE]f.pm6
14
6/23/03, 3:48 PM
Other convenient CD functions
In a CD Text, some information about the disc (its
disc title, performer and track title) is recorded.
You can show these disc information on the
display.
Showing an assigned name
1
Select text display mode while
playing a CD Text.
Each time you press the
button, the display changes
as follows:
Current track no.
and Track Title
Current track no.
and Elapsed playing time
Disc Title / Performer
When disc information appears on the display,
the corresponding name indicator lights up.
When a disc title/performer is displayed.
You can assign names to conventional CDs.
If you have assigned a name to a CD, the
assigned name appears on the display, followed
by the current track number and elapsed playing
time.
When the CD name is displayed, the DISC
indicator lights up on the display (see page 33).
ENGLISH
Playing a CD Text
Lights up
To confirm the current track number and
elapsed playing time while the assigned
name is shown, press DISP (display).
Each time you press the button, the assigned
name and current track number/elapsed playing
time alternate on the display.
Note:
You cannot assign a name to a CD Text or an MP3
disc.
When a track title is displayed.
Prohibiting CD ejection
Notes:
• You can use the scroll mode to show the disc
information on the display.
See also “Selecting the scroll mode—SCROLL” on
page 32.
• When you press DISP (display) while playing a
conventional CD, “NO NAME” appears for the
disc title/performer (unless you have assigned a
name to the CD) and the track title.
You can prohibit CD ejection and can lock a CD
in the loading slot.
While pressing CD/CH, press and
hold CD 0 for more than
” flashes on the
2 seconds. “CD
display for a while, and the CD is
locked and cannot be ejected.
To cancel the prohibition and unlock the CD,
press and hold CD 0 for more than 2 seconds
again, while pressing CD/CH.
“EJECT OK” flashes on the display for a while,
and the CD is unlocked.
15
EN12-15KW-XC939[EE]f.pm6
15
6/23/03, 3:48 PM
ENGLISH
MP3 INTRODUCTION
What is MP3?
Precautions when recording MP3 files
on a CD-R or CD-RW
MP3 is an abbreviation of Motion Picture Experts
Group (or MPEG) Audio Layer 3*. MP3 is simply
a file format with a data compression ratio of
1:10 (128 Kbps**). That means, by using MP3
format, one CD-R or CD-RW can contain 10
times as much data volume as a regular CD can.
This unit can only read MP3 files that are
recorded in the format that is compliant with ISO
9660 Level 1, Level 2 or Joliet.
* This player is not compatible with the data encoded
with Layer 1 and 2 formats.
** Bit rate is the average number of bits that one
second of audio data will consume. The unit used is
Kbps (1024 bits/second). To get a better audio
quality, choose a higher bit rate. The most popular
bit rate for encoding is 128 Kbps.
An MP3 decoder is incorporated into this unit.
You can play back MP3 files (tracks) recorded on
CD-Rs, CD-RWs, and CD-ROMs.
How are MP3 files recorded
and played back?
MP3 “files (tracks)” can be recorded in
“directories (folders)”—in PC terminology.
During recording, the files and directories can be
arranged in a way similar to arranging files and
directories/folders of computer data.
“Root” is similar to the root of a tree. Every file
and directory can be linked to and be accessed
from the root.
Extra information data such as album title,
performer name, song title, recording year, music
genre and a brief comment can be stored within
an MP3 file.
Playback order, file search order, and directory
search order of the MP3 files recorded on a disc
are determined by the writing (or encoding)
application; therefore, playback order may be
different from the one you have intended while
recording the directories and the files.
This unit can show ID3v1 tags (album name,
performer name and song title) on the display.
• Some characters cannot be shown correctly.
• This unit is not compatible with ID3v2.
The illustration on the next page shows an
example of how MP3 files are recorded on a
CD-R or CD-RW, how they are played back, and
how they are searched for on this unit.
Compatible with ID3v1
Other main features in this unit:
• Maximum number of directories/files: 289
(Total)
• Available characters: A–Z, 0–9, _(underscore)
• Maximum number of characters for file name
(ISO 9660 Level 1):12 (inclusive of
separation mark—“.” and
extension code—“mp3”)
(ISO 9660 Level 2): 31 (inclusive of
separation mark—“.” and
extension code—“mp3”)
(Joliet):
64 (inclusive of
separation mark—“.” and
extension code—“mp3”)
• Maximum number of characters for directory
name: 64
Notes:
• The unit can read a CD-ROM containing MP3 files.
However, if non-MP3 files are recorded together
with MP3 files, this unit will take a longer time to
scan the disc. It may also cause the unit to
malfunction.
• The unit cannot read or play an MP3 file without
the extension code—mp3.
• The unit is not compatible with Playlist*.
* A playlist is a simple text file, used on a PC, which
enables users to make their own playback order
without physically rearranging the files.
16
EN16-21KW-XC939[EE]f.pm6
16
6/23/03, 3:48 PM
ENGLISH
Level 1
MP3 directory/file configuration
02
04
03
01
05
10
5 6
09
18 19
11
06
7
Level 6
ROOT
08
1 2 3 4
Level 4
Level 3
01
Level 5
Hierarchy
Level 2
ROOT
8
07
20
9
12
13
14
15
16
21
22
17
Note:
There is no limit on the number of the hierarchy levels (nested
directories). However, up to 8 hierarchy levels is recommended for
stable operations.
: Root
: Directories
: MP3 files
MP3 playback/search order
• The numbers in circles below the MP3 files ( ) indicate the playback order and search order of
the MP3 files. Normally this unit plays back MP3 files in the recorded order.
• The numbers inside the directories indicate the playback order and search order of the directories
on an MP3 disc. Normally this unit plays back MP3 files in the directories in the recorded order.
17
EN16-21KW-XC939[EE]f.pm6
17
6/23/03, 3:48 PM
ENGLISH
MP3 OPERATIONS
Refer also to “CD OPERATIONS” on pages
12 to 15.
Playing an MP3 disc
1
Insert an MP3 disc into the loading
slot.
The unit turns on, draws
in an MP3 disc and
starts playback
automatically.
Ex.: When the disc contains 13 directories
and 125 MP3 files
\
Lights up
Playback starts automatically from the first file of
the first directory once file check is completed.
Then, the display changes to show the following:
• When “TAG ON” is selected (initial setting:
see page 32)
Album name/performer name (directory
name)* = Track title (file name)* =
Elapsed playing time
* If an MP3 file does not have ID3 tags, directory
name and file name appear.
• When “TAG OFF” is selected
Directory name and file name appear.
Notes:
• All the files on the disc will be played repeatedly
until you stop playback—All File Repeat Play.
• MP3 discs require a longer readout time**.
(The readout time differs due to the complexity of
the directory/file configuration.)
** Readout time is the time taken by the unit to
scan or check the disc for files and file
information.
\
MP3 indicator lights up.
18
EN16-21KW-XC939[EE]f.pm6
18
6/23/03, 3:48 PM
While playing back an MP3 file,
you can change the file
information shown on the display.
Each time you press DISP
(display), the display changes to
show the following:
• When “TAG ON” is selected (initial setting:
see page 32)
Album name/
Track title
Performer name
(File name)*
(Directory name)*
Elasped playing time
* If an MP3 file does not have ID3 tags, directory
name and file name appear.
• When “TAG OFF” is selected
File name
Directory name
Elasped playing time
Notes:
• You can use the scroll mode to show the disc
information on the display.
See also “Selecting the scroll mode—SCROLL” on
page 32.
• If you change the setting from “TAG OFF” to “TAG
ON” while playing an MP3 file, the tag display will
be activated when the next file starts playing.
To stop play and eject the disc
Press CD 0.
Disc play stops and the disc automatically ejects
from the loading slot (“EJECT” appears on the
display). The source changes to the last selected
source.
If you change the source, the disc play also stops
(without ejecting the disc this time).
Locating a file or a particular
portion on an MP3 disc
To fast-forward or reverse the file
ENGLISH
To change the display information
Press and hold ¢
while
playing an MP3 disc, to fastforward the file.
Press and hold 4
while
playing an MP3 disc, to
reverse the file.
To go to the next or previous files
Press ¢
briefly while
playing an MP3 disc, to go
forward to the beginning of
the next file.
Each time you press the
button consecutively, the
beginning of the next file is
located and played back.
(See “MP3 playback/search
order” on page 17.)
Press 4
briefly while
playing an MP3 disc, to go
back to the beginning of the
current file.
Each time you press the
button consecutively, the
beginning of the previous file
is located and played back.
(See “MP3 playback/search
order” on page 17.)
Notes:
• If the ejected disc is not removed for about
15 seconds, the disc is automatically inserted again
into the loading slot to protect it from dust. (Disc
play will not start this time.)
• You can eject the disc even when the unit is turned
off.
19
EN16-21KW-XC939[EE]f.pm6
19
6/23/03, 3:48 PM
ENGLISH
To skip 10 files
1 Press MODE repeatedly until
“2 –10 +10 3” appears.
2 –10 +10 3
Canceled
Press the number button corresponding to the
directory number to start playing the first file in
the selected directory.
REPEAT
RANDOM
2 Press +10 or –10 button.
To skip 10 files* forwards to
the last file
To skip 10 files* backwards
to the first file
* The first time you press +10 or –10 button, the
file skips to the nearest higher or lower file with
a file number of multiple ten (ex. 10th, 20th,
30th).
Then each time you press the button, you can
skip 10 files.
• After the last file, the first file will be selected,
and vice versa.
To go to a particular directory directly
IMPORTANT:
To directly select the directories using the
number button(s), it is required that directories
are assigned 2 digit numbers at the beginning
of their directory names. (This can only be
done during the recording of CD-Rs or
CD-RWs.)
Ex.: If directory name is “01 ABC”
= press 1 to go to directory 01 ABC
If directory name is “1 ABC”
= cannot directly select this directory.
If directory name is “12 ABC”
= press and hold 6 (12) to go to
directory 12 ABC
• To select a directory number from 1 – 6:
Press 1 (7) – 6 (12) briefly.
• To select a directory number from 7 – 12:
Press and hold 1 (7) – 6 (12) for more than
1 second.
Notes:
• If “MP3” flashes on the display after you have
selected a directory, it means that the directory does
not contain any MP3 files.
• You cannot directly select a directory with a number
greater than 12.
To select a particular file in a directory, press
or 4
after selecting the directory.
¢
To skip to the next directory or the
previous directory—either on the same
hierarchy level or on a different hierarchy
level
Press 3 (+10) briefly while
playing an MP3 disc.
Each time you press the button
consecutively, the next directory
is located (and the first file in
the directory starts playing, if
recorded).
(See “MP3 playback/search
order” on page 17.)
Press 2 (–10) briefly while
playing an MP3 disc.
Each time you press the button
consecutively, the previous
directory is located (and the
first file in the directory starts
playing, if recorded).
(See “MP3 playback/search
order” on page 17.)
Note:
If the directory does not contain any MP3 files, it is
skipped.
20
EN16-21KW-XC939[EE]f.pm6
20
6/23/03, 3:48 PM
To play back tracks at random
(Random Play)
To play back tracks repeatedly (Repeat
Play)
1 Press MODE repeatedly until
“RANDOM” appears.
2 –10 +10 3
1 Press MODE repeatedly until
“REPEAT” appears.
2 –10 +10 3
Canceled
RPT
Indicator
RANDOM
RANDOM
2 Press SEL (select).
Each time you press the
button, random play mode
changes as follows:
RANDOM1 ON
RANDOM2 ON
RANDOM OFF
REPEAT2 ON
REPEAT OFF
Mode
REPEAT
REPEAT
2 Press SEL (select).
Each time you press the
button, repeat play mode
changes as follows:
REPEAT1 ON
Canceled
ENGLISH
Selecting MP3 playback modes
Mode
Plays repeatedly
REPEAT1 ON Lights
The current file (or
specified file).
REPEAT2 ON Flashes
All files of the current
directory (or specified
directory).
RND
Indicator
Plays at random
RANDOM1 ON Lights
All files of the current
directory, then the
files of the next
directory, and so on.
RANDOM2 ON Flashes
All files of all
directories.
RANDOM OFF Goes off
Canceled.
REPEAT OFF Goes off Canceled.
21
EN16-21KW-XC939[EE]f.pm6
21
6/23/03, 3:48 PM
ENGLISH
TAPE OPERATIONS
Listening to a tape
2 Press SEL (select).
Each time you press the
button, the Dolby B NR turns
on (“DOLBY ON”) and off
(“DOLBY OFF”).
You can play back type I (normal) tapes.
1
Insert a cassette into the cassette
compartment.
This indicator lights up when the
Dolby B NR is turned on.
Tape indicator flashes
Note on One-Touch Operation:
When a cassette is already in the cassette
compartment, pressing TAPE/AUX turns on the
unit and starts tape play automatically.
2
3
Select the tape direction.
Each time you press the
button, the tape direction
changes alternately.
j
The unit turns on and tape play starts
automatically.
When one side of the tape reaches its end
during play, the other side of the tape
automatically starts playing. (Auto Reverse)
Turn on or off the Dolby B NR* as
needed.
1 Press MODE repeatedly until
“DOLBY B” appears.
DOLBY B
B.SKIP
Canceled
REPEAT
* Manufactured under license from Dolby
Laboratories.
“Dolby” and the double-D symbol are
trademarks of Dolby Laboratories.
22
EN22-24KW-XC939[EE]f.pm6
22
6/23/03, 3:48 PM
Press TAPE 0.
Tape play stops and the cassette automatically
ejects from the cassette compartment.
If you change the source, the tape play also
stops (without ejecting the cassette this time).
• You can also eject the cassette by pressing TAPE 0
while the unit is turned off.
Finding the beginning of a
tune
Multi Music Scan allows you to automatically
start playback from the beginning of a specified
tune. You can specify up to 9 tunes ahead or
before the current tune.
ENGLISH
To stop play and eject the cassette
During playback
To fast-forward and rewind a tape
Press ¢
for more than
1 second to fast-forward the
tape.
When the tape reaches its
end, the tape is reversed
and playback starts from the
beginning of the other side.
for more than
Press 4
1 second to rewind the tape.
When the tape reaches its
end, playback of the same
side starts.
To stop fast-forward and rewind at any
position on the tape, press 2 PROG 3.
Tape play starts from that position on the tape.
Note:
When the tape reaches its end while fast-forwarding,
the tape direction will be changed automatically.
1
Specify where (how many tunes
ahead of or before the current tune)
the tune you want is located.
To locate a tune ahead
of the current tune on
the tape
To locate a tune before
the current tune on the
tape
Each time you press the button, the
number changes up to ±9.
When the beginning of the specified tune is
located, playback starts automatically.
Notes:
• While locating a specified tune:
– If the tape is rewound to its beginning, playback
starts from the beginning of that side.
– If the tape is fast-forwarded to the end, it is
reversed and played from the beginning of the
other side.
• In the following cases, Multi Music Scan may not
operate correctly:
– Tapes with tunes having long pianissimo
passages (very quiet parts) or non-recorded
portions.
– Tapes with short non-recorded sections.
– Tapes with high level noise or humming between
tunes.
– The Dolby NR setting does not match. For
example, if the tape is recorded with the Dolby C
NR.
23
EN22-24KW-XC939[EE]f.pm6
23
6/23/03, 3:48 PM
ENGLISH
Other convenient tape
functions
Skipping blank portions on the tape
You can skip blank portions between the tunes
(Blank Skip).
1 Press MODE repeatedly until
“B.SKIP” appears.
DOLBY B
B.SKIP
Canceled
REPEAT
2 Press SEL (select).
Each time you press the
button, skip function mode
turns on (“B.SKIP ON”) and
off (“B.SKIP OFF”)
alternately.
When this function is on, the B.SKIP indicator
lights up on the display and the unit skips blank
portions of 15 seconds or more, fast-forwards to
the next tune, then starts playing it.
Playing the current tune repeatedly
Notes:
In the following cases, Blank Skip and Repeat Play
may not operate correctly:
– Tapes with tunes having long pianissimo passages
(very quiet parts) or non-recorded portions.
– Tapes with short non-recorded sections.
– Tapes with high level noise or humming between
tunes.
– The Dolby NR setting does not match. For example,
if the tape is recorded with the Dolby C NR.
Prohibiting tape ejection
You can prohibit the tape ejection and can lock a
tape in the cassette compartment.
While pressing TAPE/AUX, press
and hold TAPE 0 for more than
” flashes
2 seconds. “TAPE
on the display for a while, and
the tape is locked and cannot be
ejected.
To cancel the prohibition and unlock the tape,
press and hold TAPE 0 for more than 2 seconds
again, while pressing TAPE/AUX.
“EJECT OK” flashes on the display for a while,
and the tape is unlocked.
You can play the current tune repeatedly
(Repeat Play).
1 Press MODE repeatedly until
“REPEAT” appears.
DOLBY B
B.SKIP
Canceled
REPEAT
2 Press SEL (select).
Each time you press the
button, repeat play mode
turns on (“REPEAT ON”) and
off (“REPEAT OFF”)
alternately.
24
EN22-24KW-XC939[EE]f.pm6
24
6/23/03, 3:48 PM
Adjusting the sound
Reinforcing the bass sound
You can adjust the sound characteristics to your
preference.
You can also adjust the level of Super Bass.
1
Select the item you want to adjust.
1
Each time you press the
button, the adjustable items
change as follows:
FADER
Select “S.BASS.”
EQ
Canceled
ENGLISH
SOUND ADJUSTMENTS
S.BASS
L.V.METER
While adjusting Super Bass, S. BASS level
flashes.
BAL
VOLUME
(Balance)
As the number increases, Super Bass
level also increases.
Indication
To do:
Range
FADER*
Adjust the front
and rear speaker
balance.
R06 (Rear only)
|
F06 (Front only)
BAL
(Balance)
Adjust the left
and right speaker
balance.
L06 (Left only)
|
R06 (Right only)
VOLUME
Adjust the volume. 00 (min.)
|
50 (max.)
*
2
2
Adjust the level within the range of
“00” to “08.”
If you are using a two-speaker system, set the
fader level to “00.”
Adjust the level.
Note:
Normally + / – buttons work for volume adjustment.
So you do not have to select “VOLUME” to adjust the
volume level.
25
EN25-27KW-XC939[EE]f.pm6
25
6/23/03, 3:49 PM
ENGLISH
Selecting preset sound modes
To store a sound mode separately for each
playback source (EQ Link)
You can select a preset sound adjustment
suitable to the music genre.
Once you select a sound mode, it is stored in
memory. It will be recalled every time you select
the same source. A sound mode can be stored
for each of the following sources—FM1, FM2,
FM3, AM, CD, tape, external components and
the EX (extra) button (see page 10).
• See also “Changing general settings (PSM)” on
page 30.
1
Select “EQ.”
EQ
S.BASS
Canceled
L.V.METER
1 Press and hold SEL (select) for more than
2
Select the sound mode.
The sound mode
changes as follows:
2 seconds so that one of the PSM items
appears on the display.
2 Press ¢
or 4
to select “EQ LINK
(Equalization Link).”
3 Press + to select “LINK ON.”
4 Press SEL (select) to finish the setting.
To cancel EQ Link, repeat the same procedure
and select “LINK OFF” by pressing – in step 3.
FLAT
POP
R & B*
Hard Rock
JAZZ
Country
USER**
DanceMusic
Raggae
Classic
(back to the beginning)
* Rhythm and Blues
** If you want to adjust and store your original
sound mode (USER), see “Storing your own
sound adjustments” on page 27.
• When “EQ LINK” is set to “LINK ON”
The selected sound mode and Super Bass
level can be stored in memory for the current
source.
Each time you select the same source, the
same sound mode is also recalled, and shown
after the source name.
• When “EQ LINK” is set to “LINK OFF”
The selected sound mode effect applies to all
the sources selected.
EQ level changes as you
select the sound mode.
Ex.: When you select “R & B”
To cancel the sound mode, select “FLAT” in
step 2.
Note:
You can adjust the sound mode to your preference,
and store it in memory.
26
EN25-27KW-XC939[EE]f.pm6
26
6/23/03, 3:49 PM
3
• Refer to the table
below for adjusting the
selected sound
element.
You can adjust the sound modes to your
preference and store your own adjustments in
memory (USER sound mode).
• There is a time limit in doing the following
procedure. If the setting is cancelled before you
finish, start from step 1 again.
1
Indication
Select “EQ.”
EQ
S.BASS
Canceled
Adjust the selected sound element.
L.V.METER
ENGLISH
Storing your own sound
adjustments
Range
LOW FREQ.
50 Hz, 80 Hz, 120 Hz
LOW LEVEL
–06 (min.) — +06 (max.)
MID FREQ.
700 Hz, 1 kHz, 2 kHz
MID LEVEL
–06 (min.) — +06 (max.)
HIGH FREQ.
8 kHz, 12 kHz
HIGH LEVEL
–06 (min.) — +06 (max.)
EQ level adjusted flashes
2
Select sound elements to adjust.
Each time you press the
button, the sound elements to
adjust change as follows:
Ex.: When you adjust “LOW FREQ”
4
LOW FREQ.*
LOW LEVEL
MID FREQ.*
MID LEVEL
HIGH FREQ.*
HIGH LEVEL
(back to the beginning)
5
Repeat steps 2 and 3 to adjust the
other sound elements.
Store the adjustments.
Your setting is stored in USER
sound mode.
FREQ. (LOW, MID, HIGH):
Select the center frequency to
adjust.
LEVEL (LOW, MID, HIGH):
Adjust the enhancement level.
* By pressing ¢
or 4
directly move as follows:
LOW FREQ.
, you can
MID FREQ.
HIGH FREQ.
27
EN25-27KW-XC939[EE]f.pm6
27
6/23/03, 3:49 PM
ENGLISH
LEVEL METER SETTING
Selecting level meter patterns
3.
SideWinder
Level meter is displayed horizontally.
You can select one from 7 different level meter
patterns or a demonstration of all the patterns.
1
Select “L.V. METER.”
4.
EQ
Canceled
Full Size
Level meter is displayed on the main display.
S.BASS
L.V.METER
5.
Spin
Spin in the right meter.
2
Press +/– to select the level meter
pattern.
Each time you press the
button, the level meter
changes as follows:
6.
Double
Waves are displayed on both level meters.
ALL DEMO
Full Size
Dolphin
Standard
SideWinder
Spin
Double
HIGH WAY
OFF
(back to the beginning)
7.
HIGH WAY
As if you were driving along a highway.
Level meter patterns
1.
ALL DEMO (initial setting)
Demonstrates all the level meter patterns,
each for 20 seconds.
2.
8.
Standard
Dolphin
A dolphin is swimming in the main display.
Standard level meter.
9.
OFF
No level meter is displayed.
28
EN28-28KW-XC939[EE]f.pm6
28
6/23/03, 3:49 PM
About the demonstration
mode (DEMO MODE)
Setting the clock
When shipped from the factory, “DEMO” is set to
“DEMO ON” in this unit. The demonstration will
start automatically if no sound comes in for
3 minutes. (See page 31.)
1
After installation, set the built-in clock correctly.
Press and hold SEL (select) for more
than 2 seconds so that one of the
PSM items appears on the display.
(See page 31.)
ENGLISH
OTHER MAIN FUNCTIONS
To deactivate the demonstration mode
1
2
Press and hold SEL (select) for more
than 2 seconds so that one of the
PSM items appears on the display.
(See page 31.)
Press ¢
“DEMO.”
or 4
2
If “CLOCK HOUR” does not appear,
or 4
repeatedly
press ¢
until it appears.
to select
3
3
Press – to select “DEMO OFF.”
4
Finish the setting.
4
Adjust the hour.
Press ¢
or 4
until
“CLOCK MIN” (minute) appears on
the display.
CONTINUED TO THE NEXT PAGE
29
EN29-33KW-XC939[EE]f.pm6
29
6/23/03, 3:49 PM
ENGLISH
5
Changing general settings
(PSM)
Adjust the minute.
You can change the settings for this unit by using
the PSM (Preferred Setting Mode) control.
6
Basic Procedure
Finish the setting.
• There is a time limit in doing the following
procedure. If the setting is canceled before you
finish, start from step 1 again.
1
To check the current clock time while the unit
is turned off, press DISP (display).
The power turns on, the clock time is shown for
5 seconds, then the power turns off.
2
3
4
5
Press and hold SEL (select) for more
than 2 seconds so that one of the
PSM items appears on the display.
(See page 31.)
Select a PSM item you want to
adjust. (See page 31.)
Adjust the PSM item selected.
Repeat steps 2 and 3 to adjust the
other PSM items if necessary.
Finish the setting.
30
EN29-33KW-XC939[EE]f.pm6
30
6/23/03, 3:49 PM
1
2
ENGLISH
Preferred Setting Mode (PSM) items
3
Factory-preset See
page
settings
Hold.
Select.
Set.
–
+
DEMO OFF
DEMO ON
CLOCK HOUR Hour adjustment
Back
Advance
CLOCK MIN
Minute adjustment
Back
Advance
CLOCK DISP
Clock display
CLOCK OFF
EQ LINK
Sound control memory
linkage
LINK ON
DIMMER
Dimmer mode
CONTRAST
Display contrast
CONTRAST 1 – CONTRAST 10 CONTRAST 5
32
SCROLL
Scroll mode
SCRL ONCE
SCRL AUTO
SCRL ONCE
SCRL OFF
32
EXT INPUT
External input selection
CD CHANGER
CD CHANGER
32
AUX ADJ
Auxiliary input level
adjustment
A.ADJ 00
32
TAG DISP
Tag display
TAG ON
32
DEMO
Demonstration mode
DEMO ON
31
1:00
29
CLOCK ON
CLOCK OFF
31
LINK OFF
LINK OFF
26
DIM OFF
DIM ON
DIM AUTO
DIM AUTO
32
A.ADJ 00 – A.ADJ 05
TAG OFF
Turning the demo mode on or off
—DEMO MODE
You can turn the demo mode on or off.
When shipped from the factory, “DEMO ON” is
selected.
• DEMO OFF:
Turns the demo mode off.
• DEMO ON:
Turns the demo mode on. The
demonstration will start
automatically if no sound
comes in for 3 minutes.
Note:
If the unit has been reset (and the power is on), the
demonstration will start if no sound comes in for
about 15 seconds.
LINE INPUT
TAG ON
Setting the clock display—CLOCK DISP
You can set the clock to show on the display
when the unit is turned off.
When shipped from the factory, the clock is set
not to show on the display.
• CLOCK OFF:
Clock display is turned off.
• CLOCK ON:
Clock display is turned on.
Note:
If the power supply is not interrupted by turning off
the ignition key of your car, it is recommended to
select “CLOCK OFF” to save the car’s battery.
31
EN29-33KW-XC939[EE]f.pm6
31
6/23/03, 3:49 PM
ENGLISH
Selecting the dimmer mode—DIMMER
When you turn on the car headlights, the display
automatically dims (Auto Dimmer).
When shipped from the factory, Auto Dimmer
mode is activated.
• DIM OFF:
Cancels Auto Dimmer.
• DIM ON:
Always dims the display.
• DIM AUTO:
Activates Auto Dimmer.
Note:
Auto Dimmer equipped for this unit may not work
correctly on some vehicles, particularly on those
having a control dial for dimming.
In this case, set the dimmer mode to “DIM ON” or
“DIM OFF.”
Adjusting the display contrast level
—CONTRAST
You can adjust the display contrast level from 1
(dark) to 10 (bright).
When shipped from the factory, the display
contrast level is set at level 5.
Selecting the scroll mode—SCROLL
You can select the scroll mode for the disc
information.
When shipped from the factory, Auto Scroll mode
is set to “SCRL ONCE.”
• SCRL ONCE:
Scrolls only once.
• SCRL AUTO:
Repeats the scroll (5-second
intervals in between).
• SCRL OFF:
Cancels Auto Scroll.
Selecting the external component to use
—EXT INPUT
You can connect an external component to the
CD changer jack on the rear using the Line Input
Adapter KS-U57 (not supplied).
To use the external component as the playback
source through this unit, you need to select
which component—CD changer or external
component—to use.
When shipped from the factory, CD changer is
selected as the external component.
• CD CHANGER: To use the CD changer.
• LINE INPUT:
To use the external
component other than CD
changer.
Notes:
• If the current source is CD changer or external
component, this setting does not appear.
• For connecting the Line Input Adapter KS-U57 and
the external component, refer to the Installation/
Connection Manual (separate volume).
Adjusting the auxiliary input level
—AUX ADJ
Adjust the auxiliary input level properly when an
external component is connected to the auxiliary
input jack.
When shipped from the factory, the auxiliary
(AUX) input level is set at level 00.
If the input level of the connected component is
not high enough, increase the input level
properly. Without adjusting the line input level,
you may be surprised at the loud sound when
you change source from the external component
to another source.
Turning the tag display on or off
—TAG DISP
An MP3 file can contain file information called
“ID3 Tag” where its album name, performer, track
title, etc. are recorded.
There are two versions–ID3v1 (ID3 Tag version
1) and ID3v2 (ID3 Tag version 2). This unit is
compatible only with ID3v1.
When shipped from the factory, “TAG ON” is
selected.
• TAG ON: Turns on the ID3 tag display while
playing MP3 files.
• If an MP3 file does not have ID3
tags, directory and file name
appear.
Note:
If you change the setting from
“TAG OFF” to “TAG ON” while
playing an MP3 file, the tag display
will be activated when the next file
starts playing.
• TAG OFF: Turns off the ID3 tag display while
playing MP3 files. (Only the
directory name and file name can
be shown.)
32
EN29-33KW-XC939[EE]f.pm6
32
6/23/03, 3:49 PM
3
Each time you press the
button, the character set
changes as follows:
You can assign names to station frequencies,
CDs, and the external component connected to
the auxiliary (AUX) input jack.
After assigning a name, it will appear on the
display when you select the source.
Sources
Station frequencies*
Maximum number
of the characters
Up to 10 characters
(up to 32 station
frequencies including
both FM and AM)
CDs** and
CD changer**
Up to 32 characters
(up to 40 discs)
External component
(“AUX INPUT” only)
Up to 10 characters
4
When you select a
source, the power
automatically
comes on.
Each time you press the
button, the source
changes as described on
page 7.
2
Press and hold SEL (select) for more
than 2 seconds while pressing DISP
(display).
)
Small letters (
)
)
Select a character.
About the available
characters, see page 38.
5
You cannot assign a name to a station frequency
stored in the EX (extra) button.
** You cannot assign a name to a CD Text or an MP3
disc.
Select a source you want to assign a
name to.
Capital letters (
Numbers and symbols (
*
1
Select the character set you want
while “ ” is flashing.
ENGLISH
Assigning names to the
sources
6
7
Move the cursor to the next (or
previous) character position.
Repeat steps 3 to 5 until you finish
inputting the name.
Finish the procedure while the last
selected character is flashing.
To erase the input characters
To erase all the characters at a time, press and
hold DISP (display) for more than 1 second as
described in the procedure above.
Notes:
• When you try to assign a name to the 33rd station
frequency or 41st CD, “NAME FULL” appears on
the display. (In this case, delete unwanted names
before assignment.)
• When the CD changer is connected, you can assign
names to discs in the CD changer. These names can
also be shown on the display if you insert the discs
in this unit.
(at the same time)
33
EN29-33KW-XC939[EE]f.pm6
33
6/23/03, 3:49 PM
ENGLISH
EXTERNAL COMPONENT OPERATIONS
MD player, etc.
You can connect two external components to this
unit.
Connect one to the auxiliary (AUX) input jack on
the control panel, and the other to the CD
changer jack on the rear.
Preparations:
• For connecting the Line Input Adapter KS-U57 and
the external component, refer to the Installation/
Connection Manual (separate volume).
• Before operating the external component connected
to the CD changer jack, select the external input
correctly. (See “Selecting the external component to
use—EXT INPUT” on page 32.)
1
Select the external component.
AUX INPUT: Press TAPE/AUX repeatedly to
select the component
connected to the AUX jack on
the control panel.
2
3
Turn on the connected component
and start playing the source.
Adjust the volume.
If the input level of the external component
connected to the auxiliary (AUX) input jack
is not high enough, increase the input level
properly.
Without adjusting the input level, you may be
surprised at the loud sound when you change
the source from one external component to
another. (See “Adjusting the auxiliary input
level—AUX ADJ” on page 32.)
LINE INPUT: Press CD/CH repeatedly to
select the component
connected to the CD changer
jack.
• If “LINE INPUT” does not appear on the
display, see page 32 and select the
external input (“Selecting the external
component to use—EXT INPUT”).
34
EN34-34KW-XC939[EE]f.pm6
34
6/23/03, 3:50 PM
ENGLISH
CD CHANGER OPERATIONS
We recommend that you use one of the CH-X
series with your unit (except for JVC MP3
compatible CD changer.)
If you have another CD automatic changer,
consult your JVC IN-CAR ENTERTAINMENT
dealer for connections.
• For Example, if your CD automatic changer is one
of the KD-MK series, you need a cord (KS-U15K)
for connecting it to this unit.
Before operating your CD automatic changer:
• Refer also to the Instructions supplied with
your CD changer.
• If no discs are in the magazine of the CD
changer or the discs are inserted upside
down, “NO DISC” will appear on the display. If
this happens, remove the magazine and set
the discs correctly.
• If “RESET 1” – “RESET 8” appears on the
display, something is wrong with the
connection between this unit and the CD
changer. If this happens, check the
connection, connect the connecting cord(s)
firmly if necessary, then press the reset
button of the CD changer.
Note on One-Touch Operation:
When you press CD/CH, the power automatically
comes on. You do not have to press
/ ATT to
turn on the power.
Note:
If you play a CD with assigned name (see page 33),
the assigned name appears on the display, followed by
the track number and elapsed playing time.
To change the display information
While playing back a CD, you
can change the information
shown on the display.
Each time you press DISP
(display), the display changes to
show the following:
Current track no.
and Elapsed playing time
Assigned name*
Disc no. and
Current track no.
* If no name is assigned, “NO NAME” will
appear.
Playing CDs
Select the CD automatic changer (CD-CH).
Playback starts from the first
track of the first disc.
All tracks of all discs are played
back.
Track number
Elapsed playing time
35
EN35-37KW-XC939[EE]f.pm6
35
6/23/03, 3:50 PM
ENGLISH
To fast-forward or reverse the track
Press and hold ¢
while playing a CD, to fastforward the track.
To go to a particular disc directly
Press the number button corresponding to the
disc number to start its playback (while CD
changer is playing).
Press and hold 4
while playing a CD, to
reverse the track.
To go to the next or previous tracks
Press ¢
briefly while
playing a CD, to go ahead to
the beginning of the next
track.
Each time you press the
button consecutively, the
beginning of the next tracks
is located and played back.
Ex.: When disc number 3 is selected.
Disc number Track number
\
\
Press 4
briefly while
playing a CD, to go back to
the beginning of the current
track.
Each time you press the
button consecutively, the
beginning of the previous
tracks is located and played
back.
• To select a disc number from 1 – 6:
Press 1 (7) – 6 (12) briefly.
• To select a disc number from 7 – 12:
Press and hold 1 (7) – 6 (12) for more than
1 second.
Track number
Elapsed playing time
36
EN35-37KW-XC939[EE]f.pm6
36
6/23/03, 3:50 PM
To play back only intro (Intro scan)
1 Press MODE repeatedly until
“INTRO” appears.
To play back tracks repeatedly (Repeat
Play)
1 Press MODE repeatedly until
“REPEAT” appears.
REPEAT
RANDOM
Canceled
INTRO
INTRO
INTRO1 ON
Mode
Plays repeatedly
REPEAT1 ON Lights
The current track (or
specified track).
REPEAT2 ON Flashes
All tracks of the current
disc (or specified disc).
INTRO2 ON
INTRO OFF
REPEAT2 ON
REPEAT OFF
RPT
Indicator
Canceled
2 Press SEL (select).
Each time you press the
button, CD intro scan mode
changes as follows:
(Continuous play)
Mode
RANDOM
(Continuous play)
2 Press SEL (select).
Each time you press the
button, CD repeat play mode
changes as follows:
REPEAT1 ON
REPEAT
ENGLISH
Selecting CD playback modes
Indicator
Plays the
beginnings
(15 seconds)
INTRO1 ON Track number Of all tracks on all
flashes
inserted discs.
INTRO2 ON Disc number Of the first track on
flashes
each inserted disc.
INTRO OFF None
Canceled.
REPEAT OFF Goes off Canceled.
Track number
To play back tracks at random
(Random Play)
1 Press MODE repeatedly until
“RANDOM” appears.
REPEAT
RANDOM
Ex.: When “INTRO1 ON” is selected.
INTRO
Canceled
(Continuous play)
Disc number
2 Press SEL (select).
Each time you press the
button, CD random play mode
changes as follows:
RANDOM1 ON
RANDOM2 ON
RANDOM OFF
Mode
RND
Indicator
Plays at random
RANDOM1 ON Lights
All tracks of the
current disc, then the
tracks of the next
disc, and so on.
RANDOM2 ON Flashes
All tracks of all discs
inserted in the
magazine.
RANDOM OFF Goes off
Canceled.
EN35-37KW-XC939[EE]f.pm6
Ex.: When “INTRO2 ON” is selected.
37
37
6/23/03, 3:50 PM
ENGLISH
ADDITIONAL INFORMATION
To clean the heads
Available characters
• You can use the following characters to
assign names to station frequencies, CDs,
and external component. (See page 33.)
• You can display the information (album title,
performer name, song title, etc.) as ID3v1
tags when you playback an MP3 file with this
unit. (See pages 16 and 41.)
Capital letters
A
B
C
D
E
F
G
H
I
J
K
L
M
N
O
P
Q
R
S
T
U
V
W
X
Y
Z
space
Small letters
a
b
c
d
e
f
g
h
i
j
• Clean the heads after every 10 hours of use
using a wet-type head cleaning tape (available
at an audio store).
When the head becomes dirty, you may realize
the following symptoms:
– Sound quality is reduced.
– Sound level decreases.
– Sound drops out.
• Do not play dirty or dusty tapes.
• Do not touch the highly-polished head with any
metallic or magnetic tools.
k
l
m
n
o
To keep the tape clean
p
q
r
s
t
u
v
w
x
y
z
space
• Always store the tapes in
their storage cases after
use.
• Do not store tapes in the
following places:
– Subject to direct sunlight
– With high humidity
– At extremely hot temperatures
Numbers and symbols
0
1
2
3
4
5
6
7
8
9
!
”
#
$
%
&
+
’
(
)
,
–
.
*
/
:
;
<
=
>
?
@
_
`
space
Handling cassettes
The cassette deck built in this unit requires very
little attention, but you will be able to extend the
life of the cassette deck if you follow the
instructions in the column to the right.
CAUTIONS:
• Do not play the tapes with peeling labels;
otherwise, they can damage the unit.
• Tighten tapes to remove slack since loose tape
may become entangled with the mechanism.
• Do not leave a cassette in the cassette
compartment after use, as the tape may become
slack.
The function below is also provided to ensure the
longer life of the cassette deck.
Ignition key-off release
When you turn off the ignition key with a cassette
in the compartment, the unit automatically
releases the tape from its head.
38
EN38-43KW-XC939[EE]f.pm6
38
6/23/03, 3:51 PM
When playing a CD-R or CD-RW
This unit has been designed to reproduce CDs,
CD-Rs (Recordable), CD-RWs (Rewritable), and
CD Texts.
• This unit is also compatible with MP3 discs.
How to handle discs
Center holder
When removing a disc
from its case, press down
the center holder of the case
and lift the disc out, holding it
by the edges.
• Always hold the disc by the
edges. Do not touch its recording surface.
When storing a disc into its case, gently insert
the disc around the center holder (with the
printed surface facing up).
• Make sure to store discs in their cases after use.
To keep discs clean
A dirty disc may not play
correctly. If a disc does
becomes dirty, wipe it with a
soft cloth in a straight line from
center to edge.
To play new discs
New discs may have some
rough spots around the inner
and outer edges.
If such a disc is used, this unit
may reject the disc.
To remove these rough spots,
rub the edges with a pencil or ball-point pen, etc.
Moisture condensation
Moisture may condense on the lens inside the
CD player in the following cases:
• After starting the heater in the car.
• If it becomes very humid inside the car.
Should this occur, the CD player may
malfunction. In this case, eject the disc and leave
the unit turned on for a few hours until the
moisture evaporates.
Warped
disc
Sticker
Before playing back CD-Rs or CD-RWs, read
their instructions or cautions carefully.
• Use only “finalized” CD-Rs or CD-RWs.
• Some CD-Rs or CD-RWs may not play back on
this unit because of their disc characteristics,
and for the following reasons:
— Discs are dirty or scratched.
— Moisture condensation on the lens inside
the unit.
— The pickup lens inside the unit is dirty.
• CD-RWs may require a longer readout time
since the reflectance of CD-RWs is lower than
that of regular CDs.
• CD-Rs or CD-RWs are susceptible to high
temperatures or high humidity, so do not leave
them inside your car.
• Do not use following CD-Rs or CD-RWs:
— Discs with stickers, labels, or protective seal
stuck to the surface.
— Discs on which labels can be directly printed
by an ink jet printer.
Using these discs under high temperatures or
high humidity may cause malfunctions or
damage to discs. For example,
— Stickers or labels may shrink and warp a
disc.
— Stickers or labels may peel off so discs
cannot be ejected.
— Print on discs may get sticky.
Read instructions or cautions about labels and
printable discs carefully.
ENGLISH
Handling discs
CAUTIONS:
• Do not insert 8 cm discs (single CDs) into the
loading slot. (Such discs cannot be ejected.)
• Do not insert any disc of unusual shape—like a
heart or flower; otherwise, the unit will
malfunction.
• Do not expose discs to direct sunlight or any
heat source or place them in a place subject to
high temperature and humidity. Do not leave
them in a car.
• Do not use any solvent (for example,
conventional record cleaner, spray, thinner,
benzine, etc.) to clean discs.
Sticker
residue
Disc
Stick-on
label
39
EN38-43KW-XC939[EE]f.pm6
39
6/23/03, 3:51 PM
What appears to be trouble is not always serious. Check the following points before calling a service
center.
Symptoms
Disc Playback
FM/AM
General
ENGLISH
TROUBLESHOOTING
Causes
Remedies
• Sound is sometimes
interrupted.
Connections are not good.
Check the cords and
connections.
• Sound cannot be heard
from the speakers.
The volume control is turned
to the minimum level.
Adjust it to the optimum level.
Connections are incorrect.
Check the cords and
connections.
• This unit does not work at
all.
The built-in microcomputer
may have functioned
incorrectly due to noise, etc.
Press the reset button on the
front panel (see page 2.)
• SSM (Strong-station
Sequential Memory)
automatic preset does not
work.
Signals are too weak.
Store stations manually.
• Static noise while listening
to the radio.
The aerial is not connected
firmly.
Connect the aerial firmly.
• Disc cannot be played back. Disc is inserted upside down.
Insert the disc correctly.
• Disc sound is sometimes
interrupted.
You are driving on rough
roads.
Stop disc play while driving on
rough roads.
Disc is scratched.
Change the disc.
Connections are incorrect.
Check the cords and
connections.
No disc is in the loading slot
(or in the magazine.)
Insert a disc into the loading
slot.
Disc is inserted incorrectly.
Insert the disc correctly.
• Disc can neither be played
back nor ejected.
The CD player may be
functioning incorrectly.
Press and hold both the
/ ATT and CD 0 buttons at
the same time for several
seconds.
• “EJECT ERR” appears on
the display.
The disc was interrupted
ejection or insertion.
Press CD 0, or press both the
/ ATT and CD 0 buttons
together to clear the message.
• “NO DISC” appears on the
display.
• CD-R/CD-RW cannot be
CD-R/CD-RW is not finalized.
played back.
• Tracks on the CD-R/CD-RW
cannot be skipped.
• Insert a finalized CD-R/
CD-RW.
• Finalize the CD-R/CD-RW
with the component which you
used for recording.
40
EN38-43KW-XC939[EE]f.pm6
40
6/23/03, 3:51 PM
• Disc cannot be played back.
No MP3 files are recorded on
the disc.
Change the disc.
MP3 files do not have the
extension code—mp3 in their
file names.
Add the extension code
—mp3 to their file names.
MP3 files are not recorded in
the format compliant with ISO
9660 Level 1 or 2.
Change the disc.
(Record MP3 files using a
compliant application.)
• Files skip, or 00’00”
appears and playback
stops.
Files are encoded in Layer 1
or Layer 2 format.
Insert a disc that contains files
encoded in Layer 3 format.
• Noise is generated.
The file played back is not an
MP3 file (although it has the
extension code—mp3).
Skip to another file or change
the disc. (Do not add the
extension code—mp3 to nonMP3 files.)
• A longer readout time is
required (“FILE CHECK”
keeps flashing on the
display).
Readout time varies due to
the complexity of the
directory/file configuration.
Do not use too many
hierarchies and directories.
Also, do not record any other
types of audio tracks together
with MP3 files.
• Files cannot be played back
as you have intended them
to play.
Playback order is determined
when the files are recorded.
• Elapsed playing time is not
correct.
This sometimes occurs during
play. This is caused by how
the files are recorded on the
disc.
• “MP3” flashes on the
display.
There are no MP3 files in the
current directory.
Select another directory.
• “NO FILES” appears on the
display for a while, then the
disc ejects automatically.
There are no MP3 files in this
disc.
Insert a disc that contains MP3
files.
• Correct characters are not
displayed. (Tag Display, e.g.
album name)
This unit can only display
alphabet (capital: A–Z, small:
a–z) and numbers.
MP3 Playback
Causes
ENGLISH
Remedies
Symptoms
41
EN38-43KW-XC939[EE]f.pm6
41
6/23/03, 3:51 PM
Tape Playback
CD Changer
ENGLISH
Symptoms
Causes
• A cassette tape cannot be
inserted.
Remedies
You have tried to insert a
cassette in the wrong way.
Insert the cassette with the
exposed tape facing right.
• Cassette tapes become hot. This is not a malfunction.
• Tape sound is at very low
level and sound quality is
degraded.
The tape head is dirty.
Clean it with a head cleaning
tape.
• “NO MAGAZINE” appears
on the display.
No magazine is loaded in the
CD changer.
Insert the magazine.
• “RESET 8” appears on the
display.
This unit is not connected to a
CD changer correctly.
Connect this unit and the CD
changer correctly and press
the reset button of the CD
changer.
• “RESET 1” – “RESET 7”
appears on the display.
• The CD changer does not
work at all.
Press the reset button of the
CD changer.
The built-in microcomputer may
function incorrectly due to noise,
etc.
Press the reset button on the
front panel (see page 2.)
About mistracking:
Mistracking may result from driving on extremely rough roads. This does not damage the
unit and the CD, but will be annoying. We recommend that you stop CD play while
driving on such rough roads.
42
EN38-43KW-XC939[EE]f.pm6
42
6/23/03, 3:51 PM
AUDIO AMPLIFIER SECTION
CD PLAYER SECTION
Maximum Power Output:
Front:
45 W per channel
Rear:
45 W per channel
Continuous Power Output (RMS):
Front:
17 W per channel into 4 Ω,
40 Hz to 20 000 Hz at no more
than 0.8% total harmonic
distortion.
Rear:
17 W per channel into 4 Ω,
40 Hz to 20 000 Hz at no more
than 0.8% total harmonic
distortion.
Load Impedance: 4 Ω (4 to 8 Ω allowance)
Equalizer Control Range:
LOW:
±12 dB (50 Hz, 80 Hz, 120 Hz)
MID:
±12 dB (700 Hz, 1 kHz, 2 kHz)
HIGH: ±12 dB (8 kHz, 12 kHz)
Frequency Response: 40 Hz to 20 000 Hz
Signal-to-Noise Ratio: 70 dB
Auxiliary input jack: 3.5 mm dia. stereo mini jack
Line-Out Level/Impedance:
2.0 V/20 kΩ load (full scale)
Output Impedance: 1 kΩ
Type: Compact disc player
Signal Detection System: Non-contact optical
pickup (semiconductor laser)
Number of channels: 2 channels (stereo)
Frequency Response: 5 Hz to 20 000 Hz
Dynamic Range: 96 dB
Signal-to-Noise Ratio: 98 dB
Wow and Flutter: Less than measurable limit
MP3 decoding format: MPEG1/2 Audio Layer 3
Max. Bit Rate: 320 Kbps
TUNER SECTION
Frequency Range:
FM:
87.5 MHz to 108.0 MHz
AM:
531 kHz to 1 602 kHz
[FM Tuner]
Usable Sensitivity: 11.3 dBf (1.0 µV/75 Ω)
50 dB Quieting Sensitivity:
16.3 dBf (1.8 µV/75 Ω)
Alternate Channel Selectivity (400 kHz):
65 dB
Frequency Response: 40 Hz to 15 000 Hz
Stereo Separation: 35 dB
Capture Ratio: 1.5 dB
ENGLISH
SPECIFICATIONS
CASSETTE DECK SECTION
Wow and Flutter: 0.1 % (WRMS)
Fast-Wind Time: 100 sec. (C-60)
Frequency Response: 30 Hz to 16 000 Hz
(Normal tape)
Signal-to-Noise Ratio: (Normal tape)
Dolby B NR ON: 65 dB
Dolby B NR OFF: 56 dB
Stereo Separation: 40 dB
GENERAL
Power Requirement:
Operating Voltage: DC 14.4 V
(11 V to 16 V allowance)
Grounding System: Negative ground
Allowable Operating Temperature:
0°C to +40°C
Dimensions (W x H x D):
Installation Size:
178 mm x 100 mm x 150 mm
Front Panel Size:
170 mm x 96 mm x 20 mm
Mass: 2.2 kg (excluding accessories)
Design and specifications are subject to change
without notice.
[AM Tuner]
Sensitivity: 20 µV
Selectivity: 35 dB
43
EN38-43KW-XC939[EE]f.pm6
43
6/23/03, 3:51 PM
Having TROUBLE with operation?
Please reset your unit
Refer to page of How to reset your unit
Затруднения при эксплуатации?
Пожалуйста, перезагрузите Ваше
устройство
Для получения информации о перезагрузке Вашего
устройства обратитесь на соответствующую страницу
VICTOR COMPANY OF JAPAN, LIMITED
V
J
EN, RU
C
© 2003 VICTOR COMPANY OF JAPAN, LIMITED
Cover001AKW-XC939[EE]f.pm6
2
6/23/03, 3:47 PM
0603MNMMDWJEIN
LVT1099-003A
[EE]
V
J
C
0603MNMMDWJEIN
EN, RU
РУCCKИЙ
ENGLISH
Questions and Answers — Music File MP3
This sheet is provided for MP3 compatible CD changers and receivers.
Q1 What is MP3?
MP3, so-called “MPEG Audio Layer 3,” is one of digital compression standards for specifying the
audio part of moving-picture compression standard “MPEG.” MP3 can compress music data to
about one-tenth of the original size. Compared with conventional CDs which can only record up to
74 minutes worth of music data, if you write MP3 files to 650 MB CD-Rs/RWs, music data worth of
about 10 CDs can be stored on a disc (at a bit rate of 128 Kbps).
Q2 What type of MP3 files can be played back on this player?
MP3 files placed on CD media (CD-ROM, CD-R or CD-RW) can be played back.
When creating MP3 discs using your computer, CD-R/RW drive and writing software, you have to
observe the following precautions:
• When writing MP3 files to CD media, you are recommended to use Joliet, ISO 9660 Level 1, or
ISO 9660 Level 2 as your CD format. With any other file formats, folder/file names may not be
correctly displayed.
• Be sure to add a file extension [.MP3] to any MP3 files. This player cannot play back files with no
extension [.MP3] even if they are actually MP3 files. Furthermore, files created in non-MP3
format cannot properly be played back even if they have file extensions [.MP3] in their file names.
• This player is not compatible with the data encoded with Layer 1 and 2 formats.
Q3 Is there any limit on the number of folders and files?
This player can handle a maximum of 289* folders and files. If a disc includes more than the
maximum, this player cannot handle surplus folders and files. Folders with no MP3 files included
and files with no extension [.MP3] are disregarded.
• This player has such a feature that allows you to repeatedly play back the files in a desired folder
or randomly play back the files from a disc. So, when creating MP3 discs, if you make folders by
artist or album and insert the related MP3 files into them, you can realize such convenience in
use as you would experience with a CD changer.
* This number is for a CD receiver. For a CD changer, the maximum number is 512.
Q4 Can MP3 discs with many hierarchy levels be played back?
There is no limit on the number of the hierarchy levels. However, up to 8 hierarchy levels is
recommended for stable operations.
Q5 Can 80-minute discs (capacity: 700 MB) be utilized?
Yes, they can (but not for the discs of any longer time than 80 minutes).
Q6 Can CD-Rs/RWs including both music CD data (CD-DA) and MP3 data be
played back?
Only data of the first recognized type is played back.
Q7 Can CD-Rs/RWs with MP3 data added later (multi-session discs) be
played back?
Yes, they can.
• Be sure to perform “session close” on such discs; otherwise, an unclosed session cannot be
detected and cannot be played back.
Q8 Is this player compatible with “Emphasis”?
Yes, it is.
Q9 What sampling frequency range can be handled?
Вопросы и ответы – Музыкальный файл MP3
Данная брошюра поставляется с MP3-совместимыми проигрывателями компактдисков и принимающими устройствами.
B. 1
Что такое МР3?
МР3, так называемый “Звуковой слой 3 MPEG”, представляет собой один из стандартов
цифрового уплотнения, предназначенный для обозначения звуковой части стандарта
сжатия киноизображения “MPEG.” МР3 может уплотнять музыкальные данные до примерно
одной десятой первоначального размера. По сравнению с традиционными компактдисками, на которые можно записывать только до 74 минут музыкальных данных, при
записи файлов MP3 на компакт-диски однократной записи и перезаписываемые компактдиски на 650 мегабайт на одном диске можно записать музыкальные данные в объеме,
равном примерно 10 компакт-дискам (при скорости передачи битов 128 Кбит/с).
B. 2
Какой тип файлов МР3 можно воспроизводить на
данном проигрывателе?
Можно воспроизводить файлы МР3, записанные на различные компакт-диски (компактдиск постоянной памяти, компакт-диск однократной записи или перезаписываемый
компакт-диск). При создании дисков МР3 с помощью Вашего компьютера, дисковода
компакт-дисков однократной записи/ перезаписываемых компакт-дисков и программного
обеспечения для записи Вы должны соблюдать следующие меры предосторожности:
• При записи файлов МР3 на компакт-диск Вам рекомендуется использовать Joliet,
уровень 1 ISO 9660 или уровень 2 ISO 9660 в качестве формата Вашего компакт-диска. В
любых других форматах файлов названия папок/файлов могут быть показаны
неправильно.
• Не забудьте добавить расширение имени файла [.МР3] к любым файлам МР3. Данный
проигрыватель не может воспроизводить файлы без расширения имени [.MP3], даже если
они действительно являются файлами МР3. Более того, файлы, созданные не в формате
МР3, невозможно правильно воспроизводить, даже если они имеют расширение имени
файла [.MP3] в своих названиях файлов.
• Данный проигрыватель не совместим с данными, закодированными в форматах слоя 1 и 2.
B. 3
Имеется ли какое-либо ограничение по
количеству папок и файлов?
Данный проигрыватель может обработать максимум 289* папок и файлов. Если на диске
записано больше этого максимума, данный проигрыватель не может обработать излишнее
количество папок и файлов. Папок, в которые не включены файлы МР3, и файлы без
расширения имени файла [.MP3] игнорируются.
• Данный проигрыватель обладает такой функциональной возможностью, которая
позволяет Вам повторно воспроизводить файлы в желаемой папке или воспроизводить в
произвольном порядке файлы на диске. Таким образом, при создании дисков МР3, если
Вы делаете папка по артисту или альбому и вставляете туда относящиеся к этому файлы
МР3, Вы можете добиться такого же удобства при пользовании, которое Вы имеете, когда
пользуетесь проигрывателем-автоматом компакт-дисков.
* Это число относится к принимающему устройству компакт-дисков. Для проигрывателя
компакт-дисков максимальным числом является 512.
B. 4
Можно ли воспроизводить диски МР3 со многими
уровнями иерархии?
Не существует ограничения по количеству уровней иерархии. Однако, для стабильной
работы рекомендуется использовать до 8 уровней иерархии.
B. 5
A sampling frequency range of 16 kHz – 48 kHz can be handled.
Можно ли использовать 80-минутные диски
(емкость: 700 Мбайт)?
Да, можно (но не диски на более чем 80 минут).
B. 6
But depending on the type of the encoder used, playback may not take place correctly.
Можно ли воспроизводить компакт-диски
однократной записи и перезаписываемые
компакт-диски, включающие данные
музыкальных компакт-дисков (CD-DA) и данные
МР3?
Воспроизводятся только данные первого распознанного типа.
B. 7
Можно ли воспроизводить компакт-диски
однократной записи и перезаписываемые
компакт-диски, на которые данные МР3 были
добавлены позднее (многосеансовые диски)?
Да, можно.
• Нужно обязательно выполнять “сеанс закрыт” на таких дисках, иначе незакрытые
сеансы нельзя будет обнаружить и нельзя будет воспроизвести.
B. 8
Совместим ли данный проигрыватель с
“Emphasis”?
Да, совместим.
B. 9
Kакой диапазон частот дискретизации может
быть обработан?
Может быть обработан диапазон частот дискретизации 16 кГц – 48 кГц.
Но в зависимости от типа применяемого кодирующего устройства воспроизведение может
происходить неправильно.
MP3-Q&A[EE]_LVT1099-003A_1.pm6
1
5/8/03, 4:22 PM
Q10 Is there any bit-rate related constraint on MP3 file playback?
There is no particular constraint, but you are recommended to use a stereo with a bit rate of
128 Kbps or over in terms of sound quality. This player can also handle VBR (variable bit rate).
Q11 Is the player compatible with M3U playlist?
Q12 Is the player compatible with ID3 Tag?
It is compatible with ID3 Tag Version 1. But be careful as the player isn’t compatible with Version 2.
The one-byte letters, numbers and symbols listed below can be recognized (except for some
models).
• For more precise information on the available characters, see the Instructions supplied.
A
F
K
P
U
Z
E
J
O
T
Y
a
f
k
p
u
z
Small letters
b
c
d
g
h
i
l
m n
q
r
s
v w x
Space
e
j
o
t
y
передачи битов ограничение при
воспроизведении файлов МР3?
Какого-либо конкретного ограничения нет, но Вам рекомендуется использовать стерео со
скоростью передачи битов 128 Кбит/с или более в отношении качества звука. Данный
проигрыватель может также обрабатывать VBR (переменный поток данных).
No, it isn’t.
Capital letters
B C D
G H
I
L M N
Q R S
V W X
Space
B. 10 Есть ли какое-либо связанное со скоростью
Numbers and symbols
0
1
2
3
4
5
6
7
8
9
!
”
#
$ %
&
’
(
)
*
+
,
.
/
:
;
< = >
? @ _
` Space
Q13 MP3 folder/file names displayed are different from those given at the
time of MP3 disc creation (names displayed on computers)…?
With this player, folder/file names are displayed as follows:
• Folder/file names can be displayed by scrolling, if necessary.
• This player is compatible with Joliet, ISO 9660 Level 1, ISO 9660 Level 2, and Romeo folder/file
names. (Up to 128* character will be displayed for Romeo format.)
• This player can handle only one-byte characters. Any other characters cannot be correctly
displayed.
* When operating a CD changer, this maximum number decreases to 64 for a disc including more
than 290 folder and files in total.
Q14 MP3 files cannot be played back…?
Playback is not possible in the following cases:
• The “Packet Write” method is used to record on CD-Rs/RWs.
• The file extension is not [.MP3].
• The file encoded with Layer 1 or Layer 2 (even if extension is [.MP3]).
• The file data is not in MP3 data format.
• Playback may not be possible, depending on recording conditions (data missing, etc.) or media
conditions (stain, scratch, warp, etc.).
Q15 An MP3 disc requires a long readout time…?
When an MP3 disc is inserted, information inside the disc (number of folders and files, and
positions of data) is first read.
So, in the following cases, a fairly long time may be needed before playback starts:
• If the file structure is complicated,
• If the number of files is large, or
• If the number of sessions is large (in case of multi-session discs).
Q16 There occurs sound interruption or sound skipping…?
Sound interruption or sound skipping may occur, depending on recording conditions (missing data,
etc.) or media conditions (stain, scratch, warp, etc.).
Q17 Can WAV files be played back?
No, they can’t. WAV files cannot be handled.
Q18 Can such compression formats as WMA and ATRACK 3 be played back?
No, they can’t.
Q19 MP3 files are not played back in an intended order…?
The playback order of MP3 files may differ from your intended order since your writing software
may rearrange the order of folders and files when writing to CD-Rs/RWs.
Q20 Are there any functions restrained during MP3 playback?
• The search function works but search speed is not constant during search.
• When skip is tried at the last file in a folder, the next folder is selected.
Q21 Elapsed playing time is not displayed correctly…?
Files recorded in VBR (variable bit rate) have a discrepancy in elapsed time display, and do not
show the actual passage of time. Especially, after performing the search function, this difference
becomes noticeable.
B. 11 Совместим ли данный проигрыватель со списком
воспроизведения М3U?
Нет, не совместим.
B. 12 Совместим ли данный проигрыватель с тегом
ID3?
Он совместим с тегом ID3, вариант 1. Но необходимо соблюдать осторожность, поскольку
данный проигрыватель не совместим с вариантом 2. Однобайтные буквы, числа и символы,
перечисленные ниже, могут распознаваться (за исключением некоторых моделей).
• Более точную информацию относительно имеющихся знаков смотрите в прилагаемых
Инструкциях.
Заглавные буквы
A B C D E
F G H
I
J
K L M N O
P Q R S T
U V W X Y
Z Промежуток
Строчные буквы
a
b
c
d
e
f
g
h
i
j
k
l
m n
o
p
q
r
s
t
u
v w x
y
z Промежуток
Числа и символы
0
1
2
3
4
5
6
7
8
9
!
”
#
$ %
&
’
(
)
*
+
,
.
/
:
;
< = >
? @ _
` Промежуток
B. 13 Отличаются ли показываемые на экране дисплея
названия папок/файлов МР3 от тех, которые даны
во время создания диска МР3 (названия,
показываемые на компьютерах)…?
С данным проигрывателем названия папок/файлов на экране дисплея показываются
следующим образом:
• Названия папок/файлов могут показываться на экране дисплея путем прокрутки, если
требуется.
• Данный проигрыватель совместим с названиями папок/файлов Joliet, ISO 9660 уровня 1,
ISO 9660 уровня 2 и Romeo. (В формате Romeo на экране дисплея будет показано до
128* знаков.)
• Данный проигрыватель может обрабатывать только однобайтные знаки. Любые другие
знаки невозможно правильно изобразить на экране дисплея.
* При работе проигрывателя компакт-дисков это максимальное число снижается до
64 для диска, включающего в общей сложности более 290 папок и файлов.
B. 14 Файлы МР3 невозможно воспроизводить…?
Воспроизведение невозможно в следующих случаях:
• Для записи на компакт-дисках однократной записи и перезаписываемых компакт-дисках
используется метод “Packet Write” [“пакетная запись”].
• Расширение имени файла - не [.MP3].
• Файл закодирован со слоем 1 или слоем 2 (даже если расширение имени - [.MP3]).
• Данные файла записаны не в формате данных МР3.
• Воспроизведение невозможно, в зависимости от условий записи (отсутствуют данные и
т.п.) или состояния носителя (пятно, царапина, деформация и т.п.).
B. 15 Диск МР3 требует длительного времени
считывания?
Когда вставлен диск МР3, сначала считывается информация внутри такого диска
(количество папок и файлов, а также местоположение данных).
Таким образом, в следующих случаях может пройти довольно длительное время до того,
как начнется воспроизведение:
• Если структура файла является сложной,
• Если количество файлов большое, или
• Если имеется большое количество сеансов (в случае многосеансовых дисков).
B. 16 Имеют ли место случаи перерыва или пропуска
звука?
Перерывы звука или пропуски звука могут случаться, в зависимости от условий записи
(отсутствуют данные и т.п.) или состояния носителя (пятно, царапина, деформация и т.п.).
B. 17 Можно ли воспроизводить файлы WAV (звуковые
файлы)?
Нет, нельзя. Файлы WAV не могут быть обработаны.
B. 18 Могут ли воспроизводиться такие форматы
сжатия, как WMA и ATRACK 3?
Нет, не могут.
B. 19 Файлы МР3 не воспроизводятся в
запланированном порядке…?
Порядок воспроизведения файлов МР3 может отличаться от запланированного Вами
порядка, поскольку используемое Вами программное обеспечение записи может
переделать порядок папок и файлов при записи на компакт-дисках однократной записи и
перезаписываемых компакт-дисках.
B. 20 Ограничивается ли действие каких-либо функций
во время воспроизведения МР3?
• Функция поиска работает, но скорость поиска непостоянна во время поиска.
• При попытке перейти на последний файл в какой-либо папке выбирается следующая
папка.
B. 21 Истекшее время воспроизведение не
показывается правильно на экране дисплея…?
Файлы, записанные в VBR (переменный поток данных), имеют расхождение в показе на
экране дисплея истекшего времени и не показывают фактически прошедшее время. Эта
разница становится особенно заметной после выполнения функции поиска.
MP3-Q&A[EE]_LVT1099-003A_1.pm6
2
5/8/03, 4:22 PM
KW-XC939
Installation/Connection Manual
Руководство по установке/подключению
LVT1099-002A
V
J
[EE]
C
0603MNMMDWJEIN
EN, RU
РУССКИЙ
ENGLISH
• This unit is designed to operate on 12 V DC, NEGATIVE ground electrical systems.
• Это устройство разработано для эксплуатации на 12 В постоянного напряжения с
минусом на массе.
INSTALLATION (IN-DASH MOUNTING)
УСТАНОВКА (УСТАНОВКА В ПРИБОРНУЮ ПАНЕЛЬ)
The following illustration shows a typical installation. However, you should make adjustments
corresponding to your specific car. In this case consult the manual included with the installation kit
(option).
In some case, depending of the type and the model of your car, it is not possible to install the unit
into the center console.
If you have any questions or require information regarding installation kits, consult your JVC
IN-CAR ENTERTAINMENT dealer or a company supplying kits.
На следующей иллюстрации показана типовая установка. Однако возможны
дополнительные регулировки в соответствии с определенным автомобилем. В этом случае
обратитесь к руководству, включенному в монтажный комплект (поставляется отдельно).
В некоторых случаях, в зависимости от типа и модели автомобиля, устройство можно
установить на центральной панели.
При появлении вопросов или при необходимости получения информации относительно
монтажных комплектов обратитесь к поставщику автомобильных аудиосистем компании
JVC IN-CAR ENTERTAINMENT или в компанию, поставляющую монтажные комплекты.
Before installing the unit
Перед установкой устройства
• To prevent short circuits, it is recommended to disconnect the battery’s negative terminal and
make all electrical connections before installing the unit.
• For reason of security, do not install the unit in a place where it may disturb your driving or where
there is not enough ventilation space around the unit.
• When the installation position has been determined, confirm that the cords are sufficiently long.
• When mounting the unit, be sure to use the screws provided, as instructed. If other screws are
used, there is a possibility that parts could become loose or damaged.
• If you are not sure how to install this unit correctly, consult a JVC IN-CAR ENTERTAINMENT
dealer or have it installed by a qualified technician.
• When tightening screws or bolts be careful not to pinch any connection cord.
• Для предотвращения коротких замыканий рекомендуется отключить отрицательный
терминал аккумуляторной батареи и выполнить все электрические соединения перед
установкой устройства.
• В целях безопасности не устанавливайте данное устройство в местах, где оно может
помешать вождению или в местах с недостаточной вентиляцией.
• После определения места установки проверьте, достаточна ли длина кабелей.
• При установке устройства используйте только прилагаемые болты в соответствии с
инструкцией. В случае использования других болтов существует вероятность, что детали
могут быть потеряны или повреждены.
• Если нет уверенности в том, как правильно установить устройство, обратитесь за
консультацией к поставщику автомобильных аудиосистем компании JVC IN-CAR
ENTERTAINMENT или к квалифицированному техническому специалисту.
• Аккуратно затягивайте болты, чтобы не пережать соединительные кабели.
Caution:
To install the mounting brackets to the unit, use only the supplied screws (M5 x 6 mm).
If you use any screw longer than 6 mm, the unit can be damaged.
Внимание:
Для прикрепления крепежных скоб к устройству используйте только прилагаемые болты
(M5 x 6 мм). Использование любых болтов длиной более 6 мм может привести к
повреждению устройства.
After installing the unit
Check if all the brake lamps, lights, flasher, wiper, etc. work correctly.
После установки устройства
Убедитесь, что стоп-сигналы, фары, поворотники, дворники и т.п. устройства работают
корректно.
Parts list for installation and connection
Список деталей для установки и подключения
The following parts are provided with this unit.
After checking them, please set them correctly.
Следующие детали поставлены в комплекте с устройством.
После проверки комплектации, пожалуйста, установите их правильно.
Flat countersunk screws (M5 x 6 mm)
Болты с плоской потайной головкой
(M5 x 6 мм)
CR2025
Power cord
Кабель питания
Plate for use with a Nissan car
Пластина для автомобилей
марки Nissan
Batteries
Батарейка
Remote controller
дистанционного управления
Binding screws (M5 x 6 mm)
Зажимные болты (M5 x 6 мм)
TROUBLESHOOTING
BЫЯВЛЕНИЕ НЕИСПРАВНОСТЕЙ
• The fuse blows.
* Are the red and black leads connected correctly?
• Сработал предохранитель.
* Правильно ли подключены черный и красный провода?
• Power cannot be turned on.
* Is the yellow lead connected?
• Питание не включается.
* Подключен ли желтый провод?
• No sound from the speakers.
* Is the speaker output lead short-circuited?
• Звук не выводится через громкоговорители.
* Нет ли короткого замыкания на кабеле выхода громкоговорителей?
• Sound is distorted.
* Is the speaker output lead grounded?
* Are the “–” terminals of L and R speakers grounded in common?
• Звук искажен.
* Заземлен ли провод выхода громкоговорителей?
* Заземлены ли разъемы “–” правого (R) и левого (L) громкоговорителей?
• Unit becomes hot.
* Is the speaker output lead grounded?
* Are the “–” terminals of L and R speakers grounded in common?
• Устройство нагревается.
* Заземлен ли провод выхода громкоговорителей?
* Заземлены ли разъемы “–” правого (R) и левого (L) громкоговорителей?
1
Install_KW-XC939[EE]002A_4.p6
1
6/10/03, 9:31 AM
1
Remove the audio system originally installed.
Note: Be sure to keep all the screws and parts removed from your car. They are to be used in
the future.
1
Извлеките первоначально установленную аудиосистему.
Примечание: Убедитесь, что все болты и детали системы извлечены из автомобиля.
Они понадобятся в дальнейшем.
2
3
4
Install the mounting brackets, removed from the car, to this unit.
2
3
4
Прикрепите извлеченные из автомобиля крепежные скобы к данному устройству.
Connect the wires (see the diagrams on the reverse side).
Fix this unit to the car using the screws removed in step 1.
Подключите провода (см. схемы на обратной стороне).
Закрепите данное устройство в машине с помощью извлеченных в действии 1 болтов.
На следующем рисунке показана установка устройства в автомобиле марки
Toyota.
За более подробной информацией обратитесь к поставщику
автомобильных аудиосистем компании JVC IN-CAR ENTERTAINMENT.
The following example shown is for installation in a Toyota.
For more details, consult your JVC IN-CAR ENTERTAINMENT dealer.
Screws supplied with this unit
Болты, поставляемые с данным
устройством
Securely connect the ground wire to the metal body
of the car using the screw originally fixed to the
metal body of the car.
Плотно прикрепите заземляющий провод к
металлическим частям автомобиля с помощью
уже имеющихся там болтов.
Mounting bracket removed from
the car
Извлеченные из автомобиля
крепежные скобы
Screws supplied with this unit:
Select the proper screw type, fitting to your car.
Болты, поставляемые с данным
устройством:
Подберите подходящий для автомобиля тип
болта.
Binding screw
(M5 x 6 mm)
Зажимной болт
(M5 x 6 мм)
Mounting bracket removed
from the car
Извлеченные из автомобиля
крепежные скобы
Flat countersunk screw
(M5 x 6 mm)
Болт с плоской
потайной головкой
(M5 x 6 мм)
Screw removed from the car in step 1
Болты, извлеченные из
автомобиля в действии 1
Screws supplied with this unit
Болты, поставляемые с
данным устройством
Install the unit at an angle of less than 30°.
Установите устройство под углом менее 30°.
Less than 30˚
Менее 30°
If there is an interfering tab on the mounting bracket, bent it flat.
Если на крепежных скобах есть мешающие установке уголковые
фиксаторы, разогните их.
Fix the supplied plate as illustrated.
Закрепите прилагаемую пластину, как показано на рисунке.
When installing the unit in a Nissan car.
Установка устройства в автомобиле марки Nissan.
Plate for use with a Nissan car
Пластина для автомобилей
марки Nissan
ELECTRICAL CONNECTIONS
ЭЛЕКТРИЧЕСКИЕ ПОДКЛЮЧЕНИЯ
To prevent short circuits, we recommend that you disconnect the battery’s negative terminal and
make all electrical connections before installing the unit. If you are not sure how to install this unit
correctly, have it installed by a qualified technician.
Для предотвращения коротких замыканий мы рекомендуем Вам отсоединить
отрицательный разъем аккумулятора и осуществить все подключения перед установкой
устройства. Если Вы не знаете точно, как следует устанавливать это устройство,
обратитесь к квалифицированному специалисту.
Note:
This unit is designed to operate on 12 V DC, NEGATIVE ground electrical systems. If your
vehicle does not have this system, a voltage inverter is required, which can be purchased at JVC
IN-CAR ENTERTAINMENT dealers.
• Replace the fuse with one of the specified rating. If the fuse blows frequently, consult your JVC
IN-CAR ENTERTAINMENT dealer.
• If noise is a problem...
This unit incorporates a noise filter in the power circuit. However, with some vehicles, clicking or
other unwanted noise may occur. If this happens, connect the unit’s rear ground terminal (see
connection diagram) to the car’s chassis using shorter and thicker cords, such as copper
braiding or gauge wire. If noise still persists, consult your JVC IN-CAR ENTERTAINMENT
dealer.
• Maximum input of the speakers should be more than 45 W at the rear and 45 W at the front, with
an impedance of 4 Ω to 8 Ω.
• Be sure to ground this unit to the car’s chassis.
• The heat sink becomes very hot after use. Be careful not to touch it when removing this unit.
Примечание:
Это устройство разработано для эксплуатации на 12 В постоянного напряжения с
минусом на массе. Если Ваш автомобиль не имеет этой системы, требуется инвертор
напряжения, который может быть приобретен у дилера JVC IN-CAR ENTERTAINMENT.
• Заменяйте предохранитель другим предохранителем указанного класса. Если
предохранитель сгорает слишком часто, обратитесь к дилеру JVC IN-CAR
ENTERTAINMENT.
• При появлении сильных помех...
Это устройство оснащено фильтром помех в цепи питания. Однако в некоторых случаях
возможно появление щелчков и других нежелательных помех. В этом случае подключите
задний разъем заземления этого устройства (см. схему подключения ниже) к шасси
автомобиля при помощи более коротких и толстых проводов. Если помехи не исчезают,
обратитесь к дилеру JVC IN-CAR ENTERTAINMENT.
• Максимальная входная мощность громкоговорителей должна быть больше 45 Вт сзади и
45 Вт впереди при полном сопротивлении от 4 Ω до 8 Ω.
• Нe забудьте заземлить устройство на шасси автомобиля.
• Радиатор во время использования сильно нагревается. Старайтесь его не трогать во
время удаления устройства.
Heat sink
Радиатор
2
Install_KW-XC939[EE]002A_4.p6
2
6/10/03, 9:31 AM
РУССКИЙ
ENGLISH
If your car is equipped with the ISO connector
Если Ваш автомобиль оборудован разъемами ISO
You may need to modify the wiring of the supplied power cord as illustrated.
• Contact your authorized car dealer before installing this unit.
Вам может потребоваться изменение соединений полученного в комплекте кабеля питания, как показано на
иллюстрации.
• Перед установкой устройства обратитесь к Вашему официальному дилеру автомобиля.
• Connect the ISO connectors as illustrated.
• Подключите разъемы ISO, как показано на иллюстрации.
A
B
C
D
E
F
G
H
For some VW/Audi or Opel (Vauxhall) automobile
Для некоторых автомобилей VW/Audi или Opel (Vauxhall)
From the car body
На корпусе автомобиля Original wiring
Исходное
соединение
Yellow/Желтый
ISO connector
Разъем ISO
Yellow/Желтый
Yellow/Желтый
Yellow/Желтый
I
J
K
L
M
N
O
P
Red/
Красный
Red/
Красный Red/Красный
Modified wiring 1
Модифицированное
соединение 1
ISO connector of the supplied power cord
Разъем ISO, полученный в комплекте
кабеля питания
Red/
Красный
View from the lead side
Вид со стороны контактов
Red/Красный
Yellow/Желтый
Modified wiring 2
Модифицированное
соединение 2
Red/
Красный
Red/
Красный
Use modified wiring 2 if the unit does not
turn on.
Если устройство не включается,
модифи-цируйте кабель по схеме 2.
Yellow/Желтый
Red/Красный
Red/
Красный
Connections without using the ISO connectors / Подключение без использования разъемов ISO
Перед началом подключений: Тщательно проверьте проводку в автомобиле.
Before connecting: Check the wiring in the vehicle carefully. Incorrect connection may cause
Неправильное подключение может привести к серьезному повреждению устройства.
serious damage to this unit.
The leads of the power cord and those of the connector from the car body may be different in color. Жилы силового кабеля и жилы соединителя от кузова автомобиля могут быть разного цвета.
1 Отрежьте разъем ISO.
1 Cut the ISO connector.
2 Connect the colored leads of the power cord to the car battery, speakers and power aerial (if 2 Подключите цветные провода кабеля питания к аккумулятору, громкоговорителям и
автономной антенне (если есть) в следующем порядке:
any) in the following sequence.
1 Черный: земля
1 Black: ground
2 Желтый: к аккумулятору (постоянный 12 В)
2 Yellow: to car battery (constant 12 V)
3 Красный: к вспомогательному разъему
3 Red: to an accessory terminal
4 Синий с белой полосой (удаленный выход): к удаленному проводу другого
4 Blue with white stripe (Remote out): to remote lead of other equipment or power aerial if
оборудования или антенны (макс. 200 мА).
any (200 mA max.)
5 Оранжевый с белой полосой: к подсветке или ламповому терминалу
5 Orange with white stripe: to illumination or small lamp terminal
6 Другие: к громкоговорителям
6 Others: to speakers
3 Connect the aerial cord.
3 Подключите кабель антенны.
4 В последнюю очередь подключите электропроводку к устройству.
4 Finally connect the wiring harness to the unit.
1
• When connecting a CD changer, we recommend to use one of the CH-X series CD changers
(except for JVC MP3 compatible CD changer.)
If your CD changer is one of the KD-MK series, you need an optional cord (KS-U15K).
• You can also connect an external component such as a portable MD player by connecting the Line
Input Adapter KS-U57 (not supplied). (See diagram .)
• При подключении устройства автоматической смены компакт-дисков рекомендуется
использовать одно из устройств серии CH-X (кроме устройства автоматической смены
компакт-дисков компании JVC, совместимого с MP3). Если устройство автоматической
смены компакт-дисков относится к серии KD-MK, необходим дополнительный кабель
(KS-U15K).
• Можно также подключить внешнее устройство, например, портативный MD-проигрыватель,
используя коммуникационный адаптер KS-U57 (не входит в комплект поставки). (См. схему
.)
JVC CD changer or another external
component
Устройство автоматической смены
компакт-дисков JVC или другое
внешнее устройство
Cut the ISO connector
Отрежьте разъем ISO
Line out (see diagram
Линейный выход (см.
схему )
)
F-OUT R-OUT
L
L
R
R
Rear ground terminal
Задний разъем заземления
3
2
15 A fuse
Предохранитель 15A
To the car aerial
К автомобильной антенне
*
JVC CD changer jack
Разъем устройства
автоматической смены
компакт-дисков компании JVC
4
P
1
L
Red
Красный
*1 : Before checking the operation of this unit prior
to installation, this lead must be connected,
otherwise power cannot be turned on.
*1 : Перед проверкой работы устройства
подключите этот провод, иначе питание
не включится.
3
White
Белый
White with black
stripe
Белый с черной
полосой
M
4
To remote lead of other equipment or power aerial if any
К удаленному проводу другого оборудования или антенны
N
(ILLUMINATION)
Gray with black
stripe
Серый с черной
полосой
Left speaker (front)
Левый громкоговоритель
(передний)
D
C
5
H
Gray
Серый
Green with black
stripe
Зеленый с
черной полосой
Right speaker (front)
Правый громкоговоритель
(передний)
To illumination or small lamp terminal
К питанию антенны, если есть
G
B
Green
Зеленый
3
Purple with black
stripe
Пурпурный с черной
полосой
Left speaker (rear)
Левый громкоговоритель
(задний)
3
Install_KW-XC939[EE]002A_4.p6
Fuse block
Блок
предохранителя
To an accessory terminal in the fuse block
К вспомогательному разъему в блоке предохранителя
Orange with white stripe
Оранжевый с белой полосой
6
E
*
To a live terminal in the fuse block connecting to the car
battery (bypassing the ignition switch)
К разъему фазы в блоке предохранителя (минуя блок
зажигания)
2
O
)
To metallic body or chassis of the car
К металлическому корпусу или шасси автомобиля
Blue with white stripe
Синий с белой полосой
F
Ignition switch
Переключатель
зажигания
*
Black
Черный
Yellow*1
Желтый*1
To other equipment (see diagram )
К другому оборудованию (см. схему
Not included with this unit.
Не входит в комплект.
6/10/03, 9:31 AM
A
Purple
Пурпурный
Right speaker (rear)
Правый громкоговоритель
(задний)
PRECAUTIONS on power supply and speaker connections:
ПРЕДОСТЕРЕЖЕНИЯ по питанию и подключению громкоговорителей:
• DO NOT connect the speaker leads of the power cord to the car battery; otherwise, the
unit will be seriously damaged.
• Connect the black lead (ground), yellow lead (to car battery, constant 12 V), and red lead (to an
accessory terminal) correctly.
• BEFORE connecting the speaker leads of the power cord to the speakers, check the speaker
wiring in your car.
– If the speaker wiring in your car is as illustrated in Fig. 1 and Fig. 2 below, DO NOT
connect the unit using that original speaker wiring. If you do, the unit will be seriously
damaged.
Redo the speaker wiring so that you can connect the unit to the speakers as illustrated in Fig. 3.
– If the speaker wiring in your car is as illustrated in Fig. 3, you can connect the unit using
the original speaker wiring in your car.
– If you are not sure of the speaker wiring of your car, consult your car dealer.
• НЕ подключайте провода громкоговорителей к аккумулятору автомобиля, иначе
устройство будет повреждено.
• Правильно подключите черный провод (земля), желтый провод (в аккумулятор,
постоянный ток 12 В) и красный провод (в вспомогательный разъем).
• ПЕРЕД подключением проводов громкоговорителей к кабелю питания
громкоговорителя проверьте схему соединений громкоговорителей в Вашем
автомобиле.
– Если проводка громкоговорителей в Вашем автомобиле такая, как показано на
приводимых ниже Fig. 1 и Fig. 2, НЕ подключайте устройство с помощью
первоначальной проводки громкоговорителей. Если Вы это сделаете, устройство
будет серьезно повреждено.
Переделайте проводку громкоговорителей так, чтобы Вы могли подключить
устройство к громкоговорителям, как это показано на рис. 3.
– Если проводка громкоговорителей в Вашем автомобиле такая, как показано на
Fig. 3, Вы можете подключить устройство с помощью первоначальной проводки
громкоговорителей в Вашем автомобиле.
– Если Вы не знаете соединение громкоговорителей в Вашем автомобиле, обратитесь к
Вашему автомобильному дилеру.
+
L -
+
+
L -
-
+
R -
+
+
+
R -
-
Fig. 1
+
L -
-
+
-
+
R -
+
-
Fig. 2
+
-
Fig. 3
Connecting the leads / Подключение контактов
Twist the core wires when connecting.
Закрутите концы проводов при соединении.
CAUTION / ПРЕДОСТЕРЕЖЕНИЕ:
• To prevent short-circuit, cover the terminals of the UNUSED leads with insulating tape.
• Для предотвращения короткого замыкания заклейте НЕИСПОЛЬЗУЕМЫЕ концы
изолирующей лентой.
Solder the core wires to connect them securely.
Спаяйте провода для надежного соединения.
Connections Adding Other Equipment / Подключение других устройств
Amplifier / Усилитель
Вы можете подключить усилитель и другое оборудование для модернизации
стереосистемы в Вашем автомобиле.
• Подсоедините провод внешнего устройства (синий с белой полосой) к проводу
внешнего устройства другого оборудования так, чтобы им можно было управлять с
этого устройства.
• Только для усилителя:
– Подключите выходные клеммы данного устройства к входным клеммам усилителя.
– Отсоедините громкоговорители от данного устройства, подключите их к
усилителю. Оставьте провода громкоговорителей данного устройства
неиспользованными.
You can connect an amplifier and other equipment to upgrade your car stereo system.
• Connect the remote lead (blue with white stripe) to the remote lead of the other equipment so
that it can be controlled through this unit.
• For amplifier only:
– Connect this unit’s line-out terminals to the amplifier’s line-in terminals.
– Disconnect the speakers from this unit, connect them to the amplifier. Leave the
speaker leads of this unit unused.
Rear speakers
Задние
громкоговорители
Signal cord (not supplied with this unit)
Кабель сигнала (не входит в комплект)
L
INPUT
L
R
R
JVC Amplifier
JVC Усилитель
Remote lead
Провод внешнего устройства
*2
F-OUT
L
R
R-OUT
L
R
R
*
*
INPUT
L
R
R
JVC Amplifier
JVC Усилитель
To power aerial if any
К питанию антенны, если есть
Blue with white stripe
Синий с белой полосой
L
KW-XC939
L
Y-connector (not supplied with this unit)
Разъем Y (не входит в комплект)
A
B
C
D
E
F
G
H
*
*
* Cut the rear speaker leads of the car’s ISO connector and connect them to the amplifier.
* Отрежьте провода задних громкоговорителей разъема ISO и подсоедините их к
усилителю.
Front speakers
Передние
громкоговорители
Rear speakers
Задние
громкоговорители
*2
You can connect another power amplifier for front
speakers.
Вы можете подключить еще один усилитель мощности
для передних динамиков.
Front speakers
Передние
громкоговорители
*2 Firmly attach the ground wire to the metallic body or to the
chassis of the car—to the place not coated with paint (if coated
with paint, remove the paint before attaching the wire). Failure
to do so may cause damage to the unit.
*2 Плотно прикрепите заземляющий провод к
металлическому кузову или шасси автомобиля—в месте,
не покрытом краской (если оно покрыто краской, удалите
краску перед тем, как прикреплять провод).
Невыполнение этого требования может привести к
повреждению данного устройства.
CD changer or another external component / Устройство автоматической смены компакт-дисков или другое внешнее устройство
Cord (supplied with the CD changer)
Шнур (поставляется с устройством
автоматической смены компакт-дисков)
Line Input Adapter KS-U57 (not supplied with this unit)
Коммуникационный адаптер KS-U57 (не входит в комплект)
Signal cord (not supplied with this unit)
Кабель сигнала (не входит в комплект)
L
L
L
L
R
R
R
R
or
или
JVC CD changer
Проигрыватель нескольких
компакт-дисков JVC
External component
Внешнее устройство
F-OUT
L
R
R-OUT
L
R
KW-XC939
4
Install_KW-XC939[EE]002A_4.p6
4
6/10/03, 9:31 AM