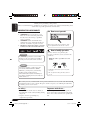
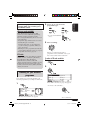
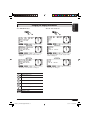
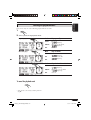
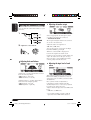
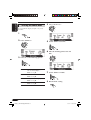
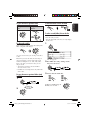
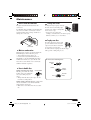
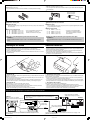
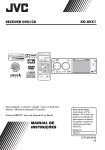
1
NEDERLANDS FRANÇAIS DEUTSCH ENGLISH
HDD NAVIGATION/DVD RECEIVER
FESTPLATTEN-NAVIGATIONSSYSTEM/DVD-RECEIVER
SYSTÈME DE NAVIGATION À DISQUE DUR/RECEPTEUR DVD
HDD NAVIGATIE/DVD-RECEIVER
KD-NX901
For cancelling the display demonstration, see page 14.
Zum Abbrechen der Displaydemonstration siehe Seite 14.
Pour annuler la démonstration des affichages, référez-vous à la page 14.
Zie bladzijde 14 voor het annuleren van de displaydemonstratie.
For installation and connections, refer to the separate manual.
Für den Einbau und die Anschlüsse siehe das eigenständige Handbuch.
Pour l’installation et les raccordements, se référer au manuel séparé.
Bijzonderheden over de installatie en aansluiting van het apparaat vindt u in de desbetreffende
handleiding.
INSTRUCTIONS
BEDIENUNGSANLEITUNG
MANUEL D’INSTRUCTIONS
GEBRUIKSAANWIJZING
LVT1294-001B
[E]
Front_KD-NX901[E]fb.indd 2
05.3.17 1:58:14 PM
ENGLISH
Thank you for purchasing a JVC product.
Please read all instructions carefully before operation, to ensure your complete understanding and to
obtain the best possible performance from the unit.
IMPORTANT FOR LASER PRODUCTS
1. CLASS 1 LASER PRODUCT
2. CAUTION: Do not open the top cover.
There are no user serviceable parts inside
the unit; leave all servicing to qualified
service personnel.
3. CAUTION: Visible and invisible laser
radiation when open and interlock failed or
defeated. Avoid direct exposure to beam.
4. REPRODUCTION OF LABEL: CAUTION
LABEL, PLACED OUTSIDE THE UNIT.
How to reset your unit
This will reset the microcomputer. Your
preset adjustments will also be erased.
How to forcibly eject a disc
Warning:
If you need to operate the receiver while
driving, be sure to look ahead carefully or
you may be involved in a traffic accident.
If a disc cannot be recognized by the
receiver or cannot be ejected, ejects the disc
as follows.
• While the source operation screen is
shown...
Caution
Never try to analyse or retrieve the data
stored in the Hard Disk Drive (HDD).
Otherwise, you may have your warranty
invalid, and be penalized by law.
The manufacturer assumes no liability for
any damage resulting from such conduct as
mentioned above.
• If this does not work, try to reset your
receiver.
• Be careful not to drop the disc when it
ejects.
For security reasons, a numbered ID card is provided with this receiver, and the same ID number
is imprinted on the receiver’s chassis. Keep the card in a safe place, as it will help the authorities
to identify your receiver if stolen.
For safety....
Temperature inside the car....
• Do not raise the volume level too much, as
this will block outside sounds, making driving
dangerous.
• Stop the car before performing any
complicated operations.
If you have parked the car for a long time in
hot or cold weather, wait until the temperature
in the car becomes normal before operating the
unit.
2
EN02-10_KD-NX901[E]fb.indd 2
05.3.17 1:59:24 PM
SAFETY INSTRUCTIONS
• DO NOT install any unit in locations
where;
– it may obstruct the steering wheel and
gearchange lever operations, as this may
result in a traffic accident.
– it may obstruct the operation of safety
devices such as air bags, as this may
result in a fatal accident.
– it may obstruct visibility.
• DO NOT operate the unit while
manipulating the steering wheel, as this
may result in a traffic accident.
• The driver must not watch the monitor
while driving.
If the driver does it while driving, it may
lead to carelessness and cause an accident.
• If the parking brake is not engaged, the
following messages appear...
– When you try to watch the playback
picture on the monitor, “DRIVER MUST
NOT WATCH THE MONITOR WHILE
DRIVING” appears, and no playback
picture will be shown.
– When you try to enter your destination
for the navigation guidance, “Function
not available while driving.” appears,
and you cannot enter the destination.
These warnings appear only when the
parking brake wire is not connected, or the
parking brake is not engaged (refer to the
Installation/Connection Manual).
Use of the Navigation System is only permitted
if the traffic conditions are suitable and you
are absolutely sure that no risk, obstruction
or inconvenience will be incurred to you,
your passengers or other road users. The
requirements of the Road Traffic Regulations
must always be followed. The destination
must not be entered while driving the car.
The Navigation System serves solely as an
aid to navigation. It never releases the driver
from his duties to drive carefully and to make
own judgement in road traffic. Inaccurate
or incorrect instructions may happen to be
given due to changing traffic conditions. The
actual road signs and traffic regulations must
therefore always be observed. In particular, the
Navigation System cannot be used as an aid to
orientation when visibility is poor.
This Navigation System must only be used for
its intended purpose. The volume of the car
radio/Navigation System must be adjusted so
that external noise is still audible.
Caution on volume setting:
Discs produce very little noise compared
with other sources. Lower the volume
before playing a disc to avoid damaging
the speakers by the sudden increase of the
output level.
ENGLISH
WARNINGS
When to update the database:
If the following message appears on the
display when you turn on the power, visit
<http://www.jvc-exad.com>. You can
confirm the update information.
When replacing/rotating the tires:
It is required to clear all the accumulated
learning data which is important for accurate
navigation. To clear the data, perform
“DELETE RUNTIME” on page 21.
3
EN02-10_KD-NX901[E]fb.indd 3
05.3.17 1:59:26 PM
ENGLISH
Contents
How to reset your unit ............................... 2
How to forcibly eject a disc ....................... 2
How to read this manual ............................ 5
Disc operations ...................... 48
Playing a disc in the receiver ...................48
Introduction ............................. 6
DVD/VCD special functions ..... 52
Remote controller
— RM-RK230 ......................... 8
Selecting subtitles .................................... 52
Selecting audio languages ....................... 52
Selecting multi-angle views..................... 52
Disc menu operations .............................. 53
Zoom in.................................................... 53
Main elements and features ....................... 8
Control panel — KD-NX901 .... 10
Parts identification ................................... 10
Preparations .......................... 11
Getting started ....................... 13
Basic operations .....................................13
Basic operations ....................................... 50
On-screen disc operations ...... 54
On-screen bar basic operations ................ 55
Control screen basic operations ............... 57
List screen operations .............................. 58
Cancelling the display demonstration...... 14
Setting the clock ...................................... 14
DVD setup menu .................... 59
Navigation operations ........... 15
What is navigation .................................15
Basic navigation operations.....................16
Other disc operations ............. 62
Navigation operation menus .................... 17
Navigation setups ..................................19
Navigation setting menus ........................ 20
Basic navigation processes ......................22
Entering your destination......................... 23
• By address ............................................ 23
• By postal code ........................................ 26
• By town centre ........................................ 27
• By destination lists ............................... 28
• By points of interests (P.O.I.) ............... 28
• By the coordinates ................................ 31
Storing addresses and routes.................... 32
Convenient features using the stored routes ... 34
Setting guidance options .......................... 36
Setting route options ................................ 37
Route guidance ........................................ 38
Display information during guidance ...... 39
Dynamic guidance ................................... 41
Radio operations ................... 42
Listening to the radio..............................42
Storing stations in memory ...................... 43
Listening to a preset station ..................... 44
Changing the display information ........... 44
Searching for your favourite programme.... 45
Using the standby receptions ................... 46
Tracking the same programme ................ 47
Basic setting procedure ............................ 59
Basic operations ....................................... 62
Selecting the playback modes.................. 64
Changing the display information ........... 65
HDD operations ..................... 66
Playing genre/album/track in the HDD ...66
Selecting the playback modes.................. 68
Changing the display information ........... 69
Playing playlists ....................................... 70
Recording audio CDs............................... 70
Assigning the titles .................................. 72
Editing the HDD contents........................ 72
• Erasing a track/album/genre ................. 73
• Moving a track/album .......................... 73
• Sorting an album/genre ........................ 74
• Creating/editing a playlist .................... 75
• Erasing a playlist .................................. 75
• Duplicating a playlist............................ 76
• Storing tree information into SD .......... 77
• Confirming the HDD contents ............. 77
SD operations ........................ 78
Inserting the SD card ..............................78
Selecting the playback modes.................. 81
Changing display information ................. 82
Duplicating data into HDD ...................... 82
4
EN02-10_KD-NX901[E]fb.indd 4
05.3.17 1:59:27 PM
Storing your own sound adjustments....... 85
Adjusting the sound basic settings........... 86
General settings — PSM ......... 87
Basic procedure ....................................... 87
Selecting the dimmer mode ..................... 90
How to read this manual
The following methods are used to make the
explanations simple and easy-to-understand:
• Some related tips and notes are explained in
“More about the functions” (see pages 105
– 110).
• Button operations are mainly explained with
the illustrations as follows:
ENGLISH
Sound adjustments ................ 84
Selecting preset sound modes
(EQ: equalizer)....................................84
Other main functions ............. 91
Assigning titles to the sources ................. 91
Changing the control panel angle ............ 92
Detaching the control panel ..................... 92
Press briefly.
CD changer operations ........... 93
Playing discs in the CD changer ...............93
Selecting the playback modes.................. 96
Changing the display information ........... 97
Press repeatedly.
External component operations... 98
Playing an external component ...............98
DAB tuner operations ............. 99
Listening to the DAB service....................99
Storing DAB services in memory .......... 100
Tuning in to a preset DAB service ........ 100
Searching for your favorite programme ... 101
Using the Standby Reception ................ 101
Tracking the same programme .............. 102
Changing the display information ......... 102
Maintenance ........................ 103
Press either one.
Press and hold until
your desired response
begins.
Language codes ................... 104
More about the functions ..... 105
Troubleshooting ................... 112
Press A, then press
B.
Specifications ....................... 118
END-USER TERMS.................. 120
Press and hold both
buttons at the same
time.
5
EN02-10_KD-NX901[E]fb.indd 5
05.3.17 1:59:28 PM
ENGLISH
Introduction
DVD/CD player
Discs you can play
You can play back the following discs (12 cm
and 8 cm) on this receiver:
• DVD Video: Recorded in PAL color system
with Region Code “2” (see below).
– DVD-R/DVD-RW recorded in the DVDVideo format can also be played.
• Video CD (VCD)/audio CD
• MP3/WMA: Recorded either in CD-R/
CD-RW or DVD-R/DVD-RW/DVD-ROM.
– CD-R/CD-RW: Compliant with ISO 9660
Level 1, ISO 9660 Level 2, Romeo, and
Joliet.
– DVD-R/DVD-RW/DVD-ROM: Compliant
with UDF-Bridge Format.
Discs cannot be played back
DVD-Audio, DVD-ROM (data), DVD-RAM,
DVD-R/DVD-RW recorded in the DVD-VR
format, CD-ROM, CD-I (CD-I Ready), Photo
CD, etc.
• Playing back these discs will generate noise
and damage the speakers.
Note on Region Code:
DVD players and DVD Video discs have
their own Region Code numbers. This
receiver can only play back DVD discs
whose Region Code numbers include “2.”
Examples:
Caution for DualDisc playback
• The Non-DVD side of a “DualDisc” does
not comply with the “Compact Disc Digital
Audio” standard. Therefore, the use of NonDVD side of a DualDisc on this product may
not be recommended.
Digital audio formats
The System can play back the following digital
audio formats—Linear PCM/Dolby Digital*1/
DTS*2/MPEG Audio.
*1 Manufactured under license from Dolby
Laboratories. “Dolby” and the doubleD symbol are trademarks of Dolby
Laboratories.
*2 “DTS” and “DTS 2.0 + Digital Out” are
registered trademarks of Digital Theater
Systems, Inc.
Hard Disc Drive (HDD)
Installation
This unit has a built-in HDD, which is a device
to read minute magnetic changes. The inside of
the device is precision components, requiring
you to notice the following when installing the
unit:
Install the unit at a place where the following
conditions are satisfied:
• Level, dry and neither too hot nor too cold—
between 5°C and 35°C.
• At an altitude between –300 m below sea
level and +3000 m above sea level.
• With adequate ventilation to prevent internal
heat buildup in the unit.
“DVD Logo” is a trademark of DVD Format/
Logo Licensing Corporation registered in the
US, Japan and other countries.
6
EN02-10_KD-NX901[E]fb.indd 6
05.3.17 1:59:29 PM
While the unit is turned on, the hard disk
is constantly rotating at a high speed. This
requires you to notice the following:
• DO NOT impart vibration or shock.
• DO NOT allow anything having strong
magnetism or emitting strong electromagnetic
waves (cellular phones, etc.) near the unit.
• DO NOT disconnect the power cords from the
car battery when the unit is turned on. Failure
in following the above cautions may damage
the HDD (the stored data will be lost and be
never restored).
Serial Copy Management System (SCMS)
This system uses SCMS which allows only
first-generation digital copies to be made of
premastered software such as regular CDs. If
you try to record from a duplicated CD-R/
RW, “SCMS Cannot Copy” may appear on
the display then recording will be cancelled.
IMPORTANT: The manufacturer assumes
no liability whatsoever for any damage
resulting from missed opportunity or
accidental erasure due to malfunctioning of
the unit or due to trouble in the unit, such as
fatal collapse of the hard disk drive itself.
• Since the HDD has its lifetime, it is
strongly recommended to make a copy
of your important recordings, and keep it
using other recording devices.
It should be noted that it may be unlawful
to re-record pre-recorded tapes, records, or
discs without the consent of the owner of
copyright in the sound or video recording,
broadcast or cable programme and in any
literary, dramatic, musical, or artistic work
embodied therein.
Display indications
This unit displays a variety of the screens.
• More detailed information is described in
each related sections.
ENGLISH
Before using HDD
Navigation displays:
• Route guidance has not been started, but
the unit is in navigation mode:
The display shows the current position.
Compass is always shown even if
“Compass” is set to “Off” (see page 88).
• Route guidance has been started:
The display shows the navigation guidance.
While the guidance is performed, you can also
enjoy playing any source (ex. HDD).
Source playback displays:
Compass is shown if “Compass” is set to
“On.”
7
EN02-10_KD-NX901[E]fb.indd 7
05.3.17 1:59:30 PM
ENGLISH
Remote controller —
RM-RK230
Installing the lithium coin battery
(CR2025)
Main elements and features
MONITOR CONTROL
MODE
ASPECT
MENU
DVD / RECEIVER CONTROL
ZOOM
ATT
+10
SOURCE
–100
PRESET
/ TITLE
BAND
+100
/ TITLE
–10
OSD
DUAL
1
VOL
DISC+ 2
TOP M
4
2nd VOL
3
MENU
5
6
ENTER
7
Using the remote controller:
• Aim the remote controller directly at the
remote sensor on the unit (see page 10). Make
sure there is no obstacle in between.
• Do not expose the remote sensor to strong
light (direct sunlight or artificial lighting).
Warning:
• Do not install any battery other than
CR2025 or its equivalent; otherwise, it
may explode.
• Store the battery in a place where children
cannot reach to avoid risk of accident.
• To prevent the battery from over-heating,
cracking, or starting a fire:
– Do not recharge, short, disassemble, or
heat the battery or dispose of it in a fire.
– Do not leave the battery with other
metallic materials.
– Do not poke the battery with tweezers or
similar tools.
– Wrap the battery with tape and insulate
when throwing away or saving it.
DISC– 8
SETUP
9
RETURN
0
SHIFT
RM-RK230
The remote controller can operate the playback
sources any time, even when you are using the
Navigation System.
MONITOR CONTROL
1 Monitor control buttons
• Controllable only if your monitor is one
of the JVC monitors—KV-MR9010 or
KV-MH6510.
DVD/RECEIVER CONTROL
2
(standby/on attenuator) button
• Turns on and off the power and also
attenuates the sound.
3 SOURCE button
• Selects the source.
4 BAND button
• Selects the FM/AM/DAB bands.
5 TOP M (menu) button*1
• Displays the DVD disc menu.
8
EN02-10_KD-NX901[E]fb.indd 8
05.3.17 1:59:30 PM
*1 These buttons function as the number
buttons when pressed with SHIFT button.
*2 These buttons function as +10/–10 buttons
when pressed with SHIFT button.
*3 These buttons function as the +100/–100
buttons when pressed with SHIFT button.
ENGLISH
6 DUAL button
• Does not function for this model.
7 VOL + / – buttons
• Adjusts the volume level.
• Does not function as 2nd VOL +/–
buttons for this model.
8 SETUP button*1
9 SHIFT button
p For disc operations:
• /TITLE 5 / ∞ — Selects the titles (for
DVD) or folders (for MP3/WMA, HDD,
and SD). *2
For tuner operations:
• PRESET 5 / ∞ — Changes the preset
stations.
q For disc operations:
• 4 / ¢ (reverse skip/forward skip)*3
• 1 / ¡ (reverse search/forward
search): Not used for CD-CH, HDD, and
SD.
• 7 (stop), 3 (play), 8 (pause): Not used
for CD-CH, HDD, and SD.
3 (play) also functions as ZOOM button
when pressed with SHIFT button.
For tuner operations:
• 4 / ¢ — Searches for stations*3
w OSD button
• Displays the on-screen bar.
• Also functions as the /TITLE button
when pressed with SHIFT button.
– You can directly select folders (for
MP3/WMA) or titles (for DVD) using
the number buttons (see the right
column).
e MENU button*1
• Displays the DVD disc menu.
r Menu operation buttons*1
• Cursor (% , fi , @ , #), and ENTER
• % / fi : Also functions as DISC+ / –
buttons when the source is “CD-CH.”
t RETURN button*1
y DVD/VCD special function buttons
•
(audio),
(subtitle),
(angle)
How to select a number
• To select a number from 1 – 9:
• To select a number greater than 9:
Ex:
To select 10, press +10, then 0.
To select 65, press +10 six times, then 5.
To select 104, press +100, 0 , then 4.
To select 236, press +100 twice, +10 three
times, then 6.
• –100 and –10 buttons are used to correct a
misentry. They reduce the corresponding
digit number before entering the last digit
number.
9
EN02-10_KD-NX901[E]fb.indd 9
05.3.17 1:59:31 PM
ENGLISH
Control panel —
KD-NX901
Parts identification
SOURCE
VOL
KD-NX901
T/P
OK
+
SEL
1
4
2
5
3
6
REC
MODE
BACK
DISP
–
NAVI / AV
1 VOL (volume) +/– button
2 0 / (eject/angle) button
• Ejects the disc if pressed.
• Changes the control panel angle if pressed
repeatedly after held once.
3 SEL (select) button
For Navigation System:
• Displays the DESTINATION menu if
pressed.
• Displays the Setup Menu if pressed and
held.
For playback sources:
• Displays the “Select Preset EQ” screen
and sound setting screens if pressed
repeatedly.
• Displays the PSM menu if press and held.
4 SOURCE button
5 Control dial/OK button
• Control dial: Selects the items.
• OK button: Confirms the selection.
6 Remote sensor
7 Display window
8 T/P (traffic programme/programme
type) button
• Turns on/off TA Standby Reception if
pressed.
• Turns on/off PTY Standby Reception if
pressed and held.
• Displays the traffic information while in
the navigation mode.
9
p
q
w
e
r
t
(standby/on attenuator) button
• Turns on the power when it is off.
• Attenuates the sound when the power is
on.
• Turns off the power if pressed and held.
DISP (display)/BACK button
• DISP: Changes the display patterns.
• BACK: Goes back to the previous screen
or cancels the setting while operating the
menus.
MODE/REC button
• MODE: Changes the functions of some
buttons.
• REC: Activates the recording mode if
pressed and held while playing a CD.
NAVI/AV button
• Switches the display information between
navigation screen and source operation
screen.
Reset button
Number buttons
(control panel release) button
10
EN02-10_KD-NX901[E]fb.indd 10
05.3.17 1:59:32 PM
Before using the Navigation System first time, it is required to calibrate the Navigation System.
• After deleting the run time (DELETE RUNTIME: see page 21) or changing the installation angle
(UNIT ANGLE: see page 21), calibration is also required.
1 Turn on the ignition switch (either to
1
ENGLISH
Preparations
ON or to ACC).
to turn on the power, then
press NAVI/AV.
Select your preferred language and set
your measured angle.
2 Press
2
3
• When shipped from the factory, navigation
language is set to UK English.
• See “Measuring the installation angle” on
the Installation/Connection Manual (and also
pages 20 and 21).
4 Confirm the following connections on
the screen.
GPS antenna A:
• GPS:OK \ Connection is OK.
• GPS:NG \ Antenna is disconnected or shortcircuited.
3
Parking brake lead B:
Step on the brake pedal, then disengage and
engage the parking brake repeatedly.
• If “PKG:OFF” appears when disengaged
and “PKG:ON” appears when engaged,
connection is OK.
Reversing signal lead C:
Engage the parking brake, step on the brake
pedal, then shift the gearchange lever.
• If “D:FWD/H” and “D:FWD/L” alternate
on the screen, connection is OK. (Only after
calibration is started, “REV” appears when
the gearchange lever is set to reverse.)
4
Speed signal lead D:
Drive the car for a while.
• If the number increases as you speed up the
car, connection is OK.
A
If connection is not good, check the connection.
B
C
D
To be continued....
11
EN11-29_KD-NX901[E]NAVIfb.indd 11
05.3.17 2:00:39 PM
ENGLISH
5
5 After confirming all the above
connections, drive the car to start
calibration.
• A certain speed is required for calibration.
• Calibration time differs among the cars.
• During calibrating, you can use the System as
the receiver (you can listen to the music, etc.)
• If you turn off the ignition switch, calibration
is temporarily stopped. When it is turned on,
calibration will restart.
E
Once calibration is finished (when the
learning level becomes “2”), the current
position information appears on the
display.
E: If you are on some road, the road name
appears.
F: If not, the latitude/longitude appear.
F
Navigation (functions such as guidance) cannot
be used until calibration is complete.
• “Function not available while driving.” appears
if you try to enter the destination without the
parking brake engaged (or without the parking
brake lead connected). You cannot enter the
destination.
12
EN11-29_KD-NX901[E]NAVIfb.indd 12
05.3.17 2:00:43 PM
ENGLISH
Getting started
Basic operations
To use the Navigation System
To enjoy source playback
~
~
Ÿ
Ÿ
Each time you press
the button, navigation
and source screens
alternate.
!
Operate navigation.
You cannot select some sources if they
are not ready.
!
See page 22.
1 Set the destination.
2 Start guidance.
To adjust the guidance volume level, see page
20.
While using the Navigation System, you
can always confirm all available traffic
information on the display.
⁄
@
Operate the source as you like
(for operations, see the respective
pages).
Adjust the sound as you want.
(See page 84.)
To drop the volume in a moment (ATT)
To restore the sound,
press it again.
To turn off the power
• For details, see page 41.
13
EN11-29_KD-NX901[E]NAVIfb.indd 13
05.3.17 2:00:44 PM
ENGLISH
Cancelling the display
demonstration
If no operations are done for about one minute,
display demonstration starts (except when the
Navigation System is in use).
[Initial: Interval]—see page 87.
1
Setting the clock
The built-in clock is automatically adjusted by
receiving the GPS signals. To obtain correct
time information, it is required to set the local
time.
• When the GPS signals are received first
time after calibration (see page 11), the
clock is automatically set to the Coordinated
Universal Time (UTC).
Adjust the clock to your local time only after
it has been set to UTC.
2
1
2 Select “24H/12H,” then select
“24Hours” or “12Hours.”
3 Select “Off.”
3 Select “Time,” then set the local time.
4 Finish the procedure.
4 Finish the procedure.
To activate the display demonstration
In step 3 above...
• Select “All Time” or
“Interval.”
To check the local time when the power is
turned off
14
EN11-29_KD-NX901[E]NAVIfb.indd 14
05.3.17 2:00:45 PM
ENGLISH
Navigation operations
What is navigation
With the KD-NX901, the location of the
car is determined via Global Positioning
System (GPS), the distance from the
desired destination and the required routes
are determined using a digital road map,
a navigation computer and sensors. A
speedometer signal and a reverse signal are
additionally used to calculate the estimated
time of arrival or the remaining travel time to
the destination.
For safety, navigation is predominantly in
spoken form (in various languages, in female
voice or in male voice) supported by a
direction indicator on the display.
Safety instructions
• Traffic signs should be observed
carefully while driving using the
Navigation System. Navigation System
is only an aid. Driver must always decide
whether or not to heed the information
provided. JVC does not accept liability
for erroneous data provided by the
Navigation System.
• Traffic guidance is restricted to
passenger vehicles only. Special driving
recommendations and regulations for
other vehicles (e.g. commercial vehicles)
are not included.
• The destination cannot be entered
while driving the car.
Navigation guidance is performed, based on the database, therefore, it may not be applicable to
the current situation because of changes in traffic conditions (e.g. changes in tollroads, principal
roads, one-way traffic, or other traffic regulations). In this case, observe the current traffic signs
or regulations.
Terms of licence
You are granted a non-exclusive licence to
use the database for your personal purposes.
The present licence does not authorise the
granting of sublicenses.
Use of the data is only permitted in this
specific JVC system. It is forbidden to
extract or make further use of significant
parts of the database content, or to duplicate,
modify, adapt, translate, analyse, decompile
or reverse-engineer any part thereof.
IMPORTANT for dynamic guidance
Once “TMC” (see page 37) is set to “✓
(On),” you can use dynamic route guidance.
The traffic announcements sent by a TMC
radio station is received and analysed.
Navigation System can inform you of where
congestion exists, and how you can detour it.
For the users in Austria:
The location and event code were made
available by ASFINAG and BMVIT.
15
EN11-29_KD-NX901[E]NAVIfb.indd 15
05.3.17 2:00:46 PM
ENGLISH
Basic navigation operations
The following buttons are used for navigation
operations.
To enter a character:
To display the DESTINATION menu:
Select (reverse) a character, then enter.
To select an item:
Number of items matching to the current
entries
Select the number next to the item
shown on the display.
• You can also select an item by...
Select (reverse) the item, then confirm.
To return to the previous screens
• Once you have entered a letter, the System
can show only the letters to be entered as the
next letter.
• The System will show a matching name
closest to the current entries. If the correct
location name is shown, press 6 to finish
entry.
To show the list of the matching names, press
and hold OK, then press the number buttons
to select (or rotate the dial to show other
lists).
• If no more letters can be entered, the System
automatically completes the entry.
• To erase the misentry, press 4.
To exit from navigation screens
16
EN11-29_KD-NX901[E]NAVIfb.indd 16
05.3.17 2:00:47 PM
SET FROM
ENGLISH
Navigation operation menus
Before operating navigation, be familiar with
the operation menus and setup menus.
DESTINATION
On this menu, you can select how to set your
destination.
• ADDRESS: Set your destination by entering
the address.
The SELECT menu appears—see page 23.
This is the first menu displayed when pressing
SEL.
• SET DESTINATION: Display the SET
FROM menu—see page 22.
• ROUTE OPTIONS: Set your preferred
settings to reach your destination such
as availability of motorways, ferries, and
tollroads—see page 37.
This menu appears after you have set your
destination.
• START GUIDANCE: Start guidance to your
destination—see page 22.
• ADD VIA POINT: Set a place where you
want to stop by (Via Point) before reaching
your final destination—see page 36.
The SET FROM menu appears.
• ITINERARY: Confirm the destination where
you are going to be navigated through Via
Points.
• ROUTE OPTIONS: See page 37.
• PREVIOUS DEST.: Set your destination
by selecting from the last 50 guided
destinations—see page 28.
• PRESET ADDRESSES: Set your
destination by selecting from the six preset
addresses—see page 28.
To preset a new address (and name the
location)—see page 28.
• STORED ADDRESSES: Set your
destination by selecting from 50 stored
addresses—see page 28.
To store a new address (and name the
location), see page 32.
17
EN11-29_KD-NX901[E]NAVIfb.indd 17
05.3.17 2:00:48 PM
ENGLISH
• P.O.I.: Set your destination (or Via Point) by
selecting from the P.O.I. (points of interests)
list. It includes petrol stations, restaurants,
hospitals, etc.—see page 28.
P.O.I. functions differently according to
navigation status.
• CITY: Enter the city name of your
destination—see page 24.
• STREET: Enter the street name of your
destination—see page 25.
SELECT
After you have entered the street name, you
can select one of the options.
On this menu, you can select your particular
destination by the country, city, street, town
centre, postal code, and its coordinates.
• When you use navigation for the first time,
only “COUNTRY” and “COORDINATES”
are displayed.
• Once you have set “COUNTRY/CITY,” the
previously set names are displayed.
• If the centres are listed for the currently
displayed city, “CENTRE” is displayed.
• CENTRE: Enter the town centre for your
destination—see page 27.
• POSTAL CODE: Enter the postal code of
your destination—see page 26.
• COUNTRY: Select the country where your
destination exists—see page 24.
After you have entered the postal code, you
can enter the street name.
• COORDINATES: Enter the geographical
coordinates (LATITUDE/LONGITUDE) to
locate your destination—see page 31.
18
EN11-29_KD-NX901[E]NAVIfb.indd 18
05.3.17 2:00:49 PM
ENGLISH
Navigation setups
Before operating navigation, set up the
Navigation System to your preference.
~
While listening to any source...
Navigation screen
(current position)*
appears.
* If navigation is already started, the
guidance screen appears.
!
Change the setting.
1 Select the item to change.
• When selecting “VOICE GUIDANCE,”
the submenu appears. Select an item
again on submenu.
2 Select an option for the selected
item.
or
The numbers at the both sides are shown
only after the preset addresses are stored
(see page 33).
Ÿ
Display SETTINGS menu.
• To exit from the VOICE GUIDANCE
submenu...
⁄
@
Repeat step ! to set up other
items.
Finish the setup.
19
EN11-29_KD-NX901[E]NAVIfb.indd 19
05.3.17 2:00:50 PM
ENGLISH
Navigation setting menus
COORDINATES
Set your preferred unit:
DEG/MIN/SEC, DEG/MILLI/MICRO
VOICE GUIDANCE
Guidance voice comes out only through the
front speakers (and the front line out on the
rear).
LANGUAGE
Set your preferred language:
DANSK, DEUTSCH, ENGLISH UK,
ENGLISH US, ESPAÑOL, FRANÇAIS,
ITALIANO, NEDERLANDS, SVENSKA
• Once you have selected the language, the
selected language is used for navigation—
spoken and displayed.
MEASURING UNIT
You can set up the following on this sub menu:
• VOICE – M/F: Select MALE or FEMALE
voice for spoken navigation.
• GUIDANCE VOLUME: Adjust the guidance
volume level—0 to 8.
• VOICE CHANNEL: Select the guidance
output channel—Lch ONLY, Rch ONLY, or
Lch & Rch.
• VOICE CRUISE: —CRUISE: 0
(cancelled) to CRUISE: 10.
When this function is activated, the System
automatically increases the guidance volume
level as the car speeds up.
If you want to use the automatic volume
increase even at low speeds, set the level to
the lower numbers; on the other hand, if you
want to use it only at high speeds, set it to the
higher numbers.
Set your preferred measuring unit:
METRIC (km), IMPERIAL (yard)
20
EN11-29_KD-NX901[E]NAVIfb.indd 20
05.3.17 2:00:51 PM
You can confirm the following of the current
status:
• Direction/Learning level*1
• Velocity/PPS (Pulse Per Second)
• Gyro sensor/Unit angle
• Latitude/Number of GPS satellite received*2
• Longitude
*1 Indicates the learning data level. The higher
the number is (the highest number is “4”),
the more accurate the learning data is.
(Learning data is the one the System
accumulates for accurate navigation—such
as velocity, Gyro output level with respect to
car’s movement.)
*2 If “NG” is shown instead, the GPS antenna
is not connected, or short-circuited.
VERSION CHECK
You can confirm the software version of the
digital maps (DB).
DELETE RUNTIME
Reset the run time in the following cases:
• When you reinstall the unit to another car.
• When you replace or rotate the tires.
Once this is carried out, the learning data is
cleared. When you exit from the navigation
setting menu, the System will perform
calibration internally again.
• If the guidance has been activated, you cannot
use this function.
ENGLISH
TEST
UNIT ANGLE
You can register the unit angle manually.
• Installation angle of the main unit is
automatically required to be preset when you
use the Navigation System for the first time
after installation or when you delete run time.
• If the guidance has been activated, you cannot
use this function.
Set one of the angles measured by the supplied
gauge:
• UNIT ANGLE 1: Select when the
installation angle is within the range of –5.0
to 17.0˚.
• UNIT ANGLE 2: Select when the
installation angle is within the range of 17.0
to 23.0˚
• UNIT ANGLE 3: Select when the
installation angle is within the range of 23.0
to 28.0˚.
• UNIT ANGLE 4: Select when the
installation angle is within the range of 28.0
to 32.0˚. *
30˚
* It is not recommended to install the main unit
at an angle of more than 30˚; otherwise, the
malfunction may result.
21
EN11-29_KD-NX901[E]NAVIfb.indd 21
05.3.17 2:00:52 PM
ENGLISH
Basic navigation processes
~
While listening to any source...
⁄
Navigation screen
(current position)*
appears.
• ADDRESS: See page 23.
• PREVIOUS DEST.: See page 28.
• PRESET ADDRESSES: See page
28.
• STORED ADDRESSES: See page
28.
• P.O.I.: See page 28.
* If navigation is already started, the
guidance screen appears.
Ÿ
• You can also locate your destination by
entering the coordinates (see page 31)
and by selecting a stored route (see page
34).
Display the DESTINATION
menu.
@
!
Select one of the options listed on
the display.
Confirm the selected destination.
Select “SET DESTINATION.”
22
EN11-29_KD-NX901[E]NAVIfb.indd 22
05.3.17 2:00:53 PM
¤
3 Confirm the selected destination.
Select “START GUIDANCE.”
ENGLISH
• Before (or after) starting guidance, you
can set “ADD VIA POINT” and “ROUTE
OPTIONS.”
Entering your destination
#
By address
Confirm.
1 Display the DESTINATION menu.
Route is calculated, then guidance starts.
To cancel the route guidance...
2 Select “SET DESTINATION.”
then
Starting navigation guidance to the
preset addresses
Once you have stored the PRESET
ADDRESSES (see page 33), starting guidance
to the addresses is very simple and easy.
• If the navigation is already started, you cannot
use this function.
1 While listening to any source...
Navigation screen
(current position)
appears.
3 Select “ADDRESS.”
• When you use navigation for the first
time, the following screen appears.
• Once you have used navigation, your last
destination is shown.
2 Select the preset address number.
To be continued...
23
EN11-29_KD-NX901[E]NAVIfb.indd 23
05.3.17 2:00:54 PM
ENGLISH
4 Locate your destination country.
Ex. Enter “LONDON.”
• If the country name is shown in the
“COUNTRY” column, select the country
only when your destination is located in a
different country.
1 Select “COUNTRY.”
2 Select your destination country.
2 To select the city displayed on the
2nd line...
To display the list of the matching
names, then select the city on the
list...
5 Locate your destination city.
1 Select “CITY,” then enter the city
name.
• If the city name is shown in the “CITY”
column, select the city only when your
destination is located in a different city.
24
EN11-29_KD-NX901[E]NAVIfb.indd 24
05.3.17 2:00:55 PM
ENGLISH
6 Locate your destination street in the
selected city.
1 Select “STREET,” then enter the
street name.
Ex. Enter “FORE.”
7 Select either “ENTIRE STREET,”
“HOUSE NUMBER,” or
“JUNCTION.”
• To locate your destination by town
centres, select “CENTRE” (see page 27).
2 To select the street displayed on
the 2nd line...
To display the list of the matching
names, then select the street on
the list...
• ENTIRE STREET: Select if you do not
know the particular address.
• HOUSE NUMBER: Select if you know
the exact address, then enter the house
number. (If no data exist for the selected
street, this will not be displayed.)
• JUNCTION: Select to display the list
of the junctions, then select the junction
nearest to your destination. (If no data
exist for the selected street, this will not
be displayed.)
8 Confirm your destination.
If the same name is used for different
streets, STREET IN (area) entry menu
appears. Enter the area where your
destination street is located.
25
EN11-29_KD-NX901[E]NAVIfb.indd 25
05.3.17 2:00:56 PM
ENGLISH
By postal code
You can locate your destination by postal code
after you have set the country.
To display the list of the
matching codes, then select the
code on the list...
1 Display the SELECT menu.
3 Follow steps 6 and 7 on page 25.
• If the destination country has not been set,
set the country (see step 4 on page 24)
before going the next step.
2 Set the postal code.
1 Select “POSTAL CODE.”
2 Enter the postal code.
3 To select the postal code
displayed on the 2nd line...
26
EN11-29_KD-NX901[E]NAVIfb.indd 26
05.3.17 2:00:57 PM
Centre lists within the selected city appear.
By town centre
ENGLISH
2 Select “CENTRE.”
3 Select your destination centre.
You can locate your destination by town centre
once you set the country and the city.
1 Display the SELECT menu.
4 Confirm your destination.
• If the city name has not been entered,
“CENTRE” will not be used. ] Enter the
city name (see step 5 on page 24), then
confirm your entry so that the following
screen appears.
• If the data for the centres within the city
does not exist, “CENTRE” will not be
used. ] Select another method to enter
your destination.
27
EN11-29_KD-NX901[E]NAVIfb.indd 27
05.3.17 2:00:58 PM
ENGLISH
By destination lists
You can locate your destination by selecting
from the following lists—PREVIOUS
DEST./PRESET ADDRESSES/STORED
ADDRESSES.
1 Display the SET FROM menu.
By points of interest (P.O.I.)
You can locate your destination by selecting
form the P.O.I.
• To use the P.O.I., enter the country in
advance; otherwise, the P.O.I. within the
previous settings (county) will be located. (To
set the country, see step 4 on page 24.)
1 Display the SET FROM menu.
2 Select “PREVIOUS DEST.,”
“PRESET ADDRESSES,” or
“STORED ADDRESSES.”
Ex. when selecting “PREVIOUS DEST.”
3 Select one of the listed item.
4 Confirm your destination.
2 Select “P.O.I.”
• CATEGORY: Select from the categorized
locations.
• NAME: Enter the name of your P.O.I.
directly.
• AREA: Select the area where you want to
search for your P.O.I.
• TELEPHONE NUMBER: Enter the
telephone number of your P.O.I.
• Country (Ex. ENGLAND): Change the
country if necessary. ] Select the country
(see step 4 on page 24).
• If the country has not been selected, the
country selection is automatically requested
in this step.
28
EN11-29_KD-NX901[E]NAVIfb.indd 28
05.3.17 2:00:59 PM
P.O.I. are categorized and sub-categorized for
you to find easily.
6 Enter the city within which you want
to locate your P.O.I.
P.O.I. list appears.
3 Select “CATEGORY.”
ENGLISH
Selecting P.O.I. by category
Main categories list appears.
7 Select (or confirm) your destination.
4 Select the main category you want.
• Then, display the sub-categories...
8 Confirm your destination.
OR
Sub-categories list of the main category
selected appears. (Ex. when selecting
SHOPPING for the main category). ]
Go to step 5.
Selecting P.O.I. by entering the name
3 Select “NAME.”
P.O.I. name entry menu appears.
• If you want to search for
all the items in the main
category...
CITY entry menu appears. ] Go to step
6.
4 Enter the name of your P.O.I.
1 Enter the name.
5 Select the sub-category you want.
CITY entry menu appears.
To be continued...
29
EN11-29_KD-NX901[E]NAVIfb.indd 29
05.3.17 2:01:00 PM
ENGLISH
2 To select the name displayed on
the 2nd line...
To display the list of the matching
names, then select the name on
the list...
• If the name you have entered exists in
many categories, P.O.I. CATEGORY
menu appears. ] Select the categories.
• If the name you have entered exists in
many cites, CITY entry menu appears. ]
Enter the city.
3 Select “AREA.”
P.O.I. AREA menu appears.
4 Select one of the options.
Main categories list appears.
5 Select the category you want.
• You can select your P.O.I. location either
from the main category or sub-category
(see page 29 for details).
5 Select (or confirm) your destination.
6 Select (or confirm) your P.O.I.
6 Confirm your destination.
7 Confirm your destination.
Selecting P.O.I. by area
You can locate P.O.I. from the following areas.
• LOCAL AREA: Select P.O.I. within the
distance of 5 km from the current position.
(Selectable anytime)
• NEAR DESTINATION: Select P.O.I. within
the distance of 5 km from your destination.
(Selectable after setting the destination)
• ALONG ROUTE: Select P.O.I. within the
distance of 2 km along the route. (Selectable
after starting the guidance)
30
EN30-41_KD-NX901[E]NAVIfb.indd 30
05.3.17 2:03:29 PM
ENGLISH
Selecting P.O.I. by telephone number
3 Select “TELEPHONE NUMBER.”
Telephone number entry menu appears.
4 Enter telephone number (with its
area code), then confirm the location.
2 Select “COORDINATES.”
LATITUDE entry screen appears.
3 Enter the latitude, then select North
(N) or South (S).
LONGITUDE entry screen appears.
5 Confirm your destination.
4 Enter the longitude, then select East
(E) or West (W).
Geological position name of the entered
position is displayed.
By the coordinates
You can locate your destination by entering its
latitude and longitude.
1 Display the SELECT menu.
5 Confirm your destination.
31
EN30-41_KD-NX901[E]NAVIfb.indd 31
05.3.17 2:03:33 PM
ENGLISH
Storing addresses and routes
You can store the addresses or routes in
memory.
• To cancel editing during the process, press
BACK (DISP).
Saving addresses in STORED ADDRESS
2 Select “SAVE ADDRESS.”
SAVE AS menu appears.
1 While the current position is shown...
• If navigation has been started, press DISP
(BACK) to display the current position
screen.
3 Select “STORED ADDRESS.”
SAVE FROM menu appears.
• CURRENT ADDRESS: Save the current
address.
• ADDRESS: Save a new address by setting it
manually using the SELECT menu.
• PREVIOUS DEST.: Save an address by
selecting from the previous destinations.
• P.O.I.: Save a P.O.I. using P.O.I. menus.
4 Select (or confirm) the address to
store.
INPUT NAME menu appears.
EDIT menu appears.
• SAVE ADDRESS: Save addresses in
memory.
• DELETE ADDRESS: Delete memorized
addresses.
• RECORD ROUTE: Save the route in
memory. By storing the routes, you can use
the convenient features explained on page 34.
• DELETE ROUTE: Delete memorized route.
5 Name the address.
• You can enter the maximum of 32
characters. For character entry method,
see page 91.
6 Store the name.
EDIT menu appears again.
32
EN30-41_KD-NX901[E]NAVIfb.indd 32
05.3.17 2:03:34 PM
7 Store the name.
You can preset an address into each number
buttons—total six addresses.
EDIT menu appears again.
2 Select “SAVE ADDRESS.”
ENGLISH
Saving addresses in PRESET ADDRESS
SAVE AS menu appears.
If the preset addresses have been stored, you
can directly select one by pressing the number
buttons while the current position screen is
shown.
3 Select “PRESET ADDRESS.”
Stored addresses list appears.
Deleting memorized addresses
2 Select “DELETE ADDRESS.”
DELETE ADDRESS menu appears.
4 Select the address to store from the
list.
Preset addresses list appears.
5 Select the number you want to preset
the address into.
INPUT NAME menu appears.
• PREVIOUS DEST.: Delete an unwanted
address from the PREVIOUS DEST. list.
• STORED ADDRESSES: Delete an
unwanted address from the STORED
ADDRESSES list.
• PRESET ADDRESSES: Delete an
unwanted address from the PRESET
ADDRESSES list.
3 Select one of the options (listed
above).
4 Select an unwanted address.
• If an address has been preset in the
selected number, it will be overwritten.
6 Name the address.
• You can enter the maximum of 32
characters.
“DELETE: PRESS OK” appears.
5 Confirm.
EDIT menu appears again.
To be continued...
33
EN30-41_KD-NX901[E]NAVIfb.indd 33
05.3.17 2:03:35 PM
ENGLISH
Saving new routes
To cancel the recording...
You can save up to 20 routes in memory.
2 Select “RECORD ROUTE.”
START RECORDING menu appears.
• Recording will also be cancelled if you switch
off the car ignition switch.
Deleting stored routes
3 Start recording the route from the
current position.
4
Drive the car following the route
2 Select “DELETE ROUTE.”
ROUTES menu appears.
3 Select an unwanted route.
“DELETE: PRESS OK”
screen appears.
as you want to record, then stop
recording when you arrive at your
destination.
INPUT NAME menu appears.
4 Confirm.
EDIT menu appears again.
5 Name the address.
• You can enter the maximum of 32
characters. For character entry methods,
see page 91.
6 Store the name.
EDIT menu appears again.
Convenient features using the
stored routes
You can confirm your current position—
distance to the destination and estimated time
of arrival (ETA) if you are on at least one of
the stored routes, and set the route end as the
guidance destination.
• You can also display the traffic information
along the stored routes.
34
EN30-41_KD-NX901[E]NAVIfb.indd 34
05.3.17 2:03:37 PM
1 While not using guidance...
If you now press the number button
corresponding the route number, you can set
its route end as the guidance destination. (To
start the guidance, see page 22).
ENGLISH
Checking ETA and distance
Checking traffic information along the
stored routes
If the number icon is highlighted on the
display as in the example below, some traffic
information is available along the route.
The display example below indicates that some
traffic information is available along the stored
route 1 (Home).
2
ROUTES menu appears.
3 Select the route you are now taking.
• You can select up to 3 routes in this step,
so that you can know the current position
on these route.
This means you are not on this route
now.
To check the traffic information, follow the
procedure below.
1 Select the stored route number (in
this example, 1).
To move to another page
of the list (if any), rotate the
dial.
The list of the available information
appears.
4 Display the information.
or
2 Select the one you want to confirm
the information in details.
35
EN30-41_KD-NX901[E]NAVIfb.indd 35
05.3.17 2:03:38 PM
ENGLISH
Setting guidance options
Editing Via Point locations
1 Enter your destination to display the
following DESTINATION menu.
Entering the Via Points
You can set five Via Points along the way to
your final destination.
• You can set Via Points even while you are
navigated to your destination.
1 Enter your destination to display the
2 Select “ITINERARY.”
ITINERARY list appears.
following DESTINATION menu.
• Via Points are listed in sequence, and the
final destination is at bottom.
2 Select “ADD VIA POINT.”
SET FROM menu appears.
3 To change the Via Point sequence
• Select a Via Point on the list, then press...
3 Set a Via Point using the above menu
(and menus that follow).
• Operations are the same as explained for
“Entering your destination.”
*
To erase a Via Point
• Select a Via Point on the list, then press...
• You cannot delete the final destination
once the guidance to it has been started.
* If you have already started guidance to the
destination, “RESTART GUIDANCE” is
shown.
4
4 Repeat steps 2 and 3 to set more Via
Points.
36
EN30-41_KD-NX901[E]NAVIfb.indd 36
05.3.17 2:03:39 PM
1 Enter your destination to display the
following DESTINATION menu.
2 Select “ROUTE OPTIONS.”
ROUTE OPTIONS menu appears.
3 Set each option on the menu.
• For details on each option, see below.
• AUTO REROUTE/MANUAL REROUTE:
Set how you want the System to reroute
when it is required (for example, when some
congestion is expected on the route—judged
by received TMC information).
This function does not work when “TMC” is
set to “× (Off).”
ENGLISH
Setting route options
AUTO REROUTE: The System re-calculates
the route whenever necessary.
MANUAL REROUTE: The System asks
you whenever re-calculation is required (see
example below).
• Press OK to detour. If not, press BACK
(DISP).
4
ROUTE OPTIONS
On this menu, you can set some of the
important elements of route calculation.
• FASTEST (SHORTEST):
FASTEST: The System calculates the
shortest journey time.
SHORTEST: The System calculates the
shortest route to the destination.
• TMC: Set the availability of Traffic Message
Channel (TMC) information.
✓: The System calculates (and re-calculates
whenever necessary) the route using
TMC information. Dynamic guidance
will become possible.
×: The System calculates the route without
using TMC information.
• MOTORWAY:
✓: The System calculates the route including
the motorways.
×: The System calculates the route excluding
the motorways.
• FERRY:
✓: The System calculates the route including
availability of ferries.
×: The System calculates the route excluding
availability of ferries.
• TOLLROAD:
✓: The System calculates the route including
the tollroads.
×: The System calculates the route excluding
the tollroads.
37
EN30-41_KD-NX901[E]NAVIfb.indd 37
05.3.17 2:03:41 PM
ENGLISH
Route guidance
Once you start guidance, you will hear the
guidance in the selected language and voice.
In addition to them, the display also shows the
guidance information on the display.
• Guidance voice comes out only through the
front speakers (and the front line out on the
rear).
The following are some of the example of the
voice guidance (and display information):
• Display examples below are the ones used in
the countries where the drivers should keep
right.
• “When possible, U-turn.”
• “Right turn 400 meters ahead.”
• “Take the first exit at the roundabout.”
• “Keep right 400 meters ahead.”
The guidance information appears.
• By pressing NAVI/AV, you can return
to the playback source operation screen.
Yet, the guidance information to the
destination is displayed on the right of
the display.
WARNING: Road traffic regulations
always take priority when a vehicle is being
driven in traffic. Navigation System is
only an aid. Errors may occur in individual
data items/entries. At all times, the driver
must decide whether or not to heed the
information provided.
JVC does not accept liability for
erroneous data provided by the
Navigation System.
• “You have arrived at your destination.
Guidance ends at this point.”
To return to the normal screen after reaching
the destination, press any button.
• When you come close to a Via Point (approx.
within 30 m), the following screen appears.
When you reach the Via Point, or move away
(approx. 30 m) from it, the normal guidance
screen will be resumed.
38
EN30-41_KD-NX901[E]NAVIfb.indd 38
05.3.17 2:03:42 PM
While being navigated, you can use the
following convenient functions using the
number buttons.
ENGLISH
Display information during
guidance
After starting guidance, the guidance
information appears on the display.
• When you are still far from the next
turning point:
To return to the guidance screen (left) after you
use these functions...
• The current road name *
• DST: Distance to the destination
• ETA: Estimated time of arrival
Avoiding congestion
When you realize a congestion exists ahead...
• When you come close to the next
turning point:
• The next road name * you will take
• The distance to the turning point
* If the road is unnamed in the database,
“UNNAMED” appears for the road name.
1
AVOID SECTION menu appears.
2 Enter the length of the congestion to
avoid.
3 Start searching for the detour.
39
EN30-41_KD-NX901[E]NAVIfb.indd 39
05.3.17 2:03:43 PM
ENGLISH
Displaying traffic information
You can confirm the traffic information of the
place* nearest to your current position along the
route.
* Within 100 km from the current position.
2 Select the one you want to confirm in
details.
Displaying the current position in
details
TRAFFIC INFO screen appears.
On this screen, you can confirm the following:
• Event: Shows the detailed traffic information.
(If “– – – – –” appears, no information is now
available.)
• Road: on what road it is happening.
• TAIL: up to where it continues.
• HEAD: from where it is happening
• Time: The period for which this information
is valid.
•
•
•
•
•
1st row: country
2nd row: city
3rd row: road
4th row: latitude
5th row: longitude
Displaying the turning points list
You can confirm the route you are taking to the
destination.
To confirm the available* traffic information
along the route...
* Within 200 km from the current position.
1 Display the traffic information list.
40
EN30-41_KD-NX901[E]NAVIfb.indd 40
05.3.17 2:03:44 PM
DETAILS menu appears.
Using this menu, you can confirm the
following:
Dynamic guidance
Once “TMC” (see page 37) is set to “✓ (On),”
you can use dynamic route guidance.
The traffic announcements sent by a TMC
radio station is received and analysed by the
System. The System can inform you of where
congestion exists, and how you can detour it.
• Dynamic route guidance is not available in
some countries.
• The System can receive TMC information
without tuning in to such a station.
ENGLISH
Displaying the guidance details
• JOURNEY INFO:
As the traffic announcements are transmitted
by TMC radio stations, JVC cannot assume
responsibility for the completeness or
accuracy of the announcements.
• DESTINATION INFO:
To confirm all available traffic information...
You can confirm it any time except when
the display is showing the playback source
information.
1 Display the traffic information list.
• GUIDANCE MODE:
2 Select the one you want to confirm in
details.
41
EN30-41_KD-NX901[E]NAVIfb.indd 41
05.3.17 2:03:46 PM
ENGLISH
Radio operations
Listening to the radio
!
~
Start searching for a station.
When a station is received,
searching stops.
Ÿ
To stop searching, press OK.
To tune in to a station manually
In step !...
Lights up when receiving an FM stereo
broadcast with sufficient signal strength.
1
4
2
5 6 7
8
Within
5 seconds
3
9pqw e
1
2
3
4
5
6
7
8
9
p
q
w
e
FM/AM band
Station frequency
STEREO/MONO indicators
Station icon
PTY icon
TP indicator (see page 46)
PTY indicator (see page 47)
Sound mode (see page 85)
AF/REG indicator (see page 88)
Programme type (PTY: see page 45)
Station name (PS)
Preset number
DX/LOCAL indicators
42
EN42-47_KD-NX901[E]tunerfb.indd 42
05.3.17 2:04:33 PM
1
Storing stations in memory
You can preset six stations for each band.
ENGLISH
When an FM stereo broadcast is hard to
receive
FM station automatic presetting—
SSM (Strong-station Sequential
Memory)
2
1
MONO indicator lights up.
Reception improves, but stereo effect will
be lost.
2 Select the FM band (FM1 – FM3)
you want to store into.
To restore the stereo effect, repeat the same
procedure. “Mono Off” appears and the MONO
indicator goes off.
Tuning in FM stations only with
strong signals
If received signals are weak, you may only
hear noises. You can make this unit detect only
stations with sufficient signal strength while
searching for FM stations.
3
4
1
“SSM” appears, then disappears when
automatic presetting is over.
2
Local FM stations with the strongest signals are
searched and stored automatically in the FM
band.
• DX: To tune in to all receivable stations.
The DX indicator lights up.
• Local: To tune in to only stations with
sufficient signal strength.
LOCAL indicator lights up.
Manual presetting
Ex.: Storing FM station of 92.5 MHz into the
preset number 4 of the FM1 band.
1
To be continued...
43
EN42-47_KD-NX901[E]tunerfb.indd 43
05.3.17 2:04:36 PM
ENGLISH
2
To select a preset station on the list
1 Select “TUNER,” then the band.
3
2 Display the preset station list.
4
Preset number flashes for a while.
• For FM bands: Rotate the dial to display
the lists for the other bands.
Listening to a preset station
3 Select the preset station.
• If you cannot tune in to the preset FM RDS
station, Programme Search is working. For
details, see “P-Search” on page 89.
1
Changing the display information
2
3 Select the preset station.
Station name is enlarged.
44
EN42-47_KD-NX901[E]tunerfb.indd 44
05.3.17 2:04:37 PM
2 Select one of your favourite
ENGLISH
The following operations are only
possible while you are tuning in to
an FM RDS station.
programme type.
What you can do with RDS
RDS (Radio Data System) allows FM
stations to send an additional signal along
with their regular programme signals.
By receiving the RDS data, this receiver can
do the following:
• Programme Type (PTY) Search (see below)
• Standby Reception of Traffic
Announcement (TA: see the following)
or your favourite programme (PTY) (see
pages 46 and 47)
• Tracking the same programme automatically
—Network-Tracking Reception (see page 47)
• Programme Search (see page 89)
• To select from all PTY
codes...
3 Start searching.
If there is a station broadcasting a
programme of the same PTY code as you
have selected, that station is tuned in.
PTY codes
News, Affairs, Info, Sport, Educate, Drama,
Culture, Science, Varied, Pop M (music),
Rock M (music), Easy M (music),
Light M (music), Classics, Other M
(music), Weather, Finance, Children, Social,
Religion, Phone In, Travel, Leisure, Jazz,
Country, Nation M (music), Oldies, Folk M
(music), Document
To select a PTY code on the list
1
2
Searching for your favourite
programme
You can tune in to a station broadcasting your
favourite programme by searching for a PTY code.
Preset PTY codes list (see page 46) appears.
1
• To move to the other lists...
The last selected PTY code appears.
To be continued...
45
EN42-47_KD-NX901[E]tunerfb.indd 45
05.3.17 2:04:38 PM
ENGLISH
3 Select a PTY code.
4 Repeat steps 2 and 3 to store
other PTY codes into other preset
numbers.
4 Start searching.
5 Finish the procedure.
Using the standby receptions
Storing your favourite programmes
You can store six favourite programme types.
Preset programme types in the number buttons
(1 to 6):
1
TA Standby Reception
TA Standby Reception allows the receiver to
switch temporarily to Traffic Announcement
(TA) from any source other than AM.
The volume changes to the preset TA volume
level (see page 89).
• If the DAB tuner is connected, Standby
Reception also works to search for a DAB
service broadcasting Traffic Announcement.
To activate TA Standby Reception
TP indicator either lights up
or flashes.
2 Select a PTY code.
Ex.: When “Rock M” is selected
3 Select the preset number (1 – 6) you
want to store into.
• If the TP indicator lights up, TA Standby
Reception is activated.
• If the TP indicator flashes, TA Standby
Reception is not yet activated.
To activate TA Standby Reception, tune in to
another station (or DAB service) providing
the signals. The TP indicator will stop
flashing and remain lit.
To deactivate the TA Standby Reception
TP indicator goes off.
Preset number flashes for a while.
46
EN42-47_KD-NX901[E]tunerfb.indd 46
05.3.17 2:04:39 PM
PTY Standby Reception allows the unit to
switch temporarily to your favourite programme
from any source other than AM.
• When shipped from the factory, “News” is
selected for your favourite programme type.
To change it to your favourite PTY code, see
page 88.
• If the DAB tuner is connected, Standby
Reception also works to search for a DAB
service.
To activate PTY Standby Reception
1
Tracking the same programme
When driving in an area where FM reception
is not sufficient enough, this receiver
automatically tunes in to another FM RDS
station of the same network, possibly
broadcasting the same programme with
stronger signals (see the illustration below)—
Networking-Track Reception.
ENGLISH
PTY Standby Reception
When shipped from the factory, NetworkTracking Reception is activated.
To change the Network-Tracking Reception
setting, see “AF-Regn’l” on page 88.
Programme A broadcasting on different
frequency areas (01 – 05)
2
The PTY indicator either lights up or
flashes.
• If the PTY indicator lights up, PTY
Standby Reception is activated.
• If the PTY indicator flashes, PTY Standby
Reception is not yet activated.
To activate PTY Standby Reception, tune
in to another station (or DAB service)
providing the signals. The PTY indicator
will stop flashing and remain lit.
To deactivate the PTY Standby Reception
Select “PTY Off.”
PTY indicator goes off.
47
EN42-47_KD-NX901[E]tunerfb.indd 47
05.3.17 2:04:40 PM
ENGLISH
Disc operations
Playing a disc in the receiver
The disc type is automatically detected, and
playback starts automatically (for DVD:
automatic start depends on its internal program).
• Turn on the monitor for playing a DVD or
VCD. You can also control the audio CD, CD
Text, and MP3/WMA playback by referring
to the monitor screen. (See pages 57 and 58.)
If the current disc is an audio CD, CD Text,
MP3/WMA, or VCD without PBC, all tracks
will be played repeatedly until you change the
source or eject the disc.
• If a title list or disc menu appears while
playing a DVD or VCD with PBC, see “Disc
menu operations” on page 53.
The following marks are used to indicate
the playable discs....
DVD Video
Video CD with PBC
Video CD
(with/without PBC)
Audio CD/
CD Text
MP3/WMA disc
All discs listed here
Before performing any operations, make
sure the following....
• For DVD playback, you can change the Setup
Menu setting as you like. (See pages 59 – 61.)
• For DVD/CD playback, using the remote
controller is more attractive. You can enjoy
more functions.
When you want to operate the DVD/CD
player using the buttons on the control
panel, see “Other disc operations” on pages
62 to 65.
If “ ” appears on the monitor when
pressing a button, the disc cannot accept an
operation you have tried to do.
• In some cases, without showing “ ,”
operations will not be accepted.
When you play back a multi-channel DVD
software such as Dolby Digital and DTS,
signals are down converted into 2 channels,
and reproduced through the speakers and
LINE OUT jacks on the rear. (See also
“DOWN MIX” on page 61.)
• To fully enjoy multi-channel DVD
software, connect a multi-channel decoder
compatible with these sources to the
DIGITAL OUT terminal on the rear. (See
also “DIGITAL AUDIO OUTPUT” on
page 61.)
48
EN48-65_KD-NX901[E]DVDfb.indd 48
05.3.17 2:05:45 PM
1
2
3
ENGLISH
While playing DVD:
1
2
3
Title number
Chapter number
Playing time information
1
Folder name icon/Album title (Tag)
icon
Folder number
Track number
Elapsed playing time
Track name icon/Track title (Tag)
icon
MP3/WMA icon
Track title or track name
Album title/performer or folder
name
While playing MP3/WMA discs:
1
2
2
3
3
5
4
6
4
5
6
While playing CD/VCD:
1
2
3
1*
2
3
4*
5*
6*
4
5
6
7
Disc title icon
Track number
Elapsed playing time
Track title icon
Track title
Disc title/performer or your assigned
disc name
PBC playback (for VCD with PBC)
7
* Only for CD Text/Audio CD
49
EN48-65_KD-NX901[E]DVDfb.indd 49
05.3.17 2:05:48 PM
ENGLISH
Basic operations
Operations
Display indication and/or next operation
To stop play temporarily
“PAUSE” illuminates on the display.
A still picture appears.
A Frame by frame playback
B Slow motion playback
*
* Reverse slow motion playback is only for DVD.
To resume normal play:
To replay the previous
scenes—One Touch Replay
The playback position moves back about 10 seconds before
the current position.
To stop playback
When you start playback again, playback
starts from where it has been stopped
(Resume play).
When you start playback again, playback starts from
the beginning of the last track.
• During playback, on-screen guide icons appear on the monitor for a while (see page 111).
To eject the disc
50
EN48-65_KD-NX901[E]DVDfb.indd 50
05.3.17 2:05:49 PM
• For DVD: During play or pause.
• For VCD: While PBC (see page 53) is not
in use.
To locate a particular title/chapter/
track directly
• For DVD: During play or pause—Chapter
Before playback—Title
• For VCD: While PBC (see page 53) is not
in use.
• For MP3/WMA: Select a track within the
same folder.
ENGLISH
To go to the next or previous
chapters/tracks
To fast-forward or reverse
the track—Forward/
Reverse Search
• To select a number greater than 9, see “How
to select a number” on page 9.
To locate a title/folder
• You can also use the following buttons.
The search speed
changes to x2 ] x10.
To locate a particular title/folder
directly
To resume normal speed
Then, within 10 seconds,
press the number buttons
(see page 9).
• For MP3/WMA discs: To directly select
the folders using the number button(s), it
is required that folders be assigned 2 digit
numbers at the beginning of their folder
names—01, 02, 03, and so on.
51
EN48-65_KD-NX901[E]DVDfb.indd 51
05.3.17 2:05:51 PM
ENGLISH
DVD/VCD special functions
Selecting subtitles
You can select the language of the subtitle to be
shown on the monitor.
• You can also erase the subtitle if not
necessary.
For VCD:
You can select the audio channel to
play. (This is convenient when playing a
Karaoke VCD.)
ST
ST
ST
1/3
ENGLISH
1/3
ST
ENGLISH
Ex. when the disc has 3 options
ST: To listen to normal stereo (left/right)
playback.
L:
To listen to the L (left) audio channel.
R:
To listen to the R (right) audio channel.
Selecting audio languages
For DVD:
You can select the language to listen to if the
disc has multiple audio languages.
1/3
ENGLISH
Selecting multi-angle views
You can view the same scene at different angles
if the disc has multi-angle views.
1/3
1/3
1/3
1
ENGLISH
1
Ex. when the disc has 3 options
1/3
1/3
1
2
1/3
3
Ex. when the disc has 3 multi-angle views
52
EN48-65_KD-NX901[E]DVDfb.indd 52
05.3.17 2:05:52 PM
Menu-driven playback is possible while playing
back a DVD with menu-driven features or a
VCD with PBC (PlayBack Control).
To return to the previous
menus
• For some discs, you can also move between
the menus by pressing 4 / ¢.
ENGLISH
Disc menu operations
While playing a DVD
Cancelling the PBC playback
1
1
A title list or disc menu will appear on the
monitor.
2 Select a track number.
2 Select the item you want on the
menu.
• To select a number greater than 9, see “How
to select a number” on page 9.
Selected item starts playback.
• On some discs, you can also select items
using the corresponding number buttons.
To resume PBC
Zoom in
While playing a VCD
• When a list of items is displayed on the
monitor.
• To select a number greater than 9, see “How
to select a number” on page 9.
1
ZOOM 1
ZOOM OFF
ZOOM 2
ZOOM 3
ZOOM 6
ZOOM 4
ZOOM 5
2 Move the zoomed-in portion.
53
EN48-65_KD-NX901[E]DVDfb.indd 53
05.3.17 2:05:53 PM
ENGLISH
On-screen disc operations
About the On-Screen Bar
You can check the disc information and use
some functions through the on-screen bar.
• For audio CD, CD Text, and MP3/WMA
disc you can also use the control screen
(see pages 57 and 58).
On-Screen bars
DVD
2ch
DVD -V
TIME
TITLE
CHAP
T02-C03 TOTAL 1:25:58
OFF
VCD
VCD
PBC
TIME
TRACK
TRACK 1 TIME
00:36
REPEAT INTRO RANDOM
MP3/WMA
TIME 00:00:36
FILE
REPEAT INTRO RANDOM
CD Text/Audio CD
CD
5. 1ch
REPEAT INTRO RANDOM
TIME
1 Disc type
2 • Audio signal format type (for DVD and
DTS audio CD)
• PBC (only for VCD)
3 Playback information
Current title/chapter
T02-C03
TRACK 1
Current track
TOTAL
Elapsed playing time
T. REM
Remaining disc time (for VCD)
Remaining title time (for DVD)
TIME
Elapsed playing time of the
current chapter/track
REM
Remaining time of the current
chapter/track
4 Playback condition
Play
Forward/Reverse Search
Forward/Reverse Slow-motion
Pause
Stop
5 Operation icons
Time indication
TIME
Time Search *
TITLE
Title Search
CHAP
Chapter Search
Track Search *
TRACK
Change the audio language or
audio channel.
Change the subtitle language.
Change the view angle.
Repeat play (for DVD)
OFF
REPEAT
Repeat play (for other discs) *
INTRO
Intro play *
RANDOM
Random play *
00:36
* Not available during PBC playback.
54
EN48-65_KD-NX901[E]DVDfb.indd 54
05.3.17 2:05:54 PM
4 Finish the procedure.
ENGLISH
On-screen bar basic operations
1 Display the on-screen bar.
• For DVD/VCD:
To erase the on-screen bar
(twice)
• For other discs:
On-screen bar appears for
about 5 seconds.
2ch
DVD -V
TIME
TITLE
T02-C03 TOTAL 1:25:58
OFF
CHAP
2 Select an item.
• The selectable options for Repeat/Intro/
Random plays:
OFF
• If pop-up menu does not appears, pressing
ENTER repeatedly changes the settings.
DVD:
• If pop-up menu appears, go to steps 3 and
4.
2ch
DVD -V
TIME
TITLE
Repeat play
OFF
CHAP
TITLE
T02-C03 TOTAL 1:25:58
CHAP
OFF
REPEAT
––
3 • Make a selection from the pop-up
Repeat play
VCD:
menu.
MP3/WMA:
• Enter the number.
CD Text/Audio CD:
To be continued....
55
EN48-65_KD-NX901[E]DVDfb.indd 55
05.3.17 2:05:56 PM
ENGLISH
INTRO
To search for a particular point by playing
time
Intro play
VCD:
1 Select
.
2 Enter the elapsed playing time of the current
title or of the disc.
MP3/WMA:
CD Text/Audio CD:
Ex. • To enter 1 (hours): 02 (minutes): 00
(seconds), press 1, 0, 2, 0, then 0.
• To enter 54 (minutes): 00 (seconds), press
0, 5, 4, 0, then 0.
RANDOM
Random play
• It is always required to enter the hour digit
(even “0” hour), but it is not required to
enter trailing zeros (the last two digits in
the examples above).
• To correct a misentry, press...
VCD:
MP3/WMA:
3 Finish the procedure.
To search for a particular title/chapter/
track
CD Text/Audio CD:
1 Select TITLE , CHAP
2 Enter the number.
or
TRACK
.
To change the time information
1 Select TIME .
2 Change the time information.
TIME
0:00:58
T.REM 0:35:24
REM
0:11:23
TOTAL 1:01:58
• To correct a misentry, press the number
button until the correct number is entered.
3 Finish the procedure.
56
EN48-65_KD-NX901[E]DVDfb.indd 56
05.3.17 2:05:58 PM
You can search for and play the desired items
through the control screen.
• The control screen automatically appears on
the monitor when you insert a disc.
To select a folder or track
1 Select “Folder” list or “Track” list on the
control screen.
ENGLISH
Control screen basic operations
2 Select a folder or track.
MP3/WMA control screen
REPEAT TRACK TIME : 00:00:14
FOLDER : 2 / 3
01 Music
02 Music
03 Music
Track Information
Album
Weather
Artist
Robert M. Smith
Title
Rain
Track : 5 / 14 (Total 41)
Cloudy.mp3
Fair.mp3
Fog.mp3
Hail.wma
Indian summer.mp3
Rain.mp3
Shower.mp3
Snow.mp3
Thunder.wma
Typhoon.mp3
Wind.mp3
Winter sky.mp3
CD Text/Audio CD control
screen
• While recording a CD into the HDD,
CD Text/Audio CD control screen is not
displayed.
TIME :
1
2
3
4
5
6
7
Current folder
Current folder number/total folder number
Folder list
Selected playback mode
Elapsed playing time of the current track
Operation mode icon
Current track number/total number of tracks
in the current folder (total number of tracks
in the disc)
8 Track information
9 Track list
p Current track (highlighted bar)
Track Information
Album
Four seasons
Artist
Robert M. Smith
Title
Rain
1
2
3
4
5
6
00:14
Track : 5 / 14
Cloudy
Fair
Fog
Hail
Indian summer
Rain
Shower
Snow
Thunder
Typhoon
Wind
Winter sky
Elapsed playing time of the current track
Operation mode icon
Current track number/total number of tracks
Track information
Track list
Current track (highlighted bar)
To select a track
57
EN48-65_KD-NX901[E]DVDfb.indd 57
05.3.17 2:05:59 PM
ENGLISH
List screen operations
You can display the folder list/track list while
playback is stopped. On this list, you can
confirm the contents and start playback.
For MP3/WMA:
1 Display the folder list.
Each time you press the button,
the list screen comes on and
goes off.
2 Select the folder on the list.
Folder/track list screens
Folder list (MP3/WMA)
Folder : 153/440 Track 154/198
fol140
fol150
fol130
fol141
fol151
fol131
fol142
fol152
fol132
fol143
fol153
fol133
fol144
fol154
fol134
fol145
fol155
fol135
fol146
fol156
fol136
fol147
fol157
fol137
fol148
fol158
fol138
fol149
fol159
fol139
Page : 4/11
fol160
fol161
fol162
fol163
fol164
fol165
fol166
fol167
fol168
fol169
Track list (MP3/WMA/CD Text/Audio CD)
Folder : 169/220 Track 154/198
file0131.mp3 file0141.mp3 file0151.wma
file0132.mp3 file0142.mp3 file0152.mp3
file0133.wma file0143.mp3 file0153.wma
file0134.mp3 file0144.mp3 file0154.mp3
file0135.mp3 file0145.wma file0155.mp3
file0136.wma file0146.mp3 file0156.mp3
file0137.wma file0147.wma file0157.mp3
file0138.mp3 file0148.mp3 file0158.wma
file0139.mp3 file0149.wma file0159.wma
file0140.wma file0150.wma file0160.wma
Page : 4/11
file0161.wma
file0162.mp3
file0163.wma
file0164.mp3
file0165.wma
file0166.wma
file0167.wma
file0168.wma
file0169.mp3
file0170.wma
Track list of the selected folder appears.
3 Select the track on the list, and start
playback.
To go back to the folder list,
press...
For CD Text/Audio CD:
1 Display the track list.
Each time you press the button,
the list screen comes on and
goes off.
2 Select the track on the list, and start
Ex. Track list for MP3/WMA
playback.
1 Current folder number/total folder
number (only for MP3/WMA)
2 Current track number/total number of
tracks in the current folder (for MP3/
WMA) or in the disc (for CD Text/
Audio CD)
3 Current page/total number of the pages
included in the list
4 Current folder/track (highlighted bar)
58
EN48-65_KD-NX901[E]DVDfb.indd 58
05.3.17 2:06:00 PM
You can store the initial disc playback status.
• While playing, no change can be made on the
Setup Menus.
• When shipped from the factory, the on-screen
language is set to English. To change the
language, see page 60.
4
AUDIO
DIGITAL AUDIO OUTPUT
STREAM/PCM
DOWN MIX
STEREO
DOLBY SURROUND
ONSTEREO
D. RANGE COMPRESSION
Basic setting procedure
ENGLISH
DVD setup menu
5 select an option.
1
LANGUAGE
AUDIO
MENU LANGUAGE
ENGLISH
AUDIO LANGUAGE
ENGLISH
SUBTITLE
ENGLISH
ON SCREEN LANGUAGE
ENGLISH
2
DIGITAL AUDIO OUTPUT
STREAM/PCM
DOWN MIX
STEREO
DOLBY SURROUND
ONSTEREO
D. RANGE COMPRESSION
6
AUDIO
AUDIO
DIGITAL AUDIO OUTPUT
STREAM/PCM
DOWN MIX
STEREO
D. RANGE COMPRESSION
ON
Ex.: When selecting the “AUDIO” screen
DIGITAL AUDIO OUTPUT
STREAM/PCM
DOWN MIX
DOLBY SURROUND
D. RANGE COMPRESSION
ON
To return to the normal screen
3 Select an item you want to set up.
AUDIO
DIGITAL AUDIO OUTPUT
STREAM/PCM
DOWN MIX
STEREO
D. RANGE COMPRESSION
ON
Ex.: When selecting “DOWN MIX”
59
EN48-65_KD-NX901[E]DVDfb.indd 59
05.3.17 2:06:01 PM
ENGLISH
LANGUAGE menu
Item
Contents
MENU LANGUAGE :
Select the initial disc menu language.
ENGLISH, SPANISH, FRENCH, GERMAN, ITALIAN, DUTCH, SWEDISH,
DANISH, and others.
AUDIO LANGUAGE :
Select the initial audio language.
ENGLISH, SPANISH, FRENCH, GERMAN, ITALIAN, DUTCH, SWEDISH,
DANISH, and others.
SUBTITLE :
Select the initial subtitle language or erase the subtitle (OFF).
OFF (no subtitles), ENGLISH, SPANISH, FRENCH, GERMAN, ITALIAN,
DUTCH, SWEDISH, DANISH, and others.
ON SCREEN LANGUAGE :
Select the language for the Setup Menu and some indications shown on the
monitor.
ENGLISH, SPANISH, FRENCH, GERMAN, ITALIAN, DUTCH, SWEDISH,
DANISH.
• For the LANGUAGE settings, see also the language codes list on page 104.
PICTURE menu
Item
Contents
MONITOR :
16:9
4:3 LETTER BOX
4:3 PAN SCAN
OSD POSITION :
Position 1
Position 2
Select the monitor type to watch a wide screen picture on your monitor.
• 16:9 : Select this when the aspect ratio of your monitor is 16:9.
• 4:3 LETTER BOX : Select this when the aspect ratio of your
monitor is 4:3. While viewing a wide screen picture, the black bars
appear on the top and the bottom of the screen.
• 4:3 PAN SCAN : Select this when the aspect ratio of your monitor is
4:3.
While viewing a wide screen picture, the black bars do not appear;
however, the left and right edges of the pictures will not be shown on
the screen.
Select the on-screen bar position on the monitor.
• 1 : Higher position
• 2 : Lower position (Help screens under the Setup Menu also
disappear.)
60
EN48-65_KD-NX901[E]DVDfb.indd 60
05.3.17 2:06:02 PM
Item
Contents
DIGITAL AUDIO OUTPUT :
Select the signal format to be emitted through the DIGITAL OUT (Optical)
terminal on the rear.
• PCM ONLY : Select this when connecting an amplifier or a decoder
incompatible with Dolby Digital, DTS, and MPEG Audio, or connecting to a
recording device.
• DOLBY DIGITAL/PCM : Select this when connecting an amplifier or a
decoder compatible with Dolby Digital.
• STREAM/PCM : Select this when connecting an amplifier or a decoder
compatible with Dolby Digital, DTS, and MPEG Audio.
DOWN MIX :
When playing back a multi-channel DVD disc, this setting affects the signals
reproduced through the LINE OUT jacks (and thought DIGITAL OUT
terminal when “PCM ONLY” is selected for “DIGITAL AUDIO OUTPUT.”)
• DOLBY SURROUND : Select this when you want to enjoy multi-channel
surround audio by connecting an amplifier compatible with Dolby Surround
to this receiver.
• STEREO : Normally select this.
ENGLISH
AUDIO menu
D. RANGE COMPRESSION : You can enjoy a powerful sound at low or middle volume levels while playing
a Dolby Digital software.
• AUTO : Select this to apply the effect to multi-channel encoded software
(excluding 1 channel and 2 channel software).
• ON : Select this to always use this function.
61
EN48-65_KD-NX901[E]DVDfb.indd 61
05.3.17 2:06:03 PM
ENGLISH
Other disc operations
In this section, you can learn how to use the
buttons on the control panel in order to operate
the DVD/CD player.
Basic operations
To stop playback
To go to the next or previous
chapters/tracks
• For DVD: During play or pause.
• For VCD: While PBC (see page 53) is not
in use.
Using the control
dial:
Using the number
buttons:
To start playback again
• If you press the button
during pause, it is also
cancelled.
To replay the previous screens
—One Touch Replay
While playing...
To locate a particular title/chapter/
folder/track directly
• For DVD: During play or pause—Chapter
Before playback—Title
• For VCD: While PBC (see page 53) is not
in use.
To select a number from 1 – 6:
To eject a disc
To select a number from 7 – 12:
To fast-forward or reverse
the chapter/track
The search speed changes to x2 ] x10.
• To use folder search on MP3/WMA discs, it
is required that folders are assigned with a
2-digit number at the beginning of their folder
names—01, 02, 03, and so on.
• Number buttons can also use to select item on
the PBC menu.
62
EN48-65_KD-NX901[E]DVDfb.indd 62
05.3.17 2:06:04 PM
To select a folder/track on the list
You can confirm the title of each item and
select the item you want.
• For DVD: During play or pause.
• For VCD: While PBC (see page 53) is not
in use.
• For MP3/WMA: Select a track within the
same folder.
As you rotate the dial, you can skip 10 chapters/
tracks at a time.
First time you rotate the dial, the chapter/track
skips to the nearest higher or lower chapter/
track with a chapter/track number of multiple
ten (ex. 10th, 20th, 30th). Then, each time you
rotate the dial, you can skip 10 chapters/tracks.
• After the last track, the first chapters/tracks
will be selected and vice versa.
To go to the next or previous folders
1
Folder icon is highlighted on the display.
Within
5 seconds
1
ENGLISH
To skip chapters/tracks quickly
Folder list appears.
2
3 Select an item on the list.
To move to another page of
the list, rotate the dial.
Prohibiting disc ejection
You can lock a disc in the loading slot.
2
To cancel the prohibition, repeat the same
procedure. “Eject OK” flashes.
63
EN48-65_KD-NX901[E]DVDfb.indd 63
05.3.17 2:06:05 PM
ENGLISH
Selecting the playback modes
You can use only one of the following playback modes at a time.
1
2 Select your desired playback mode.
Repeat play
*1 Only while playing a DVD disc.
*2 Only while playing an MP3 or WMA disc.
Mode
Plays repeatedly
Chapter
• For DVD: During play or pause.
• For VCD: While PBC (see page 53) is
not in use.
Random play
One chapter.
•
lights up.
Title *1: One title.
•
lights up.
Track:
One track.
•
lights up.
Folder *2: All tracks of the folder.
•
lights up.
Off:
For DVD: Cancels Repeat play.
For other discs: All tracks of the disc.
Mode
Folder
Disc:
Off:
Intro scan
*1:
Mode
Plays at random
*2:
All tracks of the folder, then tracks
of the next folder and so on.
•
lights up.
All tracks of the disc.
•
lights up.
Cancels.
Plays the first 15 seconds of
Track:
All tracks of the disc.
•
lights up.
Folder *2: First track of every folder.
•
lights up.
Off:
Cancels.
To cancel the playback mode
• You can also cancel it by selecting “Off” in step 2.
64
EN48-65_KD-NX901[E]DVDfb.indd 64
05.3.17 2:06:06 PM
ENGLISH
Changing the display information
• For MP3/WMA discs
• For CD Text/Audio CD
Album title/performer or folder name is
enlarged.
Disc title/performer or your assigned disc
name is enlarged.
Track title or track name is enlarged.
Track title is enlarged.
Icons
Meanings
Folder name icon
Track name icon
Disc title icon
Album title (Tag) icon
Track title (Tag) icon
MP3 format
WMA format
65
EN48-65_KD-NX901[E]DVDfb.indd 65
05.3.17 2:06:08 PM
ENGLISH
HDD operations
Playing genre/album/track in the HDD
~
About the HDD
The built-in HDD works not only as storage
for navigation data, but as Music Server
where you can record 99 albums in each
genre folder (total 99 genre folders can be
made).
• Each album can include 999 tracks.
• Playlists can also be made and played.
To record CDs, see “Recording audio CDs”
on page 70.
To copy MP3/WMA files from an SD card
into the HDD, see page 82.
To edit the contents of the HDD, see
“Editing the HDD contents” on page 72.
1
2
3
The last selected track starts playing.
• All tracks in the HDD will be played
repeatedly until you change the source.
• WMA Tag cannot be displayed during
HDD playback.
1
4
2
3
4
5
6
5
6
78
9
7
8
9
Album name icon/Album title (Tag)
icon
Album number
Track number
Elapsed playing time
Track name icon/Track title (Tag)
icon
Recording format—MP3/WMA/
CDC*
Track title or track name
Album title/performer or album
name
Genre number
* CDC:CD compression—format used for storing CD tracks into the HDD. Either <.llc> or <.bsc>
is used as an extension code (see page 71).
66
EN66-77_KD-NX901[E]HDDfb.indd 66
05.3.17 2:07:05 PM
Using the control
dial:
2
ENGLISH
To go to the next or previous track
Using the number
buttons:
To select a track/album/genre on the list
You can confirm the title of each item and select
the item you want.
• To select a playlist, see page 70.
1
• By using the number buttons (1 – 6), you can
also go directly to tracks 1 – 12.
– For tracks 1 – 6: Press 1 – 6.
– Fro tracks 7 – 12: Press and hold 1 – 6.
To skip tracks quickly
You can skip tracks within the same album.
Genre list appears.
2
As you rotate the dial, you can skip 10 tracks at
a time.
First time you rotate the dial, the track skips to
the nearest higher or lower track with a track
number of multiple ten (ex. 10th, 20th, 30th).
Then, each time you rotate the dial, you can
skip 10 tracks.
• After the last track, the first track will be
selected and vice versa.
*
* During playlist playback, the track
list included in the current playlist is
displayed.
3 Select an item on the list.
To go to the next or previous albums/
genres
1
To move to another page of
the list, rotate the dial.
• The icon for the selected item is
highlighted on the display (except track
icon).
• During playlist playback, this does not
work. You can skip tracks only.
Within
5 seconds
67
EN66-77_KD-NX901[E]HDDfb.indd 67
05.3.17 2:07:07 PM
ENGLISH
Selecting the playback modes
You can use only one of the following playback modes at a time.
1
2 Select your desired playback mode.
Repeat play
Mode
Plays repeatedly
Track:
Off:
One track.
•
lights up.
All tracks of the album.
•
lights up.
All tracks in the genre.
•
lights up.
Cancels.
Mode
Plays at random
Album:
Off:
All tracks of the album.
•
lights up.
All tracks of the genre.
•
lights up.
All tracks in the HDD.
•
lights up.
Cancels.
Mode
Plays the first 15 seconds of
Track:
All tracks of the album.
•
lights up.
First track of every album.
•
lights up.
First track of every genre.
•
lights up.
Cancels.
Album:
Genre:
Random play
Genre:
All:
Intro scan
Album:
Genre:
Off:
To cancel the playback mode
• You can also cancel it by selecting “Off” in
step 2.
• HDD playback mode is also cancelled in the
following cases:
– When you record an audio CD into the
HDD (see page 70).
– When you duplicate the data in the SD into
the HDD (see page 82).
68
EN66-77_KD-NX901[E]HDDfb.indd 68
05.3.17 2:07:09 PM
• For normal playback
Album title/performer or album name is
enlarged.
• For playlist playback
ENGLISH
Changing the display information
Playlist name is enlarged.
Track title or track name is enlarged.
Track title or track name is enlarged.
Icons
Meanings
Genre name icon
Album name icon
Genre name is enlarged.
Track name icon
Playlist name icon
Album title (Tag) icon
Track title (Tag) icon
MP3 format
WMA format
CDC format
69
EN66-77_KD-NX901[E]HDDfb.indd 69
05.3.17 2:07:10 PM
ENGLISH
Playing playlists
You can display the lists of the playlists stored,
then select the one you want to play.
• To make your own playlists, see page 75.
1
Recording audio CDs
You can only record audio CD (CD-DA) tracks
into the HDD.
• While the following recording/editing
process:
– To return to the previous screens, press
BACK (DISP) repeatedly.
– To cancel it, press and hold BACK (DISP).
1 While playing a CD...
2 Display the list of the playlists.
*
* This appears only after you have
cancelled recording (but have neither
ejected the disc nor edited the HDD
contents).
2 Select the recording type.
3 Select the playlist, and start
playback.
• If more than six playlists exist, rotate the
dial to show other playlists, then press...
To cancel the playlist playback, select a genre
or an album after displaying the list (see page
67).
• REC Album: Records the entire CD
from its first track.
• REC Track: Records the current track
from its beginning.
• REC Continue: Continues the
previously cancelled recording from the
track being recorded when cancelled.
\ Go to step 6.
70
EN66-77_KD-NX901[E]HDDfb.indd 70
05.3.17 2:07:11 PM
6 Start recording.
ENGLISH
3 Select the genre to store the
recording into.
• If more than six genres exist, rotate the
dial to show other genres, then press...
7 When the following screen appears,
stop recording.
• If you want to create a new genre folder,
select “New Genre.”
4 Select the album to store the
recording into.
• When you have selected “REC Album,”
this step is skipped.
• If more than six albums exist, rotate the
dial to show other albums, then press...
• To store the track into a new album, select
“New Album.”
• Recording is finished before playback is over.
Once you stop the recording, CD playback
resumes.
• Track names are automatically assigned with
the extension code <.llc> or <.bsc>.
• Even if you do not stop recording manually,
recording is automatically stored.
• When you have selected “New Genre” or
“New Album,” its title will be assigned
automatically such as <ge000001>,
<ge000002>, or <al000001>, <al000002>.
You can change the title later manually (see
page 72).
To cancel the recording
5 Select the recording mode.
or
• Compress (HQ): High quality lossless
recording, but data size is bigger—
extension code <.llc>.
• Compress: More compressed
recording, so data size becomes smaller—
extension code <.bsc>.
• Rectime: shows the total play time of the
recording.
Recording will be cancelled in the following
cases:
• If you turn off the power or switch off the car
ignition switch.
• If you detach the control panel.
To continue the recording, press REC
(MODE), then select “REC Continue” (see
page 70).
71
EN66-77_KD-NX901[E]HDDfb.indd 71
05.3.17 2:07:12 PM
ENGLISH
Assigning the titles
You can assign (or change) the title to genres,
albums, and playlists.
• You cannot assign titles to tracks.
1 While playing an HDD track...
• For assign the title to a playlist, play the
playlist you want.
Enlarge the indication (see also
page 69) to which you want
to assign a new name (ex. to
assign the title to a genre).
• To move the character entry position...
or
(to left)
(to right)
If you press and hold the button, the
character entry position moves the first
position or the last position.
• To erase a misentry, move the character
entry position to the one you want to
erase, then...
• To erase the entire
entries...
4 After entering the title...
2 Enter the text entry mode.
• When you modify the genre or
album name, the current track
will restart from the beginning.
and
Editing the HDD contents
Edit Menus comprises of three main pages
(below) and sub-screens.
3 Assign the title (maximum 32
characters).
• To change the character set...
A–Z/a–z
(Upper case/ Lower case)
Accented letters
(Lower case)
• To enter a character...
0 – 9 & symbols
(Numbers)
Accented letters
(Upper case)
• When one of the Edit Menus is shown, the
current track will be played repeatedly.
• While editing the HDD contents, no sounds
come out.
• When editing is over, the current playback
mode is cancelled, and normal playback will
be resumed.
72
EN66-77_KD-NX901[E]HDDfb.indd 72
05.3.17 2:07:13 PM
3 Select the one you want to erase.
To select the item shown on the display...
• If more than six items exist on the same
level, rotate the dial to display others.
To return to the previous
screen...
Erasing a track/album/genre
Ex. To erase an unwanted track
1 While playing an HDD track...
ENGLISH
To move between the
pages...
4 Confirm.
• Once editing is finished,
playback resumes (from the
current track. If the currently
playing one is erased, from the
track located either before or
after the erased one).
Moving a track/album
You can move the current track into another
album or current album into another genre.
Ex. To move the track
1 While playing an HDD track/album
you want to move...
2 Select one of the “Erase” functions.
: To erase the track within the
current album
: To erase the album within
the current genre
: To erase the genre
2 Select one of the “Move” functions.
: To move the track
: To move the album
To be continued...
73
EN66-77_KD-NX901[E]HDDfb.indd 73
05.3.17 2:07:14 PM
ENGLISH
3 Select an album to move the track
2 Select one of the “Sort” functions.
into.
• For “Move Album”: select the genre to
move the album into.
: To sort the album
4 Confirm.
• Once editing is finished,
playback resumes (from
the tracks in the currently
playing album/genre).
: To sort the genre
Sorting an album/genre
You can change the current album priority in
a genre and the current genre priority in the
HDD.
This is important since the tracks in the HDD
will be played back in the sequence of the listed
genre and album.
Ex. To sort the album
1 While playing an HDD track in an
album or genre you want to sort...
The current album is reversed on the list.
3 Select the album the next to which
you move the current album.
• For “Sort Genre”: select the genre the
next to which you move the current
genre.
4 Confirm.
• Once editing is finished,
playback resumes (from
the tracks in the sorted
album/genre).
74
EN66-77_KD-NX901[E]HDDfb.indd 74
05.3.17 2:07:16 PM
You can create a playlist by entering the
current track into a new playlist. You can also
add tracks into the existing playlist.
• You can create 99 playlists.
1 While playing an HDD track you
want to add in a playlist...
4 Confirm.
• Once editing is finished,
playback resumes (from the
current track).
ENGLISH
Creating/editing a playlist
• When you have selected “New Playlist,”
its title will be assigned automatically
such as <pl000001.m3u>, <pl000002.
m3u>.
You can change the playlist name later
manually (see page 72).
5 Repeat the above steps until you
enter all tracks you want.
• You can include up to 99 tracks in a
playlist.
Erasing a playlist
2 Select “Entry Tr to PL.”
1 While playing an HDD track...
3 Select the playlist you want to add
the track into.
• To add the track into a new playlist, select
“New Playlist.”
2 Select “Erase Playlist.”
To be continued...
75
EN66-77_KD-NX901[E]HDDfb.indd 75
05.3.17 2:07:17 PM
ENGLISH
3 Select an unwanted playlist.
1 While playing an HDD track...
4 Confirm.
2 Select one of the “Copy” functions.
• Once editing is finished,
playback resumes (from the
current track).
: From HDD to SD
: From SD to HDD
Duplicating a playlist
You can copy playlists from the HDD to an
SD card or vice versa. By using this function,
you can edit the playlists stored in the HDD
using your own PC.
Basic procedure:
1 Insert an SD (see page 78).
2 Copy the playlists in the HDD into the SD—
using “Copy PL HDD–>SD.”
3 Copy the playlists from the SD into your
PC, edit them on your PC (see page 77 for
editing), then copy the edited playlist into the
SD.
4 Insert the SD again, then copy the edited
playlists into the HDD—using “Copy PL
SD–>HDD.”
3 Select a playlist you want copy.
4 Confirm.
• Once editing is finished,
playback resumes (from
the current track).
• If the same named playlist exists, it is
overwritten.
76
EN66-77_KD-NX901[E]HDDfb.indd 76
05.3.17 2:07:18 PM
You can export the tree information (folder
structure) of the HDD into an SD card.
This makes it easy for you to make a new
playlist when many genres/albums/tracks are
recorded in the HDD.
• Before starting, insert an SD card.
1 While playing an HDD track...
To make a playlist from this file, use a text
editor on your PC.
Start the first line with <#EXTM3U>, then
list the tracks in the playback sequence as the
example below.
ENGLISH
Storing tree information into SD
#EXTM3U
/m_data/music/genre1/album1/track2.mp3
/m_data/music/genre2/album4/track11.mp3
/m_data/music/genre4/album5/track4.wma
..............
• Save a file with the extension code <.txt>,
then manually change the extension code to
<.m3u>.
To copy the file into the HDD, save it in
<list> folder under <JVCMS> folder as
described on page 78.
2 Select “Store Treeinfo.”
Confirming the HDD contents
You can confirm the contents of the HDD.
1 While playing an HDD track...
3 Confirm.
• Once editing is finished,
playback resumes (from the
current track).
• Tree information is stored in the
loaded SD as <contents.txt>.
2 Select “Disp HDD Info.”
The <contents.txt> file will be displayed on
your PC as follows.
/m_data/music/genre1/album1/track1.mp3
/m_data/music/genre1/album1/track2.mp3
/m_data/music/genre1/album1/track3.wma
/m_data/music/genre1/album1/track4.wma
..............
To erase the HDD Info screen...
77
EN66-77_KD-NX901[E]HDDfb.indd 77
05.3.17 2:07:19 PM
ENGLISH
SD operations
Inserting the SD card
To play the tracks in an SD card, it must be
configured strictly as follows:
You can play back MP3/WMA tracks recorded
in an SD card, and also copy the MP3/WMA
tracks in the SD into the HDD.
• WMA Tag cannot be displayed during SD
playback.
• Turn off the power before detaching the
control panel.
*
• Top folder must be titled <JVCMS> (JVC
Music Server), the folder including album
folder must be <music>.
– DO NOT store the files directly in <music>.
– DO NOT make any folders in album
folders.
• Album titles and track titles can be assigned
as you like; however, track must have their
extension code such as <.mp3> <.wma>.
• <music> folder can include up to 99 album,
and each album can include up to 999 tracks.
~
Detach the control panel.
Ÿ
• SD cards are precision products. DO NOT
impact, bend, drop, or wet them.
* Playlists in the <list> folder cannot be
played, but can be copied into the HDD (see
page 77).
Press in SD until you hear a clicking
sound.
78
EN78_83_KD-NX901[E]SDfb.indd 78
05.3.17 2:08:09 PM
@
ENGLISH
To eject SD, press the SD as illustrated.
• Press the SD softly (do not release your
finger quickly); otherwise, the SD may
pop out from the unit.
• When you pull out the SD, pull it out
straightly from the loading slot.
!
Attach the control panel.
Playback starts automatically in the
alphabetical order of the album name/
track name.
⁄
1
• The control panel goes
back to the previous
position (see page 92).
2
3
4
1
2
3
4
5
5
6
7 8
6
7
8
Album name icon/Album title (Tag)
icon
Album number
Track number
Elapsed playing time
Track name icon/Track title (Tag)
icon
Recording format
Track title or track name
Album title/performer or album
name
79
EN78_83_KD-NX901[E]SDfb.indd 79
05.3.17 2:08:12 PM
ENGLISH
To go to the next or previous track
Using the control
dial:
2
Using the number
buttons:
To select a track/album on the list
You can confirm the title of each item and
select the item you want.
• By using the number buttons (1 – 6), you can
also go directly to tracks 1 – 12.
– For tracks 1 – 6: Press 1 – 6.
– Fro tracks 7 – 12: Press and hold 1 – 6.
1
To skip tracks quickly
You can skip tracks within the same album.
Album list appears.
As you rotate the dial, you can skip 10 tracks at
a time.
First time you rotate the dial, the track skips to
the nearest higher or lower track with a track
number of multiple ten (ex. 10th, 20th, 30th).
Then, each time you rotate the dial, you can
skip 10 tracks
• After the last track, the first track will be
selected and vice versa.
2
3 Select an item on the list.
To go to the next or previous albums
1
To move to another page of
the list, rotate the dial.
The album icon is highlighted.
Within
5 seconds
80
EN78_83_KD-NX901[E]SDfb.indd 80
05.3.17 2:08:13 PM
You can use only one of the following playback modes at a time.
1
ENGLISH
Selecting the playback modes
2 Select your desired playback mode.
Repeat play
Mode
Plays repeatedly
Track:
Off:
One track.
•
lights up.
All tracks of the album.
•
lights up.
Cancels.
Mode
Plays at random
Album:
Off:
All tracks of the album.
•
lights up.
All tracks in the SD.
•
lights up.
Cancels.
Mode
Plays the first 15 seconds of
Track:
All tracks of the album.
•
lights up.
First track of every album.
•
lights up.
Cancels.
Album:
Random play
All:
Intro scan
Album:
Off:
To cancel the playback mode
• You can also cancel it by selecting “Off” in
step 2.
81
EN78_83_KD-NX901[E]SDfb.indd 81
05.3.17 2:08:14 PM
ENGLISH
Changing display information
Album title/performer or album name is
enlarged.
Duplicating data into HDD
You can copy the data in the SD card into the
HDD.
• While copying the data into the HDD, no
sounds come out.
• It takes time to copy a data of much volume
(about 5 minutes for 100 MB data—this
is just an estimation). Actual time varies
depending on the album configuration and the
system condition.
• When you duplicate the data in the SD
into the HDD, the HDD playback mode is
cancelled (see page 68).
• While the following duplicating process:
– To return to the previous screens, press
BACK (DISP) repeatedly.
– To cancel it, press and hold BACK (DISP).
Copying the current track
1
Track title or track name is enlarged.
2
Icons
Meanings
Album name icon
Track name icon
Playlist name icon
Album title (Tag) icon
Track title (Tag) icon
MP3 format
WMA format
82
EN78_83_KD-NX901[E]SDfb.indd 82
05.3.17 2:08:15 PM
3 Select the target genre you want to
• If more than six genres exist, rotate the
dial to show other genres, then press...
ENGLISH
Copying the current album/all
albums
copy the track into.
1
• If you want to create a new genre folder,
select “New Genre.”
2
: To copy the current album
: To copy all albums at a
time
Album list of the selected genre appears.
4 Select the target album you want to
move the track into.
• If more than six albums exist, rotate the
dial to show other albums, then press...
3 Select the target genre.
• If more than six genres exist, rotate the
dial to show other genres, then press...
• If you want to create a new album, select
“New Album.”
• If you want to create a new genre folder,
select “New Genre.”
5 Confirm.
• Once editing is finished,
playback resumes (from the
current track).
4 Confirm.
• Once editing is finished,
playback resumes (from the
current track).
83
EN78_83_KD-NX901[E]SDfb.indd 83
05.3.17 2:08:16 PM
ENGLISH
Sound adjustments
Selecting preset sound modes (EQ: equalizer)
You can select a preset sound mode suitable to
the music.
Ÿ
~
or
Ex.: When “Hard Rock (H.ROCK)” is selected
• By using the number buttons, you can
only select the sound modes shown on the
display.
Sound modes (preset frequency level settings)
The list below shows the preset frequency level settings for 12 sound modes.
Sound mode
Preset equalizing values
60 Hz
150 Hz
400 Hz
1 kHz
2.4 kHz
6 kHz
12 kHz
Flat
00
00
00
00
00
00
00
Hard Rock
+03
+03
+01
00
00
+02
+01
R&B
+03
+02
+02
00
+01
+01
+03
Pop
00
+02
00
00
+01
+01
+02
Jazz
+03
+02
+01
+01
+01
+03
+02
DanceMusic
+04
+02
00
–02
–01
+01
+01
84
EN84_92_KD-NX901[E]SELfb.indd 84
05.3.17 2:08:56 PM
ENGLISH
3 Adjust the level (–05 to +05).
Storing your own sound
adjustments
You can adjust the sound modes and store your
own adjustments in memory.
1 Select one of the preset sound modes.
4 Repeat steps 2 and 3 to adjust the
other frequency bands.
• Repeat steps ~ and Ÿ on page 84.
5 Select one of the user modes—
2 Enter the sound adjustment mode,
USER1/2/3.
then select a frequency to adjust.
Ex. when “USER1” is selected
Sound mode
Preset equalizing values
60 Hz
150 Hz
400 Hz
Country
+02
+01
00
Reggae
+03
00
00
Classics
+02
+03
+01
User1
00
00
User2
00
User3
00
1 kHz
2.4 kHz
6 kHz
12 kHz
00
00
+01
+02
+01
+02
+02
+03
00
00
+02
00
00
00
00
00
00
00
00
00
00
00
00
00
00
00
00
00
00
85
EN84_92_KD-NX901[E]SELfb.indd 85
05.3.17 2:08:59 PM
ENGLISH
Adjusting the sound basic settings
Adjusting subwoofer output
You can adjust the sound characteristics to your
preference.
1
Select an appropriate cutoff frequency level
according to the subwoofer connected.
• 115 Hz/85 Hz/55 Hz
The frequencies higher than the selected level
are cut off to the subwoofer.
2 Adjust the selected item.
Adjust the subwoofer output level.
• 00 (min.) to 08 (max.)
You can also activate or deactivate the High
Pass Filter (HPF) by pressing 3.
When it is activated, “H” is displayed in
between the output level and the cutoff
frequency. Lower frequency signals will be sent
only to the subwoofer so that you can enjoy
the low frequency effect (LFE) of the DVD
software purely from the subwoofer.
Adjusting fader and balance
Adjust fader—speaker output balance between
the front and rear speakers.
• F06: Upmost—front only
• R06: Downmost—rear only
Adjust the balance—speaker output balance
between the left and right speakers.
• L06: Leftmost—left only
• R06: Rightmost—right only
Adjusting the input level of each
source
This setting is required for each source except
FM. Before making an adjustment, select an
appropriate source for which you want to make
an adjustment.
Once you have made an adjustment, it
is memorized, and the volume level will
automatically increase or decrease by adjusted
level when you change the source.
Adjust to match the input level to the FM sound
level.
• –05 (min.) to +05 (max.)
• If you adjust it while recording a CD, the
input level of the HDD will be adjusted.
86
EN84_92_KD-NX901[E]SELfb.indd 86
05.3.17 2:09:00 PM
General settings — PSM
3 Adjust the PSM item selected.
ENGLISH
Basic procedure
You can change PSM (Preferred Setting Mode)
items listed in the table that follows.
1
4 Repeat steps 2 and 3 to adjust the
other PSM items if necessary.
5 Finish the procedure.
2 Select a PSM item.
Ex.: When you select “Scroll”
Clock
Movie
Indications
Selectable settings, [reference page]
Demo
Interval: [Initial]; Display demonstration is activated and shown in
Display demonstration
one-minute intervals.
All Time: Display demonstration is activated.
Off: Cancels, [14].
• Display demonstration starts if no operation is done for about
one minute.
KeyIn CFM
Key-in confirmation
On: [Initial]; Power-on, power-off, source (or compass) animations
are activated.
Off: Cancels.
24H/12H
Clock system
12Hours O 24Hours, [14]
[Initial: 24Hours]
Time
Time
Set the local time (in one-hour intervals).
It is not required to set the minute since it is automatically adjusted
by referring to the received GPS signals.
[Initial: 00:00]
To be continued...
87
EN84_92_KD-NX901[E]SELfb.indd 87
05.3.17 2:09:01 PM
Display
ENGLISH
Indications
Selectable settings, [reference page]
Scroll
Scroll
The entire text information can be shown by scrolling if it cannot be
shown at a time.
Once:
[Initial]; Scrolls only once.
Auto:
Repeats scrolling (in 5-second intervals).
Off:
Cancels. (For DAB: only shows the headline)
• Holding DISP (BACK) can scroll the display regardless of the
setting.
Dimmer
Dimmer
Auto:
[Initial]; Dims the display when you turn on the
headlights.
Off:
Cancels.
On:
Activates dimmer.
Time Set: Sets the timer for dimmer, [90].
From– To*1
Dimmer time
Any hour – Any hour, [90]
[Initial: 18– 07]
Contrast
Contrast
1 – 10
[Initial: 5]
LCD Type
Display type
Auto:
Tag
Tag display
On:
[Initial]; Positive pattern will be selected during the
day time*2; while negative pattern will be used during
the night time*2.
Positive: Positive pattern of the display.
Negative: Negative pattern of the display.
Off:
Compass
Compass
On:
Tuner
Off:
[Initial]; To show the Tag while playing MP3/WMA
tracks.
• WMA Tag cannot be shown during HDD/SD playback.
Cancels.
[Initial]; Display the compass (indicating the direction
of the north).
Display the source animation when “KeyIn CFM” is
set to “On.”
PTY Stnby
PTY Standby
You can select one of the PTY codes for the PTY Standby
Reception, [47]. [Initial: News]
AF-Regn’l
Alternate frequency/
regionalization
reception
When the received signals from the current station become weak....
AF:
[Initial]; Switches to another station (the programme may
differ from the one currently received), [47].
• AF indicator lights up.
AF Reg: Switches to another station broadcasting the same
programme.
• REG indicator lights up.
Off:
Cancels (not selectable when “DAB AF” is set to “On”).
*1 Displayed only when “Dimmer” is set to “Time Set.”
*2 Determined by the “Dimmer” setting.
88
EN84_92_KD-NX901[E]SELfb.indd 88
05.3.17 2:09:02 PM
Audio
Tuner
Selectable settings, [reference page]
TA Volume
Traffic
announcement
volume
When a Traffic Announcement is tuned in by TA Standby
Reception, the volume level automatically changes to the preset
level.
[Initial: 15]; Volume 0 – Volume 30 or Volume 50*3
P-Search
Programme search
On: The receiver tunes in to another frequency broadcasting the
same programme as the original preset RDS station is if the
preset station signals are not sufficient.
Off: [Initial]; Cancels.
IF Filter
Intermediate
frequency filter
Auto: [Initial]; Increases the tuner selectivity to reduce
interference noises between the stations. (Stereo effect will
be degraded.)
Wide: Subject to the interference noises from adjacent stations, but
sound quality will not be degraded. (Stereo effect will not
be degraded.)
DAB AF*4
Alternative
frequency reception
On: [Initial]; Tracks the programme among DAB services and FM
RDS stations, [102].
• AF indicator lights up.
Off: Cancels.
Announce*4
Announcement
standby reception
Select one of the 9 announcement types for Announcement Standby
Reception, [102].
Travel [Initial]/Warning/News/Weather/Event/Special/
Rad Inf/Sports/Finance
Beep
Beep
On:
Off:
ExtInput*5
External Input
Changer: [Initial]; To use a JVC CD changer.
Ext In: To use any external component.
Telephone
Telephone muting
Muting1/Muting2: Select either one which mutes the sounds
while using the cellular phone. (This does not affect
the route guidance.)
Off: [Initial]; Cancels.
Amp Gain
Amplifier gain
control
You can change the maximum volume level of the unit.
High Pwr: [Initial]; Volume 0 – Volume 50
Low Pwr: Volume 0 – Volume 30 (Select this if the maximum
power of the speaker is less than 50 W to avoid
damaging the speaker.)
Off:
Deactivates the built-in amplifier.
ENGLISH
Indications
[Initial]; Beep sounds when you operate the unit.
Cancels.
*3 Depends on the amplifier gain control.
*4 Displayed only when the DAB tuner is connected.
*5 Not display when CD changer or external component is selected for the source.
89
EN84_92_KD-NX901[E]SELfb.indd 89
05.3.17 2:09:02 PM
ENGLISH
Selecting the dimmer mode
4 Select “From– To.”
You can dim the display at night or as you set
the timer.
1
2 Select “Dimmer.”
5 Set the dimmer start time.
6 Move the flashing point to the end
time.
3 Select one of the following options.
Auto:
Dims the display when you
turn on the headlights.
\ Go to step 8.
Off:
Cancels.
\ Go to step 8.
On:
Always dims the display.
\ Go to step 8.
Time Set: Set the timer for dimmer.
\ Go to step 4.
7 Set the dimmer end time.
8 Exit from the setting.
90
EN84_92_KD-NX901[E]SELfb.indd 90
05.3.17 2:09:03 PM
Other main functions
You can assign titles to CDs (both in this
receiver and in the CD changer), and external
component.
• To assign the titles to the HDD contents, see
page 72.
Maximum number of
characters
Sources
CDs/CD-CH
Up to 32 characters (up
to 30 discs)
External component
Up to 16 characters
• You cannot assign a title to DVD, VCD,
CD Text or an MP3/WMA disc.
3 Assign a title.
ENGLISH
Assigning titles to the sources
1 Select a character set.
A–Z/a–z
(Upper case/ Lower case)
Accented letters
(Lower case)
0 – 9 & symbols
(Numbers)
Accented letters
(Upper case)
2 Select a character.
3 Move to the next (or previous)
character position.
1 Select the source.
• For a CD in this receiver: Insert a CD.
• For CDs in the CD changer: Select
“CD-CH,” then select a disc number.
• For external component: Select “LINE
IN.”
2 Enter the title assignment screen.
• If you press and hold the button,
the character position moves to the
beginning (or the last).
• To erase a misentry, move the
character entry position to the one you
want to erase, then...
4 Repeat steps 1 to 3 until you
finish entering the title.
4 Finish the procedure.
Ex. when you select CD as the source
To erase the entire title
In step 2...
91
EN84_92_KD-NX901[E]SELfb.indd 91
05.3.17 2:09:04 PM
ENGLISH
Changing the control panel angle
Detaching the control panel
When detaching or attaching the control panel,
be careful not to damage the connectors on
the back of the control panel and on the panel
holder.
Detaching the control panel
Before detaching the control panel, be sure to
turn off the power.
Warning:
Attaching the control panel
92
EN84_92_KD-NX901[E]SELfb.indd 92
05.3.17 2:09:05 PM
ENGLISH
CD changer operations
Playing discs in the CD changer
About the CD changer
It is recommended to use the JVC MP3compatible CD changer with your receiver.
• You can also connect other CH-X series
CD changers (except CH-X99 and
CH-X100). However, they are not
compatible with MP3 discs, so you cannot
play back MP3 discs.
• You cannot use the KD-MK series CD
changers with this receiver.
• Disc text information recorded in the CD
Text can be displayed when a JVC CD
Text compatible CD changer is connected.
Before operating your CD changer:
• Refer also to the Instructions supplied
with your CD changer.
• You cannot control and play any DVD,
VCD, and WMA disc in the CD changer.
~
All tracks of the inserted discs will be
played repeatedly.
Ÿ
Select a disc.
For disc number from 1 – 6:
For disc number from 7 – 12:
93
EN93_98_KD-NX901[E]CDCHfb.indd 93
05.3.17 2:10:01 PM
ENGLISH
While playing MP3 discs:
1
2
3
4
1
2
3
4
5
6
7
8
5
6
78
9
9
Folder name icon/Album title (Tag)
icon
Folder number
Track number
Elapsed playing time
Track name icon/Track title (Tag)
icon
MP3 icon
Track title or track name
Album name/performer or folder
name
Disc number
While playing CD Text/Audio CD:
1
2
3
1
2
3
4
5
6
7
4
5 6
Disc title icon
Track number
Elapsed playing time
Track title icon
Track title
Disc title/performer or your assigned
disc name
Disc number
7
94
EN93_98_KD-NX901[E]CDCHfb.indd 94
05.3.17 2:10:04 PM
Using the control
dial:
To fast-forward or reverse the track
ENGLISH
To go to the next or previous tracks
Using the number
buttons:
To select a track/folder/disc on the list
You can confirm the title of each item and
select the item you want.
• For CD Text/Audio CD: You can only display
the disc list.
To skip tracks quickly
1
This operation is only possible when using JVC
MP3-compatible CD changer.
As you rotate the dial, you can skip 10 tracks at
a time.
First time you rotate the dial, the track skips to
the nearest higher or lower track with a track
number of multiple ten (ex. 10th, 20th, 30th).
Then, each time you rotate the dial, you can
skip 10 tracks.
• After the last track, the first track will be
selected and vice versa.
• For MP3: You can skip tracks only within the
same folder.
To go to the next or previous folders (only
for MP3)
Disc list appears.
2 For MP3 discs only: Change to the
list you want to use.
3 Select an item on the list.
1
Within
5 seconds
To move to another page of
the list, rotate the dial.
2
95
EN93_98_KD-NX901[E]CDCHfb.indd 95
05.3.17 2:10:04 PM
ENGLISH
Selecting the playback modes
You can use only one of the following playback modes at a time.
1
2 Select your desired playback mode.
Repeat play
Mode
Plays repeatedly
Track:
One track.
•
lights up.
Folder *1: All tracks of the folder.
•
lights up.
Disc:
All tracks of the disc.
•
lights up.
Off:
Cancels.
Random play
Mode
Folder
Off:
All tracks of the folder, then tracks
of the next folder and so on.
•
lights up.
All tracks of the disc.
•
lights up.
All tracks of the inserted discs.
•
lights up.
Cancels.
Mode
Plays the first 15 seconds of
Disc:
All:
Intro scan
Plays at random
*1:
Track:
All tracks of the current disc.
•
lights up.
Folder *1: First track of every folder.
•
lights up.
Disc:
First track of every inserted disc.
•
lights up.
Off:
Cancels.
*1 Only while playing an MP3 disc.
To cancel the playback mode
• You can also cancel it by selecting “Off” in
step 2.
96
EN93_98_KD-NX901[E]CDCHfb.indd 96
05.3.17 2:10:05 PM
ENGLISH
Changing the display information
• For MP3 discs
• For CD Text/Audio CD
Album name/performer or folder name is
enlarged.
Disc title/performer or your assigned disc
name is enlarged.
Track title or track name is enlarged.
Track title is enlarged.
Icons
Meanings
Folder name icon
Track name icon
Disc title icon
Album title (Tag) icon
Track title (Tag) icon
MP3 format
97
EN93_98_KD-NX901[E]CDCHfb.indd 97
05.3.17 2:10:07 PM
ENGLISH
External component operations
Playing an external component
You can connect an external component to the
CD changer jack on the rear using the Line
Input Adapter KS-U57 (not supplied) or Aux
Input Adapter KS-U58 (not supplied).
• For connection, see Installation/Connection
Manual (separate volume).
!
~
⁄
Adjust the volume.
Adjust the sound as you want.
(See page 84.)
• If you cannot select “LINE IN,” select
“Ext In” for “ExtInput” in the PSM
setting (see page 89).
Ÿ
Turn on the connected component
and start playing the source.
98
EN93_98_KD-NX901[E]CDCHfb.indd 98
05.3.17 2:10:08 PM
ENGLISH
DAB tuner operations
Listening to the DAB service
!
It is recommended to use DAB (Digital
Audio Broadcasting) tuner KT-DB1000
with your receiver. If you have another
DAB tuner, consult your JVC IN-CAR
ENTERTAINMENT dealer.
~
When an ensemble is received,
searching stops.
To stop searching, press OK.
⁄
Ÿ
1
4
Start searching for an ensemble.
2
5 6
7 8
3
9 p q
w
1
2
3
4
5
6
7
8
9
p
q
w
Select a service (either primary or
secondary) to listen to.
DAB band
Ensemble frequency
Channel (ensemble) number
Channel (ensemble) icon
PTY icon
TP indicator
PTY indicator
AF indicator (see page 89)
ANN indicator
DRC indicator
Programme type (PTY: see page 45)
Channel (ensemble) name
99
EN99_102_KD-NX901[E]DABfb.indd 99
05.3.17 2:10:49 PM
ENGLISH
To tune in to an ensemble manually
2
In step !...
3 Select the preset DAB service
(primary) number (1 – 6) you want.
Storing DAB services in memory
You can preset six DAB services (primary) for
each band.
1 Perform steps ~ to ⁄ on page 99, to
select a service you want.
2 Select the preset number (1 – 6) you
want to store into.
If the selected primary service has some
secondary services, press the same button
repeatedly will tune in to the secondary
services.
To select a preset service on the list
1 Select “DAB,” then the band.
2 Display the preset station list.
Preset number flashes for a while.
Tuning in to a preset DAB service
1
• Rotate the dial to display the lists for the
other bands.
3 Select the preset service.
100
EN99_102_KD-NX901[E]DABfb.indd 100
05.3.17 2:10:52 PM
You can reinforce the low level sounds, which
is hard to listen to while driving, to improve
your listening if the currently received service
provides Dynamic Range Control (DRC)
signals.
1
2
Searching for your favorite
programme
You can tune in to a service broadcasting your
favorite programme by searching for a PTY code.
• Operations are exactly the same as explained
on page 45 for FM RDS stations.
• You cannot preset the PTY codes separately
for DAB tuner and for FM tuner.
ENGLISH
When a service is hard to listen to
Using the Standby Reception
• The higher the number is, the stronger the
reinforcement becomes.
• When this function is activated, DRC
indicator lights up on the display.
Then when the DRC signals are detected,
turns to be
.
What you can do with DAB
DAB can deliver CD quality sound without
any annoying interference and signal
distortion. Furthermore, it can carry text,
pictures, and data.
By connecting the DAB tuner, this receiver
can do the following:
• Programme Type (PTY) Search
• Standby Reception of Traffic
Announcement (TA) or your favorite
programme (PTY)
• Tracking the same programme automatically
—Alternative Frequency Reception (see
“DAB AF” on page 89)
TA (Road Traffic News) Standby
Reception
• Operations are exactly the same as explained
on page 46 for FM RDS stations.
• You cannot activate TA Standby Reception
separately for the DAB tuner and for FM
tuner.
PTY Standby Reception
• Operations are exactly the same as explained
on page 47 for FM RDS stations.
• PTY Standby Reception for DAB tuner works
only using a dynamic PTY code.
• You can neither store your favorite PTY nor
activate PTY Standby Reception separately
for the DAB tuner and for the FM tuner.
• You can activate and deactivate PTY Standby
Reception when the source is either “FM” or
“DAB.”
To be continued...
101
EN99_102_KD-NX901[E]DABfb.indd 101
05.3.17 2:10:53 PM
ENGLISH
Announcement Standby Reception
Announcement Standby Reception allows the
receiver to switch temporarily to your favorite
service (announcement type).
To select your favorite announcement type,
see page 89.
1
• While receiving an FM RDS station:
When driving in an area where a DAB service
is broadcasting the same programme as the
FM RDS station is broadcasting, this receiver
automatically tunes in to the DAB service.
When shipped from the factory, Alternative
Frequency Reception is activated.
To deactivate the Alternative Frequency
Reception, see page 89.
2
Changing the display information
The ANN indicator either lights up or
flashes
• If the ANN indicator lights up,
Announcement Standby Reception is
activated.
• If the ANN indicator flashes,
Announcement Standby Reception is not
yet activated.
To activate, tune in to another service
providing the signals. The ANN indicator
will stop flashing and remain lit.
Ensemble name is enlarged.
Tracking the same programme
You can keep listening to the same programme
by activating the Alternative Frequency
Reception (see page 89).
Service name is enlarged.
• While receiving a DAB service:
When driving in an area where a
service cannot be received, this receiver
automatically tunes in to another ensemble
or FM RDS station, broadcasting the same
programme.
DLS (Dynamic Label Segment: DAB text
information) is displayed, being enlarged.
102
EN99_102_KD-NX901[E]DABfb.indd 102
05.3.17 2:10:54 PM
How to clean the connectors
Frequent detachment will deteriorate the
connectors.
To minimize this possibility, periodically wipe
the connectors with a cotton swab or cloth
moistened with alcohol, being careful not to
damage the connectors.
To keep discs clean
A dirty disc may not play correctly.
If a disc does become dirty, wipe
it with a soft cloth in a straight line
from center to edge.
• Do not use any solvent (for
example, conventional record cleaner, spray,
thinner, benzine, etc.) to clean discs.
ENGLISH
Maintenance
To play new discs
Connector
Moisture condensation
Moisture may condense on the lens inside the
DVD/CD player in the following cases:
• After starting the heater in the car.
• If it becomes very humid inside the car.
Should this occur, the DVD/CD player may
malfunction. In this case, eject the disc and
leave the receiver turned on for a few hours
until the moisture evaporates.
How to handle discs
When removing a disc from Center holder
its case, press down the center
holder of the case and lift the
disc out, holding it by the
edges.
• Always hold the disc by the edges. Do not
touch its recording surface.
When storing a disc into its case, gently insert
the disc around the center holder (with the
printed surface facing up).
• Make sure to store discs into the cases after
use.
New discs may have some rough
spots around the inner and outer
edges. If such a disc is used, this
receiver may reject the disc.
To remove these rough spots, rub the edges
with a pencil or ball-point pen, etc.
Do not use the following discs:
Warped
disc
Sticker
Disc
Sticker
residue
Stick-on
label
103
EN103_122_KD-NX901[E]fb.indd 103
05.3.17 2:11:31 PM
ENGLISH
Language codes
Code
Language
Code
Language
Code
Language
AA
AB
AF
AM
AR
AS
AY
AZ
BA
BE
BG
BH
BI
BN
BO
BR
CA
CO
CS
CY
DZ
EL
EO
ET
EU
FA
FI
FJ
FO
FY
GA
GD
GL
GN
GU
HA
HI
HR
HU
HY
IA
IE
IK
Afar
Abkhazian
Afrikaans
Ameharic
Arabic
Assamese
Aymara
Azerbaijani
Bashkir
Byelorussian
Bulgarian
Bihari
Bislama
Bengali, Bangla
Tibetan
Breton
Catalan
Corsican
Czech
Welsh
Bhutani
Greek
Esperanto
Estonian
Basque
Persian
Finnish
Fiji
Faroese
Frisian
Irish
Scots Gaelic
Galician
Guarani
Gujarati
Hausa
Hindi
Croatian
Hungarian
Armenian
Interlingua
Interlingue
Inupiak
IN
IS
IW
JA
JI
JW
KA
KK
KL
KM
KN
KO
KS
KU
KY
LA
LN
LO
LT
LV
MG
MI
MK
ML
MN
MO
MR
MS
MT
MY
NA
NE
NO
OC
OM
OR
PA
PL
PS
PT
QU
RM
RN
Indonesian
Icelandic
Hebrew
Japan
Yiddish
Javanese
Georgian
Kazakh
Greenlandic
Cambodian
Kannada
Korean (KOR)
Kashmiri
Kurdish
Kirghiz
Latin
Lingala
Laothian
Lithuanian
Latvian, Lettish
Malagasy
Maori
Macedonian
Malayalam
Mongolian
Moldavian
Marathi
Malay (MAY)
Maltese
Burmese
Nauru
Nepali
Norwegian
Occitan
(Afan) Oromo
Oriya
Panjabi
Polish
Pashto, Pushto
Portuguese
Quechua
Rhaeto-Romance
Kirundi
RO
RU
RW
SA
SD
SG
SH
SI
SK
SL
SM
SN
SO
SQ
SR
SS
ST
SU
SW
TA
TE
TG
TH
TI
TK
TL
TN
TO
TR
TS
TT
TW
UK
UR
UZ
VI
VO
WO
XH
YO
ZH
ZU
Rumanian
Russia
Kinyarwanda
Sanskrit
Sindhi
Sangho
Serbo-Croatian
Singhalese
Slovak
Slovenian
Samoan
Shona
Somali
Albanian
Serbian
Siswati
Sesotho
Sundanese
Swahili
Tamil
Telugu
Tajik
Thai
Tigrinya
Turkmen
Tagalog
Setswana
Tonga
Turkish
Tsonga
Tatar
Twi
Ukrainian
Urdu
Uzbek
Vietnamese
Volapuk
Wolof
Xhosa
Yoruba
China
Zulu
104
EN103_122_KD-NX901[E]fb.indd 104
05.3.17 2:11:33 PM
Navigation System
Entering your destination
Basic navigation processes
• If you turn off, then on the car ignition after
starting the route guidance, it is restarted
automatically following the screen below.
By the points of interests (P.O.I.)
• If no P.O.I. data exists for the selected city,
“NO P.O.I. FOUND” appears on the display.
Press BACK (DISP) until the CITY entry
menu appears, then re-enter another city.
Selecting P.O.I. by area
• If no P.O.I. data exists for the selected area,
“NO P.O.I. FOUND” appears on the display.
Press BACK (DISP) until the main categories
list appears.
ENGLISH
More about the functions
• If you try to enter a destination without
the parking brake engaged, the following
screen appears, and you cannot enter your
destination.
By the coordinates
• If the entered position is out of navigable area,
“NO NAVIGABLE AREA” appears on the
display. Enter again.
Setting the route options
• Motorways are always used to calculate the
route if the distance to the destination is over
200 km.
• If the destination cannot be reached without
using motorways/ferries/tollroads, they are
used to calculated the route without respect to
the route option settings.
Convenient features using the stored routes
• If you try to display the stored addresses/
routes when no addresses/routes have been
stored, “ITEMS NOT FOUND” appears on
the display.
• If you try to display the traffic information
when no information is available, “ITEMS
NOT FOUND” appears on the display.
• When you reach the area approximately
within 30 m around the destination/Via Point,
the Navigation System considers that you
have reached your destination/Via Point.
Navigation guidance
• The System may not receive GPS signals in
the following places...
– in a tunnel or parking lot in the building
– under an overhead road
– in a place surrounded by high buildings or
by closely standing trees.
• The position of your car may not be detected
correctly in the following cases...
– when running on a road close to the other
one (e.g. a motorway and ordinary road
running in parallel)
– when turning at an almost straight fork in
the road
– when running on a gridiron road
– after taking a ferry, etc.
– when running on a steep mountain road
– when running on a spiral road
– when turning left or right after running on a
long straight road
To be continued....
105
EN103_122_KD-NX901[E]fb.indd 105
05.3.17 2:11:34 PM
ENGLISH
– when running in a zigzag line on a broad
road
– when starting your car shortly after starting
the engine
– when running for the first time after
installing the unit
– when changing tires or attaching chains on
the tires
– when tire slip occurs continuously and
frequently
– after running on areas other than a road
(e.g. private lands or parking lots)
– after running in underground or tower type
parking lots
– after rotating your car on a turntable
– after frequent stops and starts in a
congestion
– when the accuracy of GPS is deteriorated
intentionally
– when running on a road constructed
recently
• The route calculated by the System is one of
the possible routes to your destination. The
route is not always the most appropriate one.
• The following phenomena may occur even if
the System is working correctly...
– It may guide to a closed road.
– It may guide to a route requiring U-turn.
– It may not guide to your destination if there
is only a narrow road or no road to your
destination.
– It may not avoid a congestion even if
dynamic guidance is activated.
– It may show a different road name.
– It may not ask you to turn at a junction even
if you need to.
– It may give a guidance different from the
actual road condition.
– It may give an incorrect distance
information.
Playback operations
Basic operations
• There is a time limit for some operations.
In this case, if no further operation is done
for a certain period, the current operation is
cancelled.
Turning on the power
• By pressing SOURCE on the receiver, you
can also turn on the power.
Selecting the sources
• When no disc is loaded in the receiver,
“DISC” cannot be selected.
• Without connecting to the CD changer and
DAB tuner, “CD-CH” and “DAB” cannot be
selected.
Turning off the power
• If you turn off the power while listening to a
disc, disc play will start automatically, next
time you turn on the power.
Tuner operations
Storing stations in memory
• During SSM search...
– All previously stored stations are erased and
stations are stored newly.
– Received stations are preset in No. 1 (lowest
frequency) to No. 6 (highest frequency).
– When SSM is over, the station stored in
No. 1 will be automatically tuned in.
• When storing a station manually, a previously
preset station is erased when a new station is
stored in the same preset number.
• TA Standby Reception and PTY Standby
Reception will be cancelled temporarily in the
following cases:
– While recording a CD into the HDD.
– While editing the HDD contents.
– While copying the SD contents into the
HDD.
• If you want to know more about RDS, visit
<http://www.rds.org.uk>.
106
EN103_122_KD-NX901[E]fb.indd 106
05.3.17 2:11:35 PM
Playing a DVD-R/RW or CD-R/RW
General
• Use only “finalized” DVD-R/RWs or CD-R/
RWs.
• If no playable files are recorded in a folder,
the folder will not be recognized.
• This receiver can play back multi-session
discs; however, unclosed sessions will be
skipped while playing.
• Some DVD-R/RWs or CD-R/RWs may not
play back on this receiver because of their
disc characteristics, and for the following
causes:
– Discs are dirty or scratched.
– Moisture condensation occurs on the lens
inside the receiver.
– The pickup lens inside the receiver is dirty.
– CD-R/RWs on which the files are written
with “Packet Write” method.
– DVD-R/RWs which are not written in
UDF-Bridge Format (ex. UDF format or
ISO format).
– There are improper recording conditions
(missing data, etc.) or media conditions
(stain, scratch, warp, etc.).
• DVD-RWs or CD-RWs may require a longer
readout time since the reflectance of DVDRW and CD-RW is lower than that of regular
discs.
• Do not use the following DVD-R/RWs or
CD-R/RWs:
– Discs with stickers, labels, or protective
seal stuck to the surface.
– Discs on which labels can be directly
printed by an ink jet printer.
Using these discs under high temperatures or
high humidities may cause malfunctions or
damages to discs.
• In this manual, words “track/file” and “folder/
album” are interchangeably used when
referring to MP3/WMA files and folders.
• On some discs, the actual operations may
be different from what is explained in this
manual.
• This receiver can also play back 8 cm discs.
• This receiver can only play back audio CD
(CD-DA) files if different type of files are
recorded in the same disc.
– The first track will be skipped if a different
type of file is detected first.
• For DVD-R/DVD-RW: This receiver can
play only discs recorded in the DVD-Video
format. (Discs recorded in the DVD-VR
format cannot be played.)
• When a disc has been loaded, selecting
“DISC” for the playback source starts disc
play.
Inserting a disc
• When a disc is inserted upside down, the disc
will eject automatically.
Basic operations
• No sound comes out during slow motion
playback. When playing a VCD, reverse slow
motion playback is prohibited.
• One Touch Replay works only within the
same title. (For some DVDs, this function
does not work.)
• When playing a DVD/VCD, no sound comes
out during Search.
• Reverse search stops automatically when it
reaches the beginning of the disc. Playback
resumes at normal speed.
ENGLISH
Disc operations
To be continued....
107
EN103_122_KD-NX901[E]fb.indd 107
05.3.17 2:11:35 PM
ENGLISH
Playing MP3/WMA files
• This receiver can play back MP3/WMA files
with the extension code <.mp3> or <.wma>
(regardless of the letter case—upper/lower).
• This receiver can show the names of albums,
artists (performer), and ID3 Tag (Version 1.0,
1.1, 2.2, 2.3, or 2.4) for MP3 files and for
WMA files.
• This receiver can display only one-byte
characters. No other characters can be
correctly displayed.
• This receiver can play back MP3/WMA files
meeting the conditions below:
– Bit rate:
32 kbps — 320 kbps (MP3)
32 kbps — 192 kbps (WMA)
– Sampling frequency:
48 kHz, 44.1 kHz, 32 kHz (for MPEG-1/
WMA)
24 kHz, 22.05 kHz, 16 kHz (for MPEG-2)
– Disc format: ISO 9660 Level 1/ Level 2,
Romeo, Joliet, Windows long file name
• The maximum number of characters for file/
folder names vary among the disc format used
(includes 4 extension characters—<.mp3> or
<.wma>).
– ISO 9660 Level 1: up to 12 characters
– ISO 9660 Level 2: up to 31 characters
– Romeo: up to 128 characters
– Joliet: up to 64 characters
– Windows long file name: up to 128
characters
• This receiver can recognize the total of 1100
files and of 250 folders (maximum of 999 per
folder).
• This receiver can play back the files recorded
in VBR (variable bit rate).
The files recorded in VBR have a discrepancy
in elapsed time display, and do not show
the actual elapsed time. Especially, after
performing the search function, this difference
becomes noticeable.
• This receiver cannot play back the following
MP3/WMA files:
– MP3 files encoded in MP3i and MP3 PRO
format.
– MP3 files encoded in an unappropriated
format.
– MP3 files encoded with Layer 1/2.
– WMA files encoded with lossless,
professional, and voice format.
– WMA files which are not based upon
Windows Media® Audio.
– WMA files copy-protected with DRM.
– WMA files encoded with MBR (Multiple
Bit Rate) format.
– Files which have the data such as WAVE,
ATRAC3, etc.
Changing the source
• If you change the source, playback also stops
(without ejecting the disc).
Next time you select “DISC” for the playback
source, disc play starts automatically.
Ejecting a disc
• If the ejected disc is not removed within
15 seconds, the disc is automatically inserted
again into the loading slot to prevent it from
dust. (Disc play will not start automatically.)
DVD/VCD special functions
• For some DVDs and VCDs, changing the
subtitle language, audio language (or audio
channel) without using the disc menu is
prohibited.
• While zoomed in, the picture may look
coarse.
108
EN103_122_KD-NX901[E]fb.indd 108
05.3.17 2:11:36 PM
• When the language you have selected is not
recorded on a disc, the original language is
automatically used as the initial language. In
addition, for some discs, the initial languages
settings will not work as you set due to their
internal disc programming.
• After changing any of the initial language
settings, eject the disc and insert it (or another
disc) again so that your setting takes effect.
• When you select “16:9” for a picture whose
aspect ratio is 4:3, the picture slightly changes
due to the process for converting the picture
width.
• Even if “4:3 PAN SCAN” is selected, the
screen size may become “4:3 LETTER BOX”
with some DVDs. This depends on how they
are recorded.
HDD operations
Playing Playlists
• You can use the playback mode—Repeat
Play, Random Play, or Intro Scan during
playlist playback. However, when you start
playlist playback (or change the playlist),
the playback mode is cancelled. You need to
select the playback mode again.
• If you have changed the genre name or
album name or changed their locations after
enrolling their tracks into a playlist, the tracks
will be skipped when you play the playlist.
(“No Music File” appears on the display.)
• Text data in the CD Text cannot be recorded
into the HDD.
• If album recording is cancelled, the tracks
which have been completely recorded will
be stored into the HDD. Yet you cannot play
back them until you finish recording the
remaining. If you edit the HDD contents,
eject the disc, or perform a new recording
before recording the remaining, the recorded
tracks will be discarded.
• Play time indication may advance unstably
on the display while recording. This is not a
malfunction of this unit.
ENGLISH
DVD setup menu
Editing the HDD contents
• While playing a playlist, you cannot display
the Edit menus.
• While editing, you cannot change the
playback source or eject the disc.
• You cannot move a track or album if the same
name exists in the target album or genre. In
this case, “Same Name” appears.
• When you have selected “New Genre,” “New
Album,” or “New Playlist” as a storage place
(after recording or editing), its title will be
assigned automatically such as <gexxxxxx>,
<alxxxxxx>, or <plxxxxxx.m3u>.
You can change the title later manually (see
page 72).
• You cannot use a space for the first character
of the title when assigning it to album/genre/
playlist.
Recording audio CDs
SD operations
• Sound quality may deteriorate if you select
“Compress” for recording mode.
• While recording, recorded sounds are
reproduced from the speakers. When
recording is stopped, CD original sounds are
reproduced.
• While recording, TA Standby Reception and
PTY Standby Reception will be cancelled
temporarily.
• While recording, you cannot change the
playback source or eject the disc.
• The maximum number of characters for
album/track name is 128 (including 4
extension code—<.mp3> or <.wma>).
• The required SD recording format is FAT
12/16/32 and the recommended storage type
is 8 MB to 512 MB.
• You cannot use MMC or mini SD with this
receiver.
• When an SD card is inserted, a file named
“FAILSAFE” is automatically created in the
card. The data size of this file varies among
the inserted card.
109
EN103_122_KD-NX901[E]fb.indd 109
05.3.17 2:11:36 PM
ENGLISH
• While playing an SD card, the playback order
may differ from the one played back using
other SD players.
• This receiver may be unable to play back
some SD cards due to their characteristics or
recording conditions.
• While duplicating SD data into HDD, you
cannot change the playback source or eject
the disc.
Sound adjustments
• While editing the HDD contents or
duplicating SD into the HDD, you cannot
make sound adjustments.
General settings—PSM
• While editing the HDD contents or
duplicating SD into the HDD, you cannot
enter the PSM setting screen.
• When you change the “DAB AF” setting
from “Off” to “On,” the “AF-Regn’l” setting
changes to “AF” if it has been set to “Off.”
• If you change the “Amp Gain” setting from
“High Pwr” to “Low Pwr” while the volume
level is set higher than “Volume 30,” the
receiver automatically changes the volume
level to “Volume 30.”
Other main functions
• If you try to assign a title to a 31st disc,
“Name Full” flashes on the display. Delete
unwanted titles before assignment.
• Titles assigned to discs in the CD changer can
also be shown if you play back the disc in the
receiver.
Glossary
Navigation System
DST
Stands for destination for this Navigation
System.
ETA
Estimated Time of Arrival.
GPS
Global Positioning System.
By receiving the GPS signals from the
satellites, the Navigation System determines the
position of the car.
P.O.I.
Points of Interest.
You can select your destinations by selecting
from the categories—such as business centres,
shopping centres.
TMC
Traffic Message Channel.
Traffic messages transmitted by some VHF
broadcasters via RDS signals.
Using this data, the Navigation System
performs dynamic navigation.
Via Point
A location through which you reach your final
destination. For this Navigation System, you
can determine five locations through which you
can reach your final destination.
Playback sources
Dolby Digital
Compressed digital audio, developed by Dolby
Laboratories, which enables multi-channel
encode to create the realistic surround sound.
DTS
Compressed digital audio, developed by Digital
Theater Systems, Inc., which enables multichannel like Dolby Digital. As the compression
ratio is lower than for Dolby Digital, it provides
wider dynamic range and better separation.
110
EN103_122_KD-NX901[E]fb.indd 110
05.3.17 2:11:37 PM
On-screen guide icons
During play, the following guide icons may
appear for a while on the monitor.
MPEG Audio
Another compressed digital audio which also
enables multi-channel encode to create the
realistic surround sound.
: Appears at the beginning of a scene
containing multi-subtitle languages
(for DVD only).
On-screen guide
While operating the built-in DVD/CD player,
operation modes are displayed on the monitor.
See the next column.
ENGLISH
Linear PCM
Uncompressed digital audio, the same format
used for CDs and most studio masters.
: Appears at the beginning of a scene
containing multi-audio languages (for
DVD only).
: Appears at the beginning of a scene
containing multi-angle views (for
DVD only).
Playlist
A file that determines the playback sequence of
the audio files stored in the HDD.
: Playback
UDF-Bridge Format
A hybrid file system used to provide
compatibility with ISO 9660 for accessing
any type of files on the disc. (UDF stands for
Universal Disk Format.)
: Pause
: Forward slow motion playback
(for DVD and VCD only)
: Reverse slow motion playback
(for DVD only)
WMA
Windows Media Audio.
A compression process developed by
Microsoft® for compressing audio data (i.e.
music).
: Forward search
: Reverse search
Output signals through the DIGITAL OUT terminal
They differ depending on the “DIGITAL AUDIO OUTPUT” setting on the Setup Menu (see page
61).
• No signals come out while playing the files in the HDD or SD, or while recording an audio CD
into the HDD.
DIGITAL AUDIO OUTPUT
Playback Disc
DVD 48 kHz, 16/20/24 bits Linear PCM
96 kHz, Linear PCM
with DTS
with Dolby Digital
with MPEG Audio
Audio CD, Video CD
Audio CD with DTS
MP3/WMA
STREAM/PCM
Output Signals
DOLBY DIGITAL/PCM
PCM ONLY
48 kHz, 16 bits stereo Linear PCM
DTS bitstream
48 kHz, 16 bits stereo Linear PCM
48 kHz, 16 bits
Dolby Digital bitstream
stereo Linear PCM
MPEG bitstream
48 kHz, 16 bits Linear PCM
44.1 kHz/48 kHz, 16 bits stereo Linear PCM
DTS bitstream
44.1 kHz, 16 bits stereo Linear PCM
32/44.1/48 kHz, 16 bits Linear PCM
111
EN103_122_KD-NX901[E]fb.indd 111
05.3.17 2:11:37 PM
ENGLISH
Troubleshooting
What appears to be trouble is not always serious. Check the following points before calling a service
center.
Navigation troubles
Destination setting
General
Symptoms
Causes
Remedies
• Navigation voice cannot
be heard from the
speakers.
Guidance voice level is set
to the minimum level.
Adjust it to the optimum
level.
• Navigation System does
not work at all.
The built-in microcomputer
may have functioned
incorrectly, etc.
Reset the unit (see page 2).
• “Low Temperature”
appears and Navigation/
Disc/HDD/SD do not
work.
The internal temperature
is too low. This is normal.
Internal protective circuitry
is working.
Leave the power on, and
wait until the internal
temperature rises and the
indication goes off.
• Navigation information is
not precise.
GPS antenna is affected by
the windshield if installed in
the car compartment.
Install the GPS antenna
outside to avoid interference.
• Mechanical noises are
heard.
The HDD is constantly
rotating at a high speed
when the car ignition switch
is on, causing imperceptible
mechanical noise (especially
when the temperature is
low).
This is normal.
• “NO P.O.I. FOUND”
appears on the display.
There are no matching
points in your selected city
or area.
Find the location using
another method.
• “NO NAVIGABLE
AREA” appears on the
display.
The entered point is out of
the navigable area.
Enter a point within the
navigable area.
You have tried to save the
current address into the
STORED ADDRESS (see
page 32) while you are out
of the navigable area.
This is normal. You cannot
save the current address
if it is located out of the
navigable area.
112
EN103_122_KD-NX901[E]fb.indd 112
05.3.17 2:11:39 PM
Guidance
Causes
Remedies
“TOO MANY POIs.
PLEASE INPUT DETAIL
CATEGORY/CITY”
appears on the display.
Category/city you have
selected includes too many
POIs.
Specify the category/city
more in details so that P.O.I.
search becomes possible.
• “TOO FAR FROM
STREET” appears on the
display.
You have tried to save the
current address into the
STORED ADDRESS (see
page 32) while you are about
300 m away from the nearest
street.
This is normal. You can
only save the current address
when you are within 300 m
from the street.
• Navigation guidance is
incorrect.
Installation angle setting is
not correct.
Installation angle setting
affects the accuracy. Set it
correctly (see page 21).
• Navigation guidance is
sometimes incorrect.
Reversing signal/speed
signal wires are not
connected.
Connect them correctly (see
Installation/Connection
Manual—separate volume).
• Navigation guidance is
heard to listen to.
Surround noise interferes.
Increase the voice cruise
level (see page 20).
ENGLISH
Destination setting
Symptoms
113
EN103_122_KD-NX901[E]fb.indd 113
05.3.17 2:11:39 PM
ENGLISH
Receiver troubles
Disc playback
FM/AM
General
Symptoms
Causes
Remedies
• “Push Reset” appears
on the display, and the
control panel movement is
freezed.
Something is blocking the
control panel movement.
Remove the obstacle, then
reset the receiver (see page 2).
• If this does not work,
check if the installation has
been correctly done.
• Sound cannot be heard
from the speakers.
The volume level is set to the Adjust it to the optimum
minimum level.
level.
Connections are incorrect.
Check the cords and
connections.
• The receiver does not
work at all.
The built-in microcomputer
may have functioned
incorrectly due to noise, etc.
Reset the receiver (see page
2).
• SSM automatic presetting
does not work.
Signals are too weak.
Store stations manually.
• Static noise while listening
to the radio.
The antenna is not connected
firmly.
Connect the antenna firmly.
• Disc cannot be
recognised—“No Disc,”
“Loading Error,” or “Eject
Error” flashes.
The DVD/CD player may
have functioned incorrectly.
Eject the disc forcibly (see
page 4).
• “REGION CODE
ERROR!” appears on the
monitor.
Disc with an incorrect
Region Code is inserted.
Insert a disc with a proper
Region Code (see page 6).
• DVD-R/RW or CD-R/RW
cannot be played back.
• Tracks on the DVD-R/RW
or CD-R/RW cannot be
skipped.
Disc is not finalized.
• Insert a finalized disc.
• Finalize the disc with the
component which you used
for recording.
• Disc can be neither played
back nor ejected.
The DVD/CD player may
have functioned incorrectly
Eject the disc forcibly (see
page 2).
• Disc sound and picture are
sometimes interrupted.
You are driving on rough
roads.
Stop playback while driving
on rough roads.
Disc is scratched.
Change the disc.
Connections are incorrect.
Check the cords and
connections.
114
EN103_122_KD-NX901[E]fb.indd 114
05.3.17 2:11:40 PM
MP3/WMA playback
Causes
Remedies
• No playback picture
(DVD/VCD) appears on
the monitor.
Parking brake wire is not
connected properly.
See Installation/Connection
Manual.
• The left and right edges of
the picture are missing on
the screen.
“4:3 PAN SCAN” is
selected when viewing on
a conventional TV (aspect
ratio 4:3).
Select “4:3 LETTER BOX.”
(See page 60.)
• Disc cannot be played
back.
No MP3/WMA tracks are
recorded on the disc.
Change the disc.
MP3/WMA tracks do not
have the extension code
<.mp3> or <.wma>.
Add the extension code
<.mp3> or <.wma> to their
file names.
Tracks are not recorded in
the format compliant with
ISO 9660 Level 1, Level 2,
Romeo, or Joliet.
Change the disc.
(Record MP3/WMA
tracks using a compliant
application.)
• Noise is generated.
The track played back is not
an MP3/WMA file (although
it has the extension code
<.mp3> or <.wma>).
Skip to another track or
change the disc. (Do not add
the extension code <.mp3>
or <.wma> to non-MP3 or
WMA tracks.)
• A longer readout time is
required.
Readout time varies due to
the complexity of the folder/
file configuration.
Do not use too many
hierarchies and folders.
• Tracks cannot be played
back as you have intended
them to play.
Playback order is determined
when the files are recorded.
ENGLISH
Disc playback
Symptoms
• Elapsed playing time is not This sometimes occurs
correct.
during play. This is caused
by how the tracks are
recorded on the disc.
• WMA track cannot be
played back, and skipped.
The track is copy-protected
with DRM.
• Correct characters are
not displayed (e.g. album
name).
This receiver can only
display alphabets (A – Z,
a – z), numbers, and a
limited number of symbols
and some accented letters.
To be continued....
115
EN103_122_KD-NX901[E]fb.indd 115
05.3.17 2:11:40 PM
ENGLISH
Symptoms
• “No Files” appears on the
display.
Remedies
No playable file is recorded.
Folder configuration is not
correct.
Record using the correct
folder configuration. See
page 78.
SD card format is not
appropriate.
Use SD card formatted in
FAT 12/16/32.
SD card or tracks cannot be
played back.
Reinsert or change the SD
card.
• “Invalid Card” appears on
the display.
MMC card is inserted.
Use the SD card.
• “No Music Files” appears
on the display, and the
folder is skipped.
No track is recorded in the
selected folder (album/
genre).
• “HDD Full,” “SD Full,”
“Track Full,” “Album
Full,” “Genre Full,” or
“Playlist Full” appears on
the display
The capacity of the target
storage you have selected—
such as HDD, SD, etc. is
already full.
• “Cannot Recording”
appears on the display.
You have tried to record any
disc other than audio CDs.
• “Rec Error” appears and
CD recording is cancelled.
Recording is failed due to
the external influences such
as vibration, shaking of the
car
Stop recording on a rough
road. Try to record once
more while driving on a
paved road. If the trouble still
persist, consult your dealer.
• “SCMS Cannot Copy”
appears.
You have tried to copy nonoriginal disc.
The second generation
copy is prohibited. Copy its
original disc.
• You cannot move a track
or an album (“Same
Name” appears on the
display).
The same named track or
album exists in the target
folder.
Select another target folder
(album or genre).
• “Read Failed” appears on
the display.
HDD/SD
Causes
Deleting the unwanted items
in the target storage to make
an enough space.
116
EN103_122_KD-NX901[E]fb.indd 116
05.3.17 2:11:40 PM
HDD/SD
Causes
Remedies
• “SD Loading Error”
appears on the display.
(You cannot open the
control panel.)
SD card is not fully inserted
into the loading slot.
Insert it fully into the loading
slot.
• “Write Protect” appears on
the display.
SD card is write-protected.
Unprotect the SD by sliding
the protect tab on the SD
from the “LOCK” position to
the opposite.
• “No SD Card” appears on
the display.
SD card is not inserted.
Insert an SD card.
• “No Disc” appears on the
display.
No disc is in the magazine.
Insert disc into the magazine.
Disc is inserted upside down.
Insert disc correctly.
ENGLISH
Symptoms
CD changer
• “No Magazine” appears on No magazine is loaded in the Insert the magazine.
the display.
CD changer.
• “Reset 8” appears on the
display.
This receiver is not
Connect this receiver and the
connected to the CD changer CD changer correctly and
correctly.
press the reset button of the
CD changer.
• “Reset 1” – “Reset 7”
appears on the display.
• The CD changer does not
work at all.
Press the reset button of the
CD changer.
The built-in microcomputer
may function incorrectly due
to noise, etc.
Reset the receiver (see page
2).
117
EN103_122_KD-NX901[E]fb.indd 117
05.3.17 2:11:41 PM
ENGLISH
Specifications
NAVIGATION SYSTEM
System & Service:
L1, C/A code
Global Positioning System
Standard Positioning Service
Reception System: 15-channel multi-channel
reception system
Reception Frequency: 1 575.42 MHz
Sensitivity: –130 dBm
Update Rate: 1/second, continuous
[GPS Antenna]
Polarization: Right Handed Circular
Polarization
Dimensions (approx.):
30.4 mm × 11.7 mm × 35.5 mm (W × H × D)
Cable (approx.): 5.0 m
Attachment mat size (approx.): 70 mm × 70 mm
AUDIO AMPLIFIER SECTION
Maximum Power Output:
Front: 50 W per channel
Rear: 50 W per channel
Continuous Power Output (RMS):
Front: 20 W per channel into 4 Ω, 40 Hz
to 20 000 Hz at no more than 0.8%
total harmonic distortion.
Rear: 20 W per channel into 4 Ω, 40 Hz
to 20 000 Hz at no more than 0.8%
total harmonic distortion.
Load Impedance: 4 Ω (4 Ω to 8 Ω allowance)
Equalizer Control Range:
Frequencies: 60 Hz, 150 Hz, 400 Hz, 1 kHz,
2.4 kHz, 6 kHz, 12 kHz
Level: ±10 dB
Signal-to-Noise Ratio: 70 dB
Audio output level:
Digital (DIGITAL OUT: Optical):
Signal wave length: 660 nm
Output level: –21 dBm to –15 dBm
Line-Out Level/Impedance:
2.0 V/20 kΩ load (full scale)
Output Impedance: 1 kΩ
Color system: PAL
Video output (composite): 1 Vp-p/75 Ω
Other Terminals: SUBWOOFER OUT,
CD changer
Steering wheel remote input
TUNER SECTION
Frequency Range:
FM: 87.5 MHz to 108.0 MHz
AM: (MW) 522 kHz to 1 620 kHz
(LW) 144 kHz to 279 kHz
[FM Tuner]
Usable Sensitivity: 11.3 dBf (1.0 µV/75 Ω)
50 dB Quieting Sensitivity:
16.3 dBf (1.8 µV/75 Ω)
Alternate Channel Selectivity (400 kHz): 65 dB
Frequency Response: 40 Hz to 15 000 Hz
Stereo Separation: 40 dB
Capture Ratio: 1.5 dB
[MW Tuner]
Sensitivity: 20 µV
Selectivity: 65 dB
[LW Tuner]
Sensitivity: 50 µV
DVD/CD PLAYER SECTION
Signal Detection System: Non-contact optical
pickup (semiconductor laser)
Number of Channels: 2 channels (stereo)
Frequency Response:
DVD, fs=48 kHz/96 kHz:
16 Hz to 20 000 Hz
VCD/CD:
16 Hz to 20 000 Hz
Dynamic Range:
96 dB
Signal-to-Noise Ratio: 98 dB
Wow and Flutter: Less than measurable limit
MP3 (MPEG Audio Layer 3):
Max. Bit Rate: 320 Kbps
WMA (Windows Media® Audio):
Max. Bit Rate: 192 Kbps
118
EN103_122_KD-NX901[E]fb.indd 118
05.3.17 2:11:41 PM
MP3 (MPEG Audio Layer 3):
Max. Bit Rate: 320 kbps
WMA (Windows Media® Audio):
Max. Bit Rate: 192 kbps
GENERAL
Power Requirement:
Operating Voltage:
DC 14.4 V (11 V to 16 V allowance)
Grounding System: Negative ground
Allowable Operating Temperature:
0°C to +40°C
Allowable Operating Altitude:
–300 m to +3000 m
Dimensions (W × H × D):
Installation Size (approx.):
182 mm × 52 mm × 159 mm
Panel Size (approx.):
188 mm × 58 mm × 13 mm
Mass (approx.): 2.1 kg (excluding accessories)
Design and specifications are subject to change
without notice.
The digitised maps for this Navigation System
supplied by NAVTEQ Corporation are all
copyrighted in the following countries:
Austria:
© Bundesamt für Eich- und
Vermessungswesen
France:
source: Géoroute® IGN France & BD
Carto® IGN France
Germany:
Die Grundlagendaten wurden mit
Genehmigung der zuständigen
Behörden entnommen
Italy:
La Banca Dati Italiana è stata prodotta
usando quale riferimento anche
cartografía numeríca ed al tratto
prodotta e fornita dalla Regione
Toscana
Norway:
Copyright © 2000; Norwegian
Mapping Authority
Portugal:
Source: IgeoE – Portugal
Spain:
Información geográfica propiedad del
CNIG
Sweden:
Based upon electronic data © National
Land Survey Sweden
Switzerland: Topografische Grundlage: ©
Bundesamt für Landestopographie
UK:
Based upon Ordnance Survey
electronic data and used with the
permission of the Controller of Her
Majesty’s Stationary Office
© Crown Copyright, 1995.
ENGLISH
HDD/SD SECTION
• Microsoft and Windows Media are either
registered trademarks or trademarks of
Microsoft Corporation in the United States
and/or other countries.
• This unit is not compatible with Multiple
Bit Rate (MBR: a file that contains the same
content encoded at several different bit rates).
The receiver is equipped with the steering
wheel remote control function.
• See the Installation/Connection Manual
(separate volume) for connection.
This product incorporates copyright
protection technology that is protected
by U.S. patents and other intellectual
property rights. Use of this copyright
protection technology must be authorized
by Macrovision, and is intended for home
and other limited viewing uses only unless
otherwise authorized by Macrovision.
Reverse engineering or disassembly is
prohibited.
119
EN103_122_KD-NX901[E]fb.indd 119
05.3.17 2:11:42 PM
ENGLISH
END-USER LICENSE AGREEMENT
THIS END-USER LICENSE AGREEMENT (“AGREEMENT”) IS A BINDING LEGAL CONTRACT
BETWEEN YOU (EITHER AN INDIVIDUAL OR A LEGAL ENTITY), ON THE ONE HAND, AND
VICTOR COMPANY OF JAPAN, LIMITED (“JVC”) AND ITS LICENSORS (INCLUDING THEIR
LICENSORS AND SUPPLIERS) ON THE OTHER HAND. BY USING THE DATA (“DATA”) AND
SOFTWARE LICENSED UNDER THIS AGREEMENT (COLLECTIVELY, THE “PRODUCT”), YOU WILL
BE BOUND BY THE TERMS OF THIS AGREEMENT. IF YOU DO NOT AGREE TO THE TERMS OF
THIS AGREEMENT, JVC AND ITS LICENSORS ARE NOT WILLING TO LICENSE ANY RIGHT TO USE
OR ACCESS THE PRODUCT TO YOU.
The Product is provided for your personal, internal use only and not for resale or distribution to others. It is
protected by copyright and other intellectual property laws, and is subject to the terms and conditions of this
Agreement.
© 1993–2004 NAVTEQ All rights reserved.
The Data for areas of Canada includes information taken with permission from Canadian authorities, including:
© Her Majesty the Queen in Right of Canada, © Queen’s Printer for Ontario, © Canada Post Corporation,
GeoBase ®.
TERMS AND CONDITIONS
Personal Use Only. Subject to the terms and conditions of this Agreement, JVC and its licensors (including their
licensors and suppliers), as appropriate, hereby grant you a non-transferable, non-exclusive license to use the
Product together with JVC TBT Car Navigation Application Software for the solely personal, non-commercial
purposes for which you were licensed, and not for service bureau, time-sharing or other similar purposes.
You may only use the Product as described in this Agreement and with its accompanying documentation.
Accordingly, but subject to the restrictions set forth in the following paragraphs, you may copy the Data only
as necessary for your personal use to view and save the Data, provided that you do not remove any copyright
or other proprietary notices that are associated with the Product and do not modify the Product in any way. You
agree not to otherwise reproduce, copy, modify, decompile, disassemble or reverse engineer any portion of the
Product, and not to sublicense, loan, transfer, distribute or sell it in any form, in whole or in part and for any
purpose, except to the extent permitted by mandatory laws. Any software provided as part of the Product will
be in object code form only and any copy of such software shall be used only as a back-up, provided that the
primary and back-up copy may not be used concurrently. JVC and its licensors (including their licensors and
suppliers) reserve the right to upgrade, enhance, change or modify the Product at any time in its sole discretion
(“Enhancements”). Any Enhancements made available to you, if any, will be subject to the terms of this
Agreement, except to the extent that conflicting or more restrictive provisions are provided in future agreements
relating to such Enhancements.
Restrictions. Except where you have been specifically licensed to do so by JVC, and without limiting the
preceding paragraph, you (a) may not use the Product with any products, systems, or applications installed
or otherwise connected to or in communication with vehicles, capable of vehicle navigation, positioning,
dispatch, real time route guidance, fleet management or similar applications; (b) may not use the Product with
or in communication with any positioning devices or any mobile or wireless-connected electronic or computer
devices, including without limitation cellular phones, palmtop and handheld computers, pagers, and personal
digital assistants or PDAs or any similar devices; and (c) shall maintain the Product in strict confidence and
shall not disclose it or make it available to any unauthorized third parties. Without limiting the foregoing, you
may only use the Data in the form delivered and it may not be subject to any further automated or systematic
processing. You may transfer the license and all copies of the Product to a third party, provided that (i) the
transferee agrees to comply with the terms and conditions of this Agreement and (ii) you irrevocably delete the
Product from your systems, if applicable. Except for the limited license granted in this Agreement, JVC and
its licensors (including their licensors and suppliers) retain all right, title and interest in the Product, all copies
thereof, and all proprietary rights in the Product, including copyrights, patents, trademarks and trade secret
rights.
120
EN103_122_KD-NX901[E]fb.indd 120
05.3.17 2:11:43 PM
ENGLISH
No Warranty. The Product is provided to you “as is”, and you agree to use it at your own risk. JVC and its
licensors (and their licensors and suppliers) make no guarantees, representations, conditions or warranties of
any kind, express or implied, arising by law or otherwise, respecting the Product including but not limited to,
content, quality, accuracy, completeness, effectiveness, reliability, fitness for a particular purpose, usefulness,
use or results to be obtained from this Product, or that use of the Product or of the server from which the Data
is accessed, if applicable, will be uninterrupted or error-free. You assume full responsibility for the selection of
the Product to achieve your intended purpose, for the proper installation and use of the Product and verifying the
results obtained from your use.
Disclaimer of Warranty: JVC AND ITS LICENSORS (INCLUDING THEIR LICENSORS AND SUPPLIERS)
DISCLAIM ANY WARRANTIES, EXPRESS OR IMPLIED, OF QUALITY, PERFORMANCE,
MERCHANTABILITY, FITNESS FOR A PARTICULAR PURPOSE OR NON-INFRINGEMENT. SOME
STATES, TERRITORIES AND COUNTRIES DO NOT ALLOW CERTAIN WARRANTY EXCLUSIONS,
SO TO THAT EXTENT THE ABOVE EXCLUSION MAY NOT APPLY TO YOU.
Disclaimer of Liability: JVC AND ITS LICENSORS (INCLUDING THEIR LICENSORS AND SUPPLIERS)
SHALL NOT BE LIABLE TO YOU IN RESPECT OF ANY CLAIM, DEMAND OR ACTION,
IRRESPECTIVE OF THE NATURE OF THE CAUSE OF THE CLAIM, DEMAND OR ACTION ALLEGING
ANY LOSS, INJURY OR DAMAGES, DIRECT OR INDIRECT, WHICH MAY RESULT FROM THE USE
OR POSSESSION OF THE PRODUCT; OR FOR ANY LOSS OF PROFIT, REVENUE, CONTRACTS OR
SAVINGS, OR ANY OTHER DIRECT, INDIRECT, PUNITIVE, EXEMPLARY, INCIDENTAL, SPECIAL
OR CONSEQUENTIAL DAMAGES ARISING OUT OR RELATING TO THIS AGREEMENT, YOUR USE
OF OR INABILITY TO USE THE PRODUCT, ANY DEFECT IN THE PRODUCT, OR THE BREACH OF
THESE TERMS OR CONDITIONS, WHETHER IN AN ACTION IN CONTRACT OR TORT OR BASED ON
A WARRANTY OR OTHER LEGAL THEORY, EVEN IF JVC OR ITS LICENSORS (INCLUDING THEIR
LICENSORS AND SUPPLIERS) HAVE BEEN ADVISED OF THE POSSIBILITY OF SUCH DAMAGES. IT
IS EXPRESSLY UNDERSTOOD AND AGREED THAT IN THE EVENT ANY REMEDY HEREUNDER IS
DETERMINED TO HAVE FAILED OF ITS ESSENTIAL PURPOSE, ALL LIMITATIONS OF LIABILITY
AND EXCLUSIONS OF DAMAGES SET FORTH HEREIN SHALL REMAIN IN EFFECT. SOME
STATES, TERRITORIES AND COUNTRIES DO NOT ALLOW CERTAIN LIABILITY EXCLUSIONS OR
DAMAGES LIMITATIONS, SO TO THAT EXTENT THE ABOVE MAY NOT APPLY TO YOU.
Termination. This Agreement is effective until terminated. Your rights under this Agreement will terminate
automatically without notice if you fail to comply with any of the terms and conditions of this Agreement. The
following provisions shall survive any termination or expiration of this Agreement: No Warranty, Disclaimer of
Liability, Indemnity, Entire Agreement, and Governing Law.
Export Control. You agree not to export from anywhere any part of the Product provided to you or any direct
product thereof except in compliance with, and with all licenses and approvals required under, applicable export
laws, rules and regulations.
Indemnity. You agree to indemnify, defend and hold JVC and its licensors (including their respective licensors,
suppliers, assignees, subsidiaries, affiliated companies, and the respective officers, directors, employees,
shareholders, agents and representatives of each of them) free and harmless from and against any claim, demand
or action, irrespective of the nature of the claim, demand or action, alleging any liability, loss, injury (including
injuries resulting in death), cost, expense, or damages of any kind or character, including but not limited to
attorney’s fees, arising out of or in connection with any use or possession by you of this Product.
Entire Agreement. These terms and conditions constitute the entire Agreement between JVC and its licensors
(including their licensors and suppliers) and you pertaining to the subject matter hereof, and supersede in its
entirety any and all written or oral agreements previously existing between us with respect to such subject matter.
This Agreement may not be modified, amended or in any way altered except by an instrument in writing signed
by authorized representatives of both parties. In the event that any provision of this Agreement is found invalid
or unenforceable pursuant to judicial decree, the remainder of this Agreement shall remain valid and enforceable
according to its terms.
Warnings. The Data may contain inaccurate or incomplete information due to the passage of time, changing
circumstances, sources used and the nature of collecting comprehensive geographic data, any of which may lead
to incorrect results.
121
EN103_122_KD-NX901[E]fb.indd 121
05.3.17 2:11:44 PM
ENGLISH
Governing Law. The above terms and conditions shall be governed by the laws of the Netherlands, without
giving effect to (i) its conflict of laws provisions, or (ii) the United Nations Convention for Contracts for
the International Sale of Goods, which is explicitly excluded. You agree to submit to the jurisdiction of The
Netherlands for any and all disputes, claims and actions arising from or in connection with the Product provided
to you hereunder.
U.S. Government End Users. If the Product is being acquired by or on behalf of the United States government or
any other entity seeking or applying rights similar to those customarily claimed by the United States government,
the Product is licensed in accordance with the rights set forth at DFARS 252.227-7013(f)(3), TECHNICAL
DATA - NONCOMMERCIAL ITEMS; DFARS 227.7202 et seq., COMMERCIAL COMPUTER SOFTWARE
OR COMMERCIAL COMPUTER SOFTWARE DOCUMENTATION; FAR 12.211, TECHNICAL DATA;
and FAR 12.212, COMPUTER SOFTWARE, as applicable. Users shall have only the rights in the Product that
have been referenced or specified in this Agreement.
In addition, (i) for acquisitions conducted by the Department of Defense, the Data is licensed with “Limited
Rights” in accordance with the rights set forth at DFARS 252.227-7013(f)(3), TECHNICAL DATA
– NONCOMMERCIAL ITEMS, and Data delivered or otherwise furnished with “Limited Rights” shall be
marked with the following “Limited Rights Notice” set forth at DFARS 252.227-7013(f)(3), and shall be treated
in accordance with such Notice:
LIMITED RIGHTS
CONTRACT NO.: __________________________________________________
CONTRACTOR (MANUFACTURER/SUPPLIER) NAME: NAVTEQ
CONTRACTOR (MANUFACTURER/SUPPLIER) ADDRESS: 222 Merchandise Mart Plaza, Suite 900, Chicago, Illinois 60654
The Government’s rights to use, modify, reproduce, release, perform, display, or disclose these technical data
are restricted by paragraph (b)(3) of the Rights in Technical Data - Noncommercial Items clause contained in
the above identified contract. Any reproduction of technical data or portions thereof marked with this legend
must also reproduce the markings. Any person, other than the Government, who has been provided access to
such data must promptly notify the above named Contractor.
and; (ii) for civilian agency acquisitions, the Data is licensed in accordance with the rights set forth at FAR
52.227-14(g)(1), RIGHTS IN DATA - GENERAL (Protection of limited rights data and computer software). In
the event that the Contracting Officer requires the delivery of limited rights data that has been withheld or would
otherwise be withholdable in accordance with FAR 52.227-14(g)(1), the Data is licensed with “Limited Rights”
as set forth in the following “Limited Rights Notice” at FAR 52.227-14(g)(2) (Alternate II), which shall be
affixed to the Data and the Data shall be treated in accordance with such Notice (which shall be marked on any
reproduction of these data, in whole or in part):
LIMITED RIGHTS NOTICE (JUN 1987)
These data are submitted with limited rights under Government Contract No. _____ (and subcontract ______,
if appropriate). These data may be reproduced and used by the Government with the express limitation
that they will not, without written permission of the Contractor, be used for purposes of manufacture
nor disclosed outside the Government; except that the Government may disclose these data outside the
Government for the following purposes, if any, provided that the Government makes such disclosure subject
to prohibition against further use and disclosure: There are no additional purposes permitting disclosure of
such Data.
The manufacturer/supplier of the Data is NAVTEQ, 222 Merchandise Mart Plaza, Suite 900, Chicago, Illinois 60654.
If the Contracting Officer refuses to comply with the applicable licenses set forth herein, the Contracting Officer
must notify NAVTEQ prior to seeking additional or alternative rights in the Product.
122
EN103_122_KD-NX901[E]fb.indd 122
05.3.17 2:11:45 PM
Having TROUBLE with operation?
Please reset your unit
Refer to page of How to reset your unit
Haben Sie PROBLEME mit dem Betrieb?
Bitte setzen Sie Ihr Gerät zurück
Siehe Seite Zurücksetzen des Geräts
Vous avez des PROBLÈMES de fonctionnement?
Réinitialisez votre appareil
Référez-vous à la page intitulée Comment réinitialiser votre appareil
Hebt u PROBLEMEN met de bediening?
Stel het apparaat terug
Zie de pagina met de paragraaf Het apparaat terugstellen
EN, GE, FR, NL
© 2005 Victor Company of Japan, Limited
Rear_KD-NX901[EX_EU]f.indd 2
0205MNMMDWJEIN
05.2.23 9:01:42 PM
KD-NX901
Installation/Connection Manual
Manuel d’installation/raccordement
LVT1294-003A
[E]
0205MNMMDWJEIN
EN, FR
© 2005 Victor Company of Japan, Limited
ENGLISH
FRANÇAIS
This unit is designed to operate only on 12 V DC, NEGATIVE ground electrical systems. If your
vehicle does not have this system, a voltage inverter is required, which can be purchased at JVC
IN-CAR ENTERTAINMENT dealers.
• Read this manual carefully and thoroughly. Especially pay attention to the safety instructions.
Cet appareil est conçu pour fonctionner sur des sources de courant continu de 12 V à masse
NÉGATIVE seulement. Si votre véhicule n’offre pas ce type d’alimentation, il vous faut un
convertisseur de tension, que vous pouvez acheter chez un revendeur d’autoradios JVC.
• Lisez attentivement et complètement ce Manuel d’installation/raccordement. En faisant,
particulièrement attention aux instructions de sécurité.
WARNINGS
AVERTISSEMENTS
• DO NOT install any unit in locations where;
– it may obstruct the steering wheel and gearshift lever operations, as this may result in a traffic
accident.
– it may obstruct the operation of safety devices such as air bags, as this may result in a fatal
accident.
– it may obstruct visibility.
• DO NOT operate any unit while manipulating the steering wheel, as this may result in a traffic
accident.
• The driver must not watch the monitor while driving.
If the driver watches the monitor while driving, it may lead to carelessness and cause an
accident.
• If the parking brake is not engaged, the following messages appear...
– When you try to watch the playback picture on the monitor, “DRIVER MUST NOT WATCH THE
MONITOR WHILE DRIVING” appears, and no playback picture will be shown.
– When you try to enter your destination for the navigation guidance, “Function not available
while driving.” appears, and you cannot enter the destination.
These warnings appear only when the parking brake wire is not connected, or the parking brake
is not engaged.
• N’INSTALLEZ aucun appareil dans les endroits suivants:
– où il peut gêner l’accès au volant ou au levier de vitesse car cela peut entraîner un accident de
la circulation.
– où il peut gêner la manipulation de dispositifs de sécurité tels que les coussins de sécurité car cela
peut entraîner un accident fatal.
– où il peut gêner la visibilité.
• NE COMMANDEZ PAS l’appareil lors de la manipulation du volant car cela peut entraîner un
accident de la circulation.
• Le conducteur ne doit pas regarder le moniteur lorsqu’il conduit.
Se livrer à ce genre d’activité lorsqu’on est au volant réduit considérablement la vigilance du
conducteur et multiplie les risques d’accident.
• Si le frein de stationnement n’est pas engagé, le message suivant apparaît...
– Quand vous essayez de regarder l’image de lecture sur le moniteur, “LE CONDUCTEUR NE
DOIT PAS REGARDER LE MONITEUR EN CONDUISANT” apparaît et aucune image de
lecture n’est montrée.
– Quand vous essayez d’entrer votre destination pour la navigation, “Cette fonction n’est pas
accessible pendant la conduite” apparaît et vous ne pouvez pas entrer la destination.
Ces avertissements apparaissent uniquement si le fil du frein de stationnement n’est pas
connecté ou si le frein de stationnement n’est pas engagé.
Before installing the unit, observe the following...
• Park the car in a safe and level place, and turn off the ignition switch.
• It is strictly recommended to have the unit installed by a technician who has special knowledge
and skills for installation. Incorrect installation may result in damage to the unit or to the vehicle.
• Attach each component firmly in place so that it cannot be loosened or detached in the event of
a collision or sudden braking.
• Take preventive measures to avoid unexpected disconnection of the cords and damage to
the cords. This trouble may happen while moving or reclining the seat.
Avant d’installer l’appareil, respectez les points suivant...
• Garez la voiture dans un endroit sûr et plat et coupez le contact de la voiture.
• Il est strictement recommandé de faire installer l’appareil par un technicien qui possède des
connaissances spéciales et des compétences pour l’installation. Une installation incorrecte peut
entraîner des dommages à l’appareil ou au véhicule.
• Fixez solidement chaque appareil de façon qu’il ne puisse pas se desserrer ou se détacher
même en cas de collision ou de coup de frein brutal.
• Prenez des mesures préventives pour éviter que des cordons se déconnectent
accidentellement ou soient endommagés. Cela peut se produire lorsque vous déplacez
ou inclinez le siège.
Parts list for installation and connection
Liste des pièces pour l’installation et raccordement
The following parts are provided for this unit.
After checking them, please set them correctly.
Les pièces suivantes sont fournies avec cet appareil.
Après vérification, veuillez les placer correctement.
A/B
Hard case/Control panel
Etui de transport/
Panneau de commande
D
Trim plate
Plaque d’assemblage
C
Sleeve
Manchon
F
Washer (ø5)
Rondelle (ø5)
G
Lock nut (M5)
Écrou d’arrêt (M5)
H
Handles
Poignées
E
Power cord
Cordon d’alimentation
J
Crimp connector
Raccord à sertir
I
Battery
Pile
K
Parking brake extension lead
Cordon prolongateur du frein de
stationnement
CR2025
L
Mounting bolt (M5 x 20 mm)
Boulon de montage (M5 x 20 mm)
M
Rubber cushion
Amortisseur en caoutchouc
N
Remote controller
Télécommande
O/P
GPS antenna/Attachment mat
Antenne GPS/Feuille de fixation
Q
Measuring gauge
Gabarit de mesure
RM-RK230
TROUBLESHOOTING
EN CAS DE DIFFICULTÉS
• The fuse blows.
* Are the red and black leads connected correctly?
• Le fusible saute.
* Les fils rouge et noir sont-ils raccordés correctement?
• Power cannot be turned on.
* Is the yellow lead connected?
• L’appareil ne peut pas être mise sous tension.
* Le fil jaune est-il raccordé?
• No sound from the speakers.
* Is the speaker output lead short-circuited?
• Pas de son des enceintes.
* Le fil de sortie d’enceinte est-il court-circuité?
• Sound is distorted.
* Is the speaker output lead grounded?
* Are the “–” terminals of L and R speakers grounded in common?
• Le son est déformé.
* Le fil de sortie d’enceinte est-il à la masse?
* Les bornes “–” des enceintes gauche et droite sont-elles mises ensemble à la masse?
• Noise interfere with sounds.
* Is the rear ground terminal connected to the car’s chassis using shorter and thicker cords?
• Interférence avec les sons.
* La prise arrière de mise à la terre est-elle connectée au châssis de la voiture avec un cordon
court et épais?
• The receiver becomes hot.
* Is the speaker output lead grounded?
* Are the “–” terminals of L and R speakers grounded in common?
• The receiver does not work at all.
* Have you reset the receiver?
Install1-3KD-NX901EF_f.p65
1
•
*
*
•
1 *
L’autoradio devient chaud.
Le fil de sortie d’enceinte est-il à la masse?
Les bornes “–” des enceintes gauche et droite sont-elles mises ensemble à la masse?
L’autoradio ne fonctionne pas du tout.
L’avez-vous réinitialisé?
2/24/05, 1:51 PM
INSTALLATION (IN-DASH MOUNTING)
INSTALLATION (MONTAGE DANS LE TABLEAU DE BORD)
The following illustration shows a typical installation. If you have any questions or require
information regarding installation kits, consult your JVC IN-CAR ENTERTAINMENT dealer or a
company supplying kits.
• If you are not sure how to install this unit correctly, have it installed by a qualified technician.
• Make sure not to block the fan on the rear panel to maintain proper ventilation when installed.
L’illustration suivante est un exemple d’installation typique. Si vous avez des questions ou avez
besoin d’information sur des kits d’installation, consultez votre revendeur d’autoradios JVC ou une
compagnie d’approvisionnement.
• Si vous n’êtes pas sûr de pouvoir installer correctement cet appareil, faites-le installer par un
technicien qualifié.
• Lors de l’installation assurez-vous de ne pas bloquer le ventilateur à l’arrière afin de permettre
une ventilation correcte.
6
3
2
1
!
Do the required electrical connections.
Réalisez les connexions électriques.
D
Do not block the fan.
C
B
18
4
m
~
Ne bloquez pas le
ventilateur.
5
H
53
m
m
⁄
4
m
Ÿ
M
L
*2
@
Bend the appropriate tabs to hold the
sleeve firmly in place.
B
Tordez les languettes appropriées pour
maintenir le manchon en place.
*2
D
*1
C
*1 When you stand the unit, be careful not to damage the fuse on the rear.
*1 Lorsque vous mettez l’appareil à la verticale, faire attention de ne pas endommager le fusible situé sur l’arrière.
*2 Fit the protrusions outside the unit.
*2 Fixez les protubérances à l’extérieur de l’appareil.
Caution for installing
Précautions lors de l’installation
Fit the receiver into the mounting sleeve by using four corners of the trim plate.
• DO NOT press the panel (shaded in the illustration).
Fixez l’autoradio sur le manchon de montage en utilisant les quatre coins de la
plaque de garniture.
• NE POUSSEZ PAS sur le panneau (en gris sur l’illustration).
Retrait de l’appareil
Removing the unit
Avant de retirer l’appareil, libérer la section arrière.
Before removing the unit, release the rear section.
1
2
4
3
Insert the two handles, then pull them as
illustrated so that the unit can be removed.
H
Insérez les deux poignées, puis tirez de la
façon illustrée de façon à retirer l’appareil.
B
D
When installing the unit without using the sleeve
Lors de l’installation de l’appareil sans utiliser de manchon
When using the optional stay
Lors de l’utilisation du hauban en option
Fire wall
Cloison
In a Toyota for example, first remove the car radio and install the unit in its place.
Par exemple dans une Toyota, retirez d’abord l’autoradio et installez l’appareil à la place.
3
Stay *
Hauban *3
F
Flat type screws (M5 x 8 mm) *3
Vis à tête plate (M5 x 8 mm) *3
*3 Not included with this unit.
*3 Non fourni avec cet appareil.
G
L
Bracket *3
Support *3
Dashboard
Tableau de bord
Flat type screws (M5 x 8 mm) *3
Vis à tête plate (M5 x 8 mm) *3
Screw *3
Vis *3
Pocket
Poche
Bracket *3
Support *3
C
Note
: When installing the unit on the mounting bracket, make sure to use the 8 mm-long
screws. If longer screws are used, they could damage the unit.
Remarque : Lors de l’installation de l’appareil sur le support de montage, assurez-vous
d’utiliser des vis d’une longueur de 8 mm. Si des vis plus longues sont utilisées,
elles peuvent endommager l’appareil.
*3 Not included with this unit.
*3 Non fourni avec cet appareil.
Assembling the measuring gauge
Assemblage du gabarit de mesure
1
30˚
2
5˚
32˚
28˚
23˚
17˚
-5˚
32˚
Install the unit at an angle of less than 30˚ vertically and of less than 5˚ horizontally.
• After installation, confirm the vertical angle of the unit using the supplied measuring gauge.
17˚
• Keep the gauge handy for the future use.
• Conservez le gabarit à portée de main pour
une utilisation future.
2
2
23˚
-5˚
Installez l’appareil avec un angle vertical de moins de 30˚ et un angle horizontal de moins de 5˚.
• Après l’installation, vérifiez l’angle vertical de l’appareil en utilisant le gabarit de mesure fourni.
Install1-3KD-NX901EF_f.p65
28˚
2/24/05, 1:51 PM
Mesure de l’angle d’installation
Measuring the installation angle
AVANT de commencer, assurez-vous que...
• Vous avez garé votre voiture dans un endroit où elle n’est pas inclinée. (Elle doit être garée
horizontalement).
BEFORE starting, make sure...
• You have parked the car where it cannot be inclined. (It should be parked horizontally.)
1
2
Measure this angle.
Mesurez cet angle.
-5˚
32˚
17˚ 23˚ 28˚
:1
:2
:3
:4
1 Détachez le panneau de commande.
2 Mesurez l’angle.
1 Detach the control panel.
2 Measure the angle.
• Fixez le gabarit de mesure dans une position proche et à plat de l’appareil (dans la partie
en gris de l’illustration ci-dessus).
• Attach the measuring gauge closely and flatly to the main unit (to the portion shaded in the
above illustration).
3 Notez l’angle mesuré.
3 Note your measured angle.
1
2
3
4
\
\
\
\
UNIT ANGLE 1 (–5.0 to 17.0˚)
UNIT ANGLE 2 (17.0 to 23.0˚)
UNIT ANGLE 3 (23.0 to 28.0˚)
UNIT ANGLE 4 (28.0 to 32.0˚*)
1
2
3
4
* It is not recommended to install the main
unit at an angle of more than 30˚;
otherwise, the malfunction may result.
\
\
\
\
ANGLE 1 (–5,0 à 17,0˚)
ANGLE 2 (17,0 à 23,0˚)
ANGLE 3 (23,0 à 28,0˚)
ANGLE 4 (28,0 à 32,0˚*)
* Il n’est pas recommandé d’installer
l’apareil avec un angle de plus de 30˚;
sinon, cela peut entraîner un mauvais
fonctionnement.
When you use the Navigation System for the first time after
installation...
Quand vous utilisez l’autoradio pour la première fois après
l’installation...
Follow the procedure described on pages 11 and 12 of the INSTRUCTIONS (separate
volume).
Suivez la procédure décrite aux pages 11 et 12 du MANUEL D’INSTRUCTIONS (volume
séparé).
Connecting the GPS antenna
Connexion de l’antenne GPS
• People who use pacemakers should avoid a physical contact with the magnetic antenna and
should not handle it themselves. This causes malfunctions of the pacemakers.
• Keep the magnetic antenna away from the storage media such as disks, credit cards;
otherwise, its data will be collapsed.
• The antenna should be attached so firmly that it cannot be detached in the event of a collision
or sudden braking.
• Les personnes utilisant un stimulateur cardiaque doivent éviter tout contact physique avec
l’antenne magnétique et ne doivent pas la manipuler elles-même. Cela pourrait entraîner un
dysfonctionnement du stimulateur cardiaque.
• Tenez l’antenne magnétique à distance des supports de mémoire tels que les disques, les
cartes de crédit; sinon, les données pourraient être corrompues.
• L’antenne doit être fixée suffisamment solidement pour qu’elle ne puisse pas se détacher en
cas de choc ou de coup de frein brutal.
Å Inside the car / À l’intérieur de la voiture
ı Outside the car / À l’extérieur de la voiture
O
O
P
Å Inside the car
Å À l’intérieur de la voiture
Beneath a non-metallised* window, fix the attachment mat (P) on the dashboard, then place the
antenna (O) on the mat.
• Make sure that the antenna is not covered by any components and parts of the car and it can
receive the signals from all directions.
* The windows with screen antenna, windscreen heating or thermally insulated screens will
interferes with GPS reception, and will degrade the reliability of the Navigation System.
Derrière une fenêtre non métallisée*, fixez la feuille de fixation (P) sur le tableau de bord, puis
placez l’antenne (O) sur la feuille.
• Assurez-vous que l’antenne n’est recouverte par aucun composant ou aucune partie de la
voiture et peut recevoir les signaux de toutes les directions.
* Les vitres avec une antenne incrustée, les chauffages de pare-brise ou les écrans d’isolation
thermique interfèrent avec la réception GPS et réduisent la fiabilité du système de navigation.
ı Outside the car
ı À l’extérieur de la voiture
Fix the antenna (O) to a pre-washed, flat, metallic surface.
• Wire the antenna cord so as not to allow the rain to leak in.
• The antenna magnetically attached will be used even at a speed of 180 km/h (maximum).
The antenna must be specially secured for higher speeds.
• Detach the antenna before you wash the car with the car-wash facilities.
Fixez l’antenne (O) sur une surface métallique plate.
• Câblez le cordon d’antenne de façon à empêcher la pluie de pénétrer à l’intérieur.
• Une fois fixée, l’antenne magnétique ne se détachera pas même à une vitesse de 180 km/h
(maximum). L’antenne doit être fixée spécialement pour les vitesses plus élevées.
• Détachez l’antenne avant de laver votre voiture dans un poste de lavage.
Required connections for DVD playback / Connexions requises pour la lecture de DVD
KV-MR9010
Wide color monitor (not supplied)
Moniteur couleur à écran large (non fourni)
Digital optical cable (not supplied)
Câble optique numérique (non fourni)
Amplifier or the decoder compatible with the multichannel digital sources
Amplificateur ou décodeur compatible avec les sources numériques à
canaux multiples
KD-NX901
AV1-IN
To Video input
À l’entrée vidéo
Video cord (not supplied)
Cordon vidéo (non fourni)
AV2-INPUT
VIDEO OUT
À propos des sons reproduits par la prise DIGITAL OUT, référez-vous à la page 111 du
MANUEL D’INSTRUCTIONS.
About sounds reproduced through the DIGITAL OUT terminal, see page 111 of the
INSTRUCTIONS.
3
Install1-3KD-NX901EF_f.p65
3
DIGITAL OUT
2/24/05, 1:51 PM
ENGLISH
FRANÇAIS
FRANÇAIS NEDERLANDS
ELECTRICAL CONNECTIONS
RACCORDEMENTS ÉLECTRIQUES
To prevent short circuits, we recommend that you disconnect the battery’s negative terminal and
make all electrical connections before installing the unit.
• Be sure to ground this unit to the car’s chassis again after installation.
Pour éviter tout court-circuit, nous vous recommandons de débrancher la borne négative de la
batterie et d’effectuer tous les raccordements électriques avant d’installer l’appareil.
• Assurez-vous de raccorder de nouveau la mise à la masse de cet appareil au châssis de la
voiture après l’installation.
Notes:
• Replace the fuse with one of the specified rating. If the fuse blows frequently, consult your JVC
IN-CAR ENTERTAINMENT dealer.
• It is recommended to connect to the speakers with maximum power of more than 50 W (both at
the rear and at the front, with an impedance of 4 Ω to 8 Ω). If the maximum power is less than
50 W, change “Amp Gain” setting to prevent the speakers from being damaged (see page 89 of
the INSTRUCTIONS).
• Incorrect wiring may result in damage to or destruction of vehicle components and safety
devices.
• To prevent short-circuits and any associated risk of fire, cover the terminals of the UNUSED
leads with insulating tape.
• The heat sink becomes very hot after use. Be careful not to touch it when removing this unit.
Remarques:
• Remplacer le fusible par un de la valeur précisée. Si le fusible saute souvent, consulter votre
revendeur d’autoradios JVC.
• Il est recommandé de connecter des enceintes avec une puissance de plus de
50 W (les enceintes arrière et les enceintes avant, avec une impédance comprise entre
4 Ω et 8 Ω). Si la puissance maximum est inférieure à 50 W, changez “Amp Gain” pour éviter
d’endommager vos enceintes (voir page 89 du MANUEL D’INSTRUCTIONS).
• Un câblage incorrect peut entraîner des dommages ou la destruction de composants du véhicule
ou de dispositifs de sécurité.
• Pour éviter tout court-circuit et tout risque d’entraîner un incendie, recouvrez les extrémités des
fils INUTILISÉS avec un ruban isolant.
• Le dissipateur de chaleur devient très chaud après usage. Faites attention de ne pas le toucher
en retirant cet appareil.
Heat sink
Dissipateur de chaleur
PRECAUTIONS on power supply and speaker connections:
PRÉCAUTIONS sur l’alimentation et la connexion des enceintes:
• DO NOT connect the speaker leads of the power cord to the car battery; otherwise, the
unit will be seriously damaged.
• BEFORE connecting the speaker leads of the power cord to the speakers, check the speaker
wiring in your car.
• NE CONNECTEZ PAS les fils d’enceintes du cordon d’alimentation à la batterie; sinon,
l’appareil serait sérieusement endommagé.
• AVANT de connecter les fils d’enceintes du cordon d’alimentation aux enceintes, vérifiez le
câblage des enceintes de votre voiture.
A
+
L -
-
+
R -
-
+
+
If your car is equipped with the ISO connector
Si votre voiture est équippée d’un connecteur ISO
• Connect the ISO connectors as illustrated.
• Connectez les connecteurs ISO comme montré sur l’illustration.
View from the lead side
Vue à partir du côté des fils
From the car body
De la carrosserie de la voiture
A
+
L -
-
+
R -
-
+
+
D
E
F
G
H
-
+
R -
-
+
+
For some VW/Audi or Opel (Vauxhall) automobile
Pour certaines voitures VW/Audi ou Opel (Vauxhall)
You may need to modify the wiring of the supplied power cord as illustrated.
• Contact your authorized car dealer before installing this unit.
Vous aurez peut-être besoin de modifier le câblage du cordon d’alimentation fourni comme montré sur
l’illustration.
• Contactez votre revendeur automobile autorisé avant d’installer l’appareil.
Y
B
C
+
L -
ISO connector
Connecteur ISO
Y
*
Original wiring
Câblage original
Y: Yellow
Jaune
R: Red
Rouge
R
R
*4
* Choking coil
* Bobine d’arrêt
I
J
K
L
M
N
O
P
Modified wiring
Câblage modifié
Y
Y
ISO connector of the supplied power cord
Connecteur ISO pour le cordon d’alimentation fourni
*
R
CAUTION: If no ACC position exists on the ignition switch, connect the red lead through
the unit to a terminal which can be switched on and off by the ignition switch. Otherwise, it
may cause the car battery to be exhausted.
R
Ignition switch
Interrupteur d’allumage
ATTENTION: Si l’interrupteur d’allumage ne possède pas de position ACC, connectez le fil
rouge provenant de l’appareil à une prise qui peut être mise sous et hors tension par
l’interrupteur d’allumage. Sinon, la batterie de la voiture risquerait de se décharger.
R
*4 L’affectation des fiches ISO peut varier selon la voiture. Un câblage incorrect peut entraîner des
dommages ou la destruction de composants du véhicule ou de dispositifs de sécurité. Si vous
avez des doutes, contactez le fabricant de votre voiture ou un magasin spécialisé autorisé.
*4 The assignment of the ISO plug may vary among the cars. Incorrect wiring may result in
damage to or destruction of car components and safety devices. If you are in any doubt, contact
your vehicle manufacturer or authorised specialist workshop.
4
Install4-6KD-NX901EF_f.p65
4
Fuse block
Porte-fusible
2/24/05, 1:38 PM
B
Connections without using the ISO connectors
Connexions sans l’utilisation des connecteurs ISO
Before connecting: Check the wiring in the vehicle carefully. Incorrect connection may cause
serious damage to this unit.
The leads of the power cord and those of the connector from the car body may be different in
color.
1 Cut the ISO connector.
2 Connect the colored leads of the power cord in the order specified in the illustration below.
3 Connect the aerial cord and GPS antenna.
4 Finally connect the wiring harness to the unit.
Avant de commencer la connexion: Vérifiez attentivement le câblage du véhicule. Une
connexion incorrecte peut endommager sérieusement l’appareil.
Le fil du cordon d’alimentation et ceux des connecteurs du châssis de la voiture peuvent être
différents en couleur.
1 Coupez le connecteur ISO.
2 Connectez les fils colorés du cordon d’alimentation dans l’ordre spécifié sur l’illustration cidessous.
3 Connectez le cordon d’antenne et l’antenne GPS.
4 Finalement, connectez le faisceau de fils à l’appareil.
1
LINE OUT/SUBWOOFER OUT—
3
Aerial terminal
Borne de l’antenne
3
DIGITAL OUT
GPS antenna
Antenne GPS
To disconnect the CD/DAB connector
Pour déconnecter le connecteur CD/DAB
Yellow*6
Jaune *6
Red
Rouge
P
L
Ignition switch
Interrupteur d’allumage
2
1
To metallic body or chassis of the car
À un corps métallique ou au châssis de la
voiture
*5
To a live terminal in the fuse block connecting to the car battery
(bypassing the ignition switch) (constant 12 V)
À une borne sous tension du porte-fusible connectée à la batterie de la
voiture (en dérivant l’interrupteur d’allumage) (12 V constant)
O
3
To speed signal lead
Au fil de signal de vitesse
Pink
Rose
Speed signal lead
Fil de signal de vitesse
Climp connector (not supplied)—see note *7
Raccord à sertir (non fourni)—voir remarque *7
F
J
6
4
To the remote lead of other equipment or power aerial if any
(200 mA max.)
Au fil de télécommande de l’autre appareil ou à l’antenne
automatique s’il y en a une (200 mA max.)
(ILLUMINATION)
N
5
To car light control switch
À l’interrupteur d’éclairage de la voiture
To cellular phone system
À un système de téléphone cellulaire
Climp connector (not supplied)—see note *7
Raccord à sertir (non fourni)—voir remarque *7
Reversing lamp lead
Fil des feux de recul
Purple with white stripe
Violet avec bande blanche
To reversing lamp lead
Au fil des feux de recul
7
K
9
D
E
White with black stripe
Blanc avec bande noire
M
Orange with white stripe
Orange avec bande blanche
Brown
Marron
Fuse block
Porte-fusible
To an accessory terminal (or the one which can be switched on/off
by the ignition switch)
Vers une borne accessoire (ou une borne qui peut être mise sous/
hors tension en mettant le contact)
Blue with white stripe
Bleu avec bande blanche
*6 Before checking the operation of this unit prior to
installation, this lead must be connected, otherwise
power cannot be turned on.
*6 Pour vérifier le fonctionnement de cet appareil avant
installation, ce fil doit être raccordé, sinon l’appareil
ne peut pas être mis sous tension.
I
*5 Not included for this unit
*5 Non fourni avec cet appareil
Hold the connector top tightly
(1), then pull it out (2).
Tenez fermement le dessus
du connecteur (1) puis tirezle vers l’extérieur (2).
8
2
*5
Black
Noir
To CD changer/DAB tuner—
Au changeur de CD/tuner DAB—
1
To parking brake lead (see “Connecting the parking brake lead”)
Au fil du frein de stationnement (voir “Connexion du fil du frein de
stationnement”)
15 A fuse
Fusible 15 A
4
Rear ground terminal
Borne arrière de masse
2
To steering wheel remote controller—
Pour la télécommande de volant—
VIDEO OUT
Cut the ISO connector
Coupez le connecteur ISO
White Gray with black stripe
Blanc Gris avec bande noire
Left speaker (front)
Enceinte gauche (avant)
C
Gray
Gris
H
Green with black stripe
Vert avec bande noire
Right speaker (front)
Enceinte droit (avant)
G
Green
Vert
Purple with black stripe
Violet avec bande noire
B
Left speaker (rear)
Enceinte gauche (arrière)
A
Purple
Violet
Right speaker (rear)
Enceinte droite (arrière)
Guidance voice comes out only through the front speakers (and front line out).
Le guidage vocal sort uniquement des enceintes avant (et de la sortie de ligne avant).
Connecting the speed signal lead (I)
Connexion du fil de signal de vitesse (I)
Locate the signal lead from the speedometer, then connect it and the speed signal lead from the
power cord with a climp connector (not supplied).
• If you do not know the exact installation position/location of the speed signal lead, consult the
vehicle manufacturer or your car dealer. Incorrect wiring may damage or destruct the vehicle
components and safety devices.
• This connection is necessary to use the Navigation System.
Localisez le fil provenant de l’indicateur de vitesse, puis connectez-le au fil de signal de vitesse
provenant du cordon d’alimentation en utilisant un raccord à sertir (non fourni).
• Si vous ne connaissez pas la position d’installation ou l’emplacement exact du fil de signal de
vitesse, consultez le fabricant du véhicule ou votre revendeur automobile. Un câblage incorrect
peut endommager ou détruire les composants et dispositifs de sécurité du véhicule.
• Cette connexion est nécessaire pour pouvoir utiliser le système de navigation.
Connecting the reverse gear signal lead (K)
Connexion du fil de signal de marche arrière (K)
Locate the reversing lamp lead in the boot, then connect it and the reverse gear signal lead from
the power cord with a climp connector (not supplied).
• This connection is necessary to locate car position precisely for navigation by detecting the car
movement—forward/backward.
Localisez le fil des feux de recul dans le coffre, puis connectez le fil de signal de marche arrière
provenant du cordon d’alimentation en utilisant un raccord à sertir (non fourni).
• Cette connexion est nécessaire pour la navigation afin de localiser la position de la voiture
avec précision en détectant les mouvements avant/arrière de la voiture.
Climp connector (not supplied)—see note *7
Raccord à sertir (non fourni)—voir remarque *7
Reversing lamp lead
Fil des feux de recul
Purple with white stripe
Violet avec bande blanche
To car battery
À la batterie de la voiture
To reversing lamp
Au feux de recul
Reversing lamp lead
Fil des feux de recul
5
Install4-6KD-NX901EF_f.p65
5
KD-NX901
2/24/05, 1:38 PM
Connecting the parking brake lead using the supplied crimp connector (J) and
parking brake extention lead (K)
Connexion du fil du frein de stationnement en utilisant un raccord à sertir (J)
et le cordon prolongateur du frein de stationnement (K)
PARKING
BRAKE
K
Parking brake lead (light green)
Fil du frein de stationnement (vert clair)
KD-NX901
J
Parking brake
Frein de stationnement
*7 How to connect the crimp connector
Comment utiliser le raccord à sertir
Parking brake switch (inside the car)
Commutateur de frein de stationnement
(à l’intérieur de la voiture)
C
To metallic body or chassis of the car
À un corps métallique ou au châssis de la voiture
Connections Adding Other Equipment
Raccordement pour ajouter d’autres appareils
LINE OUT—Amplifier / Amplificateur
Vous pouvez connecter un amplificateur ou autre appareil pour améliorer votre système
autoradio.
• Connectez le fil de commande à distance (bleu avec bande blanche) au fil de commande à
distance de l’autre appareil de façon qu’il puisse être commandé via cet appareil.
• Pour l’amplificateur seulement:
– Déconnectez les enceintes de cet appareil et connectez-les à l’amplificateur. Laissez
les fils d’enceintes de cet appareil inutilisés.
– Le guidage vocal sort uniquement de la sortie de ligne avant.
You can connect an amplifier and other equipment to upgrade your car stereo system.
• Connect the remote lead (blue with white stripe) to the remote lead of the other equipment so
that it can be controlled through this unit.
• For amplifier only:
– Disconnect the speakers from this unit, connect them to the amplifier. Leave the
speaker leads of this unit unused.
– Guidance voice comes out only through the front line out.
Signal cord (not supplied with this unit)
Cordon de signal (non fourni avec cet appareil)
L
INPUT
L
R
R
Y-connector (not supplied with this unit)
Connecteur Y (non fourni avec cet appareil)
Remote lead
Fil d’alimentation à distance
JVC Amplifier
JVC Amplificateur
*8
Remote lead (Blue with white stripe)
Fil d’alimentation à distance (Bleu avec bande blanche)
Rear speakers
Enceintes arrière
To power aerial if any
À l’antenne automatique, s’il y en a une
LINE OUT (REAR)
L
KD-NX901
LINE OUT
(FRONT)
L
INPUT
L
R
R
*9
LINE OUT (FRONT)
R
JVC Amplifier
JVC Amplificateur
*9
Front speakers
Enceintes avant
A
B
C
D
E
F
G
H
*9 Cut the rear speaker leads of the car’s ISO connector and connect them to the amplifier.
*9 Coupez les fils des enceintes arrière du connecteur ISO de la voiture et connectez-les à
l’amplificateur.
*9
*9
*8
*8 Firmly attach the ground wire to the metallic body or to the chassis of the car—to the
place not coated with paint (if coated with paint, remove the paint before attaching the
wire). Failure to do so may cause damage to the unit.
*8 Attachez solidement le fil de mise à la masse au châssis métallique de la voiture—à un
endroit qui n’est pas recouvert de peinture (s’il est recouvert de peinture, enlevez d’abord
la peinture avant d’attacher le fil). L’appareil peut être endommagé si cela n’est pas fait
correctement.
Rear speakers
Enceintes arrière
You can connect another power amplifier for
front speakers—to LINE OUT (FRONT).
Vous pouvez connecter un autre amplificateur de
puissance pour les enceintes avant—à LINE OUT
(FRONT).
Front speakers
Enceintes avant
CD changer and DAB tuner / Changeur de CD et tuner DAB
Refer also to pages 93 and 99 of the INSTRUCTIONS.
Référez-vous aux pages 93 et 99 du MANUEL D’INSTRUCTIONS.
Connecting cord supplied with your DAB tuner
Cordon de connexion fourni avec votre tuner DAB
PRÉCAUTION:
Avant de connecter le changeur de CD et/ou le tuner
DAB, s’assurer que l’unité est éteinte.
CAUTION:
Before connecting the CD changer and/or the DAB tuner,
make sure that the unit is turned off.
Connecting cord supplied with your CD changer
Cordon de connexion fourni avec votre changeur de CD
Connecting cord supplied with your DAB tuner or CD changer
Cordon de connexion fourni avec votre tuner DAB ou changeur de CD
JVC DAB tuner
Tuner DAB JVC
JVC CD changer
Changeur de CD JVC
JVC DAB tuner
Tuner DAB JVC
KD-NX901
• You can connect both components in series as illustrated above.
• Vous pouvez connecter les deux appareils en série comme montré ci-dessus.
SUBWOOFER OUT
L
L
L
L
R
R
R
R
KS-U57
Signal cord (not supplied with this unit)
Cordon de signal (non fourni avec cet appareil)
3.5 mm stereo mini plug
Mini fiche stéréo de 3,5 mm
CD changer jack
Prise du changeur
de CD
External component
Appareil extérieur
KS-U58
D
Signal cord (not supplied for this unit)
Cordon de signal (non fourni avec cet appareil)
KD-NX901
KS-U58
KS-U57
JVC CD changer
Changeur de CD JVC
KD-NX901
External Component / Appareil extérieur
KD-NX901
or
ou
L
L
R
R
Subwoofer
Caisson de grave
JVC Amplifier
JVC Amplificateur
SUBWOOFER OUT
: Line Input Adapter—optionally purchased
: Adaptateur d’entrée de ligne—vendu séparément
: Aux Input Adapter—optionally purchased
: Adaptateur d’entrée auxiliaire—vendu séparément
Connecting to the steering wheel remote controller
Connexion de la télécommande de volant
If your car is equipped with the steering wheel remote controller, you can operate this
receiver using the controller. To do it, a JVC’s OE remote adapter (not supplied) which
matches with your car is required. Consult your JVC IN-CAR ENTERTAINMENT dealer for
details.
Steering wheel remote input
Entrée de la télécommande de volant
Si votre voiture est munie d’une télécommande de volant, vous pouvez commander cet
autoradio en utilisant la télécommande. Pour le faire, un adaptateur pour télécommande au
volant JVC (non fourni) correspondant à votre voiture est nécessaire. Consultez votre
revendeur d’autoradio JVC pour les détails.
KD-NX901
6
Install4-6KD-NX901EF_f.p65
6
2/24/05, 1:38 PM
OE remote adapter (not supplied)
Adaptateur pour télécommande au volant (non fourni)
Steering wheel remote controller (equipped in the car)
Télécommande de volant (installée dans la voiture)