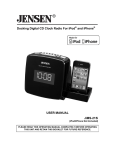
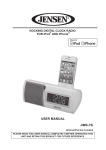
1
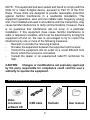
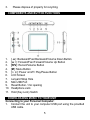
MODEL SMPV-4GBEB DIGITAL MEDIA PLAYER PLEASE READ THIS USER MANUAL COMPLETELY BEFORE OPERATING THIS UNIT AND RETAIN THIS BOOKLET FOR FUTURE DEAR JENSEN CUSTOMER Selecting fine audio equipment such as the unit you've just purchased is only the start of your musical enjoyment. Now it's time to consider how you can maximize the fun and excitement your equipment offers. This manufacturer and the Electronic Industries Association's Consumer Electronics Group want you to get the most out of your equipment by playing it at a safe level. One that lets the sound come through loud and clear without annoying blaring or distortion and, most importantly, without affecting your sensitive hearing. Sound can be deceiving. Over time your hearing "comfort level" adapts to higher volumes of sound. So what sounds "normal" can actually be loud and harmful to your hearing. Guard against this by setting your equipment at a safe level BEFORE your hearing adapts. To establish a safe level: - Start your volume control at a low setting. - Slowly increase the sound until you can hear it comfortably and clearly and without distortion. Once you have established a comfortable sound level: Set the dial and leave it there. Taking a minute to do this now will help to prevent hearing damage or loss in the future. After all, we want you listening for a lifetime. We Want You Listening For a Lifetime Used wisely, your new sound equipment will provide a lifetime of fun and enjoyment. Since hearing damage from loud noise is often undetectable until it is too late, this manufacturer and the Electronic Industries Association's Consumer Electronics Group recommend you avoid prolonged exposure to excessive noise. Customer's Record: The serial number of this product is found on the unit. You should note the serial number of this unit in the space provided as a 1 permanent record of your purchase to aid in identification in the event of theft of loss. Model Number:SMPV-4GBEB Serial No: L SAFETY INFORMATION Read this user guide carefully to ensure proper use of the product and to avoid any danger or physical damage. Do not use this unit in extremely hot, cold, dusty and moist environment. Do not drop the unit, this could cause damage to the external cabinet as well as internal components. Do not repair the unit by yourself, or it will cause damage. Avoid getting the unit wet or drop it in water. Do not use the unit while driving or doing other things that you must fully concentrate in as it may cause distraction. Use your unit with care and attention to your health, especially your hearing. To avoid damage by electrostatic discharge, do not operate the unit in extremely dry environment. Always use the accessories provided by or approved by our company, also do not subject your unit to moisture. Please follow the right way to download data; we won't be responsible for the loss of date due to misuse. COMPLIANCE WITH FCC This device complies with Part 15 of the FCC Rules. Operation is subject to the following two conditions: (1) this device may not cause harmful interference, and (2) this device must accept any interference received, including interference that may cause undesired operation. 2 NOTE : This equipment has been tested and found to comply with the limits for a Class B digital device, pursuant to Part 15 of the FCC Rules. These limits are designed to provide reasonable protection against harmful interference in a residential installation. This equipment generates, uses and can radiate radio frequency energy and, if not installed and used in accordance with the instructions, may cause harmful interference to radio communications. However, there is no guarantee that interference will not occur in a particular installation. If this equipment does cause harmful interference to radio or television reception, which can be determined by turning the equipment off and on, the user is encouraged to try to correct the interference by one or more of the following measures: Reorient or relocate the receiving antenna. Increase the separation between the equipment and receiver. Connect the equipment into an outlet on a circuit different from that to which the receiver is connected. Consult the dealer or an experienced radio/TV technician for help. CAUTION: Changes or modifications not expressly approved by the party responsible for compliance could void the user’s authority to operate the equipment. ACCESSORIES INCLUDED Video conversion software CD USB cable Earbuds 3 User manual POWER SOURCE & RECHARGING This unit operates on a built-in Li –polymer battery and must be charged prior to use. Please charge the unit for at least 8 hours before first use. 1. Connect the PC USB port and the unit’s USB port with the provided USB cable. 2. An animating battery icon will appear as shown in the diagram on the right during charging. Once full charged, the battery will stop running. The average recharging time is approximately 3 hours for normal use. 3. To stop the charging process, disconnect the USB cable. Notes Your computer must be turned on while connected to your player for charging. Do not overcharge the player after the initial charge. Overcharging could shorten the battery’s life and charging capacity. The built-in Li-polymer battery will normally offer about 300 or more charge/discharge cycles. The Li-polymer battery will discharge slowly on its own even when the unit is not in use, so if the unit is not used for an extended period of time it will be necessary to recharge the unit at least once every 6 months to maintain normal performance. CAUTION 1. Danger of explosion if battery is incorrectly replaced. Replacement should be by a qualified technician and only with the same or equivalent type battery. 2. Do not disassemble, crush, short-circuit or incinerate your battery as it may cause fire, injury, burns, explosion or other hazards. 4 3. Please dispose of properly for recycling. COMPONENTS AND BUTTON FUNCTIONS 1. 2. 3. 4. 5. 6. 7. 8. 9. 10. 11. [-]: Backward/Fast Backward/Volume Down Button [+]: Forward/Fast Forward/Volume Up Button [R/V]: Record/Volume Button [M]: Menu Button []: Power on/off / Play/Pause Button LCD Screen Lanyard Strap Hole Mini USB Port Reset Button / mic opening Headphone Jack Hold (Key Lock) Switch DOWNLOADING MUSIC TO YOUR UNIT Connecting to your Personal Computer: 1. Connect the unit to your computer USB port using the provided USB cable. 5 2. 3. The unit will turn itself on automatically. The LCD screen will look like the image on the right indicating a successful connection to the computer’ USB interface is established successfully. For Windows XP/Vista/7 users, once the unit is connected to your computer, it appears as a removable drive in “My Computer”. Downloading files into your unit: For Windows users: 1. Select the track(s) you want to download. 2. Right-click on the file(s), a menu pops up and click “Copy”. 3. Under My Computer or Windows Explorer, double-click the Removable Disk to open the drive. The Removable Disk window appears. 4. Right-click on the Removable Disk window and click “Paste” in the menu. 5. When the copy process begins, the LCD screen will change to the left diagram below to indicate that your computer is transferring data to your unit. Do not disconnect your unit until the LCD screen change back to the idle screen on the right side diagram. Otherwise, it may result in data loss or even damage to your unit. 6 Removing the unit from the computer: Note: Please follow these steps carefully to avoid data loss or unit damage. For Windows users: 1. Click on the “Safely Remove Hardware” icon (green arrow) in the system tray of your Windows desktop to bring up the list of USB Mass Storage Device attached to our computer. 2. 3. 4. 5. From the device list, choose the Drive designator that corresponds to your unit, for example Drive (H:). Click on the chosen device to unload it from your computer system. After a while, a “Safe To Remove Hardware” system message window will pop up telling you that your unit can now be safely removed from the system. Disconnect your unit from the USB port of your computer. 7 Creating the playlist: As soon as the USB cable is disconnected from the unit, the following prompt will pop up: “ Create playlist or not “ Tap Button for “Yes” or M Button for “No“. When Button is tapped, the following message will appear on the screen: “ Creating Playlist … Please wait … “ Note: the playlist helps to maintain advanced indexing and sorting of various music, video, voice recording files properly after each file download from your computer, so we strongly recommend all users to accept its creation. However, if your unit is fully loaded with all kinds of media files, it may take considerable time (several minutes) to create. BASIC OPERATIONS Buttons used for “Menu” [M], “REC/Volume” [R/V], “Play/Pause” [ ], Skip [- / +] functions can be controlled in 3 different ways: 1. Tap - press the button briefly then release it immediately. 2. Press - press and hold the button for about 2 seconds then release it. 3. Hold - press and keep holding the button until function change occurs. Turning power on/off and initializing unit for first use 8 1. 2. 3. Hold theButton to turn on the unit. On first use, please press the Reset button once with a pointed object such as a straighten paper clip, to correctly initialize the unit and the unit will restart and go to Music function of Main Menu automatically. To turn unit off, hold Button. Playing music, video, voice/radio recordings 1. Connect the earbuds to the Headphone Jack. 2. Make sure the Hold Switch is set to the unlock ² position. 3. Tap either -/+ Button to select either music, video or playback mode. 4. Tap Button to enter the desired mode. 5. To play or pause, tap theButton. Note: the unit supports lyric synchronization in music mode. When you see the lyrics icon on the screen, hold M Button until the lyric is displayed on the screen. Press M Button to return to normal music screen. 6. To change tracks, tap either - or+ Button. 7. To move backward or forward quickly while playing a track, hold either - or+ Button. 8. To return to the Main Menu, hold the M Button. ID3 Tag Display This unit is able to display the title, artist, album, etc. of compatible music files during playback. If the ID3 tag information is too long to be displayed all at once on the LCD screen, the hidden information will scroll from right to left across the LCD. One Touch Instant Live/Radio Recording 1. Hold R/V Button in any functions to start live/radio recording instantly. Tap Button to pause and tap it again to resume. 9 2. 3. Tap the M Button to save the current recording to the Record\Voice subfolder. Hold the M Button to return to the previous function screen. Volume Adjustment In Music, Video, Playback or Radio mode, tap R/V Button to select volume adjust mode. When the speaker icon is shown reversed, tap or hold either - or + Button to decrease or increase the volume output. FUNCTION MENUS AND SETTINGS Menu Navigation 1. From the Main Menu, tap - or + Button to select 1 out of 9 functions: Music, Video, Record, Playback, Radio, Picture, Text, Browser or Setting. 2. Then tap Button to confirm. Submenu Navigation 1. From each function menu you can tap the M Button for submenus (if available). 2. When viewing submenus, the sign will indicate the current setting. Tap - or + Button to change to the desired available option. 3. Then tap Button to select or to confirm and go back to the function screen immediately. 4. If no keys are press within 5 seconds, the last selected option will take effect and it will return to the function screen automatically. 5. Hold M Button to return to Main Menu immediately. MENU-1 MUSIC Choose MUSIC function to play your MP3, WMA, OGG and other supported music files. 10 Indicators of Music function EQ mode: shows either Nature, Rock, Pop, Classical, Soft, Jazz, DBB or SRS WOW™HD in effect File type & bitrate: shows MP3,WMA,OGG,ASF,APE file types and its bitrate in kbps File search mode: it shows up when file mode in navigation submenu is chosen Folder search mode: it shows up when folder mode in navigation submenu is chosen File information: shows current file number/total file number, filename, ID3 tag & storing folder details Lyrics available: indicates a displayable lyric file of the current music file is present Play/pause: = play,= pause, = stop, =fast backward, =fast forward A-B replay: when A-B replay mode is activated Repeat mode: 1N=normal, T1=repeat one, 1D=repeat current folder, TD=repeat current folder, TA=repeat all, TS=random & 1 I =intro Volume level: shows current volume setting from 0 – 28 in form of a 11 bar graph Volume adjust: it will be highlighted when volume adjust mode is selected by R/V Button Playing time: shows the elapsed and total time of current music file Battery level: shows 3 blue segments when fully charged, Press M Button for more functions below: While playing, the following 13 functions are available: MENU-1-1 Repeat mode Tap -or+ Button to choose from 7 playback/repeat modes: Normal (default) – Repeat one – Folder once – Folder – Repeat all – Random - Intro Press Button to confirm. MENU-1-2 Equalizer (EQ) Tap -or+ Button to choose from 7 preset EQ settings: Normal (default) –Rock - Pop – Classical – Soft - Jazz – DBB. Press Button to confirm. MENU-1-3 SRS WOW HD This function enhances the sound quality beyond the regular preset EQ settings. Tap -or+ Button to choose from 3 options: SRS WOW – SRS WOW HD (default) – User setting – Disable SRS WOW HD In the User setting submenu, tap -or+ Button to choose from 8 more options: SRS 3D, TruBass, FOCUS, CENTER, DEFINITION, Speakersize, Limiter, Exit. Note: When SRS WOW or HD sound effects are selected, preset EQ will be disabled. WOW, SRS and are trademarks of SRS Labs, Inc. 12 WOW technology is incorporated under license from SRS Labs, Inc. MENU-1-4 Tempo rate This function allows you to change the playback speed. There are 17 levels from -8 to +8 in which -8 is the slowest, +8 is the fastest and 0 (default) means normal speed. MENU-1-5 A-B replay This function allows you to repeat a certain passage of MP3 songs only for the chosen number of cycles at the chosen rest interval in between successive replays. MENU-1-5-1 Replay TapButton to start replay function. “A” starts to blink in the screen. Tap+ Button to fix replay start point “A”, “B” will start to flash for the end point. Tap+ Button to fix replay end point B. “A-B” stops flashing and now it starts to replay the passage between markers A and B. If you want to change the marker points for a new replay passage, just tap -Button, then “A” start to flash and repeat above steps to complete. TapButton to terminate A-B replay function. MENU-1-5-2 Replay times This function allows you to change the numbers of replay cycles. Tap -or+ Button to choose from 1 to 10 cycles. MENU-1-5-3 Replay gap This function allows you to change the rest interval in between successive replays. Tap -or+ Button to choose from 1 to 10 seconds. MENU-1-6 Folder list 13 This function displays all accessible folders in the unit’s user memory. Note: the ROOT folder is reserved for system use. MENU-1-7 List mode This function lists all compatible music files in the unit’s memory according to Title, Artist, Album & Filename. Choose the Exit option to return to the music screen. MENU-1-8 Favorite This function lets you keep a quick list of your favorite music tracks. Choose the Exit option to return to the music screen. MENU-1-8-1 View favorite TapButton to review your current favorite list. Tap -or+ Button to choose the track you want to play immediately. TapButton to confirm. MENU-1-8-2 Add favorite TapButton to add the current playing track to your existing favorite list. MENU-1-8-3 Delete favorite TapButton to review your current favorite list. Tap -or+ Button to choose the track you want to remove from the list. TapButton to confirm. Note: the original music track will not be erased. MENU-1-9 Navigation mode MENU-1-9-1 File mode TapButton to enable file search mode. In the music screen, when you tap/hold the -or+ Button, it will go back to previous or next music track within the current 14 folder. When all tracks in the current folder are listed, it will proceed to the files in the previous or next folder. MENU-1-9-2 Folder mode TapButton to enable folder search mode. In the music screen, when you tap/hold the -or+ Button, it will go back to previous or next music folder until the last or first folder is reached. MENU-1-10 Bookmark While playing a music track, this function let you insert bookmarks (timestamps) within it for instant playback from those entry points. Choose Exit option to return to the music screen. MENU-1-10-1 View bookmark TapButton to review your current bookmark list. Tap -or+ Button to choose the entry point you want to playback immediately. TapButton to confirm. Note: the bookmarks will be kept until they are deleted or the original music track is erased from memory. MENU-1-10-2 Delete bookmark TapButton to review your current bookmark list. Tap -or+ Button to choose the entry point you want to remove from the list. TapButton to confirm. MENU-1-10-3 Add bookmark TapButton to add the current point to the bookmark list of the playing music track. MENU-1-11 FFREV speed setting 15 This function allows you to set the fast forward or reverse speed while playing a music track. Tap -or+ Button to choose from 5 speeds: 1X – 2X – 4X (default) – 8X -16X Press Button to confirm. MENU-1-12 FFREV sound setting This function allows you to set whether sound can be heard while quickly searching within the playing music track. Tap -or+ Button to choose from: Sound off (default) – Sound On. MENU-1-13 Exit Choose this to return to music screen. While in pause or stop mode, the following 5 functions are available: MENU-1-1 Local folder TapButton to display all supported music tracks in the current folder. Tap - Button to choose “ \ ” to go up one level to display all other folders in the user memory. Tap -or+ Button to choose the desired folder. TapButton to confirm. MENU-1-2 Delete file TapButton to display all supported music tracks in the current folder. Tap -or+ Button to choose the music track to permanently delete from memory. TapButton to select. Tap -or+ Button to choose from “No” (default) or “Yes”. TapButton to confirm. MENU-1-3 Delete all TapButton to permanently delete all files in the current folder from memory. Tap -or+ Button to choose from “No” (default) or “Yes”. 16 TapButton to confirm. MENU-1-4 Fade in/out time TapButton to set the fade in (rise) and fade out (decay) time in music playback. Tap -or+ Button to choose from 3 settings: Fast (default) – Normal - Slow PressButton to confirm. MENU-1-5 Exit Choose this to return to music screen. MENU-2 VIDEO Choose VIDEO to play only AMV or AVI files converted by the included video conversion software. Please refer to the video converter quick guide for details. TapButton to start playing. TapButton to pause and tap it again to resume. Tap -or+ Button twice to skip to previous or next video. While in pause or stop mode, the following 5 functions are available: MENU-2-1 Local folder TapButton to display all supported video files in the current folder. Tap - Button to choose “ \ ” to go up one level to display all other folders in the user memory. Tap -or+ Button to choose the desired folder. TapButton to confirm. MENU-2-2 Delete file TapButton to display all supported video files in the current folder. Tap -or+ Button to choose the video file to permanently delete from memory. TapButton to select. Tap -or+ Button to choose from “No” (default) or “Yes”. 17 TapButton to confirm. MENU-2-3 Delete all TapButton to permanently delete all files in the current folder from memory. Tap -or+ Button to choose from “No” (default) or “Yes”. TapButton to confirm. MENU-2-4 Repeat Tap -or+ Button to choose from 7 playback/repeat modes: Normal – Repeat one – Folder once – Folder – Repeat all – Random - Intro PressButton to confirm. MENU-2-5 Exit Choose this to return to video pause or stop screen. MENU-3 RECORD Choose RECORD to create a live recording of conversations or meetings. TapButton to start recording immediately. TapButton to pause during recording and tap it again to resume. Tap M Button to save the current recording. While in pause or stop mode, the following 4 functions are available: MENU-3-1 Local folder TapButton to display all recorded files in the current folder. Tap - Button to choose “ \ ” to go up one level to display all other folders in the user memory. Tap -or+ Button to choose the desired folder. TapButton to confirm. MENU-3-2 Record type TapButton to choose the final quality of recorded files. Tap -or+ Button to choose from: Fine REC (default) – Long REC TapButton to confirm. 18 Note: “Fine” quality will take up larger memory space than “Long” type for same recording time. MENU-3-3 Record gain TapButton to set the sensitivity of the built-in recording microphone. Tap -or+ Button to choose from 0 – 7 where 0 is lowest sensitivity and 7 is highest. Default setting is 3. TapButton to confirm. MENU-3-4 Exit Choose this to return to record pause or stop screen. MENU-4 PLAYBACK Choose PLAYBACK to playback live or radio recordings stored in memory. While playing, the following 4 functions are available: MENU-4-1 Repeat mode Tap -or+ Button to choose from 7 playback/repeat modes: Normal – Repeat one – Folder once – Folder – Repeat all – Random - Intro PressButton to confirm. MENU-4-2 Tempo rate This function allows you to change the playback speed. There are 17 levels from -8 to +8 in which -8 is the slowest, +8 is the fastest and 0 (default) means normal speed. MENU-4-3 A-B replay This function allows you to repeat a certain passage of the chosen file for the chosen number of cycles at the chosen rest interval in between successive replays. TapButton to start replay function. “A” starts to blink in the screen. Tap+ Button to fix replay start point “A”, “B” will start to flash for the end point. 19 Tap+ Button to fix replay end point B. “A-B” stops flashing and now it starts to replay the passage between markers A and B. If you want to change the marker points for a new replay passage, just tap -Button, then “A” start to flash and repeat above steps to complete. TapButton to terminate A-B replay function. MENU-4-4 Exit Choose this to return to playback pause or stop screen. While in pause or stop mode, the following 4 functions are available: MENU-4-1 Local folder TapButton to display all supported files in the current folder. Tap - Button to choose “ \ ” to go up one level to display all other folders in the user memory. Tap -or+ Button to choose the desired folder. Tap Button to confirm. MENU-4-2 Delete file TapButton to display all supported files in the current folder. Tap -or+ Button to choose the desired file to permanently delete from memory. TapButton to select. Tap -or+ Button to choose from “No” (default) or “Yes”. TapButton to confirm. MENU-4-3 Delete all TapButton to permanently delete all files in the current folder from memory. Tap -or+ Button to choose from “No” (default) or “Yes”. TapButton to confirm. MENU-4-4 Exit Choose this to return to playback pause or stop screen. MENU-5 RADIO Choose RADIO to listen to the built-in FM radio (87.5 to 108MHz). 20 Indicators of Radio function FM stereo indicator: appears when a strong stereo signal is received Preset channel number (CH01 – 20): indicates the current preset channel number Receiving frequency: indicates the current FM frequency Frequency scale (87.5-108MHz): the red pointer on the frequency scale indicates the relative location of the receiving frequency From the radio screen, tap -or+ Button to manually tune to the desired FM station frequency at 0.1MHz interval. Alternatively, hold -or+ Button to automatically tune to the next strong FM station. TapButton to move to the next preset channel in memory. To record the current radio program: Hold R/V Button to change to the Record Menu and start recording immediately. 21 TapButton to pause during recording and tap it again to resume. Tap M Button to save the current recording. Hold M Button to return to the radio function screen. Tap M Button for 5 more options: MENU-5-1 Save TapButton to save the receiving frequency into the next available preset channel location. If all preset channels are full, the save function will be aborted. MENU-5-2 Delete TapButton to clear the current preset channel from memory instantly. MENU-5-3 Delete all TapButton to clear all saved preset channels from memory instantly. Note: when the Reset Button is pressed, all saved preset channels will also be cleared. MENU-5-4 Auto search TapButton to start automatic tuning from 87.5 to 108MHz. Strong stations will automatically be saved into the preset channels starting from 01 up to 20. Note: all existing preset channels will be cleared. MENU-5-5 Exit Choose this to return to radio screen. MENU-6 PICTURE Choose PICTURE to display image files (JPG, BMP or GIF (animated) formats). TapButton to display all support image files in the current folder. Tap -or+ Button to choose the desired file. 22 TapButton to open. While displaying an image in manual mode, tap -or+ Button to choose the previous or next image. Tap M Button or Button to return to picture folder list. While in stop mode, the following 5 functions are available: MENU-6-1 Local folder TapButton to display all supported files in the current folder. Tap - Button to choose “ \ ” to go up one level to display all other folders in the user memory. Tap -or+ Button to choose the desired folder. TapButton to confirm. MENU-6-2 Display mode This function allows you to set the image slideshow function. Tap -or+ Button to choose from 2 options: Manual – Auto (default). For auto slideshow, tap -or+ Button to choose from 2 to 10 seconds (default is 2 seconds). MENU-6-3 Delete file TapButton to display all supported files in the current folder. Tap -or+ Button to choose the desired file to permanently delete from memory. TapButton to select. Tap -or+ Button to choose from “No” (default) or “Yes”. TapButton to confirm. MENU-6-4 Delete all TapButton to permanently delete all files in the current folder from memory. Tap -or+ Button to choose from “No” (default) or “Yes”. TapButton to confirm. MENU-6-5 Exit Choose this to return to picture folder list. 23 MENU-7 TEXT Choose TEXT to read “eBook” or text files (ANSI format). TapButton to display all support text files in the current folder. Tap -or+ Button to choose the desired file. TapButton to open. While reading, the following functions are available: Tap -or+ Button to go to previous or next page (when manual scroll is chosen) TapButton to stop and return to text folder list. Hold M Button to return to Main Menu. Tape M Button for following bookmark functions: MENU-7-1 Select bookmark TapButton to review your current bookmark list. Tap -or+ Button to insert a bookmark. TapButton to confirm. Note: the bookmarks will be kept until they are deleted or the original text file is erased from memory. MENU-7-2 Delete bookmark TapButton to review your current bookmark list. Tap -or+ Button to choose the bookmark you want to remove from the list. TapButton to confirm. MENU-7-3 Add bookmark TapButton to add a bookmark (appears first few characters of the first line) to the bookmark list of the current file. While in stop mode, the following 5 functions are available: MENU-7-1 Local folder TapButton to display all supported files in the current folder. Tap - Button to choose “ \ ” to go up one level to display all other folders in the user memory. 24 Tap -or+ Button to choose the desired folder. TapButton to confirm. MENU-7-2 Display mode This function allows you to set the text scroll function. Tap -or+ Button to choose from 2 options: Manual – Auto (default). For auto scroll, tap -or+ Button to choose from 1 to 10 seconds (default is 3 seconds). MENU-7-3 Delete file TapButton to display all supported files in the current folder. Tap -or+ Button to choose the desired file to permanently delete from memory. TapButton to select. Tap -or+ Button to choose from “No” (default) or “Yes”. TapButton to confirm. MENU-7-4 Delete all TapButton to permanently delete all files in the current folder from memory. Tap -or+ Button to choose from “No” (default) or “Yes”. TapButton to confirm. MENU-7-5 Exit Choose this to return to text folder list. MENU-8 BROWSER Choose BROWSER to find any supported music, image, voice or text files in any folder located in the user memory. TapButton twice to see all available folders. Tap -or+ Button to choose the desired folder and tapButton to open it for a full file listing. Tap -or+ Button to choose the file you want to open and tapButton to confirm. MENU-9 SETTING 25 Choose SETTING to customize the unit to fit your preferences. MENU-9-1 System time Choose this to set the system time for live/radio recordings. Tap M Button to highlight the Year item and then tap -or+ Button to adjust the it. Tap M Button to highlight the next Month item and then tap -or+ Button to adjust it. Repeat the above procedure to set the Day, Hour, Minute and Second items accordingly. TapButton after adjusting the last item to confirm and exit. Note: this unit only support 24-hour international time format. MENU-9-2 LCD off time Choose this to set the LCD backlight auto off time for energy saving. TapButton to choose the “Set off time” option. Tap -or+ Button to choose from 4 options: 0 – 15 (default) – 30 -60 seconds where 0 means LCD backlight is always on. MENU-9-3 Language Choose this to select your favorite language for the user interface. Tap -or+ Button to choose from 19 languages: Simplified Chinese, Traditional Chinese, English (default), Japanese, Korean, French, German, Italian, Dutch, Portuguese, Spanish, Swedish, Czech, Danish, Polish, Russian, Turkish, Hungarian and Romanian. MENU-9-4 Power off MENU-9-4-1 Off time TapButton to adjust the idle duration to last before turning off the unit automatically for energy saving. Tap -or+ Button to choose from 6 options: 0 -15 (default) 30 -60 – 90 -120 minutes where 0 means unit is always on. MENU-9-4-2 Sleep time TapButton to adjust the sleep time. 26 Tap -or+ Button to choose from 4 options: 0 (default) -15 30 -60 minutes where 0 means sleep mode is off. MENU-9-5 A-B replay Choose this to set A-B replay mode of Music and Playback functions. Tap -or+ Button to choose from 2 options: Manual replay (default) – Auto replay Note: when auto replay is selected, you only need to set the starting point A and the system will automatically complete the end point B according to previous A-B settings. MENU-9-6 Memory info Reports available memory space in MB and used up space in %. MENU-9-7 Firmware version Display firmware version of the unit. MENU-9-8 Key tone Choose this to set the key tone sound level from 0 -31. Default is 2. MENU-9-9 Reset to default settings Choose this to clear all custom settings and restore the unit to factory default settings. Tap -or+ Button to choose from “No” (default) or “Yes”. TapButton to confirm. MENU-9-10 Exit Choose this to return to Main Menu. Hold (Key Lock) Switch You may lock all the control buttons on the unit to prevent accidental change to the intended function during operation by sliding the Hold (Key Lock) Switch to the left side (with LCD screen facing upwards). A key lock icon will appear if you attempt to press any button. To unlock, slide the Hold switch in the right side. RESET FUNCTION 27 Before first use and after charging up your unit, we recommend you to press the Reset Button located between the USB port and Headphone Jack to correctly initialize it. In case of an erroneous display or prolonged abnormal behavior during normal use, you can also safely restore it to its factory preset conditions by pressing the Reset Button. Please note that all personal settings including current time, alarm time and sleep session will be cleared. So, be sure to set up the clock again according to previous sections above. TROUBLESHOOTING Problems Possible Solutions The battery may be exhausted. Please connect the player to your computer USB port for recharging. Try to restart it 10 minutes later. It takes about 3 hours to fully recharge an exhausted battery. - Make sure the volume is not set to zero and check out the connection between earbuds and the unit. - Music file may be corrupted. Please download it again from your computer. - Video file may be corrupted. Please use the video converter software to recreate the video clip. Unit does not turn on No sound coming from the earbuds when playing music or video files 28 The system time is not controlled by quartz and therefore may gain time faster than normal clocks. Please try to check and adjust the system time, if necessary, before making live/radio recordings. Check out for correct interface language you have chosen. - Make sure the USB port of your computer is working normally and the connecting cable is not broken. - Make sure memory space of your player is not full. Timestamps of recorded files appear to gain time in a few days Strange characters displayed on the screen Unable to download files from the computer into the unit SPECIFICATIONS Power Screen Size USB Interface Built-in Memory Firmware Average Playing Time Support File Formats Built-in Rechargeable Li-Polymer Battery (DC3.7V 360mAh) 2.0-inch TFT (220x176 pixels) USB 2.0 (High Speed) 4GB Flash Memory ACTION solution 2 hours for video and 12 hours for music play Audio:MP3/WMA/WAV/OGG/APE/ACT/ASF Video: AMV/AVI Image: JPG/BMP/GIF 29 Preset EQ & SRS Sound Effects FM Band FM Preset Channels 19 User Interface Languages Operating System Supported File System Working Temperature Nature, Rock, Pop, Classical, Soft, Jazz, DBB & SRS WOW™ HD 87.50 -- 108.00MHz 20 Simplified Chinese, Traditional Chinese, English (default), Japanese, Korean, French, German, Italian, Dutch, Portuguese, Spanish, Swedish, Czech, Danish, Polish, Russian, Turkish, Hungarian, Romanian. Windows 2000, XP, Vista & 7 FAT16 or FAT32 41 OF - 95 OF / 5OC - 35 OC 90 DAY LIMITED WARRANTY AND SERVICE VALID IN THE U.S.A ONLY SPECTRA MERCHANDISING INTERNATIONAL, INC. warrants this unit to be free from defective materials or factory workmanship for a period of 90 days from the date of original customer purchase and provided the product is utilized within the U.S.A. This warranty is not assignable or transferable. Our obligation under this warranty is the repair or replacement of the defective unit or any part thereof, except batteries, when it is returned to the SPECTRA Service Department, accompanied by proof of the date of original consumer purchase, such as a duplicated copy of a sales receipt. You must pay all shipping charges required to ship the product to SPECTRA for warranty service. If the product is repaired or replaced under 30 warranty, the return charges will be at SPECTRA’s expense. There are no other express warranties other than those stated herein. This warranty is valid only in accordance with the conditions set forth below: 1. The warranty applies to the SPECTRA product only while: a. It remains in the possession of the original purchaser and proof of purchase is demonstrated. b. It has not been subjected to accident, misuse, abuse, improper service, usage outside the descriptions and warnings covered within the owner’s manual or non-SPECTRA approved modifications. c. Claims are made within the warranty period. 2. This warranty does not cover damage or equipment failure caused by electrical wiring not in compliance with electrical codes or SPECTRA owner’s manual specifications, or failure to provide reasonable care and necessary maintenance as outlined in the owner’s manual. 3. Warranty of all SPECTRA products applies to residential use only and is void when products are used in a nonresidential environment or installed outside the United States. This warranty gives you specific legal rights, and you may also have other rights which vary from state to state. TO OBTAIN SERVICE, please remove all batteries (if any) and pack the unit carefully and send it prepaid by insured parcel post or UPS to SPECTRA at the address shown below. IF THE UNIT IS RETURNED WITHIN THE WARRANTY PERIOD shown above, please include a proof of purchase (dated cash register receipt) so that we may establish your eligibility for warranty service and repair of the unit without cost. Also include a note with a description explaining how the unit is defective. A customer service representative may need to contact you regarding the status of your repair, so include your name, address, phone number and e-mail address to speed the process. 31 IF THE UNIT IS OUTSIDE THE WARRANTY PERIOD, please include a check for $25.00 to cover the cost of repair, handling and return postage. All out of warranty returns must be sent prepaid. It is recommended that you contact SPECTRA first at 1-800-777-5331 or by e-mail at [email protected] for updated information on the unit requiring service. In some cases the model you have may be discontinued and SPECTRA reserves the right to offer alternative options for repair or replacement. SPECTRA MERCHANDISING INTERNATIONAL, INC. 4230 North Normandy Avenue, Chicago, IL60634, USA. 1-800-777-5331 To register your product, visit the link below on the website to enter your information. http://www.spectraintl.com/wform.htm Printed in China 32