1
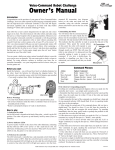
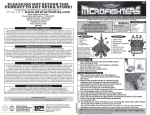
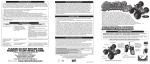
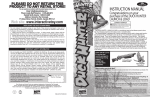
Blimp Bomber radio-controlled airship
•
•
•
•
Radio-Controlled.
Quiet, Safe Electric Flight.
Includes Vinyl Target.
Requires:
One 9V Alkaline Battery for Transmitter
One CR123A Lithium Battery for Gondola
Helium (available at most party
supply stores and florists)
Items may differ from images depicted above
Congratulations on the purchase of your Air-Tech airship. Your new
aircraft is designed to be easy to fly and to survive the learning curve
associated with new R/C pilots. But, as with any sophisticated
device, you must learn how to operate it and care for it. Please read
this manual thoroughly
Copyright © 2002 INTERACTIVE TOY CONCEPTS LTD. - Printed in China
Be sure to assemble and fly your airship only
under adult supervision.
•
Do not fly near people, pets or appliances.
•
Use common sense when operating your airship!
•
Keep clear of the propeller blades.
UM-14001-20627
Warnings & Safety Precautions!
• This airship is designed for indoor use only!
• The manufacturer is not responsible for any loss or damage caused by unsafe
operation of the blimp. Always use common sense when piloting your blimp!
• The gondola should be handled carefully. It is made of lightweight
materials that can be easily damaged by rough handling.
• Hold the balloon securely after filling it with Helium to prevent it from flying away!
• Do not continue to fill the balloon after it becomes firm - it could burst.
• The balloon expands when temperature rises. If you completely fill the balloon at a low
temperature and the room temperature increases, the balloon may rupture or burst.
Your kit includes:
1. Metallized inflatable balloon
2. Gondola (thruster module)
3. Transmitter with antenna
4. Putty (for balancing/ballast)
5. Rudder fins
module to the bottom center of
the balloon with the other
hand. Another option is to
allow the balloon to rise to the
ceiling and then attach the
gondola from the underside.
You also need (not included):
1. 1 Battery CR123A (3V Lithium battery) for the gondola.
2. 1 Battery 6F22 (9V Alkaline battery) for the transmitter.
3. Helium gas for the balloon (available from florists, party shops, or any
other shop selling balloons).
4. Single and double sided-tape to attach gondola and fins to balloon.
Once the module is attached,
apply single-sided tape around
the outside lip to ensure maximum adhesion.
Note that the On/Off switch of the gondola should face the rear of the
balloon.
Uncoil the antenna wire and let it trail from the rear of the module away from the propellers.
Install Batteries
Open
the
gondola’s
battery
compartment by removing the screw
from the battery compartment's door.
Insert a CR123A lithium battery into
the battery holder, ensuring that the
polarity is correct. Close the battery
compartment and tighten the screw.
Remove the battery cover located at the
rear of the transmitter by sliding it
downwards. Insert a 9V alkaline battery into
the battery compartment, again being careful
to position it so that the polarity is correct.
NOTE: Placing the module in the position required for proper balance
may take a few attempts. You can remove and reposition the module by
carefully peeling it away from the balloon. Notice how the balloon reacts
with the weight of the
gondola. If it is nose-heavy
then move it slightly
backward. If it is tail-heavy
then try moving it slightly
toward the front of the
balloon. Make sure the module
is aligned straight along the
axis of the balloon!
Fill Balloon with Helium
Insert the helium tank nozzle into the Auto-Seal Valve, which is located
within the flap on the seam of the balloon. Gently
push the nozzle into the opening - be careful not to
push the nozzle too far as it may damage the
balloon’s Auto-Seal Valve. Fill the balloon with
Helium until the balloon becomes firm, without
over-stressing the seams. Remove the filler nozzle
then close the auto-seal valve by pressing the
Auto-Seal Valve back together. Note that you can
roll the flap up and tape it in position to minimize
any chance of Helium leaking out.
Install the Styrofoam Fins
Carefully separate the die-cut styrofoam sheet into 4 fins by following
the perforated lines. Each fin has one edge with tabs that need to be
separated. Bend each tab 90° The first tab to the left and the
next to the right, continuing to
alternate to the end .
Attach the fins to the rear of
the Blimp by using doublesided tape or regular Scotch
tape. Ensure that the fins are
straight!
Connect the Gondola (Thruster Module)
Apply double-sided tape to the inside bottom of the gondola, around the
flat outer area or by which the gondola will be attached to the balloon.
Ballast the Balloon
The blimp must be adjusted so that it is neutrally buoyant. This is
merely a fancy way of saying that the blimp must float at about eye-level
without rising or falling. This is accomplished by adding the correct
amount of ‘ballast’ putty. Note that the bombs and battery must already
be installed at this point (see next page).
Secure the module to the underside of the blimp. You may find it easiest
to hold the helium-filled airship with one arm while pressing the taped
1
UM-14001-20627
Make sure that you are
indoors, away from any
ventilator,
air-conditioner
outlet or any other source of
air currents.
Allow the weight of the
gondola to gently roll the
balloon upright, so that the
gondola hangs underneath.
The two buttons mounted on the top of the controller cause the (single)
horizontal prop to spin backwards or forwards. This causes the blimp to
ascend or descend. You’ll find that with practice very precise control of
your blimp is possible.
Tip! For best performance use short bursts of the engines (1-3 seconds).
This will conserve battery life as well as make control easier. Experiment
with directional control & timing to navigate the vessel as desired.
Develop your own skills and techniques!
ballast putty
To drop bombs, press the bomb release button mounted in the center of
the transmitter’s face. Each time you press the button a bomb will be
released.
Slowly release the balloon and note its vertical movement: If the
balloon floats upwards place a small piece of putty along the centerline
of the gondola. Test the result of the ballast change by again seeing if the
blimp rises when released. Continue adding putty until the blimp has no
more tendency to rise.
Gameplay
Compete against friends! Place the target on the floor. Each pilot gets 2
minutes to drop his or her bombs onto the target. The one with the best
score wins. Introduce variations... each pilot takes over from the last one
at the spot where the blimp happens to be after two minutes. Use your
imagination!
Tip! The putty sticks well to almost any surface once it has been kneaded
for a few seconds, to soften it. Try to place the putty along the centerline
of the gondola (center, front to back). Balance the gondola by placing
equal amounts on either side of module. Be sure to keep the putty away
from the propellers.
Invent competitions such as knocking over targets, steering through
courses, time lapse racing or even hone your skills trying to pick up light
objects by placing a small paper clip on the end of the antenna wire and
using it as a hook (You may have to adjust the Ballast Putty to make up
for the extra weight). Try delivering the object to a drop-off zone!
If the balloon sinks remove some of the putty. If the balloon sinks
without any putty having been added, carefully add more Helium to the
balloon (not too much, as overfilling will cause balloon to burst). Adjust
& Repeat until the balloon floats in the air when released. If the problem
persists, try refilling the balloon with fresh Helium.
Safety Precautions for Handling your Blimp
a. Do not use the balloon outdoors since the slightest breeze could blow
the balloon away.
b. Do not fly the balloon near sharp or pointed objects. If the balloon
repeatedly bumps into sharp or pointed objects, it will damage the
balloon and helium gas will leak even though a hole may not be visible.
c. Do not fly the balloon near people, especially children and pets.
d. Do not operate the balloon near people's face or hair. This is very
dangerous because the propellers are constantly turning. If the balloon
gets near someone's face or hair, release the controls to stop the propellers
from spinning.
e. The metallized balloon may conduct electricity, which could cause
harm or injury. The customer alone is completely fully responsible for the
control and safe use of the balloon.
f. Control and navigation will be compromised if operating the balloon
near a ventilator, air conditioner outlet or any other source of wind. Avoid
rooms with ceiling fans!
g. Do not fly the balloon near any source of heat (Halogen lights,
candles, ovens, heat radiators, etc.).
h. When balloon is not in use, leave it inflated inside a cool, dry room
with closed windows and doors.
Note that if you are in a high altitude area, your balloon will not float
due to the low air density at your level. In this case, contact us for a highaltitude balloon. This high altitude balloon is only suitable for highaltitude areas and cannot be used near sea-level due to it’s extreme lift.
Important!
The balloon will float for many weeks. However, Helium is a very small
atom and will slowly dissipate through the material of the balloon. The
balloon will eventually start to look saggy but will probably continue to
float. You can use a straw to carefully blow a bit of air into the balloon to
plump it up. Eventually, enough Helium will escape through the balloon
to cause the balloon to sink. When this happens, add a small amount of
helium as described above. Make sure to
adjust the ballast if necessary.
bomb mount
Loading the Bombs
The foam bombs each have a magnetic
nose which fits into the yellow ‘target’
printed within each bomb-bay. There is an
electromagnet located within this yellow
‘target’ which holds the bomb until you
decide to release it using the bomb release
button on the transmitter. A vinyl target is
included with your Blimp Bomber to make
it easy to test your piloting and bombing
skills. Challenge your friends, use your
imagination to think up games! Let us know
what your favorites are!
Tip! The module's hanging antenna wire can be used as a mooring line
to tie the balloon to a fixed object.
i. Do not store the balloon in an area where there is a temperature
variance of more than 10°. Such an increase in temperature will cause the
balloon to expand. If this occurs, carefully open the Auto-Seal Valve
carefully inserting a drinking straw and release a small amount of helium.
j. Rooms with windows and direct sunlight may create more than a 10°
indoor temperature variance between morning and night. This would
NOT be an ideal storage area.
k. The purity of the helium will decrease if air mixes with the Helium. If
this occurs, deflate the balloon and refill with fresh Helium.
l. Do not forget to switch OFF the gondola and transmitter when you are
finished playing with the blimp.
m. Do not touch the inside of the receiver or the transmitter with your
hand or with any metal object.
Operating your blimp
1. Screw the antenna into the top of the transmitter - do not overtighten.
2. Turn on the transmitter via the face-mounted switch. The red LED
should light up. If not, check your battery or replace with a fresh one.
3. Move the thruster module's switch to the ‘ON’ position.
4. Follow the instructions that are printed on the face of the transmitter.
Essentially, each stick controls one of the side-mounted motors causing it
to spin forwards or backwards. The resulting thrust causes the blimp to
move forwards, backwards, turn or spin in place.
2
UM-14001-20627
n. When storing the balloon for a long time period:
1. Remove the module from the balloon by carefully peeling off the tape.
Be careful to hold on to the balloon so it can't float away!
2. Remove the batteries from transmitter and the gondola.
3. Deflate the balloon by carefully inserting a drinking straw into the
balloon's valve and then gently squeezing out the balloon's Helium.
Battery Warnings
Use only fresh non-rechargeable
batteries of the same or equivalent
type as recommended.
Warranty in USA and Canada
Your U.S. Navy Blimp is warranted against any manufacturer's defects.
A defective part will be replaced or repaired, with the same or similar
model provided that the U.S. Navy Blimp have been operated according
to the instructions and that a dated purchase receipt is provided. The
warranty does not apply to any product which has been subject to abuse,
misuse, and operation different from that described in this manual,
negligence, an accident or not observing the general safety precautions.
Defects caused by tampering, unauthorized alterations or repairs, or other
causes not arising out of defects in material or workmanship are not
covered by this warranty. Note that the mylar balloon is NOT covered by
the warranty.
Non-rechargeable batteries are
not to be recharged.
Batteries are to be inserted with
the correct polarity.
Exhausted batteries are to be
removed from the toy.
Batteries are to be removed if the
toy will not be used for a few days.
Warranty in Europe and other countries
The local distributor or retailer will provide a warranty. For further
information please contact the retailer you purchased the product from or
contact the importer (name is printed on the package).
The supply terminals (battery
contacts) are not to be short-circuited.
Tip! Please try operating the units with fresh batteries before returning
the product. Weak batteries will cause poor performance.
Please contact Interactive Toy Concepts Ltd. before returning product to
your retailer. Most problems can be solved over the phone or via email.
Address for shipping products under warranty:
Interactive Toy Concepts Ltd.
1192 Martin Grove Road
Toronto, Ontario, Canada
M9W 5M9
email: [email protected]
website: www.interactivetoy.com
Product must be returned in it’s original packaging, with a proof of
purchase and a brief explanation of the problem.
Replacement Parts
If you need to, you can order replacement parts directly from us via
telephone or email. Please call (416) 444-6873 or send email to
[email protected]
We reserve the right to make improvements to the design of the Air-Tech
Blimp Bomber. Thus, your aircraft may vary slightly from that depicted
in the preceding images.
FCC Note: (United States Only)
This device complies with Part 15 of the FCC Rules.
Operation is subject to the following two conditions:
(1) This device may not cause harmful interference and
(2) This device must accept any interference received,
including interference that may cause undesired operation.
3
UM-14001-20627
Other Air-Tech Products Available From
TM
NAVY BLIMP
AIRSHIP AMERICA
Item # 14051
2-channel: Item # 14061
3-channel: Item # 05032
STINGRAY
Item # 13261
Alien Wizard
TURBO BLIMP
Item # 02020
2-channel: Item # 03020
3-channel: Item # 04020
BATTLE BOTS
TM
BLIMP BOMBER
Item # 06020
STEALTH
Item # 14001
Item # 13251
AIRSHIP EARTH
Item # 02420
Contact:
Interactive Toy Concepts Ltd.
1192 Martin Grove Road
Toronto, Ontario, Canada
M9W 5M9
[email protected]
SkyFlyer
Item # 13201
For more info, visit our website at
www.interactivetoy.com
4
UM-14001-20627