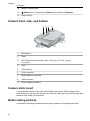
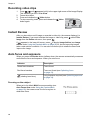
1
HP Photosmart R827
Digital Camera
User Guide
� �� � �� �� � �� � � � � �� � � � �
Legal and notice
information
© Copyright 2006 Hewlett-Packard
Development Company, L.P.
The information contained herein is
subject to change without notice. The
only warranties for HP products and
services are set forth in the express
warranty statements accompanying
such products and services. Nothing
herein should be construed as
constituting an additional warranty. HP
shall not be liable for technical or
editorial errors or omissions contained
herein.
Windows® is a U.S. registered
trademark of Microsoft Corporation.
SD Logo is a trademark of its
proprietor.
Contents
1
2
3
Getting started.......................................................................................................5
Camera top and back .............................................................................................5
Camera front, side, and bottom...............................................................................6
Camera dock insert.................................................................................................6
Before taking pictures..............................................................................................6
Install the battery..............................................................................................7
Charge the battery............................................................................................7
Turn on the camera..........................................................................................7
Choose the language.......................................................................................7
Set the region...................................................................................................7
Set the date and time.......................................................................................8
Install and format an optional memory card.....................................................8
Install the software...........................................................................................9
Using your camera................................................................................................10
Taking pictures and recording video clips.......................................................11
Taking still pictures................................................................................................11
Recording video clips............................................................................................12
Instant Review.......................................................................................................12
Auto focus and exposure.......................................................................................12
Focusing on the subject.................................................................................12
Optimizing focus.............................................................................................13
Using Focus Lock...........................................................................................13
Optimizing exposure.......................................................................................14
Other recommendations.................................................................................14
Using the focus range settings..............................................................................14
Using zoom............................................................................................................15
Optical zoom..................................................................................................15
Digital zoom....................................................................................................15
Setting the flash.....................................................................................................16
Red eye..........................................................................................................16
Using the shooting modes.....................................................................................16
Using Panorama mode...................................................................................17
Using the Capture Menu.......................................................................................18
Using the Self-Timer settings.........................................................................21
Using the Burst setting...................................................................................22
Exposure Compensation................................................................................22
Adaptive Lighting............................................................................................23
White Balance................................................................................................23
ISO speed......................................................................................................23
Reviewing images and video clips....................................................................24
Using Playback......................................................................................................24
Deleting images..............................................................................................25
Saving frames from video clips......................................................................25
HP Photosmart R827 Digital Camera
3
Viewing thumbnails........................................................................................25
Magnifying images.........................................................................................26
Using the Playback Menu......................................................................................26
Viewing image information.............................................................................27
Viewing slideshows........................................................................................27
Stitching panoramas.......................................................................................28
Recording audio.............................................................................................28
4 Using the Design Gallery Menu..........................................................................29
Applying artistic effects..........................................................................................29
Modifying colors.....................................................................................................30
Adding borders......................................................................................................30
Removing red eyes................................................................................................31
Cropping images...................................................................................................31
5 Transferring and printing images......................................................................33
Transferring images with HP Photosmart Software..............................................33
Transferring images without HP Photosmart Software.........................................33
Connecting to the computer...........................................................................34
Using a memory card reader..........................................................................34
Printing images from the camera...........................................................................34
Printing panoramas from the camera....................................................................35
6 Using HP Photosmart Express...........................................................................36
Using the Photosmart Express Menu....................................................................36
Tagging images as Favorites................................................................................37
Marking images for printing...................................................................................37
Buying prints online...............................................................................................38
Sharing images......................................................................................................38
Setting up online destinations in the camera.................................................39
Sending images to online destinations...........................................................39
7 Using the Setup Menu.........................................................................................41
8 Troubleshooting..................................................................................................43
Resetting the camera............................................................................................43
Problems and solutions.........................................................................................43
9 Product support...................................................................................................48
Helpful websites....................................................................................................48
Getting assistance.................................................................................................48
A Managing batteries..............................................................................................50
Top points about batteries.....................................................................................50
Extending battery life.............................................................................................50
Safety precautions for using batteries...................................................................50
Power indicators....................................................................................................51
Number of shots per battery type..........................................................................51
Recharging the Lithium Ion battery.......................................................................52
Safety precautions for recharging batteries...........................................................52
B Specifications......................................................................................................54
Memory capacity...................................................................................................55
Image quality.........................................................................................................56
Video quality..........................................................................................................56
Index............................................................................................................................57
4
1
Getting started
Use this section to get familiar with the camera controls, set up your digital camera for
use, and begin taking pictures.
Camera top and back
8
2
3
4
5
6
9
7
10
11
12
1
13
16
1
2
15
14
Speaker.
Flash button—See Setting the flash on page 16.
3
Focus button—See Using the focus range settings on page 14.
4
Photosmart Express button—See Using HP Photosmart Express
on page 36.
5
Live View/Playback button—Switches between Live View and
Playback (see Taking pictures and recording video clips on page 11 and
Reviewing images and video clips on page 24).
6
Shutter button.
7
8
9
Video button.
Power light.
button.
10
Zoom lever—Accesses Zoom (see Using zoom on page 15), Thumbnails
(see Viewing thumbnails on page 25), and Magnify (see Magnifying images
on page 26) functions.
11
Mode button—Press
to access the Shooting Mode menu while in Live
View (see Using the shooting modes on page 16).
12
13
and
buttons—Scroll through menus and images.
button—Displays camera menus, selects options, and confirms actions.
HP Photosmart R827 Digital Camera
5
Chapter 1
(continued)
14
15
16
Battery Charging light.
Delete button—Accesses the Delete function while in Playback.
Image Display.
Camera front, side, and bottom
1 2 3
4
5
6
9
8
7
1
Microphone.
2
Flash.
3
Self-Timer/Focus Assist light—See Using the Self-Timer settings
on page 21.
4
Lens.
5
Tripod mount.
6
Dock connector.
7
Battery/Memory card door.
8
USB connector.
9
Power adapter connector.
Camera dock insert
If you purchase a dock, it will come with multiple clear inserts. When setting up the
optional dock for use with this camera, use the dock insert with the round blue tag. See
the dock User Guide for instructions.
Before taking pictures
Complete the following procedures before taking pictures or recording video clips.
6
Install the battery
1.
2.
3.
Open the Battery/Memory card door by sliding the latch as indicated on the Battery/
Memory card door.
Insert the battery in the larger slot, pushing
the battery in until the latch catches.
Close the Battery/Memory card door.
Note Turn off the camera before
removing the battery. Fully charge the
battery before using it the first time (see
Charge the battery on page 7).
Charge the battery
You can charge the battery in the camera using an AC power adapter or in the extra
battery bay of an optional HP Photosmart Premium camera dock.
1.
2.
Connect the AC power adapter to the camera,
then plug it in to an electrical outlet. If you are
using an optional camera dock, plug in the
dock, then dock the camera.
The camera’s blinking Battery Charging light
indicates that the battery is charging (if you are
charging in an optional HP Photosmart
Premium camera dock, the dock's Battery
Charging light blinks). The battery is fully charged when the Battery Charging light
turns on solid (see Recharging the Lithium Ion battery on page 52 for information
on charging times).
Note You can also charge the battery using an optional HP Photosmart quick
recharger.
Turn on the camera
To turn on the camera, press the
button.
Choose the language
Use
press
to choose the language you want, then
.
To change the language later, use the Setup menu (see
Using the Setup Menu on page 41).
Set the region
Along with the Language setting, the Region setting determines the default date format
and the format of the video signal for displaying camera images on a television when
HP Photosmart R827 Digital Camera
7
Chapter 1
connected through an optional HP Photosmart Premium camera dock or wireless dock
base (see Using the Setup Menu on page 41).
Use
.
to choose the region you want, then press
Set the date and time
Accurately setting the date and time will help you locate images once you have
transferred them to your computer, and will ensure that images are accurately marked if
you use the date and time imprint feature. See Date & Time Imprint under Using the
Capture Menu on page 18.
1.
2.
3.
Use
to adjust the highlighted value.
Use
to move to the other selections and repeat
Step 1 until the date and time are set correctly.
Press
when the date, time, and format settings
again to confirm.
are correct, then press
To change the date and time later, use the Setup
Menu (see Using the Setup Menu on page 41).
Install and format an optional memory card
This camera supports standard and high speed, HP-branded Secure Digital (SD)
memory cards, 8MB to 2GB.
1.
2.
3.
Turn off the camera and open the Battery/Memory card door.
Insert the optional memory card in the smaller slot
as shown. Make sure the memory card snaps into
place.
Close the Battery/Memory card door and turn on the
camera.
Always format new memory cards before first use.
Formatting removes all images from the memory card,
so make sure to transfer existing images before formatting (see Transferring and printing
images on page 33).
1.
2.
3.
4.
8
With the camera turned on, press
until
appears briefly in the upper right
corner of the Image Display. This indicates you are in Playback.
Press .
Use
to select Format Card, then press
.
Use
to select Yes, then press
to format the card.
Note Once you install a memory card, all new images and video clips are stored
on the card, rather than in internal memory. To use internal memory and view
images stored there, remove the memory card. To transfer images from internal
memory to an optional memory card, see Move Images to Card under Using the
Playback Menu on page 26.
For information about supported memory cards, see Storage under Specifications
on page 54.
Install the software
The HP Photosmart Software provides features for transferring images and video clips
to your computer, as well as features for modifying stored images (remove red eyes,
rotate, crop, resize, adjust image quality, and more). See About the HP Photosmart
Software on page 9.
Note If you have trouble installing or using the HP Photosmart Software, see
the HP Customer Care website for more information: www.hp.com/support.
Windows
If your Windows computer:
●
●
1.
2.
3.
Has a minimum of 128MB of RAM, Windows XP or x64, and Internet Explorer 5.5
Service Pack 2 or higher (Internet Explorer 6 is recommended), you have the option
to install either HP Photosmart Premier or HP Photosmart Essential.
Has a minimum of 128MB of RAM, Windows 2000, and Internet Explorer 5.5 Service
Pack 2 or higher (Internet Explorer 6 is recommended), HP Photosmart Essential is
installed.
Close all programs and temporarily disable any virus protection software.
Insert the HP Photosmart Software CD into the CD drive and follow the on-screen
instructions. If the installation screen does not appear, click Start, click Run, type
D:\Setup.exe, where D is the letter of your CD drive, then click OK.
When the software has finished installing, re-enable virus protection software.
Macintosh
To install the HP Photosmart Mac software, your Macintosh computer must meet the
system requirements as stated on the camera packaging.
1.
2.
3.
Insert the HP Photosmart Software CD into the CD drive.
Double-click the CD icon on the computer desktop.
Double-click the installer icon, then follow the on-screen instructions.
HP Photosmart R827 Digital Camera
9
Chapter 1
About the HP Photosmart Software
The CD that came with your camera contains the following versions of HP Photosmart
Software:
●
●
●
HP Photosmart Premier Software (for Windows XP and x64 systems with at least
128MB of RAM). This version of the software includes some extra features that let
you:
– Process images tagged as Favorites for printing, sending, and buying prints
online. See Tagging images as Favorites on page 37.
– Pause a video and print a frame from it.
HP Photosmart Essential Software (for Windows 2000, Windows XP, and x64
systems with at least 128MB of RAM). This version does not have the extra features
specified in HP Photosmart Premier Software.
HP Photosmart Mac Software (for Macintosh systems).
To learn more about the software features and how to use them, see the Help feature in
the HP Photosmart Software.
Using your camera
Now that you’ve completed setup, you can take and review still images and video clips.
For information on taking still pictures and See Taking still pictures on page 11
capturing video clips
and Recording video clips on page 12
For information on reviewing images and
video clips on the camera
See Reviewing images and video clips
on page 24
For information on enhancing your images See Using the Design Gallery Menu
on page 29
For information on transferring images
from your camera to a computer
See Transferring images with
HP Photosmart Software on page 33
For information on printing images
See Printing images from the camera
on page 34
Tip To switch between Live View and Playback, press
10
.
2
Taking pictures and recording
video clips
Live View allows you to frame pictures and video clips in the Image Display. To activate
until
appears briefly in the upper right corner of the Image
Live View, press
Display. The Live View display looks like this:
1
Shooting mode indicator.
2
Memory card indicator.
3
Battery level indicator (see Power indicators on page 51).
4
5
12
Pictures remaining count.
Focus brackets (see Auto focus and exposure on page 12).
Taking still pictures
You can take a picture almost any time the camera is on, regardless of what is shown
on the Image Display.
1.
2.
3.
4.
5.
Press
until
appears briefly in the upper right corner of the Image Display.
This indicates you are in Live View.
Frame the subject for your picture.
Press the Shutter button halfway down to measure and
lock the focus and exposure. The focus brackets in the
Image Display turn solid green when focus is locked
(see Auto focus and exposure on page 12).
Press the Shutter button all the way down to take the
picture.
To add an audio clip of up to 60 seconds, continue holding
the Shutter button down, then release it when done.
HP Photosmart R827 Digital Camera
11
Chapter 2
Recording video clips
1.
2.
3.
4.
Press
until
appears briefly in the upper right corner of the Image Display.
This indicates you are in Live View.
Frame the subject.
Press and release the
Video button.
To stop recording video, press and release the
Video
button again.
Instant Review
After you have taken a still image or recorded a video clip, the camera displays it in
Instant Review. If you want to delete the image or video clip, press , select This
.
Image from the Delete sub-menu, then press
If
appears in the lower left corner, press to display Image Advice (see Image
Advice under Using the Playback Menu on page 26) for tips on improving images
taken under similar conditions. You can also use these tips to retake the scene and
improve the image.
Auto focus and exposure
When you press the Shutter button halfway down, the camera automatically measures
and locks the focus and exposure. When you auto focus:
Indicator
Description
Green focus brackets
Focus found.
Red focus brackets
Focus not found (see Optimizing focus
on page 13).
(shaking hand icon)
Long exposure required (see Optimizing exposure
on page 14).
Focusing on the subject
When set to its default Multi focus area setting (see
Auto Focus Area under Using the Capture Menu
on page 18), the camera uses five focus regions to
determine focus.
12
When you press the Shutter button halfway down, the
camera focuses from the closest distance, then
examines other focus regions, displaying those in focus
as green brackets. The sample image shows focus in
regions one, two, and five.
If the camera keeps focusing on something other than
your subject, set Auto Focus Area to Spot (see Auto
Focus Area under Using the Capture Menu
on page 18), then use Focus Lock (see Using
Focus Lock on page 13).
Optimizing focus
When the camera cannot auto focus, the focus brackets turn red. This indicates the
picture may be out of focus because the subject is out of the focus range or the scene
has low contrast.
For the Normal Focus range
If the camera is set to Normal Focus (see Using the focus range settings
on page 14) and cannot focus, it will still take the picture. Try releasing the Shutter
button, reframing, and then pressing the Shutter button halfway down again. If the focus
brackets are still red:
●
●
If the scene has low contrast, use Focus Lock (see Using Focus Lock
on page 13) and aim at a point on the subject that has more colors or crisp edges.
If the subject is too close (less than 500 mm or 20 in), move farther away from the
subject or use the
Macro or
Auto Macro focus range (see Using the focus
range settings on page 14).
For the Macro focus range
Macro and cannot focus, the camera will not take the picture.
If the camera is set to
Try one of the following:
●
●
Move within the Macro range or set the camera to
Auto Macro or
Normal
Focus (see Using the focus range settings on page 14).
In low contrast scenes, use Focus Lock (see Using Focus Lock on page 13).
Using Focus Lock
Use Focus Lock to focus on a subject that is not in the center of the picture, to capture
action shots more quickly by pre-focusing in the area where the action will occur, or to
focus in low light or low contrast situations.
1.
2.
Frame the subject for your picture within the focus
brackets. In low light or low contrast situations,
frame a brighter or higher contrast object.
Press the Shutter button halfway down.
HP Photosmart R827 Digital Camera
13
Chapter 2
3.
4.
Hold the Shutter button halfway down and reframe.
Press the Shutter button all the way down to take
the picture.
Optimizing exposure
When you press the Shutter button halfway down, the camera also measures the light
level to set the proper exposure. If the camera determines the scene will require a very
long exposure, a shaking hand icon ( ) appears. The camera will take the picture, but
it may be blurry because it is difficult to hold the camera still for the length of time required.
Try one of the following:
●
●
●
●
Set the flash to Auto Flash or Flash On (see Setting the flash on page 16).
Set the camera on a tripod or stable surface.
If the subject is out of the flash range or you do not have a tripod, set the shooting
mode to Steady Photo (see Steady Photo under Using the shooting modes
on page 16).
Turn on more light.
Other recommendations
If an image does not appear to be in proper focus or exposure when you review it in
Playback, use Image Advice (see Image Advice under Using the Playback Menu
on page 26) to help you determine how to correct the problem for similar images in
the future. If you can retake an image, you can follow the suggestions in Image
Advice to improve the image you capture.
Because focus and exposure are crucial to good images, you might find these other
topics useful:
●
●
●
●
Topics on blurry, dark, light, or grainy images in Troubleshooting on page 43
Using the focus range settings on page 14
Auto Focus Area and AE Metering under Using the Capture Menu
on page 18
Exposure Compensation on page 22
Using the focus range settings
To select a focus range setting, press
then press
.
, use
to highlight the desired focus range,
Normal Focus (Default)—Use when taking pictures of subjects greater than
500 mm (20 in) away.
Macro—Use when taking close-up pictures of subjects between 100 mm and
1 m (4.7 to 39.4 in) away.
14
(continued)
Auto Macro—Use when you are not sure if the subject is in the Macro or
Normal focus range.
Infinity—Use when taking pictures of distant objects and landscapes.
The focus range setting remains in effect until it is changed again, or you turn off the
camera.
Using zoom
Your camera has both optical and digital zoom. Optical zoom physically adjusts the lens
to make the subject of your picture appear closer. After you have zoomed the lens out
fully using optical zoom, the camera employs digital zoom. Digital zoom uses no moving
lens parts.
Tip The more you zoom in on the subject of your picture, the more small
movements of the camera are magnified (this is called camera shake). If
appears when you press the Shutter button halfway down, the picture may
be blurry. Be sure to hold the camera still or add more light to the scene. Try
holding the camera closer to your body or against a steady object, or set the
camera on a tripod or stable surface.
Optical zoom
Optical zoom moves the lens between wide angle (1x) and telephoto (3x).
In Live View, use the buttons on the Zoom lever to control zoom.
to zoom out.
Press to zoom in and
Digital zoom
In digital zoom, the Image Display shows a yellow frame around the scene and the image
quality setting (MP value). As you zoom in, the yellow frame shrinks to indicate the area
of the scene the camera will capture, and the MP value decreases to indicate the
resolution at which the scene will be captured.
When capturing images using digital zoom, make sure that the MP value shown in the
Image Display is appropriate for the size at which you want to print the captured image.
For MP values and their recommended print sizes, see Image Quality under Using the
Capture Menu on page 18.
1.
2.
3.
In Live View, press on the Zoom lever to optically zoom to the maximum level,
then release the lever.
Press and hold until the image you want to capture fills the yellow frame. If you
.
zoom in too far, press
To return to optical zoom, press
until digital zooming stops. Release
, then
press it again.
HP Photosmart R827 Digital Camera
15
Chapter 2
Note Digital zoom is not available in Panorama mode nor when recording video
clips.
Setting the flash
To select a flash setting, press , use
.
to highlight the desired flash mode, then press
Auto Flash (Default)—The camera uses the flash, if necessary. If you want
the camera to remove red eyes if they exist in images, turn on Red-Eye
Removal (see Red-Eye Removal under Using the Capture Menu
on page 18). For information about red eye, see Red eye on page 16.
Flash On—The camera always uses flash. If the light is behind your subject,
use this setting to increase the light on the front of your subject. If you want
the camera to remove red eyes if they exist in images, turn on Red-Eye
Removal (see Red-Eye Removal under Using the Capture Menu
on page 18).
Flash Off—The camera does not use flash. Use this setting to capture poorly
lit subjects beyond the flash range or to capture scenes with the existing light.
The Flash setting remains in effect until it is changed again, or you turn off the camera.
Note The flash is not available in Document, Landscape, Night Scenery,
Panorama, Sunset, or Theatre shooting modes, with the Burst setting, nor while
recording video clips. In Night Portrait shooting mode, the flash is set to On.
Red eye
The red-eye phenomenon is caused when light from the flash reflects off the subjects'
eyes, which can make human eyes appear red in the captured image. If you turn on
Red-Eye Removal (see Red-Eye Removal under Using the Capture Menu
on page 18), the camera examines the image after taking it. If the camera detects
red eyes, it then processes the image to remove them.
This examination and processing takes additional time. If you find the additional time too
long, you can turn off
Red-Eye Removal and remove the red eyes after you have
captured the image, using either Remove Red Eyes (see Remove Red Eyes under
Using the Design Gallery Menu on page 29) or the HP Photosmart Software that
came with your camera.
Using the shooting modes
Shooting modes are predefined settings for everyday situations. They are optimized for
particular types of scenes or shooting situations.
16
To select a shooting mode, press
.
mode, then press
while in Live View, use
to highlight a shooting
Auto Mode (Default)—For taking good shots quickly, when you do not have
time to select a special shooting mode.
Landscape—For scenes with deep perspective, such as mountain scenes.
Portrait—For pictures that have one or more people as their primary subject.
Steady Photo—For minimizing picture blur when the subject is moving or you
cannot hold the camera still long enough in moderate to dim light conditions
(see Optimizing exposure on page 14).
or
Panorama—For grand landscapes or group pictures where you need to
capture a wide shot that one image cannot capture (see Using Panorama
mode on page 17).
Theatre—For capturing images at school programs, concerts, or indoor
sporting events without using flash.
Action—For capturing sporting events, moving cars, or any scene where you
want to stop the action.
Night Portrait—For capturing images of people at night. This mode uses the
flash and a long exposure. As a result, you must set the camera on a tripod
or stable surface.
Night Scenery—For capturing night scenes. This mode uses a long exposure
with no flash. As a result, you must set the camera on a tripod or stable surface.
Beach—For capturing scenes at the beach.
Snow—For capturing scenes in snow.
Sunset—For capturing outdoor scenes at sunset.
Document—For capturing flat, textual, or graphical pieces.
Note The shooting modes do not apply when you are recording video clips.
The shooting mode remains in effect until it is changed again, or until you turn off the
camera.
Using Panorama mode
Panorama mode allows you to take a sequence of 2 to 5 pictures that can be stitched
together to capture a scene too wide to fit into a single picture. To stitch your panoramic
sequence together, use Stitch Panorama on the camera (see Stitching panoramas
on page 28). If you installed the HP Photosmart Software (see Install the software
HP Photosmart R827 Digital Camera
17
Chapter 2
on page 9), you can also stitch panoramas automatically as you transfer them to your
computer.
1.
2.
3.
4.
5.
While in Live View, press
, use
to select either
Panorama (left to right)
Panorama (right to left), then press
.
or
Press the Shutter button to take the first picture in the panoramic sequence.
Position the camera to take the second picture.
Use the transparent overlay of the first image
superimposed on one third of the Live View screen
to align your second picture with the first.
Press the Shutter button to take the second
picture.
Continue adding more pictures to the panorama,
or press
to end the panoramic sequence.
During Instant Review (see Instant Review
on page 12), each image in the panoramic sequence is displayed. When the last image
when the
is displayed, you can stitch the sequence by pressing , then pressing
stitched panorama appears. You can also delete the panoramic sequence by pressing
, selecting Entire Panoramic Sequence, then pressing
.
Note To add audio to images taken in Panorama mode, see Recording audio
on page 28.
Using the Capture Menu
The Capture Menu allows you to adjust camera settings that affect the characteristics
of the images and video clips you capture.
1.
2.
3.
4.
While in Live View, press
to display the Capture Menu.
Use
to highlight a menu option, then press
to display the menu option’s
sub-menu.
Use
to highlight a setting, then press
.
Press
to exit the Capture Menu.
For on-camera information about an option, use
sub-menu, then press
.
to highlight Help... in the option's
Shooting Modes—For selecting a shooting mode. For information about
shooting modes and another way to select them, see Using the shooting
modes on page 16.
Self-Timer—For capturing images or recording video after a delay interval
you specify (see Using the Self-Timer settings on page 21).
●
●
●
Off (Default)—Disables Self-Timer.
On—For taking one shot or video clip.
2 Shots—For taking two delayed shots or one video clip.
For On and 2 shots, you can specify a delay interval of 2, 5, 10, 20, or 30
seconds.
18
(continued)
Red-Eye Removal—For automatically removing red eyes when flash is set
to Auto or Flash On and the camera detects red eyes. For information about
red eyes, see Red eye on page 16.
On, Off (Default)
Exposure Compensation—Overrides the camera’s automatic exposure
setting. For more information, see Exposure Compensation on page 22.
●
●
To make the images you are about to capture brighter, press to increase
the value.
To make the images you are about to capture darker, press to decrease
the value.
Adaptive Lighting—Balances the relationship between light and dark areas.
For more information, see Adaptive Lighting on page 23.
●
●
●
Off (Default)—Processes the image as normal.
Low—Gently brightens dark regions.
High—Greatly brightens dark regions.
Bracketing—Creates a set of three images, each set to a different value.
●
●
●
●
Off (Default)—Processes the image as normal.
Adaptive Lighting—Images created with Adaptive Lighting set to Off,
Low, and High.
Exposure—Images created at value set for Exposure Compensation
and under- and over-exposed by the value you select using
.
Color—Images created in full color, black & white, and sepia.
During Instant Review (see Instant Review on page 12), you can delete the
entire bracketing sequence. To delete individual images, see Deleting images
on page 25.
Image Quality—Sets resolution and compression for images. The greater the
number, the higher the resolution. The fewer stars, the greater the
compression (see Image quality on page 56).
●
●
●
●
●
●
7MP
—For enlarging or printing images greater than 28 by 36 cm
(11 by 14 in).
Normal (7MP
) (Default)—For printing images up to 28 by 36 cm (11
by 14 in).
5MP
—For printing images up to 20 by 25 cm (8 by 10 in).
3MP
—For printing images up to 13 by 18 cm (5 by 7 in).
VGA
—For sending images via e-mail or posting them to the Internet.
Custom...—For specifying a custom combination of resolution (7MP,
5MP, 3MP, VGA) and compression ( to
). Use
to move
between Resolution and Compression, and
to specify a setting.
HP Photosmart R827 Digital Camera
19
Chapter 2
(continued)
Video Quality—Sets resolution and compression for video clips. The fewer
stars, the greater the compression.
●
●
●
Normal (VGA
) (Default)—For outdoor action video clips or
printing individual video frames up to 10.2 by 15.2 cm (4 by 6 in).
VGA
—For indoor video clips or printing individual video frames up
to 7.6 by 12.7 cm (3 by 5 in).
QVGA —For capturing longer video clips or e-mailing shorter clips.
Burst—For taking two or more shots quickly in succession (see Using the
Burst setting on page 22).
On, Off (Default)
White Balance—Balances color based on lighting conditions. For more
information, see White Balance on page 23.
●
●
●
●
●
●
Auto (Default)—Corrects for scene illuminance. For general picture
taking.
Sun—For outdoor scenes in sunny or cloudy conditions.
Shade—For outdoor scenes in shade or at dusk.
Tungsten—For indoor scenes with incandescent or halogen lighting.
Fluorescent—For indoor scenes with fluorescent lighting.
Manual—For setting a custom White Balance based on your target
subject. To set the white balance, select Manual, then follow the onscreen instructions.
Auto Focus Area—Selects between a wide, multi-zone focus region and a
spot focus region. For more information, see Focusing on the subject
on page 12.
●
●
Multi (Default)—Use this setting for general-purpose picture taking or to
focus on a subject not in the center of the scene. The camera searches
for focus in each of five zones.
Spot—Use this setting when the camera keeps focusing on something
other than your subject. The camera focuses on a small area in the center
of the scene.
AE Metering—Specifies which region of a scene the camera uses to calculate
the exposure.
●
●
●
Average—Useful when you want the entire scene to be used when
calculating exposure.
Center-Weighted (Default)—Useful when the subject of the picture is in
the center of the scene. Exposure is based more on the subject than its
surroundings.
Spot—Useful in backlit scenes or when the subject is very dark or light
compared to the rest of the scene. For best results, use Focus Lock (see
Using Focus Lock on page 13) with Spot.
ISO Speed—Adjusts the camera’s sensitivity to light. For more information,
see ISO speed on page 23.
●
●
20
Auto (Default)—Camera selects the best ISO speed for the scene.
ISO 100—For best quality.
(continued)
●
●
ISO 200—For lower light conditions.
ISO 400—For lower light conditions and/or action when short shutter
speeds are desired.
Saturation—Controls the saturation of colors in your pictures.
●
●
●
Low—Mutes colors to give a softer, more natural look to the subject.
Medium (Default)—Leaves colors normally saturated.
High—Emphasizes more vivid colors.
Sharpness—Controls how sharp the fine detail is in your images.
●
●
●
Low—For taking portrait pictures with softer, more natural edges.
Medium (Default)—For edges with normal sharpness.
High—For images with crisp edges.
Contrast—Controls amount of contrast between light and dark colors.
●
●
●
Low—Dark and light colors in the image are less distinct, and highlights
and shadows have more detail.
Medium (Default)—Images have normal contrast.
High—Dark and light colors in the image are more distinct, and highlights
and shadows have less detail.
Date & Time Imprint—Imprints date in lower left corner of image.
●
●
●
Off (Default)—No date or time imprinted on the image.
Date Only—Date permanently imprinted.
Date & Time—Date and time permanently imprinted.
Note Some Capture Menu options are not available in certain shooting modes
or in combination with other Capture Menu options. In addition, some do not
apply when recording video clips.
Using the Self-Timer settings
The Self-Timer allows you to take a delayed still image or video clip. You can specify the
time delay between when you press the Shutter or
Video button and when the
camera takes the picture or begins recording a video clip.
1.
2.
3.
4.
5.
While in Live View, press
to display the Capture Menu, use
to highlight
Self-Timer, then press
.
In the Self-Timer sub-menu, use
to select On (for one shot) or 2 Shots, use
to select a time delay in seconds, press
, then press
. For more
information on selecting options in the Capture Menu, see Using the Capture Menu
on page 18.
Set the camera on a tripod or stable surface.
Frame the subject in the Image Display.
The next steps depend on whether you are taking one or two still pictures, or
recording a video clip.
a. For still pictures, press the Shutter button halfway down to lock focus and
exposure. When the focus brackets turn green, press the Shutter button all the
way down.
b. For video clips, press the
Video button, then release it.
HP Photosmart R827 Digital Camera
21
Chapter 2
6.
7.
The camera counts down the time delay you selected, then takes the still image or
begins recording the video clip. If you chose 2 Shots and are taking a still image,
the camera takes the second still image a few seconds after the first.
If you are recording a video clip, press the
Video button to stop recording.
Tip If you want to include yourself in the picture, press the Shutter button all the
way down, then place the camera on a tripod or stable surface. The camera locks
focus and exposure just before the end of the countdown, allowing you time to
place yourself in the scene.
Note To add audio to images taken with the Self-Timer setting, see Recording
audio on page 28.
The Self-Timer setting resets to the default Off setting after the picture or video clip is
taken.
Using the Burst setting
Burst allows you to take two or more pictures as quickly as possible when you press and
hold the Shutter button all the way down.
1.
2.
While in Live View, press
to display the Capture Menu, use
to highlight
Burst, press
, use
to select On, press
, then press
. For more
details on selecting options in the Capture Menu, see Using the Capture Menu
on page 18.
Frame the subject, then press the Shutter button halfway down to lock the focus
and exposure. Then press the Shutter button all the way down and hold it. The
camera takes pictures as quickly as possible until you release the Shutter button or
the camera runs out of memory.
The Image Display remains off during the burst capture. After the burst images have
been taken, each image appears one at a time in Instant Review (see Instant Review
on page 12). You can delete the entire burst sequence in Instant Review. To delete
individual images, see Deleting images on page 25.
To add audio to images taken with the Burst setting, see Recording audio
on page 28.
The Burst setting remains in effect until it is changed again, or until it resets to the default
Off setting when you turn off the camera.
Exposure Compensation
You can use Exposure Compensation to override the camera's automatic exposure
setting. Exposure Compensation is useful in scenes that contain many light objects
(like a white object against a light background) or many dark objects (like a black object
against a dark background). Such scenes could turn out gray without the use of
Exposure Compensation. For a scene with many light objects, increase the Exposure
Compensation to a positive number. For a scene with many dark objects, decrease the
Exposure Compensation.
Tip To see the effect varying Exposure Compensation settings might have on
a scene, try the Exposure option in Bracketing (see Bracketing under Using
the Capture Menu on page 18).
22
Adaptive Lighting
This setting balances the relationship between bright and dark areas in a picture,
preserving gentle contrasts while reducing harsh contrasts. When used with a flash,
Adaptive Lighting can brighten areas that a flash wouldn’t reach. Adaptive Lighting
is useful in situations like these:
●
●
●
●
Outdoor scenes with a mixture of sun and shade
High contrast scenes that contain both light and dark objects
Indoor scenes that use flash photography (to soften or even out the effect of the
flash)
Backlit scenes where the subject is too far away for the flash to reach, or is severely
backlit (for example, in front of a window)
You can use Adaptive Lighting with or without flash, but it is not recommended as a
replacement for flash. Unlike the flash, Adaptive Lighting does not affect exposure
settings, so brightened areas may appear noisy or grainy, and indoor or night images
may be blurry if taken without a flash or a tripod.
Tip To see the effect the Adaptive Lighting settings might have on a scene,
use the Adaptive Lighting option in Bracketing (see Bracketing under Using
the Capture Menu on page 18).
White Balance
Different lighting conditions cast different colors. This setting allows the camera to
compensate for this, reproducing colors more accurately and ensuring that whites appear
white in the final image. You can also adjust the white balance to produce creative effects.
For example, the Sun setting produces a warmer look to the image.
ISO speed
This setting adjusts the sensitivity of the camera to light. When ISO Speed is set to the
default Auto setting, the camera selects the best ISO speed for the scene.
Lower ISO speeds capture images with the least amount of grain (or noise), but result in
slower shutter speeds. If taking a picture in low light conditions without a flash at ISO
100, use a tripod.
Higher ISO numbers allow faster shutter speeds, and can be used when taking pictures
in dark areas without a flash, or when taking pictures of fast moving objects. Higher ISO
speeds produce pictures with more grain (or noise) and, therefore, can be of lower quality.
HP Photosmart R827 Digital Camera
23
3
Reviewing images and video
clips
You can review and manipulate images and video clips in Playback as described here.
For information about enhancing images, see Using the Playback Menu
on page 26 and Using the Design Gallery Menu on page 29.
Using Playback
1.
2.
Press
until
appears briefly in the upper right corner of the Image Display.
Use
to scroll through your images and video clips (video clips play automatically).
to pause the clip, then use
to scroll through
When viewing video clips, press
the individual frames.
To switch to Live View, press
.
3.
During Playback, the Image Display also indicates additional information about each
image or video clip.
1
Memory card indicator.
2
Battery indicator (see Power indicators on page 51).
3
Image position in a panoramic sequence.
4
5
24
3
1
Number of images to print (see Marking images for printing
on page 37).
Number of electronic Photosmart Share destinations (see Sharing
images on page 38).
6
Image marked to buy prints online (see Buying prints online
on page 38).
7
Image tagged as Favorite (see Tagging images as Favorites
on page 37).
(continued)
8
0:15
9
1 of 30
●
●
●
Recorded length of this audio or video clip.
Attached audio clip indicator.
Video clip indicator.
Number of this image or video clip out of the total number of stored
images and video clips.
Deleting images
To delete a displayed image during Playback:
1.
2.
Press .
Use
to select an option, then press
.
– Cancel—Returns to Playback without deleting the displayed image.
– This Image—Deletes the image or video clip.
– All Except Favorites—Deletes all images except those tagged as Favorites.
This menu option only appears if you have images tagged as Favorites (see
Tagging images as Favorites on page 37).
– Entire Panoramic Sequence—If the current image is part of a panoramic
sequence, deletes all images in the panoramic sequence.
– All Images (in Memory/on Card)—Deletes all stored images and video clips.
– Format (Memory/Card)—Deletes all stored files, then formats the internal
memory or memory card.
– Undelete Last—Recovers the most recently deleted image. This option is only
available until you capture another image.
Saving frames from video clips
If you want to print a frame from a video clip, you can save an individual frame as a still
image.
1.
2.
3.
4.
During video playback, press
to pause the video.
Use
to scroll one frame at a time.
Press
to save the displayed frame.
Press
to resume playing the video clip.
Viewing thumbnails
1.
2.
3.
While in Playback, press
Thumbnails (same
Zoom Out on the Zoom lever) to view
as
thumbnails.
Use
and
to scroll through the thumbnails.
Press
to exit Thumbnails and view the
highlighted image on the Image Display.
HP Photosmart R827 Digital Camera
25
Chapter 3
Magnifying images
This feature is for viewing purposes only; it does not permanently alter the image.
1.
2.
3.
4.
While in Playback, press (same as Zoom In
on the Zoom lever). The currently displayed image
is magnified 2x.
Use
and
to pan around the magnified
image.
Use and
to change the magnification.
Press
to return to Playback.
Using the Playback Menu
1.
2.
3.
4.
While in Playback, press
.
Use
to highlight an option.
Use
to select an image or video clip, press
instructions.
Press
to exit the Playback Menu.
, and follow the on-screen
Image Advice—Analyzes image for focus, exposure, and so forth.
Image Info—See Viewing image information on page 27.
View Slideshow—See Viewing slideshows on page 27.
Stitch Panorama—See Stitching panoramas on page 28.
Record Audio—See Recording audio on page 28.
Move Images to Card—Moves images from internal memory to memory card.
Available only if there are images in internal memory and a memory card is
inserted.
To move images, select this option and follow the on-screen prompts.
26
Viewing image information
The Image Info screen shows the settings used when capturing the currently displayed
image or video clip.
1
ISO Speed.
2
Non-default shooting mode (see Using the shooting modes on page 16),
Flash (see Setting the flash on page 16), and Focus setting (see Using the
focus range settings on page 14).
3
All non-default Capture Menu settings except Image Quality.
4
Memory card indicator.
5
File name of the image.
6
File size of the image.
7
Date and time image was captured.
8
Image Quality setting at which the image was captured.
9
The information in the two rows in the bottom, right corner of the image is the
same provided in Playback.
Viewing slideshows
Select View Slideshow to configure and run a slideshow of images and/or video clips
on the camera Image Display or on a TV (if the camera is docked in an optional
HP Photosmart Premium dock or wireless dock base and connected to a TV).
●
●
●
●
●
●
EXIT—Returns to the Playback Menu without viewing the slideshow.
Start Slideshow—Starts the slideshow.
Images—Plays the specified images: All (default), Favorites, Stills Only, Videos
Only, This Image.
Interval—Sets the amount of time each image is shown: 2 secs, 5 secs
(Default), 10 secs, 15 secs, 60 secs, Manual (press
to manually advance the
images in the slideshow).
Loop—Specifies how often the slideshow repeats: Once (Default), 2x, 3x,
Continuous.
Audio—Plays associated audio clips at the specified volume: Off, Low, High.
HP Photosmart R827 Digital Camera
27
Chapter 3
Stitching panoramas
When an image from a panoramic sequence is displayed and you select Stitch
Panorama, the camera displays a stitched view of the panoramic sequence.
Note Stitching on-camera will result in a smaller image than if you stitched when
transferring to a computer. To stitch a panorama at the resolution at which you
took the panoramic sequence, transfer the panoramic sequence of images to your
computer (see Transferring images with HP Photosmart Software
on page 33).
1.
2.
3.
Scroll to one of the images in a panoramic sequence.
Use
to select Stitch Panorama, then press
to view a preview of the stitched
image.
to pan around the
You can use to magnify the stitched panorama, and
image and examine the stitching.
Press
to stitch and save the panoramic image; press
to cancel panorama
stitching.
When you stitch a panorama, individual images in the panoramic sequence are retained.
Recording audio
Record Audio allows you to record an audio clip and attach it to an existing image or
panoramic sequence.
1.
2.
Select Record Audio to immediately start recording.
To stop recording and attach the audio clip to the displayed image, press
.
Note You can attach audio clips to individual images in a panoramic sequence.
When you stitch the panoramic sequence (on-camera or on-computer), no audio
is attached to the stitched image. You can, however, add audio to a stitched
panorama as previously described.
If the currently displayed image already has an audio clip attached to it, the Record
Audio sub-menu displays instead when you select Record Audio.
●
●
●
28
Keep Current Clip—Retains the current audio clip and returns to the Playback
Menu.
Record New Clip—Records a new audio clip, replacing the previous audio clip.
Delete Clip—Deletes the current audio clip and returns to the Playback Menu.
4
Using the Design Gallery Menu
You can use the Design Gallery features to enhance your captured images.
1.
2.
3.
While in Playback, use
to scroll to an image, then press
.
Use
to highlight the
Design Gallery Menu tab.
Use
to highlight an option, then press
and follow the on-screen instructions.
Apply Artistic Effects—See Applying artistic effects on page 29.
Modify Color—See Modifying colors on page 30.
Add Borders—See Adding borders on page 30.
Remove Red Eyes—See Removing red eyes on page 31.
Rotate—Rotates the displayed image. Use
to rotate the image clockwise
to save the image
or counter-clockwise in 90-degree increments. Press
in the new orientation.
Crop—See Cropping images on page 31.
Applying artistic effects
Tip If you need to crop an image (see Cropping images on page 31), do so
before applying artistic effects or adding borders. If you plan to apply artistic
effects or modify colors, do so before adding a border.
Apply Artistic Effects allows you to create a copy of a selected image and apply
creative effects to the copy. To apply artistic effects:
1.
2.
Use
to select
Apply Artistic Effects, then press
.
Use
to select an option and preview the effect it has on the image.
– Cancel—Returns to the Design Gallery Menu without saving changes.
– Ink Dots—Uses dots to simulate the art technique of pointillism.
– Cartoon—Simulates a highly-graphical comic book image.
– Watercolor—Simulates a watercolor painting.
– Center Focus—Creates a feathered blur radiating from a sharp center to a
blurred edge.
– Posterize—Creates a high-contrast, flat-toned effect.
– Retro—Creates a two-color, high-contrast look from the 70s.
– Soft Glow—Adds a diffuse, bright ethereal glow.
– Vintage—Adds an aged, scratched look.
– Slimming—Compresses centered subjects for a slimmer look.
– Sky Color—Enhances sky with a feathered color that fades from the top down.
– Ground Color—Enhances landscapes with a feathered color that fades from
the bottom up.
– Kaleidoscope—Mirrors an image in four directions.
HP Photosmart R827 Digital Camera
29
Chapter 4
3.
4.
– Solarize—Creates a partial reversal of tones and emphasizes outlines.
– Drawing—Creates a pencil drawing using the edges in the image.
Press
to select the artistic effect and display the creative sub-menu.
Follow the on-screen instructions to adjust the artistic effect.
Press
to save a copy of the image with the artistic effect and return to the Design
to exit without saving and return to the Apply Artistic
Gallery Menu. Press
Effects sub-menu.
Modifying colors
Tip If you plan to apply artistic effects or modify colors, do so before adding a
border.
Modify Color allows you to apply color schemes to the displayed image. To modify
colors:
1.
2.
3.
4.
Use
to select
Modify Color, then press
.
Use
to select a color scheme and preview the effect it has on the image.
– Cancel—Returns to the Design Gallery Menu without saving changes.
– Black and White—Converts color images to black and white.
– Sepia—Converts image to a brownish tone to look old-fashioned.
– B&W Tints—Applies color tones on a black and white version of an image.
– Color Tints—Adds an extra color layer to create a mood or feeling.
Press
to select the color scheme and display the creative sub-menu.
Follow the on-screen instructions to adjust the color.
Press
to save a copy of the image with the specified color scheme and return
to exit without saving and return to the
to the Design Gallery Menu. Press
Modify Color sub-menu.
Adding borders
Tip If you need to crop an image (see Cropping images on page 31), do so
before adding borders or applying artistic effects. If you plan to apply artistic
effects or modify colors, do so before adding a border.
Add Borders allows you to add a predefined border to the displayed image. To add
a border:
1.
2.
30
Use
to select
Add Borders, then press
.
Use
to select a border type and preview the effect it has on the image.
– Cancel—Returns to the Design Gallery menu without saving changes.
– Soft Edge—Applies a soft, vignetted frame to the image.
– Inset Border—Image extends beyond the inset frame.
– Torn Edge—Creates random tears for an uneven border effect.
– Burn Edge—Creates a border with darkened areas that appear burned.
– Spatter—Creates an edge that appears to dissolve into the paper, like spray.
– Oval—Adds an oval matte border with beveled edges.
– Circle—Adds a circular matte border with beveled edges.
– Rectangle—Adds a rectangular matte border with sharp corners.
3.
4.
– Rounded Rectangle—Uses a rectangle with soft corners for the matte border.
– Square—Adds a square matte border with beveled edges.
Press
to select the border and display the creative sub-menu.
Follow the on-screen instructions to adjust the border.
Press
to save a copy of the image with the specified border and return to the
to exit without saving and return to the Add
Design Gallery Menu. Press
Borders sub-menu.
Removing red eyes
When you select
Remove Red Eyes, the camera processes the current still image
to remove red eyes from the subjects.
Note To prevent red eyes in images, see Red eye on page 16.
The red-eye removal process takes a few seconds, after which the image displays with
green boxes around corrected areas, along with the Remove Red Eyes sub-menu:
●
●
●
Save Changes (Default)—Overwrites the original image and returns to the Design
Gallery Menu.
View Changes—Displays a magnified view of the image with green boxes around
the corrected areas.
Cancel—Returns to the Design Gallery Menu without saving the red eye changes.
To undo red-eye removal, select Undo Red-Eye Removal from the Design Gallery
Menu, then press
.
Note Undo Red-Eye Removal only appears on the Design Gallery Menu if
you are viewing an image on which you have already performed red-eye removal,
or on an image taken with Red-Eye Removal turned on. See Red-Eye
Removal under Using the Capture Menu on page 18.
Remove Red Eyes is only available for still images taken with a flash.
Cropping images
Crop allows you to crop the displayed image to the selected orientation, then use
to ensure that the image content you want gets printed.
the Zoom lever and
Tip Make sure you crop images as needed before adding borders or applying
artistic effects.
1.
2.
Use
to select
Crop, then press
.
Use
to select a crop orientation and preview the effect it has on the image.
– Cancel—Returns to the Design Gallery Menu without saving changes.
– Landscape (Default)—Horizontally crops the displayed image to a 3:2 aspect
ratio (one third wider than tall).
– Portrait—Vertically crops the displayed image to a 2:3 aspect ratio (one-third
taller than wide).
– Help—Provides extended help information for the Crop function.
Follow the on-screen instructions to use the Zoom lever and adjust what appears
in the cropped image.
HP Photosmart R827 Digital Camera
31
Chapter 4
3.
32
When you print, the normal aspect ratios get cropped on the top and bottom
(landscape) or on the sides (portrait). Cropping helps ensure that the content you
want gets printed.
Press
to save a copy of the cropped image and return to the Design Gallery
Menu. Press
to exit without saving and return to the Crop sub-menu.
5
Transferring and printing images
You can transfer images and video clips with or without the HP Photosmart Software that
came with your camera. However, the HP Photosmart Software has several features for
transferring and managing your images and also guides you through the transfer
process.
Transferring images with HP Photosmart Software
If you have installed the HP Photosmart Software (see Install the software on page 9),
use this method to transfer images and video clips to your computer. You can also use
this method to transfer, stitch, and print panoramas.
Tip You can also perform this task using an optional HP Photosmart dock (see
the dock User Guide).
1.
2.
3.
If you have selected images for sharing, printing, or buying prints online (see Using
HP Photosmart Express on page 36), verify that the computer is connected to a
printer and/or the Internet.
Connect the camera and computer using the USB
cable that came with your camera.
Turn on the camera and follow the instructions on
the computer screen to transfer the images. For
more information, see the Help feature in the
HP Photosmart Software.
Transferring images without HP Photosmart Software
If you do not install the HP Photosmart Software:
●
●
●
You cannot use the Share features or Buy Prints Online on the camera's
Photosmart Express Menu (see Using HP Photosmart Express on page 36).
Panoramic sequences are not automatically stitched when you transfer the images
to your computer.
Images marked for printing do not automatically print when the camera is connected
to the computer.
However, you can still transfer images and video clips to your computer by:
●
●
Connecting your camera directly to the computer (see Connecting to the computer
on page 34)
Using a memory card reader (see Using a memory card reader on page 34)
HP Photosmart R827 Digital Camera
33
Chapter 5
Connecting to the computer
1.
2.
3.
Turn off the camera.
Connect the camera and computer using the USB cable that came with your camera,
then turn on the camera.
– On Windows computers, the camera appears as a device in Explorer, allowing
you to copy images from the camera to the computer.
– On Macintosh computers, either Image Capture or iPhoto starts automatically,
allowing you to transfer images to the computer.
When you have finished transferring images, disconnect the camera from the
computer. If your computer is running Windows 2000 or XP and you get an Unsafe
Removal warning, disregard the warning.
If you encounter problems, set the camera’s USB Configuration to Disk Drive (see
USB Configuration under Using the Setup Menu on page 41) and reconnect to your
computer.
Note On Macintosh computers, if you set the camera to Disk Drive and neither
Image Capture nor iPhoto starts automatically, look on the desktop for a disk drive
icon with the label HP_R827 and copy the images manually. For more information
about how to copy files, visit Mac help.
Using a memory card reader
You can put your camera’s optional memory card into a (separately purchased) memory
card reader. Some computers and HP Photosmart printers have built-in memory card
slots which act as a memory card reader.
For Windows computers:
1.
2.
3.
4.
5.
Insert your camera’s memory card into the memory card reader (or into your
computer’s memory card slot).
Right-click My Computer on your desktop, then select Explore.
Expand the removable drive folder, expand the DCIM folder, then click on the folder
for your camera.
Select and copy all the images to a folder on your computer.
After verifying that the images were successfully transferred, return the memory card
to your camera.
For Macintosh computers:
1.
2.
Insert your camera’s memory card into the memory card reader (or into your
computer’s memory card slot).
Either the HP Photosmart Software, Image Capture, or iPhoto starts automatically
and guides you through the process of transferring images.
If no application starts automatically or if you want to copy the images manually, look on
the desktop for the disk drive icon for the memory card, then copy the images to your
local hard drive. For more information about how to copy files, visit Mac help.
Printing images from the camera
You can connect the camera to any PictBridge-certified printer to print still
images and frames saved from a video clip (see Saving frames from video
clips on page 25). For information about printing panoramas directly to a
printer, see Printing panoramas from the camera on page 35.
34
1.
2.
3.
4.
5.
Check that the printer is turned on, there is paper in the printer, and there are no
printer error messages.
Verify that the camera's USB Configuration is set to Digital Camera (see USB
Configuration under Using the Setup Menu on page 41).
Connect the camera and printer using the USB
cable that came with your camera, then turn on
the camera.
When the camera is connected to the printer, the
Print Setup Menu displays on the camera.
– To change the set of images you want to
print, use
, then follow the on-camera
instructions.
– To edit the selection, press , then follow
the on-camera instructions.
– To change other settings, use
on the camera to select a menu option, then
use
on the camera to change the setting.
Press
to begin printing.
Note If you connect the camera to a non-HP printer and encounter problems
with printing, contact your printer manufacturer. HP does not provide customer
support for non-HP printers.
Printing panoramas from the camera
You can print panoramas stitched on the camera (see Stitching panoramas
on page 28) directly to PictBridge-certified HP printers capable of printing panoramas on
10 x 30 cm (4 x 12 in) paper. You can also print portions of still images as panoramas.
1.
2.
3.
4.
5.
Follow Steps 1 to 3 under Printing images from the camera on page 34, verifying
that you have panorama paper in the printer.
When the Print Setup Menu displays on the camera, use
to select an option in
Images or press
and follow the on-camera instructions to select a set of images.
In the Print Setup Menu, highlight Print Size:, use
to select Panorama, then
.
press
In the Panorama Printing Menu, highlight an option.
– Print as Shown—Prints the area shown within the green box.
– Select Crop Area—Allows you to adjust the portion of the selected image to
print. To select the area, press
, use
,
, , and
to position the
to return to the Panorama Printing
green box over the area, then press
Menu.
– Skip This Image—Proceeds to the next image without printing the image
displayed.
– Cancel—Exits the Panorama Printing Menu, cancels all pending and inprogress print jobs, and returns to the Print Setup Menu.
When you are done printing, disconnect the camera from the printer.
HP Photosmart R827 Digital Camera
35
6
Using HP Photosmart Express
With HP Photosmart Express, you can select still images in your camera to print
automatically (see Marking images for printing on page 37), to buy prints online (see
Buying prints online on page 38), or to send to custom destinations (see Sharing
images on page 38) the next time you connect the camera to your computer or printer.
You can also tag images on the camera as Favorites and print, buy prints online, or send
them to custom destinations as a group (see Tagging images as Favorites
on page 37).
You must have the HP Photosmart Software, either HP Photosmart Premier (Windows)
or HP Photosmart Mac (Macintosh), on your computer to use some features in the
Photosmart Express Menu. For information about this software, see About the
HP Photosmart Software on page 9.
Note Available online services vary by country or region.
Visit www.hp.com/go/sharing for more information.
Using the Photosmart Express Menu
To display the Photosmart Express Menu, press
.
menu option, then press
. Use
and
to highlight a
Print—Allows you to select images and specify number of copies to print. See
Marking images for printing on page 37.
Share—Allows you to add custom online destinations and share images to
one or more destinations. See Sharing images on page 38.
Buy Prints—Specifies images you want printed by an online printing service.
See Buying prints online on page 38.
Favorites—Allows you to tag images as Favorites. See Tagging images as
Favorites on page 37.
Help—Provides information about the Photosmart Express Menu and its
options.
36
Tagging images as Favorites
Tagging an image as a Favorite allows you to quickly print, share, or buy prints online
for the group of images tagged as Favorites.
1.
2.
3.
4.
5.
While in Playback, use
to display an image you
want to tag as a Favorite, then press .
Use
and
to highlight Favorites, then press
.
Highlight This Image, then press
. To deselect
This Image, press
again.
For each additional image you want to tag as a
Favorite, use
to display the image, then repeat
Step 3.
When you are done tagging images as Favorites,
press .
Tip To view just the images tagged as
Favorites, select Favorites in View
Slideshow (see Viewing slideshows
on page 27.
Marking images for printing
You can mark for printing individual images, groups of images tagged as Favorites, or
all images in the camera. The next time you connect the camera to a PictBridge-certified
printer or a computer with the HP Photosmart software installed, the marked images are
automatically printed.
1.
2.
Press , use
and
to highlight Print, then press
.
In the Print menu, highlight an option, then press
.
– This Image—Selects the image currently
displayed. You can scroll to a different image
using
.
– All Favorites...—Displays the Print All
Favorites sub-menu. Highlight Print All
Favorites, then press
. This option is
available only if you have tagged more than
one image as a Favorite (see Tagging images as Favorites on page 37).
– All Images...—Displays the Print All Images sub-menu. Highlight Print All
Images, then press
. This option is available only if you have more than one
image in the camera.
HP Photosmart R827 Digital Camera
37
Chapter 6
3.
4.
5.
6.
If you want to print more than one copy, highlight
. In the
Change Number of Copies, then press
Print sub-menu for changing the number of copies,
use
to specify the number of copies to print,
.
then press
From the main Print menu, you can select
additional images for printing, using
to display
an image, highlight This Image in the Print menu,
, then repeating Step 3.
pressing
When you are done marking images for printing, press .
To print the images you selected, use the USB cable that came with your camera
to connect the camera to a PictBridge-certified printer or a computer with the
HP Photosmart software installed, then turn on the camera.
Buying prints online
You can select images you want to order as prints. The next time you connect the camera
to a computer with the HP Photosmart software installed, you can order prints of the
selected images online.
1.
2.
3.
4.
5.
Press , use
and
to highlight Buy Prints, then press
.
In the Buy Prints sub-menu, highlight an option, then press
.
– This Image—Selects the image currently displayed. You can scroll to a different
image using
.
– All Favorites...—Displays the Buy Prints of All Favorites sub-menu. Highlight
, then highlight EXIT and press
Buy Prints of All Favorites, press
again. This option is available only if you have tagged more than one image
as a Favorite (see Tagging images as Favorites on page 37).
– All Images...—Displays the Buy Prints of All Images sub-menu. Highlight
Buy Prints of All Images, press
, then highlight EXIT and press
again.
This option is available only if you have more than one image in the camera.
To select additional images, use
to display an image, press
, then repeat
Step 2.
When you are done marking images for which you want to buy prints, press .
To buy prints of the images you selected, verify that the computer is connected to
the Internet, then use the USB cable that came with your camera to connect the
camera to your computer and turn on the camera. Follow the on-screen instructions
to buy prints.
Sharing images
You can customize the Share sub-menu to include e-mail addresses, group distribution
lists, online albums, or other online services. You can then select images to send to these
destinations.
38
Setting up online destinations in the camera
You can specify up to 34 custom destinations (such as individual e-mail addresses or
group distribution lists) in the Photosmart Express Menu.
1.
2.
3.
4.
5.
Verify that your computer is connected to the Internet.
Turn on the camera, then press .
Highlight
Share, then press
. If you have already created destinations,
again.
highlight Share Menu Setup and press
Connect the camera to your computer using the
USB cable that came with your camera. Follow the
on-screen instructions to set up destinations in your
camera.
Disconnect the camera from the computer, press
, then highlight Share and press
to verify that
the new destinations are now in the camera.
Sending images to online destinations
After you have set up online destinations in the camera, you can mark images to be sent
to these custom destinations the next time you connect your camera to your computer.
1.
2.
3.
Press , use
and
to highlight Share, then press
.
In the Share sub-menu, highlight an option, then
.
press
– Custom Destinations—Selects the destination
to send the image displayed in the
background. There may be multiple
destinations depending on the number of
them you created (see Setting up online
destinations in the camera on page 39). You
can scroll to a different image using
.
– All Favorites...—Displays the Share All Favorites sub-menu. To select this
in the sub-menu, then highlight each destination to which you
option, press
to select each destination. After
want to send all Favorites, pressing
. This option is available
selecting destinations, highlight EXIT and press
only if you have tagged more than one image as a Favorite (see Tagging
images as Favorites on page 37).
– All Images...—Displays the Share All Images sub-menu. To select this option,
press
in the sub-menu, then highlight each destination to which you want
to select each destination. After selecting
to send all images, pressing
. This option is available only if you
destinations, highlight EXIT and press
have more than one image in the camera.
To select additional images to share, use
to display an image, then repeat Step
2.
HP Photosmart R827 Digital Camera
39
Chapter 6
4.
5.
40
When you are done marking images to share, press .
To send the images to the destinations you selected, verify that the computer is
connected to the Internet, then connect the camera to the computer using the USB
cable that came with your camera and turn on the camera.
7
Using the Setup Menu
The Setup Menu allows you to set preferences for the camera’s behavior.
1.
2.
3.
4.
While in Live View or Playback, press
, then use
to highlight .
Use
to highlight a menu option, then press
to display the menu option’s
sub-menu.
Use
to highlight a setting, then press
.
To exit the Setup Menu, press
.
Settings you specify remain until you change them.
Display Brightness—Adjusts the brightness of the Image Display.
●
●
●
Low—For extending battery life.
Medium (Default)—For normal viewing conditions.
High—For very bright lighting conditions.
Sounds Volume—Adjusts the speaker volume for camera sounds (such as
button presses and shutter clicks) and recorded audio.
Off, Low (Default), High.
Focus Assist Light—Enables the focus assist light used in low-light
situations. You may want to turn off this feature when you do not want to
distract the subject of your picture.
Auto (Default), Off.
Display Timeout—Specifies the time after which the Image Display turns off
if you do not press a button.
Never, 15, 30, 45 (Default), 60 seconds.
Instant Review—Adjusts the time an image or video clip is displayed in
Instant Review.
Off, 1, 2 (Default), and 4 seconds.
Digital Zoom—Enables or disables digital zoom.
On (Default), Off.
Date & Time—Sets the date and time. See Set the date and time
on page 8.
USB Configuration—Specifies how a computer recognizes the camera. See
Connecting to the computer on page 34.
●
●
Digital Camera (Default)—Recognizes the camera as a digital camera
using PTP (Picture Transfer Protocol).
Disk Drive—Recognizes the camera as a disk drive using MSDC (Mass
Storage Device Class).
HP Photosmart R827 Digital Camera
41
Chapter 7
(continued)
TV Configuration—Sets the video signal format for displaying camera
images on a TV.
●
●
NTSC—Used primarily in North America, parts of South America, Japan,
Korea, and Taiwan.
PAL—Used primarily in Europe, Uruguay, Paraguay, Argentina, and
parts of Asia.
(Language)—Sets the language. See Choose the language
on page 7.
Reset Settings—Resets camera to the factory default settings.
●
●
42
Cancel—Exits the menu without resetting any of the settings.
Yes—Resets all camera settings to their defaults (except Date &
Time, Language, TV Configuration, and USB Configuration).
8
Troubleshooting
Use this section to find information on:
●
●
Resetting the camera (see Resetting the camera on page 43)
Possible problems and solutions (see Problems and solutions on page 43)
Resetting the camera
If your camera does not respond when you press buttons, reset the camera.
1.
2.
3.
4.
5.
Turn off the camera.
Remove the memory card and battery.
Press the straightened end of a paper
clip into the Reset switch (the small
hole located by the battery slot, as
shown), hold the switch down for 3-6
seconds, then release.
Reinstall the battery and close the
Battery/Memory card door.
Verify that the camera works without
an optional memory card, then reinstall the card.
When the camera is reset, any images or video clips stored in memory are retained.
Problems and solutions
Use this information to find solutions to common issues you may have using your camera.
The camera does not turn on.
● Install a new or recharged battery, ensuring that the battery is inserted correctly (see
Install the battery on page 7) and that you are using a rechargeable HP Photosmart
R07 Lithium Ion battery for HP Photosmart R-series cameras (L1812A/L1812B).
● Ensure that the HP AC power adapter is connected to the camera (directly or through
an optional dock) and is plugged into a working electrical outlet. Ensure that the
HP AC power adapter is not damaged or defective.
● Reset the camera (see Resetting the camera on page 43).
● Ensure that the memory card is the proper type (see Storage on page 55). If so,
remove the memory card and turn on the camera; if the camera turns on, format the
memory card (see Install and format an optional memory card on page 8). If the
camera still does not turn on, format the memory card using a memory card reader,
or replace the memory card.
The battery gauge goes up and down frequently.
See Power indicators on page 51.
HP Photosmart R827 Digital Camera
43
Chapter 8
I have to recharge the Lithium Ion battery frequently.
● See Extending battery life on page 50.
● A battery that is new or has not been charged recently must be recharged to reach
full capacity.
● If you have not used the battery for two months or longer, recharge it.
The Lithium Ion battery will not charge.
● Try charging it again after it has drained awhile.
● Use only the approved HP AC power adapter.
● If charging the battery in the HP quick recharger or the spare battery charging bay
of an optional HP Photosmart dock does not work, replace the battery.
The camera does not turn on when I connect to AC power, then disconnect, then
reconnect.
● Insert a battery into the camera.
● Reset the camera (see Resetting the camera on page 43).
● The AC power adapter could be malfunctioning. Try connecting to a different
approved HP AC power adapter.
● Try plugging the AC power adapter into a different electrical outlet.
It takes the camera a long time to turn on.
● Having a large number of files (over 300) stored on an optional memory card affects
the time it takes for the camera to turn on. Transfer stored files to your computer,
then format the memory card.
● Using the camera under cold conditions slows camera response time.
The camera does not respond when I press a button.
● Turn on the camera.
● Most of the camera buttons do not respond when the camera is connected to a
computer (directly or through an optional dock).
● Recharge or replace the battery.
● Connect the camera to the plugged-in AC power adapter and press buttons again.
● Reset the camera (see Resetting the camera on page 43).
● The memory card may be defective. Remove the memory card and test the camera;
if the camera works, replace the memory card.
● Format the internal memory and/or the memory card (see Install and format an
optional memory card on page 8).
The camera does not take a picture when I press the Shutter button.
● Press the Shutter button all the way down.
● The memory card or internal memory may be full. Transfer images from the camera
to your computer, then format the internal memory or the memory card (see Install
and format an optional memory card on page 8). Or replace the card with a new one.
● The camera may be processing. Wait a few seconds for the camera to finish
processing the last image before taking another picture.
44
The Image Display is not working.
● The Image Display may have timed out. Press any camera button to wake up the
camera.
● Replace or recharge the battery. If the Image Display does not turn on, remove the
battery and connect to AC power. If the Image Display still does not turn on, reset
the camera (see Resetting the camera on page 43).
My image is blurry.
● Use Focus Lock (see Using Focus Lock on page 13).
● Use Steady Photo shooting mode (see Steady Photo under Using the shooting
modes on page 16).
● Use a tripod to hold the camera steady, or improve lighting conditions.
● Set the camera to
Macro,
Auto Macro, Normal, or
Infinity focus and
try taking the picture again (see Using the focus range settings on page 14).
● Set the flash to
Auto Flash or Flash On and set the shooting mode to
Action.
● Check Image Advice for specific tips (see Image Advice under Using the Playback
Menu on page 26).
My image is too bright.
● Turn the flash off (see Setting the flash on page 16).
● Move back from the subject and use zoom.
● Adjust Exposure Compensation (see Exposure Compensation under Using the
Capture Menu on page 18).
● Use Bracketing for exposure (see Bracketing under Using the Capture Menu
on page 18).
● Check Image Advice for specific tips (see Image Advice under Using the Playback
Menu on page 26).
My image is too dark.
● Wait for natural lighting conditions to improve, use the flash (see Setting the flash
on page 16) or add indirect lighting.
● Adjust Exposure Compensation (see Exposure Compensation under Using the
Capture Menu on page 18).
● Use Bracketing for exposure (see Bracketing under Using the Capture Menu
on page 18).
● Use Adaptive Lighting (see Adaptive Lighting under Using the Capture Menu
on page 18).
● Use the Spot setting for AE Metering (see AE Metering under Using the Capture
Menu on page 18).
● If the subject you are trying to capture is outside the flash range (see Flash working
range under Specifications on page 54), turn off the flash. This causes a longer
exposure time, so use a tripod or hold the camera steady.
● Check Image Advice for specific tips (see Image Advice under Using the Playback
Menu on page 26).
HP Photosmart R827 Digital Camera
45
Chapter 8
My image is grainy.
● Add indirect lighting, use the flash (see Setting the flash on page 16), or wait for
natural lighting conditions to improve.
● Use a lower ISO Speed setting (see ISO Speed under Using the Capture Menu
on page 18).
● You may have zoomed in too far using digital zoom (see Digital zoom on page 15).
● If the camera is warm, the effect will diminish as the camera cools. For best image
quality, avoid storing the camera in very hot locations.
● Use Image Advice (see Image Advice under Using the Playback Menu
on page 26).
Images are missing on my camera.
Remove the memory card and see if the images are stored in internal memory. If so,
transfer the images to the memory card (see Move Images to Card under Using the
Playback Menu on page 26).
The Power light is on but the Image Display is off, or the camera seems stuck and
won’t operate.
● Press Live View/Playback
to reactivate the Image Display.
● Reset the camera (see Resetting the camera on page 43 ).
The camera responds sluggishly when trying to review images.
See Storage on page 55 and Memory capacity on page 55 for tips about memory
cards.
Video recording terminates abruptly. The video is saved successfully, but it is
shorter than expected.
● Choose a lower resolution/compression combination for the video (see Video
Quality under Using the Capture Menu on page 18).
● Replace your memory card with a faster card. Look for cards marked High
Performance, Pro, Ultra, or High Speed.
Video recording terminates abruptly and the video will not play back.
Reformat the card (see Install and format an optional memory card on page 8).
The camera gets warm (or even hot) to the touch.
This is normal. However, if anything seems out of the ordinary, turn off the camera and
allow it to cool. Then examine the camera and the battery for signs of possible damage.
For best image quality, turn off the camera when not using. Always store the camera in
a cool place.
My camera stalls when establishing a connection to the computer.
● Ensure that the USB cable is properly connected to the camera and computer.
● Try connecting the USB cable to another USB port on the computer.
● Turn the camera off, then on again. If that does not fix the problem, reset the camera
(see Resetting the camera on page 43).
● If the problem persists, contact HP Support (see Product support on page 48).
46
I cannot transfer images from the camera to my computer.
● Either install the HP Photosmart Software (see Install the software on page 9), or
see Transferring images without HP Photosmart Software on page 33.
● Set your camera to act as a Disk Drive (see Connecting to the computer
on page 34).
I get an error message when transferring images to my computer.
Close the HP Photosmart Transfer Software, disconnect the USB cable from the camera,
and reset the camera (see Resetting the camera on page 43). Then, restart the image
transfer process (see Transferring images with HP Photosmart Software on page 33).
I am having a problem installing or using the HP Photosmart Software.
● Make sure your computer meets the minimum system requirements (see Install the
software on page 9).
● Refer to the HP Customer Care website: www.hp.com/support.
How can I get professional-quality prints if I don’t have a photo printer?
Use the Buy Prints Online feature on the Photosmart Express Menu (see Buying
prints online on page 38).
HP Photosmart R827 Digital Camera
47
9
Product support
Use this section to find support information for your digital camera, including links to
helpful websites and an overview of the support process.
Helpful websites
Camera tips, product
registration, newsletter
subscriptions, driver and
software updates,
purchase HP supplies and
accessories
www.hp.com
Customers with disabilities
www.hp.com/hpinfo/community/accessibility (English
only)
HP Total Care, driver and
software updates, support
information
www.hp.com/support
www.hp.com/photosmart (English only)
Getting assistance
To get the best from your HP product, consult the following standard HP support
offerings:
1.
2.
3.
4.
48
Consult the product documentation.
– Review Troubleshooting on page 43 in this document.
– Review the electronic Help section within the software.
– Refer to the camera's Help screens.
Visit the HP Customer Care website at www.hp.com/support, or contact the store
where you purchased this camera. The HP Customer Care website is available to
all HP customers. The HP Customer Care website is the fastest source of up-to-date
product information and expert assistance, including:
– Fast e-mail access to qualified online support specialists.
– Software and driver updates for your camera.
– Valuable product and troubleshooting information for technical issues.
– Proactive product updates, support alerts, and HP newsletters (available when
you register your camera).
HP support by phone. Support options and fees vary by product, country/region, and
language. For a list of support conditions and phone numbers,
visit www.hp.com/support.
Post-warranty period. After the limited warranty period, help is available online
at www.hp.com/support.
5.
6.
Extending or upgrading your warranty. If you would like to extend or upgrade your
camera's warranty, please contact the store where you bought the camera or check
the HP Care Pack offers at www.hp.com/support.
If you already purchased an HP Care Pack Service, please check the support
conditions on your contract.
HP Photosmart R827 Digital Camera
49
A
Managing batteries
Your camera uses a rechargeable HP Photosmart R07 Lithium Ion battery (L1812A/L1812B).
Top points about batteries
Always insert the battery in the camera correctly (see Install the battery on page 7). If the battery is
inserted improperly, the compartment door may close but the camera will not operate.
●
●
●
●
●
●
New rechargeable Lithium Ion batteries are shipped partially charged. Fully charge them before
first use.
If you do not intend to use your camera for more than two months, leave the camera connected
to the HP AC adapter. The camera will top off the battery periodically to ensure that the camera
is always ready for use.
A rechargeable Lithium Ion battery can be left in the camera or optional dock or quick recharger
for any period of time without harm.
If a rechargeable Lithium Ion battery has not been used for more than two months, recharge
it before using it again. Fully recharge Lithium Ion batteries every six months to a year to prolong
their useful life.
The performance of Lithium Ion batteries degrades over time, especially if stored and used at
high temperatures. If battery life is unacceptably short, replace the battery.
The performance of Lithium Ion batteries will decrease as the temperature drops. To improve
battery performance, keep the camera or batteries stored in a warm inside pocket when in a
cold environment.
Extending battery life
To conserve battery power, the Image Display turns off after 45 seconds by default. Pressing any
button wakes up the camera. After five minutes of inactivity, the camera turns off.
To further extend battery life:
●
●
●
●
●
Set Display Brightness to Low (see Display Brightness under Using the Setup Menu
on page 41).
Change the Display Timeout value to a shorter interval (see Display Timeout under Using
the Setup Menu on page 41).
Set your camera to Auto Flash (see Auto Flash under Setting the flash on page 16).
If you are turning on the camera only to view images, hold down
while turning on the
camera to start in Playback without opening the lens cover.
Connect the camera to the HP AC power adapter when you transfer or print.
Safety precautions for using batteries
●
●
●
●
●
●
●
50
Do not place the battery in fire or heat the battery. Always store charged batteries in a cool
location.
Do not connect the positive and negative terminals of the battery to each other with any metal
object.
Do not carry or store the battery with metal objects. Do not drop the battery into a change-filled
pocket.
Do not pierce the battery or subject it to strong impacts or shocks.
Do not solder directly onto the battery.
Do not allow the battery to get wet.
Do not disassemble or modify the battery.
●
●
Immediately discontinue use of the battery if, while using, charging, or storing the battery, the
battery emits an unusual smell, feels excessively hot (note that it is normal for the battery to
feel warm), changes color or shape, or appears abnormal in any other way.
In the event the battery leaks and the fluid gets into one’s eye, do not rub the eye. Rinse well
with water and immediately seek medical care. If left untreated, the battery fluid could cause
damage to the eye.
Caution Risk of explosion if battery is replaced by an incorrect type. Dispose of used
batteries according to the instructions.
Power indicators
The power indicators are most accurate after a few minutes of use. The following table explains the
meaning of these indicators.
Icon
Description
Battery has more than 70 percent energy remaining.
Battery has 30 to 70 percent energy remaining.
Battery has 10 to 30 percent energy remaining.
Battery level is low. Live View is disabled but you can still review images
in Playback and use the menus.
Battery is depleted. Camera will power down.
Blinking
Camera is operating on AC power.
Animated
battery filling up
Camera is operating on AC power and is charging the battery.
Camera has successfully completed battery charging and is operating on AC
power.
Note If the camera is without a battery for a prolonged period, the clock may be reset and
you may be prompted to update it the next time you power on the camera.
Number of shots per battery type
The following table shows the minimum, maximum, and average number of shots that may be
obtained using the rechargeable HP Photosmart R07 Lithium Ion battery.
Number of Shots
Minimum
Maximum
Average
CIPA
120
275
190
240
HP Photosmart R827 Digital Camera
51
Appendix A
For Minimum, Maximum, and Average numbers, four pictures are taken per session with at least a
5 minute break between sessions. In addition:
●
●
●
●
The minimum number of shots is obtained with extensive use of Live View (30 seconds per
picture), Playback (15 seconds per picture), and Flash On. Optical zoom (both directions) is
used on 75% of the shots.
The maximum number of shots is obtained with minimal use of Live View (10 seconds per
picture) and Playback (4 seconds per picture). Flash and optical zoom (both directions) are
used on 25% of the shots.
The average number of shots is obtained with Live View used for 15 seconds per picture and
Playback used for 8 seconds per picture. Flash and optical zoom (both directions) are used
on 50% of the shots.
The CIPA number is obtained using the standards established by the Camera and Imaging
Products Association.
Recharging the Lithium Ion battery
You can recharge the HP Photosmart R07 Lithium Ion battery in the camera using the AC power
adapter. You can also charge the battery in an optional HP Photosmart dock (in-camera or through
the extra battery bay) or with an optional quick recharger.
The following table shows the average recharge time for a fully discharged battery, based on
recharge location.
Charge location
Average
charge time
Signals
In camera connected to the
HP AC power adapter
2–3 hours
Charging: Camera's battery charging light blinks
and the animated battery icon is displayed.
Charging complete: Camera's battery charging
light turns on solid and the battery gauge changes
to
In camera connected to the
HP AC power adapter
through an HP Photosmart
dock
2–3 hours
In battery bay of the
HP Photosmart 6221
Premium Camera Dock
2.5–3.5 hours
In an HP Photosmart RSeries quick recharger
1 hour
on the Image Display.
Charging: Dock's camera battery charging light
blinks.
Charging complete: Dock's camera battery
charging light turns on solid.
Charging: Dock's battery bay light blinks.
Charging complete: Dock's battery bay light
turns on solid.
Charging: Quick recharger light is yellow.
Charging complete: Quick recharger light is
green.
Safety precautions for recharging batteries
You can recharge a Lithium Ion battery in the camera or purchase an optional dock with battery bay
or a quick recharger. These devices may be warm while charging a Lithium Ion battery. This is
normal. However, you should follow the safety precautions below.
●
●
●
●
●
52
Do not charge any other battery than the HP Photosmart R07 Lithium Ion battery in the camera,
dock, or quick recharger.
Insert the Lithium Ion battery in the correct orientation.
Use the camera, dock, or quick recharger in a dry location only.
Do not charge a Lithium Ion battery in a hot location, such as in direct sunlight or near a fire.
When recharging a Lithium Ion battery, do not cover the camera, dock, or quick recharger.
●
●
●
●
Do not operate the camera, dock, or quick recharger if the Lithium Ion battery appears
damaged.
Do not disassemble the camera, dock, or quick recharger.
Unplug the HP AC power adapter or quick recharger from the electrical outlet before cleaning
the power adapter or quick recharger.
After extensive use, the Lithium Ion battery may begin to swell. If it becomes difficult to insert
the battery into or remove the battery from the camera, dock, or quick recharger, discontinue
use of the battery and replace it with a new one. Please recycle the old battery.
HP Photosmart R827 Digital Camera
53
B
Specifications
Resolution
Still pictures:
●
●
7.2MP (3112 by 2328) effective pixel count
7.4MP (3164 by 2342) total pixel count
Video clips (VGA—640 by 480 total pixel count; QVGA—320 by 240 total
pixel count):
●
●
●
VGA
VGA
QVGA
(Default)—24 frames/sec
—24 frames/sec
—24 frames/sec
Sensor
Diagonal 7.208 mm (1/2.5-inch, 4:3 format) CCD
Color depth
36 bit (12 bits by 3 colors). 36 bit images are transformed into an
optimized 24 bit image and stored in the JPEG format. This
transformation results in no discernible change to color or detail in the
stored image, and allows the image to be read by computers.
Lens
Focal length:
●
●
●
Wide—6.5 mm
Telephoto—19.6 mm
35 mm equivalent—39 mm to 118 mm
F-number:
●
●
Wide—f/3.5 to f/7.4
Telephoto—f/4.2 to f/8.8
Viewfinder
None
Zoom
●
●
Focus
Focus settings: Normal Focus (default), Macro, Auto Macro, Infinity
3x optical zoom with 10 positions between wide and telephoto
8x digital zoom
Normal Focus (default):
●
●
Wide —500 mm (19.7 in) to infinity
Telephoto —600 mm (23.6 in) to infinity
Macro— Wide, 100 mm to 1 m (3.9 in to 39.4 in)
Auto Macro—Automatically shifts into Macro when that is optimal
Shutter speed
1/1000 to 10 seconds
Built-in flash
Yes, 6-second typical recharge time (8-second maximum recharge time
at power-on)
Flash working range
●
●
●
Image Display
54
Zoom Position Wide—Maximum with ISO Speed set to Auto: 4.1
m (13.5 ft) at f/3.5
Zoom Position Telephoto—Maximum with ISO Speed set to
Auto: 3.3 m (10.8 ft) at f/4.2
Uniformity—Corner intensity >/= 55% of Center intensity
6.35 cm (2.5 in) color LTPS TFT LCD with backlight; 203,400 pixels (960
by 240) total pixel count
(continued)
Storage
●
●
●
●
32MB internal flash memory, not all of which is available for storing
images or video clips (see Memory capacity on page 55).
Slot for memory card.
This camera supports standard and high speed, HP-branded
Secure Digital (SD) memory cards, 8MB to 2GB.
The number of images or video clips that can be saved in memory
depends on the Image Quality and Video Quality settings (see
Memory capacity on page 55).
Compression format
●
●
●
JPEG (EXIF) for still images
EXIF 2.2 for still images with embedded audio
MPEG1 for video clips
Interfaces
●
●
Dock connector, which connects to an optional HP Photosmart
camera dock
USB
Standards
●
●
●
●
●
●
●
●
PTP
USB 2.0 Full Speed
JPEG
MPEG1
DPOF 1.1
EXIF 2.2
DCF
DPS
External body
dimensions
Measurements with camera off (width, depth, height):
Weight
130 grams (4.58 ounces) without battery
Power
Power sources include:
93.3 mm (3.67 in) W by 23.6 mm (0.93 in) D by 61 mm (2.40 in) H
●
●
Temperature range
One rechargeable HP Photosmart R07 Lithium Ion battery for
HP Photosmart R-series cameras
HP AC power adapter (5 Vdc, 2000 mA, 10 W)
Operational
0° to 50° C (32° to 122° F) at 15% to 85% relative humidity
Storage
–30° to 65° C (–22° to 149° F) at 15% to 90% relative humidity
Memory capacity
Not all 32MB of internal memory is available for storing images, because some memory is used for
internal camera operations. The actual file sizes and number of still images that can be stored in
internal memory or on a memory card will vary depending on the content of each still image and the
length of any associated audio clip.
HP Photosmart R827 Digital Camera
55
Appendix B
Image quality
The following table lists the approximate number and average size of still images that can be stored
in internal memory when the camera is set to different Image Quality settings (see Image
Quality under Using the Capture Menu on page 18).
10 images (3.12MB each)
7MP
Normal (7MP
) (Default)
14 images (2.07MB each)
5MP
19 images (1.49MB each)
3MP
28 images (918KB each)
VGA
201 images (145KB each)
Custom...
Number of images depends upon resolution and compression
selections
Note The values shown are for images without audio clips. Sixty seconds of audio adds
330KB to the file size.
Video quality
The following table lists the approximate number of seconds of video clips that can be stored in
internal memory when the camera is set to different Video Quality settings (see Video Quality
under Using the Capture Menu on page 18).
Normal (VGA
)—
(Default) 24 frames/sec
24 seconds
VGA
53 seconds
QVGA
56
—24 frames/sec
—24 frames/sec
108 seconds
Index
A
Action mode 17
Adaptive Lighting 19, 23
adding borders 30
AE Metering 20
apply artistic effects 29
arrow buttons 5
artistic effects 29
assistance 48
audio clips 11, 28
Auto Focus Area 20
Auto Macro setting 15
Auto mode 17
B
battery
charge 7
conserving 50
door 6
install 7
shots per 51
top points about use 50
Beach mode 17
blinking lights on camera 5, 6
borders 30
Bracketing 19
Burst setting 20, 22
C
camera
dimensions 55
parts 5, 6
reset 43
specifications 54
turn on/off 7
weight 55
Capture Menu 18
color depth 54
color of images 19, 21
colors 30
compression format 55
computer, connect to 33, 34
Contrast 21
D
Date & Time 8, 41
Date & Time Imprint 21
deleting images 25
digital zoom 15, 41
dimensions 55
direct print 34
Display Brightness 41
Display Timeout 41
dock 6
Document mode 17
E
e-mail images 38, 39
exposure 14
Exposure Compensation
22
19,
F
F-number 54
Favorites 37
flash
red-eye removal 16, 19
working range 54
Flash button 5
focal length 54
focus
auto focus 12
Auto Focus Area 20
brackets 12
focus lock 13
optimizing 13
settings 14, 54
Focus Assist light 41
Focus button 5
folded lens 6
format memory card 8
G
getting assistance 48
H
HP Photosmart Express 36,
37
HP Photosmart Express
button 5
HP Photosmart Software 9,
10
I
Image Display 6
HP Photosmart R827 Digital Camera
Image Info 27
Image Quality 19, 56
images
Contrast 21
Date & Time Imprint 21
deleting 25
Image Quality 19, 56
magnifying 26
number remaining 11
Panorama mode 17
per battery 51
sending 39
Sharpness 21
shooting modes 16
transfer to computer 33
White Balance 20
Infinity focus 15
install memory card 8
install software 9
Instant Review 12, 18, 22, 41
interfaces 55
internal memory 11, 55
ISO Speed 20, 23
L
Landscape mode 17
Language 7, 42
LEDs 5, 6
lens 6
lights on camera 5, 6
Lithium Ion battery 50, 52
Live View/Playback button 5
M
Macro focus 13, 14
Magnify control 5
magnifying images 26
memory
capacity 55
card 11
card door 6
memory card 8, 55
Menu/OK button 5
menus
Capture 18
Design Gallery 29
Photosmart Express
Playback 26
36
57
Setup 41
microphone 6
modifying colors 30
Move Images to Card 26
N
Night Portrait mode 17
Night Scenery mode 17
Normal Focus 13, 14
number of
pictures remaining 11
still images 56
O
on/off 7
ON/OFF button 5
online
destinations 38, 39
print buying 38
optical zoom 15
P
Panorama mode 17, 28
parts of camera 5, 6
Photosmart Express button 5
Photosmart Express Menu
buying prints online 38
marking images for
printing 37
sharing images 38
tagging images as
Favorites 37
pictures 11, 21
Playback 24
Playback Menu 26
Portrait mode 17
power
indicators 51
light 5
ON/OFF button 5
usage 55
preview Panorama 28
print images 34, 36
prints, buy online 38
problems and solutions 43
product support 48
R
range, focus settings 14
record
audio clips 28
video clips 12
red-eye removal 16, 19, 31
58
Region 7
remaining pictures count 11
removing red eyes 19, 31
reset camera 43
Reset Settings 42
resolution 54
reviewing images 24
S
safety precautions for
batteries 50, 52
Saturation 21
selecting images for
destinations 38, 39
selecting images for printing
37
Self-Timer
light 6
setting 18, 21
sending individual images
38, 39
set date and time 8
setting up destinations 38, 39
settings reset 42
Setup Menu 41
share pictures 36
Sharpness 21
shooting mode 16
Shutter button 5, 12
shutter speed 54
slideshow 27
Snow mode 17
software install 9
solving problems 43
sounds of camera 41
Sounds Volume 41
space remaining in memory
11
specifications 54
Steady Photo mode 17
Stitch Panorama 28
storage 55
Sunset mode 17
support process 48
T
Theatre mode 17
Thumbnails 25
Thumbnails control 5
Time & Date 8, 41
transfer images 33
troubleshooting 43
turn on/off power 7
TV Configuration 42
U
USB configuration
34, 41
V
Video button 5
video clips 12, 20, 56
Video Quality 20, 56
View Slideshow 27
viewing thumbnails 25
W
websites 48
weight 55
White Balance 20, 23
Z
zoom 15, 54
Zoom lever 5