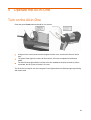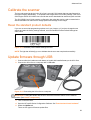
1
HP Handheld
sp400 Series
All-in-One Scanner Printer
System Administrator Guide
Copyright information
Trademark credits
(c) Copyright 2008 Hewlett-Packard Development
Company, L.P.
Microsoft and Windows are U.S. registered trademarks
of Microsoft Corporation.
The information contained herein is subject to change
without notice. The only warranties for HP products and
services are set forth in the express warranty statements
accompanying such products and services. Nothing
herein should be construed as constituting an additional
warranty. HP shall not be liable for technical or editorial
errors or omissions contained herein.
Adaptus Imaging Technology is a registered trademark
of Honeywell International, Inc.
Document 800c0374
Revision F: January, 2010
The Bluetooth word, mark, and logos are owned by the
Bluetooth SIG, Inc.
2
Contents
Contents
1
Introduction
About this guide.................................................................................................................................................... 6
The All-in-One briefly explained ........................................................................................................................... 6
Configuration and wireless options ...................................................................................................................... 6
Configuration options ...................................................................................................................................... 6
Wireless connectivity ...................................................................................................................................... 6
All-in-One components......................................................................................................................................... 6
(a) Hand mount components .......................................................................................................................... 7
(b) Handle components................................................................................................................................... 8
(c) Control panel components......................................................................................................................... 9
2
Safety information
General safety .................................................................................................................................................... 10
LED safety.......................................................................................................................................................... 10
Battery safety ..................................................................................................................................................... 10
3
Set up the All-in-One
Install the battery cable – Hand mount only ....................................................................................................... 11
Assemble the hand mount or handle accessory ................................................................................................ 11
Hand mount: ................................................................................................................................................. 11
Handle:.......................................................................................................................................................... 12
Install the print cartridge ..................................................................................................................................... 13
Install the battery and fit the wrist case – Hand mount configuration ................................................................. 15
Fitting the hand mount .................................................................................................................................. 17
Connect the battery cable .................................................................................................................................. 19
Handle setup ...................................................................................................................................................... 19
Install battery in handle accessory – Handle configuration........................................................................... 19
Handheld use................................................................................................................................................ 20
Hanging use.................................................................................................................................................. 21
Storage option............................................................................................................................................... 21
4
Configure the All-in-One
Overview ............................................................................................................................................................ 22
Implement the server application ....................................................................................................................... 22
Configure the All-in-One..................................................................................................................................... 23
Design a custom print template.......................................................................................................................... 23
5
Operate the All-in-One
Turn on the All-in-One ........................................................................................................................................ 24
Scan ................................................................................................................................................................... 25
Scan instructions – Hand mount configuration ............................................................................................. 25
Scan instructions – Handle configuration...................................................................................................... 26
Scanning tips ................................................................................................................................................ 27
Print .................................................................................................................................................................... 28
Print instructions ........................................................................................................................................... 28
Printing tips ................................................................................................................................................... 28
Clear print data ............................................................................................................................................. 29
Turn off the All-in-One ........................................................................................................................................ 30
Remove the All-in-One and wrist case – Hand mount configuration.................................................................. 30
Remove the battery – Handle configuration ....................................................................................................... 31
3
Contents
6
Maximize print quality
Materials and technique ..................................................................................................................................... 32
7
Ensure Optimal Comfort
Ergonomic recommendations – General............................................................................................................ 33
Ergonomic recommendations – Hand mount specific ........................................................................................ 33
Ergonomic recommendations – Handle specific ................................................................................................ 34
8
Maintain the All-in-One
Order supplies and accessories ......................................................................................................................... 35
Condition the battery .......................................................................................................................................... 35
Clean the All-in-One ........................................................................................................................................... 36
Cleaning materials ........................................................................................................................................ 36
Clean outside surfaces ................................................................................................................................. 36
Clean the imager window.............................................................................................................................. 36
Clean the wrist case and hand mount........................................................................................................... 37
Clean the door .............................................................................................................................................. 37
Charge the battery.............................................................................................................................................. 37
Remove the All-in-One from hand mount accessory.......................................................................................... 37
Remove the All-in-One from handle accessory.................................................................................................. 38
Replace the battery cable – Hand mount configuration ..................................................................................... 39
Replace the finger strap – Hand mount configuration ........................................................................................ 39
Replace the wrist strap – Hand mount configuration.......................................................................................... 40
Replace the rear buckle – Hand mount configuration ........................................................................................ 41
Replace the door ................................................................................................................................................ 42
Recycle............................................................................................................................................................... 42
Locate the serial number.................................................................................................................................... 42
9
Troubleshoot Problems and Get Support
Problems powering on the All-in-One................................................................................................................. 43
Problems connecting the All-in-One to wireless network ................................................................................... 43
Problems scanning............................................................................................................................................. 44
Problems printing ............................................................................................................................................... 45
Problems printing correctly................................................................................................................................. 46
Errors and warning conditions............................................................................................................................ 48
General errors and warning conditions ......................................................................................................... 48
Battery errors and warning conditions .......................................................................................................... 49
Print cartridge errors and warning conditions ............................................................................................... 50
Scanning/Wireless errors and warning conditions ........................................................................................ 51
Support services................................................................................................................................................. 53
10 Advanced Use
System requirements ......................................................................................................................................... 54
Download and install software............................................................................................................................ 54
Set up the wireless network ............................................................................................................................... 55
Bluetooth....................................................................................................................................................... 55
802.11b wireless ........................................................................................................................................... 55
Configure the server ..................................................................................................................................... 55
Design print templates........................................................................................................................................ 56
Use the default print templates ..................................................................................................................... 56
Calibrate the scanner ......................................................................................................................................... 58
Reset the standard product defaults ............................................................................................................. 58
Update firmware through USB ........................................................................................................................... 58
Update firmware wirelessly ................................................................................................................................ 59
11 All-in-One Specifications
General device specifications............................................................................................................................. 60
4
Contents
Environmental specifications.............................................................................................................................. 60
Wireless specifications ....................................................................................................................................... 61
Range of wireless module............................................................................................................................. 61
Other specifications............................................................................................................................................ 62
12 Warranty and regulatory information
Warranty............................................................................................................................................................. 64
Regulatory notices.............................................................................................................................................. 64
U.S.A............................................................................................................................................................. 64
Federal Communications Commission notice......................................................................................... 64
Modifications ........................................................................................................................................... 64
Canada ......................................................................................................................................................... 64
European Union notices................................................................................................................................ 64
Products with 2.4-GHz wireless LAN devices............................................................................................... 65
France ..................................................................................................................................................... 65
Italy.......................................................................................................................................................... 65
Wireless LAN 802.11b devices ..................................................................................................................... 65
International .................................................................................................................................................. 65
Declaration of conformity .............................................................................................................................. 66
5
Introduction
1
Introduction
About this guide
This guide provides information that users and system administrators need to set up and maintain
the HP Handheld All-in-One.
The All-in-One briefly explained
The HP Handheld All-in-One lets you scan and print in almost any location in your environment. The
entire unit, including power source, attaches comfortably to your hand and arm so you can move
around while working. The All-in-One can also communicate wirelessly with a server to exchange
scan and print information.
Configuration and wireless options
Configuration options
There are two options for holding the All-in-One during use:
•
•
Hand mount
Handle accessory
Wireless connectivity
Wireless connectivity can be accomplished in two ways:
•
•
802.11b LAN wireless
Bluetooth
Instructions for using 802.11b wireless are included in this guide; instructions for using Bluetooth are
available online at www.hp.com/support/handheldsp400aio.
All-in-One components
The HP Handheld All-in-One with handmount is designed to be worn comfortably on the hand and
arm when performing scanning, printing, and package handling tasks. The HP Handheld All-in-One
with handle is designed to be used with either hand when performing scanning and printing tasks.
The All-in-One consists of the following key components:
•
A battery
○ Installed inside a forearm-mounted wrist case; or
○ Installed into the bottom of a handle accessory
•
The scanner printer device
○ Attached to a hand mount; or
○ Attached to a handle accessory
6
Introduction
(a) Hand mount components
1
Battery inside wrist case
2
Control panel
3
All-in-One
4
Hand mount
1
Finger strap
2
Rudder
3
Strap fasteners
4
Wrist strap
7
Introduction
(b) Handle components
1
Battery inside handle
2
Control panel
3
All-in-One
4
Auto/Manual switch
5
Trigger
6
Battery release
7
Lanyard
8
Introduction
(c) Control panel components
The All-in-One control panel displays several buttons and LED lights for operation and visual
feedback.
1
Error light (red)
5
Power button
2
Print cartridge light (orange)
6
Power light (green)
3
Battery light (orange)
7
Tail lights (green or red) on
back corners of All-in-One
4
Wireless light (blue)
8
CLEAR button
9
Safety information
2
Safety information
General safety
CAUTION:
• The HP Handheld All-in-One is meant for hand-held, hand-mounted or handle-mounted use
only. It is not intended or authorized for operation within 20 centimeters (8 inches) of the head
or torso.
• Do not submerge this device in water.
• If you experience discomfort, discontinue use of the All-in-One and notify your supervisor
immediately. If you experience persistent or recurring pain or discomfort that you think may be
related to using the All-in-One, you should promptly consult a qualified physician and, if
available, your company’s health and safety department.
LED safety
The scanning imager located on this device is classified as a Class 1 LED device according to
International Standard IEC 825-1 (EN60825-1). The following precautions are recommended:
CAUTION:
• If the unit requires service, contact an authorized HP service center.
• Do not attempt to make any adjustment to the LED imaging scanner.
• Avoid looking into the LED imaging scanner.
• Do not attempt to view the LED imaging scanner with any type of optical device.
Battery safety
CAUTION:
• There is a risk of explosion if the battery is replaced by an incorrect type.
• Use only the following HP batteries: product number CE199A or CE201A.
• When discarding old batteries, contact your local waste-disposal provider regarding local
restrictions on the disposal or recycling of batteries. For information about HP recycling
programs, go to www.hp.com/recycle.
• Only use Hewlett-Packard approved accessories and UL recognized battery packs and
chargers.
• To reduce the risk of fire or burns, do not disassemble, crush, or puncture a battery; short the
external contacts on a battery; or dispose of a battery in fire or water. Do not expose a battery
to temperatures above 60 °C (140 °F).
10
Set up the All-in-One
3
Set up the All-in-One
Install the battery cable – Hand mount only
Insert the battery cable into the bottom of the hand mount, as shown.
NOTE: The Handle battery cable is permanently wired.
Assemble the hand mount or handle accessory
Hand mount:
1. Align the hand mount with the All-in-One as shown.
2. Slide the hand mount until it clicks into place.
11
Set up the All-in-One
Handle:
1. Align the handle with the All-in-One as shown.
2. Slide the All-in-One until it clicks into place.
12
Set up the All-in-One
Install the print cartridge
1. Turn off the All-in-One by pressing and holding the green Power button for three seconds if it is
not already off.
IMPORTANT: Always turn off the All-in-One before installing a print cartridge.
2. Remove the protective tape from the print cartridge by pulling it straight out.
1
Metal contacts
2
Ink nozzles
IMPORTANT: Hold the print cartridge by its sides, as shown above. Do not touch the metal
contacts or the ink nozzles.
3. Push the side button to release the door, and swing the door open.
1
Door
13
Set up the All-in-One
4. Align the print cartridge with the drawing on the door, and then carefully seat the cartridge in
the door. The label on the print cartridge should face away from the door. The metal contacts
should face the All-in-One.
1
Metal contacts
2
Label
3
Door
4
Drawing
5. Close the door, ensuring it latches securely.
14
Set up the All-in-One
Install the battery and fit the wrist case – Hand
mount configuration
IMPORTANT: Remove all jewelry from your wrist and hand before fitting the All-in-One.
1. Insert a fresh battery as shown in the 3 figures below.
Extended life battery:
Standard battery:
15
Set up the All-in-One
2. Secure the flap to retain the battery.
3. Position the front strap behind your wrist.
4. Secure the arm straps.
1
Battery gauge
NOTE: The battery gauge should face upward and be visible through the cutout on top of the
battery wrist case.
CAUTION: Do not over-tighten the straps. Over-tightening can cause discomfort.
16
Set up the All-in-One
Fitting the hand mount
IMPORTANT: Remove all jewelry from your wrist and hand before fitting the All-in-One.
1. Loosen the finger strap by detaching the fastener ends and then rotating the buckles outward
so that the strap can slip freely through the buckles.
2. Center the rubberized portion of the finger strap between the buckles.
3. Loosen the wrist strap by releasing the fastener ends and pulling the straps through the
buckles.
4. Slide your hand through the wrist strap, palm away from the All-in-One.
5. Insert pointer and middle fingers under the finger strap with the rudder positioned between the
two fingers.
6. Slide the All-in-One onto your hand until the finger strap is at the base of your fingers, and the
wrist strap is at the wrist.
17
Set up the All-in-One
7. Tighten the finger strap by pulling straight up from the buckle until there is no movement
between the hand and the All-in-One and then secure the fastener ends to lock the finger strap
in place.
IMPORTANT: The finger strap must be tight enough to prevent motion between the fingers and
the All-in-One because under-tightening may lead to irritation. Do not over-tighten to the point that
numbness or discomfort results.
NOTE: To loosen the finger strap, release the fastener strap and rotate the buckle outwards until
it is at a 90-degree angle to the All-in-One, as shown in step #1. Then pull the strap with your
fingers until it is comfortable.
8. To tighten the wrist strap, bend the wrist upward while making a relaxed fist, and then pull the
strap until the All-in-One makes light contact with the knuckles. Light tension is sufficient.
CAUTION: Do not over-tighten the wrist strap. It should not create pressure on the knuckles.
18
Set up the All-in-One
Connect the battery cable
IMPORTANT: Use only the following HP batteries: product number CE199A or CE201A.
1. Align the arrow on the battery cable connector with the top of the battery case.
2. Push in to connect the battery cable to the battery.
Handle setup
Install battery in handle accessory – Handle configuration
1. Insert a fresh battery as shown.
19
Set up the All-in-One
2. Ensure battery clicks in securely.
Handheld use
1. Place hand through Lanyard and tighten slide on strap so secure and comfortable
2. Grip handle firmly, but comfortably
20
Set up the All-in-One
Hanging use
1. Connect handle to overhead mechanism by lanyard inserted at top of handle
Storage option
1. In between shifts, the handle may be stored as shown:
NOTE:
1 Ensure that the handle is stored in a location that it will not be bumped or dropped
2 The lanyard should always be secured before using the handle unit
21
Configure the All-in-One
4
Configure the All-in-One
Overview
The All-in-One is designed for use with a server-based application that sends print data in response
to scan data received from the All-in-One. The general process is as follows:
1. When turned on, the All-in-One attempts to register with the server using network and server
configuration parameters that are stored in the All-in-One.
2. The All-in-One queries the server for any updates (firmware or configuration, for example).
3. The All-in-One is ready to scan.
4. After scanning a bar code, the All-in-One sends the information contained in the bar code to
the server.
5. The server responds with print data.
6. When the All-in-One receives the print data, the All-in-One signals the user that it is ready to
print.
7. After printing (or timing out) the All-in-One is ready to scan again.
In order to perform this scan-print process, several steps must be taken to ensure that all of the
devices in the process can communicate with each other. These steps are as follows:
•
Implement the server application. Refer to the Scan Print Protocol document, available at
www.hp.com/support/handheldsp400aio.
•
•
•
Configure the All-in-One devices to communicate with the server application.
Design the print templates.
Configure the server application and All-in-One devices to receive wireless updates (optional).
Implement the server application
The communication between the server application and the All-in-One is implemented using the Allin-One Scan Print Protocol (SPP). SPP is an ASCII-based protocol that contains a number of
command and response pairs used to communicate with and configure the All-in-One.
A number of factors must be considered when designing the server application. The primary
considerations are the number of devices that will be communicating with the server, and the
desired response time of the server application.
Refer to the Communication Protocols document for a detailed explanation of the protocol that
needs to be implemented on the server. It is available at www.hp.com/support/handheldsp400aio. In
addition, a sample server application is available for download from this website.
22
Configure the All-in-One
Configure the All-in-One
HP sp400 Series Configuration Software is available for download at the All-in-One website
(www.hp.com/support/handheldsp400aio). This Windows®-based software is used to configure the
necessary device settings so that the All-in-One can communicate with the server application. The
settings that need to be configured fall into three categories:
•
•
•
Wireless settings: security type, ESSID and Encryption keys
Server settings: primary and alternate registration servers, file server, application name
Application settings: application name, print template
The HP sp400 Series Configuration Software connects to an All-in-One device using a USB cable.
The software allows the user to configure the above settings and perform diagnostic and
maintenance functions on the All-in-One.
Refer to the HP sp400 Series Configuration Software Users Guide for details on installing and using
this software. It is available at www.hp.com/support/handheldsp400aio. For brief instructions on
configuring the server, see “Configure the server.”
Design a custom print template
HP sp400 Series Template Design Software is available for download at the All-in-One website
(www.hp.com/support/handheldsp400aio). This Windows-based software is used to design a
custom print template for your particular needs. It allows the user to create templates that consist of
static text and graphics and also dynamic text fields. The design software merges all the text and
graphics into a single template which is stored on the device.
The HP sp400 Series Template Design Software connects to the All-in-One using a USB cable. The
software allows the user to design and download templates and to perform maintenance functions.
Refer to the HP sp400 Series Template Design Software Users Guide for details on installing and
using this application, available at www.hp.com/support/handheldsp400aio. For brief instructions on
designing print templates, see “Design print templates.”
23
Operate the All-in-One
5
Operate the All-in-One
Turn on the All-in-One
Press the green Power button and hold for one second.
•
All lights on the control panel and the tail lights will blink once, and the All-in-One will emit a
tone.
•
The green Power light will continue to blink until the All-in-One completes its initialization
phase.
•
The blue Wireless light will blink until the All-in-One establishes wireless connectivity. When
connected, the All-in-One will emit a Lo-Hi tone.
The All-in-One is ready for use when the green Power light and the blue Wireless light stop blinking
and remain solid.
24
Operate the All-in-One
Scan
Scan instructions – Hand mount configuration
The All-in-One can scan most one-dimensional and two-dimensional bar code symbologies. See
“All-in-One Specifications” for a complete list.
1. Aim the green light bar at the bar code.
2. Hold the All-in-One 6 - 9 inches from the bar code.
3. Hold the All-in-One at a slight angle (approximately 5 degrees) to the scan surface.
NOTE: Hold steady for best results.
When the scan is complete, the imager light will turn off, and the All-in-One will emit a Hi tone.
When the All-in-One is ready to print, it will display green tail lights and emit a Hi tone.
25
Operate the All-in-One
NOTE: There are two ways to clear the bar code or symbol and prepare the All-in-One to scan again:
•
Press the yellow CLEAR button. The red tail lights will flash once and the All-in-One will emit a
tone.
•
Wait for the All-in-One to time out and erase the scan from the memory. The All-in-One will
emit a Hi-Lo tone and the red tail lights will flash once.
Scan instructions – Handle configuration
The All-in-One can scan most one-dimensional and two-dimensional bar code symbologies. See
“All-in-One Specifications” for a complete list.
1. Choose either Auto or Manual mode by selecting the switch on the back of unit.
NOTE: If in Manual mode the trigger on the front of the handle must be used to turn on the
scanner
2. Aim the green light bar at the bar code. If in manual mode the trigger must be held down.
3. Hold the All-in-One 6 - 9 inches from the bar code.
4. Hold the All-in-One at a slight angle (approximately 5 degrees) to the scan surface.
NOTE: Hold steady for best results.
26
Operate the All-in-One
When the scan is complete, the imager light will turn off, and the All-in-One will emit a Hi tone.
When the All-in-One is ready to print, it will display green tail lights and emit a Hi tone.
NOTE: There are two ways to clear the bar code or symbol and prepare the All-in-One to scan
again:
•
Press the yellow CLEAR button. The red tail lights will flash once and the All-inOne will emit a tone.
•
Wait for the All-in-One to time out and erase the scan from the memory. The All-inOne will emit a Hi-Lo tone and the red tail lights will flash once.
Scanning tips
•
The All-in-One's scanner is similar to a digital camera in that it takes digital pictures of a bar
code. Like a digital camera, the scanner should be held as still as possible when reading a bar
code.
•
•
•
The green light bar should be approximately centered on the bar code.
•
Reading bar codes straight on is appropriate in many cases, but the reflected light can interfere
with reading. Holding the All-in-one at an angle of about 5 degrees to the bar code may give
better results.
•
The All-in-One reads bar codes in an omnidirectional manner. This means the All-in-One does
not need to be pointed in the same direction as the bar code.
The green light bar should cover approximately 3/4 of a wide linear bar code.
The All-in-One is capable of reading bar codes at a distance of from 2 - 12 inches, but 6 - 9
inches is the ideal range. Actual reading distances may vary depending on the dimensions of
the bar code.
The green light bar should be approximately centered
on the bar code and cover approximately 3/4 of a
wide bar code
The All-in-One reads bar codes in an omnidirectional
manner
27
Operate the All-in-One
Print
Print instructions
1. Locate a clean, flat surface near the bar code for printing.
2. Place the nose of the All-in-One against the surface. The All-in-One should rest at an angle of
about 7 degrees from vertical.
3. Move the All-in-One straight across the surface.
4. When the print is finished, the green light will turn off and the All-in-One will emit a Hi tone.
CAUTION: Maintain a relaxed wrist and hand posture and use low force when printing.
Printing tips
IMPORTANT:
•
Keep the printer wheel continuously in contact with the print surface while printing.
1
Print wheel
•
•
Hold the All-in-One so that the angle of the device to the surface is approximately 7 degrees.
•
Do not rotate your wrist. Rotating your wrist while printing can cause skipping or incomplete
prints.
Do not push hard on the surface; light pressure will result in better prints, especially with soft
packages.
28
Operate the All-in-One
•
If you perform a partial or incomplete print, the All-in-One will time out, emit a Hi-Lo tone, and
the red tail lights will flash once.
Clear print data
If you find that you have an incomplete print or do not wish to print, two options are available:
•
Press the yellow CLEAR button on the control panel, then scan and print again. The All-in-One
will emit a single mid-tone note and the green tail lights will turn off after the CLEAR button is
pressed.
•
Wait for the All-in-One to time out and erase the scan from the memory. The All-in-One will
emit a Hi-Lo tone and the red tail lights will flash once, letting you know you can scan and print
again.
29
Operate the All-in-One
Turn off the All-in-One
To turn off the All-in-One, press and hold the green Power button for three seconds.
IMPORTANT: Turn off the All-in-One before disconnecting the battery cable.
Remove the All-in-One and wrist case – Hand
mount configuration
1. After turning off the All-in-One, grasp the battery cable connector and pull straight out.
IMPORTANT: Do not pull on the battery cable; pull on the battery cable connector that is plugged
into the battery.
2. Release the fastener ends of the finger strap.
3. Loosen the finger strap by rotating the front buckle (finger strap buckle) outward about 90
degrees, and then pulling the strap free through the buckles with your fingers. Repeat on the
buckle on the other side until the All-in-One is loose enough to easily slide your fingers out.
4. Loosen the wrist strap until the hand can slide out freely.
5. Slide the hand and fingers backwards out of the All-in-One.
6. Release and loosen the wrist case straps and slide the wrist case off the arm.
30
Operate the All-in-One
Remove the battery – Handle configuration
NOTE: Normally, there is no need to remove the All-in-One from the handle
1. After turning off the All-in-One, press up on the release on the back of the handle and grasp
the battery
2. Remove battery by pulling straight out
.
3. See Remove the All-in-One from handle accessory if you need to take the unit out.
31
Maximize print quality
6
Maximize print quality
For information about solving print problems, see "Problems printing."
CAUTION: HP ink is not certified for application to people or animals. Do not intentionally print on
any part of a person or animal.
CAUTION: Do not print on food. The ink used in the All-in-One is not approved for consumption.
HP recommends testing the printed images for readability in your environment and on your material.
Improving lighting conditions, optimizing font size, increasing the heat and air flow, reducing the
humidity of the room, and choosing opaque, light-colored materials can all help improve readability
of the printed image.
Materials and technique
For best results, do the following when printing:
•
•
•
Locate a clean, flat surface near the bar code to print on.
•
•
•
Keep the printer wheel continuously in contact with the print surface while printing.
Hold the All-in-One so that the angle of the device to the surface is approximately 7 degrees.
Pull the All-in-One in a straight line until the print is complete; do not your rotate wrist or the Allin-One during the print.
Maintain a relaxed wrist and hand posture and use low force when printing.
Maintain a constant speed when printing.
To achieve the best possible readability, consider the following:
•
Magenta prints are easier to see than black prints on tan-colored surfaces like cardboard
boxes.
•
•
Prints on opaque white material show up best.
Prints on dark surfaces are not very visible, especially if the surfaces are similar in color.
NOTE: Prints on porous materials like cardboard and paper dry instantly, but prints on non-porous
materials can take a few moments to dry.
32
Ensure Optimal Comfort
7
Ensure Optimal Comfort
Ergonomic recommendations – General
For optimal results and comfort, follow these ergonomic recommendations:
•
If you experience discomfort, discontinue use of the All-in-One and notify your supervisor
immediately. If you experience persistent or recurring pain or discomfort that you think may be
related to using the All-in-One, you should promptly consult a qualified physician and, if
available, your company’s health and safety department.
•
Select a comfortable print location:
○ Print at heights between elbow and shoulder level whenever possible.
○ When printing at heights at or below elbow level, printing horizontally is recommended (on
the top of the package, for example).
○ When printing at heights above elbow level, printing vertically is recommended (on the side
of the package, facing you, for example).
○ When printing at heights lower than waist level, bending at the knees (not at the waist) is
recommended.
○ To avoid extended reaches, slide packages close to you before scanning and printing.
•
To ensure good quality prints on different types of packages and to ensure comfort, use light
pressure to maintain contact with the package when printing. Applying more force will not
improve print quality.
•
•
When handling boxes, lift with both hands and use good lifting techniques.
Change your posture during the day by varying your tasks:
○ If your job requires standing for long periods, then sit during breaks.
○ If your job requires standing in one position, place one foot on a box or a bar to shift your
posture.
○ If your job requires standing in one position, use an anti-fatigue mat to improve comfort.
○ If your job requires you to walk, use cushioned insoles in your shoes to improve comfort.
Ergonomic recommendations – Hand mount
specific
For optimal results and comfort, follow these ergonomic recommendations:
•
The All-in-One is designed for scan and print applications. It is not recommended to be worn
when performing keyboarding or other office-related tasks.
•
Adjust the All-in-One finger strap so it is snug, but not too tight. The wrist strap should have
light tension to keep the device against the knuckles without pressure.
•
•
Maintain a relaxed, neutral posture while using the All-in-One. Avoid making a tight fist.
•
Make a light fist when printing to keep the fingers out of the way and help stabilize the hand
around the rudder and finger strap.
Minimize bending the wrist to position the All-in-One. Position hand in a light, relaxed fist when
using the All-in-One.
33
Ensure Optimal Comfort
•
The All-in-One can be worn on the right or left hand and arm. You may alternate wearing the
All-in-One on the right and left hand and arm.
•
If gloves are worn while using the All-in-one, ensure they fit properly. The gloves should
conform to your fingers and not significantly bunch under the finger strap. The finger length of
the gloves should be as long as your fingers so the glove webspace does not force the All-inone forward.
Ergonomic recommendations – Handle specific
For optimal results and comfort, follow these ergonomic recommendations:
•
Adjust the All-in-One lanyard so it is snug, but not too tight. The lanyard should be secure
enough to prevent the handle from dropping to the floor.
•
Maintain a relaxed, neutral posture while using the All-in-One. Avoid gripping the handle too
tightly
•
•
Minimize bending the wrist to position the All-in-One.
•
If gloves are worn while using the All-in-one, ensure they fit properly. The gloves should
conform to your fingers and the finger length of the gloves should be as long as your fingers.
The All-in-One can be used with the right or left hand. You may alternate using the All-in-One
between the right and left hand.
34
Maintain the All-in-One
8
Maintain the All-in-One
Order supplies and accessories
Use the information in this section to order replacement print cartridges and other supplies. The Allin-One is designed to enable easy, in-the-field replacement of heavily-used components.
Table 8-1 Supplies
Item
Description
HP part number
HP Handheld 400 Series Finger Strap, 25 Pk
Field-replaceable front straps
CE196A
HP Handheld 400 Series Wrist Strap, 25 Pk
Field-replaceable wrist straps
CE197A
HP Handheld 400 Series Hand Mount
Allows hands free use of HP sp400 AllCE192A
in-One
HP Handheld 400 Series Extended Life Battery
Extra long life wrist-mounted battery
CE199A
HP Handheld 400 Series Standard Life Battery
Standard life wrist-mounted battery
CE201A
HP Handheld 400 Series Extended Life Battery
Wrist Case
Wrist case for extended life battery
CE200A
HP Handheld 400 Series Standard Life Battery
Wrist Case
Wrist case for standard life battery
CE202A
HP Handheld 400 Series Battery Cable
Connects battery to hand mount
CE203A
Charger for HP Handheld 400 Series Battery
5 bay smart battery charger
CDE11403053
HP Handheld 400 Series Extended Battery
Adapter
Fits extended life battery to battery
charger
CG021A
HP Handheld 400 Series Cartridge Door
Replacement print cartridge door
CE204A
HP Handheld 400 Series 5 Bay Cradle
5 bay HP sp400 storage unit
CE194A
HP Handheld 400 Series Rear Buckle, 20 Pk
Replacement rear buckle
CE205A
HP Magenta Print Cartridges
HP Handheld sp400 Series Handle
CC602A
Handle accessory for use with HP
sp400 All-in-One
CE195A
HP also offers extended warranty and service for the All-in-One.
Condition the battery
For best results, condition new batteries before they are used. To condition batteries, follow the
instructions that came with your battery charger.
35
Maintain the All-in-One
Clean the All-in-One
CAUTION: Unplug the battery from the All-in-One before doing any cleaning procedure.
CAUTION: Never spray or douse the All-in-One with any liquid. Use only dampened wipes, cloths,
or swabs to clean the All-in-One.
IMPORTANT: Use only materials from the list below to clean the All-in-One (see "Cleaning
materials," below). Other solvents or cleaners may damage the plastic, paint, or the adhesives
used in the All-in-One.
Cleaning materials
The following materials may be used to clean the All-in-One:
•
•
•
•
•
Cotton cloths
Cotton swabs
Baby wipes
Deionized water
Eyeglass cleaning wipes (anti-static and anti-fog types only)
Clean outside surfaces
Use a cotton cloth dampened with water to clean the outside surfaces of the All-in-One.
•
To remove difficult material, such as gummy adhesive or built-up grime, use a cotton cloth
dampened with deionized water or use a baby wipe, and dry with a dry cotton cloth.
•
To clean hard-to-reach places, such as the cooling ribs of the case, use cotton swabs
dampened with deionized water.
Clean the imager window
Use eyeglass cleaning wipes to clean the imager window. Eyeglass cleaning wipes provide the best
anti-glare cleaning solution.
○ Be sure to wipe away any build-up from the center area of the imager window.
○ Cotton swabs may be used to lightly remove smudges from the window edges.
NOTE: If eyeglass cleaning wipes are not available, use a cotton swab dampened with deionized
water to clean the imager window.
36
Maintain the All-in-One
Clean the wrist case and hand mount
Use a baby wipe or a cotton cloth dampened with deionized water to scrub all areas of the
hand mount, straps, and wrist case that have come into direct contact with the skin.
Clean the door
To clean the opening in the door, do the following:
IMPORTANT: Do not touch the metal contacts or the ink nozzles.
1. Remove the print cartridge from the door.
2. Use a dry cotton cloth to remove the ink-soaked fibers from the opening in the door.
3. If the ink is too dry to easily remove the fibers, use a cotton swab dampened with deionized
water to break down the ink buildup.
Charge the battery
To charge batteries, follow the instructions that came with your battery charger.
Remove the All-in-One from hand mount
accessory
1. Squeeze both of the release buttons on the back of the hand mount.
2. Slide the hand mount backward, off of the All-in-One.
1
Release button
(one on each side)
37
Maintain the All-in-One
Remove the All-in-One from handle accessory
1
2
1. Squeeze both of the release buttons on the back of the handle.
2. Slide the All-in-One forward out of the handle.
NOTE: It may help to press the All-in-One from the back and then pull the unit the rest of the way
from the front.
NOTE: Pushing the All-In-One out too forcefully can cause it to fall out of the handle and possibly
becoming damaged.
38
Maintain the All-in-One
Replace the battery cable – Hand mount
configuration
1. Remove the hand mount from the All-in-One. See "Remove the All-in-One from hand mount
accessory,” above.
2. Remove the battery cable by lifting up.
3. Insert a new battery cable.
4. Reinstall the hand mount.
Replace the finger strap – Hand mount
configuration
1. Remove the hand mount. See "Remove the All-in-One from hand mount accessory."
2. Remove the finger strap by lifting the old buckles out of the notches.
1
Buckle
2
Strap
3. Insert a new finger strap by snapping each buckle into its notch.
4. Reinstall the hand mount.
39
Maintain the All-in-One
Replace the wrist strap – Hand mount
configuration
NOTE: This procedure can be done without removing the hand mount.
1. Release the wrist strap fastener ends.
2. Pull the old wrist strap through the buckle.
3. Insert the new wrist strap.
3
Wrist strap
4
Buckle
IMPORTANT: Make sure the fastener strap is on the outside of the wrist strap, away from the
skin.
40
Maintain the All-in-One
Replace the rear buckle – Hand mount
configuration
NOTE: This procedure can be done without removing the hand mount.
1. Grasp the buckle firmly and push it toward the gel pad until it releases.
2. Position the new buckle so it is angled as illustrated and press it into place.
1
2
NOTE: The circled illustration, below, shows the buckle installed incorrectly. Note the angle of the
buckle to the All-in-One.
41
Maintain the All-in-One
Replace the door
1. Remove the old door by opening the door 90 degrees and then pulling away to disengage the
hinge.
2. Replace with a new door by aligning the hinge and pressing the hinge onto the metal pin.
Recycle
HP encourages customers to recycle used electronic hardware, HP original cartridges, and
rechargeable batteries. For more information about HP recycling programs, go to
www.hp.com/recycle.
Locate the serial number
The All-in-One serial number is located on the product regulatory and identification label, on the
bottom of the All-in-One. Remove the hand mount to view the label on the bottom of the metal case.
The battery serial number is located on the product regulatory and identification label, on the bottom
surface of the battery.
The battery charger serial number is located in the upper-right portion of the product regulatory and
identification label, on the bottom of the battery charger.
42
Troubleshoot Problems and Get Support
9
Troubleshoot Problems and Get Support
Problems powering on the All-in-One
Figure 9-1 Problems powering on the AiO
Problem
Indicator
Cause
Solution
The All-in-One will not
power on
The green power button was not
pushed.
Press the green power button.
The battery is depleted.
Recharge the battery.
Green power light
doesn’t stay on
Replace the battery.
The battery is not plugged in
correctly.
Ensure that the arrow on the cable is aligned with the
arrow on the battery
Ensure that the battery cable is pushed all the way into the
battery
The AiO is not seated properly onto
the hand mount.
Ensure that the AiO is fully pushed onto the hand mount.
Check that the USB cover is not interfering with the
seating of the hand mount.
The battery cable needs to be
replaced.
Replace the battery cable.
The hand mount needs to be
replaced.
Replace the hand mount.
Problems connecting the All-in-One to wireless
network
Figure 9-2 Problems connecting the AiO to a wireless network
Problem
Indicator
Cause
Solution
The All-in-One is not
associating with the
access point
The access point may not be
powered on.
Verify that the access point is on.
The AiO may be out of range of the
access point.
Move closer to the access point.
Fast blinking blue light
Slow blinking green
power light
The network settings may not be
compatible between the AiO and
access point.
Access points may need to be relocated or added.
Verify the connectivity settings between the AiO and the
access point.
Ensure that the DHCP server is active.
Ensure that the device is on the same subnet as the
access point.
Slow server response resulting from
Move closer to the access point.
43
Troubleshoot Problems and Get Support
Figure 9-2 Problems connecting the AiO to a wireless network
Problem
Indicator
The All-in-One is not
communicating with the
application server
Cause
Solution
a weak signal between the AiO and
the access point.
Access points may need to be relocated or added.
The network is overloaded
Reduce number of AiOs or other traffic on the network or
expand the network’s capabilities.
The network settings may not be
compatible with the AiO.
Slow blinking blue light; solid green
power light (during initial start up this
light may be blinking slow)
Verify that the AiO is set for the appropriate server
address.
Ensure that the server is on the same subnet as the
access point.
Ensure that the correct UDP port is assigned.
The server is not responding.
Slow blinking blue light; solid green
power light (during initial start up this
light may be blinking slow)
Verify that the server’s power is on and that it is available.
The device is performing a firmware
update.
Slow blinking blue light; slow blinking
green power light; fast blinking green
tail lights
Wait for the firmware update to complete. See “Update
firmware wirelessly” in the Advanced use section
Verify that the firewall setting is turned off or allows device
traffic.
Problems scanning
Figure 9-3 Problems scanning
Problem
Cause
Solution
The All-in-One will not
scan
The red imager light
does not illuminate.
The AiO may not be powered on
The green power light is not
illuminated.
Check that the AiO is powered on.
If the green power light does not stay illuminated, refer to
the “Problems powering on” section
The AiO may not be connected to
the network
The blue wireless light is flashing.
Check that the AiO is connected to the network.
If the blue wireless light does not stay illuminated, refer to
the “Problems connecting to wireless network” section
The AiO’s ink cartridge door may be
open
Red tail lights and red warning light
blinking slowly; solid orange ink
cartridge light
Close the door.
The ink cartridge is missing or bad.
Red tail lights and red warning light
blinking quickly; solid orange ink
cartridge light
The AiO may not be seeing
movement.
The All-in-One takes a
long time to acquire the
bar code.
The imager window is obstructed.
Close the door and power cycle the AiO.
Turn off the device and replace the door.
Turn off the AiO open the ink cartridge door, and then
reseat the ink cartridge.
Turn off the AiO and install a new ink cartridge.
Move the AiO so that it sees movement.
Increase the lighting in the work area.
Clean the imager window and inspect for scratches or
cracks near the center of the window. See “Clean the
imager window” in the Maintenance section.
44
Troubleshoot Problems and Get Support
Figure 9-3 Problems scanning
Problem
Cause
Solution
The red imager light
illuminates but the AiO
takes more than a few
seconds to scan.
The AiO may be positioned too far
from target.
Ensure that the AiO is aimed directly at the target.
Scans are not
successful.
Invalid target or barcode
Red scanning light will not turn off
immediately after scan
Ensure that the AiO is 2-12” away from the target.
Scan a different barcode or target to verify usage
Ensure that the AiO is configured to read this barcode or
target
The barcode or target is damaged or
unreadable.
If available, scan another barcode or target.
Poor scanning technique.
Make sure you are following the instructions in "Scan,"
and "Scan instructions – Handle configuration."
Damaged or poor print template
quality.
If available, scan an alternate bar code.
The target surface is highly reflective
(for example, tape or lamination).
It may be necessary to tilt the All-in-One further to prevent
unwanted reflection.
Unrecognized bar code symbology.
It may be necessary to scan the Standard Product Default
Settings bar code in “Reset the standard product
defaults” in the “Advanced use” section.
NOTE: It may be necessary to scan the Standard Product
Default Settings bar code in “Reset the standard product
defaults” in the “Advanced use” section.
Problems printing
Figure 9-4 Problems printing
Problem
Cause
The All-in-One does not
print
The AiO did not scan a valid barcode Re-scan the barcode.
or target.
Ensure that the AiO is configured correctly. Refer to the
- If configured for this sequence ‘Problems scanning’ section
Print data from the server was not
received.
Green tail lights did not turn on to
indicate ready-to-print
Solution
Ensure wireless connectivity to the server. Refer to the
‘Problems connecting to wireless network’ section
After a pause, red tail light flashes once with one beep,
then slow blue blink immediately follows
Verify that there should be a response from the server. It
may be a no print message.
Ensure that valid data was received from server.
Red tail lights flash twice
The print template is Invalid or
missing.
Red tail lights blink slowly twice2x.
The AiO emits 3-4; low-high-mid
tones 3x or 4x
The AiO timed out before the print
was completed.
Ensure that the print templates are loaded correctly.
Reload the print templates.
If a firmware upgrade was recently attempted, verify that
the firmware upgrade completed
Scan again and complete the print more quickly, before
the time out is reached.
45
Troubleshoot Problems and Get Support
Figure 9-4 Problems printing
Problem
Cause
Solution
Red tail lights flash once and the AiO Reconfigure the time out to provide more time for printing
emits a hi-low tone
The printer wheel on the AiO was not Ensure that the wheel is in contact with the print surface
in contact with the print surface for
and rolls for the duration of print.
the duration of the print.
The ink cartridge is empty
Fast blinking red warning and tail
lights; fast blinking orange ink light
Replace the ink cartridge.
The door may be open.
Red tail lights and red warning light
blinking slowly; solid orange ink
cartridge light
Close the door.
There may be poor electrical contact
between the ink cartridge and the
AiO.
Red tail lights and red warning light
blinking quickly; solid orange ink
cartridge light
The ink cartridge is bad
Red tail lights and red warning light
blinking quickly; solid orange ink
cartridge light
Close the door and power cycle the AiO.
Turn off the device and replace the door.
Turn off the AiO, remove the ink cartridge and wipe the ink
cartridge contact pads.
Turn off the AiO, remove the ink cartridge and wipe the
AiO contact pads.
Turn off the AiO and replace the door.
Turn off the AiO and replace ink cartridge.
Problems printing correctly
Figure 9-5 Problems printing correctly
Problem
Cause
Solution
Prints are faded or
streaked.
The print cartridge is out of ink.
Replace the ink cartridge.
The print cartridge is dried out due to
age.
Replace the ink cartridge.
There is a faulty connection between Replace the ink cartridge.
the print cartridge and the All-in-One.
The printed image skips
(e.g., there are gaps
between parts of the
print).
AiO is moved over heavily
corrugated cardboard
Locate as smooth a printing location as possible.
Poor printing technique.
Make sure you are following the instructions in "Scan" and
"Printing Tips."
There are blank lines in
the printed image.
The opening in the door is partially
blocked.
See “Clean the door.”
The ink smears while
printing.
Wheels on the door are broken or
missing.
Replace the door. See "Replace the door."
Ink drips are present on
the printed surface.
Clean the door. See “Clean the door.”
Ink and fibers may be accumulating
on the print cartridge and/or the door.
If cleaning the door does not solve the problem, replace
the cartridge with a new one.
46
Troubleshoot Problems and Get Support
Figure 9-5 Problems printing correctly
Problem
Cause
Solution
The print smears after
printing.
The ink is not dry.
• Allow more time for the ink to dry.
• Try to avoid printing on surfaces that take longer to
dry, such as plastic sleeves, tape, etc.
•
•
•
•
•
Print rubs off
Increase air flow in the area.
Make sure the printed surface is dry.
Increase the temperature in the area.
Lower the humidity of the area.
Change to Fast Dry template.
The ink is not dry due to stacking or
contact with other objects.
Allow the ink to dry before placing printed materials on top
of or next to each other.
The printing was done on a nonporous material.
Allow the ink to dry before placing the printed area in
contact with other objects.
47
Troubleshoot Problems and Get Support
Errors and warning conditions
General errors and warning conditions
Table 9-2 Critical error
Visual feedback
Solid, red Error light
Audio
Cause
Solution
Hi tone, 3x
Critical error
All-in-One needs to be serviced.
Solid, red tail lights
Note: Other lights may be
on (blinking or solid) also.
Table 9-3 Update failure (only applicable following wireless update attempt)*
Visual feedback
Red Error light, fast blink,
20x
Audio
Cause
Solution
Hi tone
Wireless update
failure (following
wireless update
attempt)
Attempt update again.
Red tail lights, fast blink,
20x
*This will be seen the next time the All-in-One is turned on after a wireless update attempt. The green Power light will also
blink.
48
Troubleshoot Problems and Get Support
Battery errors and warning conditions
Table 9-4 Battery: Low
Visual feedback
Slow blinking, orange
Battery light
Audio
Cause
Solution
None
Battery low
(configurable %)
Warning only.
CAUTION: As the battery approaches very low,
the light will blink faster and the Hi tone will
sound every minute.
Table 9-5 Battery: Very low
Visual feedback
Fast blinking, orange
Battery light
Audio
Cause
Solution
Hi tone
Battery very low
(configurable %)
Replace battery soon.
CAUTION: As the battery approaches empty,
the All-in-One may shut down without warning.
Table 9-6 Battery: Empty, shutting down
Visual feedback
Fast-blinking, red Error
light
Audio
Cause
Solution
Hi tone
Empty, shutting down Replace battery.
NOTE: The All-in-One may shut down without
providing this feedback.
Solid, orange Battery light
Fast-blinking, red tail lights
Table 9-7 Battery: Battery level unknown
Visual feedback
Solid orange
Battery light
Audio
Cause
Solution
None
Battery level
unknown
Warning only..
49
Troubleshoot Problems and Get Support
Print cartridge errors and warning conditions
Table 9-8 Print Cartridge: Bad installation
Visual feedback
Fast blinking, red
Error light
Audio
Cause
Solution
Hi-Lo tone,
2x
Print cartridge error:
• bad installation
• missing cartridge
• bad cartridge
Ensure that the print cartridge is seated
correctly.
Ensure that the door is closed.
If problem persists, replace the print cartridge.
Solid, orange
Print Cartridge light
Fast blinking, red tail
lights
Table 9-9 Print cartridge opening or closing error
Visual feedback
Fast-blinking, red
Error light
Audio
Cause
Solution
Hi-Lo tone,
5x
Error occurred in the
opening or closing of
the print cartridge
Press the CLEAR button.
If the problem persists, turn the All-in-One off
and then on again.
Solid, orange
Print Cartridge light
Fast-blinking, red tail lights
Table 9-10 Print Cartridge: Door ajar
Visual feedback
Slow blinking, red
Error light
Audio
Cause
Solution
Mid tone,
3x
Door ajar or
damaged
Ensure door is closed.
Door damaged
Replace door. See “Replace the door.”
Solid, orange
Print Cartridge light
Slow blinking, red
tail lights
Table 9-11 Print Cartridge: Ink level unknown
Visual feedback
Solid, orange
Print Cartridge light
Audio
Cause
Solution
None
Ink level unknown
Warning only.
50
Troubleshoot Problems and Get Support
Table 9-12 Print Cartridge: Ink low
Visual feedback
Slow blinking, orange
Print Cartridge light
Audio
Cause
Solution
None
Ink low
(configurable %)
Warning only.
Table 9-13 Print Cartridge: Ink very low
Visual feedback
Fast blinking, orange
Print Cartridge light
Audio
Cause
Solution
Hi tone
Ink very low
(configurable %)
Replace print cartridge soon.
NOTE: As long as printing continues, the
audio tone will be heard at approximately 1
minute or intervals.
Table 9-14 Print Cartridge: Ink cutoff/out reached
Visual feedback
Fast blinking, red
Error light
Audio
Cause
Solution
Hi tone, 3x
Ink cutoff/out reached
(configurable %)
Replace print cartridge.
Fast blinking, orange
Print Cartridge light
Fast blinking, red tail lights
Scanning/Wireless errors and warning conditions
Table 9-15 Scanning/Wireless: Wireless network unavailable
Visual feedback
Fast blinking, blue
Wireless light
Slow blinking green Power
light
Audio
Cause
Solution
Hi-Lo tone
The wireless network
is unavailable.
Verify that the network settings on the All-inOne match the settings of your wireless
network access point. These settings must
include the ESSID, security mode (WPAPSK, WEP or none) and network key.
If the problem persists, contact your network
administrator.
51
Troubleshoot Problems and Get Support
Table 9-16 Scanning/Wireless: Application server unavailable
Visual feedback
Slow blinking, blue
Wireless light
Audio
Cause
Solution
Hi-Lo tone
The All-in-One is
configured
incorrectly.
Verify that your network has a DHCP server.
If the network does not have a DHCP server,
you must configure the All-in-One for static
IP addressing (see “Set up the wireless
network” in the “Advanced use” section).
Verify that the server addresses are set up
correctly (see “Configure the server” in the
“Advanced use” section).
If problem persists, contact your network
administrator.
The application
server is unavailable.
Verify that the application server is running. If
the problem persists, contact your network
administrator.
Table 9-17 Scanning/Wireless: Server error (immediately following successful scan)
Visual feedback
Red tail lights, blink 1x
Audio
Cause
Solution
Hi-Lo tone
Server error
Try to scan again.
Table 9-18 Scanning/Wireless: Invalid bar code or bad data
Visual feedback
Red tail lights, blinking, 2x
Audio
Cause
Solution
Hi-Lo tone
Invalid bar code or
bad data was sent to
the server.
1 Check the bar code.
2 Try to scan again.
3 If the problem persists, contact your
supervisor.
Table 9-19 Scanning/Wireless: Incomplete print (after ‘Ready to Print’*)
Visual feedback
Red tail lights, blink 1x
Audio
Cause
Solution
Hi-Lo tone
Rescan and print.
Incomplete print
timeout
(configurable timeout)
* ‘Ready to print’ is indicated by green tail lights and a Hi tone.
Table 9-20 No print template
Visual feedback
Red tail lights, slow blink,
2x
Audio
Cause
Solution
Lo-Hi-Mid
tone, 3x or
4x
There is no print
template loaded on
the All-in-One.
Load the desired print template.
52
Troubleshoot Problems and Get Support
Support services
If you have a problem, follow these steps:
1. Check the documentation that came with the product.
2. Visit the HP online support Web site at www.hp.com/support/handheldsp400aio. Online
support is available to all HP customers. It is the fastest source for up-to-date device
information and assistance and includes the following features:
○ Access to qualified online support specialists
○ Valuable product and troubleshooting information for common problems
○ Current product notices, advisories
3. Call HP support: 1-800-HP Invent (800-474-6836). Support options and availability vary by
device, country/region, and language.
53
Advanced Use
10 Advanced Use
System requirements
•
•
•
All-in-One device and accessories
Wireless network and server application
Computer with the following installed on it:
○
○
○
○
•
Windows® XP and Service Pack 2
Microsoft® .NET Framework 2.0 or later
HP sp400 Series Configuration Software
HP sp400 Series Template Design Software
USB-compliant cable that does not exceed three meters (10 feet) in length, with a type B 5-pin
plug at one end to connect to the All-in-One’s port
Figure 10-6 Both ends of the USB compliant cable
NOTE: If you are connected to the internet when you install the software and you do not have
.NET Framework installed on your computer, .NET Framework will automatically be downloaded
and installed.
Download and install software
Two software programs are required to configure the All-in-One:
•
•
HP sp400 Series Configuration Software
HP sp400 Series Template Design Software
To download this software, visit www.hp.com/support/handheldsp400aio.
54
Advanced Use
Set up the wireless network
Bluetooth
For instructions for using Bluetooth wireless, see the Bluetooth configuration instructions at
www.hp.com/support/handheldsp400aio.
802.11b wireless
1. Connect either the handmount with battery or handle with installed battery to the All-in-One.
2. Connect the All-in-One to a computer with a USB cable.
Figure 10-7 Connecting the All-in-One to a computer
3. Turn on the All-in-One.
4. Use the HP sp400 Series Configuration Software to configure the 802.11b settings. See
"Download and install software."
5. Select the Network tab and configure the All-in-One to connect to your 802.11 network.
6. Select the Server tab and configure the All-in-One to connect to your application server.
NOTE: See the HP sp400 Series Configuration Software Users Guide for more detailed
instructions and help. It is available at www.hp.com/support/handheldsp400aio.
Configure the server
1. Select the Server tab.
NOTE: All IP addresses must be entered using IP address dot notation.
2. Enter the Primary Server IP address.
3. Enter the Primary Server Port.
4. Enter the Alternate Server IP address.
5. Enter the Alternate Server Port.
6. Enter the File Server IP address.
7. Enter the File Server Port.
55
Advanced Use
Design print templates
Use the HP sp400 Series Template Design Software to design print templates for the All-in-One.
1. Download the HP sp400 Series Template Design Software at
www.hp.com/support/handheldsp400aio.
2. Use the software to lay out dynamic data fields and static data and images for your template.
IMPORTANT: The field name given to a dynamic text field and the field width must match the field
name and width used by the server. The print template name must also match the print template
name used by the server application.
3. Select a dry time print mode setting for your template.
4. Perform a print test if desired.
5. Save the template on your All-in-One.
NOTE: For more detailed instructions and help, see the HP sp400 Series Template Design
Software Users Guide. It is available at www.hp.com/support/handheldsp400aio.
Use the default print templates
Four default print templates are already saved on the All-in-One.
There are three non-wireless templates for use in demonstration mode (where a wireless
connection is not used):
○ System information print template
○ sp400 Demo print template
○ Pen Diagnostic print template
There is one wireless print template (for use with a wireless connection):
○ sp400 Default (wireless) print template
Figure 10-8 System information print
template
Figure 10-9 sp400 Demo print template
Figure 10-10 Pen Diagnostic print template
Figure 10-11 sp400 Default (wireless) print
template
NOTE: For a description of the information that is contained in the default print templates, see the
HP sp400 Series Template Design Software Users Guide. It is available at
www.hp.com/support/handheldsp400aio.
To turn the All-in-One on in demonstration mode, press the CLEAR button while pressing the
Power button.
56
Advanced Use
To move between these print templates on the All-in-One while in demonstration mode, press the
CLEAR button. You will hear one Hi tone when the system information template is selected, two
when the generic sp400 template is selected, and three when the nozzle health diagnostic template
is selected, and so on.
The All-in-One can save up to nine demonstration print templates if there is enough memory on the
All-in-One.
The system information print template and the nozzle health diagnostic print template contain
information that is useful to service technicians when problems arise.
To restore the default templates, follow these steps:
1. Click PrinterÆRestore to Factory Default Templates.
2. Turn the All-in-One off and then turn it back on.
57
Advanced Use
Calibrate the scanner
The bar code scanning device in the All-in-One is a model 5180 imager that was manufactured by
Honeywell Imaging and Mobility. To understand the imager better or to modify settings, refer to the
5X80 Engine Series 5X10/5X80 User's Guide that can be downloaded at www.honeywell.com/aidc.
The 5X10/5X80 User's Guide contains configuration bar codes that can be used to customize the
desired allowable bar codes and to change options and settings on the imager.
Reset the standard product defaults
If you are not sure what programming options are in your imager, or if you have changed some
options and want the factory settings restored, scan the Standard Product Default Settings bar
code, below.
Figure 10-12 Standard product default settings bar code
NOTE: The light bar will briefly go out to indicate that the scan was completed successfully.
Update firmware through USB
1. Connect either the handmount with battery or handle with installed battery to the All-in-One.
2. Connect the All-in-One to a computer with a USB cable.
Figure 10-13 Connecting the All-in-One to a computer
IMPORTANT: If using the handle with the All-in-One ensure that the switch is in the ‘Manual’
position. (See Handle components.)
3. Turn on the All-in-One.
4. Open the HP sp400 Series Configuration Software. See "Download and install software."
5. Select the Update tab.
There are four types of firmware update files:
58
Advanced Use
○
○
○
○
Firmware: the main program running on the All-in-One
FPGA: the processor configuration
Imager: the program running on the bar code scanner module
Communication: the program running on the wireless communication module
6. In the File boxes, enter the names of the update files. You can use the Browse button to
navigate to the update files.
NOTE: All of the update file names must have an “.hhp” extension.
7. Press the Write to Device button to begin the update process.
8. If you are doing a firmware or FPGA update, a dialog box instructing you to restart the All-inOne appears:
a. Click OK to dismiss the dialog box.
b. Press the green Power button on the All-in-One and hold for three seconds to turn the
device off.
c. After the All-in-One has turned off, restart it by pressing the Power button for one second.
d. When the connection status indicates that the device is connected again, restart the update
process by clicking the Write To Device button.
9. A dialog box announcing that the update has been successful or has failed appears. If the
update failed, try performing the update again before contacting support personnel.
NOTE: See the HP sp400 Series Configuration Software Users Guide for more detailed
instructions and help. It is available at www.hp.com/support/handheldsp400aio.
Update firmware wirelessly
If your All-in-One is configured to communicate wirelessly, it will check with the file server for
updates every time it is turned on. If a new update is available, it will download and install the new
files automatically.
During the update process, the blue Wireless light blinks slowly and the green tail lights blink fast.
The AiO may automatically reboot more than once depending on the firmware updates needed. Be
cautious to allow for the update process to complete.
•
•
If the update is successful, the Wireless light stops blinking and remains solid.
If the update fails, the red Error light, the red tail lights, and the green Power light blink 20 times
quickly.
NOTE: The All-in-One may print whether the update attempt was successful or not.
For more information about updating firmware, see the HP sp400 Series Configuration Software
User Guide. It is available at www.hp.com/support/handheldsp400aio.
59
All-in-One Specifications
11 All-in-One Specifications
General device specifications
The approximate dimensions at the widest part of the All-In-One and hand mount are as shown in
Table 11-21. The approximate weight is also shown in this table.
Table 11-21 General device specifications
Component
Width in. (mm)
Height in. (mm)
Length in. (mm)
Weight in oz
All-In-One only
2.6 (65)
1.9 (47)
5.4 (136)
9.49
Hand Mount*
2.6 (66)
1.2 (31)
5.0 (126)
3.31
All-in-One with
hand mount
2.6 (66)
2.8 (71)
5.7 (145)
12.79
Handle**
3.0 (75)
9.8 (249)
5.6 (142)
23.6
All-in-One with
handle
3.0 (75)
9.8 (249)
5.8 (147)
14.0
*Hand mount dimensions do not include straps or battery cable. Hand mount weight does include
straps and battery cable.
**Handle weight does not include battery
Environmental specifications
Table 11-22 Environmental specifications
Feature
Specification
Operating temperature
-5 to 45 degrees C (23 to 113 degrees F)
Storage temperature
-40 to 55 degrees C (-40 to 131 degrees F)
Relative humidity
5 to 95 percent, non-condensing
Vibration
MIL-STD-810E
Altitude
1,200 feet (366 meters) below sea level to
15,000 feet (4,572 meters)
60
All-in-One Specifications
Wireless specifications
Range of wireless module
The typical wireless range is 100 feet (30.5 meters) or more within an office environment, and two to
three times that distance in wide open spaces. The range depends greatly upon the design and use
of the infrastructure. Interference from other RF devices, obstructions such as walls and trees,
ambient noise levels, and the performance of other communications devices and their antenna
selection and placement may all significantly impact the performance of the whole system.
61
All-in-One Specifications
Other specifications
Table 11-23 Other wireless specifications
Feature
Specification
Technology
IEEE 802.11b DSSS, wireless compliant
Frequency
2.4 ~ 2.4835 GHz (US/Can/Japan/Europe)
2.471 ~ 2.497 GHz (Japan)
Modulation
DQPSK, DBPSK and CCK
Channels
11 channels – USA/Canada
13 channels – Europe
14 channels – Japan
4 channels - France
Data Rate
11, 5.5, 2, 1 Mbps
MAC
CSMA/CA with ACK, RTS, CTS
Protocols
TCP/IP, ARP, ICMP, DHCP, DNS, HTTP
UDAP Discovery
Data transfer
TCP/IP, HTTP, UDP
RF power
+15 dBm (typical) Approximately 32 mW
Sensitivity
-82dBm for 11 Mbps
-86dBm for 5.5 Mbps
-88dBm for 2 Mbps
-90dBm for 1 Mbps
Security
WEP (64 & 123 bit), WPA (PSK & TKIP)
The following list shows symbology types supported by the imager module. Refer to the
manufacturer specifications to verify other supported symbologies not listed below.
Table 11-24 Symbology types
Australian Post
Aztec Code
British Post
Canadian Post
China Post
Codabar
Codablock F
Code 11
Code 16K
Code 2 of 5
Code 49
Code128
62
All-in-One Specifications
Table 11-24 Symbology types
Code39 (3of9)
Code93
Data Matrix
EAN-UCC Composite Codes
EAN/JAN-13
EAN/JAN-8
IATA Code 2 of 5
Interleaved 2 of 5
Japanese Post
Kix (Netherlands)Post
Korea Post
Matrix 2 of 5
MaxiCode
MicroPDF417
MSI
PDF417
Planet Code
Plessey Code
PosiCode A and B
Postnet
QR Code
RSS Expanded
RSS Limited
RSS-14
4-CB / 4 State / Intelligent Mail Barcode
63
Warranty and regulatory information
12 Warranty and regulatory information
Warranty
If you have an existing service contract, see the contract for warranty information. If you do not have
an existing service contract, see www.hp.com/support/handheldsp400aio for information about your
warranty.
Regulatory notices
U.S.A.
Federal Communications Commission notice
Note: This equipment has been tested and found to comply with the limits for a Class A digital
device, pursuant to part 15 of the FCC Rules. These limits are designed to provide reasonable
protection against harmful interference when the equipment is operated in a commercial
environment. This equipment generates, uses, and can radiate radio frequency energy and, if not
installed and used in accordance with the instruction manual, may cause harmful interference to
radio communications. Operation of this equipment in a residential area is likely to cause harmful
interference in which case the user will be required to correct the interference at his own expense.
This device complies with part 15 of the FCC Rules. Operation is subject to the following two
conditions: (1) This device may not cause harmful interference, and (2) this device must accept any
interference received, including interference that may cause undesired operation.
Modifications
The FCC requires the user to be notified that any changes or modifications made to this device that
are not expressly approved by HP may void the user's authority to operate the equipment.
Canada
This Class A digital apparatus complies with Canadian ICES-003.
Cet appareil numérique de la classe A est conforme à la norme NMB-003 du Canada.
European Union notices
Compliance with these directives implies conformity to harmonized European standards (European
Norms) that are listed in the EU Declaration of Conformity issued by HP for this product or product
family.
This compliance is indicated by one of the following conformity markings placed on the product.
The following CE marking is valid for non-telecommunications products and for EU harmonized
telecommunications products, such as 802.11B devices.
64
Warranty and regulatory information
Hewlett-Packard GmbH, HQ-TRE, Herrenberger Strasse 140, 71034 Boeblingen, Germany
The following CE marking is valid for EU non-harmonized telecommunications products.
*If applicable, a notified body number is used. Refer to the regulatory label provided on this product.
The telecommunications functionality of this product may be used in the following EU and EFTA
countries:
Austria, Belgium, Cyprus, Czech Republic, Denmark, Estonia, Finland, France, Germany, Greece,
Hungary, Iceland, Ireland, Italy, Latvia, Liechtenstein, Lithuania, Luxembourg, Malta, Netherlands,
Norway, Poland, Portugal, Slovak Republic, Slovenia, Spain, Sweden, Switzerland, and United
Kingdom.
Products with 2.4-GHz wireless LAN devices
France
L'utilisation de cet equipement (2.4GHz wireless LAN) est soumise à certaines restrictions : cet
equipement peut être utilisé à l'interieur d'un batiment en utilisant toutes les frequences de 2400 a
2483.5MHz (Chaine 1-13). Pour une utilisation en environnement exterieur, vous ne devez pas
utiliser les frequences comprises entre 2454 a 2483.5-MHz (Chaine 10-13). Pour les dernières
restrictions, voir http://www.art-telecom.fr.
For 2.4-GHz wireless LAN operation of this product, certain restrictions apply. This equipment may
use the entire 2400-MHz to 2483.5-MHz frequency band (channels 1 through 13) for indoor
applications. For outdoor use, the 2454-MHz to 2483.5-MHz frequency band (channels 10 through
13) may not be used. For the latest requirements, see http://www.art-telecom.fr.
Italy
E'necessaria una concessione ministeriale anche per l'uso del prodotto. Verifici per favore con il
proprio distributore o direttamente presso la Direzione Generale Pianificazione e Gestione
Frequenze. License required for use. Verify with your dealer or directly with the General Direction
for Frequency Planning and Management (Direzione Generale Pianificazione e Gestione
Frequenze).
Wireless LAN 802.11b devices
International
For regulatory identification purposes, your product is assigned a Regulatory Model Number.
The Regulatory Model Number for your product is listed in the Declaration of Conformity. This
regulatory number is different from the marketing name and product number.
Regulatory Model Number: CRVSB-07BR
65
Warranty and regulatory information
Declaration of conformity
66