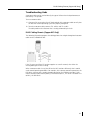
1
User Guide
10/100 Secure Network Interface Card
3CR990B-97
3CR990B-FX-97
10/100 Mbps PCI Secure Copper NIC
100 Mbps Secure Fiber NIC
http://www.3com.com/
http://esupport.3com.com
09-2325-000
Published September 2003
3Com Corporation • 350 Campus Drive • Marlborough, Massachusetts • 01752-3064 • U.S.A.
Copyright © 2003 3Com Corporation. All rights reserved. No part of this documentation may be reproduced in any form or by any means or used to
make any derivative work (such as translation, transformation, or adaptation) without written permission from 3Com Corporation.
3Com is a registered trademark and the 3Com logo is a trademark of 3Com Corporation. Unless otherwise indicated, 3Com registered trademarks
are registered in the United States and may or may not be registered in other countries.
Intel and Pentium are registered trademarks of Intel Corporation. Microsoft, Windows, and Windows NT are registered trademarks
of Microsoft Corporation. Novell and NetWare are registered trademarks of Novell, Inc. All other company and product names may be trademarks of
the respective companies with which they are associated.
3Com Corporation reserves the right to revise this documentation and to make changes in content from time to time without obligation on the part
of 3Com Corporation to provide notification of such revision or change.
3Com Corporation provides this documentation without warranty, term, or condition of any kind, either implied or expressed, including, but not
limited to, the implied warranties, terms or conditions of merchantability, satisfactory quality, and fitness for a particular purpose. 3Com may make
improvements or changes in the product(s) and/or the program(s) described in this documentation at any time.
If there is any software on removable media described in this documentation, it is furnished under a license agreement included with the product as
a separate document, in the hard copy documentation, or on the removable media in a directory file named LICENSE.TXT or !LICENSE.TXT. If you are
unable to locate a copy, please contact 3Com and a copy will be provided to you.
UNITED STATES GOVERNMENT LEGEND
If you are a United States government agency, then this documentation and the software described herein are provided to you subject to the
following:
All technical data and computer software are commercial in nature and developed solely at private expense. Software is delivered as “Commercial
Computer Software” as defined in DFARS 252.227-7014 (June 1995) or as a “commercial item” as defined in FAR 2.101(a) and as such is provided
with only such rights as are provided in 3Com’s standard commercial license for the software. Technical data is provided with limited rights only as
provided in DFAR 252.227-7015 (Nov 1995) or FAR 52.227-14 (June 1987), whichever is applicable. You agree not to remove or deface any portion
of any legend provided on any licensed program or documentation contained in, or delivered to you in conjunction with, this user guide.
Contents
1
Installing and Connecting the NIC 1
Minimum Installation Requirements 1
Installation Overview 1
Safety Precautions 2
Preparing the NIC and the Computer 2
Installing and Connecting the NIC 3
2
Windows 2003 Server Driver Installation
Installing the Network Driver 5
Verifying the Network Driver Installation 5
3
Windows XP Driver Installation 7
Installing the Network Driver 7
Verifying the Network Driver Installation
5
7
4
Windows 2000 Driver Installation 9
Installing the Network Driver 9
Verifying the Network Driver Installation 9
5
Windows NT 4.0 Driver Installation 11
Installing the Network Driver 11
Verifying the Network Driver Installation 12
6
Windows 98 SE Driver Installation 13
Installing the Network Driver 13
Verifying the Network Driver Installation 13
7
Novell NetWare Driver Installation 15
Installing the Driver in Novell NetWare Server 5.1 and 6.0
Installation During Novell OS Installation 15
Installation with Novell Already Installed 16
Verifying or Modifying NIC Parameters 17
Removing Drivers from Autoexec.ncf 18
Installing the Driver in Novell NetWare Server 6.5 19
Installation During Novell OS Installation 19
Installation with Novell Already Installed 19
8
Linux 2.4 Driver Installation 21
Installing the Network Driver 21
15
Contents
9
10
Installing and Configuring Data Encryption Offloads 23
Overview 23
Offloading Encryption Processing 23
Selecting Basic or Strong Encryption Processing 23
Configuring IPSec in Windows 2003, Windows XP, and Windows 2000
Creating a Security Policy 24
Defining the Console 25
Creating the Policy 25
Creating a Filter 26
Binding the Filter 26
Creating the Filter Action 26
Binding the Filter Action 27
Enabling Encryption 27
Disabling Encryption 27
24
Installing 3Com Advanced Server Features for Windows 29
About the Advanced Server Features 29
3Com DynamicAccess Advanced Server Features 29
Load Balancing 30
Failover 30
VLANs 31
Server Features Using Other NICs 31
Installing 3Com Advanced Server Software 32
Configuring Groups and VLANs 33
Planning the Configuration 33
Working With Server Features 34
Windows 2003, Windows XP, and Windows 2000 35
Windows NT 35
Creating a Group 35
Adding NICs to a Group 36
Specifying a Dedicated IP Address 36
Changing an IP Address 37
Creating a VLAN 37
Specifying Traffic Priorities 37
Saving the Configuration 38
Disabling Load Balancing for a Group 38
Changing the Primary NIC 38
Removing a NIC from a Group 38
Deleting or Editing a VLAN 38
Displaying NIC Properties 39
Displaying Group Properties 39
Troubleshooting a Load Balancing Configuration 39
Changing Windows 2003, Windows XP, and Windows 2000 Property Settings 40
Identifying Windows 2003 and Windows 2000 Miniport and LAN Connections 40
Using Windows 2003, Windows XP, and Windows 2000 Offload Features 40
Enabling Offloads 41
Configuring Offloads for a Group of Different NICs 42
Contents
11
Configuring the NIC 43
Default NIC Settings 43
Configuration Methods 45
Changing General NIC Configuration Settings 46
Installing the 3Com NIC Diagnostics Program 46
Starting the 3Com NIC Diagnostics Program 47
Using the 3Com NIC Diagnostics Program 47
Using the 3Com DOS Configuration Program 48
Configuring the Managed PC Boot Agent (MBA) 49
Enabling or Disabling the Boot ROM Setting 49
Booting From the Network 49
BBS BIOS-Compatible PCs 49
Non-BBS BIOS-Compatible PCs 50
Disabling the 3Com Logo 50
12
Troubleshooting the NIC 51
Interpreting the NIC LEDs 51
3CR990B-97 NIC 51
3CR990B-FX-97 NIC 52
Viewing the NIC LEDs in the Diagnostics Program 52
Troubleshooting Problems with the LEDs 52
Accessing 3Com Support Databases 53
Accessing the 3Com Knowledgebase 53
Accessing the 3Com NIC Help System 53
Accessing Release Notes and Frequently Asked Questions 53
Troubleshooting the NIC Installation 54
Problems or Error Messages 54
Cleaning Up A Failed Installation 54
Troubleshooting the Network Connection 55
Troubleshooting Remote Wake-Up 56
Troubleshooting a Network Connection 56
Troubleshooting Hubs 57
RJ-45 Cabling Pinouts (Copper NIC Only) 57
Removing the Network Driver 58
Windows 2003, Windows XP, and Windows 2000 58
Windows NT 4.0 58
Windows 98 SE 59
Removing 3Com DynamicAccess Advanced Server Features 60
Windows 2003, Windows XP, and Windows 2000 60
Windows NT 4.0 60
NetWare 60
Contents
13
Running NIC Diagnostics 61
Running the 3Com DOS Diagnostics Program 61
Running the NIC Diagnostics Tests 62
Running the Network Test 63
Running the NIC Test 63
Viewing the NIC LEDs in the 3Com Diagnostics Program
Viewing Network Statistics 64
Using the 3Com Icon in the Windows System Tray 64
Enabling the Icon 65
Displaying Network Statistics 65
Removing the 3Com NIC Diagnostics Program 65
A
Specifications and Cabling Requirements
3CR990B-97 NIC Specifications 67
3CR990B-FX-97 NIC Specifications 68
Cabling Requirements 69
3CR990B-97 NIC 69
3CR990B-FX-97 NIC 69
RJ-45 Connector Pin Assignments 70
B
Installing the 3Com DMI Agent 71
About the 3Com DMI Agent 71
System Requirements 72
Network Management Requirements 72
Installing the 3Com DMI Agent 72
C
Obtaining Support for your Product 75
Register Your Product to Gain Service Benefits
Purchase Value-Added Services 75
Where To Go For Help 75
Troubleshoot Online 75
Access Software Downloads 75
Contact Us 76
Telephone Technical Support and Repair 76
D
Regulatory Compliance Information 79
FCC Class B Statement 79
FCC Declaration of Conformity 80
MIC Class B Compliance (Korea) 80
Safety Compliance Statement 80
67
75
64
1
Installing and Connecting the NIC
This user guide explains how to install the 3Com 10/100 Secure NIC (3CR990B NIC family)
in a computer running any of the following operating systems:
• Windows 2003 Server
• Windows XP
• Windows 2000
• Windows NT 4.0
• Windows 98 SE
• NetWare 5.x and 6.x
• Linux 2.4
Your Windows operating system should have the latest service pack installed.
Minimum Installation Requirements
Your client computer or server must meet the following requirements before you can
successfully install the 3CR990B NIC:
• Processor (client or server) — Intel Pentium or above
• Available bus-mastering PCI slot, conforming to PCI 32-bit specifications, revision 2.2
• CD-ROM drive
Installation Overview
Installing the NIC involves completing the following tasks:
• Registering the product
• Installing the NIC in the computer
• Connecting the NIC to the network
• Installing the network driver
• Enabling data encryption offloads
1
1
Installing and Connecting the NIC
Safety Precautions
Observe the following safety precautions.
WARNING: Computers operate with voltages that can be lethal. Before removing
the cover, turn off the computer and unplug it. Disconnect all cables that are
connected to the main system unit. Remove jewelry from your hands and wrists.
Use insulated or nonconductive tools.
CAUTION: The NIC is packed in an antistatic container to protect it during
shipment. Do not touch the components or any metal parts on the NIC, except for
the backplate. To avoid damaging the NIC or the computer, reduce static
electricity on your body by wearing an electrostatic discharge wrist strap attached
to the chassis or by touching an unpainted metal part of the chassis before
unplugging the computer and before handling the NIC.
CAUTION: Install the NIC in a PCI slot that conforms to PCI 2.2 specifications.
Do not attempt to install the NIC in an ISA or EISA slot. Doing so may damage the
NIC and the computer.
WARNING: Make sure that the computer power cord is unplugged. Only properly
trained and authorized personnel should perform service. Contact the computer
manufacturer for information about safe service techniques.
Preparing the NIC and the Computer
After observing the safety precautions, follow these preparation steps:
1 Make sure that cable requirements are met.
3CR990B-97 NIC
The RJ-45 port on the 3CR990B-97 NIC provides a 10 Mbps or 100 Mbps connection
automatically, depending on the speed of the connected hub or switch.
The following table shows the cable requirements and maximum network cable
lengths for the 3CR990B-97 NIC:
Network Environment
Cable Required
Maximum Cable Length
10 Mbps (10BASE-T)
CAT 3, 4, or 5 unshielded
twisted pair (UTP)
100 m (328 ft)
100 Mbps (100BASE-TX)
CAT 5 UTP
100 m (328 ft)
3CR990B-FX-97 NIC
The following table shows the cable requirements and maximum network cable
lengths for the 3CR990B-FX-97 NIC:
Network
Environment
100 Mbps
(100BASE-FX)
Connector
Cable Required
SC
Long-wavelength fiber-optic
(1300 nm):
50 µ/125 µ multimode fiber
62.5 µ/125 µ multimode fiber
2
Maximum Cable Length
Full-duplex: 2,000 m (6,560 ft)
Half-duplex: 412 m (1,351 ft)
Full-duplex 2,000 m (6,560 ft)
Half-duplex 412 m (1,351 ft)
Installing and Connecting the NIC
2 Unpack and inspect the NIC for damage.
3 Exit all open applications and user processes.
4 Turn off the power to the computer and attached devices.
5 Unplug the power cables from the power source.
6 Remove the computer cover.
7 Locate an empty, non-shared bus-mastering PCI slot and remove its slot cover.
Save the screw, if there is one.
Do not install the NIC in a shared PCI slot. Avoid any PCI slot next to an ISA slot.
This slot is often shared and does not support bus mastering.
If you do not know how to identify a PCI slot, check the computer documentation or
ask the system administrator.
8 Write down the MAC address of the NIC and note the relative position of the
intended PCI slot.
The MAC address is the 12-digit hexadecimal number printed on the small bar code
label on the component side of the NIC. This information is helpful when you are
installing the network drivers and connecting the cables to the hub or switch.
The next step is to install the NIC in the computer and connect it to the network, as
described in the next section.
Installing and Connecting the NIC
Observe the safety precautions listed in “Safety Precautions” on page 2.
The following instructions apply to installing the NIC in most computers. If these
instructions are not appropriate for your computer, refer to the documentation that
accompanied the computer.
3
1
Installing and Connecting the NIC
1 Carefully insert the NIC in the empty PCI slot, as shown in the previous illustration.
Press firmly to ensure that the NIC is fully seated in the slot. Secure the NIC with the
screw if you removed one earlier.
2 Replace the computer cover and plug in the power cord. Do not turn on the power to
the computer.
3 Connect the cable.
3CR990B-97 NIC
Plug the RJ-45 connector on the twisted-pair network cable into the RJ-45 port on the
NIC backplate as shown in the following figure.
3CR990B-FX-97 NIC
Plug the network cable into the fiber port on the NIC backplate as shown in the
following figure.
4 Connect the other end of the network cable to an active network port.
The next step is to install the software. Go to the appropriate chapter for your
operating system.
NOTE: If your site network installation procedures require you to verify that
installed hardware is functional before you install software, run the
3C99XCFG.EXE DOS diagnostics program before installing the driver. For more
information, see “Using the 3Com DOS Configuration Program” on page 48.
4
2
Windows 2003 Server
Driver Installation
This chapter explains the following tasks on a computer running Windows 2003 Server:
• Install the network driver and NIC software using the 3Com installation CD.
• Verify the network driver installation.
To obtain the latest version of a driver, go to:
http://www.3com.com/
Search for “3CR990B” and “drivers.” The network driver can be used in both Microsoft
and NetWare network environments.
Installing the Network Driver
To install the driver:
1 Make sure that the NIC is installed in the computer, as described in “Installing and
Connecting the NIC” on page 3.
2 Turn on the power to the computer.
3 Insert the 3Com Installation CD in the CD-ROM drive.
The 3Com Installation CD main menu appears.
4 Click NIC Software.
5 Click NIC Drivers and Diagnostics.
6 Click Install NIC Driver.
7 Select the type of installation:
• Install with Diagnostic Program—installs the driver as well as the 3Com NIC
Diagnostics Program for Windows. See “Using the 3Com NIC Diagnostics
Program” on page 47 for more information.
• Install without Diagnostic Program—installs the driver only.
The driver installation begins.
8 Click OK when the 3Com NIC Driver Update Kit dialog box appears.
The driver is installed.
Verifying the Network Driver Installation
To verify successful NIC installation:
1 Open the Windows Start menu, and then select Control Panel.
2 Double click Network Connections.
3 Check connections in the LAN or High-Speed Internet window.
5
2
6
Windows 2003 Server Driver Installation
3
Windows XP Driver Installation
This chapter explains the following tasks on a computer running Windows XP:
• Install the network driver and NIC software using the 3Com Installation CD.
• Verify the network driver installation.
To obtain the latest version of a driver, go to:
http://www.3com.com/
Search for “3CR990B” and “drivers.” The network driver can be used in both Microsoft
and NetWare network environments.
Installing the Network Driver
To install the driver:
1 Make sure that the NIC is installed in the computer, as described in “Installing and
Connecting the NIC” on page 3.
2 Turn on the power to the computer.
3 Insert the 3Com Installation CD in the CD-ROM drive.
The 3Com Installation CD main menu appears.
4 Click NIC Software.
5 Click NIC Drivers and Diagnostics.
6 Click Install NIC Driver.
7 Select the type of installation:
• Install with Diagnostic Program—installs the driver as well as the 3Com NIC
Diagnostics Program for Windows. See “Using the 3Com NIC Diagnostics
Program” on page 47 for more information.
• Install without Diagnostic Program—installs the driver only.
The driver installation begins.
8 Click OK when the 3Com NIC Driver Update Kit dialog box appears.
The driver is installed.
Verifying the Network Driver Installation
To verify successful NIC installation:
1 Open the Windows Start menu, and then select Control Panel.
2 Double click Network Connections.
3 Check connections in the LAN or High-Speed Internet window.
7
3
8
Windows XP Driver Installation
4
Windows 2000 Driver Installation
This chapter explains the following tasks on a computer running Windows 2000:
• Install the network driver and NIC software using the 3Com Installation CD.
• Verify the network driver installation.
To obtain the latest version of a driver, go to:
http://www.3com.com/
Search for “3CR990B” and “drivers.” The network driver can be used in both Microsoft
and NetWare network environments.
Installing the Network Driver
1 Make sure that the NIC is installed in the computer, as described in “Installing and
Connecting the NIC” on page 3.
2 Turn on the power to the computer.
3 Insert the 3Com Installation CD in the CD-ROM drive.
If the main menu appears, click Exit.
Windows detects the NIC. The Found New Hardware Wizard starts.
4 Click Next.
The Install Hardware Device Drivers screen appears.
5 Make sure Search for a suitable driver for my device (recommended) is selected, and
then click Next.
The Locate Driver Files screen appears.
6 Make sure CD-ROM drives is selected, and then click Next.
The system detects the NIC. The Driver Files Search Results screen appears.
7 Click Next.
The Completing the Found New Hardware Wizard screen appears with the name of
the installed NIC.
8 Click Finish.
The driver is installed.
Verifying the Network Driver Installation
To verify successful NIC installation:
1 Right-click My Network Places and select Properties from the menu.
2 Check connections in the Network and Dial-up Connections window.
9
4
10
Windows 2000 Driver Installation
5
Windows NT 4.0 Driver Installation
This chapter explains the following tasks on a computer running Windows NT 4.0:
• Install the network driver and NIC software using the 3Com Installation CD.
• Verify the network driver installation.
To obtain the latest version of a driver, go to:
http://www.3com.com/
Search for “3CR990B” and “drivers.” The network driver can be used in both Microsoft
and NetWare network environments.
Installing the Network Driver
Before you begin, make sure that:
• All installation requirements are met. See “Minimum Installation Requirements” on
page 1.
• The NIC is installed. See “Installing and Connecting the NIC” on page 3.
• You have Network Administrator privileges.
To install the driver:
1 Turn on the power to the PC.
2 Double-click the My Computer icon, the Control Panel icon, and then the Network
icon.
3 Select the Adapters tab.
4 Click Add.
The Select Network Adapter dialog box appears.
5 Click Have Disk.
The Insert Disk dialog box appears.
6 Insert the 3Com Installation CD in the CD-ROM drive.
If the main menu appears, click Exit.
7 At the OEM Option dialog box, type in the path of the CD and then click OK.
8 Make sure the 3Com NIC is selected, and then click OK.
If this is the first time setting up the network, Windows may prompt you to click Next
to continue setting up the protocol and services.
Files are copied. Windows may prompt you for the Windows NT specific files. These
are typically located in C:\I386.
9 Click OK on any dialog boxes that may appear.
11
5
Windows NT 4.0 Driver Installation
10 When the installation is complete, Windows prompts for a reboot. After the reboot,
make sure to reapply the service pack.
NOTE: Verify that the Windows operating system has been upgraded to the latest
version and latest service pack. Also, make sure the correct BIOS and firmware are
installed to ensure the system works correctly.
NOTE: If networking has not been installed on your PC, Windows NT asks if you
want to install networking. Click Yes, and then click Select from Disk. Go to step 5
to continue.
Verifying the Network Driver Installation
To verify successful NIC installation:
1 Double click the My Computer icon, the Control Panel icon, and then the Network
icon.
2 Select the Adapters tab.
3 Make sure that the name of the NIC appears in the list of network adapters.
12
6
Windows 98 SE Driver Installation
This chapter explains the following tasks on a computer running Windows 98 SE:
• Install the network driver and NIC software using the 3Com Installation CD.
• Verify the network driver installation.
To obtain the latest version of a driver, go to:
http://www.3com.com/
Search for “3CR990B” and “drivers.” The network driver can be used in both Microsoft
and NetWare network environments.
Installing the Network Driver
To install the driver:
1 Make sure that the NIC is installed in the computer, as described in “Installing and
Connecting the NIC” on page 3.
2 Turn on the power to the computer.
3 Insert the 3Com Installation CD in the CD-ROM drive.
If the main menu appears, click Exit.
Windows detects the NIC. The Add New Hardware Wizard starts and detects a new
Ethernet Controller.
4 Click Next.
Windows prompts you to search for the best driver for your device.
5 Select Search for the best driver for your device (Recommended), and then click Next.
6 Make sure CD-ROM drive is selected, and then click Next.
Windows detects the driver.
7 Click Next.
8 Click Finish.
The driver installation is complete.
9 Restart the computer.
Verifying the Network Driver Installation
To verify successful NIC installation:
1 Right-click My Computer and select Properties.
2 Click the Device Manager tab.
The Device Manager window appears.
3 Scroll down the list of hardware devices to Network Adapters. Click the plus sign (+)
to the left of the icon to display the list of NICs currently configured.
4 Make sure the 3Com NIC is installed and that there is not a red X or a yellow
exclamation point (!) next to the device.
13
6
14
Windows 98 SE Driver Installation
7
Novell NetWare Driver Installation
This chapter explains the following tasks on a computer running Novell NetWare 5.0, 6.0,
and 6.5:
• Install the network driver and NIC software using the 3Com Installation CD.
• Verify the network driver installation.
To obtain the latest version of a driver, go to:
http://www.3com.com/
Search for “3CR990B” and “drivers.” The network driver can be used in both Microsoft
and NetWare network environments.
Installing the Driver in Novell NetWare Server 5.1 and 6.0
Before you begin, make sure that:
• The NIC is installed in the server.
• The latest support pack files are installed. The latest support packs can be found at:
http://support.novell.com/misc/patlst.htm.
To obtain the latest support pack files, go to the Novell support Web site and select
the Minimum Patch List option in the navigation bar. Scroll down the page and select
and download the latest support pack or patch file(s) for the operating system
running on your server.
There are two methods for installing the driver:
• Installation during the Novell operating system installation.
• Installation when Novell is already installed.
NOTE: If you are installing NetWare 5.x or 6.x for the first time, you need to install
the NIC driver during the operating system installation procedure.
Installation During Novell OS Installation
You may want to create an archive disk by copying all the files from the CD ROM
NetWare directory onto a floppy disk. If you choose to use the CD directly, make sure that
the CDROM.NLM file is loaded and that you are aware of the NetWare Volume name for
the CD that you just installed.
1 When prompted for the network board, select the field and then press Enter.
2 Press Insert to specify a NIC.
3 Press Insert to specify an unlisted NIC.
4 Press Enter if the drivers are contained on a floppy disk, or press F3 and enter a
different path.
5 Press Enter to select the NIC.
6 Select Modify Driver Properties to configure NIC options, or choose Return to Driver
Summary.
15
7
Novell NetWare Driver Installation
Installation with Novell Already Installed
Be sure that the server has the latest support pack available installed. The latest support
pack can be found at: http://support.novell.com/misc/patlst.htm
1 Insert the NIC into a PCI slot.
2 Go to system console on the server.
3 Run nwconfig.
4 Go to driver options, configure network drivers.
5 Choose Select a driver.
a Press Enter if the drivers are contained on a floppy disk, or
b Press F3 and enter the path of the drivers if they are not contained on a floppy disk.
6 Select Yes to copy the driver.
7 Enter the slot number of the NIC.
For instructions on identifying the slot number, see the next section, “Identifying the
Slot Number.”
8 Configure the protocols as necessary.
9 Press F10 to save the parameters.
10 Select Save parameters and load driver.
After the driver is loaded, you may continue to load other drivers if needed.
Identifying the Slot Number
If you do not know the slot number of the NIC you are installing, follow the instructions
below to identify the slot number.
1 Press the Ctrl and Esc keys on your keyboard.
2 Go to system console.
3 At the system console, type Load 3C99X .
This loads the driver.
4 At the system console, type config .
5 Look for the driver name of the 3Com NIC.
6 Note the slot number used by the NIC.
7 Type Unload 3C99X at the system console.
8 Press the Ctrl and Esc keys on your keyboard.
9 Go to nwconfig .
16
Verifying or Modifying NIC Parameters
Verifying or Modifying NIC Parameters
When a NIC configuration is saved, the NetWare install program adds load and bind
statements to the autoexec.ncf file. By accessing this file, you can verify the parameters
configured for each NIC, modify them, or enter additional parameters.
A valid autoexec.ncf file is shown below. One set of load and bind commands is shown
for each frame type the NIC is configured to support.
set Time Zone = PST8PDT
set Daylight Savings Time Offset = 1
set Start Of Daylight Savings Time = (APRIL SUNDAY FIRST 2:00:00
AM)
set End Of Daylight Savings Time = (OCTOBER SUNDAY LAST 2:00:00
AM)
set Default Time Server Type = SINGLE
set Bindery Context = O=LAN
# WARNING!
file server name NOVELLSERVER
# WARNING!
# If you change the name of this server, you must update
# all the licenses that are assigned to this server. Using
# NWAdmin, double-click a license object and click
# Certificate Assignments. If the old name of
# this server appears, you must delete it and then add the
# new server name. Do this for all license objects.
ServerID 1C8EE2C
LOAD ODINEB.NLM
LOAD TCPIP LOAD 3c99x SLOT=2 FRAME=Ethernet_802.2
NAME=3c99x_1_E82
BIND IPX 3c99x_1_E82 NET=FAFD3D25
LOAD 3c99x SLOT=2 FRAME=Ethernet_802.3 NAME=3c99x_1_E83
BIND IPX 3c99x_1_E83 NET=5A2D8D6D
LOAD 3c99x SLOT=2 FRAME=Ethernet_SNAP NAME=3c99x_1_ESP
BIND IPX 3c99x_1_ESP NET=477A35BD
LOAD 3c99x SLOT=2 FRAME=Ethernet_II NAME=3c99x_1_EII
BIND IPX 3c99x_1_EII NET=C3C8F2E4
BIND IP 3c99x_1_EII ADDR=172.16.1.1 MASK=ff.ff.ff.0
mount all
SEARCH ADD SYS:\JAVA\BIN
SEARCH ADD SYS:\JAVA\NWGFX
NOTE: The Novell monitor program and the config command are also useful for
verifying driver configuration. For information on how to use these programs, see
the Utilities Reference in your Novell NetWare online documentation.
NOTE: If you modify any NIC parameters, you must reboot the system before the
changes will take effect. If you make changes and do not reboot, you may
experience configuration problems. If the driver was loaded at console, however,
no reboot is necessary.
17
7
Novell NetWare Driver Installation
Removing Drivers from Autoexec.ncf
To remove the drivers from the autoexec.ncf file, locate the load and bind command
lines and remark them out by inserting the # symbol at the beginning of each command
line.
Example:
#
#
#
#
#
#
#
#
#
18
LOAD
BIND
LOAD
BIND
LOAD
BIND
LOAD
BIND
BIND
3c99x SLOT=2 FRAME=Ethernet_802.2 NAME=3c99x_1_E82
IPX 3c99x_1_E82 NET=FAFD3D25
3c99x SLOT=2 FRAME=Ethernet_802.3 NAME=3c99x_1_E83
IPX 3c99x_1_E83 NET=5A2D8D6D
3c99x SLOT=2 FRAME=Ethernet_SNAP NAME=3c99x_1_ESP
IPX 3c99x_1_ESP NET=477A35BD
3c99x SLOT=2 FRAME=Ethernet_II NAME=3c99x_1_EII
IPX 3c99x_1_EII NET=C3C8F2E4
IP 3c99x_1_EII ADDR=172.16.1.1 MASK=ff.ff.ff.0
Installation During Novell OS Installation
Installing the Driver in Novell NetWare Server 6.5
Before you begin, make sure that:
• The NIC is installed in the server.
• The latest support pack files are installed. The latest support packs can be found at:
http://support.novell.com/misc/patlst.htm.
To obtain the latest support pack files, go to the Novell support Web site and select
the Minimum Patch List option in the navigation bar. Scroll down the page and select
and download the latest support pack or patch file(s) for the operating system
running on your server.
There are two methods for installing the driver:
• Installation during the Novell operating system installation.
• Installation when Novell is already installed.
NOTE: If you are installing NetWare 5.x or 6.x for the first time, you need to install
the NIC driver during the operating system installation procedure.
Installation During Novell OS Installation
You may want to create an archive disk by copying all the files from the CD ROM
NetWare Server (nwserver) directory onto a floppy disk. If you choose to use the CD
directly, make sure that the CDROM.NLM file is loaded and that you are aware of the
NetWare Volume name for the CD that you just installed.
1 During the operating system installation, NetWare attempts to load the built-in driver
for the NIC. The following message appears: “The following driver instance failed to
load and will be deleted.” Select Yes to return to the summary screen.
2 Select the network field.
3 Press Insert to specify an unlisted NIC.
4 Press Enter if the drivers are contained on a floppy disk, or press F3 and enter a
different path.
5 Press Enter to select the NIC.
6 Select Modify Driver Properties to configure NIC options, or choose Return to Driver
Summary.
Installation with Novell Already Installed
Be sure that the server has the latest support pack available installed. The latest support
pack can be found at: http://support.novell.com/misc/patlst.htm
1 Insert the NIC into a PCI slot.
2 Boot the computer.
During boot time, the operating system tries to automatically detect the NIC.
3 Go to the HWdetect screen.
NetWare attempts to load the built-in driver for the NIC. The following message
appears: “The following driver instance failed to load and will be deleted.”
4 Press Enter.
5 Select the network board option.
6 Select Modify and highlight the 3c99x.lan entry.
19
7
Novell NetWare Driver Installation
7 Press the delete key to remove the built-in driver.
8 Press Insert to specify an unlisted NIC.
9 Press Enter if the drivers are contained on a floppy disk, or press F3 and enter a
different path.
10 Press Enter to select the NIC.
11 Select Modify Driver Properties to configure NIC options, or choose Return to Driver
Summary.
20
8
Linux 2.4 Driver Installation
This chapter explains how to install the network driver on a computer running Linux 2.4.
To obtain the latest version of a driver, go to:
http://www.3com.com/
Search for “3CR990B” and “drivers.” The network driver can be used in both Microsoft
and NetWare network environments.
Installing the Network Driver
To install the driver:
NOTE: Before installing the driver, make sure you are logged in as root
(SuperUser).
1 Make sure that the NIC is installed in the computer, as described in “Installing and
Connecting the NIC” on page 3.
2 Make sure that the kernel source is installed in /usr/src/linux or /usr/src/linux-2.4.
3 Copy the file /Linux/3c990.tar.gz from the 3Com Installation CD to your hard drive.
a Create a directory to mount the CD-ROM into (if it does not exist):
mkdir /mnt/cdrom
b Mount the CD-ROM using the following command:
mount /dev/cdrom /mnt/cdrom
c Copy the driver to a temporary directory:
mkdir /tmp/3c990
cp /mnt/cdrom/Linux/* /tmp/3c990
4 Unpack the driver:
cd /tmp/3c990
tar zxvf 3c990.tar.gz
5 Compile the driver:
cd /tmp/3c990/3c990
make
6 Load the driver:
make load
Depending on your configuration, the operating system may automatically start the
interface and request an address from a DHCP server. If it does not, start the interface
using the following command:
ifconfig eth0 up
You may have to substitute ' eth0 ' for your actual interface if you have more than
one Ethernet NIC installed.
21
8
22
Linux 2.4 Driver Installation
9
Installing and Configuring
Data Encryption Offloads
The 3CR990B NIC performs data encryption processing offloads in Windows 2003,
Windows XP, and Windows 2000.
The 3CR990B NIC does not encrypt the data itself: the operating system performs that
function.
Encryption processing is handled entirely by the NIC. The NIC enables true end-to-end
network security at the data capacity of the connected network cable, without sacrificing
performance.
This chapter provides instructions for configuring IPSec in Windows 2003, Windows XP,
and Windows 2000 environments.
Overview
Internet Protocol Security (IPSec) is a framework of open standards for ensuring secure
private communications over IP networks. IPSec ensures confidentiality, integrity, access
control, and authenticity of data communications across a public IP network.
Offloading Encryption Processing
You can configure any two (or more) computers running Windows 2003, Windows XP, or
Windows 2000 to perform IPSec encryption by changing the Local Security Setting in the
operating system.
With most non-3CR990B NICs, all the IPSec processing is done by the host central
processing unit (CPU), which significantly diminishes CPU performance. The 3CR990B NIC
can offload all the encryption processing from the host CPU, thereby freeing the CPU to
work on other tasks.
Selecting Basic or Strong Encryption Processing
The 3CR990B NIC provides Data Encryption Standard (DES) 56-bit encryption processing
and 3DES (3DES 168-bit) encryption processing. You can configure the 3CR990B NIC to
process data packets encrypted with either DES (basic) or 3DES (strong) algorithms. DES
and 3DES are IPSec bulk encryption algorithms for coding data.
DES encrypts 64-bit data blocks using a 56-bit key. DES can be applied in several modes.
3DES (Triple DES) achieves a higher level of security by encrypting the data three times
using DES with three different, unrelated keys. 3DES is also known as 168-bit data
encryption.
23
9
Installing and Configuring Data Encryption Offloads
Configuring IPSec in Windows 2003, Windows XP, and
Windows 2000
The 3CR990B NIC accelerates IP security (IPSec) data encryption from supported operating
systems that provide this offload capability. This feature is currently available in the
Windows 2003, Windows XP, and Windows 2000 operating systems.
IPSec primarily consists of two parts:
• encryption/decryption
• authentication
To send or receive encrypted data with a 3CR990B NIC installed, you must first create a
security policy, and then enable encryption on the NIC. The security policy establishes and
defines how encrypted network traffic between your computer and a specified server
occurs.
Authentication enables the receiver to verify the sender of a packet by adding key fields to
a packet without altering the packet data content.
The following table shows the available levels of encryption:
Encryption
Type
Encryption
Level
Description
AH
Medium
Authentication only
ESP
High
Authentication and encryption
Custom
Varies
Provides encryption and an extra authentication that includes
the IP header.
Custom allows you to select options for both AH and ESP, such
as MD%/SHA-1 and DES/3DES. And you can select the rate at
which new keys are negotiated.
Microsoft uses IKE key exchange to renew keys every x seconds
or y bytes. However, this practice is computationally very high
in overhead. Some users may set these values low and have
frequent key updates. Users more concerned with
performance will set these values higher.
For more information, refer to the Microsoft documentation
about creating IPSec flows.
Creating a Security Policy
The process you use to create and enable a security policy depends on your network
environment requirements. The following is an example of one approach to creating a
security policy.
NOTE: You must complete all of the sequences in this section to establish and
enable a security policy for transmitting and receiving encrypted data over the
network.
24
Creating a Security Policy
Defining the Console
This sequence establishes the Console and defines its parameters.
To define the Console:
1 In the Windows taskbar, click Start, Programs, Accessories, and then
Command Prompt.
2 At the DOS prompt, enter:
MMC
The Console1 screen appears.
3 In the menu click Console, and then Add/Remove Snap-in.
The Add/Remove Snap-in screen appears.
4 Click Add.
The Add Standalone Snap-in screen appears.
5 Select IP Security Policy Management, and then click Add.
The Select which computer this Snap-in will manage screen appears.
6 Enable the Local computer option.
7 Click Finish, Close, and then OK.
Creating the Policy
This sequence creates and names the new security policy.
The Console1 and Console Root screen appears with IP Security Policies on Local Machine
displayed in the list.
1 In the left pane, click IP Security Policies on Local Machine.
2 Right-click inside the right pane below the list items.
3 From the pop-up menu, select Create IP Security Policy.
The IP Security Policy Wizard starts.
4 Click Next.
The IP Security Policy Name screen appears.
5 Enter a name for the new security policy that you are creating. You can enter a
description to help you identify this policy.
6 Click Next.
The Requests for Secure Communication screen appears.
7 Clear the Activate the default response rule check box.
8 Click Next and then Finish.
A screen appears with the name of the new security policy in the title bar.
9 Click Add.
The Security Rule Wizard starts.
10 Click Next.
The Tunnel Endpoint screen appears.
11 Enable the default option This rule does not specify a tunnel, and then click Next.
The Network Type screen appears.
25
9
Installing and Configuring Data Encryption Offloads
12 Enable the default option All network connections, and then click Next.
The Authentication Methods screen appears.
13 Enable the Use this string to protect the key exchange (preshared key): option, type
the appropriate string text in the entry field, and then click Next.
Creating a Filter
This sequence creates a filter for the policy.
The IP Filter List screen appears.
1 Click Add.
A new IP Filter List screen appears.
2 Enter a name for the filter, and then click Add.
The IP Filter Wizard starts.
3 Click Next.
The IP Traffic Source screen appears.
4 Click Next.
The IP Traffic Destination screen appears.
5 Select A Specific IP Address in the pull-down list.
The IP Address entry box appears on the IP Traffic Destination screen.
6 Enter destination IP address, and then click Next.
The IP Protocol Type screen appears.
7 Accept the default, and then click Next.
8 Click Finish to close the IP Filter Wizard.
9 Click Close to close the IP Filter List screen.
Binding the Filter
This sequence attaches the new filter to the policy.
The IP Filter List screen appears.
1 Enable the option for the new filter name and make sure that the new filter name is
selected.
2 Click Next.
Creating the Filter Action
This sequence defines how the filter acts on the policy.
The Filter Action screen appears.
1 Click Add.
The Filter Action Wizard starts.
2 Click Next.
The Filter Action Name screen appears.
3 Enter a name (for example: 3DES to the Server), and then click Next.
The Filter Action General Options screen appears.
4 Accept the default, and then click Next.
The screen, Communicating with computers that do not support IPsec, appears.
26
Creating a Security Policy
5 Accept the default value, and then click Next.
The IP Traffic Security screen appears.
6 Select Custom, and then click Settings.
The Custom Security Method Settings screen appears.
7 Enable the Data integrity and encryption (ESP): check box, and then make the
appropriate selections in the Integrity and algorithms list boxes.
8 Click OK, Next, and then Finish.
Binding the Filter Action
This sequence attaches the new filter action to the filter and policy.
The Filter Action screen appears.
1 Enable the filter action option and make sure that the filter name is selected. (In this
example, we used the filter name: 3DES to the Server.)
2 Click Next, Finish, and then Close.
The newly created policy appears in the right pane of the Console Root\IP Security
Policies on Local Machine screen.
3 Exit this screen and, when prompted, save the new policy information. Use a
meaningful name for future reference.
You can modify this security policy by double clicking the icon that is created when
you save the policy in the previous step.
Enabling Encryption
An encryption policy must exist in the Console Root\IP Security Policies on the Local
Machine screen before you can enable encryption on the 3CR990B NIC.
To enable encryption:
1 Right-click the desired policy icon in the right pane of the screen.
2 Select Assign.
3 A green plus (+) symbol appears on the policy icon to indicate that encryption is
toggled on.
Disabling Encryption
An encryption policy must exist in the Console Root\IP Security Policies on the Local
Machine screen, and be enabled, before you can disable encryption on the 3CR990B NIC.
To disable encryption:
1 Right-click the desired policy icon in the right pane of the screen.
2 Select Un-assign.
The absence of a green plus (+) symbol on the policy icon indicates that encryption is
toggled off.
27
9
28
Installing and Configuring Data Encryption Offloads
10
Installing 3Com Advanced Server
Features for Windows
This chapter explains the following tasks for a computer running Windows 2003,
Windows XP, Windows 2000, or Windows NT 4.0 with the 3Com 10/100 Secure
(3CR990B) NIC installed.
NOTE: Windows 98 does not support the advanced server features.
Sections include:
• About the Advanced Server Features
• Installing 3Com Advanced Server software for a server NIC
• Configuring groups and VLANs for a server NIC
3Com Advanced Server (DynamicAccess) features include:
• Fault tolerance
• Bi-directional load balancing
• Resilient server links (RSL)
• Multiple virtual LANs (MVLANs) support
About the Advanced Server Features
The 3CR990B NIC and accompanying software provide a variety of features that relieve
network congestion and ensure high performance and maximum bandwidth availability.
NOTE: Only system administrators should configure these settings.
3Com DynamicAccess Advanced Server Features
3Com DynamicAccess Advanced Server software adds intelligence to the NIC to improve
network performance, management, and control. Advanced server features relieve
network congestion and ensure high performance and maximum bandwidth availability.
• Load Balancing groups share the network load over resilient server links (RSLs) that
keep traffic flowing even if a NIC in a group is temporarily disconnected.
• Failover fault tolerance provides a backup solution in the event of a NIC failure.
• VLANs (IEEE 802.1Q multiple virtual LANs) let you divide network segments into
logical partitions that simplify configuration changes, organize work groups
efficiently, help to control traffic, and provide extra security.
29
10
Installing 3Com Advanced Server Features for Windows
Load Balancing
Load balancing maximizes bandwidth at the server through the use of multiple parallel
resilient server links (RSLs) that share the network load as shown in the next figure.
An RSL consists of two or more NICs that form a virtual NIC. Each virtual NIC has multiple
physical NICs bound to it, forming a group. Each NIC in a group uses the same protocols
and frame types. One NIC is designated the primary NIC and the others secondary NICs.
Failover
In addition to load balancing, RSLs provide failover fault tolerance between a server and a
switch—if one NIC in a group fails, the others assume the network load of the failed NIC.
The failover behavior of secondary NICs depends on how you set load balancing:
• In a transmit load balancing arrangement, the primary NIC is the only one that
receives packets. If the primary NIC fails, a secondary NIC assumes the configuration
profile, network traffic, and active status of the failed primary NIC.
• In a bidirectional load balancing arrangement, all NICs receive packets. If any NIC fails,
receive load balancing is disabled, and the other NICs continue transmit-only load
balancing activity. Receive load balancing is restored when new connections are
established with clients.
If the primary NIC fails, a secondary NIC takes over packet reception for the group.
Bidirectional load balancing is restored after a failure when applications create new
connections and new clients log in as illustrated in the following figure.
30
Server Features Using Other NICs
VLANs
A virtual LAN (VLAN) is a group of location-independent and topology-independent
devices that communicate as if they were on the same physical LAN. Network devices on
different LAN segments and of different media types can be members of the same VLAN.
Membership in a VLAN is determined by a VLAN tag that is transmitted with the Ethernet
frame for use by a switch.
With VLANs, you can define a network according to:
• Organizational groups—For example, you can have one VLAN for the Marketing
department and one for the Finance department.
• Application groups—For example, you can have one VLAN for e-mail users and one
for multimedia users.
Implementing VLANs on a network has these advantages:
• It eases the change and movement of devices on IP networks.
With traditional IP networks, if users move to a different IP subnet, the IP addresses of
each workstation must be updated manually. With VLANs installed, if an end station
on VLAN 1 is moved to a port elsewhere on the network, you need only to specify
that the new port is on VLAN 1.
• It helps to control traffic.
With traditional networks, congestion can be caused by broadcast traffic that is
directed to all network devices whether they require it or not. Each VLAN can be set
up to contain only those devices that need to communicate with each other,
increasing network efficiency.
• It provides extra security.
Devices within each VLAN can communicate only with member devices in the same
VLAN. If a device in VLAN 1 needs to communicate with devices in VLAN 2, the traffic
must cross a router.
The 3CR990B NIC multiple VLAN capability supports IEEE 802.1Q VLAN tagging and
works with any switch that complies with IEEE 802.1Q specifications. Refer to your
Ethernet switch documentation for more information on IEEE 802.1Q VLANs.
Server Features Using Other NICs
Up to two foreign NICs (those that are not 3Com server NICs) are allowed in one group
per server. For guidelines on using foreign NICs, see “Planning the Configuration” on
page 33.
31
10
Installing 3Com Advanced Server Features for Windows
Installing 3Com Advanced Server Software
Follow these steps to install 3Com Advanced Server (DynamicAccess) software:
1 Make sure that the NIC and the network driver are properly installed in your
computer.
2 Start Windows.
3 Insert the 3Com Installation CD in the CD-ROM drive.
The Welcome screen appears.
4 Click NIC Software.
5 Click DynamicAccess technologies.
6 Click Install DynamicAccess software.
7 Select the appropriate menu option for your operating system.
The 3Com DynamicAccess Software Installation screen appears, displaying the
following prompt:
“Do you wish to install DynamicAccess Software for Servers?”
8 Click Yes.
The 3Com Advanced Server Software Installation program starts.
• When 3Com Advanced Server features are installed for Windows NT, NICs bind to
the Advanced Server protocol and real protocols bind to the Advanced Server
Miniport. Do not modify these bindings.
• When 3Com Advanced Server features are installed for Windows 2003, Windows
XP, or Windows 2000, LAN connections bind to the Advanced Server protocol and
real protocols bind to the Advanced Server miniport. Do not modify these bindings.
9 When the 3Com Advanced Server Technology installation is finished, exit the
installation CD, and then exit Windows.
10 Restart the computer.
NOTE: You must restart the computer to complete the installation.
Verifying the Installation
After the 3Com Advanced Server software is installed on the server, the following
changes are visible in the Windows Network control panel:
• For each physical NIC installed in the client computer, a virtual NIC entry appears in
the list of network adapters.
• All protocols are re-bound to the virtual NIC. The bindings to the physical NIC are still
intact.
• A 3Com DynamicAccess entry appears as a protocol.
• A 3Com DynamicAccess icon is installed in the Windows Control Panel (for
Windows NT 4.0 installations only).
32
Planning the Configuration
Configuring Groups and VLANs
3Com Advanced Server technology features allow you to configure load balancing groups
and virtual LANs (VLANs).
The following 3Com Advanced Server technology features are available for NIC groups in
Windows:
• Load balancing
• RSL failover
• Multiple VLANs
The examples in this section illustrate typical actions you might take in the course of
maintaining a 3Com Advanced Server configuration in Windows.
Planning the Configuration
Consider these items when planning groups and VLANs:
• Decide whether you want to use bidirectional load balancing or transmit load
balancing.
To use bidirectional load balancing, you must assign a dedicated IP address for each
load balancing group. This address must be unique (not used elsewhere on the
network). For details, see “Specifying a Dedicated IP Address” on page 36.
• Decide which NICs are to be part of each group. Each group must include at least two
NICs.
• Decide whether you want to use a foreign (non-3Com) NIC in one of the groups.
Up to two foreign NICs (that is, NICs that are not 3Com server NICs) are allowed in
one group per server.
• Decide which NIC is to be the primary NIC in each group. If a foreign NIC is used, it
must be designated the primary NIC.
• Disable load balancing if you have set failover for a group of NICs operating at
different speeds. 3Com Advanced Server supports failover for a group of NICs
operating at different speeds (for example, with one NIC operating at 10 Mbps,
another operating at 100 Mbps, and another at 1,000 Mbps). However,
Advanced Server supports load balancing only for a group of NICs operating at the
same speed (with all NICs operating at 10 Mbps, or all operating at 100 Mbps, or all
at 1000 Mbps). For example, if you specify failover from a 3Com Gigabit Server 1000
PCI NIC to a 3Com 10/100 PCI NIC, you must disable load balancing for that group to
achieve the best performance.
• For the best failover performance, turn the spanning tree feature off at switches that
are connected directly to the server. If the spanning tree feature is turned on, a
failover may be delayed up to 30 seconds while the switch processes the spanning
tree algorithm.
• Plan the cable changes required to connect each primary NIC and all secondary NICs
to the same network segment.
• Observe the recommended support limit of four groups per server.
33
10
Installing 3Com Advanced Server Features for Windows
• The following guidelines apply to groups under Windows 2003, Windows XP, and
Windows 2000:
802.1p Support Property—The value of the Windows 802.1p support property
must be the same for all NICs in a group. For example, if this property is enabled for
the primary NIC, it must also be enabled for all other NICs in the group.
Microsoft Task Offload Support—It is possible to form a group of NICs that have
different levels of support for Microsoft Task Offload features (TCP Checksum,
TCP Segmentation, and IPSec). In this case, the offload support is limited to the
features supported by all NICs in the group. For example, if two NICs in a group
support all offload features but one NIC supports only TCP Checksum, then offload
support for the group is limited to TCP Checksum.
• Observe these VLAN configuration guidelines:
• Assign a VLAN ID number to each VLAN. If you are not using a DHCP server, each
VLAN that is using IP services requires an IP address and subnet mask.
3Com Advanced Server software supports as many as 16 VLANs per server.
• Each VLAN bound to TCP/IP must exist on a separate IP subnet. DHCP servers used
to allocate IP addresses must be located on the same IP subnets as the VLANs.
• Each VLAN bound to the IPX/SPX protocol must use a unique network number.
• To avoid problems associated with blocked multicast streams, configure end
stations that support the IEEE 802.1p GARP Multicast Registration Protocol
specification (GMRP) on separate switch segments from stations that do not
support it.
• Under Windows 2003 and Windows 2000, when VLANs are enabled, the Windows
802.1p Support property must be disabled for all the underlying miniports.
• The following memory requirements are for multiple VLAN configurations. You can
improve overall system performance with VLANs by increasing the physical RAM,
the virtual memory page size, or both.
Number of VLANs
Minimum RAM Size (MB)
Up to 16
128
CAUTION: Before creating or removing a load balancing group or VLAN, take
note of configuration information such as IP addresses and IPX network numbers.
3Com Advanced Server software does not restore a network configuration to its
pre-Advanced Server state. Always verify that the network configuration conforms
to your expectations after creating or removing a load balancing group or VLAN.
Working With Server Features
The 3Com Advanced Server features window contains tabs for these windows:
• In the Load Balance/RSL window, you can create and change Load Balancing/RSL
groups. The NICs in a group work together to route traffic efficiently and to recover
from failures.
• In the VLANs window, you can set up virtual LANs. All groups listed on the Load
Balance/RSL window also appear as groups in the VLAN window. Any ungrouped
NICs in the Load Balance/RSL window are also listed in the VLAN window.
34
Creating a Group
Windows 2003, Windows XP, and Windows 2000
Access 3Com Advanced Server server features through the Windows Network and Dial-up
Connections window as follows:
1 Log in to Windows with administrator privileges.
2 Launch the Windows Network and Dial-up Connections window.
3 Select a Local Area Connection icon.
4 Click the right mouse button and select Properties.
The Local Area Connections Properties window appears.
5 Click the General tab.
6 In the General window, select DynamicAccess Protocol and click Properties.
The DynamicAccess Protocol Properties window appears. Click the appropriate tab to
configure server features.
Windows NT
Start 3Com Advanced Server features under Windows NT as follows:
1 Log in to the Windows NT Administrator account.
2 From the Windows Start menu, select Settings/Control Panel.
3 Double-click the DynamicAccess SW Server icon.
The DynamicAccess Resilient Server Link/Load Balance/VLAN Configuration window
appears. Click the appropriate tab to configure server features.
Creating a Group
1 Click the Load Balance/RSL tab.
2 In the Load Balance/RSL window, click Create Group.
3 In the Create Group dialog box, type a group name.
4 Set the load balancing:
To enable transmit load balancing—Clear the Receive Load Balance Enabled
check box and check the Transmit Load Balance Enabled box.
To enable bidirectional load balancing—Check both the Transmit Load Balance
Enabled box and the Receive Load Balance Enabled box. Enter only the Host ID bytes
required for a dedicated IP address. For example:
Class A
Byte 1
Byte 2
Network ID
Host ID
24
Class B
Network ID
Byte 3
Byte 4
1
253
Host ID
2
Class C
Network ID
253
Host ID
253
See “Specifying a Dedicated IP Address” on page 36 for more information on the
dedicated IP address.
35
10
Installing 3Com Advanced Server Features for Windows
To disable all load balancing—Clear the Receive Load Balance Enabled and the
Transmit Load Balance Enabled check boxes.
5 Click OK.
The name of the new NIC group appears in the Load Balancing/RSL Groups list box.
Adding NICs to a Group
1 Click the Load Balance/RSL tab.
2 In the Load Balance/RSL window:
• Select a group from the Load Balancing/RSL Groups list.
• Select a NIC from the Network Interface Cards list.
3 Click Add NIC.
The NIC appears as part of the group in the Load Balancing/RSL list box.
If you click Add NIC repeatedly, NICs are added to the group in the order that they are
listed after the first NIC you selected.
Specifying a Dedicated IP Address
Bidirectional load balancing requires that you specify a dedicated IP address for the load
balancing group. This address specifies a Network ID and a Host ID, and it must be unique
(not used elsewhere on the network). For example:
Class A
Class B
Byte 1
Byte 2
Network ID
Host ID
125
24
Network ID
139
Class C
Byte 3
Byte 4
1
253
Host ID
25
2
Network ID
193
253
Host ID
26
3
253
You can specify the dedicated IP address in the Create Group or Group Properties dialog
boxes. You cannot specify the bytes for the Network ID; they are fixed. Specify the bytes
for the Host ID for various classes of subnets as follows:
36
Class
Byte 1
Specify only bytes
A
126
2, 3, and 4 (the three rightmost boxes).
B
128 - 191
3 and 4 (the two rightmost boxes).
C
192 - 223
4 (the rightmost box).
Changing an IP Address
Changing an IP Address
If another device is using a bidirectional load balancing group's dedicated IP address, you
must change either the other device’s IP address or that of the load balancing group. Use
the appropriate procedure below:
Changing the Other
Device’s IP Address
After you change the other device's address, restart receive load
balancing as follows:
1 In the Load Balancing/RSL window, select the group that had
the duplicate address.
2 Click Properties.
3 In the Properties dialog box, click OK.
4 In the Load Balancing/RSL window, click OK to exit the
window and restart Windows.
Changing the Group’s
Dedicated IP Address
1 In the Load Balancing/RSL window, select the group that has
the duplicate address.
2 Click Properties.
3 In the Properties dialog box, enter a new IP address and click
OK.
4 In the Load Balancing/RSL window, click OK to exit the
window and restart Windows.
Creating a VLAN
1 Click the VLANs tab.
2 In the VLANs window, select a NIC or group from the VLANs list and click
Create VLAN.
3 In the VLAN ID dialog box, type a VLAN ID number and click OK.
Valid VLAN ID numbers are from 1 – 511 and from 768 – 4095. Numbers in the range
512 – 767 are reserved.
The new VLAN is added to the VLANs list.
Windows 2003/Windows XP/Windows 2000—If you create more than one VLAN,
assign a VLAN ID number to each VLAN as follows:
• Right-click My Network Places and select Properties from the menu.
• In the next window, right-click a VLAN and select Properties from the menu.
• Click Configure.
• In the NIC Properties window, click TCP/IP.
• In the next window, configure the IP address and subnet mask.
Windows NT—Restart the computer when the software prompts you to do so.
Specifying Traffic Priorities
You can use the DynamicAccess Software Setup window to specify traffic priorities.
1 Double-click the 3Com DynamicAccess icon in the Windows Control Panel.
The DynamicAccess Software Setup window appears.
2 Click the Administration tab.
3 Set 3Com Advanced Server control panel access, set VLAN options, and enable
efficient multicast control.
37
10
Installing 3Com Advanced Server Features for Windows
Saving the Configuration
To save and exit, click OK.
To exit without saving the configuration, click Cancel.
Disabling Load Balancing for a Group
Follow these steps to disable load balancing for a group:
1 Click the Load Balance/RSL tab.
2 In the Load Balance/RSL window:
• Select a group from the Load Balancing/RSL Groups list.
• Click Properties.
3 In the Group Properties dialog box:
To disable receive load balancing only—Clear the Receive Load Balance Enabled
check box.
To disable all load balancing—Clear the Receive Load Balance Enabled and the
Transmit Load Balance Enabled check boxes.
4 Click OK.
Changing the Primary NIC
The first NIC added to an empty group is automatically designated the primary NIC. NICs
added subsequently are designated as secondary NICs. If a foreign (non-3Com) NIC is
used, it must be designated the primary NIC. Primary status is indicated by a P icon at the
beginning of the NIC name.
When there are more than one NIC in a group, you can change the primary NIC as
follows:
1 Click the Load Balance/RSL tab.
2 In the Load Balance/RSL window, select a secondary NIC from the Load Balance/RSL
Groups list.
3 Click Select Primary.
Removing a NIC from a Group
Follow these steps to remove a NIC from a group:
1 Click the Load Balance/RSL tab.
2 In the Load Balance/RSL window, select a NIC from a group in the Load Balancing/RSL
Groups list.
3 Click Remove NIC.
Deleting or Editing a VLAN
When a VLAN is selected, you can delete it or edit its properties.
1 Click the VLANs tab.
2 In the VLANs window, select a VLAN.
To delete the selected VLAN, click Delete VLAN.
To edit the VLAN ID for the selected VLAN, click Edit VLAN.
38
Displaying NIC Properties
Displaying NIC Properties
Follow these steps to display NIC properties:
1 Click the Load Balance/RSL tab.
2 In the Load Balance/RSL window, select a NIC.
3 Click Properties.
The NIC Properties window appears, showing the properties of the selected NIC.
Displaying Group Properties
Follow these steps to display group properties:
1 Click the Load Balance/RSL tab.
2 In the Load Balance/RSL window, select a group in the Load Balancing/RSL Groups list
box.
3 Click Properties.
The Group Properties window appears, showing the properties of the selected group.
Troubleshooting a Load Balancing Configuration
Use the troubleshooting tips in the following table to solve problems that may occur in a
load balancing configuration.
NOTE: To access a database of technical information that can help you diagnose
and solve NIC installation, configuration, and upgrade problems, go to:
http://knowledgebase.3com.com
Symptom
Tip
Receive load balancing fails to
begin functioning.
Check the Group Properties to verify that the dedicated IP
address has been entered. If no address appears in the Group
Properties dialog box, enter one to enable receive load
balancing.
Receive load balancing stops
functioning.
Cables may be disconnected, or there may be other hardware
problems. Reconnect or change the cables. Correct any other
hardware problems. Bidirectional load balancing is restored
after this type of failure when applications create new
connections or new clients log in.
Reconnecting cables does not
restore load balancing.
Check the event log for a duplicate IP address. If another device
is using a load balancing group's dedicated IP address, change
one of the IP addresses. See “Changing an IP Address” on
page 37 for instructions.
Receive load balancing does not
function across a router.
Receive load balancing across a router is not supported. Clients
across the router cannot use receive load balancing, but clients
within the subnet get higher throughput from receive load
balancing.
39
10
Installing 3Com Advanced Server Features for Windows
Changing Windows 2003, Windows XP, and
Windows 2000 Property Settings
If you receive warnings about inconsistent property settings (for example, the 802.1p
Support property) while creating a group, use the following procedure to change a NIC
property:
1 Right-click the My Computer icon and select Properties from the menu.
2 Click the Hardware tab, then click Device Manager.
3 Double-click Network Adapters.
4 Right-click on the name of the appropriate NIC and select Properties from the menu.
5 Click the Advanced tab.
6 Select the appropriate property from the list (for example, 802.1p Support).
7 Use the scroll list to change the property value.
8 Exit the Device Manager.
Identifying Windows 2003 and Windows 2000 Miniport
and LAN Connections
3Com Advanced Server miniport connections and NIC Local Area Connections are listed in
the Network and Dial-up Connections window. If a group or VLAN is associated with a
miniport, the group name and VLAN name appear in the miniport icon name. If a
miniport is associated with an ungrouped NIC, you can identify the NIC by its MAC
address as follows:
1 In the Network and Dial-up Connections window, right-click the miniport icon and
select Properties from the menu.
2 In the DynamicAccess Properties window, click the General tab.
3 In the General tab, move the cursor over the miniport name. (Do not click the name.)
After a short pause, the MAC address of the associated NIC appears in a pop-up
window.
Using Windows 2003, Windows XP, and Windows 2000
Offload Features
The 3CR990B NIC supports Windows 2003, Windows XP, and Windows 2000 offload
features in an IP environment. The offload features are designed to enhance the Windows
2003 and Windows 2000 operating system capabilities by off-loading key TCP/IP
networking and security tasks from the operating system:
• IPSec Offload—reduces CPU utilization by allowing the NIC and a crypto chip on the
NIC to perform data encryption operations.
• TCP Segmentation Offload—reduces CPU utilization by allowing the NIC to perform
segmentation of TCP packets.
NOTE: Windows 2003 and Windows 2000 do not allow IPSec offloads and TCP
Segmentation offloads for the same session. Though all offload types may be
enabled, TCP Segmentation offloading will not occur during an IPSec session.
40
Enabling Offloads
• IP and TCP Checksum Offload—reduced CPU utilization by allowing the NIC to
perform the checksum calculation of TCP/IP and UDP/IP packets.
• 802.1p Packet Priority Offload—reduces CPU utilization by allowing the NIC to
perform the insertion of the 802.1Q tag header into the packet.
Enabling Offloads
Windows 2003 and Windows 2000 provide the capability to individually enable or disable
each of the four offload features. (The default setting for these features is enabled.)
To enable or disable individual offload settings in Windows 2003 or Windows 2000:
1 Right-click the My Network Places desktop icon and select Properties.
The Network and Dial-up Connections screen appears.
2 Right-click the Local Area Connection icon and select Properties.
The Local Area Connection Properties screen appears.
3 Click Configure.
The 3Com 10/100 Mbps Secure NIC screen appears.
4 Click the Advanced tab.
5 Select Enable Offloads in the Property list box.
6 Select the appropriate value in the Value entry box (shown in the following table) for
the desired offload state.
7 Close all open windows.
The following table describes values for the offload functions:
Value
Offload Function Enables
All Offloads Disabled
No offloads
cksum
TCP Checksum
cksum-ipsec
TCP Checksum and IPSec
cksum-tcpseg
TCP Checksum and TCP Segmentation
cksum-tcpseg-ipsec
TCP Checksum and TCP Segmentation and IPSec
ipsec
IP Sec
tcpseg
TCP Segmentation
tcpseg-ipsec
TCP Segmentation and IPSec
802.1p
Packet Priority
802.1p-cksum
Packet Priority and TCP Checksum
802.1p-cksum-ipsec
Packet Priority and TCP Checksum and IPSec
802.1p-cksum-tcpseg
Packet Priority and TCP Checksum and TCP Segmentation
802.1p-cksum-tcpseg-ipsec
Packet Priority and TCP Checksum and TCP Segmentation and
IPSec
802.1p-ipsec
Packet Priority and IPSec
802.1p-tcpseg
Packet Priority and TCP Segmentation
802.1p-tcpseg-ipsec
Packet Priority and TCP Segmentation and IPSec
41
10
Installing 3Com Advanced Server Features for Windows
Configuring Offloads for a Group of Different NICs
Your computer may contain a combination of installed NICs (including one or more
3CR990Bs with varying offload capabilities). If you have a mix of dissimilar NICs
configured in a group, then 3Com DynamicAccess Advanced Server software supports
only those offload functions that are supported by all the NICs in the group.
For example, if you have created a group consisting of a 3CR990B NIC and another NIC
that does not have any offload capabilities, then the group will not support any offloads.
In another example, if you have a group of three NICs with two supporting TCP
Checksum, TCP Segmentation, and IPSec offloads, and one supporting only IPSec, then
the group will support only IPSec offloads.
If you add a NIC to an existing group, and that NIC has offload capabilities that differ from
those of the group, then you must reconfigure the group: that is, you must delete the
group, recreate the group, and restart the computer. (If you do not delete and recreate
the group, the Advanced Server software will not bind to the NIC.)
Similarly, if you replace a NIC that has been configured as part of a group with another
NIC that has different offload capabilities, then you must reconfigure the group.
In addition, if you disable or enable any offloads for a group through the Windows 2003/
Windows 2000 Advanced tab, then you must reconfigure the group.
42
11
Configuring the NIC
This chapter describes how to configure the 3Com 10/100 Secure (3CR990B) NIC.
NOTE: Before you change the NIC configuration settings, contact your system
administrator.
Default NIC Settings
The table below lists the configuration settings for the NIC. The default setting is shown in
bold in the Settings column.
Option
Description
Settings
NetBoot ROM
Provides the ability to boot a computer over the network.
Enables or disables the Netboot ROM (if a boot ROM is
installed on the NIC).
• Disabled
• Enabled
Duplex
Determines if the NIC transmits data across the network
in both directions simultaneously (full-duplex) or in one
direction at a time (half-duplex).
• Auto Select allows the NIC to automatically connect
at the duplex mode of the connected hub or switch.
When you select this setting, the Media Type is
automatically set to Auto Select.
• Full-Duplex sets the NIC to operate in full-duplex
mode. To use this setting, the switch that you are
connected to must support full-duplex. You must also
manually set the NIC Media Type setting.
• Half-Duplex sets the NIC to operate in half-duplex
mode. You must also set the NIC Media Type setting.
Note: If you are running Windows 2003,
Windows XP, or Windows 2000, changes made to
the Duplex setting though the 3Com NIC Diagnostics
are not reflected in the registry unless you also change
the Media Select property setting in Windows:
1 In the Device Manager window, double-click
Network adapters.
2 Right-click the 3CR990B NIC and select Properties.
3 Select the Advanced tab.
4 Select Media Select in the property list, and make the
appropriate setting change in the Value list.
• Auto Select
• Full-Duplex
• Half-Duplex
(continued)
43
11
Configuring the NIC
Option
Description
Settings
Media Type
Determines the type of media your network is using.
• Auto Select allows the NIC to automatically select the
Media Type for you.
• If you set the NIC Duplex setting to Auto Select, the
Media Type is automatically set to Auto Select.
• If you set the NIC Duplex setting manually, you must
set the Media Type setting manually.
Note: If you are running Windows 2003, Windows XP,
or Windows 2000, changes made to the Media Type
setting though the 3Com NIC Diagnostics are not
reflected in the registry unless you also change the
Media Select property setting in Windows:
1 In the Device Manager window, double-click Network
adapters.
• AUTO SELECT
• 100BASE-TX
(100 Mbps)
• 10BASE-T
(10 Mbps)
• 100BASE-FX
(100 Mbps)
2 Right-click the 3CR990B NIC and select Properties.
3 Select the Advanced tab.
4 Select Media Select in the property list, and make the
appropriate setting change in the Value list.
44
Self Healing
In BASIC mode, monitors firmware heartbeat and
interrupt stalls, and tries to automatically reset the NIC.
Also monitors link status and reports changes.
In ENHANCED mode, checks for transmit/receive errors
and tries to recover.
• BASIC
• Disabled
• Enhanced
Error Tolerance
Specifies threshold levels for transmit/receive errors. An
RSL failover or NIC reset occurs when the threshold is
exceeded during the sampling period.
• High = 100 of each error category (default setting)
• Medium = 50 of each error category
• Low = 5 of each error category
• HIGH
• Medium
• Low
Alert Type
Enabled alert types are reported to the Windows System
Events monitor. The default setting is ALL. Alert types:
• Information
• Warning
• Error
•
•
•
•
•
Flow Control
When enabled, the NIC throttles the incoming data
packet stream to prevent the input buffers from
overflowing and losing packets.
• Disabled
• Enabled
Off
Information
Warning
Error
All
Configuration Methods
Configuration Methods
The NIC can be configured using any of the methods listed in the table below.
NOTE: This section describes how to configure the NIC using the 3Com NIC
Diagnostics program for Windows. For instructions on using the other two
methods, see the file or section mentioned in the table.
Method
Description
Requirement(s)
3Com NIC Diagnostics
Program for Windows
Configure the NIC locally using the 3Com NIC
Diagnostics program for Windows:
Windows 2003,
Windows XP,
Windows 2000,
Windows NT 4.0,
or
Windows 98 SE
1 Make sure that the 3Com NIC diagnostics
program is installed. See “Installing the 3Com
NIC Diagnostics Program” on page 46 for
installation instructions. See “Using the 3Com
NIC Diagnostics Program” on page 47 for usage
instructions.
2 Open the Windows Start menu.
3 Select Programs, and then 3Com NIC Utilities.
4 Click 3Com NIC Doctor.
3Com Configuration
and Diagnostics
program for DOS
Configure the NIC locally using the 3Com
Configuration and Diagnostics program for DOS:
DOS or NetWare
1 Copy 3c99xcfg.exe from the 3Com Installation
CD to the root directory of a DOS-bootable
diskette.
2 Reboot the computer using the DOS-bootable
diskette.
3 Enter at the DOS prompt:
a:\3c99xcfg.exe
See “Using the 3Com DOS Configuration Program”
on page 48 for more information.
Customers running Japanese DOS must switch to
U.S. mode DOS before running this program.
DMI 2.0 or 2.0s
Configure the NIC remotely using the 3Com DMI
Agent software.
See “Installing the 3Com DMI Agent” on page 72
for more information.
3Com DMI Agent
and a DMIcompatible browser
or a network
management
application that
supports DMI 2.0 or
2.0s
Windows Property
Settings
Configure the NIC locally as described in
“Changing Windows 2003, Windows XP, and
Windows 2000 Property Settings” on page 40.
Windows 2003,
Windows XP, or
Windows 2000
45
11
Configuring the NIC
Changing General NIC Configuration Settings
This section describes two NIC configuration methods. Depending on your computer
operating system, you can use one of the following configuration programs:
• 3Com NIC Diagnostics Program—for computers running Windows 2003,
Windows XP, Windows 2000, Windows NT 4.0, or Windows 98 SE.
• 3Com Configuration and Diagnostics Program for DOS—for computers running
DOS or NetWare.
Installing the 3Com NIC Diagnostics Program
This section describes how to install the 3Com NIC Diagnostics program after you have
already installed the network driver. This program is for computers running
Windows 2003, Windows XP, Windows 2000, Windows NT 4.0, or Windows 98 SE.
NOTE: If you manually install the network driver by selecting options on the 3Com
Installation CD Welcome Screen, you have the option of installing the network
driver with or without the 3Com NIC Diagnostics program. If you have already
installed the network driver together with the 3Com NIC Diagnostics program for
Windows, you can ignore this section.
The 3Com NIC Diagnostics program allows you to run tests that determine the status of
your network and the NIC. It also allows you to configure the NIC, view network statistics
and LEDs, and access support databases.
NOTE: When you install the 3Com NIC Diagnostics program, the network driver is
automatically updated to the latest version on the installation CD.
To install the 3Com NIC Diagnostics program:
1 Turn on the power to the PC and start Windows.
2 Insert the 3Com Installation CD in the CD-ROM drive.
NOTE: If the Welcome screen does not appear, auto insert is probably not enabled
for your CD-ROM drive.
3 Click NIC Software.
4 Click NIC Drivers and Diagnostics.
5 Click Update NIC Driver.
6 Click Update Drivers and Diagnostic Program.
The Update screen appears, displaying a message indicating the 3Com NIC Update
Kit has successfully updated the network software, and informing you that you must
restart your computer.
NOTE: If the Update screen does not appear automatically, click the Update
button displayed at the bottom of the window.
7 Click OK to return to the Update NIC drivers screen.
8 Restart Windows if prompted to do so.
The installation is complete.
46
Changing General NIC Configuration Settings
Starting the 3Com NIC Diagnostics Program
To start the 3Com NIC Diagnostics program:
1 Open the Windows Start menu.
2 Select Programs, and then 3Com NIC Utilities.
3 Click 3Com NIC Doctor.
The 3Com NIC Diagnostic screen appears.
Alternatively, you can also start the 3Com NIC Diagnostics program using the
following procedure if the 3Com NIC Diagnostics icon is displayed on the right side of
the Windows task bar:
• Double-click the 3Com NIC Diagnostics icon.
The 3Com NIC Diagnostic screen appears.
Using the 3Com NIC Diagnostics Program
This section describes NIC configuration for computers running Windows 2003,
Windows XP, Windows 2000, Windows NT 4.0, or Windows 98 SE.
Before you configure the NIC, make sure that:
• The NIC is installed in the computer and is connected to the network.
• The network driver is installed.
• The 3Com NIC Diagnostics program is installed.
To change the NIC general configuration settings, such as network driver optimization,
duplex mode, and media type:
1 Open the Windows Start menu.
2 Select Programs, and then 3Com NIC Utilities.
3 Click 3Com NIC Doctor.
The 3Com NIC Diagnostics General screen appears.
NOTE: Click Help to obtain general information about the function of a screen. To
obtain specific information about any topic on a screen, click the question mark (?)
in the upper right corner of the screen, move it over a topic, and click once.
4 If your computer has more than one NIC installed, open the Network Interface Card
(NIC) list box and select the NIC to be configured.
5 Click the Configuration tab.
The Configuration screen appears.
6 Under Network Parameter, select the setting to be changed.
For a description of each setting, click the question mark (?) in the upper right corner
of the screen, move it over a setting, and click once.
7 Open the Set Value list box and select a new value from the list of available options.
Repeat the process to change any other configuration setting.
To undo changes and return the settings to their previous values, click Undo Changes.
To return the settings to the factory default settings, click Set Factory Defaults.
8 Click OK to save the changes and exit the program.
47
11
Configuring the NIC
Using the 3Com DOS Configuration Program
This section describes NIC configuration for computers running DOS or NetWare.
To run the DOS diagnostic program:
1 Copy 3c99xcfg.exe from the 3Com Installation CD to the root directory of a DOSbootable diskette.
2 Boot to DOS using the DOS-bootable diskette.
3 Enter the following at the DOS prompt:
a:\3c99xcfg.exe
where a:\ is the drive containing the DOS-bootable diskette.
If multiple NICs are installed in the computer, select Select NIC on the first screen to
display a list of installed NICs. Use the arrow keys to select the NIC that you want to
configure and press Enter.
4 Use the arrow keys to scroll the list and make a selection. Press Enter.
NOTE: On the Configuration screen, when you choose the Auto Select setting for
Media Type, the setting for Duplex is automatically changed to Auto Select.
Selecting Auto Select for Duplex automatically changes the Media Type setting to
Auto Select.
NOTE: Note that any configuration change you make through the Windows 2003
or Windows 2000 Advanced tab overrides the same configuration setting made
through the 3Com NIC (Windows) Diagnostics program or the 3Com DOS
Diagnostic program.
5 Continue this procedure for other options. For more information on a specific option,
select the option and press F1.
NOTE: Press Esc to return to a previous screen. If a secondary window is open,
press Esc to close the window.
48
Configuring the Managed PC Boot Agent (MBA)
Configuring the Managed PC Boot Agent (MBA)
This section explains how to configure the Managed PC Boot Agent (MBA) boot ROM to
boot from the network.
NOTE: For detailed information on using, configuring, and troubleshooting the
MBA boot ROM, refer to the Managed PC Boot Agent User Guide, located with
the MBA software on the 3Com Installation CD.
Enabling or Disabling the Boot ROM Setting
The default NIC boot ROM setting is Disabled. This setting must be enabled to boot from
the network.
To enable or disable the NIC boot ROM setting:
1 Make sure that the NIC is installed and is connected to the network and that the NIC
driver is installed.
2 Open the Windows Start menu.
3 Select Programs, and then 3Com NIC Utilities.
4 Click 3Com NIC Doctor.
The 3Com NIC Diagnostics General screen appears.
5 Select the Configuration tab.
The Configuration screen appears.
6 Under Network Parameter, select NetBoot ROM.
7 Open the Set Value list box and select Enabled to enable the boot ROM or Disabled to
disable the boot ROM.
8 Click OK to save the setting and exit the program.
Booting From the Network
The boot process for the MBA boot ROM varies depending on the type of computer you
have (BBS BIOS-compatible or non-BBS BIOS-compatible).
If your computer was purchased recently, it may be BBS (BIOS Boot Specification) BIOScompatible. The BBS determines how the system BIOS identifies boot devices in a
computer (such as a CD-ROM drive, a hard drive, or a floppy drive), allows the user to
select the boot order of these devices, and then attempts to boot from each device in the
specified order.
Refer to your computer documentation if you do not know which type of computer you
have.
BBS BIOS-Compatible PCs
To enable a BBS BIOS-compatible computer to boot from the network using the MBA
boot ROM:
1 Make sure that the NIC boot ROM setting is Enabled.
See the previous section, “Enabling or Disabling the Boot ROM Setting,” for
instructions.
2 Set the MBA manually as the first boot device in the computer BIOS.
Refer to your computer documentation for instructions on accessing and configuring
the computer BIOS.
49
11
Configuring the NIC
3 Reboot the computer.
The MBA attempts to boot from the network using the default boot method PXE. To
change the default boot method or any other MBA configurations, press Ctrl+Alt+B
when the following message appears:
Initializing MBA. Press Ctrl+Alt+B to configure...
If the network boot fails, the following message appears:
Network boot aborted, press any key to continue
The BIOS continues to the next device in the boot order (for example, the local hard
drive).
NOTE: To cancel the network boot, press Esc anytime during the network boot
process.
Non-BBS BIOS-Compatible PCs
To enable a non-BBS BIOS-compatible computer to boot from the network using the MBA
boot ROM:
1 Make sure that the NIC boot ROM setting is Enabled.
See “Enabling or Disabling the Boot ROM Setting” on page 49 for instructions.
2 Change the MBA default boot setting from Local to Network.
To change the default boot setting or any other MBA configurations, use the
MBACFG utility or press Ctrl+Alt+B when the following message appears:
Initializing MBA. Press Ctrl+Alt+B to configure...
NOTE: For more information on using, configuring, and troubleshooting the MBA
boot ROM, refer to the Managed PC Boot Agent User Guide, located with the
MBA software on the 3Com Installation CD.
Disabling the 3Com Logo
To disable the 3Com logo that appears during startup:
1 Make sure that the NIC, the network driver, and the 3Com NIC Diagnostics program
are installed.
2 Open the Windows Start menu.
3 Select Programs, and then 3Com NIC Utilities.
4 Click 3Com NIC Doctor.
The 3Com NIC Diagnostics General screen appears.
5 On the General screen, make sure that the check box next to Show 3Com Logo on
Startup is not selected.
6 Exit the 3Com NIC Diagnostics program.
50
12
Troubleshooting the NIC
This chapter describes procedures for locating problems you might have with the 3Com
10/100 Secure (3CR990B) NIC. It explains how to:
• Interpret the NIC LEDs.
• Access 3Com support databases.
• Troubleshoot NIC installation problems.
• Troubleshoot NIC and network connection problems.
• Troubleshoot Remote Wake-Up.
• Remove the network driver.
NOTE: To access a database of technical information that can help you diagnose
and solve NIC installation, configuration, and upgrade problems, go to:
http://knowledgebase.3com.com
Interpreting the NIC LEDs
The 3CR990B NICs have light-emitting diodes (LEDs), as described in the following tables,
that can assist with network troubleshooting.
3CR990B-97 NIC
LED
State
Meaning
YEL/100 GRN/10
Yellow
If drivers are installed, the 100BASE-TX connection is
active.
If drivers are not installed, the NIC is receiving power.
Green
If drivers are installed, the 10BASE-T connection is active.
If drivers are not installed, the NIC is receiving power.
Off
Something is preventing the connection between the
NIC and the hub or switch.
Blinking
The cable polarity is reversed. Try a different network
cable or contact your system administrator.
Blinking
Network traffic is present.
Steady
Heavy network traffic is present.
Off
No network traffic is present.
ACT (activity)
51
12
Troubleshooting the NIC
3CR990B-FX-97 NIC
LED
State
Meaning
100 LNK
Green
If drivers are installed, the 100BASE-FX connection is
active; there is a good connection between the NIC and
the hub or switch.
Blinking
N/A
Off
Something is preventing the connection between the
NIC and the hub or switch.
Yellow
Heavy network traffic is present.
Blinking
Network traffic is present.
Off
No network traffic is present.
ACT LNK
Viewing the NIC LEDs in the Diagnostics Program
To view the LEDs in the 3Com NIC Diagnostics program:
1 Make sure that the NIC, the network driver, and the 3Com NIC Diagnostics program
are installed.
NOTE: For instructions on using the 3Com NIC Diagnostics program, see “Using
the 3Com NIC Diagnostics Program” on page 47.
2 Open the Windows Start menu.
3 Select Programs, and then 3Com NIC Utilities.
4 Click 3Com NIC Doctor.
The 3Com NIC Diagnostics General screen appears and displays following LEDs:
• Link — lights if there is a valid connection between the NIC and the network.
• Transmit — lights if the NIC is transmitting information.
• Receive — lights if the NIC is receiving information.
Troubleshooting Problems with the LEDs
If a Link LED indicates a problem, check the following to ensure that:
1 Your network hub or switch and the cable connecting to your NIC comply with the
specifications appropriate for your network connection.
2 The hub or switch is powered on.
52
Accessing the 3Com Knowledgebase
Accessing 3Com Support Databases
In addition to the 3Com support databases listed in this section, check the README.TXT
files in the ENGLISH, INSTALLS, and NWSERVER subdirectories and check the Help text
files located in the HELP directory on the 3Com Installation CD.
Accessing the 3Com Knowledgebase
To access a database of technical information that can help you diagnose and solve NIC
installation, configuration, and upgrade problems, go to:
http://knowledgebase.3com.com
Accessing the 3Com NIC Help System
To access the 3Com NIC Help system:
1 Make sure that the NIC, its driver, and the 3Com NIC Diagnostics program are
installed.
See “Installing the 3Com NIC Diagnostics Program” on page 46 for instructions.
2 Open the Windows Start menu.
3 Select Programs, and then 3Com NIC Utilities.
4 Select 3Com NIC Doctor Help.
The main Help screen appears.
5 Click Help Topics to display a list of Help topics or click Find to search for a Help topic.
Accessing Release Notes and Frequently Asked Questions
To access release notes and frequently asked questions about the NIC:
1 Make sure that the NIC, its driver, and the 3Com NIC Diagnostics program are
installed.
See “Installing the 3Com NIC Diagnostics Program” on page 46 for instructions.
2 Open the Windows Start menu.
3 Select Programs, and then 3Com NIC Utilities.
4 Click 3Com NIC Doctor.
The 3Com NIC Diagnostics General screen appears.
5 Click the Support tab.
The Support screen appears.
6 Click Support Databases to display customer support databases about the NIC in
three categories:
• Release notes — Display tips about installing and using the NIC.
• Frequently asked questions — Display common questions asked by customers
and answered by 3Com support experts.
• Knowledgebase topics — Display NIC compatibility topics.
53
12
Troubleshooting the NIC
Troubleshooting the NIC Installation
If you encounter any of the following problems or error messages, follow the steps in
“Cleaning Up A Failed Installation” later in this chapter to resolve the problem.
Problems or Error Messages
• A red X or a A yellow exclamation point (!) appears by the name of the NIC in the
Windows Device Manager.
• The Network Neighborhood icon does not appear on the Windows desktop.
• The NIC does not appear in the Network Configuration or Properties window.
• The NIC fails to authenticate the firmware image that the driver downloads, and then
the following error message appears in the Microsoft Event Viewer:
“DownloadRunTimeImage: Download Firmware Failed Image Authentication.”
• Error: “This device is not present, not working properly, or does not have all of the
driver installed. Code 22.”
• Error: “Windows was unable to locate a driver for this device.”
• Error: “You have selected a plug and play adapter. Please turn off your machine and
install the adapter. Then turn on your machine and reinstall.”
Cleaning Up A Failed Installation
If you encounter any of the problems or error messages listed above, or if the network
driver installation failed or was not completed properly, follow the steps below to clean up
your system and install the NIC correctly. This procedure:
• Removes all 3CR990B NIC drivers from your system.
• Removes the 3Com NIC Diagnostics program.
• Installs the latest network driver.
You can reinstall the 3Com NIC Diagnostics program after completing this procedure. See
“Installing the 3Com NIC Diagnostics Program” on page 46 for instructions.
1 Insert the installation CD in the CD-ROM drive.
The Welcome screen appears.
2 Click NIC Software.
3 Click Installation Utilities.
4 Click Undo Broken Installation and Uninstall.
You are given the option to Proceed or go Back. Before proceeding, write down your
network settings so that you can refer to your notes when you reinstall the NIC.
5 Click Proceed.
The uninstall process begins. A warning message appears.
6 Click OK.
A message appears stating that all of the 3CR990B NICs have been removed from
your system.
7 Click OK.
8 Exit the installation CD, and then exit Windows.
9 Restart the computer.
54
Cleaning Up A Failed Installation
10 Install the network driver.
If you are prompted for 3Com files when Windows restarts, open the drop-down box
and select the following path:
\options\cabs
See the appropriate chapter for your operating system for information about
confirming that the NIC and driver are properly installed.
After the driver has been reinstalled, reinstall the 3Com NIC Diagnostics program. See
“Installing the 3Com NIC Diagnostics Program” on page 46 for instructions.
Troubleshooting the Network Connection
If you encounter problems with using the NIC or connecting to the network, check the
table below for troubleshooting tips.
NOTE: Before inserting or removing the NIC from the computer, turn the
computer power off and unplug the power cord.
Tip
Description
Check the NIC
hardware installation
Make sure that the NIC is installed correctly in a PCI slot. Check for
specific hardware problems, such as broken traces or loose or broken
solder connections. See “Installing and Connecting the NIC” on
page 3.
Check the NIC
software installation
Make sure that the NIC software is installed correctly in the computer.
See the appropriate chapter for your operating system for information
about confirming that the NIC and driver are properly installed.
Check the network
connection
• Inspect all cables and connections. Make sure that the cable
•
complies with length and rating specifications described in
“Preparing the NIC and the Computer” on page 2.
Examine the cable for obvious signs of damage, wear, or crimping.
Substitute a known working cable. Check the length and rating of
the cable. Make sure that the cable complies with 10BASE-T,
100BASE-TX, or 100BASE-FX recommendations.
Check the computer BIOS
Make sure that you are running the latest BIOS for your computer. If
the BIOS has not been upgraded in the previous 12 months, contact
the computer manufacturer to obtain the current version of the BIOS
software.
Run the NIC diagnostic tests
Run the NIC and Network Tests, as described in “Running the NIC
Diagnostics Tests” on page 62.
If the tests fail, replace the NIC with a known working NIC and run the
tests again, using the same configuration settings as those used on the
failed NIC. If the working NIC passes all tests, the original NIC is
probably defective. For information on product repair, see “Obtaining
Support for your Product” on page 75.
Check the 3Com support
databases
Review the known problems and solutions found in the following areas:
• 3Com Knowledgebase
• 3Com NIC Help system
• Release Notes and Frequently Asked Questions
See “Accessing 3Com Support Databases” on page 53 for instructions
on using these databases.
Download the latest NIC
driver
The 3Com Software Library is your World Wide Web connection to
software, drivers, and .INF files for all 3Com products. Point your
browser to the 3Com Web page (http://www.3com.com/). Under
Service and Support, click Software, Drivers & INFs.
Run the Clean Up Failed
Installation program
The Clean Up Failed Installation program is located on the installation
CD. See “Cleaning Up A Failed Installation” on page 54 for instructions.
55
12
Troubleshooting the NIC
Troubleshooting Remote Wake-Up
If your computer does not boot in response to a Remote Wake-Up event, perform these
troubleshooting steps:
NOTE: Wake-On-Error is enabled by default.
1 Make sure that you are using the latest driver for the NIC.
This driver is shipped with the NIC on the 3Com Installation CD. It can also be
downloaded from the 3Com Software Library. Point your Web browser to the 3Com
home page:
http://www.3com.com/
Under Service and Support, click Software, Drivers, and INFs.
2 Check the computer BIOS.
• Boot the computer and enter the BIOS.
For instructions on entering the BIOS, refer to the computer documentation or
consult the computer vendor.
• Locate the Wake-Up on LAN event setting.
• Verify that the setting is enabled.
3 If the previous steps have failed, install a known functioning Remote Wake-Up NIC in
the computer.
• If Remote Wake-Up works with the new NIC installed, consult your computer
vendor for a replacement NIC.
• If Remote Wake-Up does not work with the new NIC installed, there may be a
problem with the computer motherboard. Consult your computer manufacturer.
Troubleshooting a Network Connection
When working with 10BASE-T or 100BASE-TX cabling, concentrators, and NICs from different
vendors, it is possible to connect everything but still have no network communication.
NOTE: For additional network troubleshooting information, see “Running the NIC
Diagnostics Tests” on page 62.
To narrow the range of possible causes of common network connection problems:
3CR990B-97 NIC
1 Determine whether your equipment complies with the 10BASE-T or 100BASE-TX
standard.
This is particularly important for data concentrators (hubs or repeaters).
2 Connect a straight-through cable from the computer to the hub.
The hub performs an internal crossover so that the signal can go from TD+ to RD+
and TD– to RD–. When you look at an RJ-45 connector from the front (that is, the
opposite side from where the wires enter the connector), pin 1 is identified on the
right side when the metal contacts are facing up.
3 Make sure that the TD+ and TD– wires are twisted together, and that the RD+ and
RD– are twisted together.
Using wires from opposing pairs can cause signals to be lost.
56
RJ-45 Cabling Pinouts (Copper NIC Only)
Troubleshooting Hubs
A crossover cable can be used to identify the type of failure when hub performance or
connectivity is in question.
To use a crossover cable:
1 Connect a file server and a client PC back-to-back with a crossover cable to verify that
the NIC and network operating system are properly configured.
2 To make a crossover cable, connect TD+ to RD+ and TD– to RD–.
The cable performs the crossover that is usually performed by the hub.
RJ-45 Cabling Pinouts (Copper NIC Only)
The following illustration compares the cabling pinouts for straight-through and crossover
cables on the 3CR990B-97 NIC.
If the file server and client PC function together as a small network, then either the
existing cabling or the hub is failing.
When a crossover cable is used, the LED on the NIC functions differently than it would
under normal operating conditions. For example, with a correct crossover connection, the
LED lights, whereas with a straight-through connection, the LED does not light. If you
make a crossover cable and the polarity is mismatched (that is, TD+ to RD– instead of TD+
to RD+), the LED blinks.
57
12
Troubleshooting the NIC
Removing the Network Driver
To remove the network driver from your computer, follow the steps for your operating
system.
NOTE: Removing the network driver does not result in the removal of the
diagnostics software. See “Removing the 3Com NIC Diagnostics Program” on
page 65.
Windows 2003, Windows XP, and Windows 2000
The Windows 2003, Windows XP, and Windows 2000 systems do not allow you to
uninstall the network driver from the Network and Dial-up Connections window. To
remove the network driver:
1 Right-click the My Computer icon.
2 Select Properties on the pop-up menu.
The System Properties screen appears.
3 Select the Hardware tab.
4 Click Device Manager in the middle panel.
The Device Manager screen appears.
5 Double-click Network Adapters.
6 Right-click the name of the NIC.
7 Select Uninstall on the pop-up menu.
A warning message appears.
8 Click OK to confirm the driver removal.
The network driver is removed. The Device Manager screen appears.
NOTE: The Windows 2003, Windows XP, and Windows 2000 systems do not
allow you to uninstall the 3Com Advanced Server technology miniport using the
Device Manager. To remove Advanced Server technology features, see “Removing
3Com DynamicAccess Advanced Server Features” on page 60.
9 Exit the Device Manager and shut down Windows.
To reinstall the NIC driver and software, restart the computer.
To physically remove the NIC from the computer, shut down the system, turn the
power off, and remove the NIC from the computer.
Windows NT 4.0
To remove the network driver:
1 Double-click the My Computer icon, then the Control Panel icon, and then the
Network icon.
The Network screen appears.
2 Click the Adapters tab.
3 Select the name of the NIC in the Network Adapters box, and then click Remove.
4 Click Yes to confirm the removal.
5 Click Close to close the Network screen.
You are prompted to restart the computer.
58
Windows 98 SE
6 Depending on whether you are removing the NIC or reinstalling NIC software, do the
following:
• If you are physically removing the NIC from the computer, click No. Do not restart
the computer until you shut down the system, turn the power off, and remove the
NIC from the computer.
• If you are reinstalling the NIC software, click Yes to restart the computer.
Windows 98 SE
To remove the network driver:
1 Double-click the My Computer icon, then the Control Panel icon, and then the
System icon.
2 Click the Device Manager tab.
3 Double-click Network adapters.
4 Select the name of the NIC.
5 Click Remove.
6 Click OK to confirm the device removal.
You are prompted to restart the computer.
If you are physically removing the NIC from the computer, click No. Do not restart the
computer until you shut down the system, turn the power off, and remove the NIC
from the computer.
If you are reinstalling the NIC software, click Yes to restart the computer.
59
12
Troubleshooting the NIC
Removing 3Com DynamicAccess Advanced Server
Features
Follow the steps in this section to remove 3Com DynamicAccess Advanced Server features
from your operating system.
Windows 2003, Windows XP, and Windows 2000
The Windows 2003, Windows XP, and Windows 2000 systems do not allow you to
uninstall the 3Com Advanced Server technology miniport using the Device Manager. To
remove 3Com DynamicAccess Advanced Server features:
1 Launch the Network and Dial-up Connections window.
2 Select a Local Area Connection icon.
3 Click the right mouse button and select Properties from the menu.
The Local Area Connections Properties window appears.
4 Click the General tab.
5 In the General window, select DynamicAccess Protocol and click Uninstall.
Windows NT 4.0
To remove 3Com DynamicAccess Advanced Server features:
1 From the Start menu, select Settings/Control Panel.
2 Double-click the Network icon.
3 In the Network window, click the Protocols tab.
4 In the Protocols tab, select DA Pass Thru Driver Transport.
5 Click Remove.
6 Follow the prompts to remove the software and reboot the server.
NetWare
To remove 3Com DynamicAccess Advanced Server features:
1 Enter this command at the prompt:
load nwconfig
2 In the Installation Options screen, select Product options.
3 In the Other Installation Actions screen, select View/Configure/Remove installed
products.
The Currently Installed Products screen appears, listing software products that are
installed in the system.
4 From the list of products, select 3Com DynamicAccess Server Features and press Del.
5 Select Yes to remove the software.
60
13
Running NIC Diagnostics
The 3Com 10/100 Secure (3CR990B) NIC uses two types of NIC diagnostics programs: a
Windows-based diagnostics program and a DOS-based diagnostics program.
NOTE: Before starting any diagnostics program, close all running applications.
Use the Windows-based 3Com NIC Diagnostics program if your computer is running any
of the following operating systems:
• Windows 2003
• Windows XP
• Windows 2000
• Windows NT 4.0
• Windows 98 SE
Use the 3Com DOS Diagnostics program if your computer is running any of the following
operating systems:
• DOS
• NetWare
NOTE: The following sections explain how to start both NIC diagnostics programs.
However, specific instructions are provided only for using the Windows-based
3Com NIC Diagnostics program.
This chapter explains how to:
• Run the NIC diagnostic tests.
• View the NIC LEDs in the NIC Diagnostics program.
• View network statistics.
• Use the 3Com icon in the Windows system tray.
• Remove the 3Com NIC Diagnostics program.
Running the 3Com DOS Diagnostics Program
To start the 3Com DOS diagnostics program for DOS and NetWare installations:
1 Copy 3c99xcfg.exe from the installation CD to the root directory of a DOS-bootable
diskette.
CAUTION: If you are running Japanese DOS, you must switch to U.S. mode DOS
before running the 3Com DOS diagnostics program.
2 Boot to DOS using the DOS-bootable diskette.
61
13
Running NIC Diagnostics
3 Enter the following at the DOS prompt:
a:\3c99xcfg.exe
where a:\ is the drive containing the DOS-bootable diskette.
For more information about the 3Com DOS Diagnostics program to configure the
NIC, see “Using the 3Com DOS Configuration Program” on page 48.
Running the NIC Diagnostics Tests
The 3Com NIC Diagnostics program for Windows contains tests that can check the status
of the following items:
• Network
• NIC
To run the NIC Test or Network Test:
1 Make sure that the NIC, the network driver, and the 3Com NIC Diagnostics program
are installed.
2 Open the Windows Start menu.
3 Select Programs, and then 3Com NIC Utilities.
4 Click 3Com NIC Doctor.
The 3Com NIC Diagnostics screen appears.
NOTE: Click Help to obtain general information about the function of a screen. To
obtain specific information about any topic on a screen, click the question mark (?)
in the upper right corner of the screen, move it over a topic, and click once.
The following tabs are available for viewing NIC data:
Tab
Description
General
Select the General tab to display the node address, I/O address, and device
ID for the installed NIC.
Configuration
Select the Configuration tab to view and modify configuration settings for
the installed NIC.
Statistics
Select the Statistics tab to view network traffic statistics about the installed
NIC.
Diagnostics
Select the Diagnostics tab to access diagnostics tests that you can run on
the installed NIC.
Support
Select the Support tab to access various 3Com customer support
resources.
Utilities
Select the Utilities tab to:
• Update firmware for the installed NIC.
• Perform an encryption loopback test (to test the encryption chip).
• Test the SMBus on the system.
5 Select the Diagnostics tab.
The Diagnostics screen appears.
62
Running the Network Test
Running the Network Test
Run the Network Test to check the NIC connectivity to the network. To successfully pass
the Network Connectivity test, at least one of the following conditions must be met:
• A Windows client running on the same network. This client must have a successfully
installed Windows diagnostics program that is currently not running.
• A NetWare server running on the same network.
• A DHCP server running on the same network.
• A DNS server running on the same network with TCP/IP properties configured for the
DNS server.
To run the Network test:
1 On the Diagnostics screen, click Run Network Test.
The Network Connectivity Test screen appears.
2 Click Start.
If the test passes, the NIC connection to the network is functioning correctly.
3 Click Close.
If the test fails, make sure that the:
• NIC is properly connected to the network cable.
• Hub or switch to which the NIC is connected is powered on.
• Cable complies with the proper length and specifications for your network.
Running the NIC Test
Run the NIC Test to check the physical components, connectors, and circuitry on the NIC.
1 On the Diagnostics screen, click Run NIC Test.
The NIC Test screen appears.
2 Click Perform NIC Test.
While the test is running, a progress bar indicates test progress.
• If the test passes, the NIC is functioning correctly.
• If the test fails, a message indicates the error type. Click Help in the error message
screen to obtain more information.
3 Click Close.
63
13
Running NIC Diagnostics
Viewing the NIC LEDs in the 3Com Diagnostics Program
To view the LEDs in the 3Com NIC Diagnostics program:
1 Make sure that the NIC, the network driver, and the 3Com NIC Diagnostics program
are installed.
2 Open the Windows Start menu.
3 Select Programs, and then 3Com NIC Utilities.
4 Click 3Com NIC Doctor.
The 3Com NIC Diagnostics General screen appears and displays the following LEDs:
• Link—lights if there is a valid connection between the NIC and the network.
• Transmit—lights if the NIC is transmitting information.
• Receive—lights if the NIC is receiving information.
NOTE: For instructions on interpreting the NIC LEDs, see “Interpreting the NIC
LEDs” on page 51.
Viewing Network Statistics
To view statistical information about the network:
1 Make sure that the NIC, the network driver, and the 3Com NIC Diagnostics program
are installed.
2 Open the Windows Start menu.
3 Select Programs, and then 3Com NIC Utilities.
4 Click 3Com NIC Doctor.
The 3Com NIC Diagnostics General screen appears.
5 Click the Statistics tab.
The Statistics screen appears, providing numerical data for a variety of network
events, such as: packets transmitted, bytes transmitted, late collisions, and so forth.
The information is updated by the NIC driver every five seconds.
For a description of each statistic, click the question mark (?) in the upper right corner
of the screen, drag it over a statistic and click once. A pop-up box appears, displaying
information about the statistic.
6 Click OK to exit the diagnostics program. To go to another diagnostics screen, click
the appropriate tab.
Using the 3Com Icon in the Windows System Tray
The 3Com icon, which can be enabled to appear in the Windows system tray, allows you
to start the 3Com NIC Diagnostics program. It also allows you to view the NIC’s link speed
and number of frames sent and received.
64
Enabling the Icon
Enabling the Icon
To display the 3Com icon in the Windows system tray:
1 Make sure that the NIC, the network driver, and the 3Com NIC Diagnostics program
are installed.
2 Open the Windows Start menu.
3 Select Programs, and then 3Com NIC Utilities.
4 Click 3Com NIC Doctor.
The 3Com NIC Diagnostics General screen appears.
5 On the General screen, select the check box next to Show Icon in System Tray.
6 Close the 3Com NIC Diagnostic program.
The NIC icon appears in the Windows system tray. When you double-click the icon,
the 3Com NIC Diagnostics program starts.
Displaying Network Statistics
When you drag the mouse pointer over the icon (but do not double-click the icon) a
network statistics box appears, displaying the following information:
• Frames Sent and Received—A count of the number of frames (packets) sent and
received through the NIC since the last time statistics were reset.
• Link Speed—The speed (10 Mbps or 100 Mbps) at which the NIC is connected to the
network.
The information is updated each time you move your mouse pointer over the 3Com icon.
Removing the 3Com NIC Diagnostics Program
The 3Com NIC Diagnostics Program can be removed using the Add/Remove Programs
Wizard in Windows, or by using the 3Com Installation CD.
For instructions on using the Add/Remove Programs Wizard in Windows, refer to your
Windows documentation.
To remove the 3Com NIC Diagnostics program using the 3Com Installation CD:
1 Start Windows.
2 Insert the 3Com Installation CD in the CD-ROM drive.
The Welcome screen appears.
3 Click NIC Software.
4 Click NIC Drivers and Diagnostics.
5 Click Installation Utilities.
6 Click Remove Diagnostics.
7 Click Proceed, and then follow the prompts on the screen.
65
13
66
Running NIC Diagnostics
A
Specifications and
Cabling Requirements
This appendix lists the specifications, standards conformance, cable requirements, and
connector pin assignments for the 3Com 10/100 Secure (3CR990B) NIC.
3CR990B-97 NIC Specifications
The following table provides environmental, interface, and standards information for the
3CR990B-97 NIC.
Hardware
Memory
128 KB external RAM
Bus interface
PCI Local Bus Specification, Revision 2.2
PCI master
Supports bus master scatter-gather DMAs.
Dimensions
Length: 13.31 cm (5.24 in)
Height: 8.51 cm (3.35 in)
Power requirement
+5 V ±5% operating 1.26A maximum for normal operation
(375 mA for low power mode)
Network Interface
10 Mbps Ethernet 10BASE-T
Ethernet IEEE 802.3 industry standard for a 10 Mbps
baseband CSMA/CD local area network
100 Mbps Ethernet 100BASE-TX
Ethernet IEEE 802.3u industry standard for a 100 Mbps
baseband CSMA/CD local area network
Environment
Operating temperature
32° to 158° F (0° to 70° C)
Storage temperature
–22° to 194° F (–30° to 90° C)
Operating humidity
10 to 90% noncondensing
Storage humidity
10 to 90% noncondensing
Altitude
–300 to 3,000 m (–984 ft to 9,840 ft)
Standards Conformance
•
IEEE 802.3 10BASE-T
•
Microsoft PC97
•
IEEE 802.3u 100BASE-TX
•
Microsoft PC98
•
IEEE 802.3x full-duplex, auto
negotiation, and flow control
•
Microsoft PC99
•
PCI 2.1 and 2.2
•
DMI 1.0 and 2.0
•
ACPI 1.0
•
SMBus 2.2
•
WBEM, CIM, WMI
•
•
IEEE 802.1p (General Attribute
Registration protocol) for
multicast addresses
IEEE 802.1Q VLAN Tagging
67
A
Specifications and Cabling Requirements
3CR990B-FX-97 NIC Specifications
The following table provides environmental, interface, and standards information for the
3CR990B-FX-97 NIC.
Hardware
Memory
128 KB external RAM
Bus interface
PCI Local Bus Specification, Revision 2.2
PCI master
Supports bus master scatter-gather DMAs.
Dimensions
Length: 13.65 cm (5.375 in)
Height: 8.41 cm (3.31 in)
Power requirement
+5 V ±5% operating 1.26A maximum for normal operation
(375 mA for low power mode)
Network Interface
100 Mbps Ethernet 100BASE-FX
Ethernet IEEE 802.3u industry standard for a 100 Mbps fiber
local area network
Environment
Operating temperature
32° to 158° F (0° to 70° C)
Storage temperature
–22° to 194° F (–30° to 90° C)
Operating humidity
10 to 90% noncondensing
Storage humidity
10 to 90% noncondensing
Altitude
–300 to 3,000 m (–984 ft to 9,840 ft)
Standards Conformance
•
IEEE 802.3 100BASE-FX
•
Microsoft PC97
•
IEEE 802.3x full-duplex, auto
negotiation, and flow control
•
Microsoft PC98
•
Microsoft PC99
•
DMI 1.0 and 2.0
•
ACPI 1.0
•
68
IEEE 802.1p (General Attribute
Registration protocol) for
multicast addresses
•
IEEE 802.1Q VLAN Tagging
•
SMBus 2.2
•
PCI 2.1 and 2.2
•
WBEM
Cabling Requirements
Cabling Requirements
The cable, quality, distance, and connectors must comply with the
Electronic Industries Association/Telecommunications Industries Association (EIA/TIA) 568
Commercial Building Wiring Standard and the Technical Services Bulletin TSB38 standards.
Network connection criteria are shown below:
3CR990B-97 NIC
NIC:
3CR990B-97
Cable:
Category 3, 4, or 5 unshielded twisted pair
Network cable connector:
RJ-45
Transceiver:
On-board
Maximum Network Segment:
100 m (328 ft)
Speed:
10/100 Mbps
Media Type:
10BASE-T
100BASE-TX
3CR990B-FX-97 NIC
NIC:
3CR990B-FX-97
Cable:
Long-wavelength fiber-optic (1300nm):
50 µ/125 µ multimode fiber
62.5 µ/125 µ multimode fiber
Network cable connector:
SC
Transceiver:
On-board
Maximum Network Segment:
50 µ/125 µ multimode fiber
Full-duplex: 2,000 m (6,560 ft)
Half-duplex: 412 m (1,351 ft)
62.5 µ/125 µ multimode fiber
Full-duplex: 2,000 m (6,560 ft)
Half-duplex: 412 m (1,351 ft)
Speed:
100 Mbps
Media Type:
100BASE-FX
69
A
Specifications and Cabling Requirements
RJ-45 Connector Pin Assignments
The following illustration shows the RJ-45 connector pin assignments for the
3CR990B-97 NIC.
70
B
Installing the 3Com DMI Agent
This appendix explains how to install the 3Com Desktop Management Interface (DMI)
Agent on your PC.
The 3Com DMI Agent allows any DMI-compatible browser or network management
application that supports DMI 2.0 to remotely manage and configure advanced features
of a 3CR990B NIC.
NOTE: For detailed information about the 3Com DMI Agent, refer to the
3Com DMI Agent User Guide included with the 3Com DMI Agent software on
the 3Com Installation CD.
About the 3Com DMI Agent
The 3Com DMI Agent allows you to obtain basic NIC information, including:
• Node address
• MAC address
• Driver version
Additionally, depending on the features of your NIC, the 3Com DMI Agent allows you to
view and configure advanced NIC features, including:
•
•
•
•
Managed PC Boot Agent (MBA) software
Remote Wake-Up events
Workgroup keep-alive packet
Remote system alerts (including heartbeat)
Each PC that contains a 3CR990B NIC and the 3Com DMI Agent generates a
Management Information Format (MIF) file that contains information about the PC and
the NIC. DMI applications use the information from the MIF to manage the PC and the
NIC.
The content of the MIF is based on the capabilities of the NIC driver found in the PC. For
example, if a NIC with an MBA boot ROM is found, all groups related to the boot ROM
are included in the MIF for that particular NIC. This ensures that the network management
application does not receive irrelevant information for the NIC.
For a description of each MIF supported by the 3Com DMI Agent, refer to the
3Com DMI Agent User Guide included with the 3Com DMI Agent software on the 3Com
Installation CD.
71
B
Installing the 3Com DMI Agent
System Requirements
This section lists the client PC and network management requirements for installing and
using the 3Com DMI Agent.
Client PC Requirements
Your PC requires the following items to use the 3Com DMI Agent:
• DMI Service Provider 2.0 or greater (such as Smart Technologies Service Provider 2.0)
• NDIS 3, 4, or 5 driver
• Windows 2003, Windows XP, Windows 2000, Windows NT 4.0, or Windows 98 SE
using the latest Service Pack.
Network Management Requirements
The 3Com DMI Agent InstallShield Wizard checks for the presence of a DMI service
provider on the computer you are configuring as a network management station. The
network management station requires a DMI-compatible browser or a network
management application that supports DMI 2.0, such as:
•
•
•
•
•
Hewlett Packard TopTools
Tivoli Management Suite
Dell OpenManage
Compaq Insight Manager Management Station
Intel LANDesk Client Manager
Installing the 3Com DMI Agent
This section describes how to install the 3Com DMI Agent on a PC running
Windows 2003, Windows XP, Windows 2000, Windows NT 4.0, or Windows 98 SE.
NOTE: Before installing the DMI Agent, logon to the PC with an account that has
system administration privileges.
To install the 3Com DMI Agent:
1 Make sure that the PC meets the requirements listed in “Minimum Installation
Requirements” on page 1.
2 Make sure that the 3CR990B NIC is installed in the PC and is connected to the
network.
3 Insert the 3Com Installation CD in the CD-ROM drive.
The Welcome screen appears.
4 Click NIC Software.
5 Click Install 3Com DMI Agent Now.
The 3Com DMI Agent setup program prepares the InstallShield Wizard, which allows
you to:
• View the latest README.TXT file
• Copy the 3Com DMI Agent User Guide to your computer hard drive.
72
Installing the 3Com DMI Agent
NOTE: The 3Com DMI Agent User Guide is in Microsoft Word format. If you do
not currently have access to Microsoft Word, you can download a free version of
the Microsoft Word reader from the Microsoft Web site.
• Install the 3Com DMI Agent software
6 Follow the prompts on the screen.
To verify successful installation, use a DMI-compatible browser or a network management
application that supports DMI 2.0 or 2.0s to verify that the 3Com NIC is present.
NOTE: If you have 3Com DynamicAccess Advanced Server features and a foreign
(non-3Com) NIC installed, the foreign NIC is displayed as a 3Com NIC in the DMI
browser.
Refer to the 3Com DMI Agent User Guide or contact your system administrator for
instructions.
73
B
74
Installing the 3Com DMI Agent
C
Obtaining Support for your
Product
Register Your Product to Gain Service Benefits
To take advantage of warranty and other service benefits, you must first register your
product at http://eSupport.3com.com/. 3Com eSupport services are based on
accounts that you create or have authorization to access. First time users must apply for a
user name and password that provides access to a number of eSupport features including
Product Registration, Repair Services, and Service Request.
Purchase Value-Added Services
To enhance response times or extend warranty benefits, contact 3Com or your authorized
3Com reseller. Value-added services can include 24x7 telephone technical support,
software upgrades, onsite assistance or advance hardware replacement. Experienced
engineers are available to manage your installation with minimal disruption to your
network. Expert assessment and implementation services are offered to fill resource gaps
and ensure the success of your networking projects. More information on 3Com Extended
Warranty and Professional Services is available at http://www.3com.com/.
Where To Go For Help
Contact your authorized 3Com reseller or 3Com for additional product and support
information. You will find support tools posted on the 3Com web site at
http://www.3com.com/
Troubleshoot Online
3Com Knowledgebase helps you troubleshoot 3Com products. This query-based
interactive tool is located at http://knowledgebase.3com.com/ and contains
thousands of technical solutions written by 3Com support engineers.
Connection Assistant helps you install, configure and troubleshoot 3Com desktop and
server NICs, wireless cards and Bluetooth devices. This diagnostic software is located at
http://www.3com.com/prodforms/software/connection_assistant/
ca_thankyou.html
Access Software Downloads
Software Updates are the bug fix/maintenance releases for the version of software
initially purchased with the product. In order to access these Software Updates, you must
first register your product on the 3Com web site at http://eSupport.3com.com/.
First time users will need to apply for a user name and password. A link to software
downloads can be found from the http://eSupport.3com.com/ page or from the
http://www.3com.com/ home page.
Software Upgrades are the software releases that follow the software version included
with your original product. In order to access upgrades and related documentation you
must first purchase a service contract from 3Com or your reseller.
75
C
Obtaining Support for your Product
Contact Us
3Com offers telephone, e-mail and internet access to technical support and repair
services. To access these services for your region, use the appropriate telephone number,
URL or e-mail address from the list below. You will find a current directory of support
telephone numbers posted on the 3Com web site at:
http://csoweb4.3com.com/contactus/
Telephone Technical Support and Repair
To obtain telephone support as part of your warranty and other service benefits, you must
first register your product at http://eSupport.3com.com/.
When you contact 3Com for assistance, please have the following information ready:
• Product model name, part number, and
• Diagnostic error messages
serial number
• A list of system hardware and software,
• Details about recent configuration
including revision level
changes, if applicable.
To send a product directly to 3Com for repair, you must first obtain a return authorization
number (RMA). Products sent to 3Com, without authorization numbers clearly marked on
the outside of the package, will be returned to the sender unopened, at the sender’s
expense. If your product is registered and under warranty, you can obtain an RMA
number online at http://eSupport.3com.com/ First time users will need to apply
for a user name and password.
These numbers are correct at the time of publication. Find a current directory of support
telephone numbers posted on the 3Com web site at:
http://csoweb4.3com.com/contactus/
Country
Telephone Number
Asia, Pacific Rim
Australia
1 800 678 515
Hong Kong
800 933 486
India
+61 2 9424 5179 or
000800 650 1111
Indonesia
001 803 61009
Japan
00531 616 439 or
03 5977 7991 or
03 5783 1270 (Tokyo)
Malaysia
1800 801 777
New Zealand
0800 446 398
Pakistan
+61 2 9937 5083
Philippines
1235 61 266 2602 or
1800 1 888 9469
(continued)
76
Telephone Technical Support and Repair
Country
Telephone Number
P.R. of China
10800 61 00137 or
021 6350 1590 or
00800 0638 3266
Singapore
800 6161 463
S. Korea
080 333 3308
Taiwan
00801 611 261
Thailand
001 800 611 2000
Europe, Middle East, and Africa
From anywhere in these regions, call:
+44 (0)1442 435529
You can also obtain support in this region using the following URL:
http://emea.3com.com/support/email.html
From the following countries, you may use the numbers shown:
Austria
0800 293 025
Belgium
0800 78354
Denmark
8088 33 25
Finland
0800 1 18387
France
0800 91 7736
Germany
0800 101 4159
Hungary
06800 14370
Ireland
1 800 509017
Israel
1800 9431983
Italy
800 780557
Luxembourg
800 29727
Netherlands
0800 023 3407
Norway
800 1 0767
Poland
00800 4411 349
Portugal
800 844 029
South Africa
0800 991183
Spain
900 95 8966
Sweden
020 796980
Switzerland
0800 835283
U.K.
0800 085 1816
Latin America
You can obtain support in this region using the following URLs:
Spanish speakers, enter the URL:
http://lat.3com.com/lat/support/form.html
Portuguese speakers, enter the URL:
http://lat.3com.com/br/support/form.html
English speakers in Latin America should send e-mail to:
[email protected]
Or call using the following numbers:
Antigua
1 800 988 2112
Argentina
0 810 444 3COM
(continued)
77
C
Obtaining Support for your Product
Country
Telephone Number
Aruba
1 800 998 2112
Bahamas
1 800 998 2112
Barbados
1 800 998 2112
Belize
52 5 201 0010
Bermuda
1 800 998 2112
Bonaire
1 800 998 2112
Brazil
0800 13 3COM
Cayman
1 800 998 2112
Chile
AT&T +800 998 2112
Colombia
AT&T +800 998 2112
Costa Rica
AT&T +800 998 2112
Curacao
1 800 998 2112
Ecuador
AT&T +800 998 2112
Dominican Republic
AT&T +800 998 2112
Guatemala
AT&T +800 998 2112
Haiti
57 1 657 0888
Honduras
AT&T +800 998 2112
Jamaica
1 800 998 2112
Martinique
571 657 0888
Mexico
01 800 849CARE
Nicaragua
AT&T +800 998 2112
Panama
AT&T +800 998 2112
Paraguay
54 11 4894 1888
Peru
AT&T +800 998 2112
Puerto Rico
1 800 998 2112
Salvador
AT&T +800 998 2112
Trinidad and Tobago
1 800 998 2112
Uruguay
AT&T +800 998 2112
Venezuela
AT&T +800 998 2112
Virgin Islands
57 1 657 0888
North America Telephone Support and Repair
1 847-262-0070
78
D
Regulatory Compliance
Information
FCC Class B Statement
This device complies with Part 15 of the FCC Rules. Operation is subject to the following
two conditions:
1 This device may not cause harmful interference, and
2 This device must accept any interference received, including interference that may
cause undesired operation.
WARNING: This equipment has been tested and found to comply with the limits for a
Class B digital device, pursuant to Part 15 of the FCC Rules, and the Canadian
Department of Communications Equipment Standards entitled, "Digital Apparatus,"
ICES-003.These limits are designed to provide reasonable protection against harmful
interference in a residential installation. This equipment generates, uses and can radiate
radio frequency energy and, if not installed and used in accordance with the instructions,
may cause harmful interference to radio communications. However, there is no guarantee
that interference will not occur in a particular installation. If this equipment does cause
harmful interference to radio or television reception, which can be determined by turning
the equipment off and on, the user is encouraged to try to correct the interference by one
or more of the following measures:
• Reorient or relocate the receiving antenna.
• Increase the separation between the equipment and receiver.
• Connect the equipment into an outlet on a circuit different from the one that the
receiver is connected to.
• Consult the dealer or an experienced radio/TV technician for help.
The user may find the following booklet prepared by the Federal Communications
Commission helpful:
The Interference Handbook
This booklet is available from the U.S. Government Printing Office, Washington, D.C.
20402. Stock No. 004-000-00345-4.
NOTE: In order to maintain compliance with the limits of a Class B digital device, 3Com
requires that you use quality interface cables when connecting to this device. Changes or
modifications not expressly approved by 3Com could void the user’s authority to operate
this equipment. Refer to the manual for specifications on cabling types.
79
D
Regulatory Compliance Information
FCC Declaration of Conformity
We declare under our sole responsibility that the
Model:
Description:
3CR990B-97
3CR990B-FX-97
3Com 10/100 Secure Copper NIC
3Com 100 Secure Fiber NIC
to which this declaration relates, is in conformity with the following standards or other
normative documents:
• ANSI C63.4-1992 Methods of Measurement
• Federal Communications Commission 47 CFR Part 15, subpart B
3Com Corporation: 350 Campus Drive, Marlborough, MA 01752-3064 USA
MIC Class B Compliance (Korea)
Safety Compliance Statement
CAUTION: This device has been tested and certified according to the following safety
standards and is intended for use only in Information Technology Equipment which has
been tested and certified to these or other equivalent standards:
• UL Standard 60950 / CSA 60950
• IEC 60950
• EN 60950
ATTENTION: Ce dispositif a été testé et certifié selon les normes de sûreté suivantes et est
destiné pour l'usage seulement dans le matériel de technologie de l'information qui a été
testé et certifié à ces derniers ou d'autres normes équivalentes:
• UL Standard 60950 / CSA 60950
• IEC 60950
• EN 60950
80