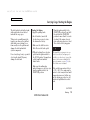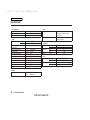
1
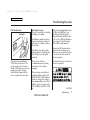
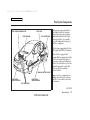
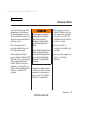
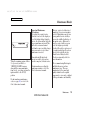
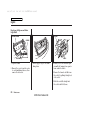
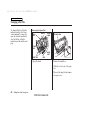
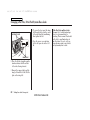
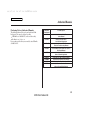
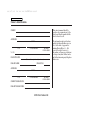
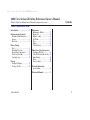
08/07/03 12:40:52 31SNF930 0002 2009 Civic Sedan GX Online Reference Owner's Manual
Refer to 2009 Civic Sedan Owner's Manual for topics not covered.
Contents
Owner's Identification Form
Introduction ............................ 2
Instruments and Controls
Instrument Panel Indicators ......... 3
Gauges ............................................ 5
Rear Seat ......................................... 5
Before Driving
Fuel .................................................. 6
Refueling Procedure ..................... 7
Fuel System Components ........... 11
Fuel Cutoff System...................... 12
Carrying Cargo ............................ 13
Driving
Starting the Engine ..................... 15
Towing a Trailer .......................... 16
Maintenance
Maintenance Minder ................... 17
Engine Oil ..................................... 21
Engine Coolant ............................. 21
Fuel Tank...................................... 22
Tires .............................................. 23
Lights ............................................ 24
Vehicle Storage ............................ 25
Taking Care of the Unexpected
Changing a Flat Tire ................... 26
If the Fuel System Has a Leak ... 28
Jump Starting ............................... 29
Fuses ............................................. 30
Fuse Locations ............................. 30
Technical Information
Specifications ............................... 31
Authorized Manuals ............... 33
00X31-SNF-9300
1
08/07/03 12:40:58 31SNF930 0003 Main Menu
Introduction
Your Civic GX runs on compressed
natural gas (CNG), a highly
pressurized version of the same
clean-burning natural gas used in
many homes.
You will find important safety
information in this supplement and
in the owner’s manual. This
information alerts you to potential
hazards that could hurt you or others.
Please read it carefully.
Your Civic GX operates and
performs like a gasoline-powered
Civic. However, there are a few
differences you should be aware of.
In addition to reading the Civic
Sedan owner’s manual, please read
this supplement carefully to
understand the operation and unique
features of your Civic GX.
2
2009 Civic Sedan GX
08/07/03 12:41:06 31SNF930 0004 Main Menu
Instrument Panel Indicators
Malfunction Indicator
Lamp
This indicator comes on for a few
seconds when you turn the ignition
switch to the ON (II) position. If it
comes on at any other time, it
indicates one of the engine’s
emissions control systems may have
a problem. For complete information,
refer to the Civic Sedan owner’s
manual.
This indicator will also come on if
there is a problem in the fuel system.
If this happens, have the vehicle
checked by an authorized Honda
Civic GX dealer as soon as possible.
Drive moderately until the dealer has
inspected the problem. Avoid fullthrottle acceleration and driving at
high speed.
MALFUNCTION INDICATOR LAMP
CONTINUED
Instruments and Controls
2009 Civic Sedan GX
3
08/07/03 12:41:15 31SNF930 0005 Main Menu
Instrument Panel Indicators
If you smell natural gas or hear a
hissing sound, except when refueling,
the fuel system may have a leak.
Follow the instructions under If the
Fuel System Has a Leak on page
28 of this supplement.
Low Fuel Indicator
LOW FUEL INDICATOR
This indicator comes on for a few
seconds when you turn the ignition
switch to the ON (II) position. It also
comes on as a reminder that you
must refuel soon. The approximate
driving distance remaining when this
indicator comes on is:
City driving − 20-25 miles
Highway driving − 25-30 miles
As the temperature of the outside air
cools, the temperature inside the
4
Instruments and Controls
2009 Civic Sedan GX
tank begins to drop, and the
pressure inside the tank drops too.
This means that when the outside air
gets very cold [below 25°F (−4°C)],
the pressure of the natural gas inside
the tank goes down, and the fuel
gauge may indicate that you have
less fuel than what actually remains
in the tank. Keep this in mind if the
low fuel indicator comes on while
you are driving in cold weather.
If this indicator starts blinking and
the fuel level reading goes down to
empty when the engine is running, it
indicates a problem in the fuel
system. Have the vehicle checked by
an authorized Honda Civic GX dealer
as soon as possible.
08/07/03 12:41:25 31SNF930 0006 Main Menu
Gauges, Rear Seat
Fuel Gauge
LOWER ‘‘F’’ MARK
UPPER ‘‘F’’ MARK
The gauge may show slightly more
or less than the actual amount. The
tank temperature, fill method, and
ambient conditions may affect the
pressure and temperature of the
natural gas.
Rear Seat
Unlike the standard Civic, the seatback cannot be folded down.
FUEL GAUGE
This gauge shows how much fuel
you have. The quantity of fuel
remaining in the tank is calculated
based on the pressure and
temperature of the natural gas in the
fuel tank.
The lower ‘‘F’’ mark indicates a full
tank at a fill pressure of 3,000 psi.
The upper ‘‘F’’ mark indicates a full
tank at a fill pressure of 3,600 psi.
Instruments and Controls
2009 Civic Sedan GX
5
08/07/03 12:41:33 31SNF930 0007 Main Menu
Fuel
Your Civic GX is designed to operate
on compressed natural gas (CNG).
The natural gas you use to refuel
must meet NFPA-52 and SAE J1616
standards for fuel composition and
quality.
If you use a fuel that does not meet
these standards, you may feel a
decrease in engine power and your
vehicle’s emissions controls may be
damaged.
6
Compressed Natural Gas (CNG)
The main component of compressed
natural gas is methane, a highly
flammable, colorless gas. While it is
the same gas that is burned in
everyday home appliances such as
kitchen stoves and water heaters,
the CNG in your vehicle is stored
under high pressure (maximum
3,600 psi/24,800 kPa).
The CNG system in your vehicle,
including the tank and hoses, has
been designed to hold gas at this
pressure. It has also been tested for
safety. You should never smell gas
or hear a hissing sound unless you
are refueling. If you smell gas or
hear a hissing sound at any other
time, you need to shut down the
CNG system. Follow the instructions
on page 12 .
Before Driving
2009 Civic Sedan GX
Compressed natural gas is
flammable and highly explosive.
You could be killed or seriously
injured if leaking natural gas is
ignited.
If you suspect a leak, have your
vehicle immediately inspected
and repaired by an authorized
Honda Civic GX dealer.
08/07/03 12:41:46 31SNF930 0008 Main Menu
Fuel, Refueling Procedure
CNG Identification
CNG LABEL
Refueling Procedure
There are two methods of refueling,
fast filling or slow filling.
Fast filling is normally used in fuel
stations for natural gas vehicles. It
takes about 3 to 5 minutes to fill up
the fuel tank.
Slow filling is done with a vehicle
refueling appliance. Refueling takes
about 1 hour per gasoline gallon
equivalent.
Your vehicle has an identifying
‘‘CNG’’ label attached next to the
rear license plate. Do not remove
this label. This label is necessary for
insuring your vehicle. Driving
without this label may violate the
laws or regulations in some states.
Always observe all safety
recommendations and operating
instructions on the refueling
equipment.
When refueling, you should use a
fuel fill nozzle that complies with
ANSI/AGA NGV-1-1994 standards.
Nozzles are designed according to
their maximum fill pressure: P24 for
2,400 psi (pounds per square inch),
P30 for 3,000 psi, and P36 for 3,600
psi.
Your vehicle’s maximum fill pressure
is 3,600 psi (24,800 kPa), so you
should refuel with a P36 nozzle.
Using a P30 nozzle will fill the tank
to the second (3,000 psi) fill mark on
the fuel gauge. Using a P24 nozzle
will not fill the tank completely.
During a fast fill, the natural gas is
warmed by the refueling process.
This causes the pressure in the tank
to rise and reduces the amount of
fuel you can put in.
The label shown below is attached to
the fuel receptacle lid.
CONTINUED
Before Driving
2009 Civic Sedan GX
7
08/07/03 12:41:57 31SNF930 0009 Main Menu
Refueling Procedure
Using f ast f ill equipment at
temperatures below 4°F (−16°C) may
damage the f uel system, potentially
causing a leak. Only use slow f ill
equipment when ambient temperatures
are below 4°F (−16°C).
Filling the Fuel Tank
The refueling equipment and
procedure can vary with the
refueling station. The CNG fill
nozzle may not look or work like the
example on the next page. The
following steps explain the typical
refueling procedure with fast fill
equipment. With slow fill equipment,
or other types of refueling
equipment, follow the instructions on
the equipment.
Push
RECEPTACLE DUST CAP
1. Park with the driver’s side of the
vehicle closest to the refueling
station.
2. Turn the ignition switch to the
LOCK (0) position, and apply the
parking brake.
3. Open the fuel receptacle lid by
pushing the handle on the left of
the driver’s seat.
8
FUEL
RECEPTACLE
Before Driving
2009 Civic Sedan GX
4. Remove the receptacle dust cap
from the fuel receptacle. Clean off
any dirt or debris around the fuel
receptacle.
08/07/03 12:42:06 31SNF930 0010 Main Menu
Refueling Procedure
5. Securely connect the CNG fill
nozzle to the fuel receptacle.
6. Turn the lever until the arrows on
the nozzle point to each other,
then follow the instructions on the
refueling station to begin refueling.
While refueling, you may hear a
chattering sound. This is normal.
If you hear or see fuel/vapor
leaking from the nozzle-receptacle
connection, stop refueling
immediately. Dirt or other debris
may be preventing a positive
connection. Turn off the refueling
station, remove the nozzle,
reconnect it to the receptacle, and
begin refueling again. If it
continues to leak, have an
authorized Honda Civic GX dealer
inspect the sealing O-ring in the
receptacle. It may be missing,
damaged, or worn.
7. Refueling will stop automatically
when the tank is full. Follow the
instructions on the refueling
station to turn it off.
8. Disconnect the CNG fill nozzle
from the fuel receptacle by slowly
turning the lever on the nozzle 180
degrees. You may hear a brief
hissing sound as a small amount of
gas escapes. This is normal.
CONTINUED
Before Driving
2009 Civic Sedan GX
9
08/07/03 12:42:15 31SNF930 0011 Main Menu
Refueling Procedure
If dirt or other debris are adhering to
the inside of the fuel receptacle, gas
may leak out after refueling. If this
happens, clean off the dirt or debris
with a clean, dry rag from the CNG
fill nozzle. If you need to add more
fuel, do the refueling procedure
again.
If you do not close the lid, the fuel
gauge on the instrument panel will
flash when you turn the ignition
switch to the ON (II) position. The
gauge will stop flashing when you
close the lid.
9. Put the receptacle dust cap on the
fuel receptacle securely.
10. Push the fuel receptacle lid closed
until it latches.
If you are not sure how to operate
the refueling station, ask for
assistance.
10
Before Driving
2009 Civic Sedan GX
Refueling Station Information
To obtain information about the
locations of compressed natural gas
(CNG) refueling stations, contact the
Natural Gas Vehicle Coalition
(NGVC) at (202) 824-7360. Online,
use http://afdcmap2.nrel.gov/
locator for the 49 states, or www.
cngvc.org for California.
08/07/03 12:42:25 31SNF930 0012 Main Menu
Fuel System Components
FUEL PRESSURE REGULATOR
FUEL TANK
FUEL FEED LINE
FUEL RECEPTACLE
Fuel system components include a
fuel tank located in the trunk, an
integrated fuel pressure regulator,
an in-tank fuel shutoff valve, high
pressure fuel lines, electronically
controlled multipoint fuel injectors,
and other equipment.
Fuel system components in the Civic
GX comply with NFPA-52 standards.
Your vehicle is equipped with
genuine Honda component parts that
have been designed and approved
for use in a compressed natural gas
vehicle. Never modify or replace any
original components or parts with
those specified for a gasolinepowered vehicle.
MANUAL SHUTOFF VALVE
FUEL FILTER
(LOW PRESSURE)
FUEL FILTER
(HIGH PRESSURE)
Improper parts or components can
damage your vehicle’s fuel system
and affect your vehicle’s safety and
performance.
FUEL INJECTORS
CONTINUED
Before Driving
2009 Civic Sedan GX
11
08/07/03 12:42:34 31SNF930 0013 Main Menu
Fuel System Components, Fuel Cutoff System
Fuel system maintenance and repair
should be done only by an authorized
Honda Civic GX dealer.
Tampering with, or improperly
maintaining the high-pressure
fuel system can cause a
dangerous condition in which
you can be seriously hurt or
killed.
Fuel Cutoff System
The in-tank fuel shutoff valve is
controlled by the ignition switch.
When the ignition switch is in the
LOCK (0) or ACCESSORY (I)
position, the valve is closed, shutting
off fuel flow to the engine. It opens
when the ignition switch is turned to
the ON (II) position. This is similar
to how an electric fuel pump works
in a gasoline-powered vehicle.
Manual Shutoff Valve
MANUAL SHUTOFF VALVE
Never attempt to modify the fuel
system, and always have fuel
system maintenance performed
by an authorized Honda Civic
GX dealer, or a qualified NGV
technician.
A manual shutoff valve is located
underneath the vehicle, near the rear
tire on the driver’s side. We
recommend that you locate this
valve so you can find it quickly.
To turn off the valve, turn the lever
one-quarter turn clockwise. Turn it
counterclockwise to turn the valve
back on.
Turn off the valve if you ever suspect
a fuel leak or are involved in an
accident.
12
Before Driving
2009 Civic Sedan GX
08/07/03 12:42:48 31SNF930 0014 Main Menu
Carrying Cargo
Load Limits
The maximum load for your vehicle
is 850 lbs (385 kg).
This figure includes the total weight
of all occupants, cargo, and
accessories, and the tongue load if
you are towing a trailer.
See Tire And Loading Information
label attached to the driver’s
doorjamb.
Label Example
Steps for Determining Correct Load
Limit −
(1)Locate the statement ‘‘The
combined weight of occupants and
cargo should never exceed XXX
kg or XXX lbs.’’ on your vehicle’s
placard.
Overloading or improper
loading can affect handling and
stability and cause a crash in
which you can be hurt or killed.
(2)Determine the combined weight
of the driver and passengers that
will be riding in your vehicle.
Follow all load limits and other
loading guidelines in this
manual.
(3)Subtract the combined weight of
the driver and passengers from
XXX kg or XXX lbs.
CONTINUED
Before Driving
2009 Civic Sedan GX
13
08/07/03 12:43:05 31SNF930 0015 Main Menu
Carrying Cargo
(4)The resulting figure equals the
available amount of cargo and
luggage load capacity. For
example, if the ‘‘XXX’’ amount
equals 1,400 lbs. and there will be
five 150 lb. passengers in your
vehicle, the amount of available
cargo and luggage load capacity is
650 lbs.
(1,400 − 750 (5 × 150) = 650 lbs.)
(5)Determine the combined weight
of luggage and cargo being loaded
on the vehicle. That weight may
not safely exceed the available
cargo and luggage load capacity
calculated in Step 4.
(6)If your vehicle will be towing a
trailer, load from your trailer will
be transferred to your vehicle.
Consult this manual to determine
how this reduces the available
cargo and luggage load capacity of
your vehicle.
14
Example 1
Max Load (850 lbs)
Passenger Weight
(150 lbs x 2 = 300 lbs)
Cargo Weight
(550 lbs)
Max Load (850 lbs)
Passenger Weight
(150 lbs x 4 = 600 lbs)
Cargo Weight
(250 lbs)
Max Load (850 lbs)
Passenger Weight
(150 lbs x 5 = 750 lbs)
Cargo Weight
(100 lbs)
Example 2
Example 3
In addition, the total weight of the
vehicle, all occupants, accessories,
cargo, and trailer tongue load must
not exceed the Gross Vehicle
Weight Rating (GVWR) or the Gross
Axle Weight Rating (GAWR). Both
are on a label on the driver’s
doorjamb.
Before Driving
2009 Civic Sedan GX
08/07/03 12:43:19 31SNF930 0016 Main Menu
Carrying Cargo, Starting the Engine
The fuel tank is located in the trunk,
with a partition between the fuel
tank and the cargo space.
When you store small items in the
trunk, secure them so they will not
shift while you are driving. Loose
items can fly over the partition and
damage the fuel tank and fuel
system components.
Do not carry large, heavy, or pointed
objects in the trunk. They may
damage the fuel tank.
Starting the Engine
1. Apply the parking brake.
2. In cold weather, turn off all
electrical accessories to reduce
the drain on the battery.
5. Turn the ignition switch to the
START (III) position. Do not hold
the switch in the START (III)
position for more than 15 seconds
at a time. If the engine does not
start right away, pause for at least
10 seconds before trying again.
3. Make sure the shift lever is in
Park. Press on the brake pedal.
4. Without touching the accelerator
pedal, turn the ignition switch to
the ON (II) position. You may hear
a click from the in-tank fuel
shutoff valve.
Make sure the malfunction
indicator lamp goes out before you
turn the ignition switch to the
START (III) position.
The immobilizer system protects your
vehicle f rom thef t. If an improperlycoded key (or other device) is used, the
engine’s f uel system is disabled. For
more inf ormation, see page 79 of the
Civic Sedan owner’s manual.
If the outside temperature is below
−4°F (−20°C), the engine may be
harder to start or may not start until
temperatures increase. In this case,
use the starting procedure for cold
weather at high altitude described
next.
CONTINUED
Driving
2009 Civic Sedan GX
15
08/07/03 12:43:32 31SNF930 0017 Main Menu
Starting the Engine, Towing a Trailer
If you regularly drive your vehicle in
very cold weather [below −4°F
(−20°C)], consider having an
engine block heater installed. It
should greatly improve starting in
very cold weather.
Also, when driving in very cold
weather, make sure that the 12 V
battery is fully charged either by
driving several miles each day or by
using a 12 V charger to fully charge
the battery.
Starting in Cold Weather at High
Altitude (Above 5,000 feet/
1,600 meters)
An engine is harder to start in cold
weather. The thinner air found at
high altitude above 5,000 feet (1,600
meters) adds to the problem.
The unique design of a CNG engine
makes it even more difficult or
impossible to start if temperatures
drop below 4°F (−16°C).
16
Use the following procedure:
1. Turn off all electrical accessories
to reduce the drain on the battery.
2. Make sure the malfunction
indicator lamp goes out before you
turn the ignition switch to the
START (III) position.
3. Push the accelerator pedal halfway to the floor and hold it there
while starting the engine. Do not
hold the ignition switch in the
START (III) position for more
than 15 seconds. When the engine
starts, release the accelerator
pedal gradually as the engine
speeds up and smooths out.
4. If the engine fails to start in step 3,
push the accelerator pedal to the
floor and hold it there while you
try to start the engine for no more
than 15 seconds. If the engine
does not start, return to step 3.
Driving
2009 Civic Sedan GX
Towing a Trailer
Your vehicle is not designed to tow a
trailer; attempting to do so can void
your warranties.
08/07/03 12:43:42 31SNF930 0018 Main Menu
Maintenance Minder
Your vehicle displays engine oil life
and maintenance service items on
the information display to show you
when you should have your dealer do
engine oil replacement and indicated
maintenance service.
Refer to the important safety
precautions and instructions in the
Civic Sedan owner’s manual.
The fuel system is under high
pressure (maximum 3,600 psi/24,800
kPa). It has no user-serviceable parts,
and its components must not be
modified. Whenever fuel system
maintenance is required, take your
vehicle to an authorized Honda Civic
GX dealer, or a qualified NGV
technician.
Tampering with, or improperly
maintaining the high-pressure
fuel system can cause a
dangerous condition in which
you can be seriously hurt or
killed.
Never attempt to modify the fuel
system, and always have fuel
system maintenance performed
by an authorized Honda Civic
GX dealer, or a qualified NGV
technician.
Avoid exceeding your vehicle’s
load limit. This puts excess stress
on the engine, brakes, and many
other parts of your vehicle. The
load limit is shown on the label on
the driver’s doorjamb.
Operate your vehicle on
reasonable roads within the legal
speed limit.
Drive your vehicle regularly over a
distance of several miles
(kilometers).
The maintenance minder assumes
you will use your vehicle as normal
transportation for passengers and
their possessions. You should also
follow these recommendations:
Maintenance
2009 Civic Sedan GX
17
08/07/03 12:43:50 31SNF930 0019 Main Menu
Maintenance Minder
Engine Oil Life Display
SEL/RESET BUTTON
ENGINE OIL LIFE DISPLAY
To see the current engine oil life,
turn the ignition switch to the ON
(II) position, and press the SEL/
RESET button repeatedly until the
engine oil life display appears.
18
MAINTENANCE MINDER INDICATOR
MAINTENANCE
ITEM CODE(S)
ENGINE OIL LIFE
INDICATOR
If the remaining engine oil life is 15
to 6 percent, you will see the engine
oil life indicator every time you turn
the ignition switch to the ON (II)
position. The maintenance minder
indicator will also come on, and the
maintenance item code(s) for other
scheduled maintenance items
needing service will be displayed
next to the engine oil life indicator.
Maintenance
2009 Civic Sedan GX
The maintenance item code or codes
indicate the main and sub items
required at the time of the oil change.
08/07/03 12:44:01 31SNF930 0020 Main Menu
Maintenance Minder
Important Maintenance
Precautions
If you have the required service
done but do not reset the display, or
reset the display without doing the
service, the system will not show the
proper maintenance intervals. This
can lead to serious mechanical
problems because you will no longer
have an accurate record of when
maintenance is needed.
When the remaining engine oil life is
5 to 1 percent, you will see a
‘‘SERVICE OIL LIFE’’ message
along with the same maintenance
item code(s), every time you turn the
ignition switch to the ON (II)
position.
Your authorized Honda dealer
knows your vehicle best and can
provide competent, efficient service.
For information on resetting the
maintenance minder, refer to the
Civic Sedan owner’s manual.
However, service at a dealer is not
mandatory to keep your warranties
in effect. Maintenance may be done
by any qualified service facility or
person who is skilled in this type of
automotive service. Make sure to
have the service facility or person
reset the display as previously
described. Keep all receipts as proof
of completion, and have the person
who does the work fill out your
Honda Service History booklet.
Check your warranty booklet for
more information.
We recommend using Honda parts
and fluids whenever you have
maintenance done. These are
manufactured to the same high
quality standards as the original
components, so you can be confident
of their performance and durability.
For information on maintenance
codes, see page 20 , or refer to the
Civic Sedan owner’s manual.
Maintenance
2009 Civic Sedan GX
19
08/07/03 12:44:15 31SNF930 0021 Main Menu
Maintenance Minder
Maintenance Minder
Symbol
A
B
Symbol
1
2
Maintenance Main Items
Replace engine oil1
Replace engine oil1 and oil filter
Replace fuel filter element (low pressure)
Drain fuel filter (high pressure)
Inspect front and rear brakes
Check parking brake adjustment
Inspect these items:
Tie rod ends, steering gear box, and boots
Suspension components
Driveshaft boots
Brake hoses and lines (including ABS)
All fluid levels and condition of fluids
Exhaust system#
Fuel lines and connections#
1 : If the message ‘‘SERVICE’’ does not appear more than 12 months after the
display is reset, change the engine oil every year.
2 : −If sub-item 2 does not appear more than 36 months after the display is reset,
inspect the fuel tank every 3 years.
−See Fuel Tank on page 22 for inspection and replacement information.
The fuel tank should be replaced 15 years after it was manufactured.
3
4
5
Maintenance Sub Items
Rotate tires
Replace air cleaner element
If you drive in dusty conditions, replace every 15,000
miles (24,000 km).
Replace dust and pollen filter
If you drive primarily in urban areas that have high
concentrations of soot in the air from industry and from
diesel-powered vehicles, replace every 15,000 miles
(24,000 km).
Replace fuel filter element (high pressure)
Inspect drive belt
Inspect valve clearance
Inspect fuel tank2
Replace transmission fluid
Replace spark plugs
Replace engine coolant
# : See information on maintenance and emissions warranty in the second
column on page 296 of the Civic Sedan owner’s manual.
NOTE:
20
Independent of the maintenance messages in the information display,
replace the brake fluid every 3 years.
Inspect idle speed every 160,000 miles (256,000 km).
Adjust the valves during services A, B, 1, 2, or 3 if they are noisy.
Maintenance
2009 Civic Sedan GX
08/07/03 12:44:27 31SNF930 0022 Main Menu
Engine Oil, Engine Coolant
Engine Oil
The SAE number tells you the oil’s
viscosity or weight. Select the oil for
your vehicle according to this chart.
5W-20 oil is formulated for yearround protection of your vehicle, to
improve cold weather starting, and
to help your engine use less fuel.
Engine Coolant
Refer to the Civic Sedan owner’s
manual for engine coolant checking
and adding procedures.
Refer to the Civic Sedan owner’s
manual for engine oil checking,
adding, and changing procedures.
Engine coolant change capacity:
1.40 US gal (5.3 )
Engine oil change capacity
(including filter):
3.9 US qt (3.7 )
Ambient Temperature
Maintenance
2009 Civic Sedan GX
21
08/07/03 12:44:50 31SNF930 0023 Main Menu
Fuel Tank
The fuel tank meets the safety
standards of NGV-2/NFPA-52/DOT
NHTSA FMVSS 304. The fuel tank
should be inspected every 3 years
after its production date. Have a
qualified Honda Civic GX dealer or a
qualified NGV technician inspect the
fuel tank for damage or leaks.
HOOD
You should also have the fuel tank
inspected after a collision.
The fuel tank should be replaced 15
years after it was manufactured. The
expiration date of the fuel tank is on
a label on the fuel tank and on a
warning label in the engine
compartment.
CNG TANK EXPIRATION DATE
FUEL TANK
Have a qualified Honda Civic GX
dealer or a qualified NGV technician
replace the fuel tank. Do not reuse
the old fuel tank.
See instructions on fuel container for
inspection and service life.
22
Maintenance
2009 Civic Sedan GX
CNG TANK EXPIRATION DATE
08/07/03 12:45:20 31SNF930 0024 Main Menu
Fuel Tank, Tires
FUEL TANK
Tires
The recommended cold tire pressure
for most normal driving conditions is
shown below.
Tire Size
P195/65R15 89H
Cold Tire Pressure
for Normal Driving
Front/Rear:
30 psi (210 kPa ,
2.1 kgf/cm )
The compact spare tire pressure is:
60 psi (420 kPa , 4.2 kgf/cm )
These pressures are also given on
the tire information label on the
driver’s doorjamb.
NOTICE: For other important tire
inf ormation, ref er to the Civic Sedan
owner’s manual.
Maintenance
2009 Civic Sedan GX
23
08/07/03 12:45:33 31SNF930 0025 Main Menu
Lights
Replacing a High-mount Brake
Light Bulb
TRUNK LINING
SOCKET
SCREW
FASTENER
1. Open the trunk.
BULB
3. Pull the upper edge of the trunk
lining down.
2. Remove the screw from the center
of each trunk lining fastener, then
remove the fasteners.
4. Remove the socket from the light
assembly by turning it one-quarter
turn counterclockwise.
5. Remove the burned out bulb from
the socket by pulling it straight out
of its socket.
6. Push the new bulb straight into
the socket until it bottoms.
24
Maintenance
2009 Civic Sedan GX
08/07/03 12:45:45 31SNF930 0026 Main Menu
Lights, Vehicle Storage
7. Reinstall the socket. Turn it
clockwise until it locks. Make sure
the new bulb is working.
8. Reinstall the trunk lining.
9. Insert the trunk lining fasteners
into their holes, then reinstall the
fastener center screws.
10. Reinstall the trunk floor.
Vehicle Storage
If you need to park your vehicle for
an extended period, refer to Vehicle
Storage in the Civic Sedan owner’s
manual for information. In addition
to these procedures, you should do
the following with your Civic GX:
After storing your vehicle for an
extended period, and before starting
the engine for the first time, open
the trunk and leave it open for
several minutes. This allows any
natural gas vapors that may have
collected in the trunk to dissipate.
Turn the manual shutoff valve to
the OFF position (see Manual
Shutoff Valve on page 12 in this
supplement).
If you store your vehicle indoors, it
should be parked in a well
ventilated area. We recommend
the installation of a natural gas
leak detector.
Maintenance
2009 Civic Sedan GX
25
08/07/03 12:45:56 31SNF930 0027 Main Menu
Changing a Flat Tire
To change a flat tire, follow the
instructions in the Civic Sedan
owner’s manual. To remove the
spare tire from the trunk and to
store the flat tire, follow the
instructions on this and the next
page.
Removing the Spare Tire
TOOL
CASE
TOOL KIT
TRUNK
FLOOR
TRUNK FLOOR
SPACER
CONE
WING
BOLT
SPARE TIRE
JACK
1. Open the trunk.
2. Remove the trunk floor.
3. Take the tool case out of the spare
tire.
4. Unscrew the wing bolt and remove
the spacer cone.
26
Taking Care of the Unexpected
2009 Civic Sedan GX
08/07/03 12:46:07 31SNF930 0028 Main Menu
Changing a Flat Tire
Storing a Flat Tire
TRUNK LINING
JACK
TRUNK LINING
RUBBER CAP
TRUNK FLOOR
4. Bend the lower part of the trunk
lining upward and take the spare
tire out of its well.
5. Turn the jack’s end
counterclockwise to loosen it, then
remove the jack.
1. Raise the trunk floor and the lower
part of the trunk lining as shown.
Remove the rubber cap from the
hole in the trunk floor, then align
the hole in the trunk lining with
the hole in the trunk floor.
CONTINUED
Taking Care of the Unexpected
2009 Civic Sedan GX
27
08/07/03 12:46:17 31SNF930 0029 Main Menu
Changing a Flat Tire, If the Fuel System Has a Leak
4. To secure the tire, insert the wing
bolt through the hole in the center
of the wheel and the trunk lining,
then tighten the bolt.
SUPPORT PLATE
5. Store the spacer cone and wing
bolt for the spare tire in the tool
kit.
WING BOLT
2. Place the flat tire straight up in the
trunk as shown, with the outside
of the wheel facing forward.
3. Remove the support plate and the
wing bolt from the tool kit. Put the
plate on the wing bolt.
28
Taking Care of the Unexpected
2009 Civic Sedan GX
If the Fuel System Has a Leak
You may detect a slight natural gas
odor for a few moments after
refueling. This is normal. You should
not be able to smell natural gas at
any other time. If you do, or if you
hear a hissing sound, your vehicle’s
fuel system may have a leak.
08/07/03 12:46:28 31SNF930 0030 Main Menu
If the Fuel System Has a Leak, Jump Starting
If you smell natural gas other than
when refueling, or if you hear a
hissing sound, follow these
directions:
1. Park your vehicle in a wellventilated area, and apply the
parking brake.
Keep heat, sparks, and flame away.
Open all the windows and the
trunk lid for ventilation.
Compressed natural gas is
flammable and highly explosive.
You could be killed or seriously
injured if leaking natural gas is
ignited.
If you suspect a leak, have your
vehicle immediately inspected
and repaired by an authorized
Honda Civic GX dealer.
2. Turn the ignition switch to the
LOCK (0) position.
3. Turn the manual shutoff valve to
the OFF position to turn off the
natural gas (see Manual Shutoff
Valve on page 12 in this
supplement).
Jump Starting
Do not jump start your vehicle if you
suspect a natural gas leak. If you
smell natural gas or hear a hissing
sound, the fuel system may have a
leak that needs to be repaired by an
authorized technician.
If you suspect a leak, turn the
manual shutoff valve to the OFF
position (see Manual Shutoff Valve
on page 12 in this supplement), and
have your vehicle towed to an
authorized Honda Civic GX dealer
(see Emergency Towing in the
Civic Sedan owner’s manual).
If the fuel system is not leaking or
damaged, you can jump start the
vehicle. Refer to the Civic Sedan
owner’s manual for the jump starting
procedure.
You cannot continue driving. Your
vehicle should be towed to an
authorized Honda Civic GX dealer
(see Emergency Towing in the
Civic Sedan owner’s manual).
Taking Care of the Unexpected
2009 Civic Sedan GX
29
08/07/03 12:46:39 31SNF930 0031 Main Menu
Fuses, Fuse Locations
Fuses
To check and replace fuses, follow
the instructions in the Civic Sedan
owner’s manual.
Since your vehicle’s interior fuses
are different from the Civic Sedan
fuses, determine from the chart or
the diagram on the fuse label, which
fuse or fuses control that device.
Fuse Locations
INTERIOR FUSE BOX
30
No. Amps.
1
2
3
4
5
6
7
8
9
10
11
12
13
14
15
16
7.5 A
15 A
10 A
7.5 A
15 A
−
7.5 A
−
7.5 A
7.5 A
10 A
10 A
10 A
7.5 A
7.5 A
10 A
Circuits Protected
Power Window
Fuel Pump
Alternator
ABS/VSA Unit
Injection
Not Used
TPMS
Not Used
ODS
METER
SRS
Right Headlight High Beam
Left Headlight High Beam
Small Light (Interior)
Small Light (Exterior)
Right Headlight Low Beam
Taking Care of the Unexpected
2009 Civic Sedan GX
No. Amps.
17
18
19
20
21
22
23
24
25
26
27
28
29
30
10 A
20 A
15 A
−
20 A
−
−
−
20 A
20 A
−
−
15 A
20 A
31
32
33
34
35
36
37
38
−
20 A
20 A
−
7.5 A
10 A
7.5 A
30 A
Circuits Protected
Left Headlight Low Beam
Headlight High Beam Main
Small Lights (Main)
Not Used
Headlight Low Beam Main
Not Used
Not Used
Not Used
Door Lock
Driver’s Power Window
Not Used
Not Used
Accessory
Front Passenger’s Power
Window
Not Used
Rear Right Power Window
Rear Left Power Window
Not Used
Accessory Radio
HAC
Daytime Running Light
Front Wiper
08/07/03 12:47:00 31SNF930 0032 Main Menu
Specifications
Dimensions
Length
Width
Height
Wheelbase
Track
Front
Rear
Weights
Gross vehicle weight rating
Seating Capacities
Total
Front
Rear
Engine
Type
Bore x Stroke
Displacement
Compression ratio
Spark plugs
177.3 in (4,504 mm)
69.0 in (1,752 mm)
56.5 in (1,435 mm)
106.3 in (2,700 mm)
59.0 in (1,499 mm)
60.2 in (1,528 mm)
See the certification label attached
to the driver’s doorjamb.
5
2
3
Water cooled 4-stroke
SOHC i-VTEC 4-cylinder
compressed natural gas engine
3.19 x 3.44 in (81.0 x 87.3 mm)
110 cu-in (1,799 cm )
12.5 : 1
NGK: IFR7F-8DS
Capacities
Fuel tank service pressure
Fuel tank capacity
Change*1
Total
Change*2
Including filter
Without filter
Total
Automatic
Change
transmission Total
fluid
Windshield washer reservoir
Engine
coolant
Engine oil
3,600 psi (24,800 kPa) at 70°F
(21°C)
3,000 psi: 7.2 gasoline gallons
equivalent (GGE)
3,600 psi: 8.0 gasoline gallons
equivalent
1.40 US gal (5.3 )
1.75 US gal (6.7 )
3.9 US qt (3.7
3.7 US qt (3.5
4.7 US qt (4.5
2.5 US qt (2.4
6.2 US qt (5.9
)
)
)
)
)
2.6 US qt (2.5 )
*1 : Including the coolant in the reserve tank and that remaining in the
engine.
Reserve tank capacity: 0.11 US gal (0.4 )
*2 : Excluding the oil remaining in the engine
Technical Information
2009 Civic Sedan GX
31
08/07/03 12:47:26 31SNF930 0033 Main Menu
Specifications
Air Conditioning
Refrigerant type
Charge quantity
Lubricant oil type
HFC-134a (R-134a)
14.1−15.9 oz (400−450 g)
SP-10
Fuses
Interior
See page 30 or the fuse label
attached to the driver’s lower
corner panel.
See Fuses in the Civic Sedan
owner’s manual.
Under-hood
Lights
Headlights
High
Low
Front turn signal/side marker/
Parking lights
Rear turn signal lights
Stop/Taillights
Rear side marker lights
Back-up lights
Taillights
High-mount brake light
License plate lights
Ceiling light
Spotlights
Trunk light
Battery
Capacity
32
12 V − 60 W (HB3)
12 V − 51 W (HB4)
12 V − 24/2 CP (Amber)
12 V
12 V
12 V
12 V
12 V
12 V
12 V
12 V
12 V
12 V
−
−
−
−
−
−
−
−
−
−
21 W (Amber)
21/5 W
2 CP
21 W
3 CP
21 W
5W
8W
8W
5W
Alignment
Toe-in
Camber
Caster
Tires
Size
Pressure
12 V − 36Ah/5HR
12 V − 45Ah/20HR
Technical Information
2009 Civic Sedan GX
Front
Rear
Front
Rear
Front
Front/Rear
Spare
Front/Rear
Spare
0.00 in (0.0 mm)
0.08 in (2.0 mm)
0°
−1°30’
7°00’
P195/65R15 89H
T125/70D15 95M
30 psi (210 kPa , 2.1 kgf/cm )
60 psi (420 kPa , 4.2 kgf/cm )
08/07/03 12:47:34 31SNF930 0034 Main Menu
Authorized Manuals
Purchasing Factory Authorized Manuals
The publications shown below can be purchased from Helm
Incorporated. You can order by phone or online:
Call Helm Inc. at 1-800-782-4356 (credit card orders only)
Go online at www. helminc. com
If you are interested in other years or models, contact Helm Inc.
at 1-800-782-4356.
Publication
Form Number
61SNA08
61SNA09
61SNA08EL
61SNA30
31SNF930
31SNA630
31SNAM30
31SNAQ30
HON-R
Form Description
2006-2009 Honda Civic 2/4 Door
Service Manual
2006-2009 Civic GX 4 Door
Service Manual Supplement
2006-2009 Honda Civic 2/4 Door
Electrical Troubleshooting Manual
2006-2009 Model Series Honda Civic 2/4 Door
Body Repair Manual
2009 Honda Civic GX 4 Door
Owner’s Manual Supplement
2009 Honda Civic 4 Door Owner’s Manual
2009 Honda Civic Honda Service History
2009 Honda Civic 4 Door Quick Start Guide
Order Form for Previous YearsIndicate Year and Model Desired
33
2009 Civic Sedan GX
08/07/03 12:47:41 31SNF930 0035 Main Menu
Authorized Manuals
Service Manual:
Covers maintenance and recommended procedures for
repair to engine and chassis components. It is written for
the journeyman mechanic, but it is simple enough for
most mechanically inclined owners to understand.
Electrical Troubleshooting Manual:
Complements the Service Manual by providing in-depth
troubleshooting information for each electrical circuit in
your vehicle.
Body Repair Manual:
Describes the procedures involved in the replacement of
damaged body parts.
34
2009 Civic Sedan GX
08/07/03 12:40:44 31SNF930 0001 Main Menu
Owner’s Identification
This owner’s manual should be
considered a permanent part of the
vehicle and should remain with the
vehicle when it is sold.
OWNER
ADDRESS
STREET
CITY
STATE/PROVINCE
ZIP CODE/
POSTAL CODE
V. I. N.
DELIVERY DATE
(Date sold to original retail purchaser)
DEALER NAME
DEALER NO.
ADDRESS
STREET
CITY
STATE/PROVINCE
ZIP CODE/
POSTAL CODE
OWNER’S SIGNATURE
DEALER’S SIGNATURE
2009 Civic Sedan GX
The information and specifications
included in this publication were in
effect at the time of approval for
printing. Honda Motor Co., Ltd.
reserves the right, however, to
discontinue or change specifications
or design at any time without notice
and without incurring any obligation
whatsoever.